Te enseñaré hacer un sencillo vestido👗 con elástico en la cintura//I will teach you to make a simple dress with elastic waist.
hive-127911·@anaarevalo01·
0.000 HBDTe enseñaré hacer un sencillo vestido👗 con elástico en la cintura//I will teach you to make a simple dress with elastic waist.
**Hola mis queridos amigos de needlework monday!.**🌹 >**Hello my dear needlework monday friends!**🌹 Bediciones para todos mis amigos creativos y emprendedores de ésta hermosa comunidad; quiero enviarles un gran saludo y un fuerte abrazo declarando un día repleto de muchas bendiciones y mucha salud para todos. >Blessings to all my creative and entrepreneurial friends of this beautiful community; I want to send you a big greeting and a big hug declaring a day full of many blessings and good health for all. Me alegra volver a compartir con todos ustedes a través de ésta plataforma, como ya se ha vuelto una costumbre, hoy quiero mostrarles un encantador proyecto a través de éste medio. Quiero enseñarles como hacer un sencillo vestido para niña, el cual llegará hasta las rodillas; además tendrá un bonito diseño primaveral en la cintura. >I am happy to be able to share with all of you through this platform, as it has already become a custom, today I want to show you a beautiful project through this medium. I want to show you how to make a simple dress for a girl that reaches the knees; It will also have a nice spring design on the waist. Para obtener éste efecto necesitaremos elástico o hilo elástico, el cual es perfecto para éste tipo de trabajo. Éste tipo de vestidos me encantan, ya que son muy frescos y cómodos para ellas; pueden usarlo para ir al parque, o para la playa. >To obtain this effect, we will need elastic or elastic thread, which is perfect for this type of work. I love this type of dresses, since they are very fresh and comfortable for them; they can use it to go to the park, or to the beach. Para cofeccionar éste vestido, use tela cotton licra; pero puedes utilizar cualquier otro tipo de tela incluyendo jeans que quedan muy hermosos. A continuación les mostraré el procedimiento en sencillos pasos, para que puedan elaborarlo en casa. >To make this dress, use cotton lycra fabric; but you can use any other type of fabric including jeans which are very beautiful. Next I will show you the procedure in simple steps, so you can make it at home. <center>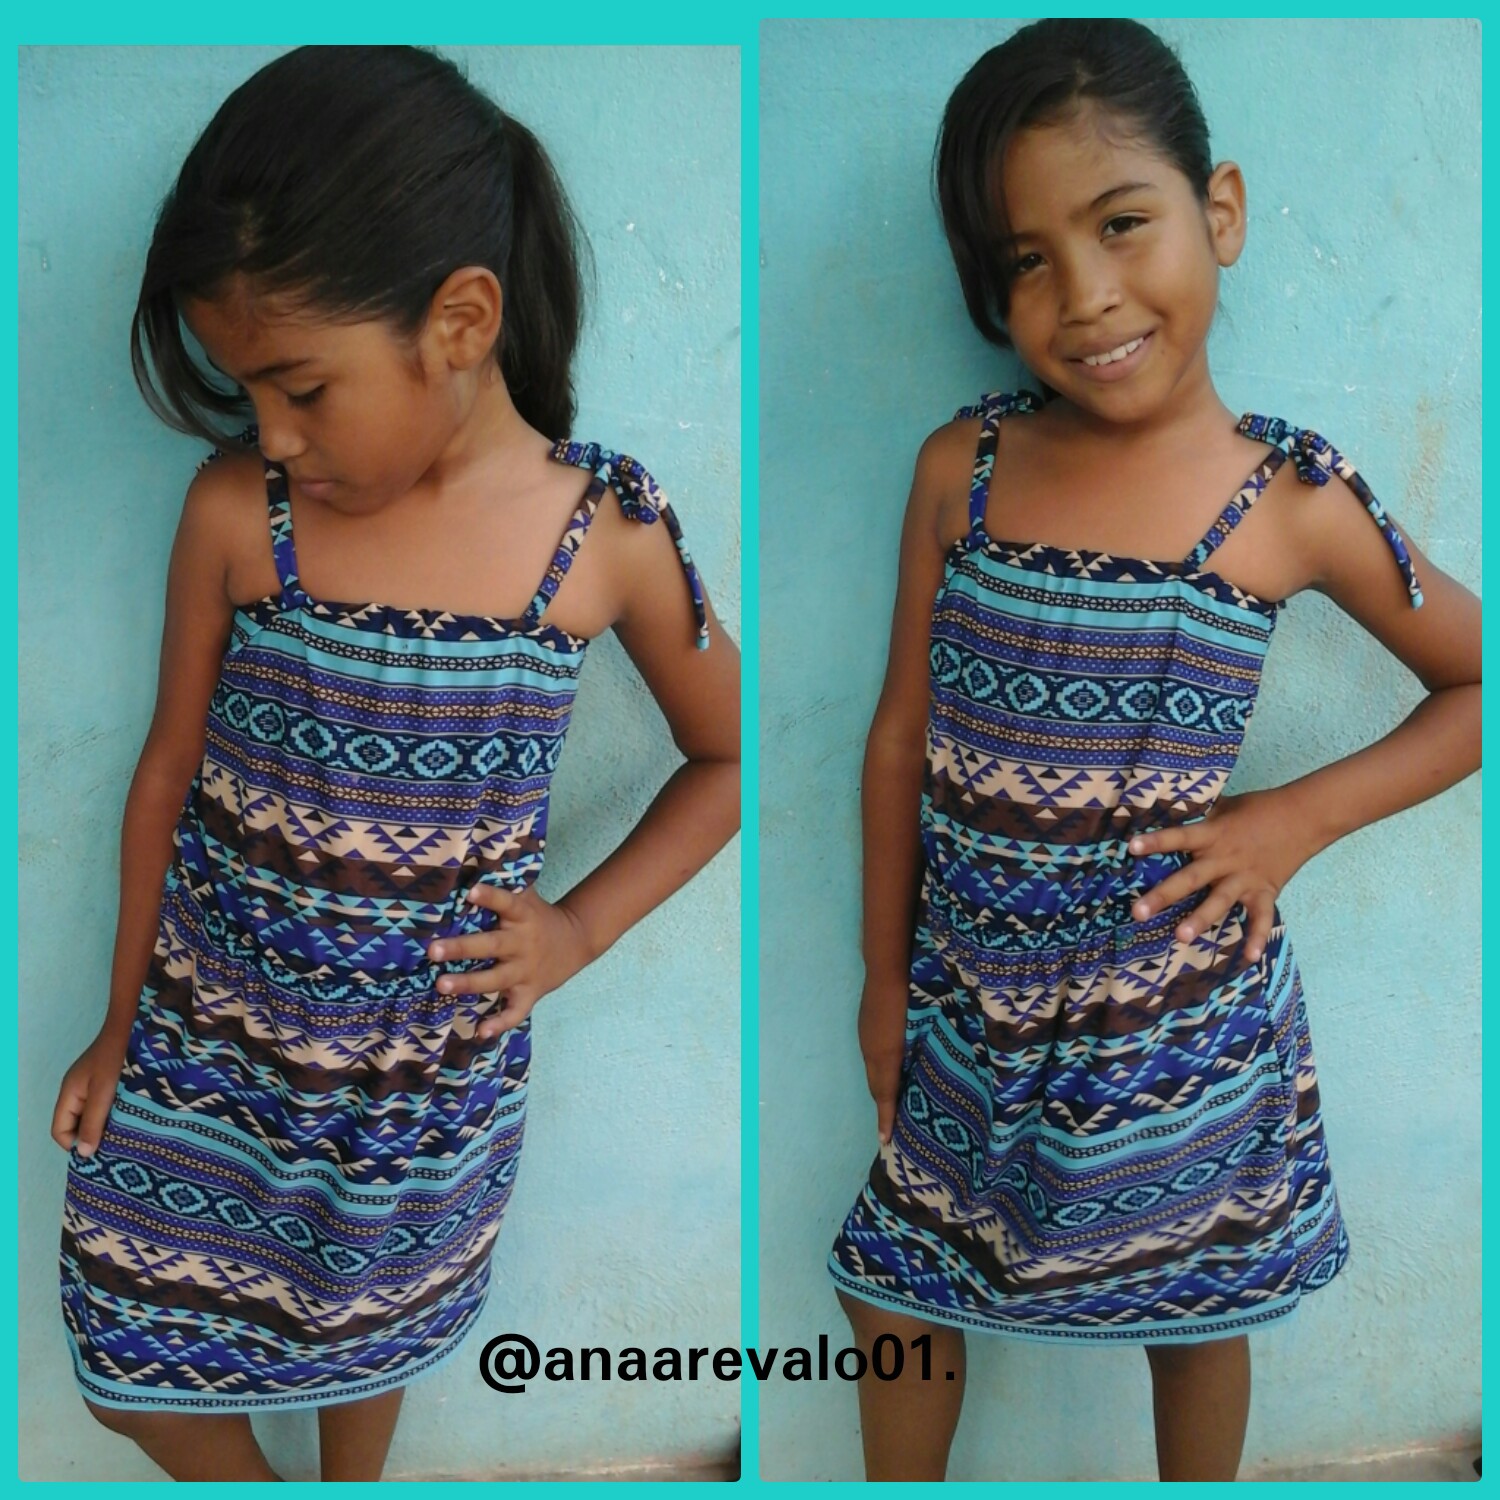</center> Para confeccionar éste sencillo vestido a la rodilla necesitaremos algunos materiales. **Materiales.** * 1mt de tela cotton licra. * Tijera. * Elástico. * Lápiz. * Hilo y aguja. >To make this simple knee-length dress we will need some materials. >**Materials.** >* 1mt of cotton lycra fabric. >* Scissor. >* Elastic. >* Pencil. >* Thread and needle. <center></center> **Paso 1.** Para confeccionar cualquier prenda siempre es necesario utilizar patrones, en éste caso tengo los patrones para hacer este tipo de vestidos. la parte superior del vestido mide 34 cm de largo por 40 cm de ancho, y la parte inferior, que es la falda, mide 46 cm de largo por 40 cm de ancho en la cintura y 50 cm en la parte inferior. Así que tenemos nuestros patrones listos para empezar a trabajar. >**Step 1.** >To make any garment it is always necessary to use patterns,In this case I have the patterns to make this type of dress. the upper part of the dress is 34cm long by 40cm wide, and the lower part, which is the skirt, is 46cm long by 40cm wide at the waist and 50cm at the bottom. So we have our patterns ready to start working. <center></center> **Paso 2.** Para hacer la falda lo primero será tomar la tela doblar, y colocar el patrón, marcamos por el borde, y recortamos. Así obtendremos piezas delanteras y posterior. >**Step 2.** >To make the skirt the first thing will be to take the fabric, fold it, and place the pattern, mark the edge, and cut it out. This way we will obtain front and back pieces. <center></center> **Paso 3.** Para hacer la parte superior tomamos un pedazo de tela, la doblamos y colocamos el patrón sobre la tela, marcamos y recortamos para obtener piezas delanteras y posterior. >**Step 3.** >To make the top we take a piece of fabric, fold it and place the pattern on the fabric, marking and cutting out front and back pieces. <center></center> **Paso 4.** En éste paso unimos la pieza delantera de la parte superior, con el delantero de la falda, y repetimos el procedimiento con las otras piezas posteriores. En ambas costuras dejamos 2 cm de tela para luego doblarla y poder introducir el Elástico. >**Step 4.** >In this step we join the front piece of the upper part, with the front of the skirt, and repeat the procedure with the other subsequent pieces. In both seams we leave 2 cm of fabric to later fold it and be able to insert the Elastic. <center></center> **Paso 5.** Aqui pueden observar los 2 cm demás que dejamos; doblamos y cosemos; debe quedar un pequeño espacio por dentro de 1cm por donde va el elástico. >**Step 5.** >Here you can see the other 2 cm that we left; we fold and sew; there should be a small space within 1cm where the elastic goes. <center></center> **Paso 6.** En este paso doblamos esos 2 cm y cosemos solo 1cm dejando un espacio de 1cm para introducir el elástico. Una vez que hayamos terminado de coser, tomamos una aguja de tejer o cualquier otra herramienta para que nos ayude a introducir el elástico por dentro. Ahora procedemos a unir las piezas enteras, cosiendo por los laterales. >**Step 6.** >In this step we fold those 2 cm and sew only 1 cm leaving a 1 cm space to insert the elastic. Once we have finished sewing, we take a knitting needle or any other tool to help us insert the elastic inside. Now we proceed to join the whole pieces, sewing on the sides. <center></center> **Paso 7.** Para terminar la parte superior, doblamos 2cm hacia la parte revés de la tela cosemos, dejando un espacio de 1cm por donde irá el elástico. Una vez que hayamos terminado de coser, dejamos una pequeña abertura para introducir el elástico. >**Step 7.** >To finish the upper part, we fold 2cm towards the wrong side of the fabric we sew, leaving a space of 1cm where the elastic will go. Once we have finished sewing, we leave a small opening to insert the elastic. <center></center> **Paso 8.** Doblamos 1cm de la parte inferior de la falda y cosemos. >**Step 8.** >We fold 1cm from the bottom of the skirt and sew. <center></center> **Paso 9.** Cortamos un par de tiras de 30cm de largo con 3cm de ancho o más, doblamos y cosemos. Dividimos las tiras, para obtener 4 de éstas. Finalizamos cosiendo cada tira en la parte superior del vestido. >**Step 9.** >We cut a couple of strips 30 cm long with 3 cm wide or more, fold and sew. We divide the strips, to get 4 of these. We finish by sewing four strips at the top of the dress. <center></center> **Trabajo final** Amigos éste es el resultado de nuestro trabajo de hoy, espero que les haya gustado, y les animo que pongan en práctica los conocimientos adquiridos en ésta publicación. >**Final work** >Friends this is the result of our work today, I hope you liked it, and I encourage you to put into practice the knowledge acquired in this publication. <center></center> De ésta manera hemos finalizado con el trabajo de hoy, para mi es un placer compartir cada proyecto con todos ustedes. Me despido deseandoles que tengan un hermoso día lleno de muchas bendiciones y salud. Gracias por tu visita, y leer mi publicación hasta el final. Nos vemos en una nueva oportunidad con más que coser... ¡Feliz día!.😉 >In this way we have finished with today's work, for me it is a pleasure to share each project with all of you. I say goodbye wishing you a beautiful day full of many blessings and health. Thank you for your visit, and read my publication until the end. See you in a new opportunity with more to sew... ¡Happy day!.😉 Todas las fotos son de mi autoria capturadas por mi tablet Samsung galaxy. Editadas por Collage_maker. Traductor Español/inglés (google.com). >All photos are my own, captured by my Samsung galaxy tablet. >Edited by Collage_maker. >Spanish/English translator (google.com).
👍 doriscova8, oscargonzalez123, mariarodriguez, tipu, kingscrown, mia-cc, kryptogames, bcm, mattbrown.art, boatymcboatface, theshell, xtipu, atongis, src3, msp-curation, ausbitbank, krystle, ma1neevent, amberyooper, isaria, juliakponsford, auditoryorgasms, digitalpnut, run-the-bits, ayushthedreamer, longer, rootdraws, sevenoh-fiveoh, clayboyn, peachymod, limn, franz54, vachemorte, nftshowroom, julesquirin, crimsonclad, anarcist69, blarchive, anarcist, koh, mitchelljaworski, bex-dk, minnowsupport, makinstuff, solominer, paolazun, lovely.logic, recoveryinc, samrisso, tomtothetom, cugel, followbtcnews, angelica7, st3llar, el-dee-are-es, elvys, zapataalex, yen1503, janetfund, kattycrochet, lrscarmen, razielmorales, build-it, cruisin, letalis-laetitia, tokenyzzy, viking-ventures, emanate-artworx, lucianaabrao, smilestitches, yoginiofoz, holovision.make,