Aprende a coser🧵 | 🖤Un chaleco tipo top con botones al frente 🪡✨/ • Learn how to sew🧵 | 🖤A button-front vest top✨🪡[ES|EN]
hive-127911·@anne002·
0.000 HBDAprende a coser🧵 | 🖤Un chaleco tipo top con botones al frente 🪡✨/ • Learn how to sew🧵 | 🖤A button-front vest top✨🪡[ES|EN]
<center>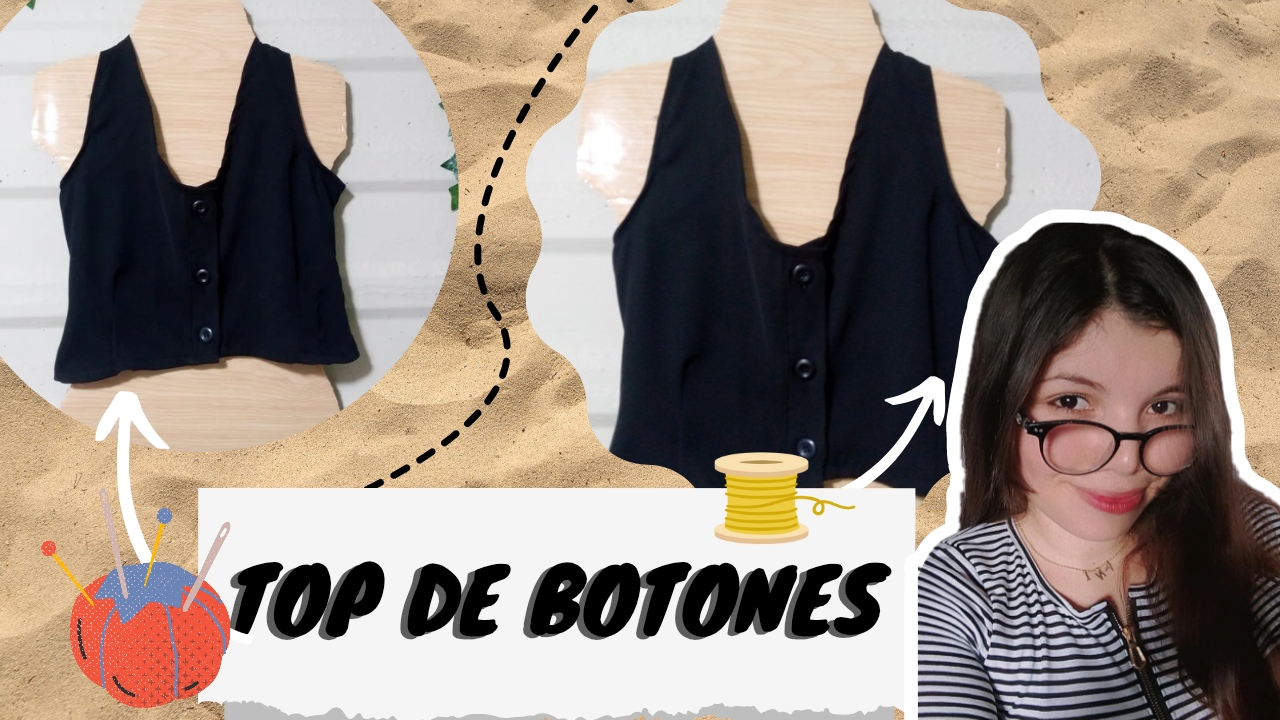 </center> # <center>.jpg)</center> <center> </center> #### _<div class="text-justify">Buenas tardes #needleworkers que tal están pasando la tarde? en donde vivo el lugar bien fresco y lluvioso perfecto para ir a mí rinconcito de costura y hacer uno que otro nuevo trabajo...🪡✨</div>_ # > #### _Good afternoon #needleworkers, how are you spending your afternoon? Where I live is a cool, rainy place, perfect for going to my little sewing spot and making a new project or two...🪡✨_ # <center>.jpg)</center> **<div class="text-justify">• Descripción de la prenda que haremos hoy:</div>** > **• Description of the garment we will make today:** <div class="text-justify">Durante los días atrás estaba pensando confeccionar una prenda que fuera sencilla y cómoda para una de mis clientas preferidas 🤭y con esto digo preferida porque es la que siempre me elige para casi hacer el milagro con las prendas que desea transformar,aunque a veces me cuesta entenderte como desea que sus prendas les quede pues termina confiando en mi y en el trabajo que pueden hacer mis manos y eso me hace sentir con mucha seguridad,hace dias vino a visitarme y me trajo varias costuras entre ellas una tela para hacer un chaleco tipo top porque ella tiene muchos vestidos escotados y ella quería una prenda que pues le ayudara mucho con este problema, entonces pensé en que una buena opción sería hacerle un chaleco porque ella quería que le cubriera mucho la parte del escote, pienso que estos chalecos son una alternativa perfecta si usas blusas de tirantes porque si no deseas que se te marque mucho el escote usando estos chalecos te puede ayudar mucho de esa manera,como ella lo quería corto pues solamente para que fuera mas fácil colocarselo le cosí tres botones.Si te gusta aprender a hacerlo aquí te muestro el tutorial completo.</div> # > _For a few days I was thinking about making a simple and comfortable garment for one of my favorite clients 🤭and with this I say favorite because she is the one who always chooses me to almost work miracles with the garments she wants to transform, although sometimes it is difficult for me to understand how she wants her garments to fit, she ends up trusting me and the work that my hands can do and that makes me feel very secure, a few days ago she came to visit me and brought me several seams including a fabric to make a top-type vest because she has many low-cut dresses and she wanted a garment that would help her a lot with this problem, so I thought that a good option would be to make her a vest because she wanted it to cover a lot of the neckline, I think that these vests are a perfect alternative if you wear strapless blouses because if you don't want your neckline to be too noticeable wearing these vests it can help you a lot in that way, since she wanted it short, I only sewed three buttons to make it easier to put on. If you like to learn how to do it, here I show you the full tutorial._ # --- <center>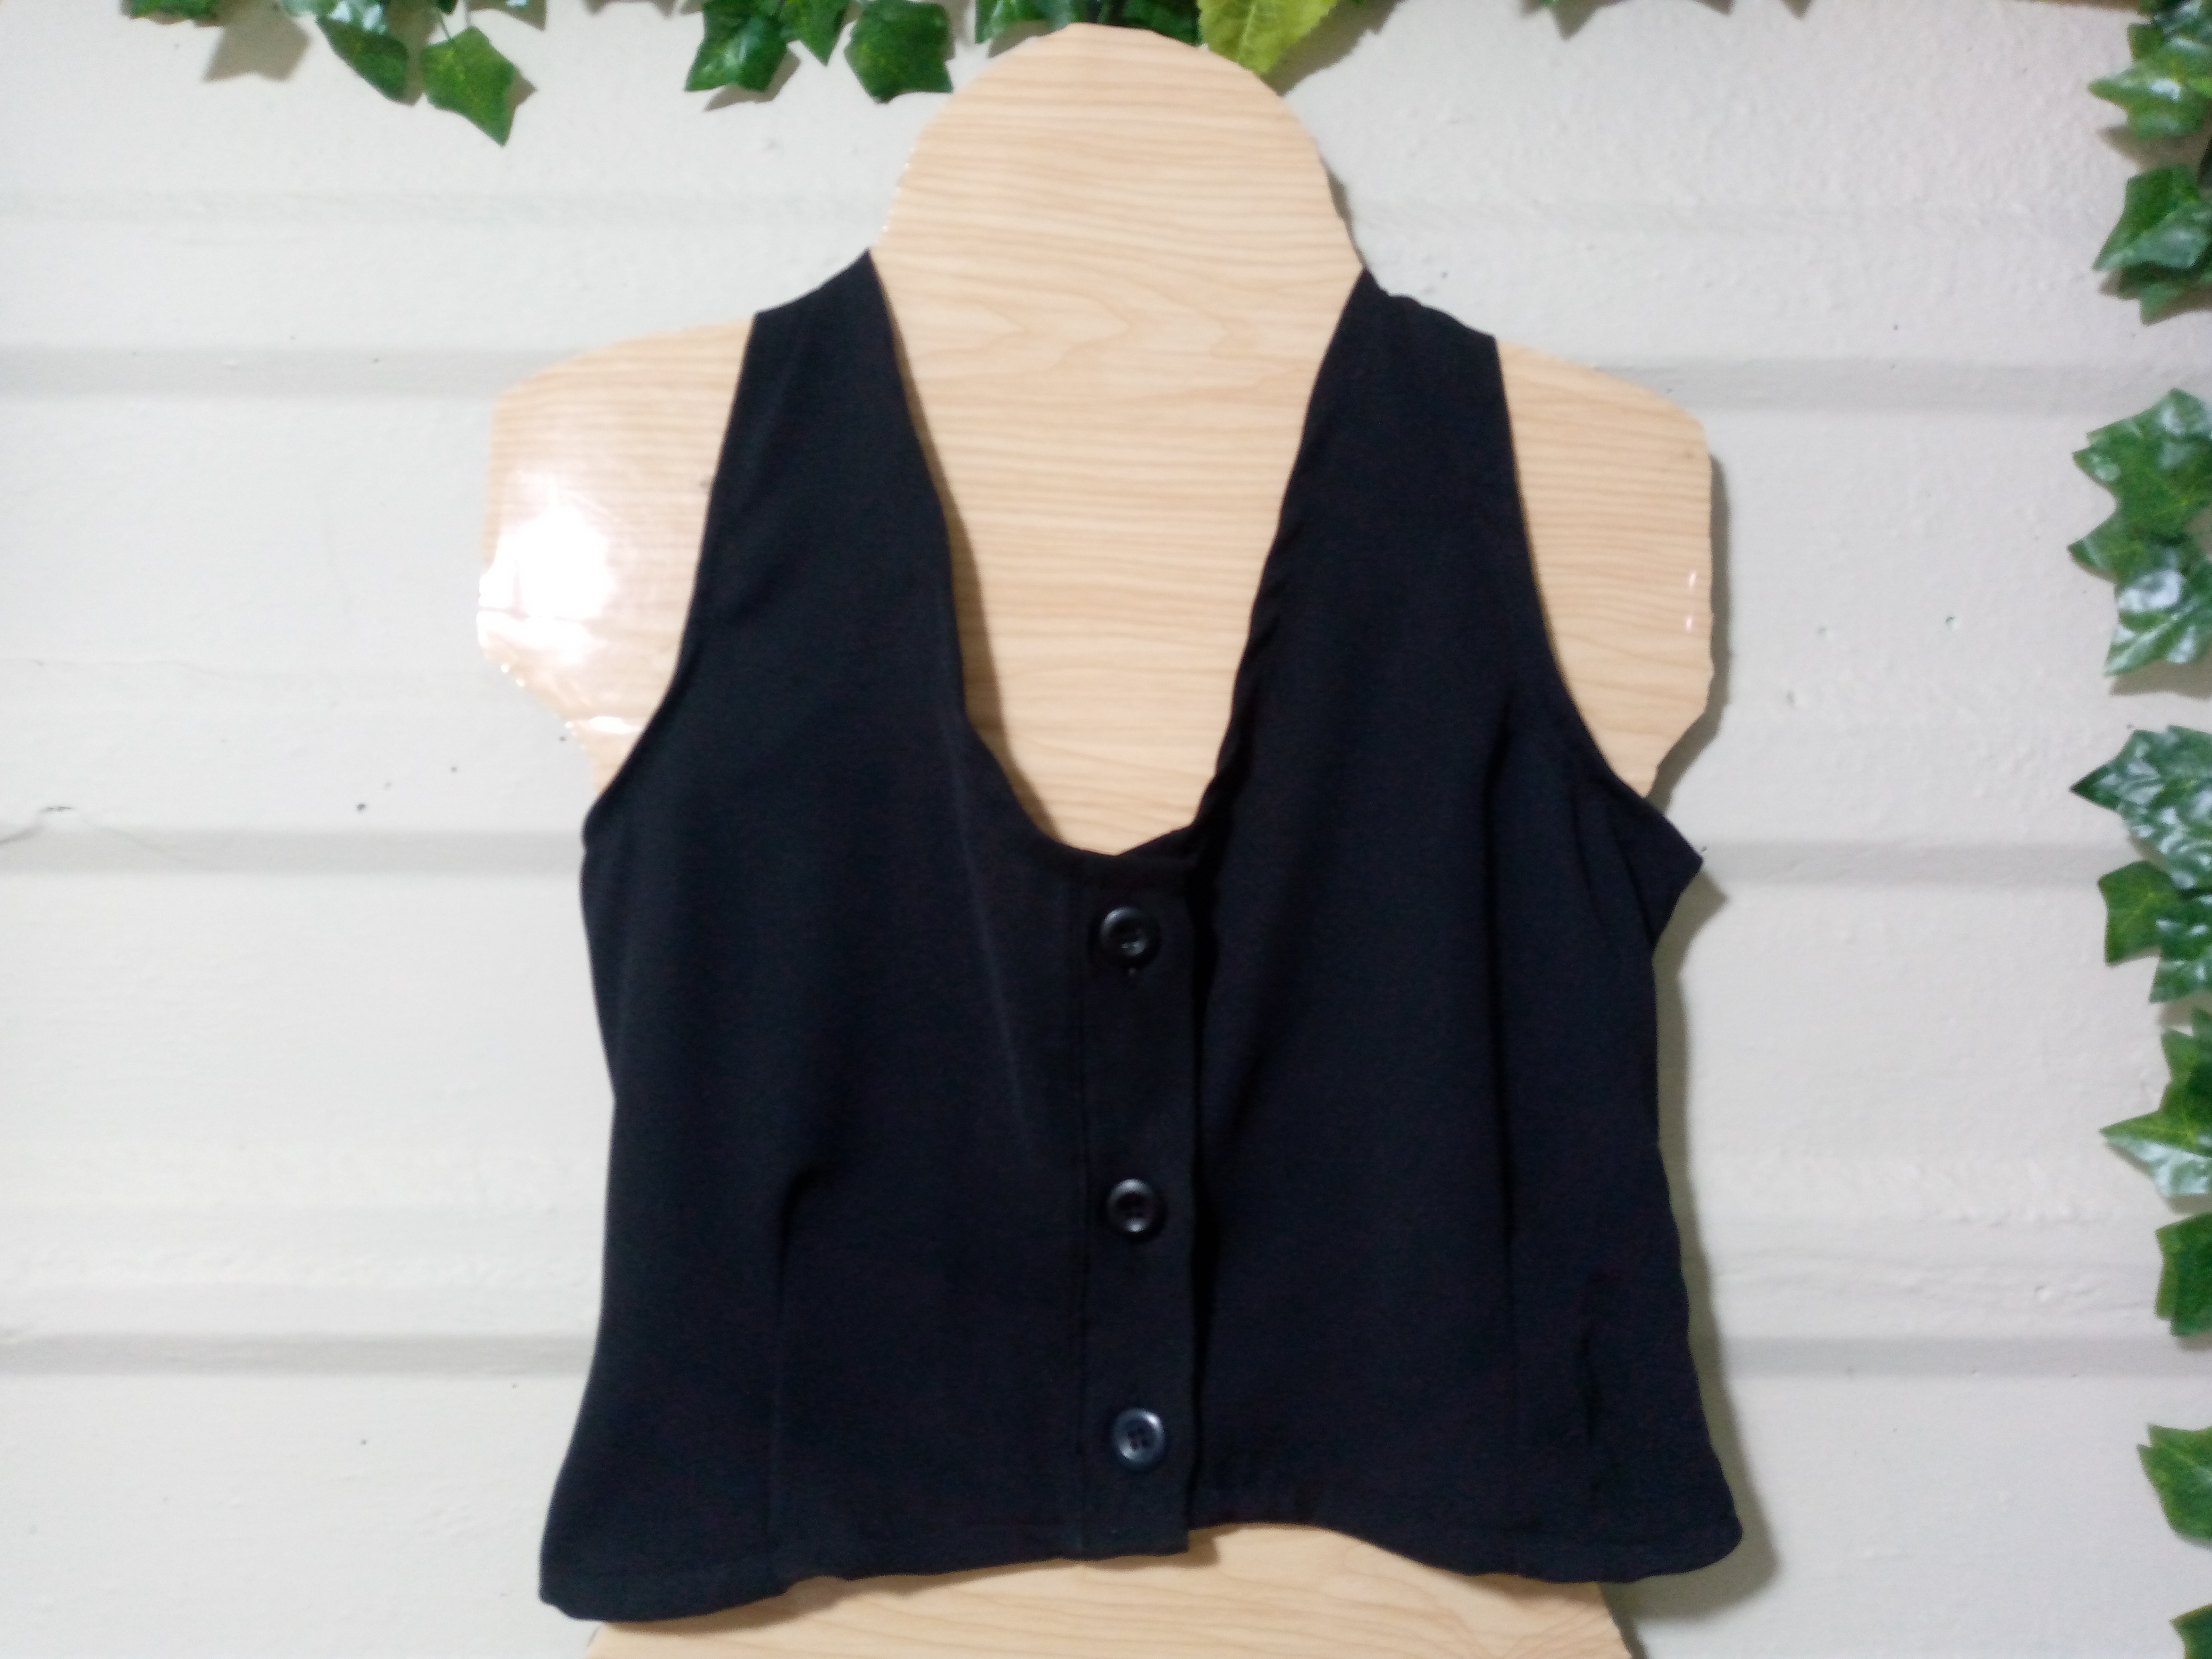 </center> <center>.jpg)</center> ## _<div class="phishy">Materiales:// Materials:</div>_ # * **_Tela alrededor de 50 cm de largo_** * **_Usaremos nuestras máquinas de coser_** * **_Hilo y aguja_** * **_Tijeras_** * **_3 botones_** # >* **_Fabric about 50 cm long_** >* **_We will use our sewing machines_** >* **_Thread and needle_** >* **_Scissors_** >* **_3 buttons_** <center>.jpg)</center> ## _<div class="phishy">Pasos a seguir://Steps to follow:</div>_ # <div class='pull-left'> 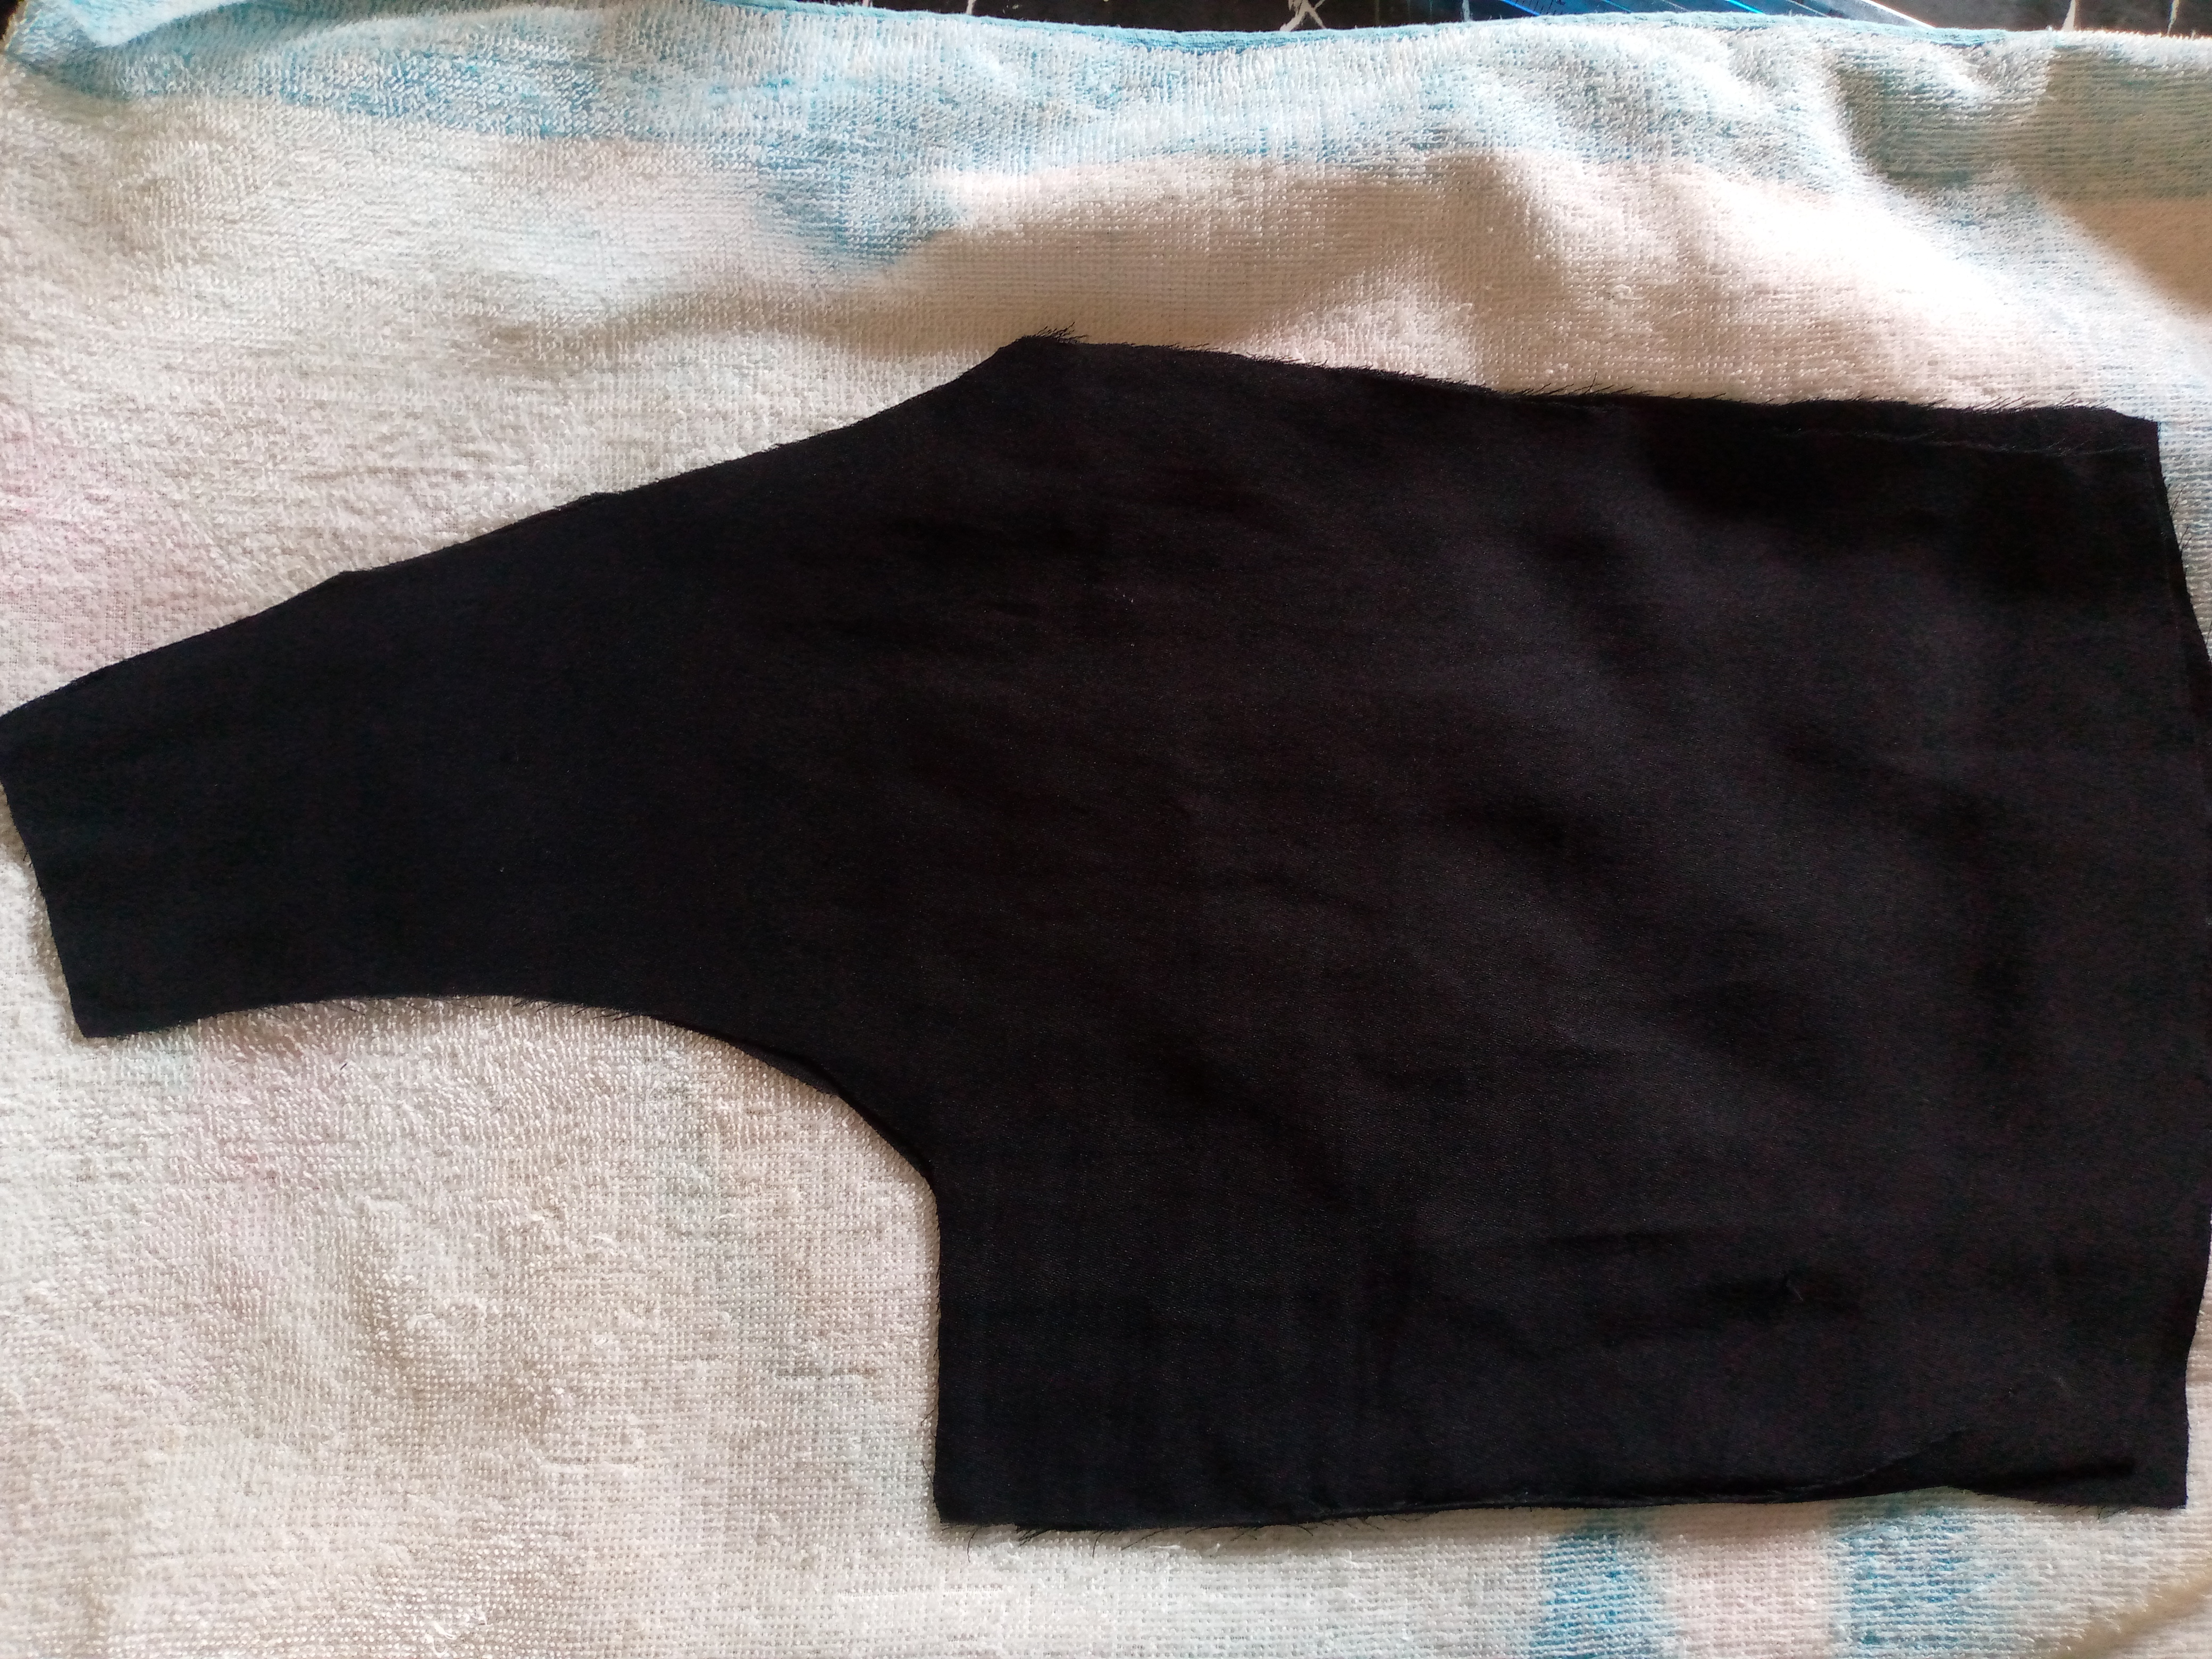 </div> <div class='pull-right'> 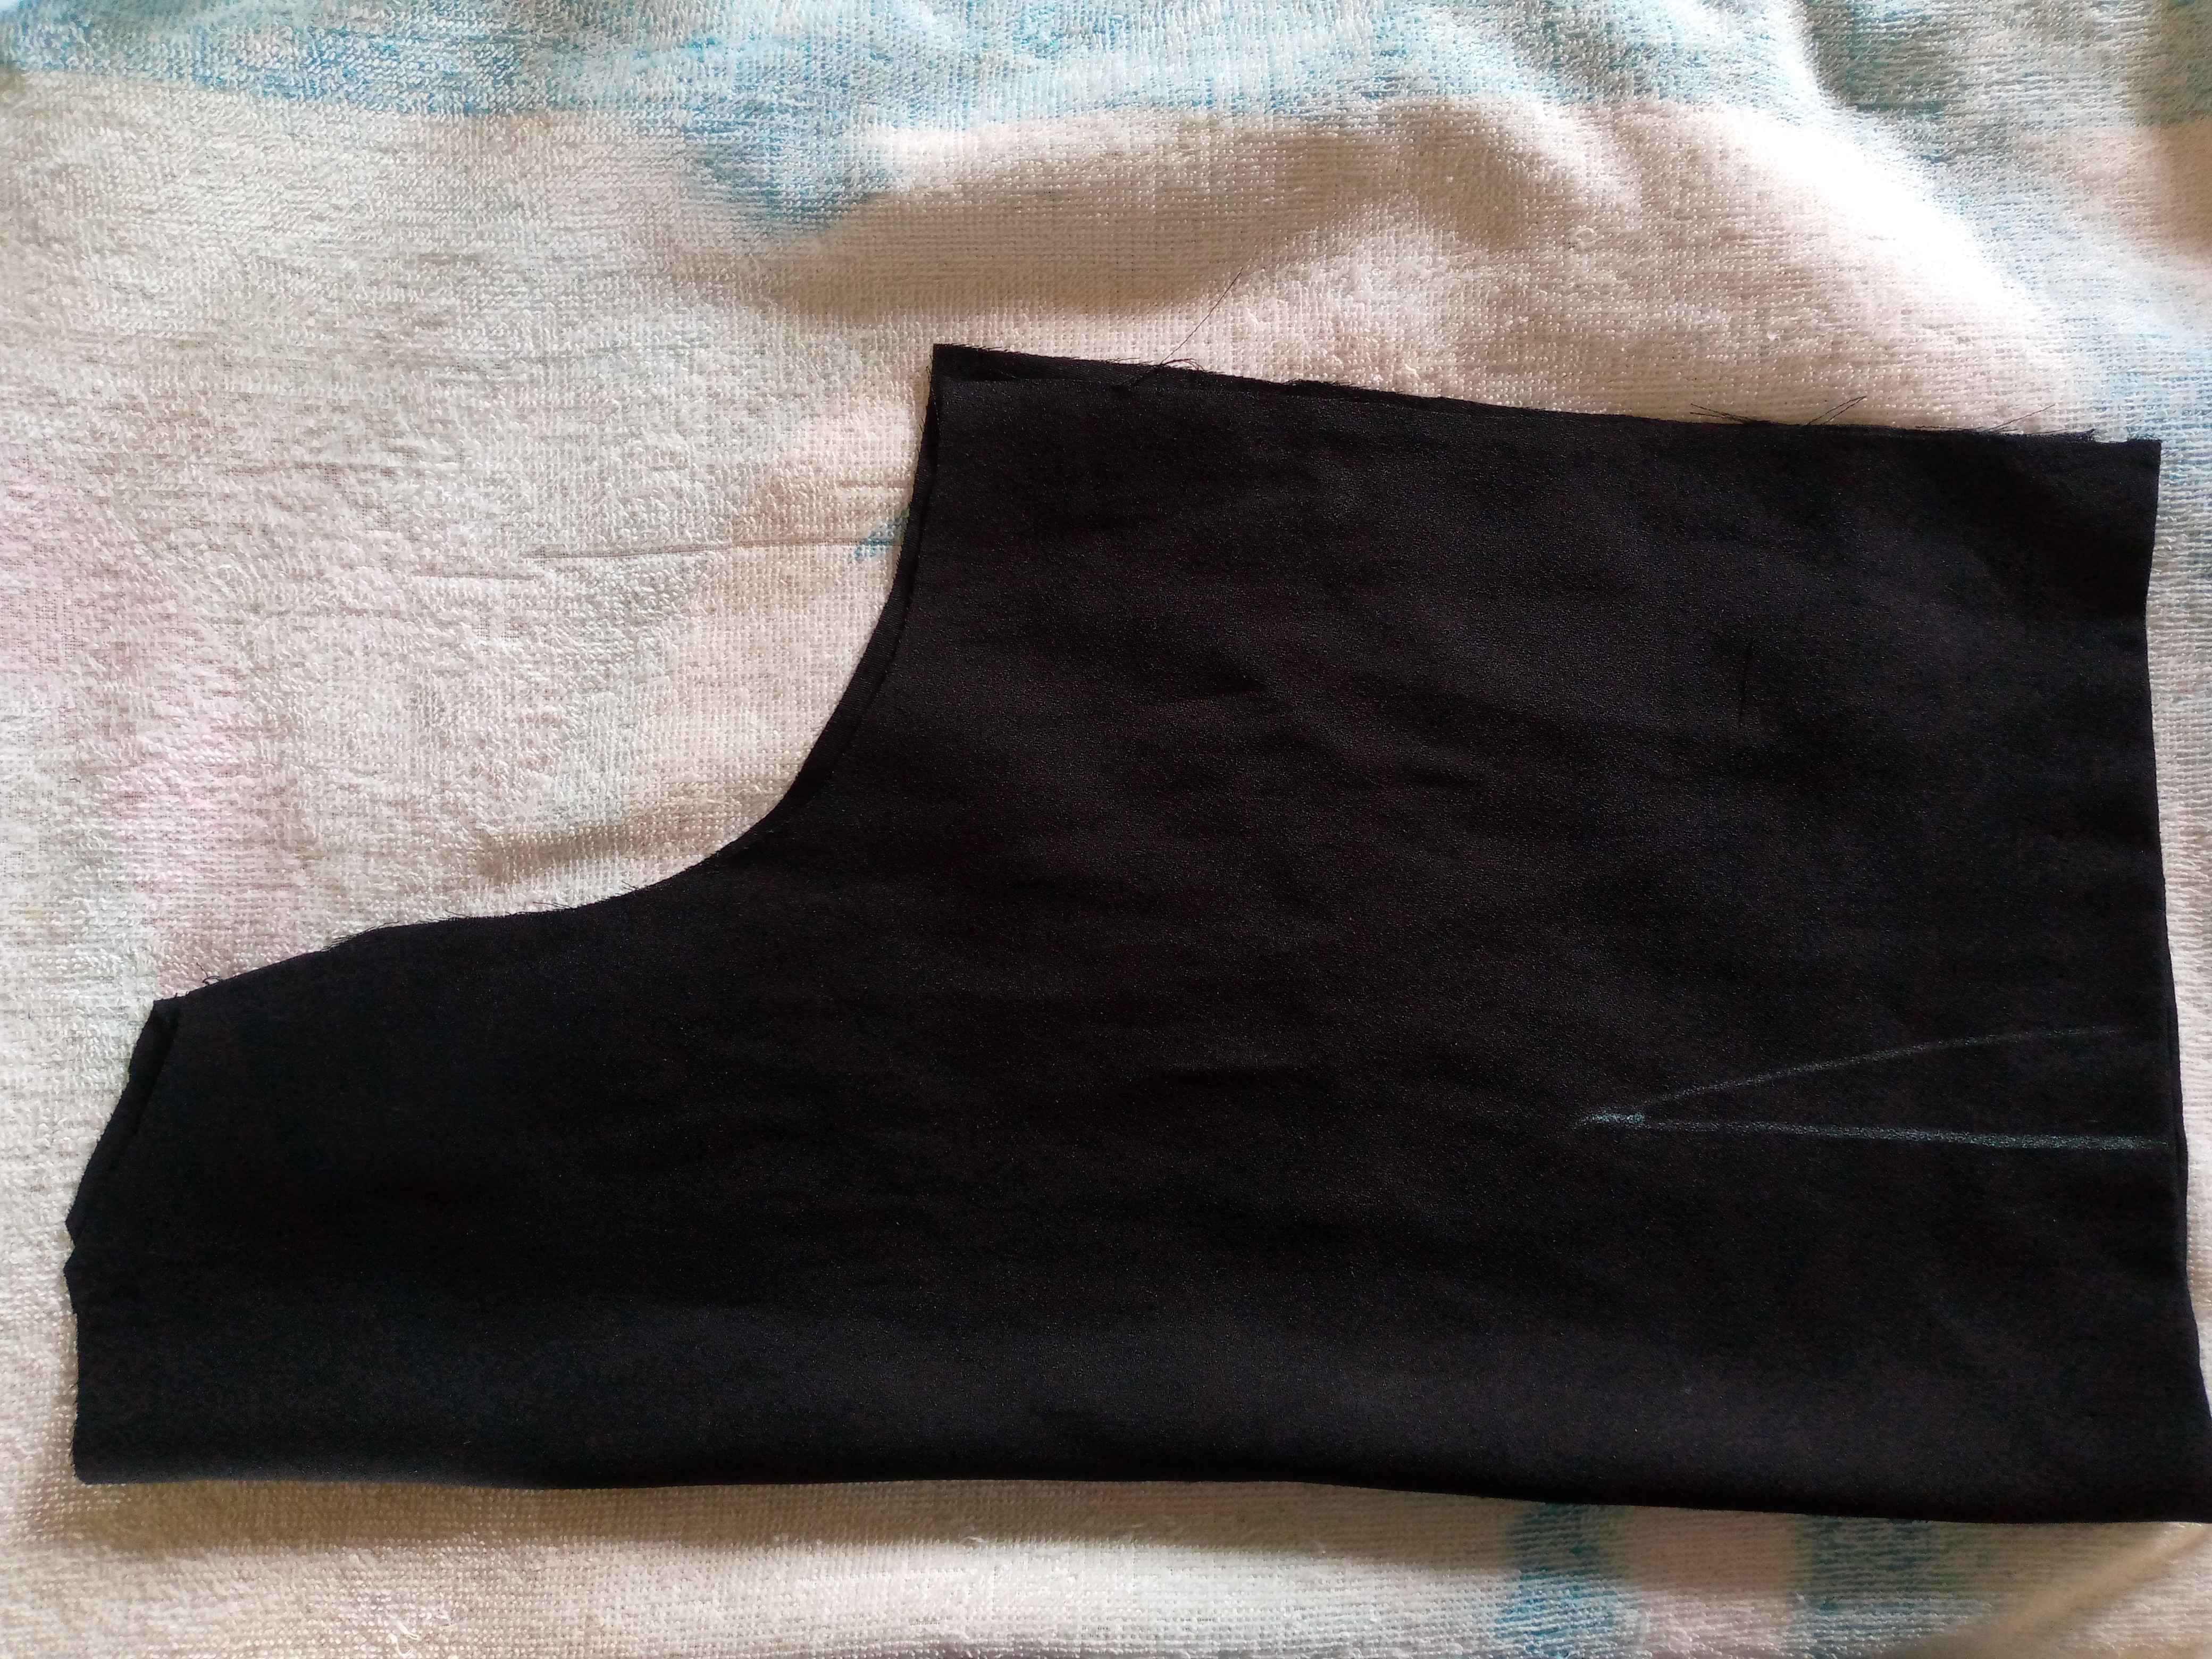 </div> <center>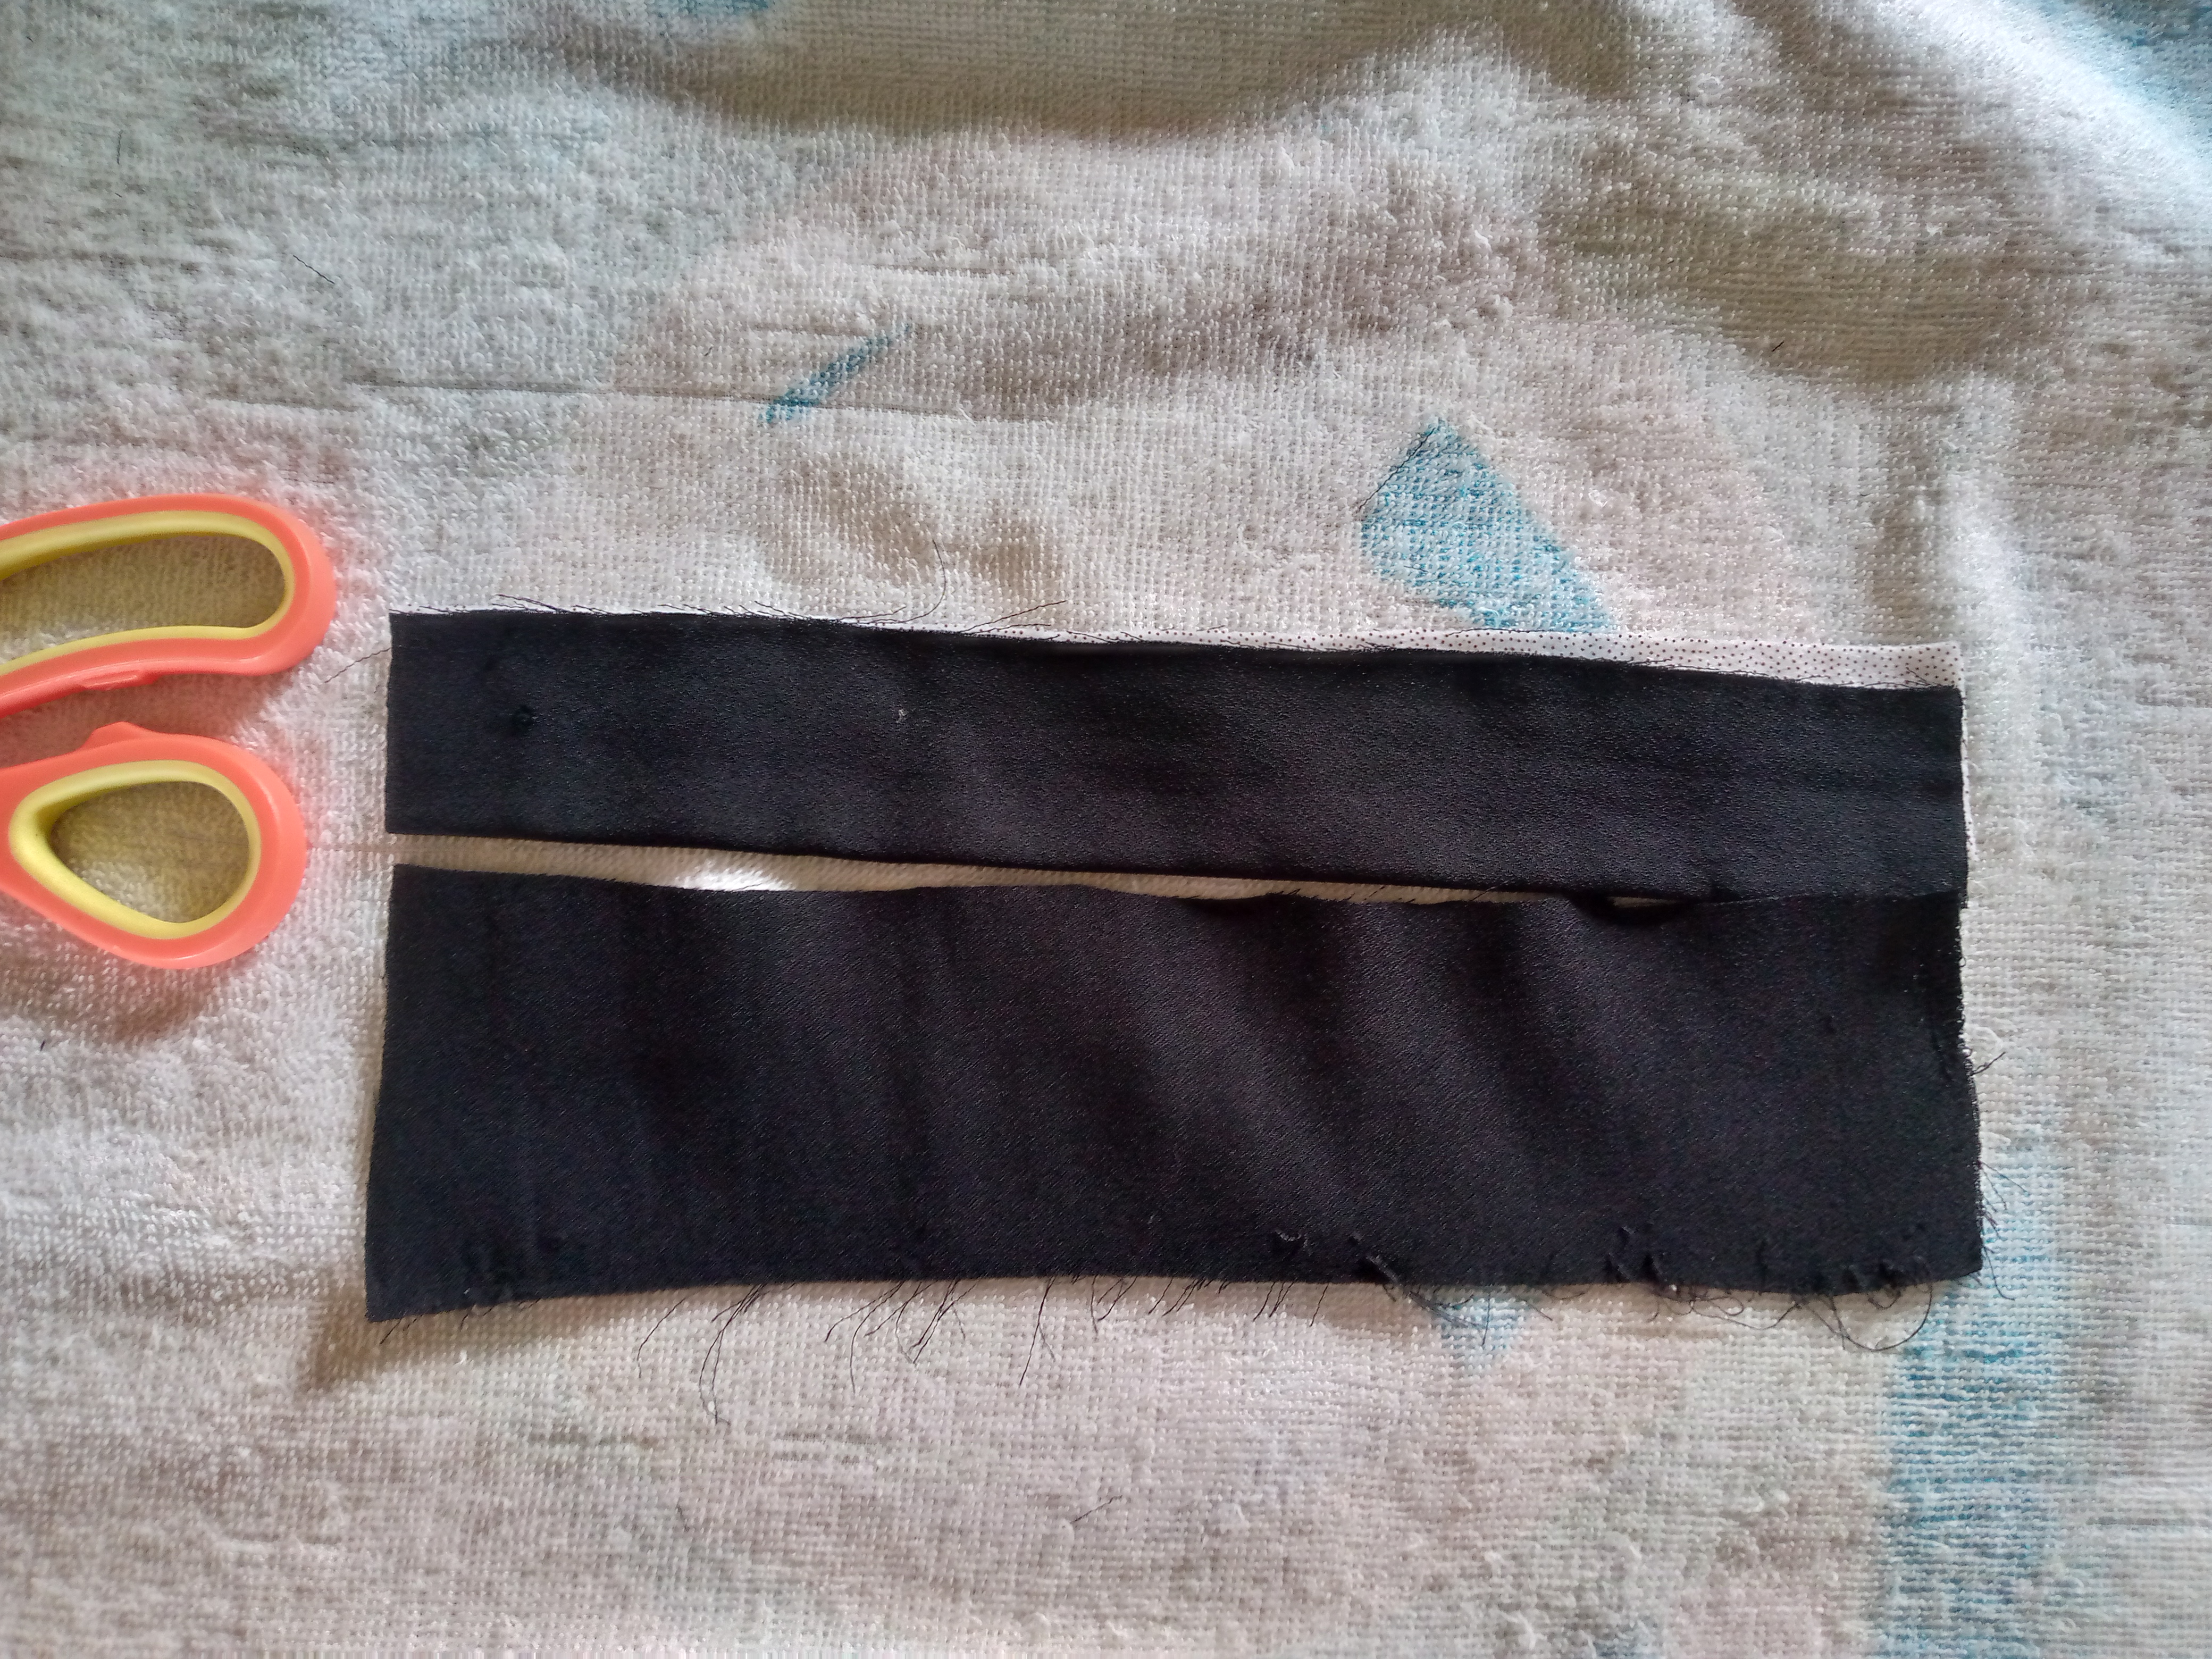</center> ### _Paso 01_ <div class="text-justify">Para empezar a coser vamos a cortar las piezas correspondientes ,para que se nos haga más fácil yo he tomado las medidas de mi clienta en un cuaderno de notas y también una medida como referencia una blusa con mangas o sin mangas ,y trazamos con una tiza y empezamos a cortar las dos piezas delanteras abiertas a la mitad y la parte de atrás luego los sesgos de donde van los botones y los ojales estás piezas van dependiendo del ancho que uno quiera colocarselos mi clienta lo quería algo grueso 😊.</div> # > ### _Step 01_ > _To start sewing we are going to cut the corresponding pieces, to make it easier for us I have taken the measurements of my client in a notebook and also a measurement as a reference a blouse with or without sleeves, and we trace with a chalk and we begin to cut the two front pieces open in half and the back part then the biases where the buttons and buttonholes go these pieces depend on the width that one wants to place them my client wanted it something thick 😊._ --- <div class='pull-left'> 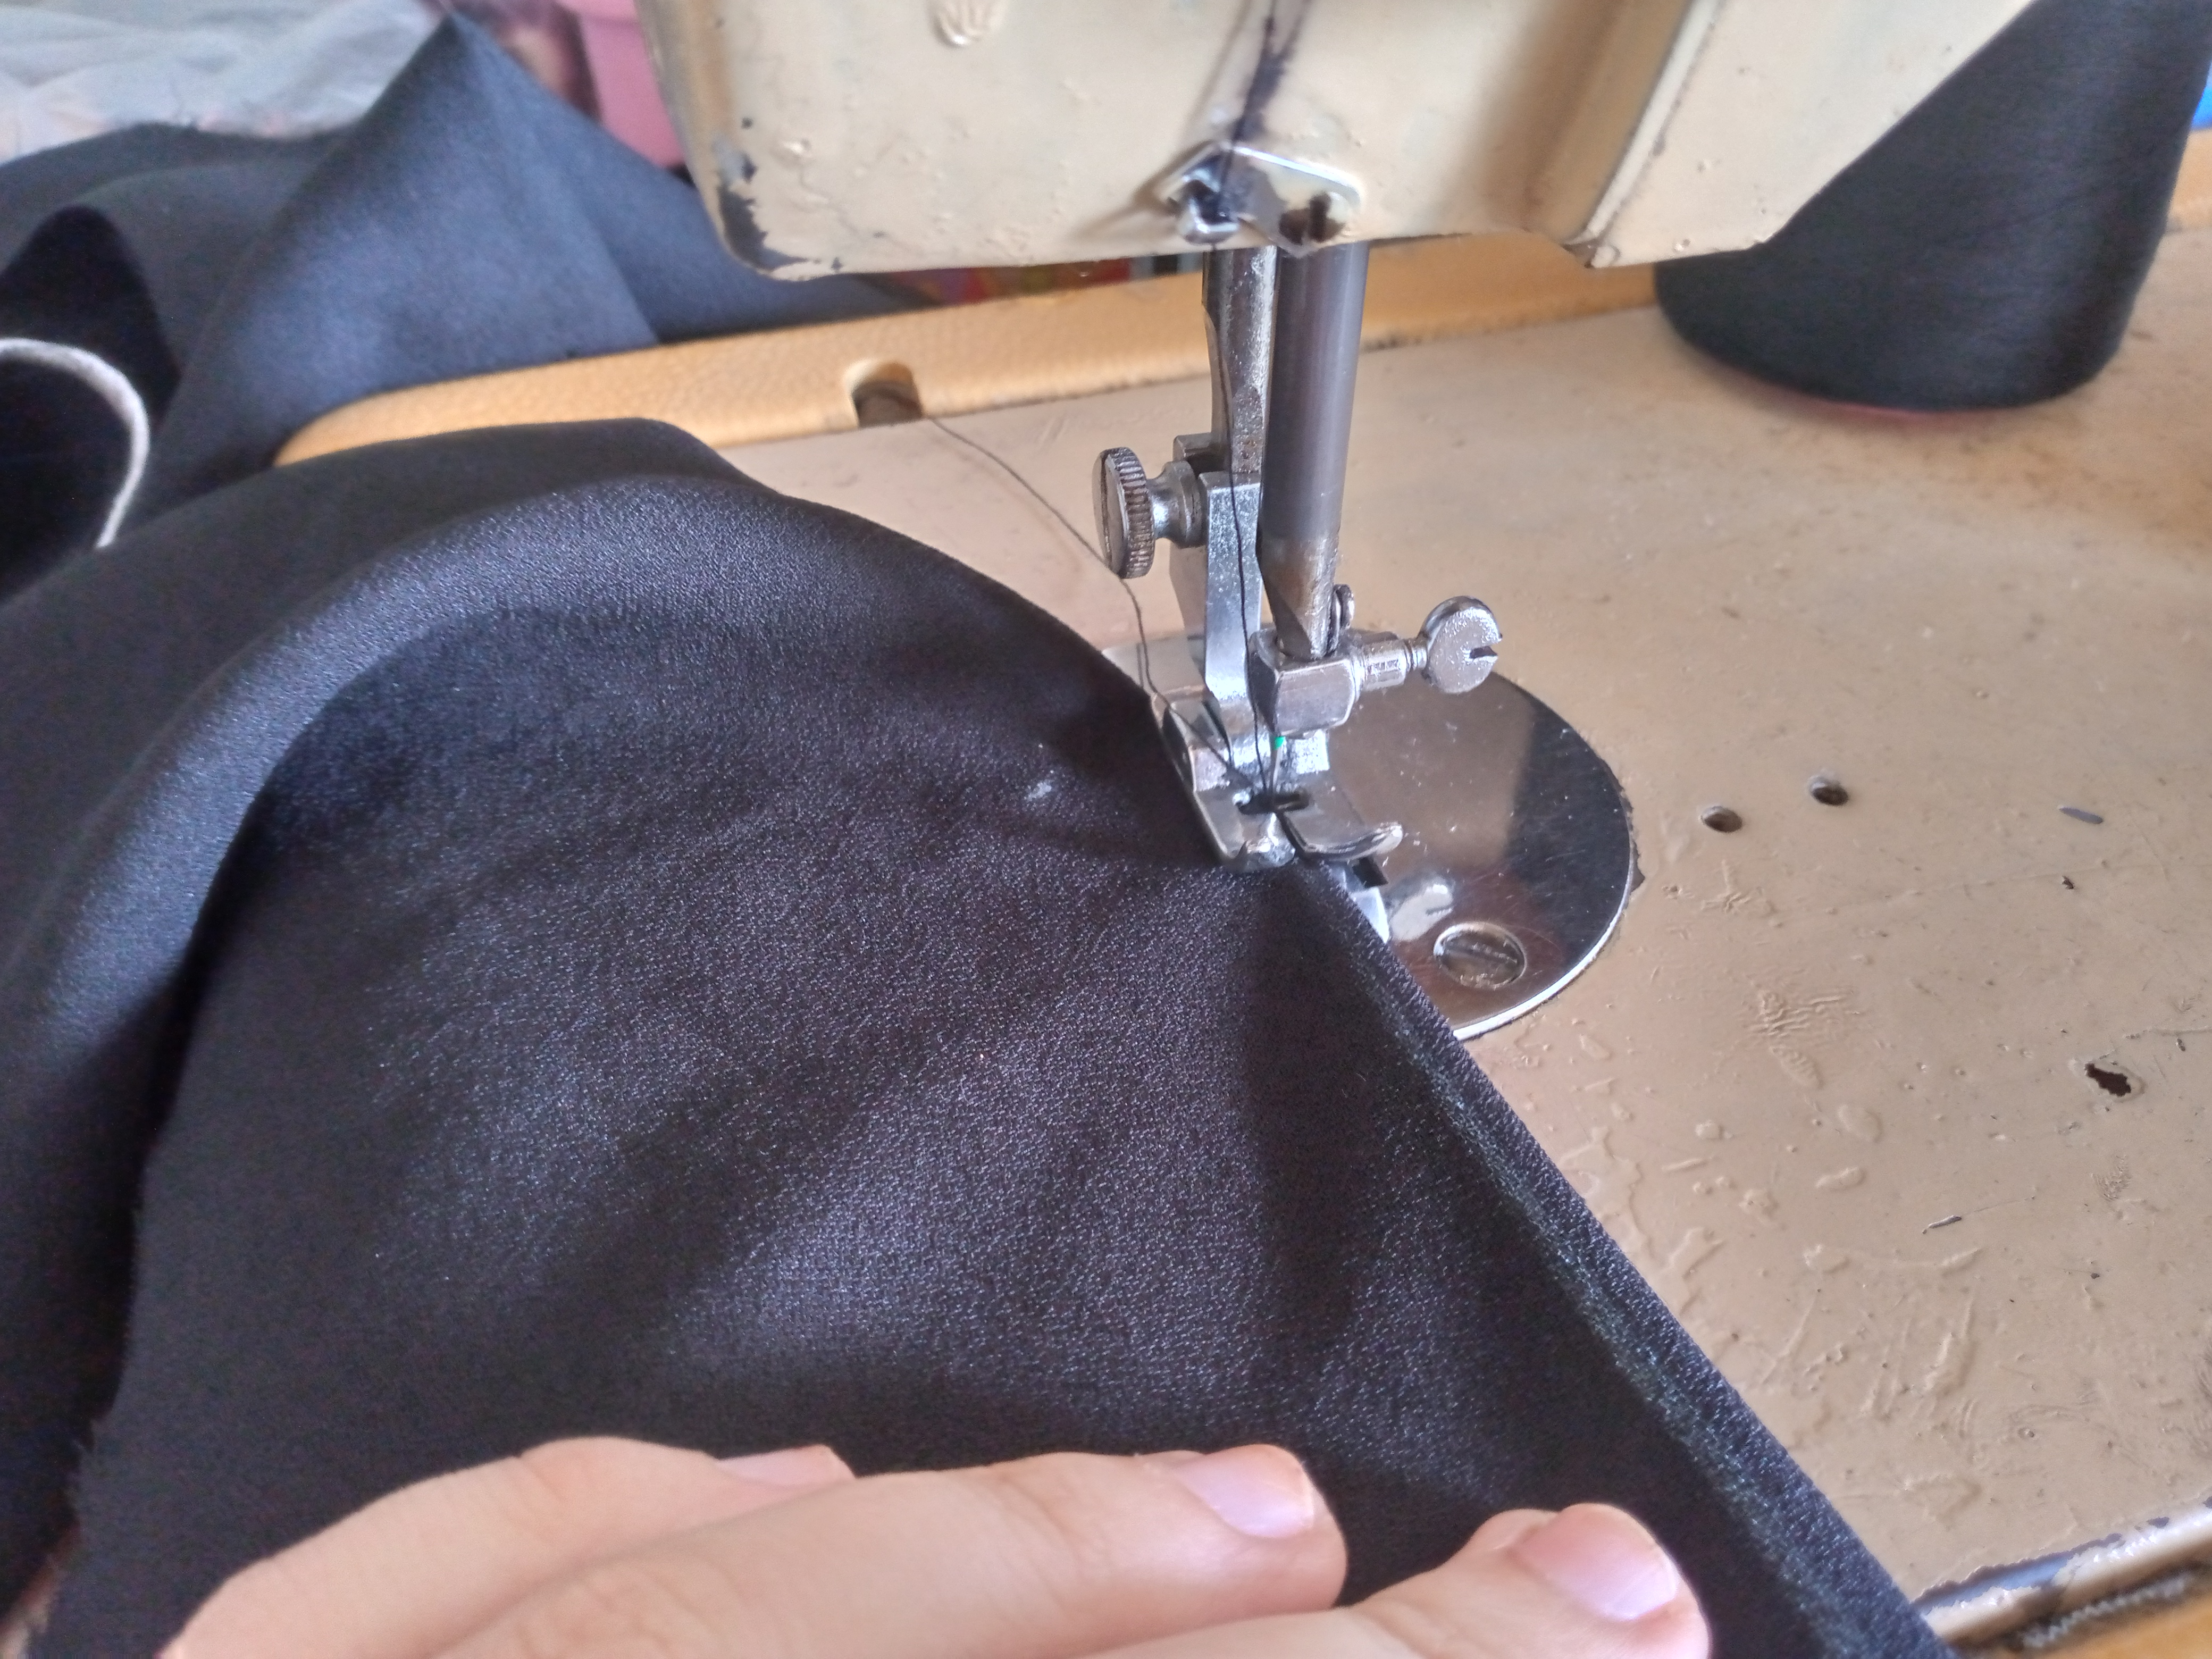 </div> <div class='pull-right'> 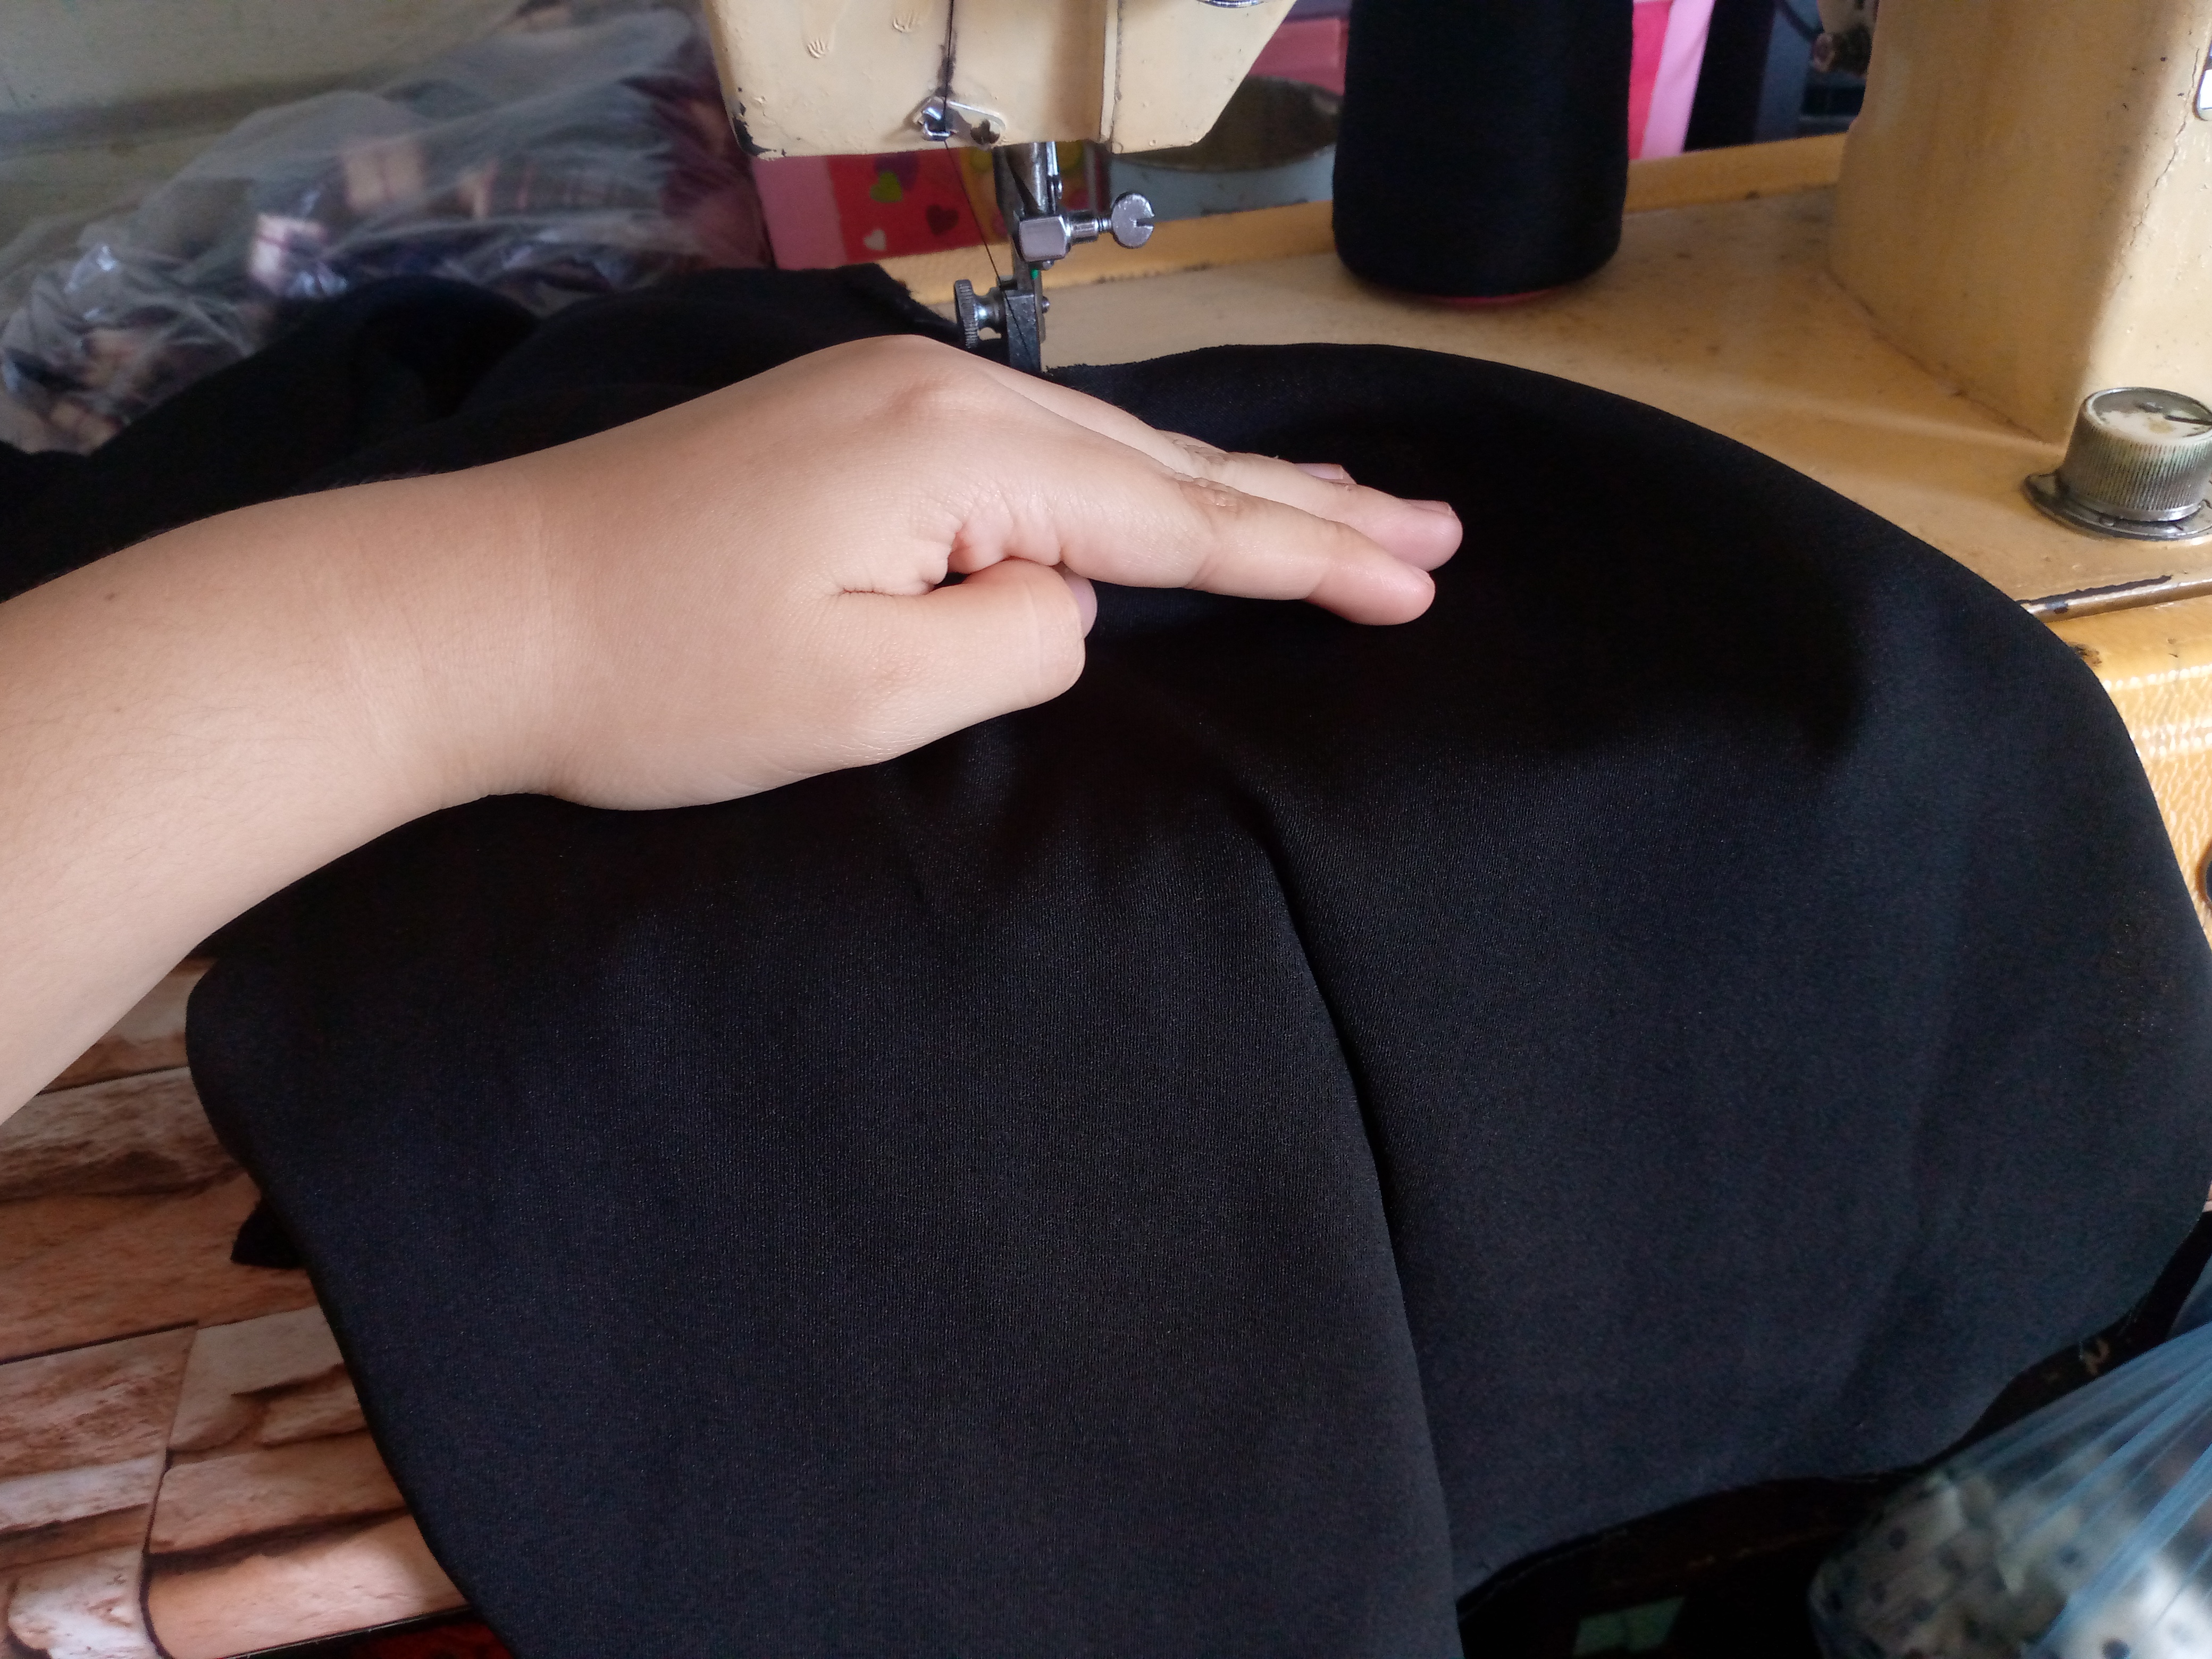 </div> <center>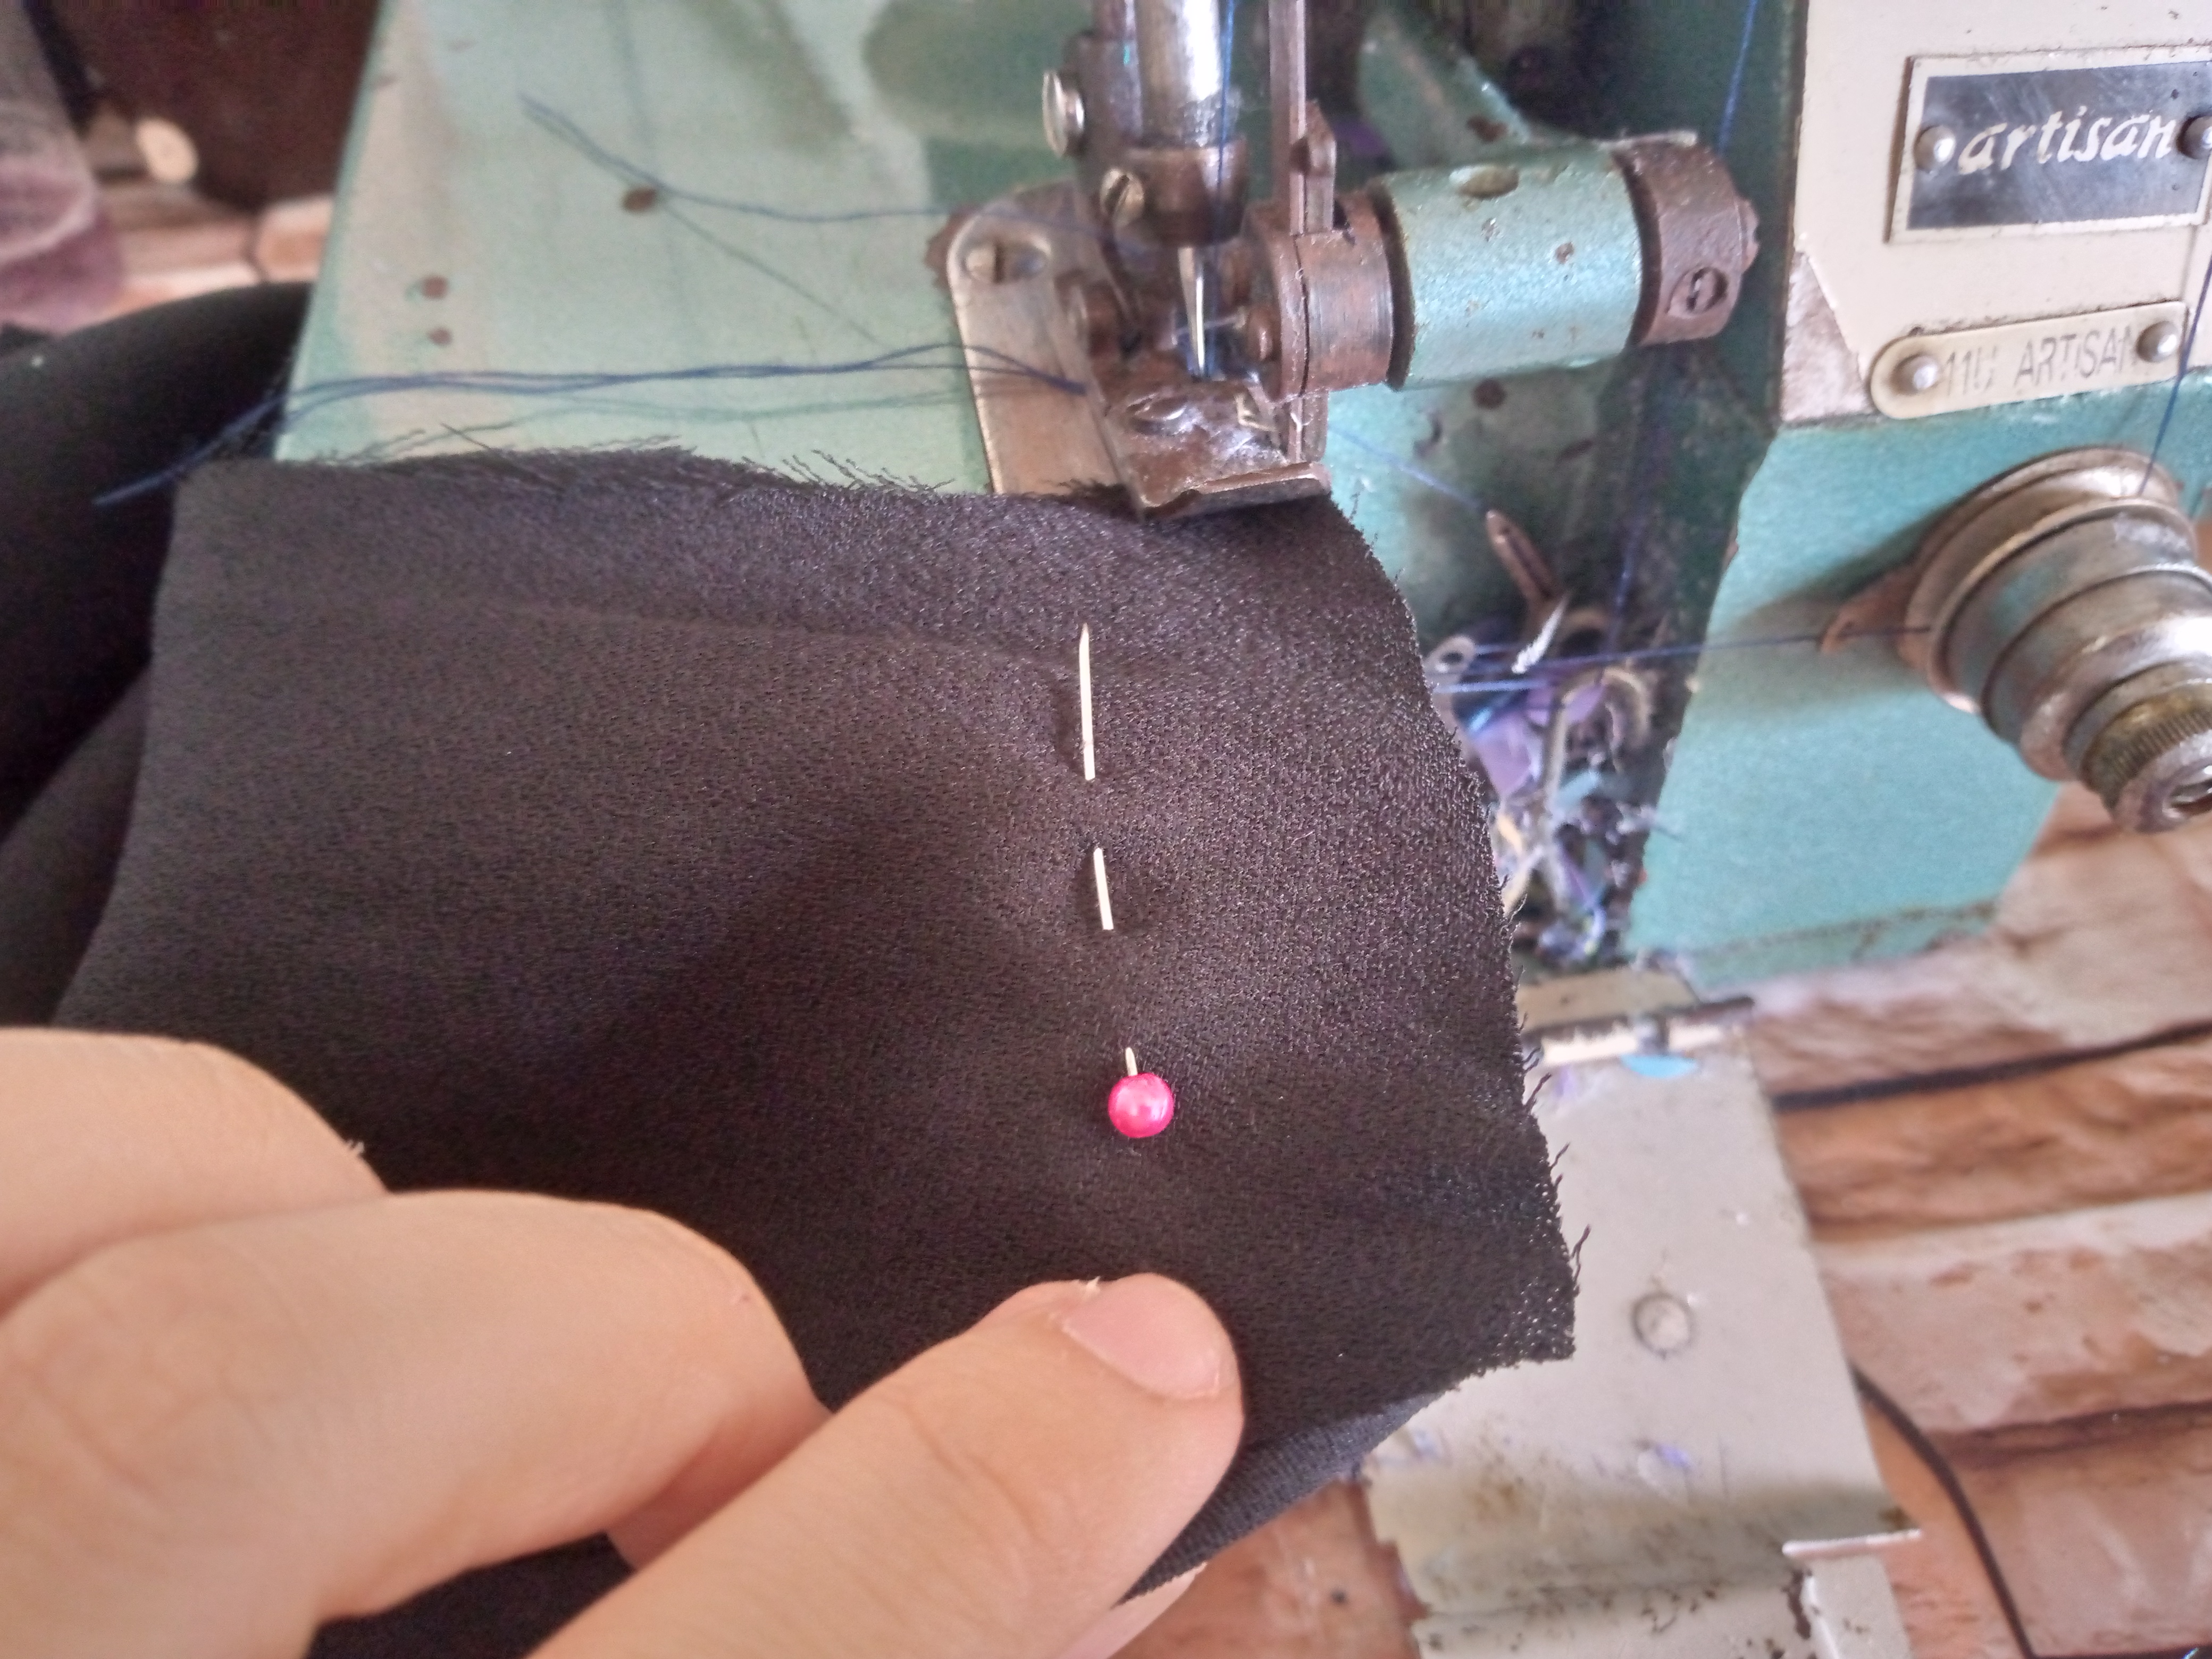 </center> ### _Paso 02_ <div class="text-justify">A este chaleco le he hecho pinzas las de atrás de 13 cm de largo x 3 de ancho y las de las piezas delanteras 9 cm de largo x 3 de ancho igualmente,y ya solo voy a coserlas porque como les mencioné las había marcado anteriormente con tiza de costura,luego cosemos la parte de los hombros del chaleco uniendo la pieza de adelante junto con la de atrás.</div> # > ### _Step 02_ > _I have made darts for this vest, the back ones measuring 13 cm long x 3 cm wide, and the front pieces are also 9 cm long x 3 cm wide. Now I am only going to sew them because, as I mentioned, I had previously marked them with sewing chalk. Then we sew the shoulder part of the vest, joining the front piece with the back piece._ --- <div class='pull-left'> 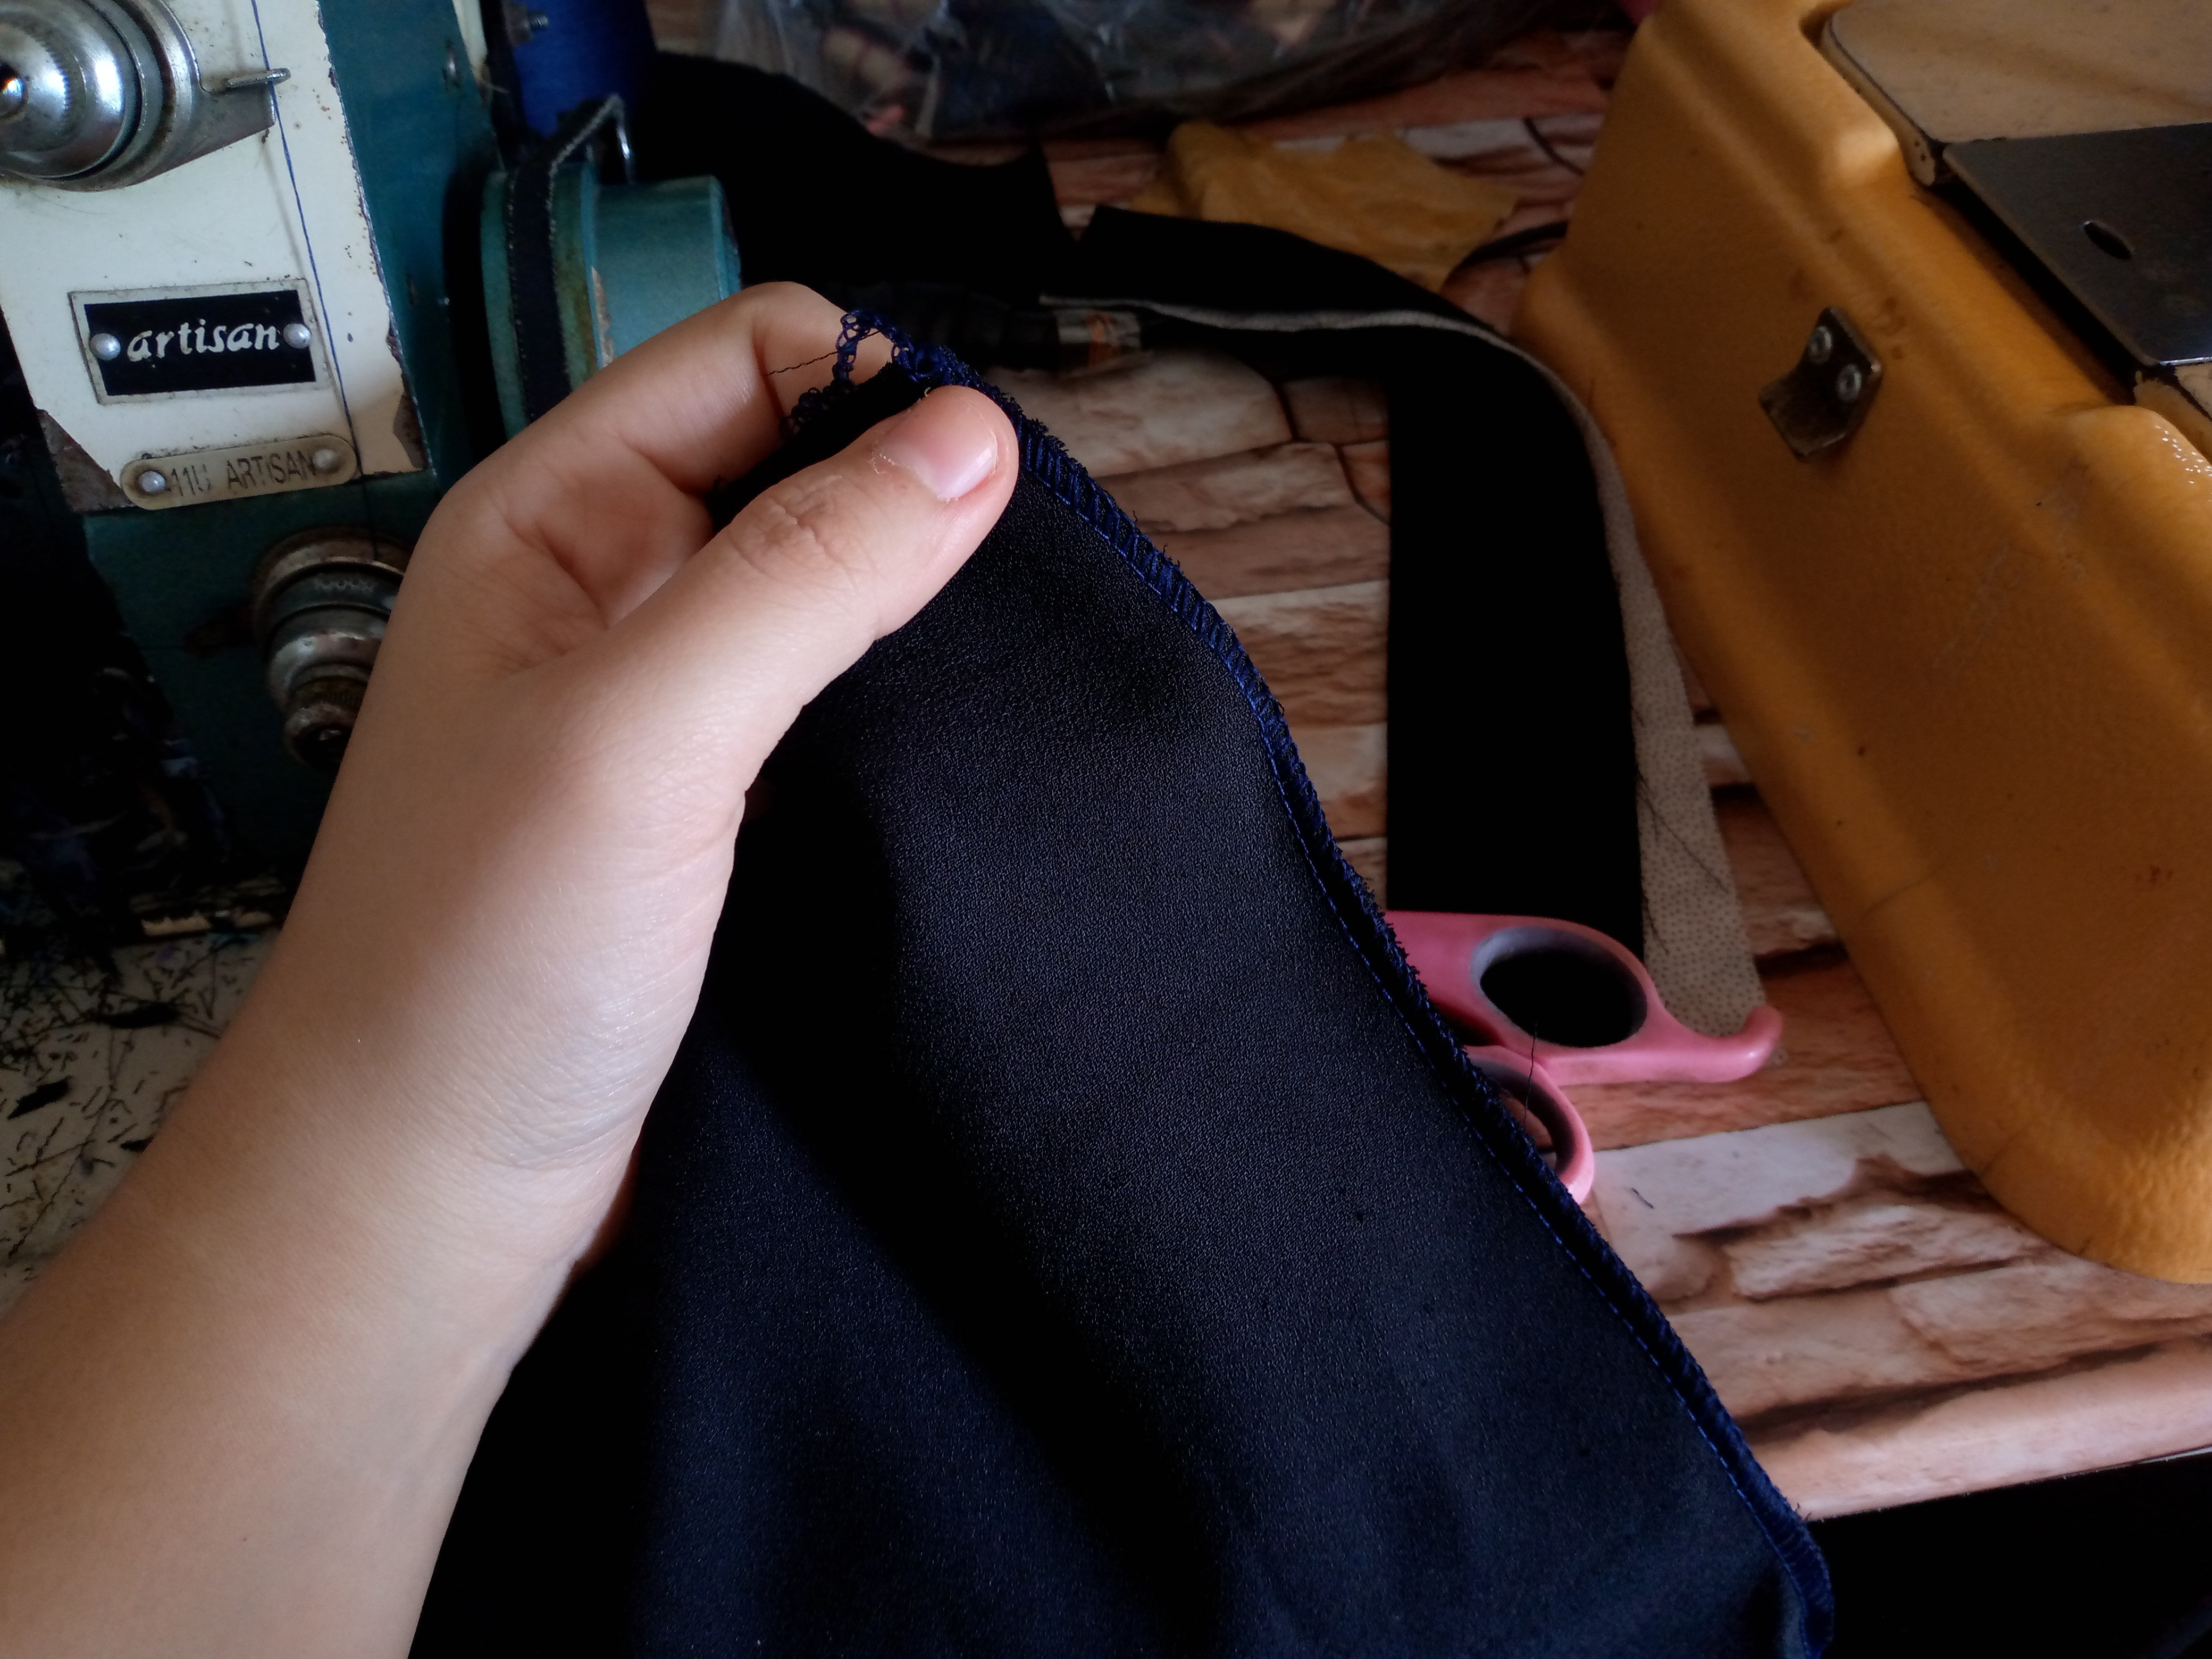 </div> <div class='pull-right'> 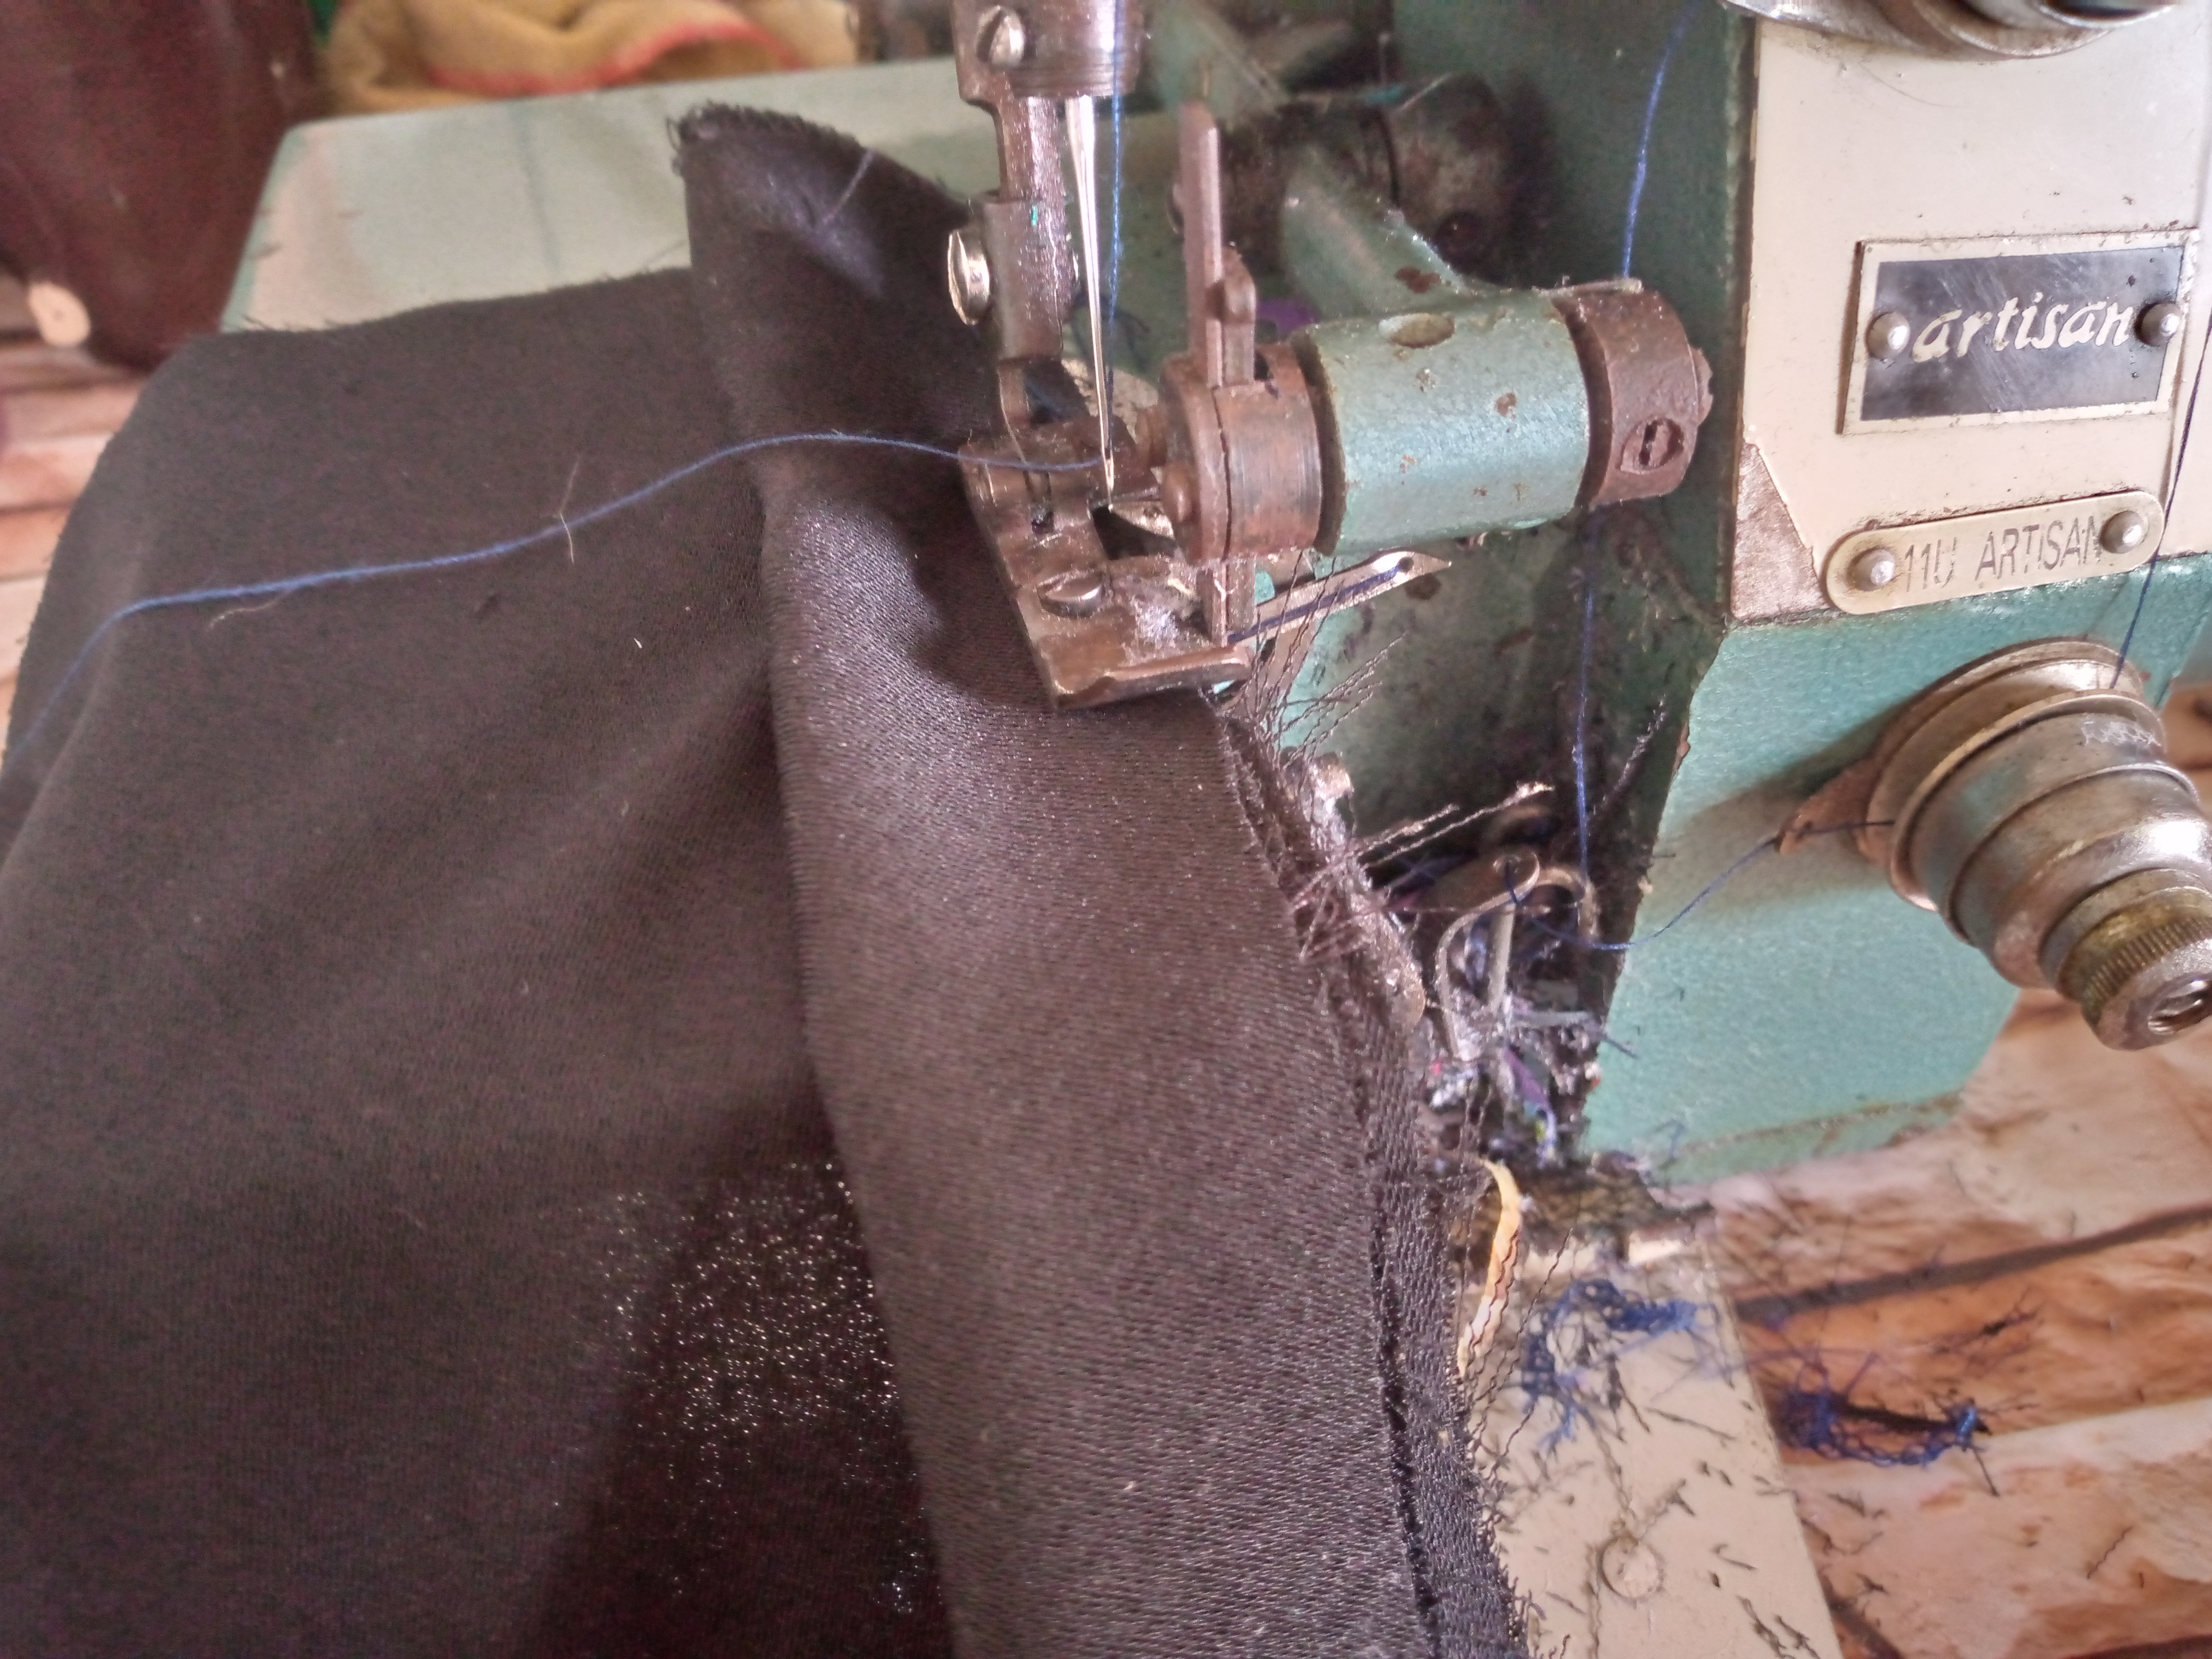 </div> <div class='pull-left'> 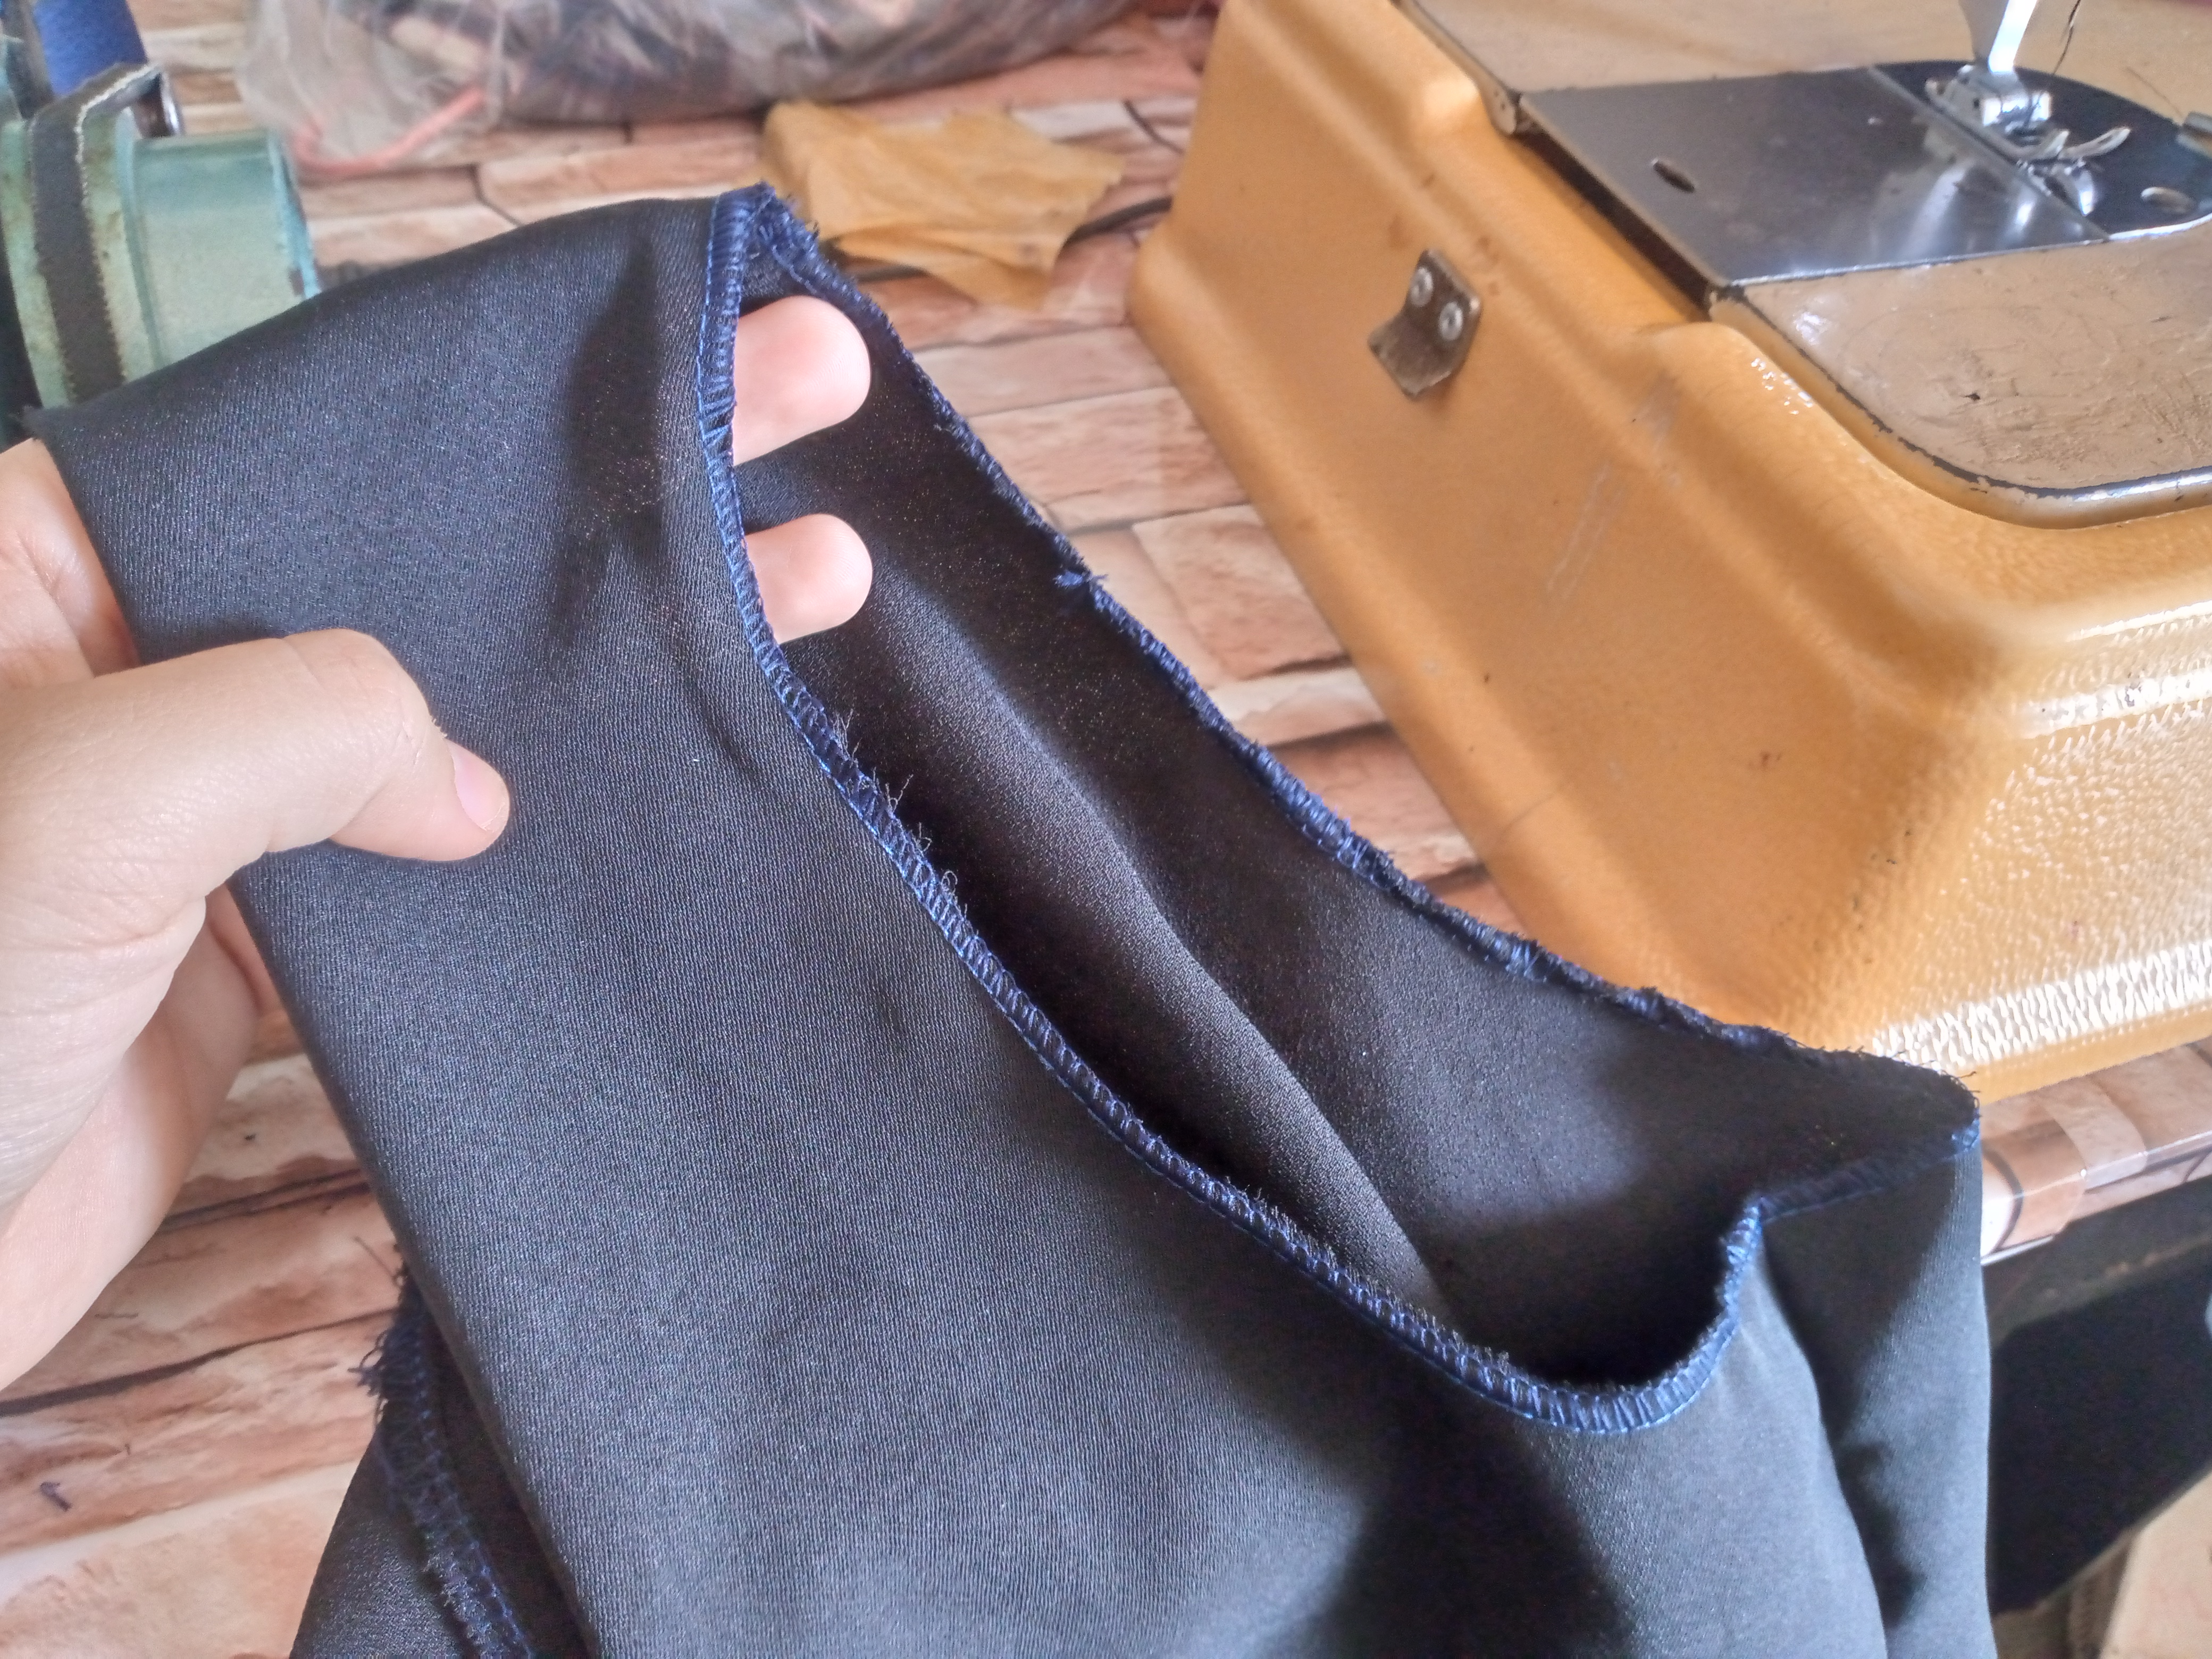 </div> <div class='pull-right'> 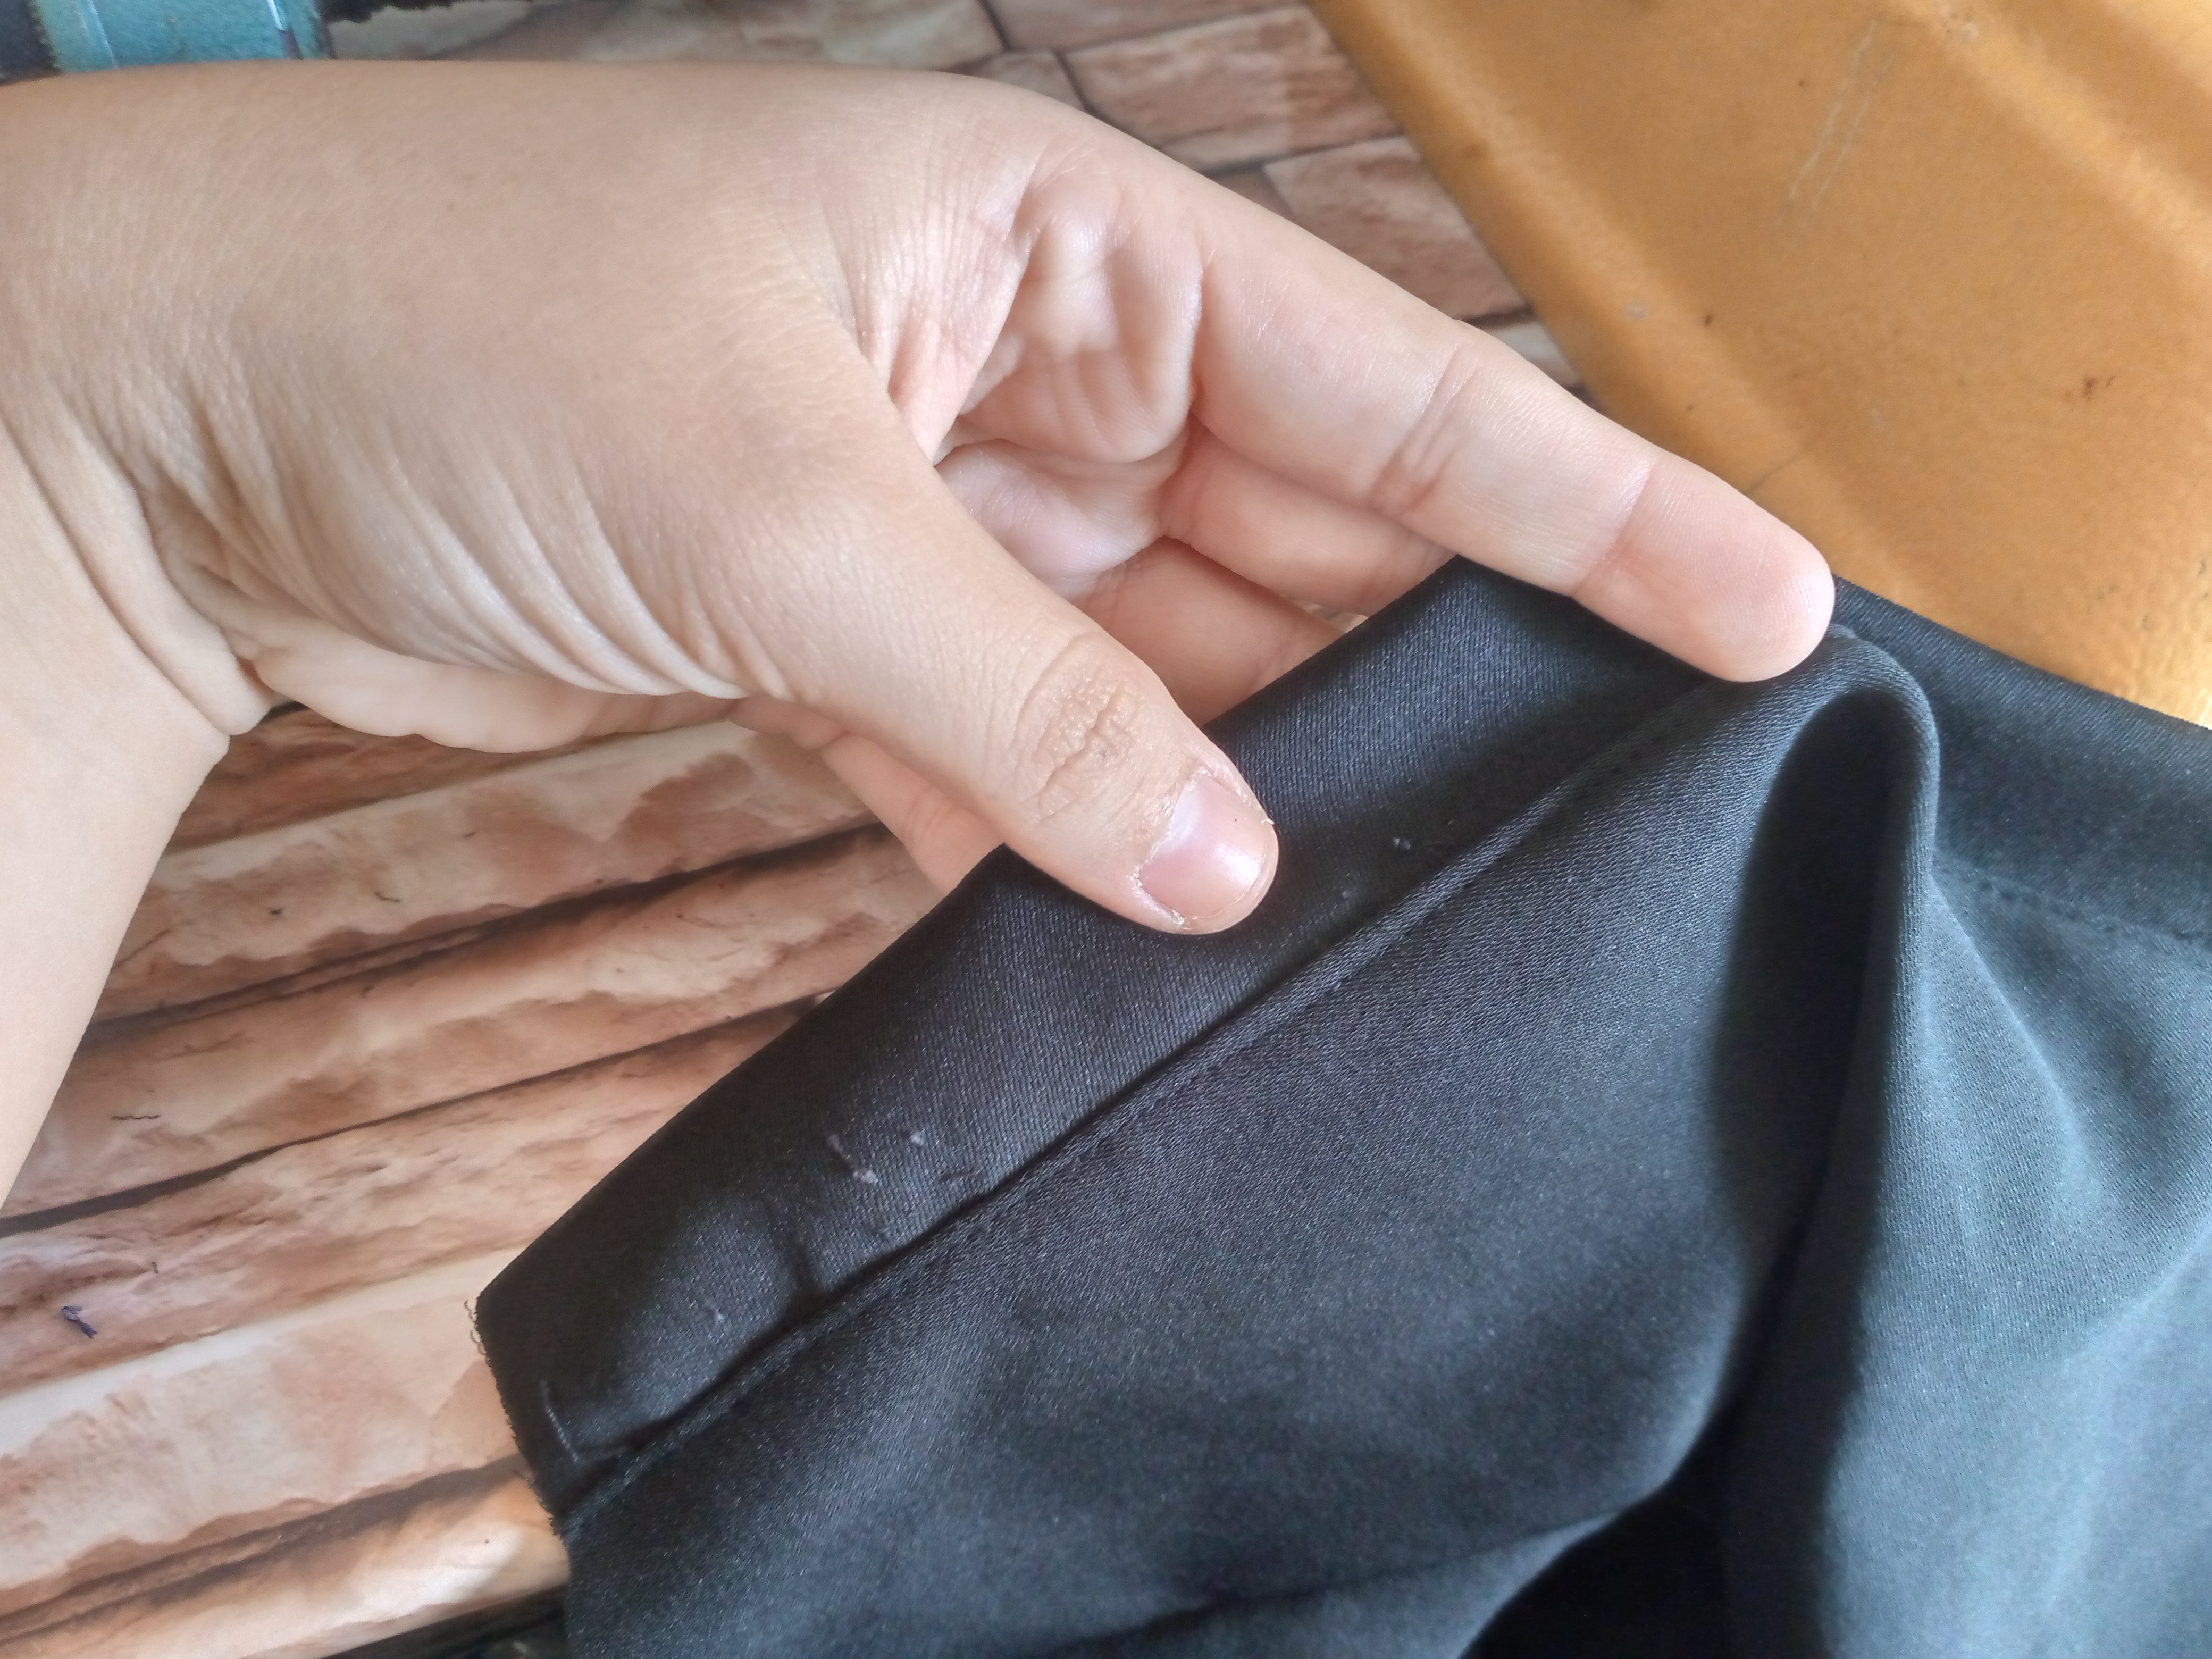 </div> ### _Paso 03_ <div class="text-justify">Vamos a coser luego la parte del sesgo de mis ojales a ambas piezas delanteras y coseremos los costados para sellar nuestro chaleco,luego con la máquina overlock en este caso lo estoy cosiendo con ella cosemos el borde de la sisa o cosemos con zig zag eso depende de la máquina que ustedes vayan a usar 😊.</div> # > ### _Step 03_ > _We will then sew the bias part of my buttonholes to both front pieces and we will sew the sides to seal our vest, then with the overlock machine in this case I am sewing it with it we sew the edge of the armhole or we sew with a zig zag, it depends on the machine you are going to use 😊._ --- <div class='pull-left'> 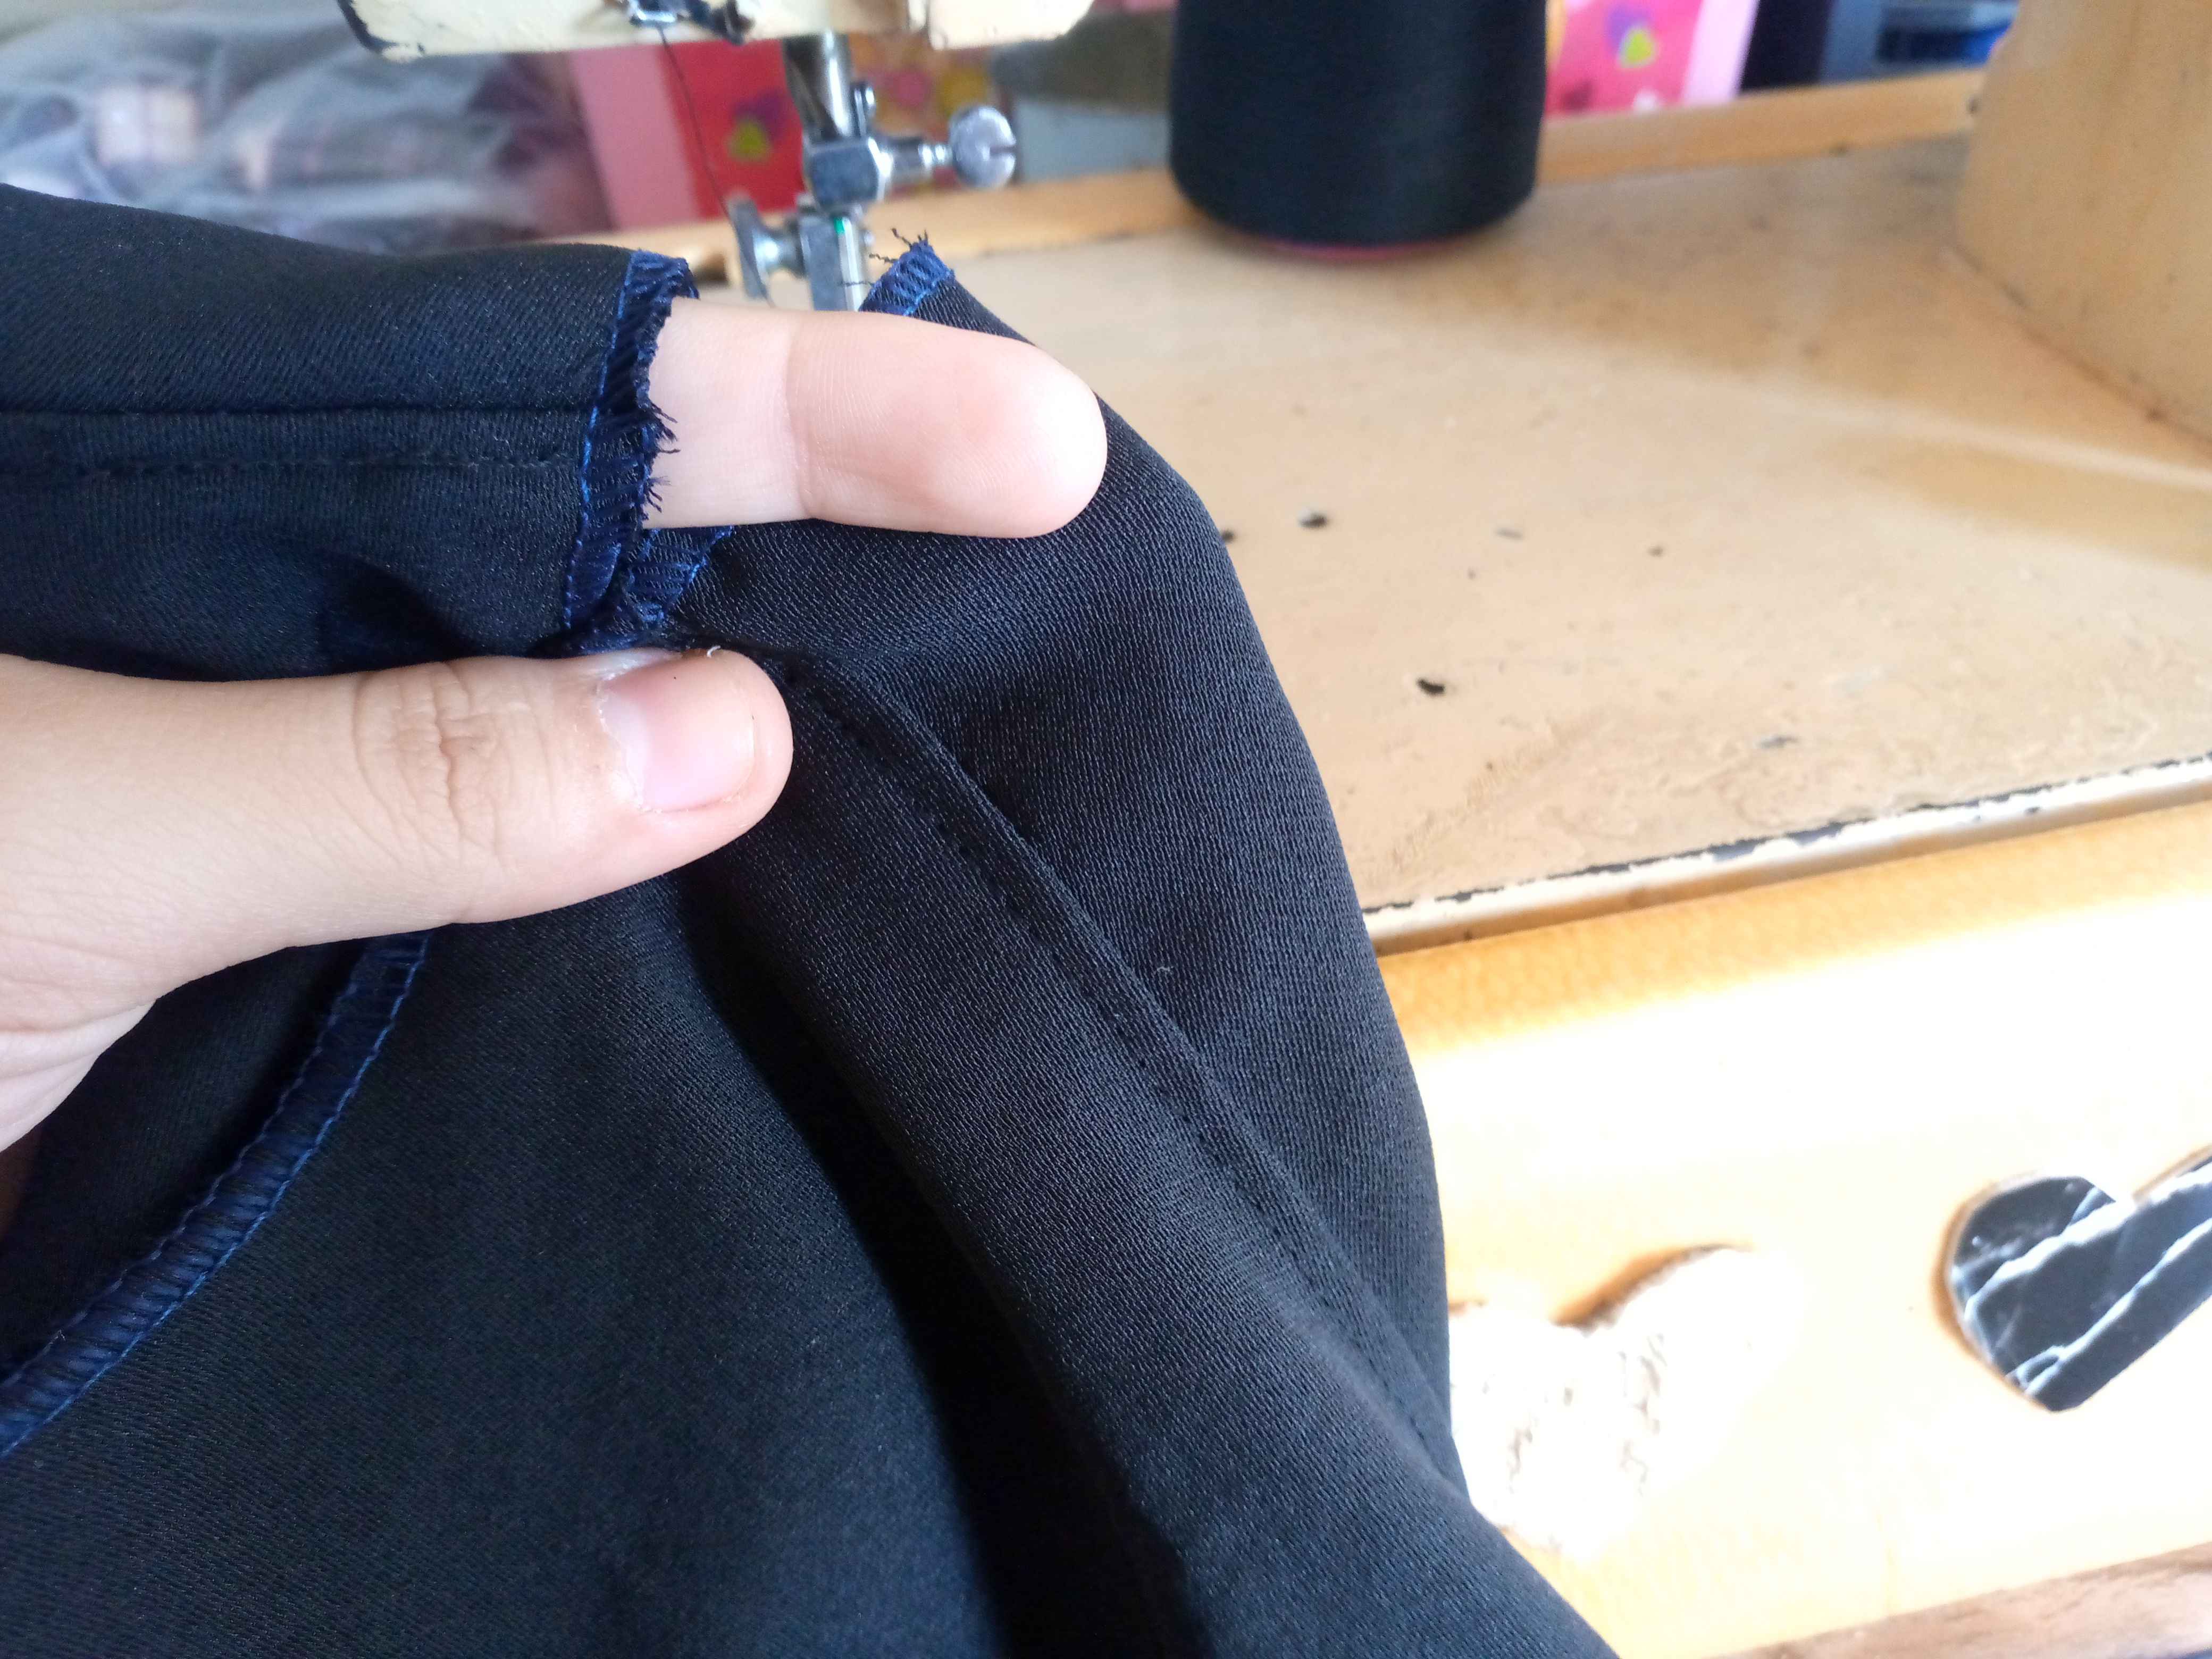 </div> <div class='pull-right'> 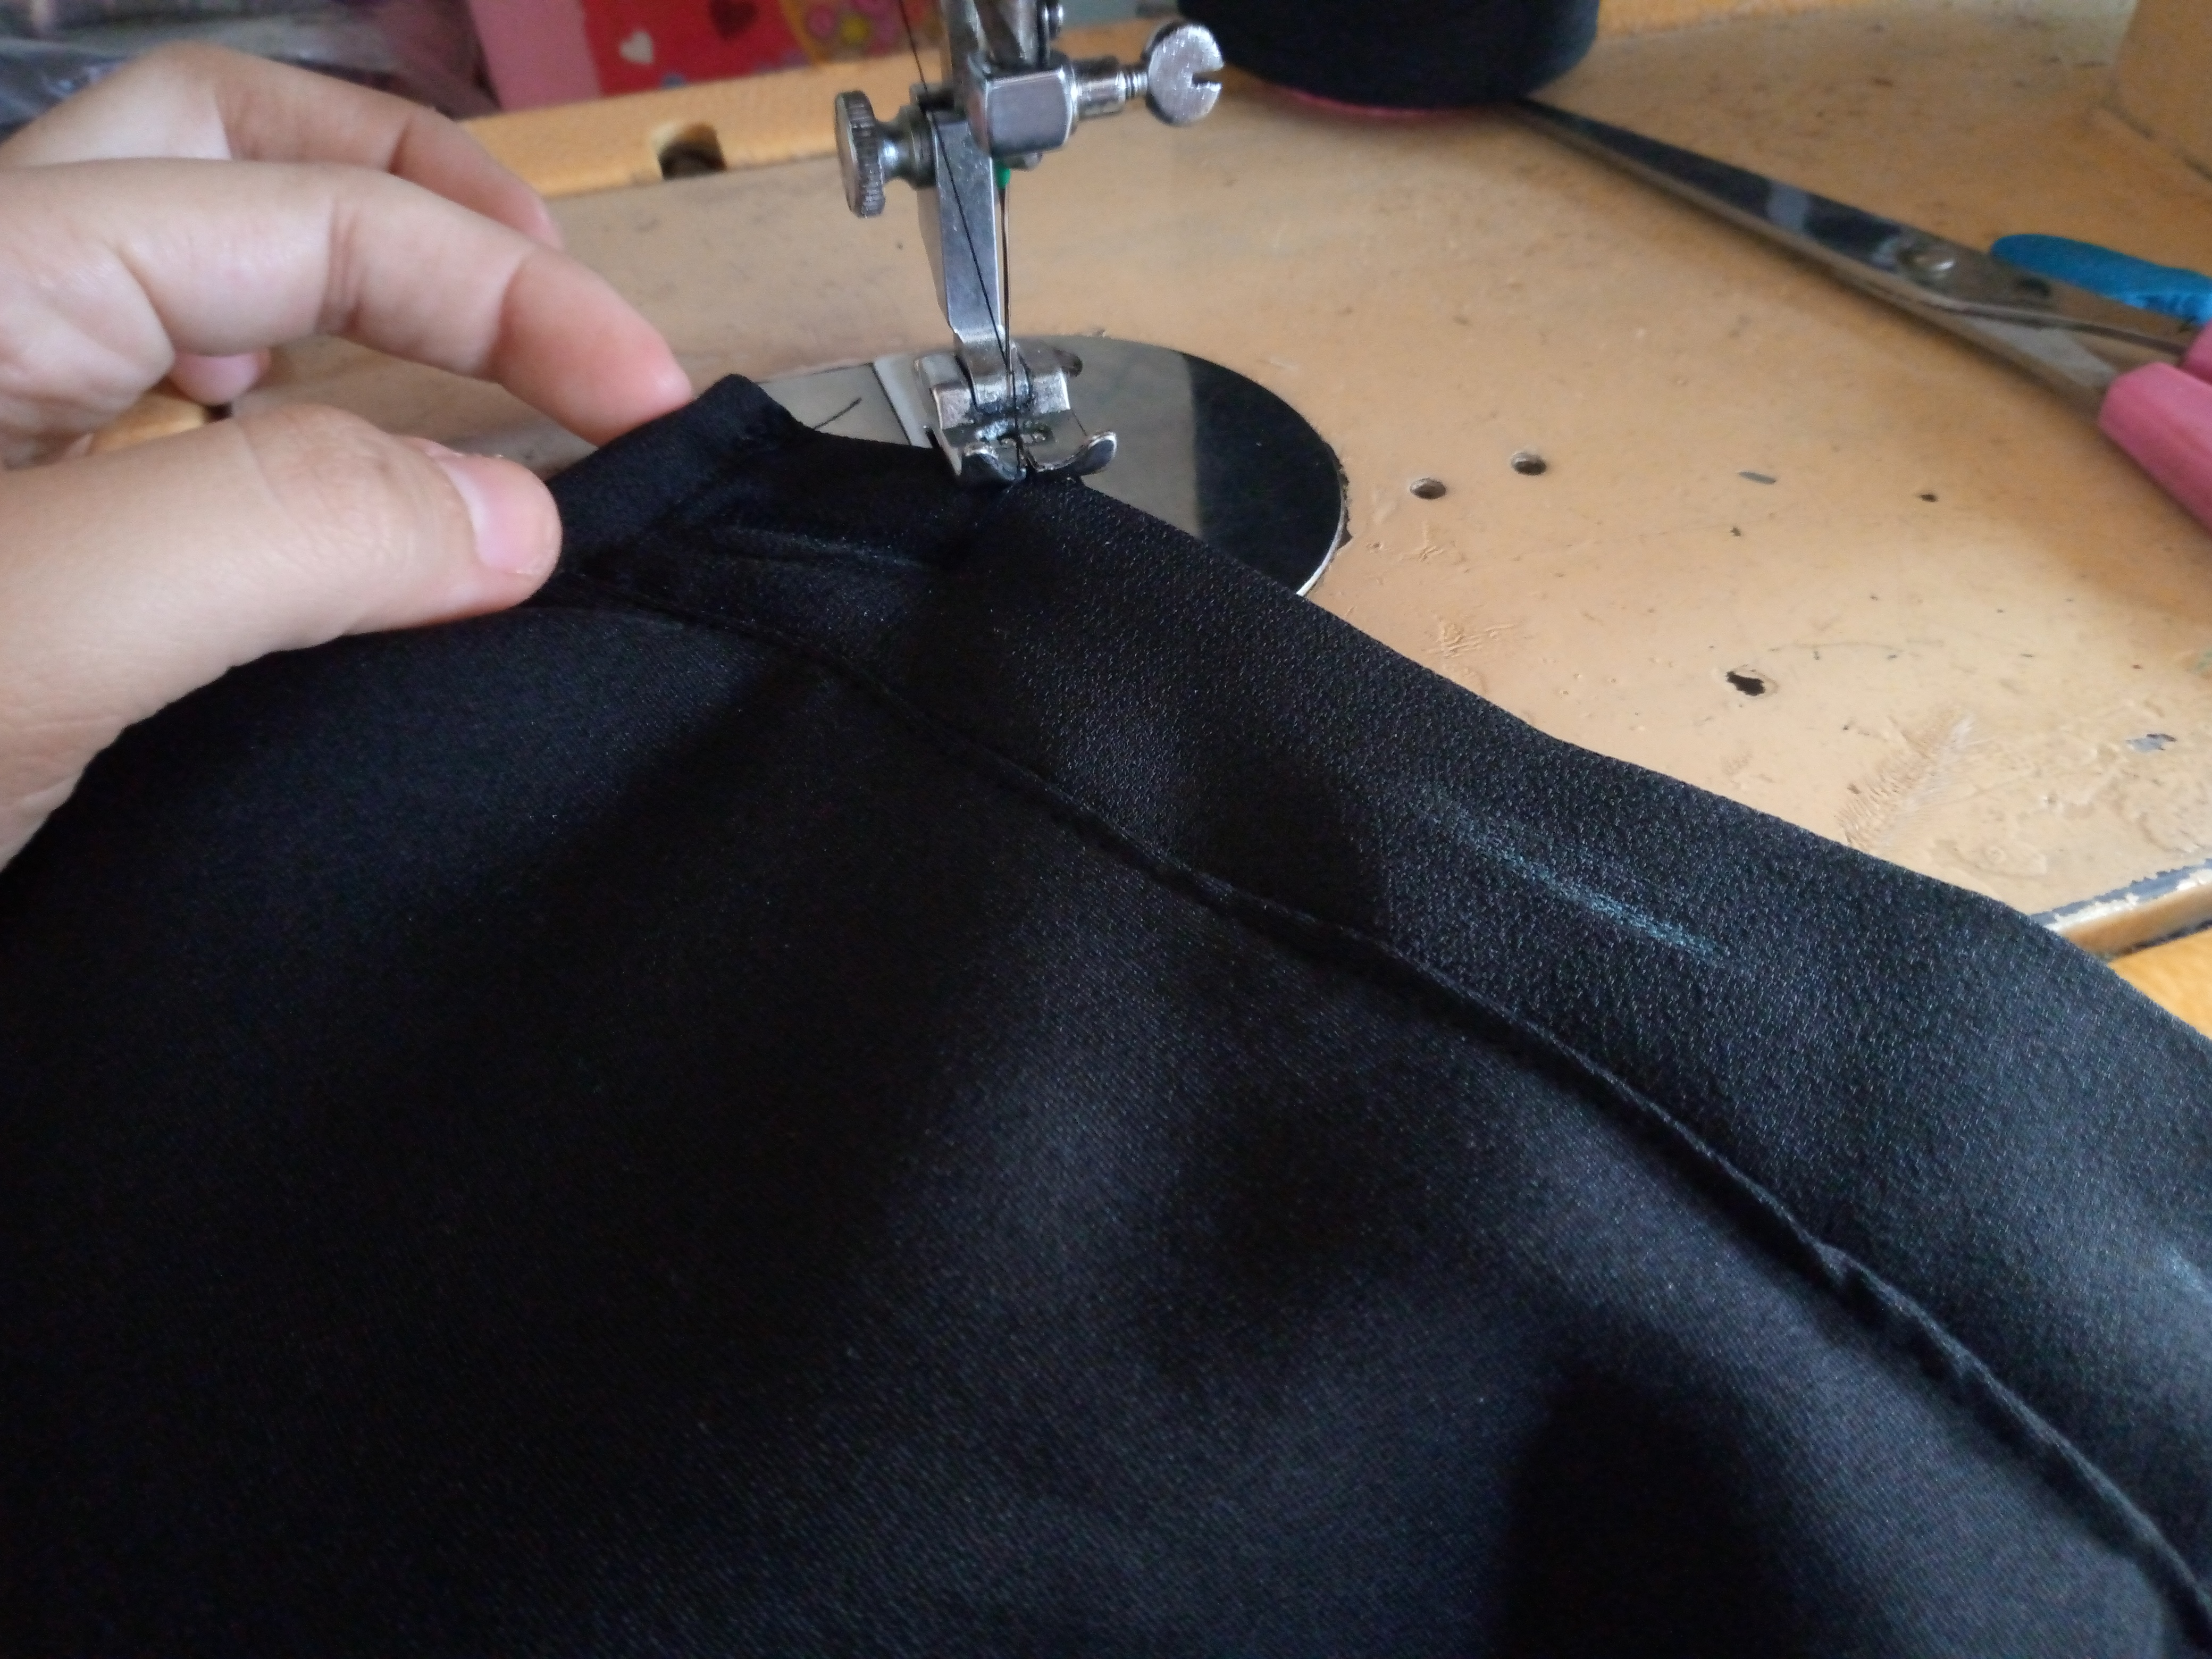 </div> <div class='pull-left'> .jpg) </div> <div class='pull-right'>  </div> ### _Paso 04_ <div class="text-justify">Repisaremos después la pieza del sesgo de donde van los ojales con costura por encima luego cosemos todo el borde de lo que es nuestro cuello para hacer un pequeño sesgo hacia adentro de 1 centímetro doblandolo ,paso después a marcar los ojales de 2 cm de largo cada uno marcaremos tres y lo cosemos con zig zag ,y también cosemos los botones ubicandolos en su lugar,con esto he terminado mi chaleco top 😊,espero te gusten los resultados.</div> # > ### _Step 04_ > _We will then re-stitch the bias piece where the buttonholes go, then we sew the entire edge of what is our collar to make a small bias inwards of 1 centimeter by folding it, then I will mark the buttonholes of 2 cm long each, we will mark three and sew them with a zigzag, and we will also sew the buttons placing them in their place, with this I have finished my top vest 😊, I hope you like the results._ --- <center>.jpg)</center> ## _<div class="phishy">Resultado:// Result:</div>_ # <center> </center> <center>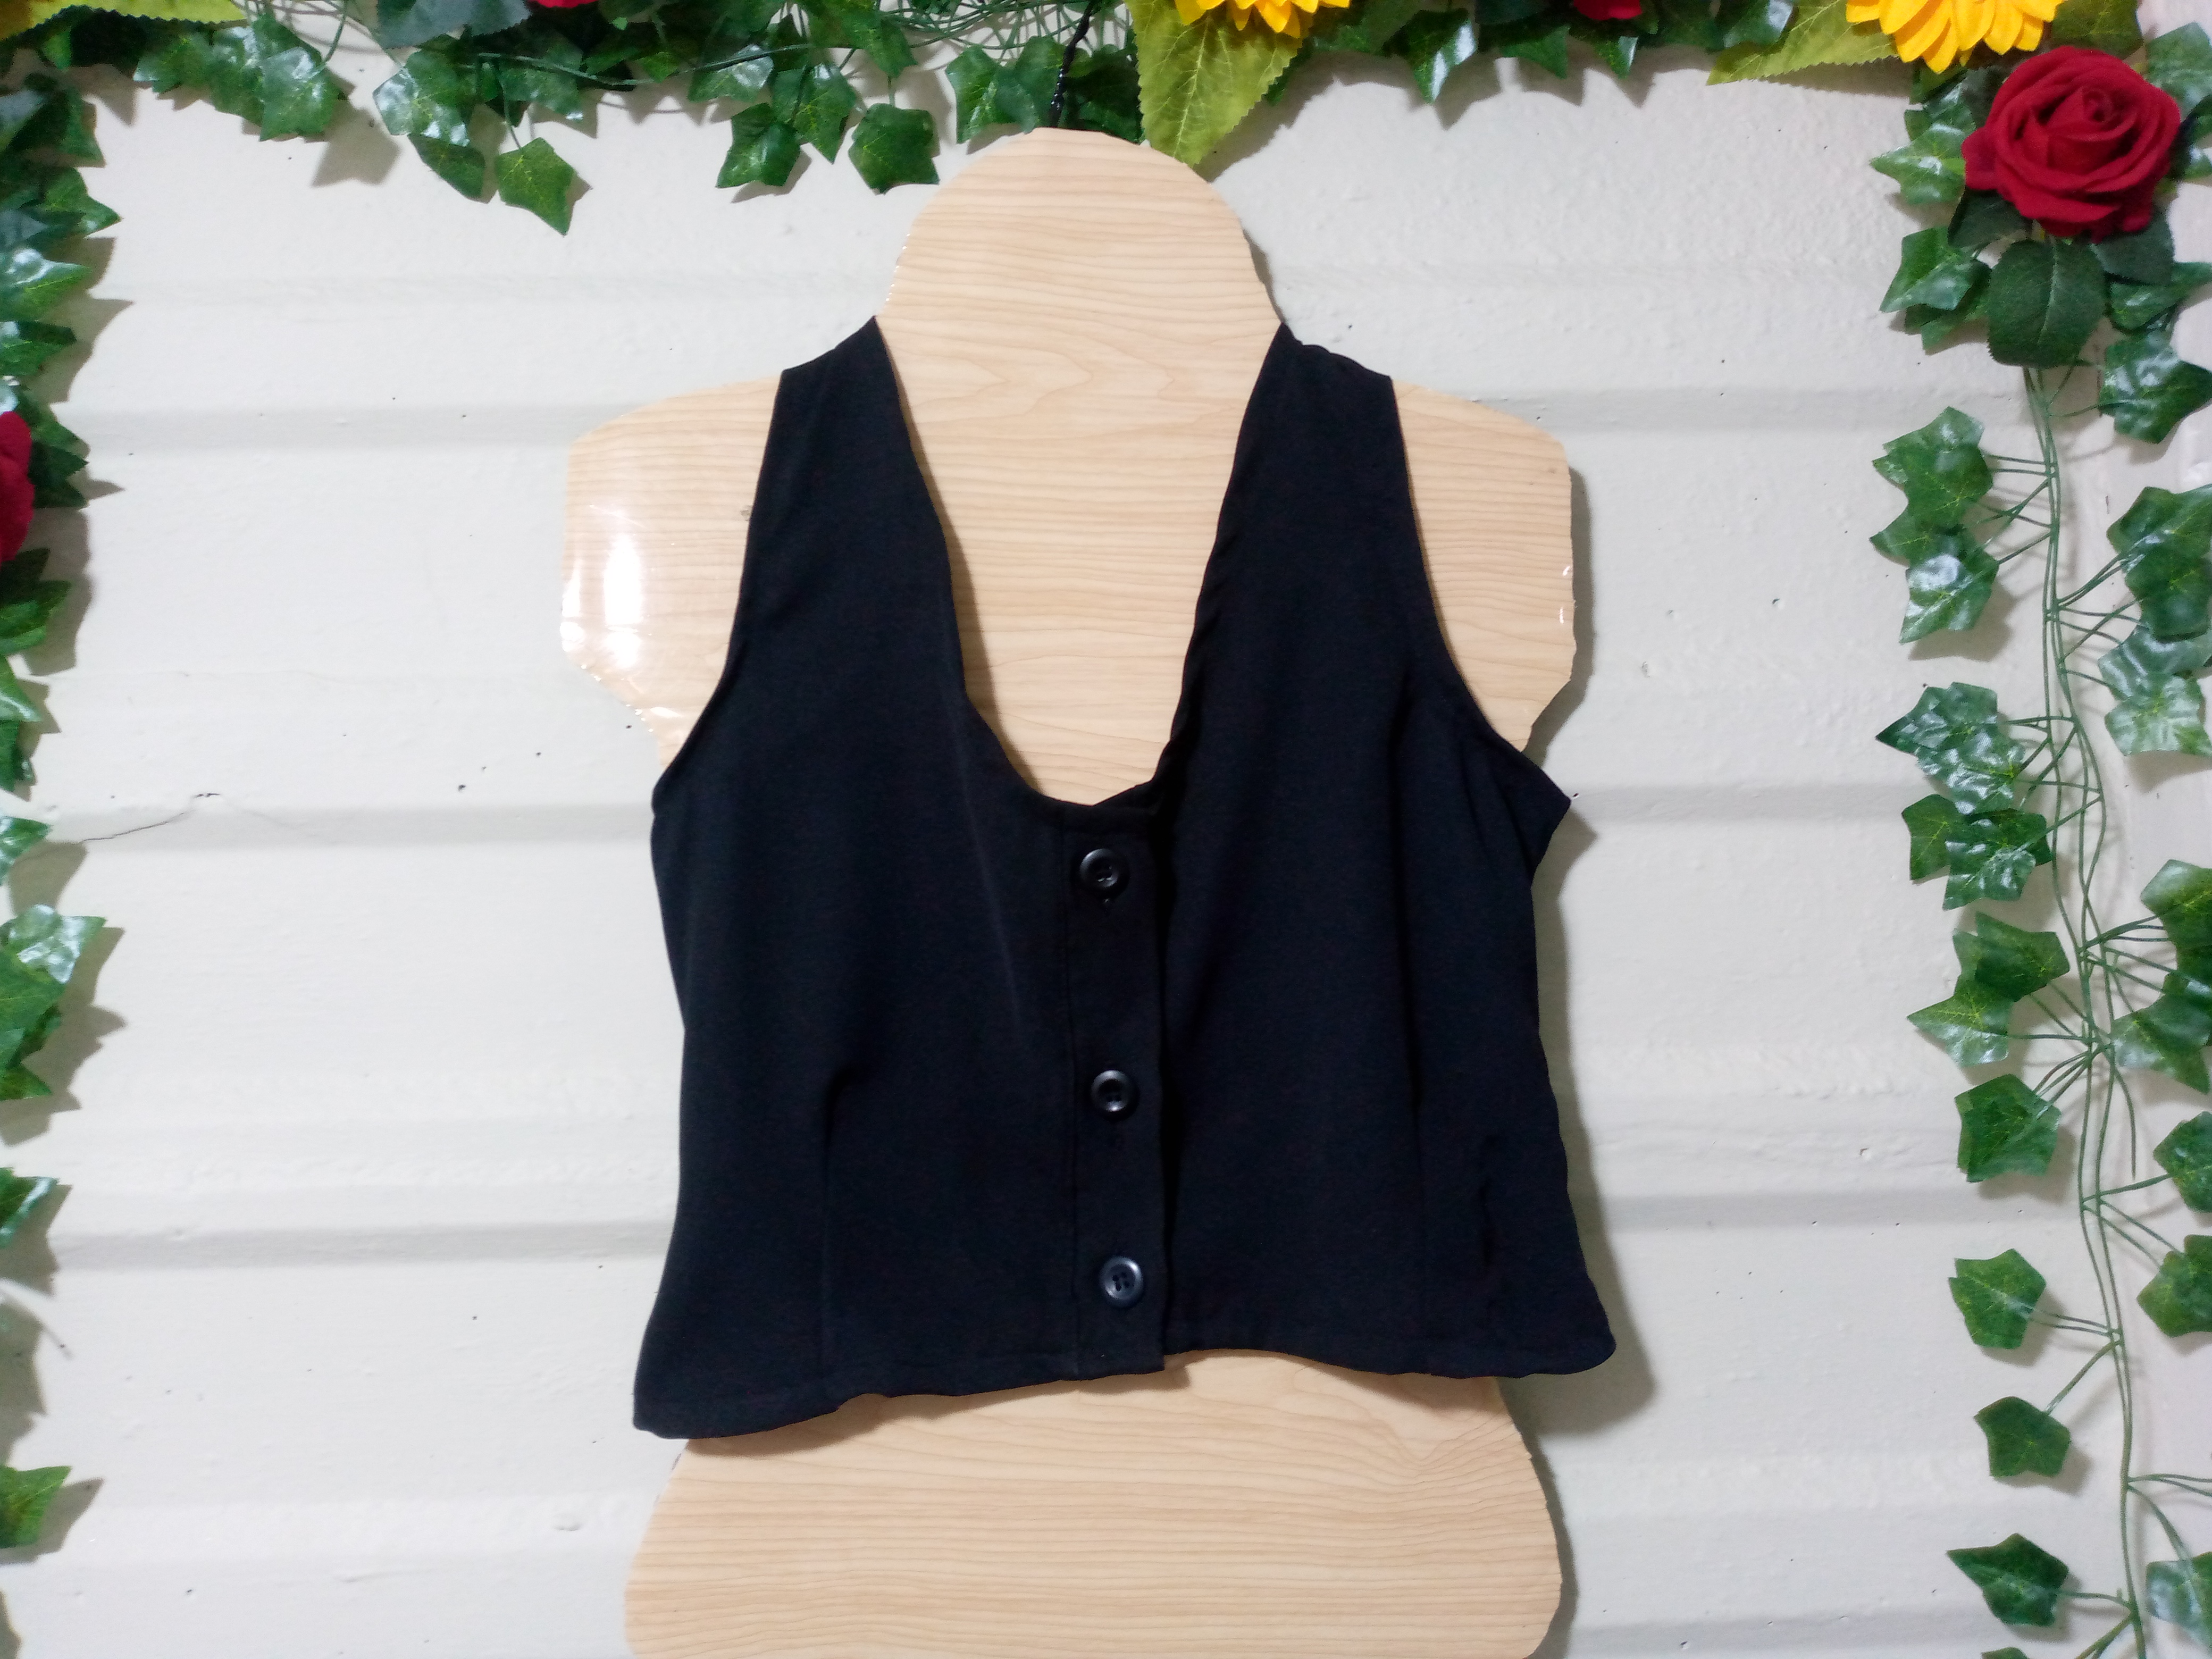 </center> <center> </center> # ------🪡-------🧵------🪡------🧵-------🪡------ ### _<div class="text-justify">Esto ha sido todo por hoy amigas costureras ,espero les haya gustado esta sencilla confección,y espero me sigan acompañando en más proyectos como estos , agradezco el tiempo también que dedicaste en leerme y nos vemos en otra ocasión,feliz y bella tarde.🌤️.</div>_ > ### _That's all for today, my seamstress friends. I hope you enjoyed this simple creation, and I hope you continue to join me in more projects like these. I also appreciate the time you spent reading me and I'll see you another time. Have a happy and beautiful afternoon.🌤️._ ------🪡-------🧵------🪡------🧵-------🪡------ # <center>.jpg)</center> # **_<center><sub>Creando las cosas con amor 🌷❤️</sub></center>_** **_<center><sub>🦋✨Todas las imágenes de esta publicación son de mi autoria ,📱tomadas con mi celular TecnoSpark8C |📸Fotos editadas en PicsArt y Canva. Texto traducido en el traductor de Google. </sub></center>_** # > **_<center><sub>Creating things with love 🌷❤️</sub></center>_** > **_<center><sub>🦋✨ All the images in this publication are my author ,📱taken with my TecnoSpark8C cell phone |📸Photos edited in PicsArt and Canva. Text translated in Google Translate.</sub></center>_** --- <center> </center> ---
👍 beco132, sohanur-rahman, delishtreats, diyhub, elizacheng, deepu7, arita992, sabrinah, ladyyunajay, ryenneleow, appreciator, flemingfarm, detlev, bluemist, sunsea, dynamicrypto, kkarenmp, danielcarrerag, bertrayo, ravenmus1c, inciter, alenox, soyunasantacruz, lucianav, keco, noalys, power-kappe, fotomaglys, aprasad2325, malhy, liveofdalla, pinkchic, noelyss, david.dicotomia, kattycrochet, rmach, tahastories1, hivelist, ganjafarmer, beerlover, jane1289, valerianis, lauracraft, altheana, needleworkmonday, bimpcy, cassidydawn, marito74, inici-arte,