[React] Mobx-state-tree 학습하기 #8 : Create an Entry Form to Add Models to the State Tree
zzan·@anpigon·
0.000 HBD[React] Mobx-state-tree 학습하기 #8 : Create an Entry Form to Add Models to the State Tree
이전글 [**"\[React\] Mobx-state-tree 학습하기 #7 : Remove Model Instances from the Tree"**](/zzan/@anpigon/react-native-manage-application-state-with-mobx-state-tree-7)에서 이어지는 내용입니다. 참고로 이 포스팅은 제가 학습한 내용을 노트에 정리하듯이 기록하여 올리는 글이기 때문에 보팅 안해주셔서 됩니다. 많은 분들이 코딩에 흥미를 느꼈으면 좋겠습니다. ㅋ
<br>
***

* 출처: https://egghead.io/courses/manage-application-state-with-mobx-state-tree
***
<br>
## Create an Entry Form to Add Models to the State Tree
* 강의 링크: https://egghead.io/lessons/react-create-an-entry-form-to-add-models-to-the-state-tree
<br>8번째 레슨입니다. 위시 리스트에 새 항목을 추가 할 시간입니다. 우리는 지금까지 작성한 입력폼과 모델을 재사용할 것입니다.
<br>우리는 다음을 배우게 됩니다.
* MST는 단일 상태 트리(single state tree)로 제한되지 않습니다. 모든 모델은 자체적인 트리를 가질 수 있습니다
* 상태 트리(state tree)에 모델 인스턴스 추가하기
<br>
***
<br><br>
새 파일 `WishListItemEntry.js`을 생성합니다. 여기서 **WishListItemEdit** 컴포넌트를 재활용합니다. 그리고 Add 버튼을 만들었습니다. 입력양식을 작성하고 Add 버튼을 누르면 WishList 모델에 새 항목을 추가하게 됩니다.
`src/components/WishListItemEntry.js`
```
import React, { Component } from "react";
import { observer } from "mobx-react";
import WishListItemEdit from "./WishListItemEdit";
import { WishListItem, WishList } from "../models/WhishList";
class WishListItemEntry extends Component {
constructor() {
super();
this.state = {
entry: WishListItem.create({
name: "",
price: 0
})
};
}
render() {
return (
<div>
<WishListItemEdit item={this.state.entry} />
<button onClick={this.onAdd}>Add</button>
</div>
);
}
onAdd = () => {
this.props.wishList.add(this.state.entry);
this.setState({
entry: WishListItem.create({
name: "",
price: 0
})
});
};
}
export default WishListItemEntry;
```
<br><br>
그다음 `WishListView.js` 파일을 수정합니다. **WishListView** 컴포넌트에는 방금 만든 **WishListItemEntry** 컴포넌트를 추가하여 화면에 보여줍니다.
`src/components/WishListView.js`
```
import React from "react";
import { observer } from "mobx-react";
import WishListItemView from "./WishListItemView";
import WishListItemEntry from './WishListItemEntry'; // add here
const WishListView = ({ wishList }) => (
<div className="list">
<ul>
{wishList.items.map((item, idx) => (
<WishListItemView key={idx} item={item} />
))}
</ul>
Total: {wishList.totalPrice} 💲
<WishListItemEntry wishList={wishList} />
</div>
);
export default observer(WishListView);
```
<br>
<br>
**실행화면**
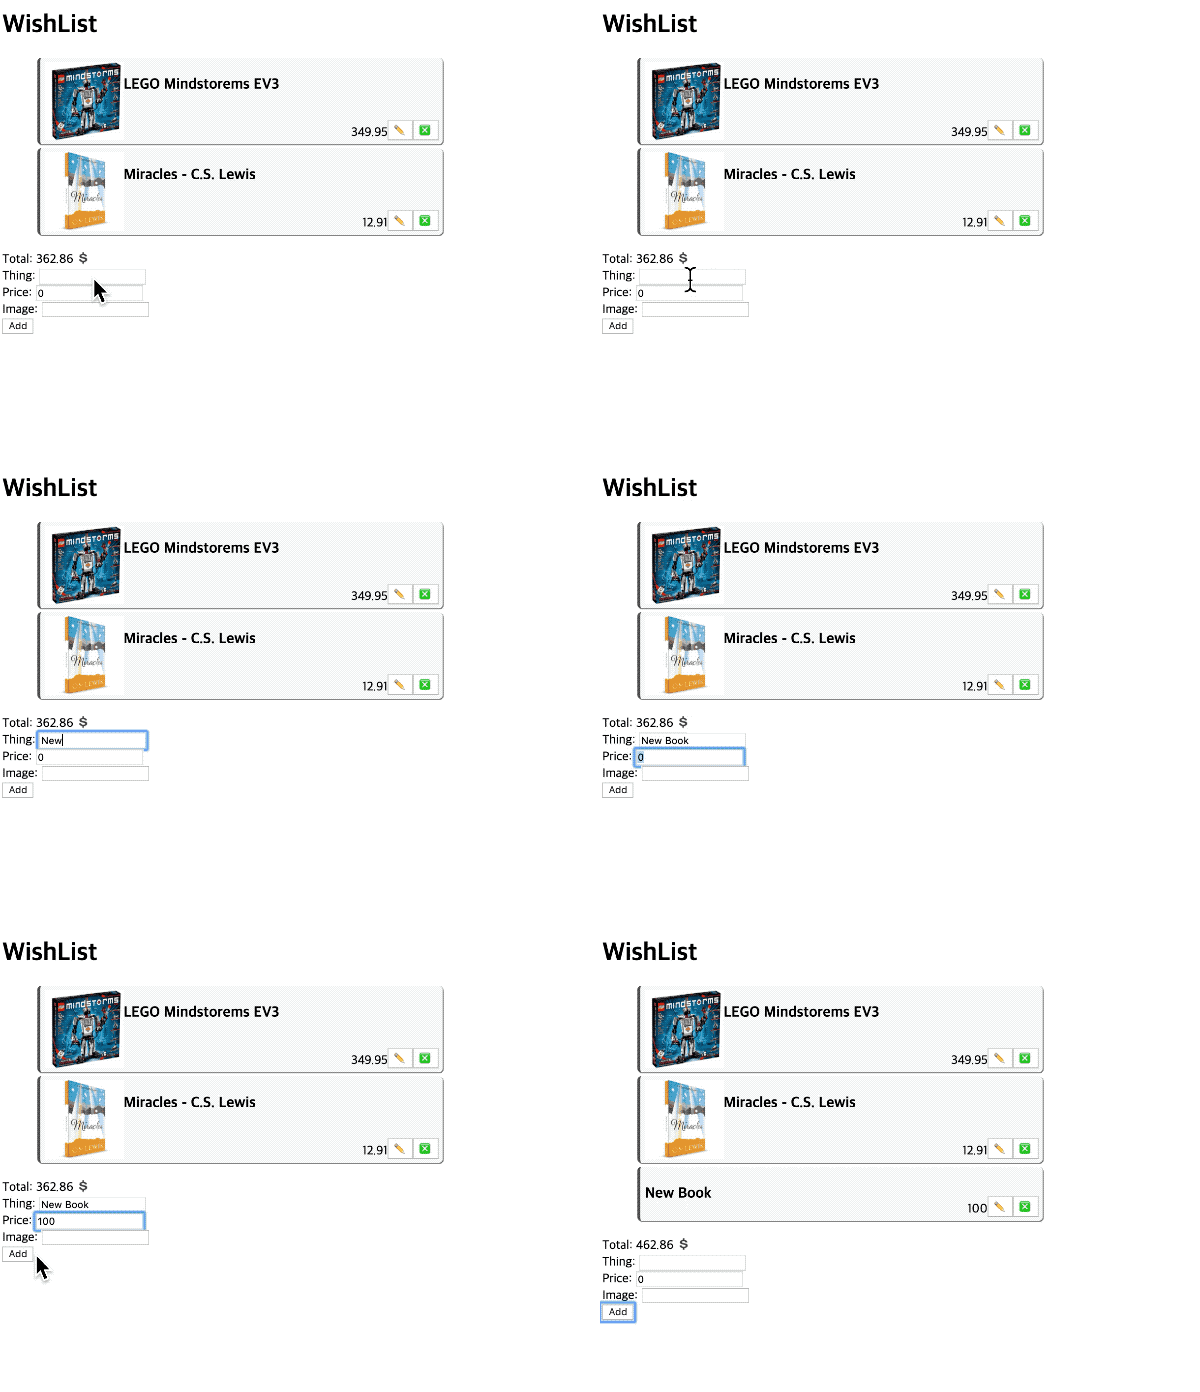
이제 새로운 항목을 작성하고 Add 버튼을 눌러보세요.
***

***
<br>오늘 수업 끝.
<br>
<br>
`댓글`, `팔로우`, `좋아요` 해 주시는 모든 분께 감사합니다.
항상 행복한 하루 보내시길 바랍니다.
***
<center><img src='https://steemitimages.com/400x0/https://cdn.steemitimages.com/DQmQmWhMN6zNrLmKJRKhvSScEgWZmpb8zCeE2Gray1krbv6/BC054B6E-6F73-46D0-88E4-C88EB8167037.jpeg'><h5>vote, reblog, follow <code><a href='/@anpigon'>@anpigon</a></code></h5></center>
***
<center><sup>Originally posted on [안피곤님의 블로그](http://anpigon.dblog.org/react-mobx-state-tree-8-create-an-entry-form-to-add-models-to-the-state-tree). Steem blog powered by [ENGRAVE](https://engrave.website).</sup></center>👍 forhappywomen, stmdev, coredump, philhyuntd, zzan.biz, astraea09, china.mobile, cn-news, china-unicom, erke, cnpc, cn-times, cn-reporter, cazbu, zyj, fty, son1001, mco, hykwf678233, donasteem, hakeznel, fun2learn, ulockblock, nailyourhome, delegate4upvot, talken, wangpigon, steemory, pigoncchio, realmankwon, pediatrics, songbj, imrahelk, minigame, nympheas, kudock, laissez-faire, realmankwon.scot, ai-channel, stylegold, newbijohn, j-car, reportup, lovelyyeon.cur, skysung, sct1004, lucky2.aaa, rainingfall, cn-sct, honeybeerbear, andrewma, anpigon, eversloth, guest123, sisilafamille, hellosteem, krfeed, maeil, zzangu, zzan.co20, tkhol, zzan.co3, wonsama.zzan, beoped, fur2002ks, rokairforce, zzan.blue, yjs3694, stpeople, busy.pay, roadofrich, ror.pay, zzan.adv, limito, virus707, ziq, marlians.zzan, elraberscer, mcenoramle, gouji, bluengel, windmolen, zzan.co13, zzan.co10, hodolbak-zzan, gghite.zzan, blockchainstudio, zzan.co7, steem-ua, newsrx, sargoon, dodoim, zzan1004, rubberducky1004, boftea, herobear, happyberrysboy, omerbiabdulah,