Algo - your own VPN!
utopian-io·@arnavr·
0.000 HBDAlgo - your own VPN!
%20-%20Copy.png)
#### Repository
https://github.com/trailofbits/algo
Three days ago, I was lying lazily on the couch after lunch with my phone in my hand and nothing to do at all. I opened Chrome and the suggested articles appeared. I remember one of then said something about a VPN client. This led me to think: What is a VPN essentially? A web server, came my own reply. Then, thought I, I should be able to use my server based in the US as a VPN server! And soon, I was running a search on creating a VPN on a web server.
The first result was a TechCrunch article with the title, 'How I mane my own VPN server in 15 minutes'. Reading through it, I came to know of a wonderful open-source set of _Ansible_ scripts to set up a personal IPSEC VPN, **Algo**. Although I didn't exactly make my web server a VPN (although Algo could), I used my Azure cloud (free student account, kudos Microsoft!) to set up the VPN.
## Features of _Algo_
* IKEv2 with strong encryption (AES-GCM, SHA2, and P-256)
* Possible to add and remove users anytime
* AdBlock option
* Option for SSH tunneling
##### Though I installed it on Azure cloud, it can be installed onto any of the following cloud computing platforms:
* DigitalOcean
* Amazon Lightsail
* Amazon EC2
* Vultr
* Microsoft Azure
* Google Compute Engine
* Scaleway
* OpenStack
* Your own Ubuntu 18.04 LTS server
The task took me some time to complete (an hour) owing to the fact that I was a perfect newbie to cloud computing (this was the first time I was actually making use of Azure), but the process was virtually automated - a couple commands for installing the required core dependencies for Algo to work in, then a few more for installing additional dependencies. Algo then runs scripts on a virtual machine created by you in a cloud solution of your choice. The precise instructions can be found on the repository, but I am adding them here along with my own suggestions and tips.
## Deploying the Algo server
Getting Algo up and running
* **Set up an account on a cloud service.** You can pick any one from the list above. I tried the process using Azure and Google Cloud Platform, and I have to say that the process for Google was a tad bit easier than that of Azure. On GCP, not only are the errors displayed but links to remedying them are provided too. The method in both cases is similar, with the only difference that Azure expects the user to know his way before running the scripts whereas Google helps him at every step.
* **Download Algo** and unzip it to any location on your local machine. I used Linux (Ubuntu 16.04 LTS) for the process because I'd learned long ago that there's no better system for working with development projects, and also because I like the Linux terminal 😂. So, I'd only be mentioning the steps and commands for Linux (deb-based) system as I can't provide insights on others, but I'd certainly suggest not to use Windows as the Windows documentation ultimately asks you to set up a 'Windows Subsystem for Linux' and install Ubuntu from the Microsoft Store, which, according to me, doesn't make sense.
* **Install Algo's core dependencies.** `cd` into the `algo-master` directory where you unzipped Algo, then run:
```bash
$ sudo apt-get update && sudo apt-get install \
build-essential \
libssl-dev \
libffi-dev \
python-dev \
python-pip \
python-setuptools \
python-virtualenv -y
```
* **Install Algo's remaining dependencies** using the same terminal window as in the last step and run:
```bash
$ python -m virtualenv --python=`which python2` env &&
source env/bin/activate &&
python -m pip install -U pip virtualenv &&
python -m pip install -r requirements.txt
```
At this step, I received an error that virtualenv was not found. To solve that, simply run the command `pip install virtualenv`.
* **Create the user list.** Now that the environment for running Algo is set up, open `config.cfg` found in the Algo directory root and add the usernames by replacing the `-phone`, `-laptop` etc. in the second line of the code by usernames. Password will be generated by Algo.
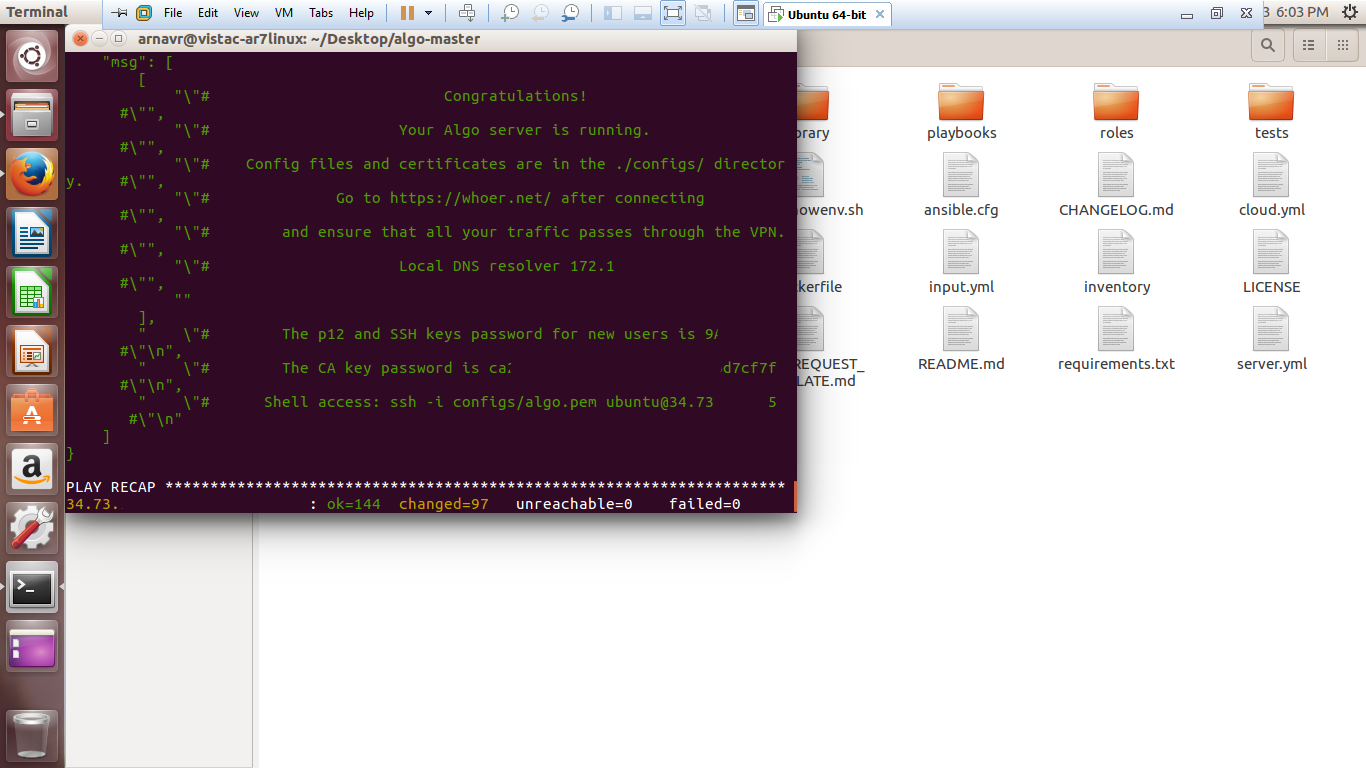
* **Start the deployment.** Return to your terminal. In the Algo directory, run command `./algo` and follow the instructions on the screen. You'll be presented by a few options to enable or disable in the VPN, none of which are required for a fully functional VPN.
And that's it! Your Algo server is now up and running! You should take note of the p12 password as *it will only be displayed this one time*. You can now begin configuring VPN clients (your phone, laptop, refrigerator) by following the instructions here: https://github.com/trailofbits/algo#configure-the-vpn-clients
That was all about Algo. I found it a very simple and worthwhile - and most importantly, private - solution for setting up VPNs. Great work, Trail of Bits!
Cheers!
ArnavR
@arnavr👍 arnavr, espoem, ascorphat, mops2e, amosbastian, tobias-g, jaff8, codingdefined, helo, fego, bestofph, merlin7, bluesniper, kendallron, pinas, leir, mcfarhat, mikits, indayclara, teamcr, sargoon, lordneroo, steem-ua, jeronimorubio, bejust, feronio, progressing, utopian-io, tombstone, cryptouno, kaczynski,