Installing and Configuring Web Server on Debian 7.8 Support by WordPress CMS
technology·@azizali·
0.000 HBDInstalling and Configuring Web Server on Debian 7.8 Support by WordPress CMS
Hi, its me again, this is my 3<sup>rd</sup> project progress. I have completed install Debian 7.8 server and configured DNS server, now I am going to configure Web server.
To make an instant web pages, I will use the Wordpress Content Management Syatem (CMS) at this time. There is too many free CMS for web server like; [Joomla](https://joomla.org), [Wordpress](https://wordpress.com), [Subrion](https://subrion.org), [Drupal](https://drupal.org), [Magento](https://magento.com), [Shopify](hytps://shopify.com), [TYPO3](https://typo3.org), etc. All is free to use.
## WHAT IS WEB SERVER?
<div class="pull-right">
<center>
<img src="https://steemitimages.com/DQmd7oHty3c1v7z16uQdMnfyTCpoobAwp7tz9rJQzuEftMy/image.png" />
<br/>
<em><a href="http://tutorials.jenkov.com/html4/the-web.html">Image credits</a></em>
</center>
</div>
Web server is a software provides data-based services and functions to receive requests from HTTP or HTTPS (usually its known as web browser) and to send back the results in the form of multiple web pages and will generally form HTML documents.
### There are several frequently used web server applications:
- Apache Web Server / The HTTP Web Server -->> ***This is my project***
- Apache Tomcat
- Microsoft Windows Server 2008 IIS (Internet Information Services)
- Lighttpd
- Zeus Web Server
- Sun Java System Web Server
> I hope my short review is enough to explain "What is a web server?".
Let's go to the Web Server configurations.
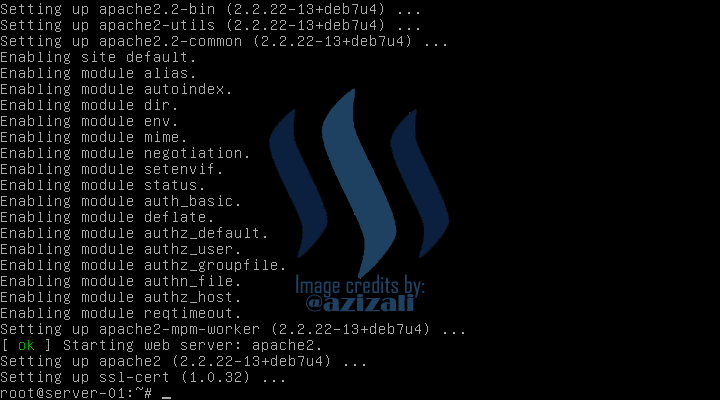
</br>1. Install Web Server application. (Use disk 1 of Debian 7.8)
<b># apt-get install apache2 </b>
*Wait until process completed.*
</br>2. Install CLI Web broser for Debian (Disk 1)
<b># apt-get install lynx </b>
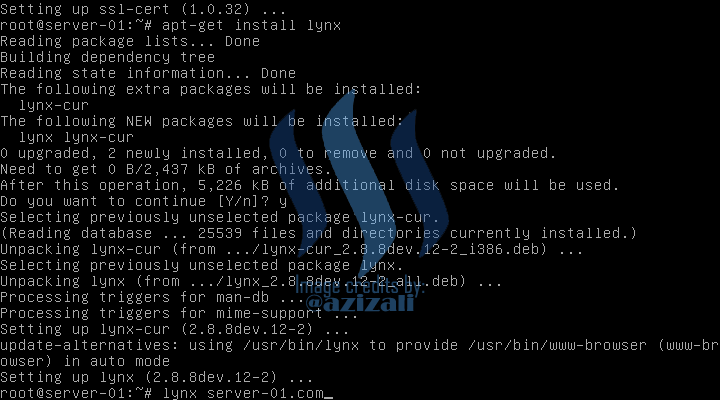
Trying access **server-01.com** before configuring anything by lynx.
<b># lynx server-01.com</b>
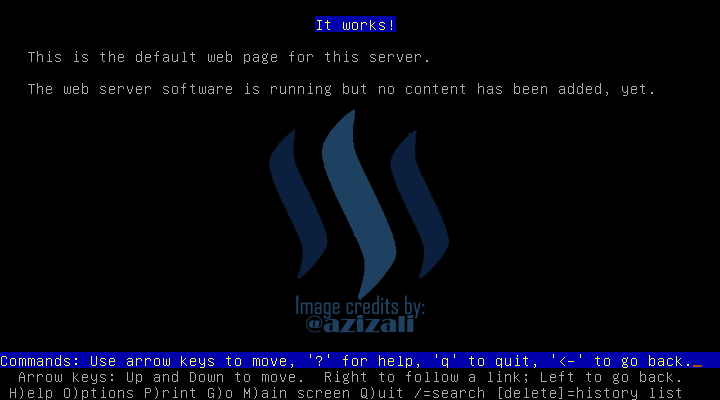
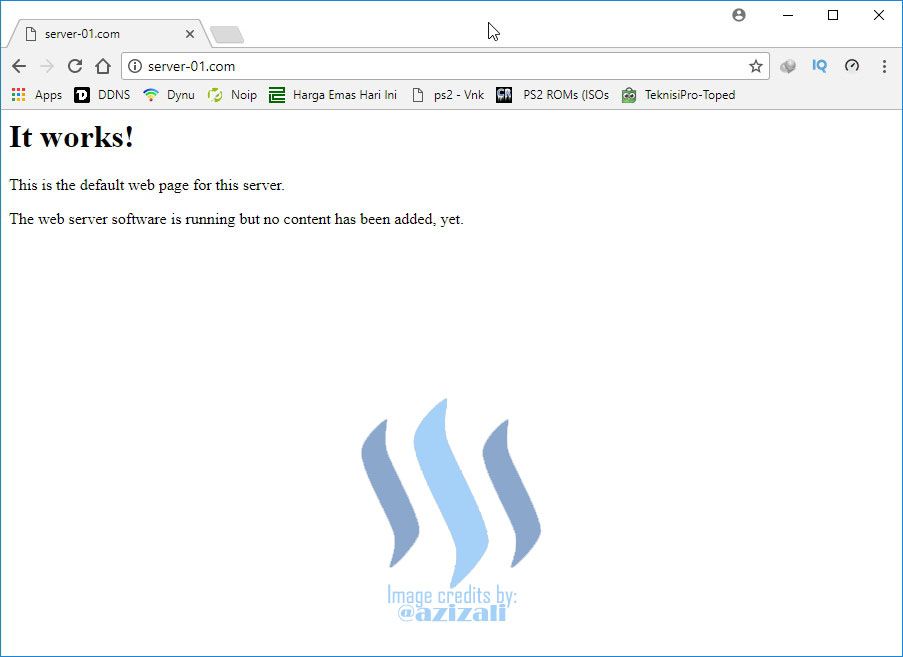
Testing web server view from client
(*You need to setup interface and client IP address, please read my last post [HERE](https://steemit.com/steemiteducation/@azizali/installing-and-configuring-dns-server-on-debian-7-8-linux-server-2017106t13188951z) to set Windows IP*)
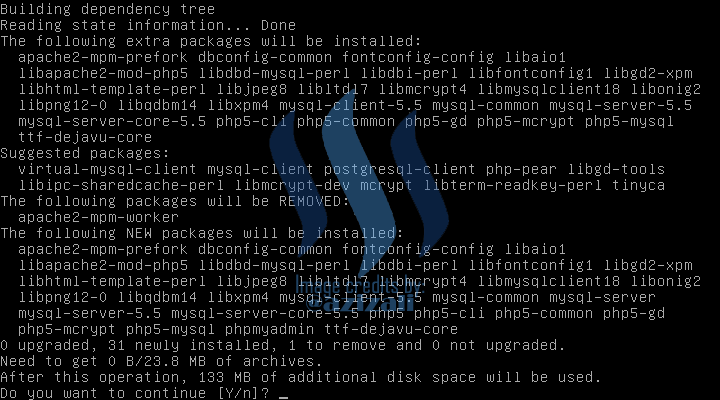
</br>3. Install PHP, SQL Server and PHPMyAdmin for database and web server supports.
<b># Install php5 mysql-server phpmyadmin </b>
Installation may take a few second to be completed, please be patient.
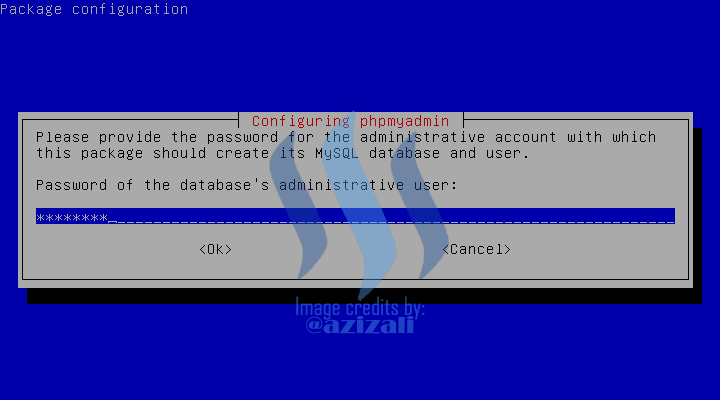
Enter **root password** for mysql database
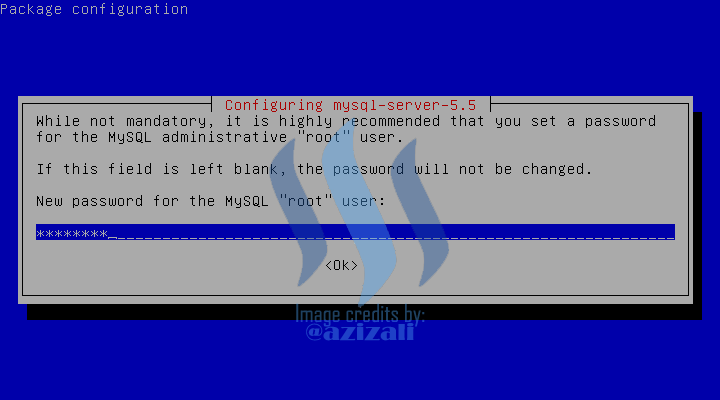
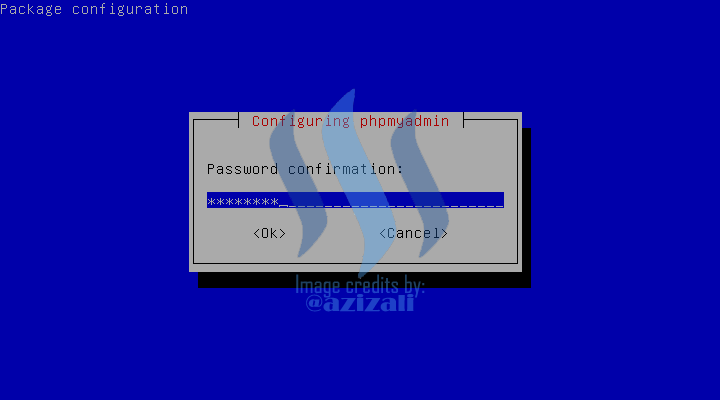
Repeat entry password.
(https://steemitimages.com/DQmSnNRzsp5ST2PzktnyYcb16HRXyHpCkuRy9u5bePBhFEN/Server-2017-10-06-10-11-26.png)
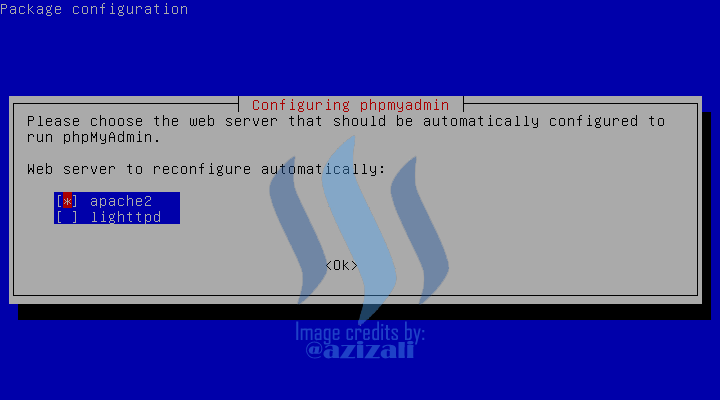
Select [apache2] for PHPMyAdmin page browser.
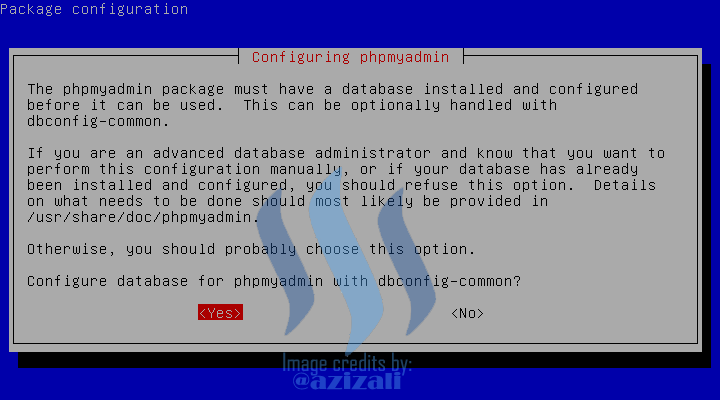
Just select **YES**
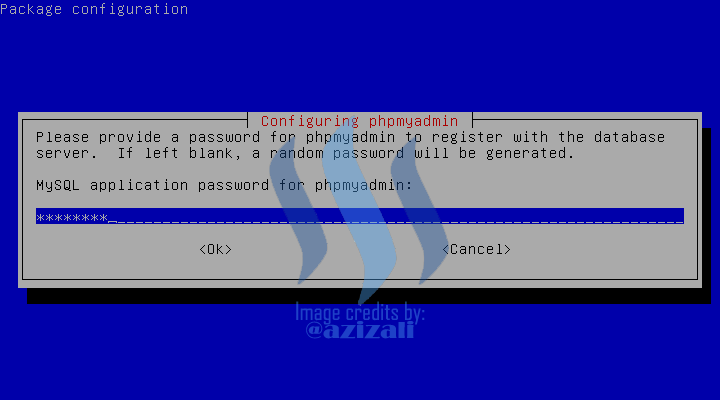
Enter password for PHPMyAdmin
Enter password for PHPMyAdmin to register with database. It can be leave empty, but system will generate password.
Repeat entry password.
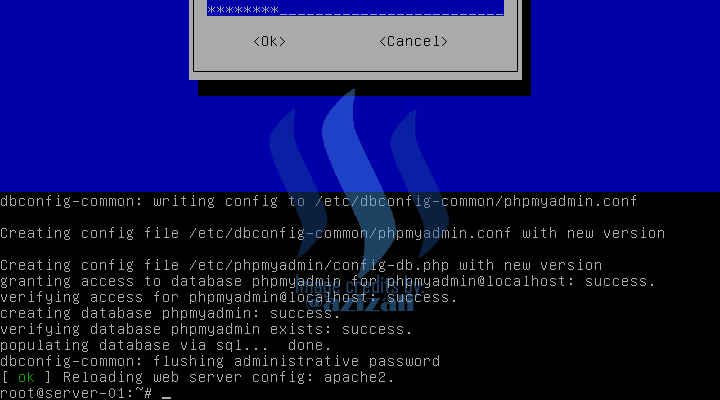
Installation of PHP, SQL and PHPMyAdmin is Completed.
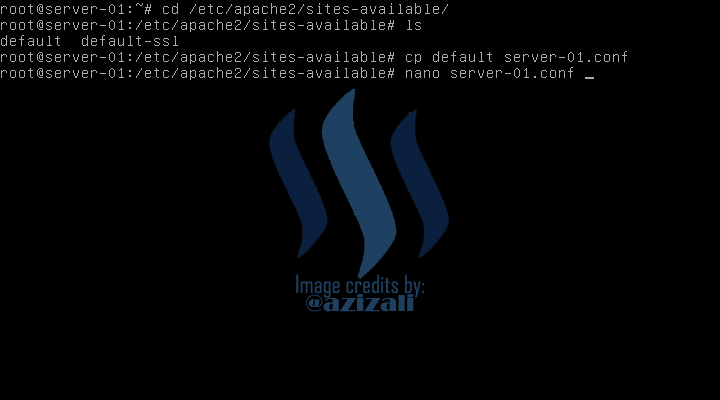
</br>4. Configure Web Server Virtual host
<b># /etc/apache2/sites-available/</b>
<b># ls</b> -->
***default*** is Virtual host for http and ***default-ssl*** is https virtual hosts. Now I will create http virtual host.
<b># cp default server-01.conf</b> --> *server-01.conf* is optional names, its up to you.
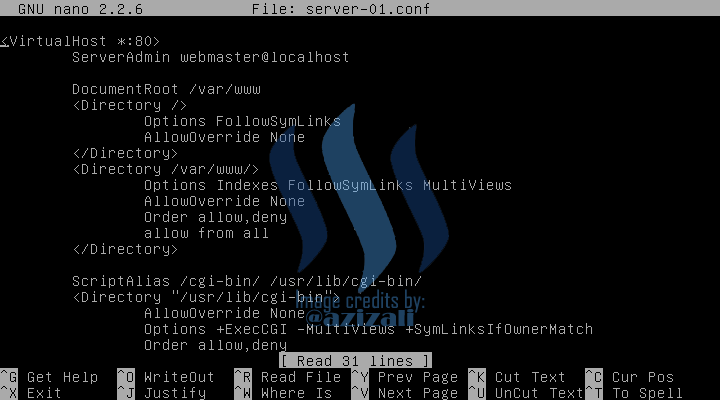
<b># nano server-01.conf</b> --> to configure virtual host.
*default file before configuration.*
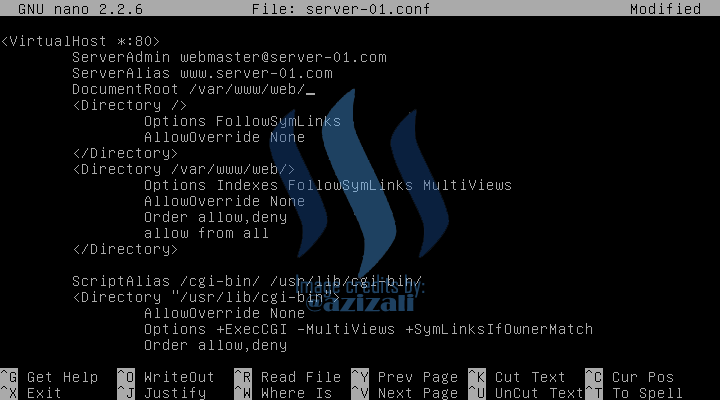
Now, change text on bellow lines: (Please see bellow image)
***Line 2***
***Line 3***
***Line 4***
***Line 9***
</br>5. Now create "web" directory inside "/var/www/" --> *this is default path for web server files*
<b># cd /var/www </b>
<b># ls</b> --> *there is no "/web" directory, so we need to create it*
<b># mkdir web</b> --> *create "/web" directory*
https://steemitimages.com/DQmXHJiuLzF5npWH3gQRviDXicSGbib6Kv227SkRQeeCrzv/Server-2017-10-06-10-17-34.png
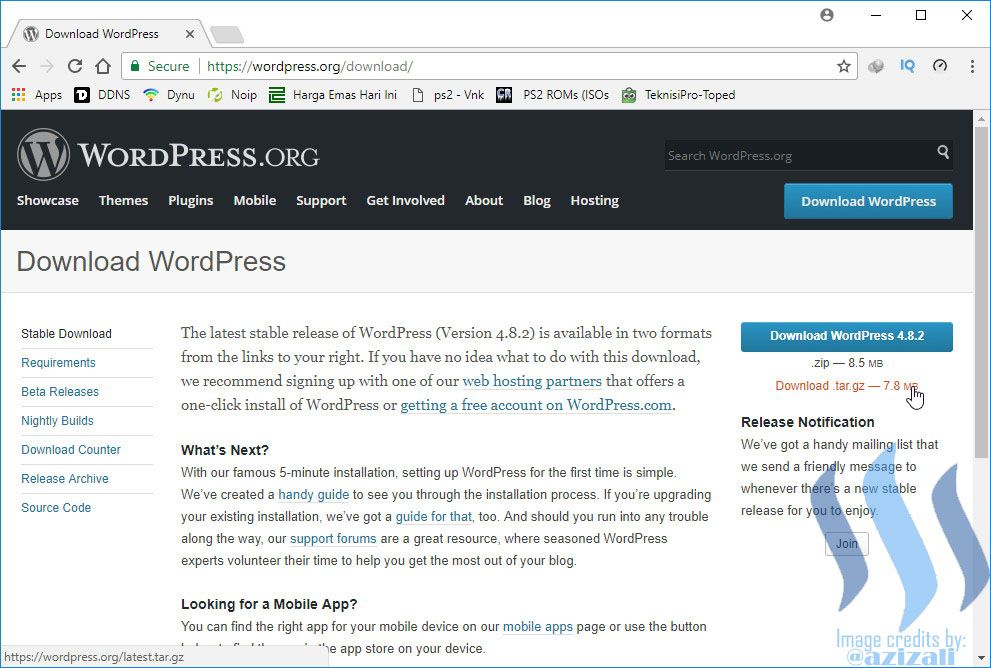
</br>6. Go to download pages [Wordpress](https://wordpress.org/download/
) and download **wordpress.tar.gz** this is for linux web server.
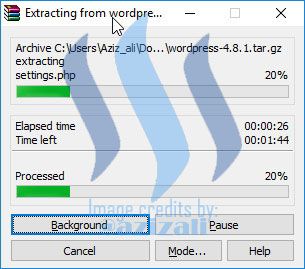
</br>**Then extract using you decompressing tools**
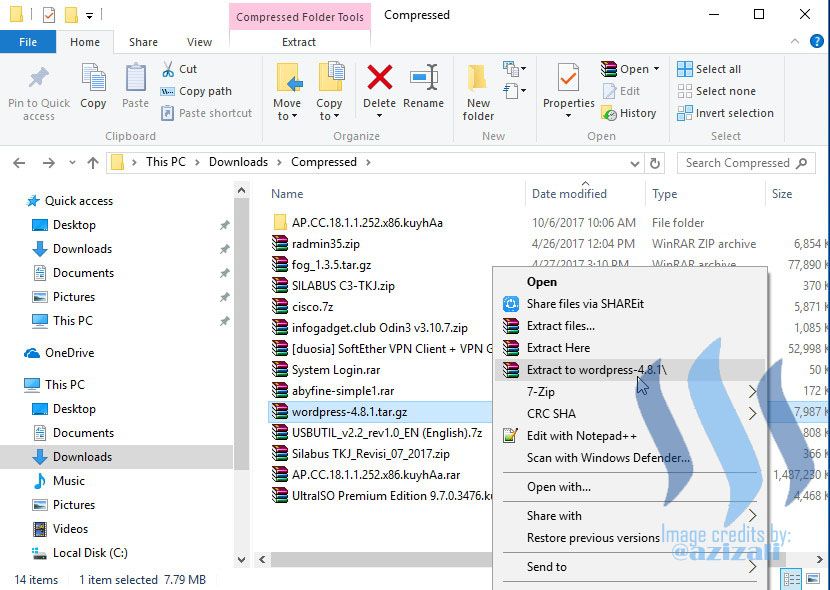
</br>**Extraction progress**
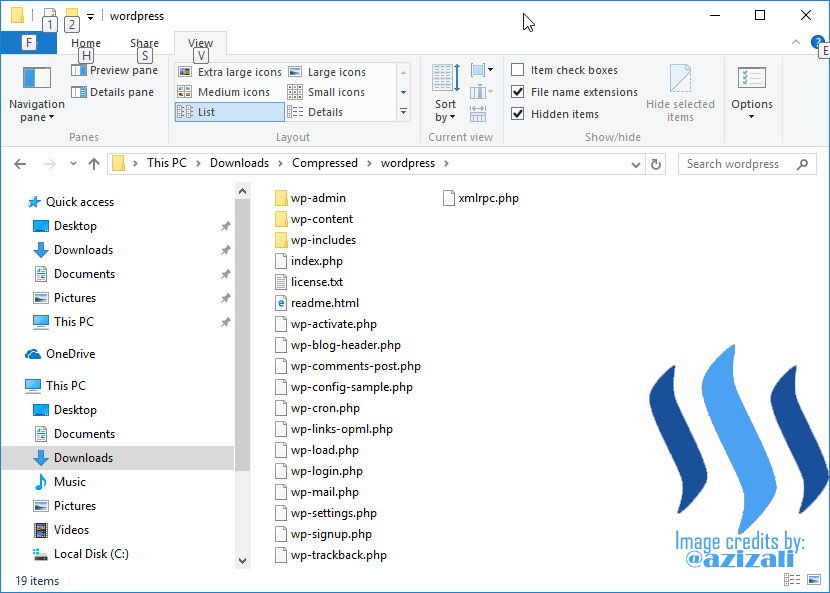
</br>**This is all worpress files after extracted, we need to copy into Debian Linux Server**
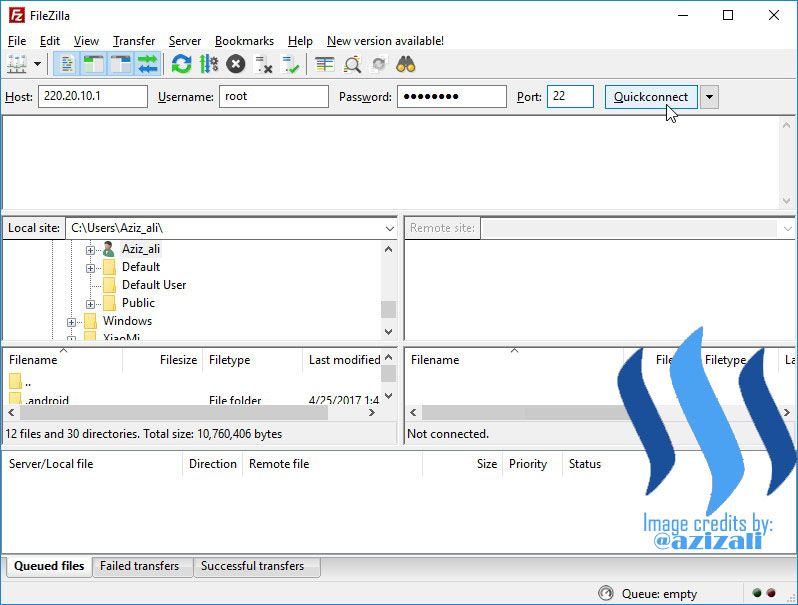
</br>7. Transfer files to Linux server using SSH or SFTP port, with default port number is 22. This port is not modified. There is too many tools for file transfer ; [FileZilla](https://filezilla-project.org/), [WinSCP](https://winscp.net/eng/download.php), etc. In this sample I am using FileZilla, if its not installed yet, please download and install it first.
Open FileZilla and connect to server's
**Host : 220.20.10.1**
**Username : root**
**Password : your password**
**Port : 22**
**Click Quickconnect**
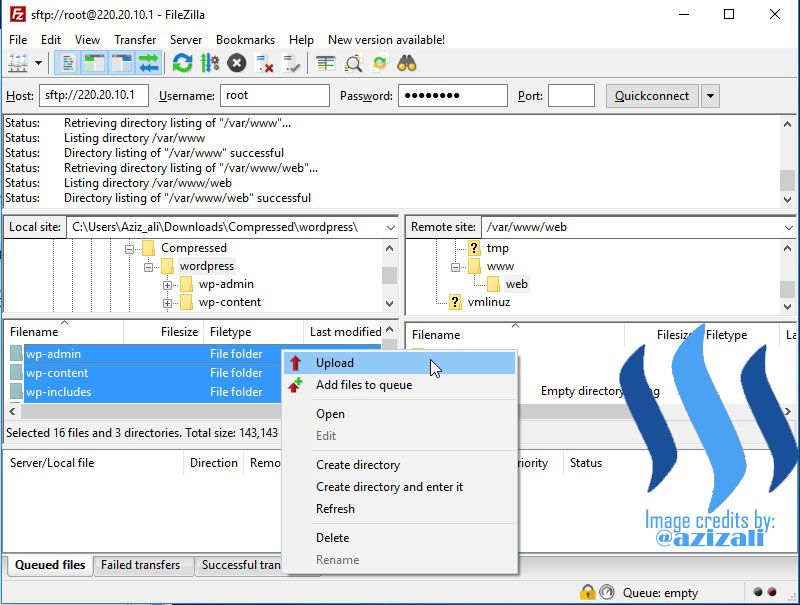
</br>8. Connection running well. On FIleZilla windows, select extracted wordpress folder on left up sides, the correct selected folder will display files on left bottom side, then select all files on left bottom sides.
Select target folder on right up side to **"/var/www/web/"**, and the right bottom side will display empty folder. Now, **right click** on left side and select **Upload** to start files transfer. Wait until running process is completed.
File transfer is running. please be patient until completed.
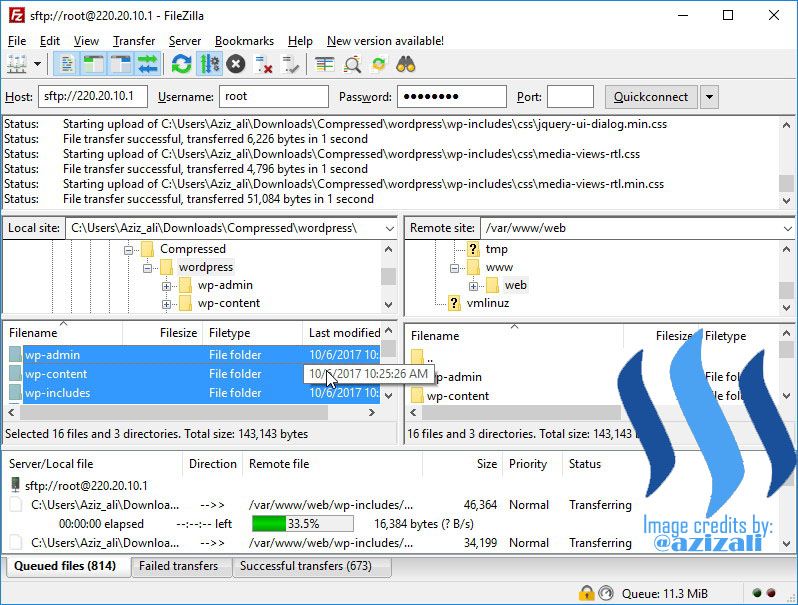
</br>9. If file transfer has been completed, now return to server configuration.
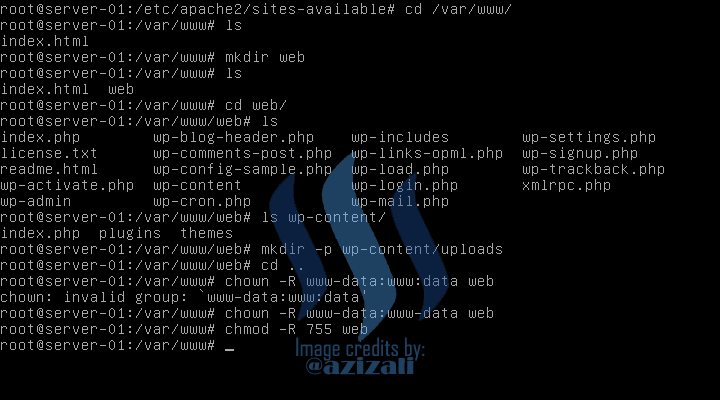
> In wordpress directories, there is no "uploads" directory, we need to create it.
<b># cd web</b>
<b># mkdir -p wp-content/uploads</b>
"uploads" directory has been created,
<b># cd ..<b/> --> return to previous directory "/var/www"
<b># chown -R www-data:www-data web</b> --> to change the directory owner
<b># chmod -R 755 web</b> --> to allow web server access the directories.
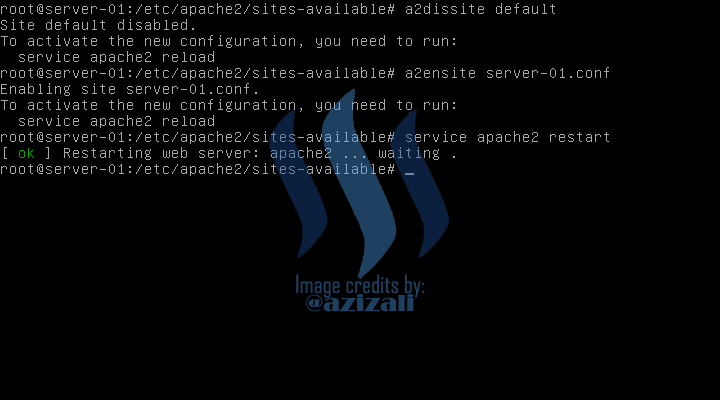
</br>10. Activate created web server.
First, disable default virtual host.
<b># a2dissite default</b>
Enable created virtual host
<b># a2ensite server-01.conf</b>
Then, Restart Web server services.
<b>service apache2 restart</b>
***Restart process must be running [OK}, if it is running [Failed] or [error] web server will be not running, so check it all again.***
***
***
<center><h2>CONFIGURING WORDPRESS WEB SERVER</h2></center>
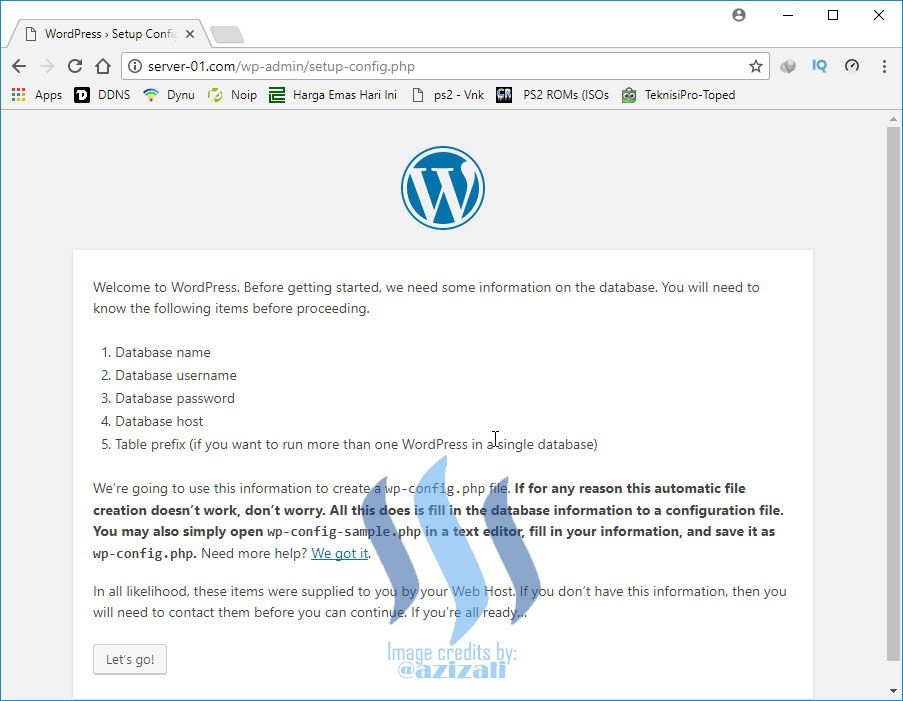
#### Open web browser and type on url address [http://server-01.com]
#### Click Les's go!
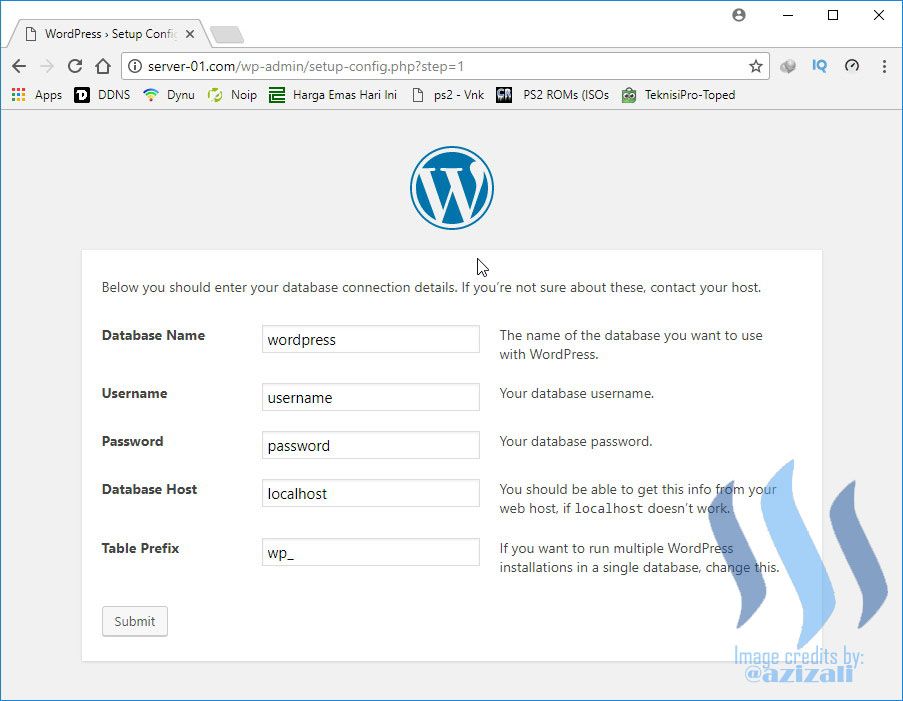
#### Before **Submit ** we need to create wordpress database's. Open new tab on web browser.
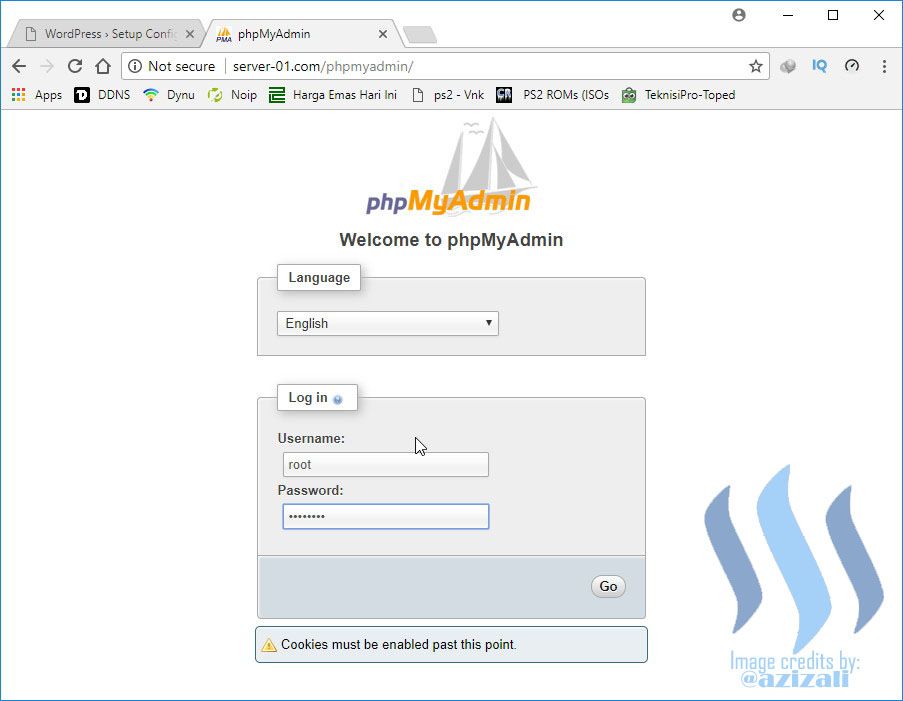
#### On new tab url address type [http://server-01.com/phpmyadmin]
Enter username and password for PHPMyAdmin.
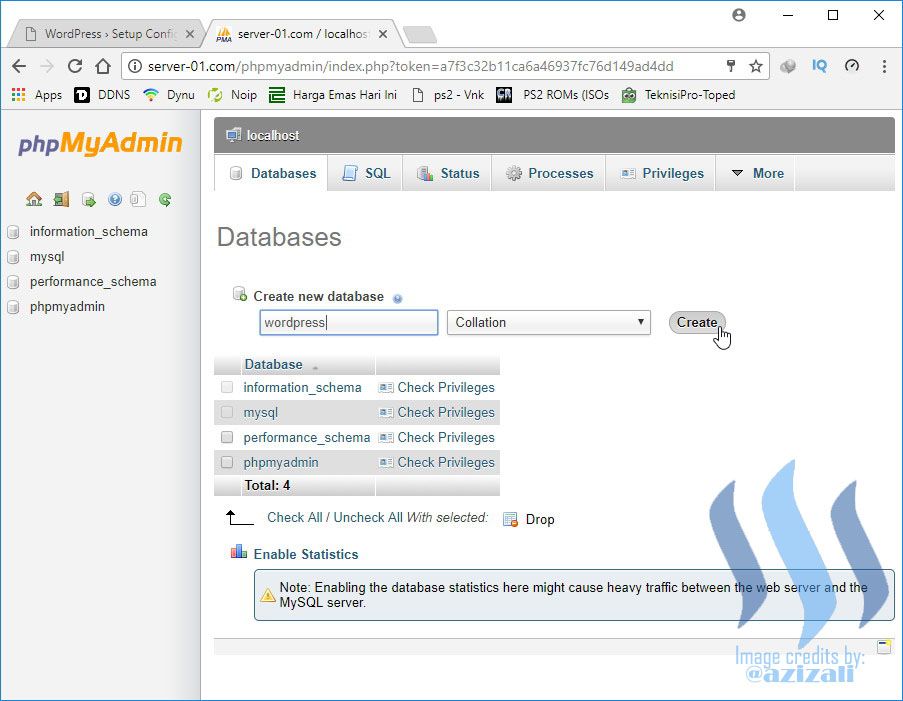
#### Click Databases to create new database
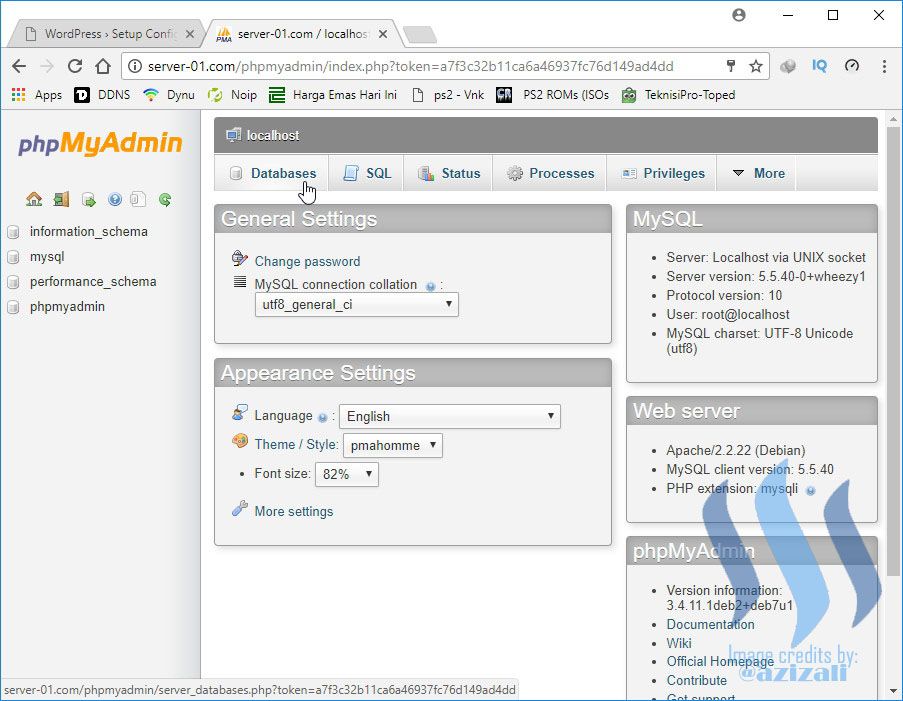
#### Type Wordpress database name **"wordpress"** (*case sensitive*), then click *create*
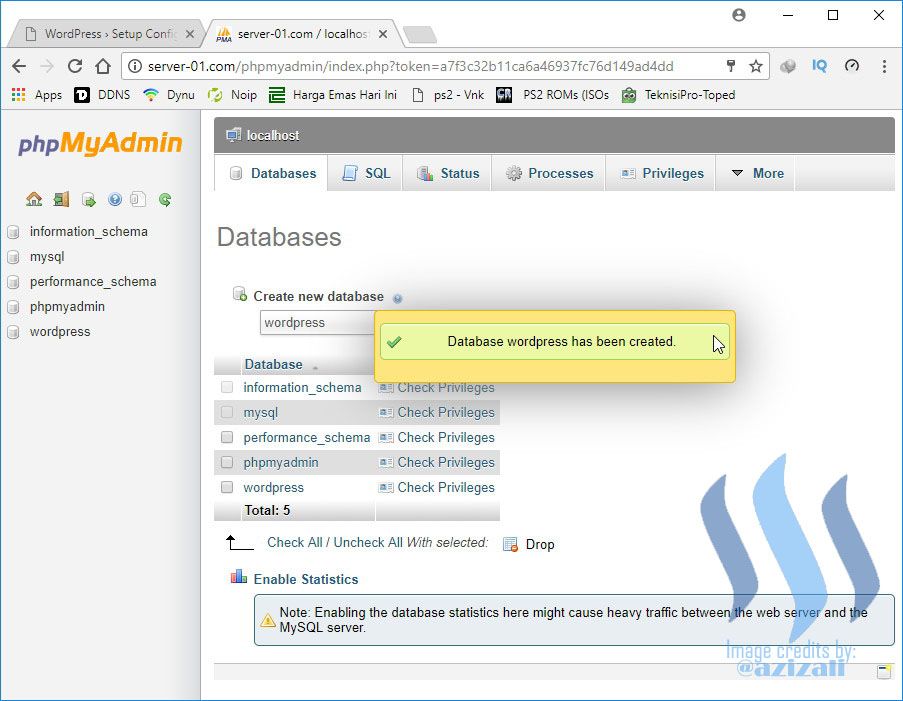
#### Database "wordpress"has been created
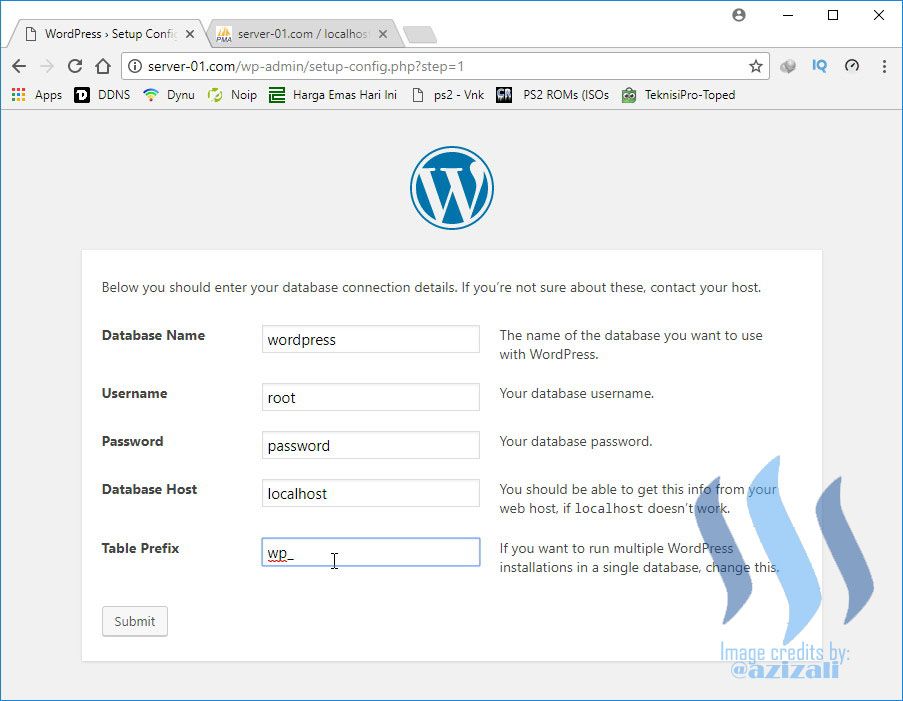
#### Back to the first tab, fill in the Database name is "wordpress", Username is "root", and Password is "your password". Then click **Submit**
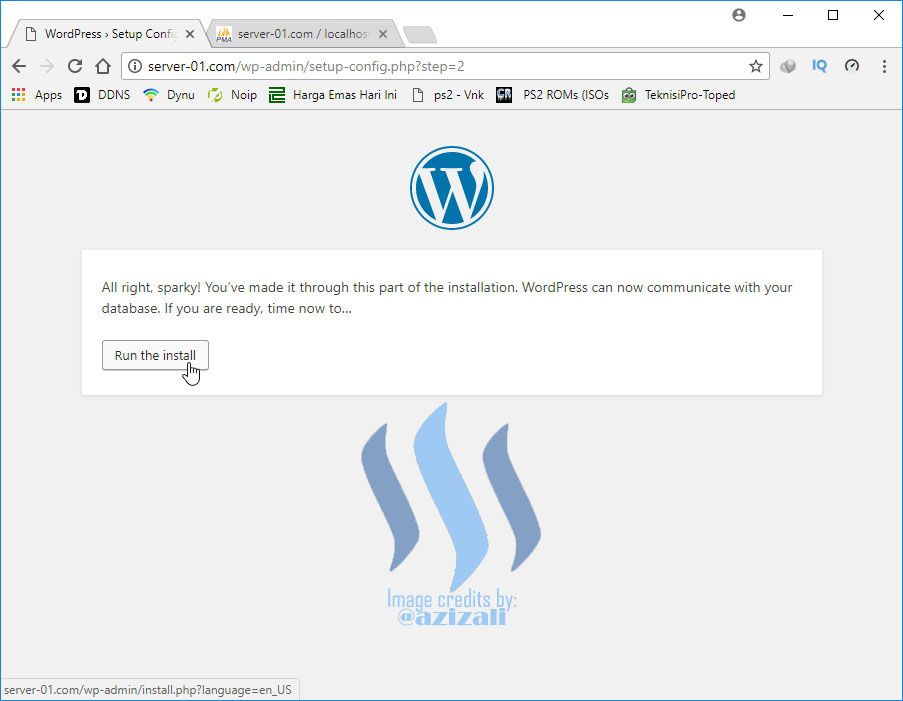
#### Anything is OK, click **Run the install** to start
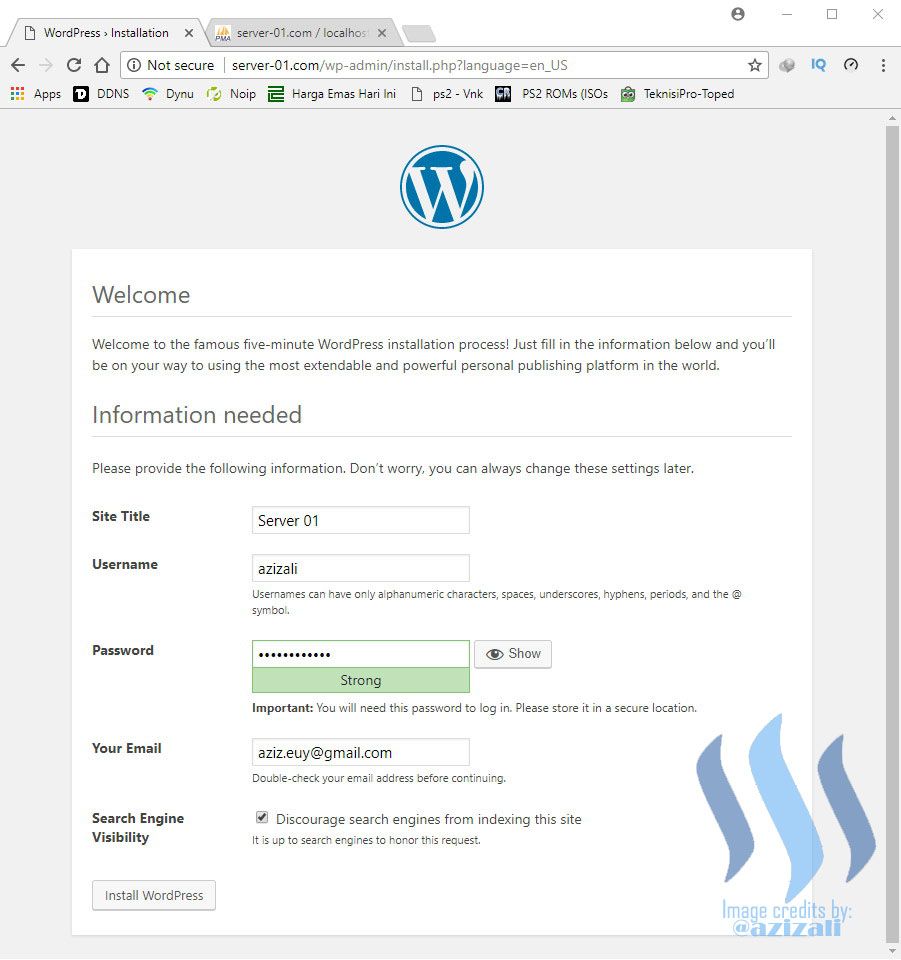
#### Installation almost complete, now fill in the forms, including site title, username and password (for web server admin - you can create your admin name and password), then click **Install Wordpress**.
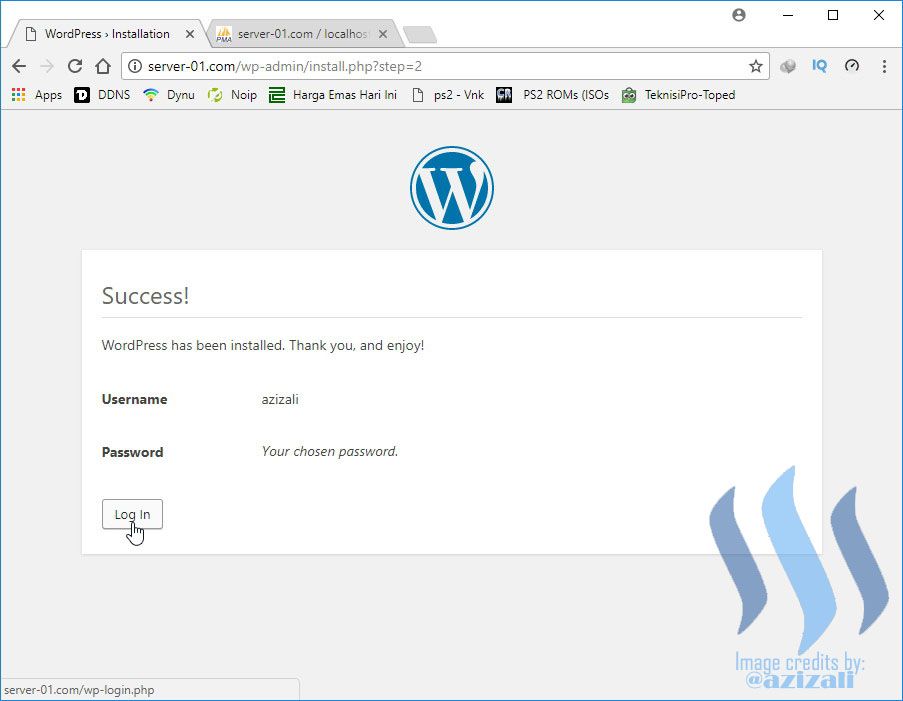
#### Installation has been completed, now let's login with create user and password for Wordpress. Click **Login**.
#### Enter username and Password to login Wordpress.

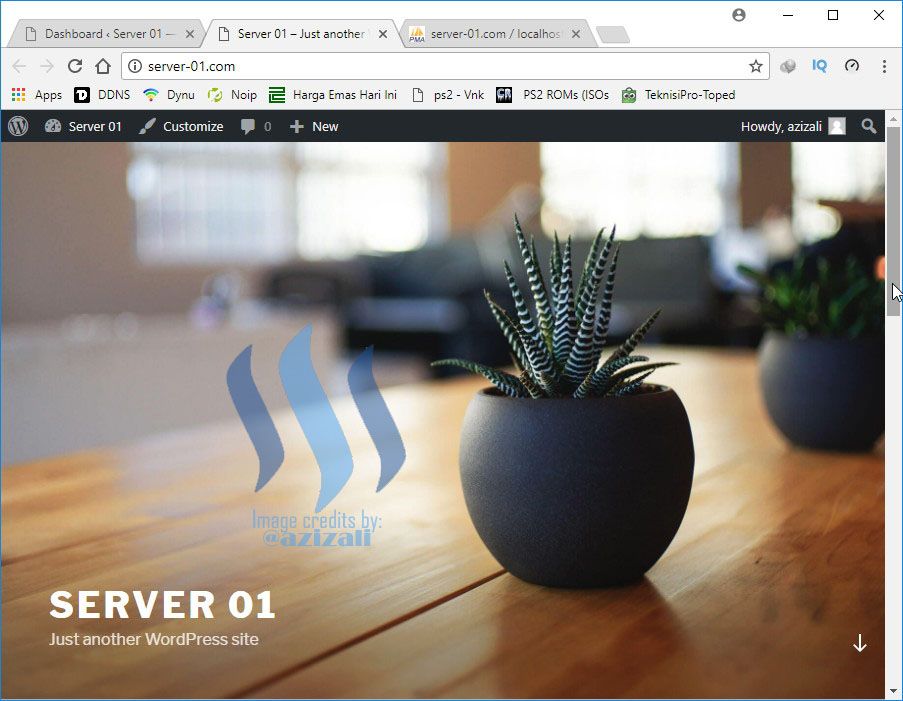
#### Login Successful. Now you can manage your web server, add posts, and more.

#### Open New Tab and type http://server-01.com to preview your created web server
***
<center><h2>This post has very perfect tutorial for beginner, I hope my post is useful for anyone who want to create his own web server at home.</h2></center>
***
### My last posts
1. [Installing Linux Debian 7.8 as Server](https://steemit.com/steemiteducation/@azizali/installig-linux-devian-7-8-as-server-2017927t14354773z)
2. [Installing and Configuring DNS Server on Debian 7.8 Linux Server](https://steemit.com/steemiteducation/@azizali/installing-and-configuring-dns-server-on-debian-7-8-linux-server-2017106t13188951z)👍 jamhuery, asmaamohamad, darklog, slempase, fantasticmonkey, smeet, curie, belgarath, hendrikdegrote, anwenbaumeister, kushed, pharesim, aarkay, thegreatsilaban, imib, zararina, steemaccess, delicacies, zye, trave160, mnur, steemcleamer, mharris, alking, phusion, madmac, curiesea, insiders-circle, muchsin, sward, liya, jaly6517, azizali, herryzal, munawar1, mursin, faisalimmer,