Ruleset strategy / analysis: Fire & Regret
hive-13323·@beaker007·
0.000 HBDRuleset strategy / analysis: Fire & Regret
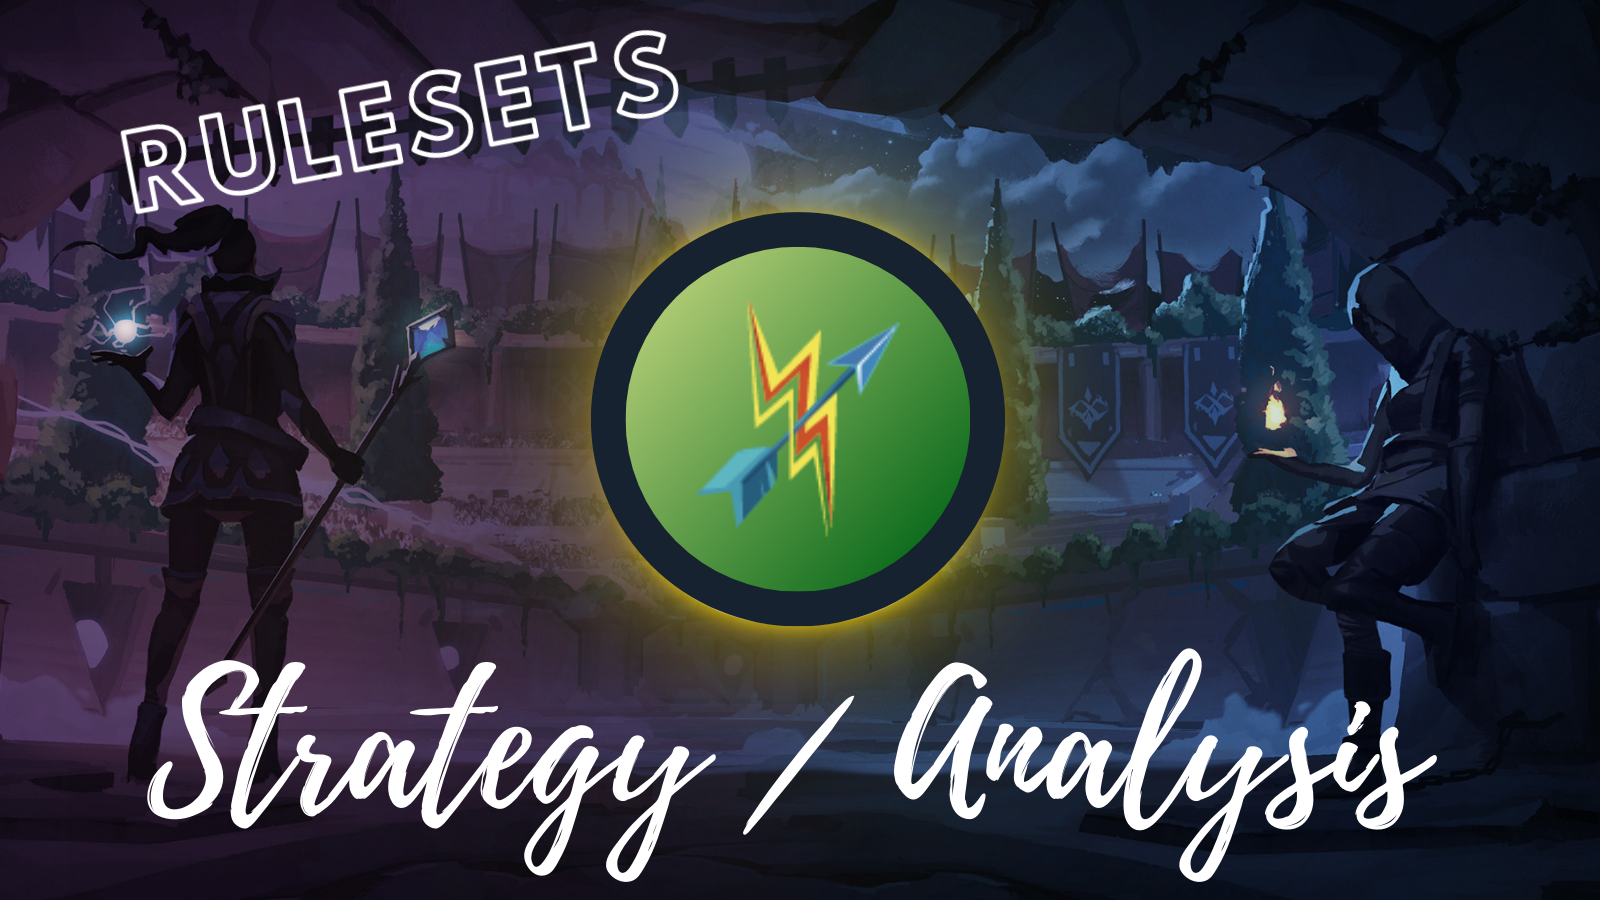 # <div class="phishy">Introduction</div> I must say is was already started with a report about the fog of war until I saw this week rule set is **fire and regret**. So we start over 🤣. **Fire and Regret** is a somewhat newer rule set, I think about a few months this is in the mix. Pretty easy to counter just do not use ranged monsters lol, lets have a closer look. https://images.hive.blog/0x0/https://i.imgur.com/QHMMPb5.png # <div class="phishy">Ruleset</div> https://images.hive.blog/150x0/https://d36mxiodymuqjm.cloudfront.net/website/icons/rulesets/new/img_combat-rule_fire-regret_150.png All units receive the *Return Fire* ability. Enemy units that attack with ranged attacks receive damage back. Notes: * Damage returned is equal to damage of the attacker divided by 2, rounded up. Official ruleset information from splinterlands: [List-of-In-Game-Rulesets](https://support.splinterlands.com/hc/en-us/articles/9123215350548-List-of-In-Game-Rulesets) #### <div class="phishy">Abilities Synergies / Strategies</div> https://images.hive.blog/50x0/https://d36mxiodymuqjm.cloudfront.net/website/abilities/ability_amplify.png **Amplify** - This increases the *return fire* damage with 1. a few of my favorites. https://images.hive.blog/150x0/https://d36mxiodymuqjm.cloudfront.net/cards_by_level/chaos/Queen%20Mycelia_lv3.png https://images.hive.blog/150x0/https://d36mxiodymuqjm.cloudfront.net/cards_by_level/chaos/Dax%20Paragon_lv5.png https://images.hive.blog/150x0/https://d36mxiodymuqjm.cloudfront.net/cards_by_level/reward/Venator%20Kinjo_lv4.png https://images.hive.blog/50x0/https://d36mxiodymuqjm.cloudfront.net/website/abilities/ability_reflection-shield.png **Reflection shield** - return fire is absorbed, must say i do not own a single ranged monster with reflection shield. https://images.hive.blog/50x0/https://d36mxiodymuqjm.cloudfront.net/website/abilities/ability_shield.png **Shield** - The Shield ability reduces Melee and Ranged attacks by 50%, rounded up. If played by your opponent, be aware that shield will reduce damage returned from the Return Fire ability. https://images.hive.blog/50x0/https://d36mxiodymuqjm.cloudfront.net/website/abilities/ability_thorns.png https://images.hive.blog/50x0/https://d36mxiodymuqjm.cloudfront.net/website/abilities/ability_magic-reflect.png **Thorns / Magic reflect** - I like to bring an extra monster with an other return fire because the change is higher that no ranged monster is played therefore a higher chance that melee or magic is played. Favorites I like to use then are: https://images.hive.blog/150x0/https://d36mxiodymuqjm.cloudfront.net/cards_by_level/reward/Djinn%20Chwala_lv6.png https://images.hive.blog/150x0/https://d36mxiodymuqjm.cloudfront.net/cards_by_level/chaos/Cursed%20Windeku_lv7.png https://images.hive.blog/150x0/https://d36mxiodymuqjm.cloudfront.net/cards_by_level/reward/Pelacor%20Conjurer_lv10.png https://images.hive.blog/150x0/https://d36mxiodymuqjm.cloudfront.net/cards_by_level/chaos/Djinn%20Muirat_lv3.png ## <div class="phishy">Avoid</div> Lets start with the obvious one https://images.hive.blog/50x0/https://d36mxiodymuqjm.cloudfront.net/website/stats/ranged-attack.png leave the ranged attackers at home. Less obvious is the https://images.hive.blog/50x0/https://d36mxiodymuqjm.cloudfront.net/website/abilities/ability_headwinds.png **Headwinds**, the change is less likely that ranged monsters are used therefor -1 range is less likely to have major impact. https://images.hive.blog/0x0/https://i.imgur.com/QHMMPb5.png # <div class="phishy">Example battle</div> We going to look at a battle where the **fire and regret** rule set is in play. # <div class="phishy"><center>Strategy</center></div>  Low mana match. most of the splinter are available, it think will go for the water splinter with a mix of melee and magic. ## <div class="phishy"><center>Rulesets</center></div> https://images.hive.blog/0x0/https://d36mxiodymuqjm.cloudfront.net/website/icons/rulesets/new/img_combat-rule_odd-ones-out_150.png **Odd Ones Out**: Only even mana cost monsters may be selected. https://images.hive.blog/0x0/https://d36mxiodymuqjm.cloudfront.net/website/icons/rulesets/new/img_combat-rule_fire-regret_150.png **Fire & Regret**: Rule set of this week. All monster will receive the *return fire* ability. Which means that all monster will return damage when attack by a ranged monster. https://images.hive.blog/0x0/https://d36mxiodymuqjm.cloudfront.net/website/icons/rulesets/new/img_combat-rule_heavy-hitters_150.png **Heavy Hitters**: All monsters will have the *knock out* ability. Which mean all monster that are stunned will receive double damage. https://images.hive.blog/0x0/https://files.peakd.com/file/peakd-hive/splinterlands/23swZrWxJER2nTsWHRgTVMA8y73J2dZiWRy2u7Cba7xbjsUjcA8824cdUUyzn3wkkjZzh.png ## <div class="phishy"><center>The Lineup</center></div> ### <div class="phishy"><center>Summoner</center></div> | Card | Reason | | - | - | | https://images.hive.blog/150x0/https://d36mxiodymuqjm.cloudfront.net/cards_by_level/promo/Lux%20Vega_lv4.png| Here we go again the reason you see this summoner that often it is that versatile and also in this rule set the extra health/speed and armor is great to have. |  This is my most used summoner and with the highest win rate over all summoners ### <div class="phishy"><center>Monsters Lineup</center></div> | #1 | #2 | #3 | #4 | #5 | #6 | |-|-|-|-|-|-| | https://images.hive.blog/150x0/https://d36mxiodymuqjm.cloudfront.net/cards_by_level/reward/Pelacor%20Bandit_lv10.png| https://images.hive.blog/150x0/https://d36mxiodymuqjm.cloudfront.net/cards_by_level/reward/Tide%20Biter_lv6.png| https://images.hive.blog/150x0/https://d36mxiodymuqjm.cloudfront.net/cards_by_level/chaos/Merdaali%20Guardian_lv8.png| https://images.hive.blog/150x0/https://d36mxiodymuqjm.cloudfront.net/cards_by_level/chaos/Spirit%20Hoarder_lv3.png| https://images.hive.blog/150x0/https://d36mxiodymuqjm.cloudfront.net/cards_by_level/soulbound/Musa%20Saline_lv2.png| https://images.hive.blog/150x0/https://d36mxiodymuqjm.cloudfront.net/cards_by_level/chaos/Angelic%20Mandarin_lv8.png| <hr> **Pelacor Bandit** (lvl 10) Most of the monsters in this line up all relate to low mana cost monster. This is with a 6 speed, 7 by lux and flying a very good monster that could help with some misses. <hr> **Tide Biter** (lvl 6) Another melee monster to avoid the *fire and regret return fire* damage. with *true strike* sure to hit. <hr> **Merdaali Guardian** (lvl 8) First healer main strategy of this setup is to heal all that i can. I assume no heavy hitter that kill be instantly. <hr> **Spirit Hoarder** (lvl 3) Second healer to heal the back position I expect some *sneak* monster because of this rule set more melee monster will be selected and these have more often *sneak*. <hr> **Musa Saline** (lvl 2) Take down shields and *scavenger* so when it gets in the front it should have gained some extra health. <hr> **Angelic Mandarin** (lvl 8) Third healer, bit tricky because it is are ranged monster hope that itself and the **spirit hoarder** can out heal it. https://images.hive.blog/0x0/https://i.imgur.com/QHMMPb5.png # <div class="phishy"><center>The Battle</center></div> ## <div class="phishy"><center>Reference</center></div> Link to the battle: [Link to battle](https://splinterlands.com?p=battle&id=sl_fdac153828c6c47eb55212b93290d2d0&ref=beaker007)  ## <div class="phishy"><center>Rounds</center></div> <hr> **Start :** 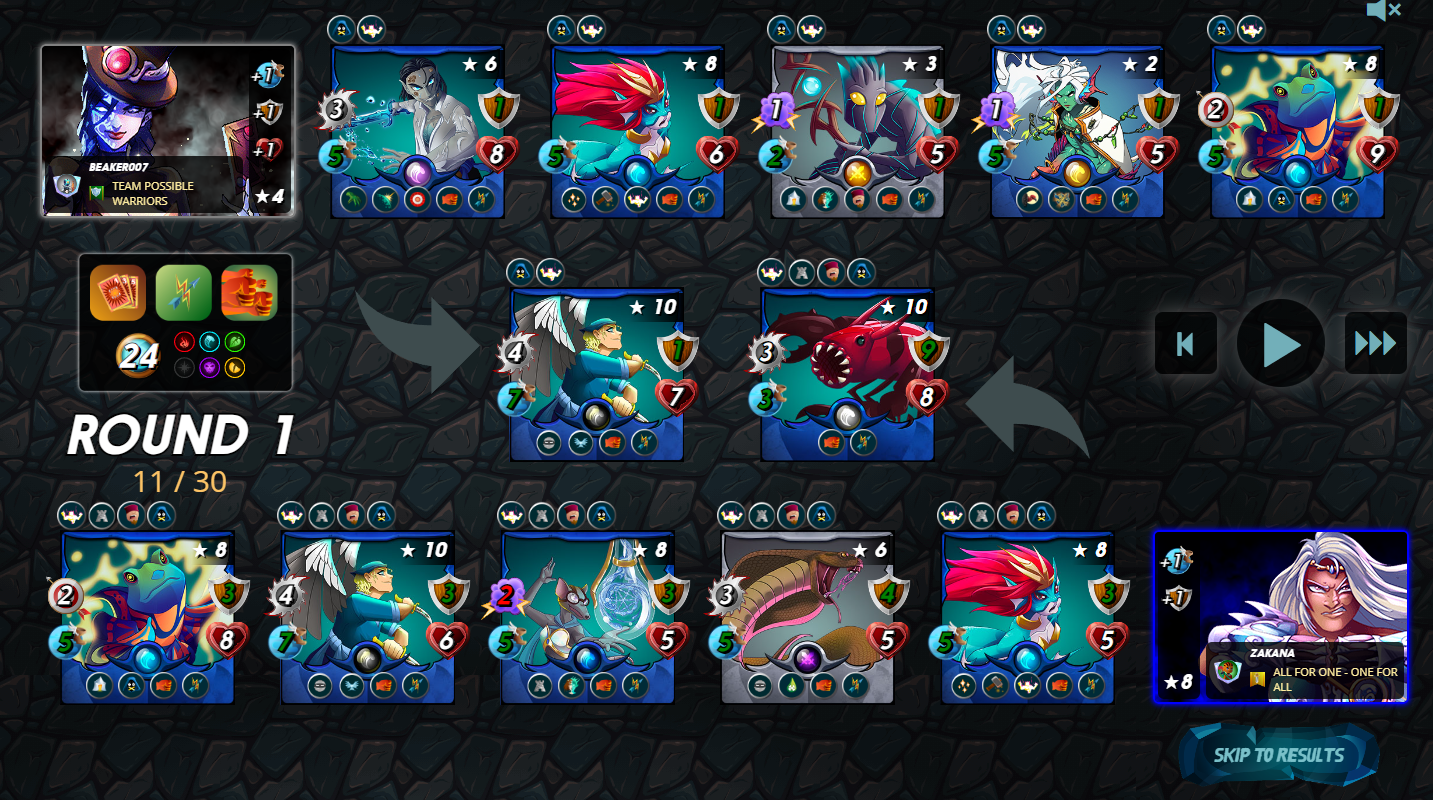 Pretty similar setup by my opponent. He misses the extra healer and also in the last position the **Angelic Mandarin**, I not sure about the outcom at this point. I got more healer by my opponent also has an extra monster with poison which is also very nice. When i can kill his healer first i think i will win. <hr> **Round 1:** 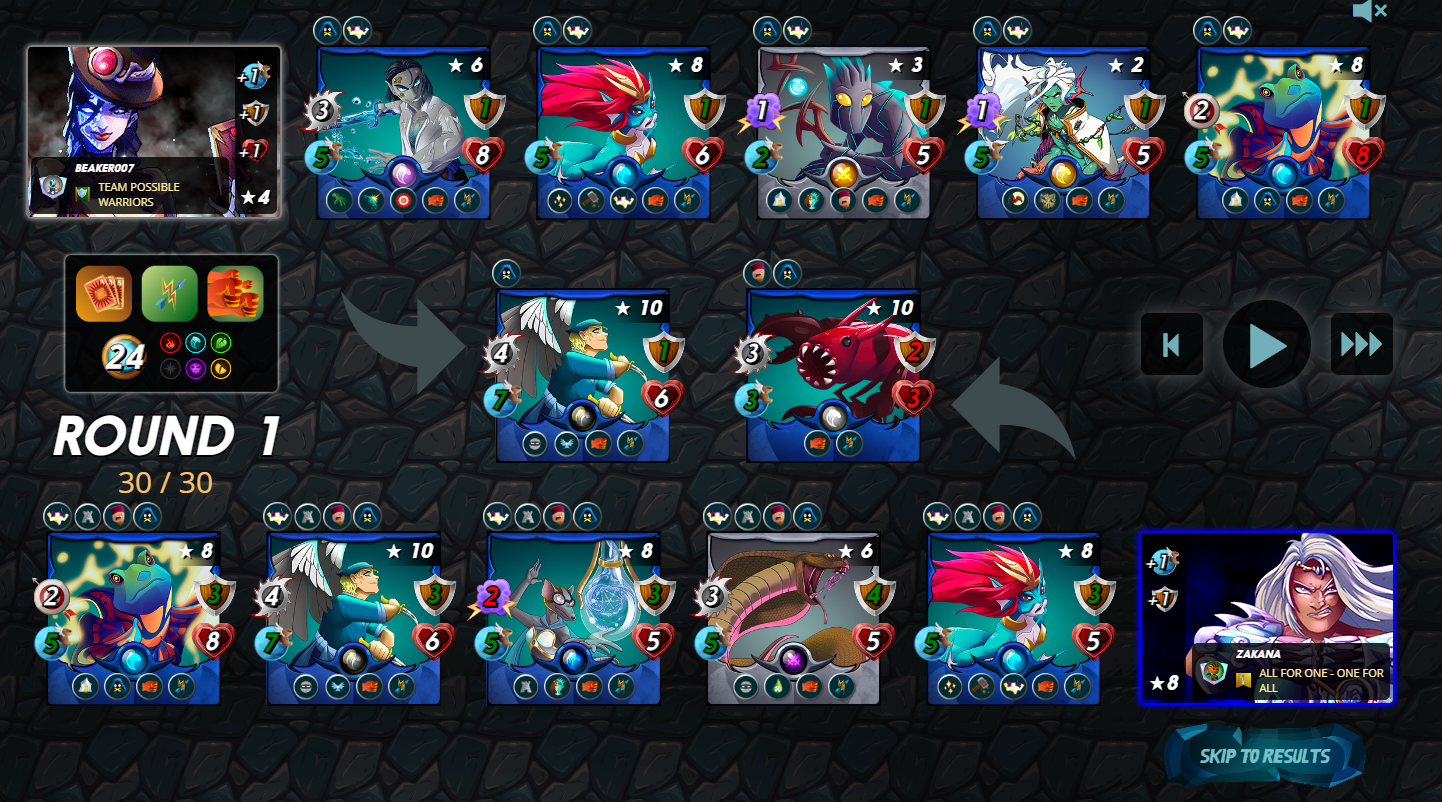 Wow, forgot about the *shatter* ability instant 9 shield gone😍. For both sides the extra heals and repair are working great.. <hr> **Round 2:**  The head start is created always a nice step when you kill the first monster. Unless it is a Martyr monster of course that is often intentionally placed to killed first🤣. The healing of the **Angelic Mandarin** is working and lukily no *poison* yet. <hr> **Round 3:**  First healer is gone. **Ureaus** has a hard time landing his poison this round it was a miss. <hr> **Round 4:** 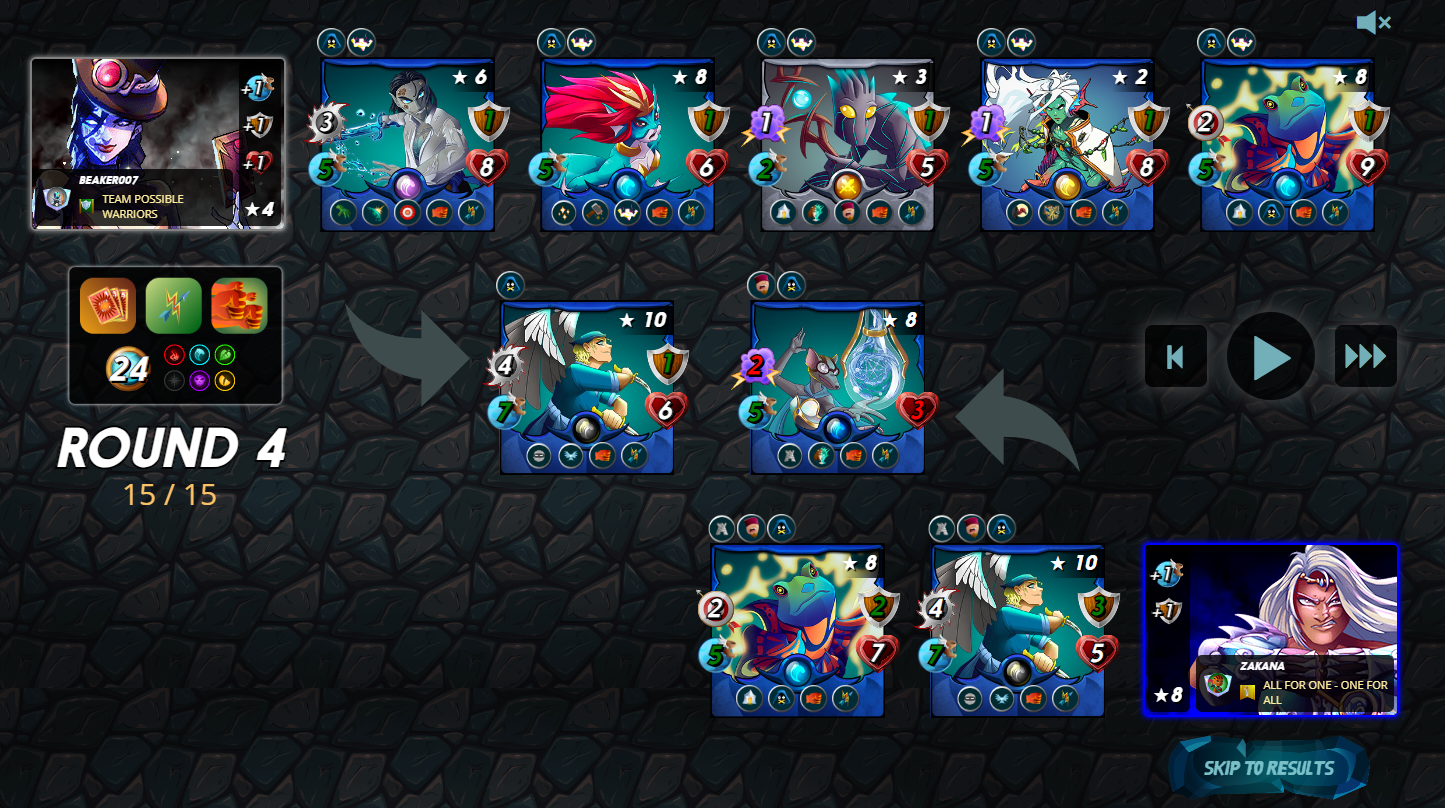 Now is just a picking on the first monster one by one. this battle is over and very good to see that the **Angelic Mandarin** is standing ground while it is a **fire and regret** rule set. <hr> **Round 5:** 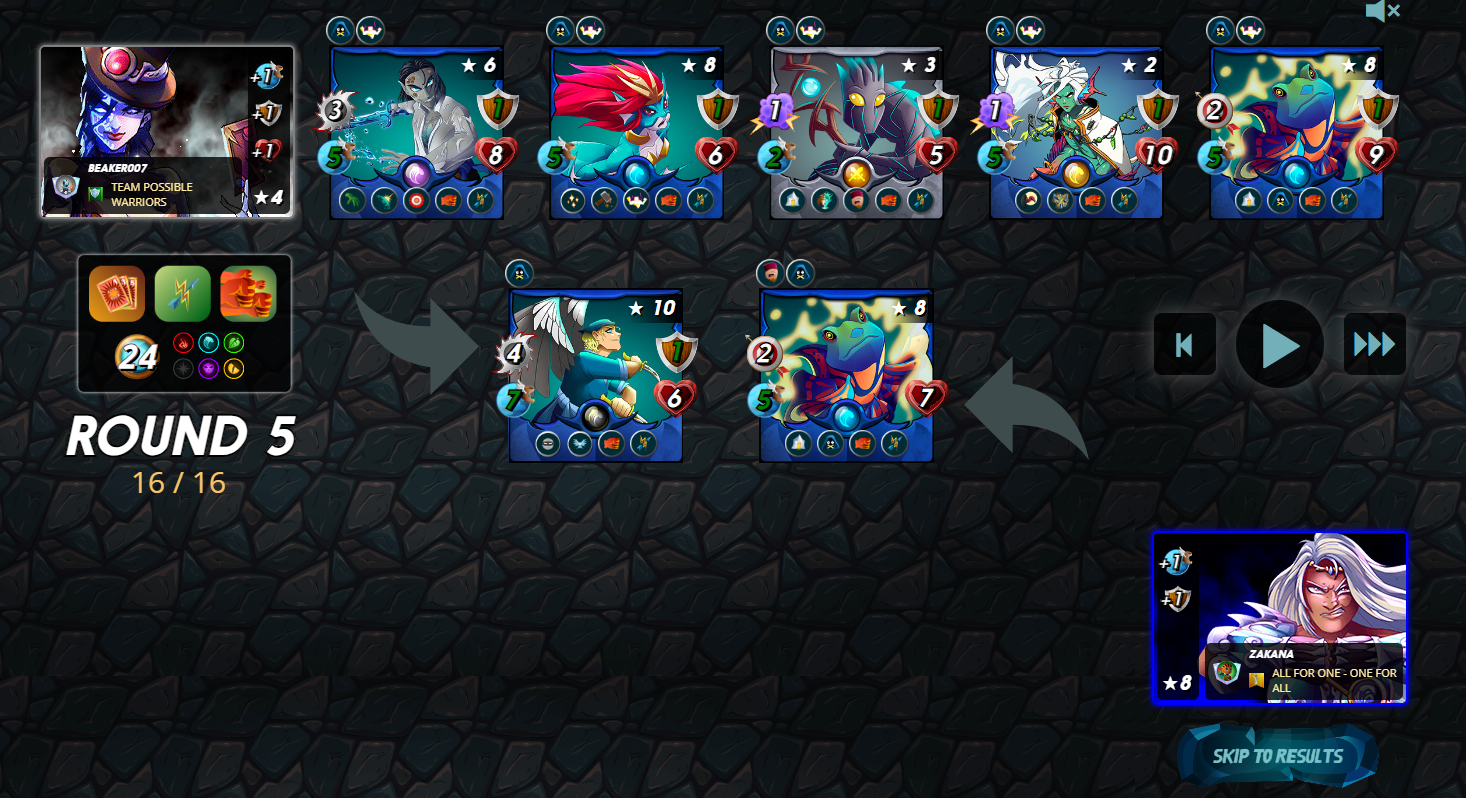 One monster left and that is the an ranged monster in the front my team is still full health. <hr> **Round 6:**  Last round... https://media.tenor.com/gUyFYKXLMY4AAAAM/wayne-rooney-mortal-kombat.gif <hr>  # Conclusion This battle shows that it important to watch out with ranged monster. Also that it is still possible to use range monster. Furthermore this a nice rule set where there are enough options to ignore/counter or work around it. # <div class="phishy">Other example battles</div> <div class="phishy">Click on the image to re-watch the battle</div> Battle 1 [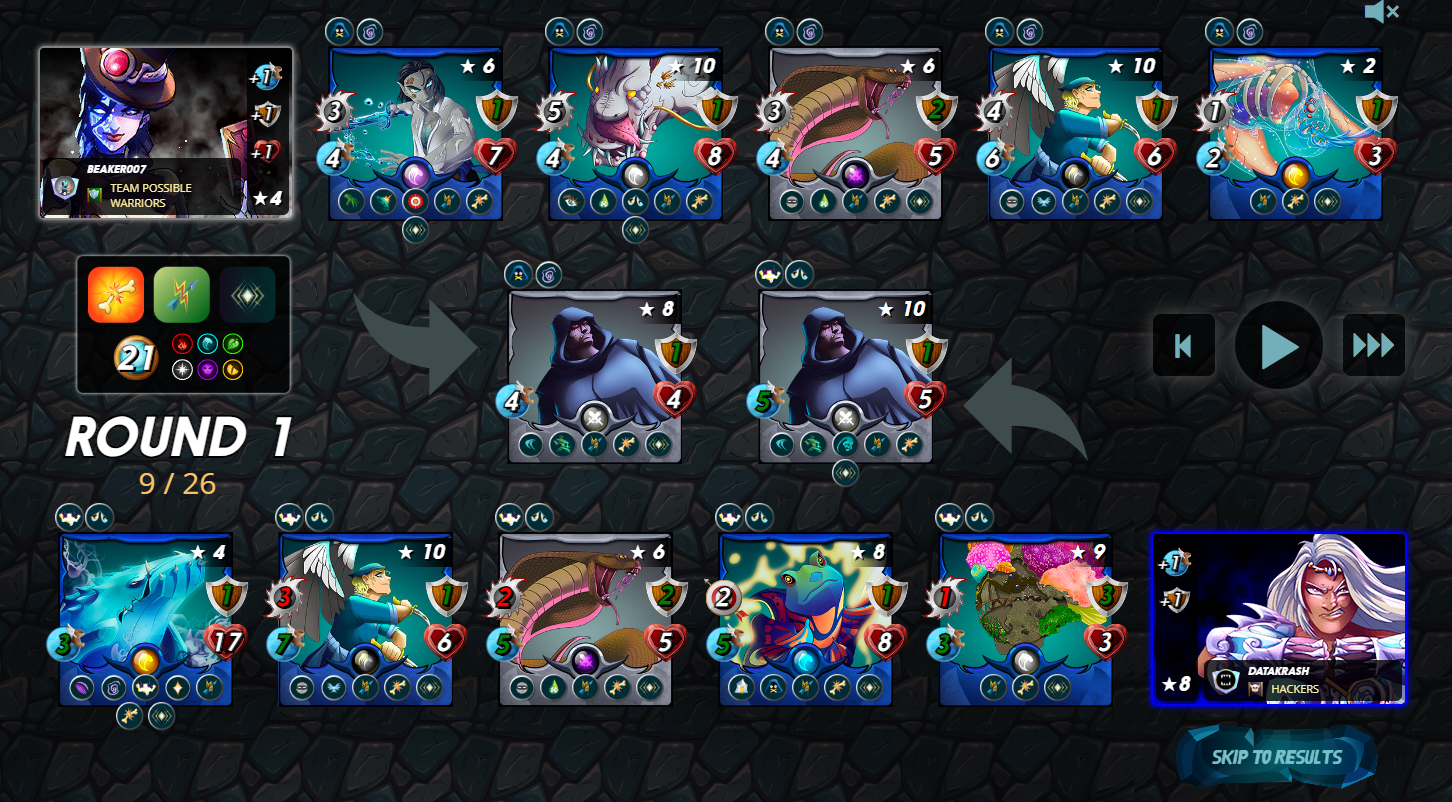](https://splinterlands.com/?p=battle&id=sl_b29979f0c8422df8c351bbacea060429) Again my opponent has selected some ranged monster in this battle not the best choice because there is also a all monsters have amplify rule set into play. <hr> Battle 2 [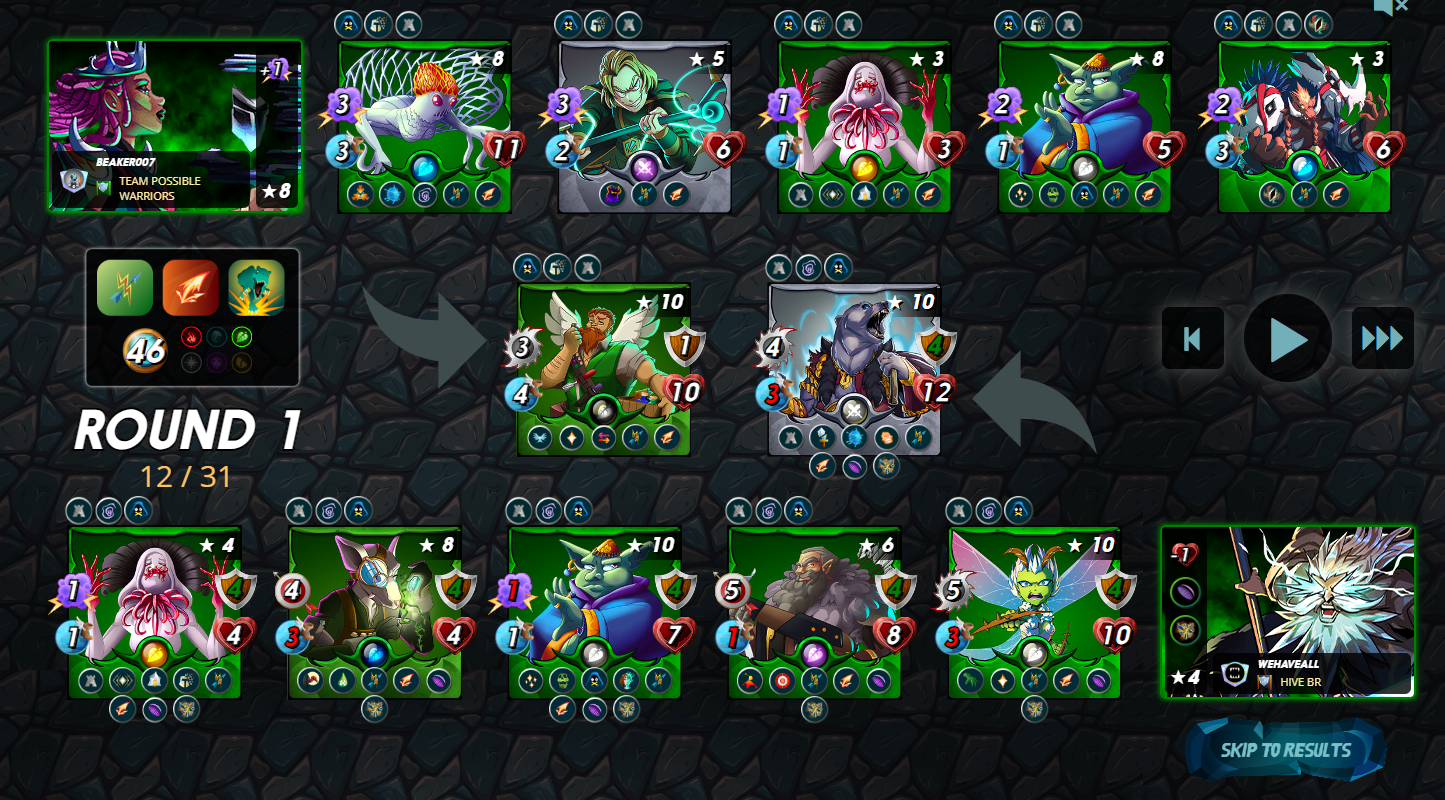](https://splinterlands.com/?p=battle&id=sl_753fe6725c7aa0f3041dbd35fe4bc51f) Again here my opponent has selected ranged monster in this case not the best choice. <hr> https://images.hive.blog/0x0/https://i.imgur.com/QHMMPb5.png # <div class="phishy">Previous ruleset strategy posts</div> The series continues, below you will find references to the other ruleset strategies / analysis posts. | Ruleset | Post | |-|-| |https://images.hive.blog/50x0/https://cdn.discordapp.com/attachments/964707845981478952/1057716169764778014/img_combat-rule_briar-patch_150.png Briar patch| [Ruleset post: Briar patch](https://peakd.com/splinterlands/@beaker007/ruleset-thorns-strategy)| |https://images.hive.blog/50x0/https://d36mxiodymuqjm.cloudfront.net/website/icons/rulesets/new/img_combat-rule_standard_150.png Standard| [Ruleset post: Standard ](https://peakd.com/hive-13323/@beaker007/ruleset-strategy-analysis-standard)| |https://images.hive.blog/50x0/https://d36mxiodymuqjm.cloudfront.net/website/icons/rulesets/new/img_combat-rule_aim-true_150.png Aim True | [Ruleset post: True aim](https://peakd.com/hive-13323/@beaker007/ruleset-strategy-analysis-true-aim)| |https://images.hive.blog/50x0/https://d36mxiodymuqjm.cloudfront.net/website/icons/rulesets/new/img_combat-rule_aimless_150.png Aimless | [Ruleset post: Aimless](https://peakd.com/hive-13323/@beaker007/ruleset-strategy-analysis-aimless)| |https://images.hive.blog/50x0/https://cdn.discordapp.com/attachments/964707845981478952/1057716415492263998/img_combat-rule_up-to-eleven_150.png Up to Eleven| [Ruleset post: Up to Eleven](https://peakd.com/hive-13323/@beaker007/ruleset-strategy-analysis-up-to-eleven) | |https://images.hive.blog/50x0/https://d36mxiodymuqjm.cloudfront.net/website/icons/rulesets/new/img_combat-rule_armored-up_150.png Armored Up | [Ruleset post: Armored Up](https://peakd.com/hive-13323/@beaker007/ruleset-strategy-analysis-armored-up) | |https://images.hive.blog/50x0/https://d36mxiodymuqjm.cloudfront.net/website/icons/rulesets/new/img_combat-rule_back-to-basics_150.png Back to Basics | [Ruleset post: Back to Basics](https://peakd.com/hive-13323/@beaker007/ruleset-strategy-analysis-back-to-basic)| |https://images.hive.blog/50x0/https://d36mxiodymuqjm.cloudfront.net/website/icons/rulesets/new/img_combat-rule_broken-arrows_150.png Broken Arrows | [Ruleset post: Broken Arrows](https://peakd.com/hive-13323/@beaker007/ruleset-strategy-analysis-broken-arrows-fatigue)| |https://images.hive.blog/50x0/https://d36mxiodymuqjm.cloudfront.net/website/icons/rulesets/new/img_combat-rule_close-range_150.png Close Range | [Ruleset post: Close Range](https://peakd.com/hive-13323/@beaker007/ruleset-strategy-analysis-close-ranged) | |https://images.hive.blog/50x0/https://cdn.discordapp.com/attachments/964707845981478952/1057716171346038876/img_combat-rule_counterspell_150.png Counterspell | [Ruleset post: Counterspell](https://peakd.com/hive-13323/@beaker007/ruleset-strategy-analysis-counterpell)| |https://images.hive.blog/50x0/https://d36mxiodymuqjm.cloudfront.net/website/icons/rulesets/new/img_combat-rule_earthquake_150.png Earthquake | [Ruleset post: Earthquake](https://peakd.com/hive-13323/@beaker007/ruleset-strategy-analysis-earthquake)| |https://images.hive.blog/50x0/https://d36mxiodymuqjm.cloudfront.net/website/icons/rulesets/new/img_combat-rule_equalizer_150.png Equalizer | [Ruleset post: Equalizer](https://peakd.com/hive-13323/@beaker007/ruleset-strategy-analysis-equalizer) | |https://images.hive.blog/50x0/https://d36mxiodymuqjm.cloudfront.net/website/icons/rulesets/new/img_combat-rule_equal-opportunity_150.png Equal Opportunity | [ Ruleset post: Equal Opportunity](https://peakd.com/hive-13323/@beaker007/ruleset-strategy-analysis-equal-opportunity)| |https://images.hive.blog/50x0/https://d36mxiodymuqjm.cloudfront.net/website/icons/rulesets/new/img_combat-rule_even-stevens_150.png Even Stevens| [Ruleset post: Even Stevens](https://peakd.com/hive-13323/@beaker007/ruleset-strategy-analysis-even-stevens)| |https://images.hive.blog/50x0/https://d36mxiodymuqjm.cloudfront.net/website/icons/rulesets/new/img_combat-rule_explosive-weaponry_150.png Explosive Weaponry | [Ruleset post: Explosive Weaponry](https://peakd.com/hive-13323/@beaker007/ruleset-strategy-analysis-explosive-weaponry)| |https://images.hive.blog/50x0/https://d36mxiodymuqjm.cloudfront.net/website/icons/rulesets/new/img_combat-rule_fire-regret_150.png Fire and Regret || That's all for this week hope you enjoyed reading this ruleset strategy/analysis. See you all on the battlefield. https://d36mxiodymuqjm.cloudfront.net/website/splinterlands_logo.png Do you also want to be part of this amazing play to earn game consider using my [refferal](https://splinterlands.com?ref=beaker007) link.
👍 splinterboost, terraboost, carl05, yozen, high8125theta, lucimorningstar, crypt0gnome, hurtlocker, kryptogeier1, smartvote, reazuliqbal, monstermarket, terracore, scraptrader, aleister, marianaemilia, shaidon, fireguardian, gabrielrr17, gomster, bastter, zaddyboy, carlosro, brucolac, hkinuvaime, elfino28, thepeoplesguild, funnel, pedrocanella, sanjeev021, goliathus, brando28, maxmaka, scrubs24, teteuzinho, prosocialise, genepoolrentsclr, anjanida, hive-world, vitoragnelli, michupa, eijibr, genepoolchlrn8r, genepoolcardlord, dudeontheweb, jagmeet12, mesk, dragonmk47, giemo, heutorybr, sylmarill, xabi, doniczkowazielen, lorddiablo, sali.porn, sd974201, criptosectadepit, steemmonsters, danlop, hadley4, athunderstruck, monstermother, elclements, gerjer, everythingsmgirl, mobi72.curation, gannibal, kgsupport, malnavi, fallen.angels, rondonsleezy, ign1te, priyabariya, reseller, goldmonsters, thaddeusprime, djrockx, jakkal-spt, marco77290, ghostlybg, holdeck2, dracrow, mvl2304, vvgm, danideuder, iasplan, jats-0, torari, monster-curator, ross92, minminlou, steentijd, fieryfootprints, newageinv, thebluewin, apokruphos, potence, arsenal4life, grosh, brofund-spt, oahb132, jankulvalski, bulldog1205, john9inch, theshad0ws, tegridy, elephantium, instamental, dusi, kimikimi, gejzep, spryquasar, dbooster.spt, yras, kqaosphreak, lothbrox, luckbound, nwothini335, jakkal-1up, hivebr.spt, bvrlordona, engr-anchovy, flowtrader, techno.spt, holoferncro, krazeworgen, vinewhite, stefanialexis, cranium, drunksamurai, cgrave, butterb, syyed, sharkmonsters, goodasgold, szf, freemonster, abh12345.spt, shyaren, nateaguila-spt, chubb149, imp0stor, rondonshneezy, solymi, repayme4568, wizzitywillican, homesteadhacker, timmy-turnip, fireguardian.spt, stophersdinnerz, banzafahra, trenloco, dafusa, splintercell-01, ingi1976, unlikelysurvivor, tillmea, johnripper, uygames, sinelux, bfciv, elkingplayer, amazot2, pocket-rents, stdd.stp, kiokizz, foreveraverage, catomoon, unitqm, huntforsteem, dw-glgsy112321s, titania21, shovelpile, finris, swaxi, mauriciolimax, d35tr0, rayius, noempathy, bladesong, siberian12, sobahd, njker, irregular-n, beffeater, lolz.spt, the-pockets, grabapack, cimmeron, apeofwallst, koment, komentator, sm-silva, krann, prettysnake, andruto, cranum, craniums1, kepslok, cernunnos, splinterstats, dagamers2, dagamers7, bluedevil0722, ezunjoshy, cranium.leo, nfter, davdiprossimo, dobroman, setik-001, craniuma, crabank, artpromo, broxi, besheda, scooter77.spt, vintherinvest, michupa.spt, cryptozdk, vault.tokens, jarmeson, thgaming, dynamicrypto, seattlea, wahlterwhite, mochilub, willendorfia, ketcom, andriko, tamdike, jpleron, bong1011, greengineer, dreamryder007, viniciotricolor, monster-mountain, splinterlandspro, rusbe, viniciohleo, gaottantacinque, cribbio, gasaeightyfive, sirsmokesalot96, lxsxl, sovstar, steemmonsterking, smallcircle, automaton, zarwelius, ak08, taushifahamed, squirrelacus, aubryd, splinterl0rd, roshni0, creeptor,