DIY Bow Build - Part 3
diy·@beatking13·
0.000 HBDDIY Bow Build - Part 3
Hey Steemers! Back again with the next few steps of building a Mollegabet style bow from red oak (Home Depot). Today, I started working on the nocks or string grooves. After gluing the tips on, they look like this. 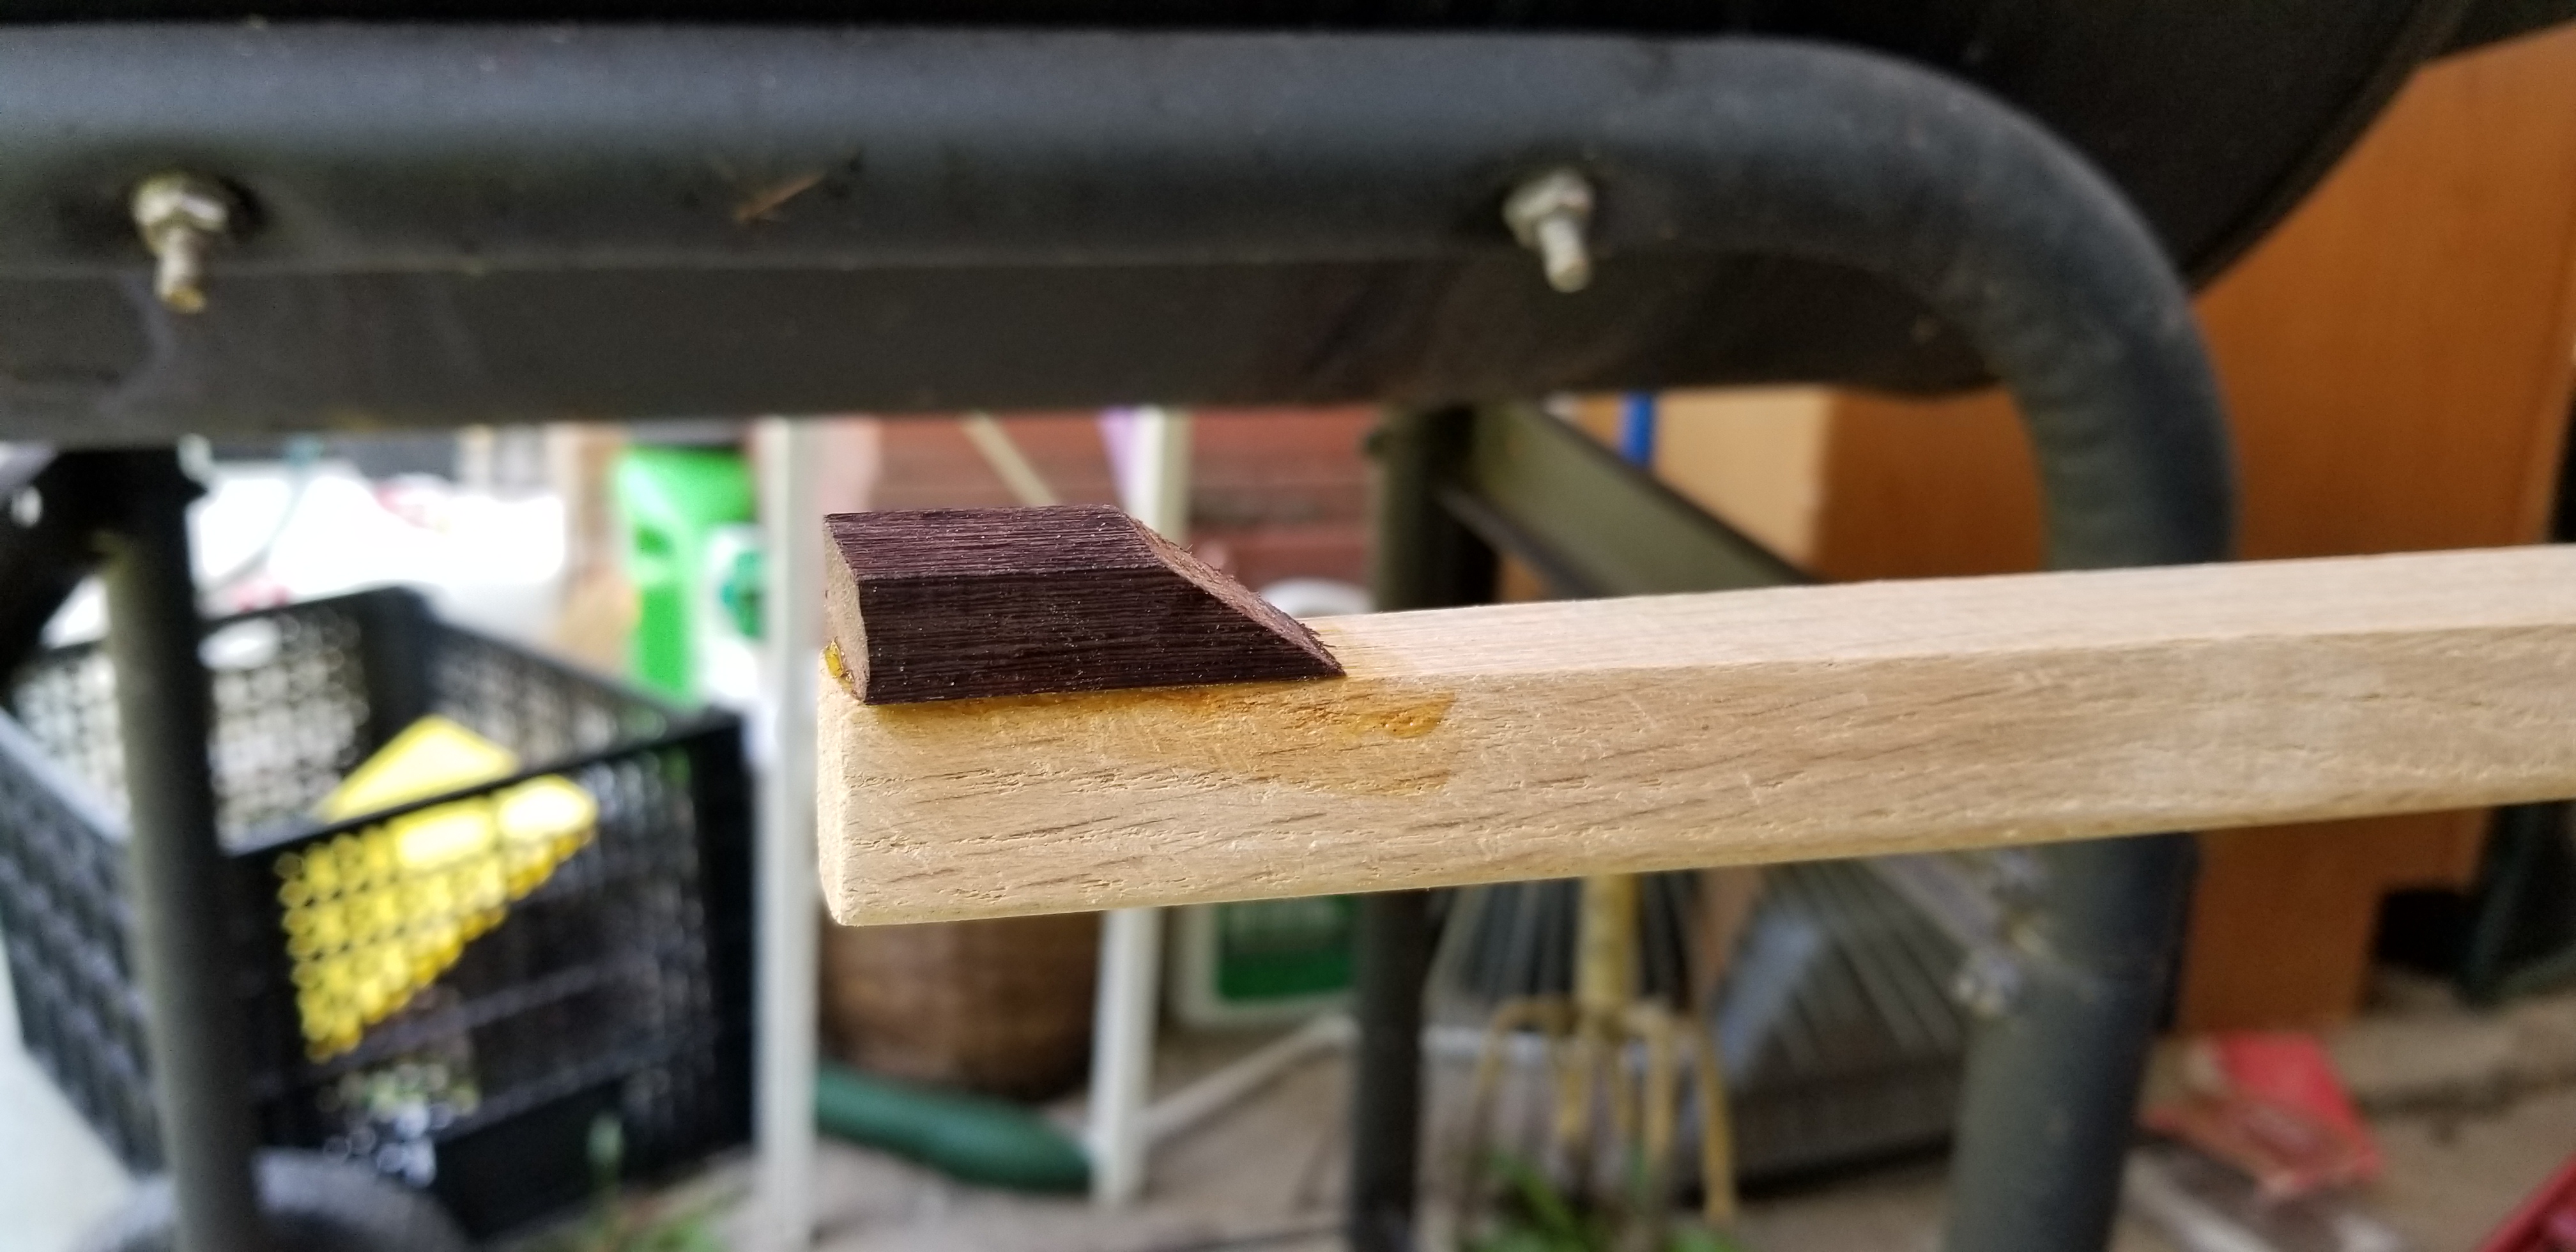 I rasped, filed, and sanded them to shape first. 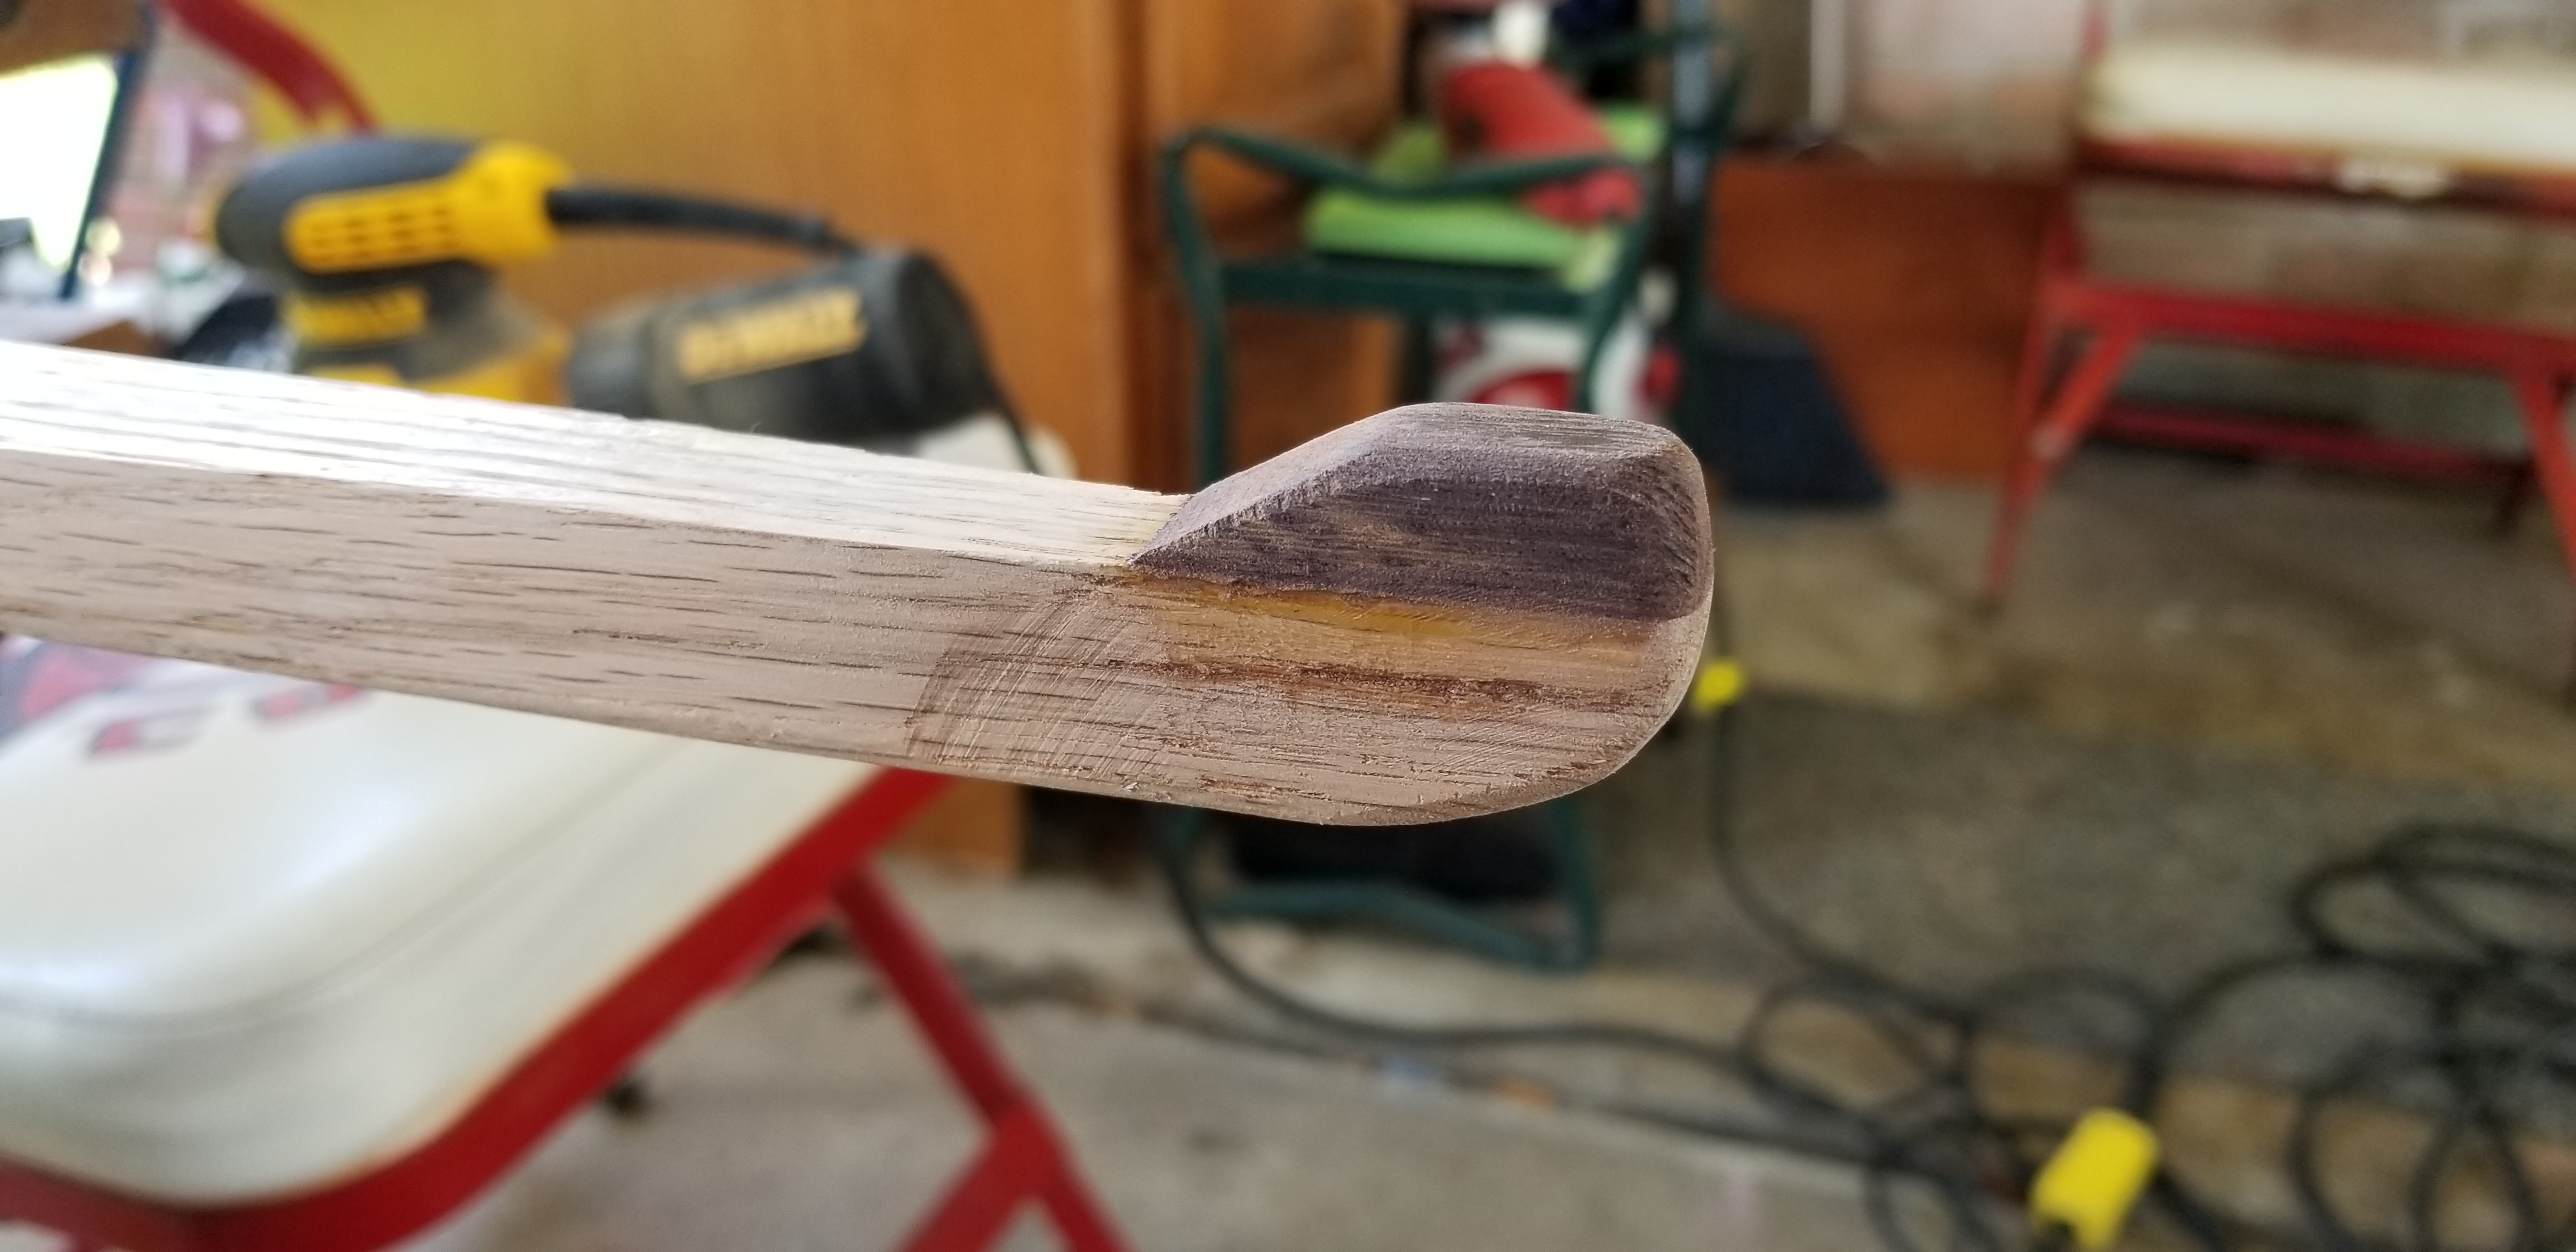 Then, with a round file, I started working out the grooves for the strings. I use 45° angles so the string fits when its on the bending bow. 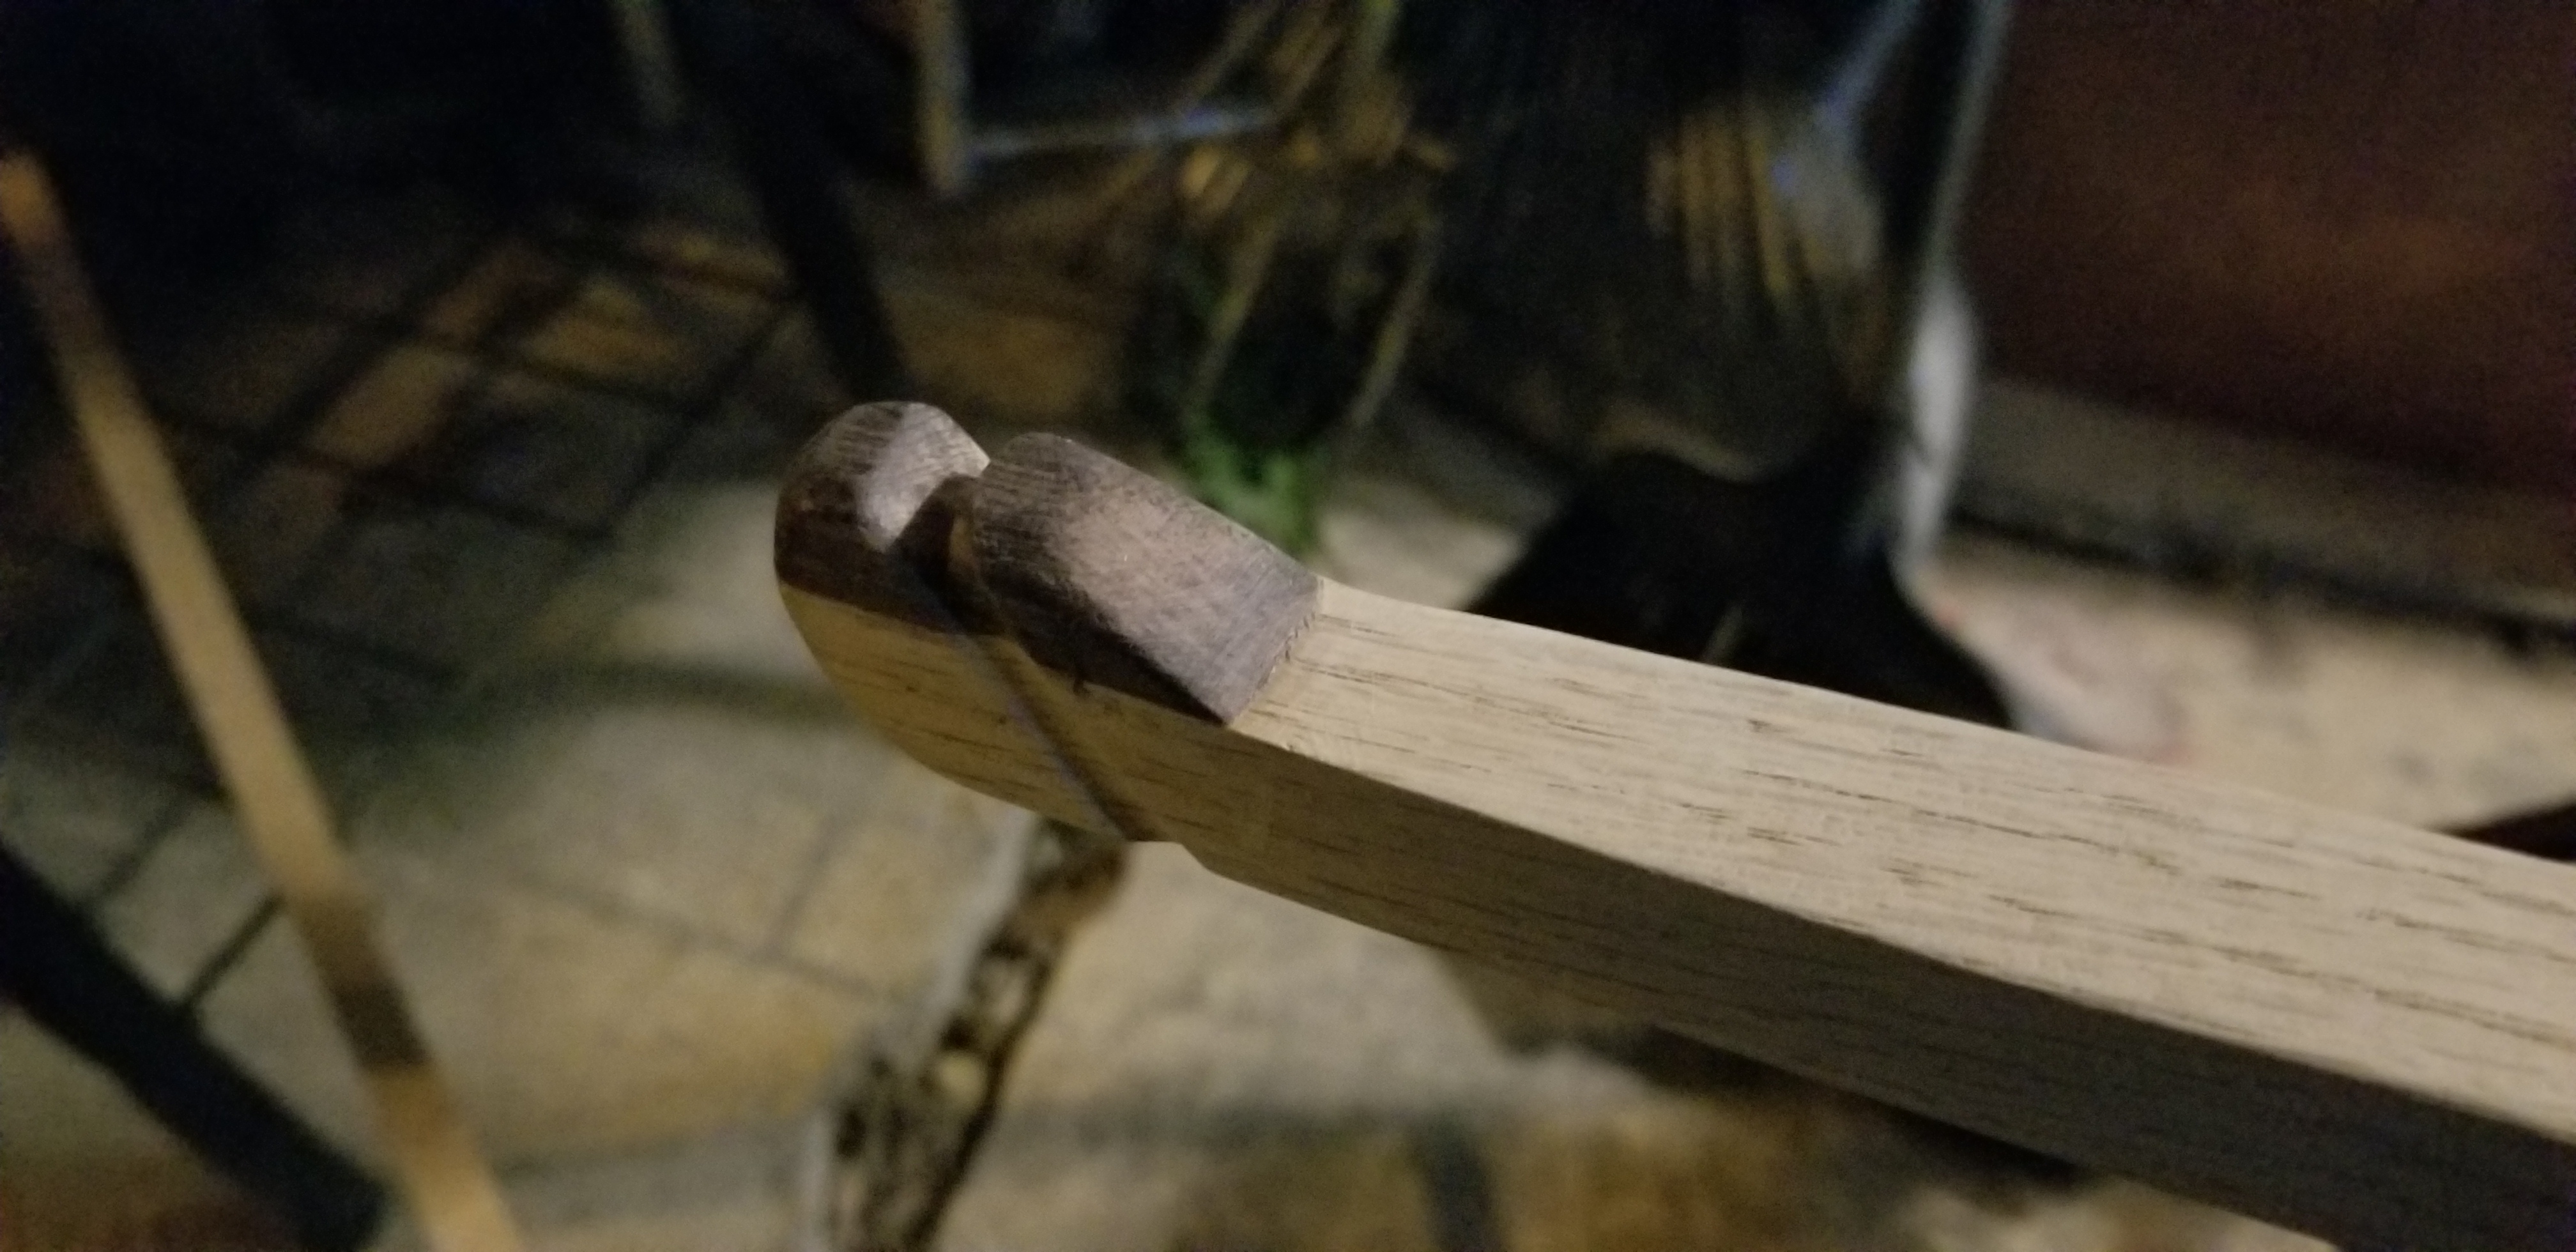 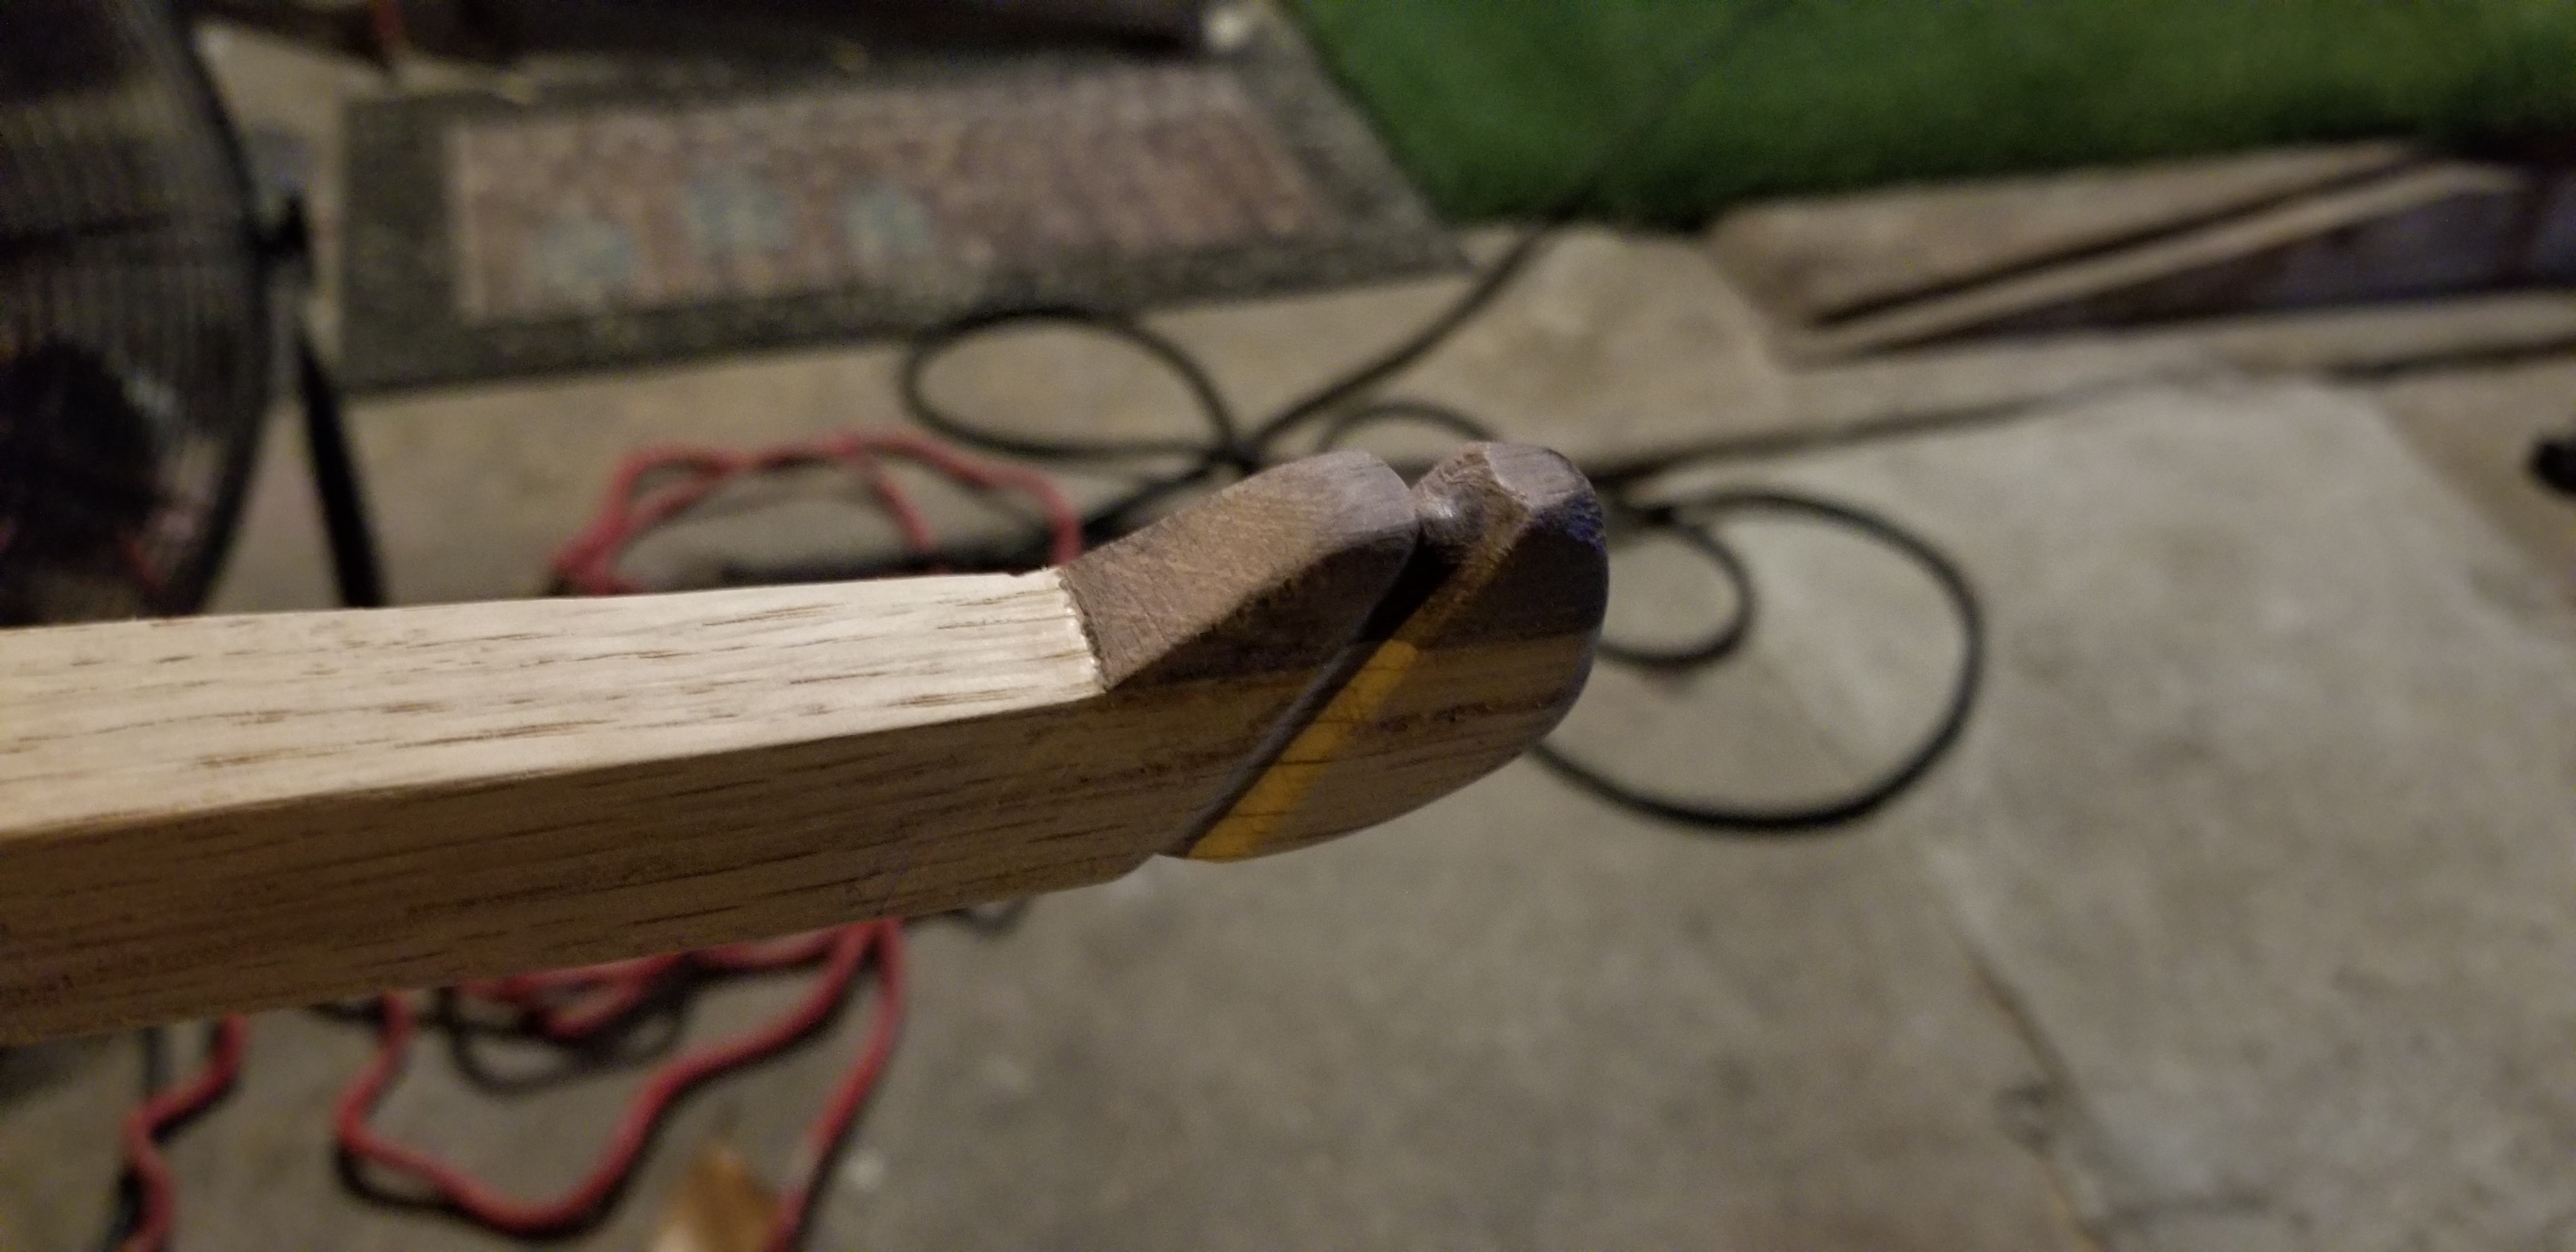 Now that the nocks are done. It's time to start thinning out the wood on the wide part of the board. Thats the part that will bend. After a few hours rasping and sanding, the board is bending well. Before I go further, I want to reinforce the wood for strength and durability. For this, I'll glue on 3 strips of drywall fiberglass.  I'll let the fiberglass and glue dry overnight and then trim the excess and file it smooth. 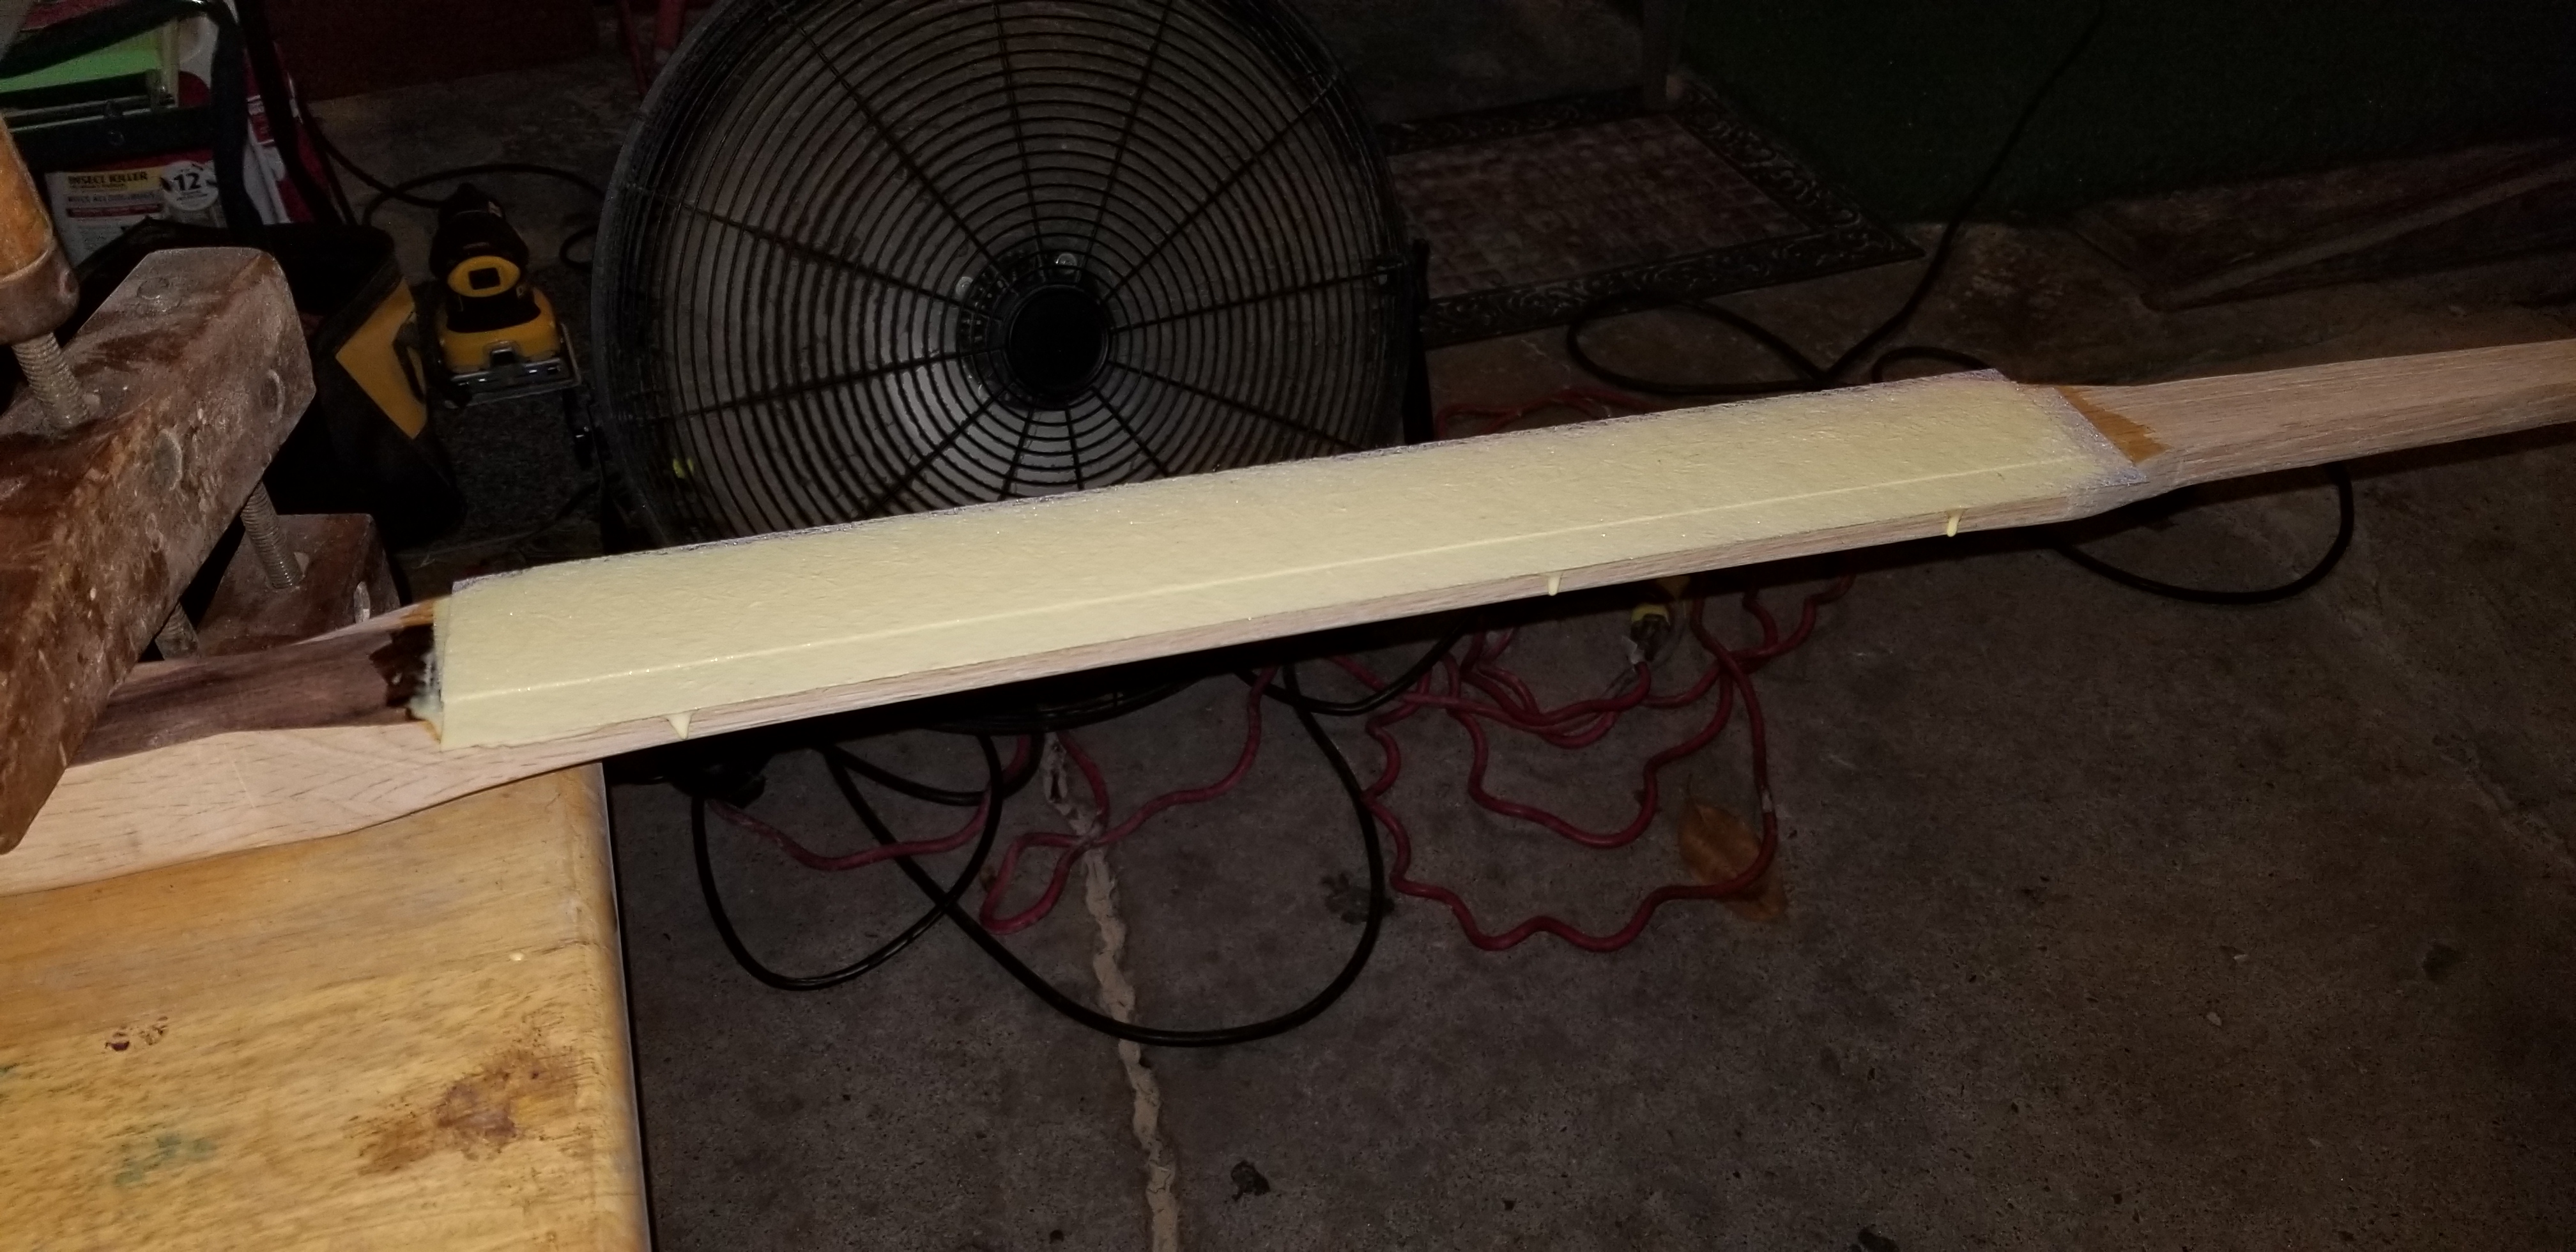 Stay tuned for the next step, tillering, where I get the limbs bending evenly and together. You'll finally see the bow taking shape! Thanks for following along! (^_^)
👍 boilingover, fastresteem, midlet, tiffcisme, knowface, onelovecuration, onelove.curation, onelovedtube, cgp, kenanqhd, jrswab, gaminghd, veganroma, spite77, vladivostok, alexabsolute, fireguardian, happymichael, cartel, originalmrspice, digitokash, scottshots, jeffmcmullen, josevallera, d00k13, mrchef111, darkfuseion, gisi, bobaphet, illuminationst8, ilazramusic, techcoderx, travellit, romafedorov, zainenn, inoobgamer, hornet-on-tour, dlife, phototutorials, altcoinpost, neeqi, neopatriarch, toddmck, exzorltg, brainpod, dnews, adventuroussoul, theaudgirl, shermanedwards, stewsak, camuel, jist, dsongs, openmind3000, masaitv, amberyooper, steemtogether, joythewanderer, cgbartow, enjoyinglife, graylan, neopch, iwanderela, cordeta, aperterikk, scottychams, vincy, pyemoney, jluvs2fly, schabenstolz, jackdub, professorbromide,