A Shield with a Bite - Using Mycelic Infantry in Battle!
hive-13323·@bteim·
0.000 HBDA Shield with a Bite - Using Mycelic Infantry in Battle!
<div class=text-justify> This week's Share Your Battle challenge features Mycelic Infantry! I was happy to see this week's challenge, because while I didn't particularly appreciate Mycelic Infantry when Chaos Legion first came out, I have grown to like it more over time and it is actually one of that cards in my collection that I have recently levelled up. Mycelic Infantry is a heck of a tank - I own a level 2 copy of it, and at that level you get a very respectable 3 attack and 1 speed, paired with 3 armor and an excellent 8 health. To top it off, Mycelic Infantry comes with the Shield ability, meaning that any non-magic attacks it gets hit by will only deal half damage. This makes Mycelic Infantry shine in any battle where you have reason to believe that there won't be much magic damage, though even if there is, 8 health is still a very decent amount of health. If you wanted to jump right to the action, [the Battle Link is right here](https://splinterlands.com?p=battle&id=sl_65a6cb96e783bb3ef299ec67f1907cba&ref=bteim). Want to hear some more about the lineup? Read on further!  --- <div class="pull-left">https://files.peakd.com/file/peakd-hive/bteim/23uEz3KfpDpTo9AsuvkmZeTgpipg8mHmC4a1aipypTpd9B9RjtcDZ6f7QqMd9yfi7NXKb.png</div> These were the rules for our battle. We can see that we have a fairly open selection of splinters and plenty of mana with a 58 mana cap. However, the ruleset is one of the stricter ones - Up Close and Personal makes it so that only melee monsters may be selected for this battle. This is a ruleset that is impactful enough that I will be shaping my entire strategy for the battle around it. --- <div class="pull-right">https://files.peakd.com/file/peakd-hive/bteim/23ywu7UZa8HsXV47a5AXzsSn8dqCbw9U1R9ZFQXdz8YjD7T3fnj5EfSyhQ1LK84AWbDpF.png</div> Mylor Crowling is already a decent Earth splinter summoner under normal conditions, but in Up Close and Personal battles he becomes straight up ridiculous. Giving all of my monsters Thorns means that they will be dealing out counter damage to any melee attackers. And, well...let's just say that we know that there will be plenty of melee monsters in this fight! --- <div class="pull-left">https://files.peakd.com/file/peakd-hive/bteim/23uFH2BNPUzaaqtmjehZuWHFPZ6nYXsd6BkDV3NeHuvchbhp8tuKD1TXoRL19LGyhxv7z.png https://files.peakd.com/file/peakd-hive/bteim/23wMaNQ4hMCfqcJZqVgCpmQBezb38w67vFALkJZd8eAwxJoYJwyGZ8uGWswF9jEAPHNfJ.png</div> I started my team with my tank and secondary tank. Grund led off in the first position as the hardest hitter on my squad. Grund hits twice per turn thanks to Double Strike, multiplying an already respectable 3 damage up to an eye-popping 6 per turn. I slotted in Junker into the second position. With Reach, he will be able to attack from that spot right off the bat. I took some extra care to make sure that both of these monsters were high health ones - I wanted to get as much Thorns damage out of them as I could! --- <div class="pull-left">https://files.peakd.com/file/peakd-hive/bteim/23tmDGYZVxJaFgYuWNxCVi97AefyhJDGpeYjguVvkFBjUR4NdcyWjcmLKQ5GNeAzmT71k.png https://files.peakd.com/file/peakd-hive/bteim/23wWvsw7pUkuQpfA55LvhxgzFiJyHJFLW5jKBDRErKu99eUdedfXgp4XUEhvE4eBJttuu.png</div> For the middle of my lineup I went with Pelacor Mercenary and Disintegrator. Pelacor Mercenary was another hard hitting and solid tank. With Flying, he even has a bit of evasion. Disintegrator was a key monster on my team - the combination of Demoralize and Thorns means that the enemy monsters will be hitting for less damage, as well as taking counterhits every time they attack. My strategy for this battle was to select the tankiest monsters I could find, protect Disintegrator, and let Thorns do the rest. --- <div class="pull-right">https://files.peakd.com/file/peakd-hive/bteim/23tmBGMssms2cPBbwy3dEGFucLtKf7ugd1EiK9ZK9ARo7RGU39zTSFJA6AeFjPDdSEoyd.png https://files.peakd.com/file/peakd-hive/bteim/23uEzCzgCYMkcL3u8E1eGjPYJMB4tygj1o2amt9CYCUXCd8gzCSZtaA5WqVfn3TMWfTEA.png</div> For the back end of my team I wanted some more bulky monsters. Xenith Monk was there to be as much of an annoyance as possible. With Heal, it could regenerate health and potentially take infinite damage, if my opponent's team damage ever dropped too low. Finally, our guest star of the week, Mycelic Infantry, was my team's anchor at the back. Mycelic Infantry's Shields, in combination with Mylor's Thorns and Disintegrator's Demoralize debuff is a very powerful combination. In many cases, opposing monsters are debuffed to the point that they are not able to deal any daamge at all to Mycelic Infantry. I positioned it at the back because in melee only battles, a large portion of the enemy damage can oftentimes come from Sneak monsters.  With the lineup set, it's off into battle! When I see the selected teams I am hopeful - my opponent has brought a fairly standard melee lineup onto the field, and my monsters with Thorns should be well positioned to deal with it. On the other hand, War Chaang with its ranged attack is slightly troublesome, and the enemy Sand Worm hits awfully hard. Let's see how the fight goes! 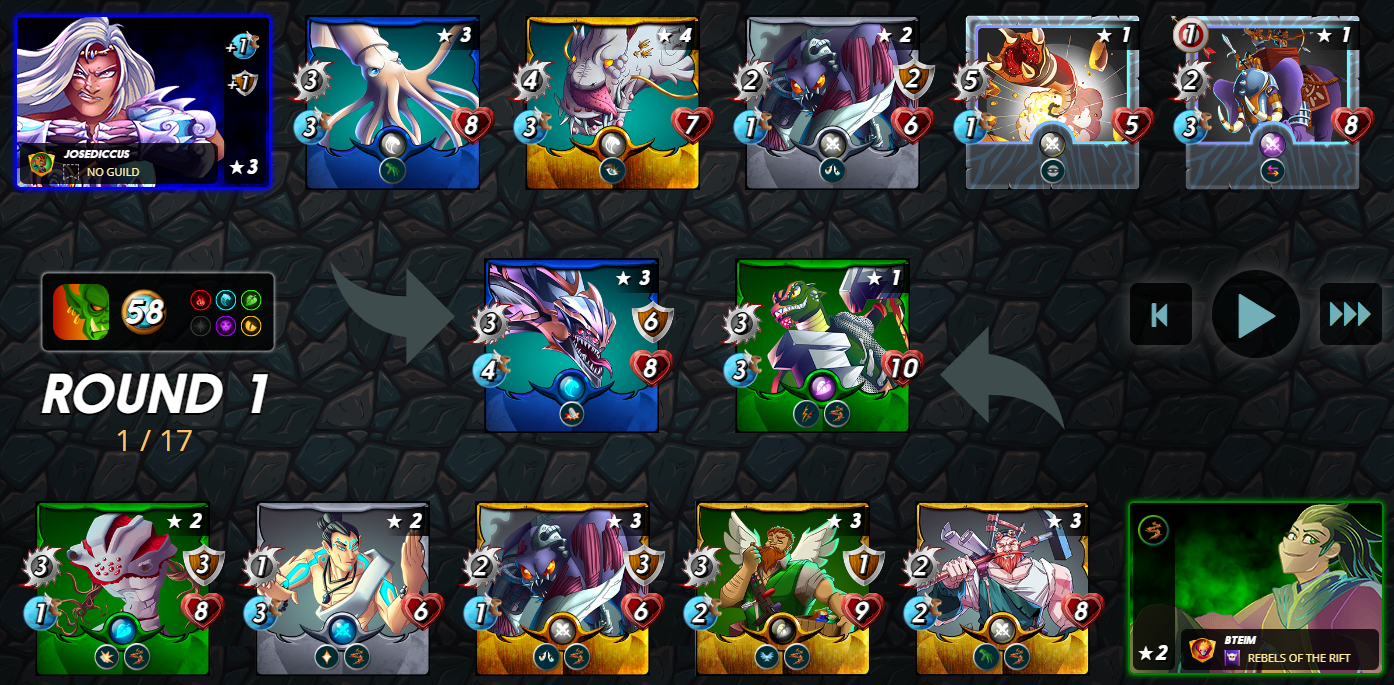 --- Thanks in part to both of us bringing along Disintegrators with Demoralize, the battle starts off slowly. Not a whole lot happens in the first round, but by the start of round 3 the damage is starting to pile up. My opponent actually draws first blood and knocks out my Grund, but all of the Thorns damage is already starting to accumulate on their team. 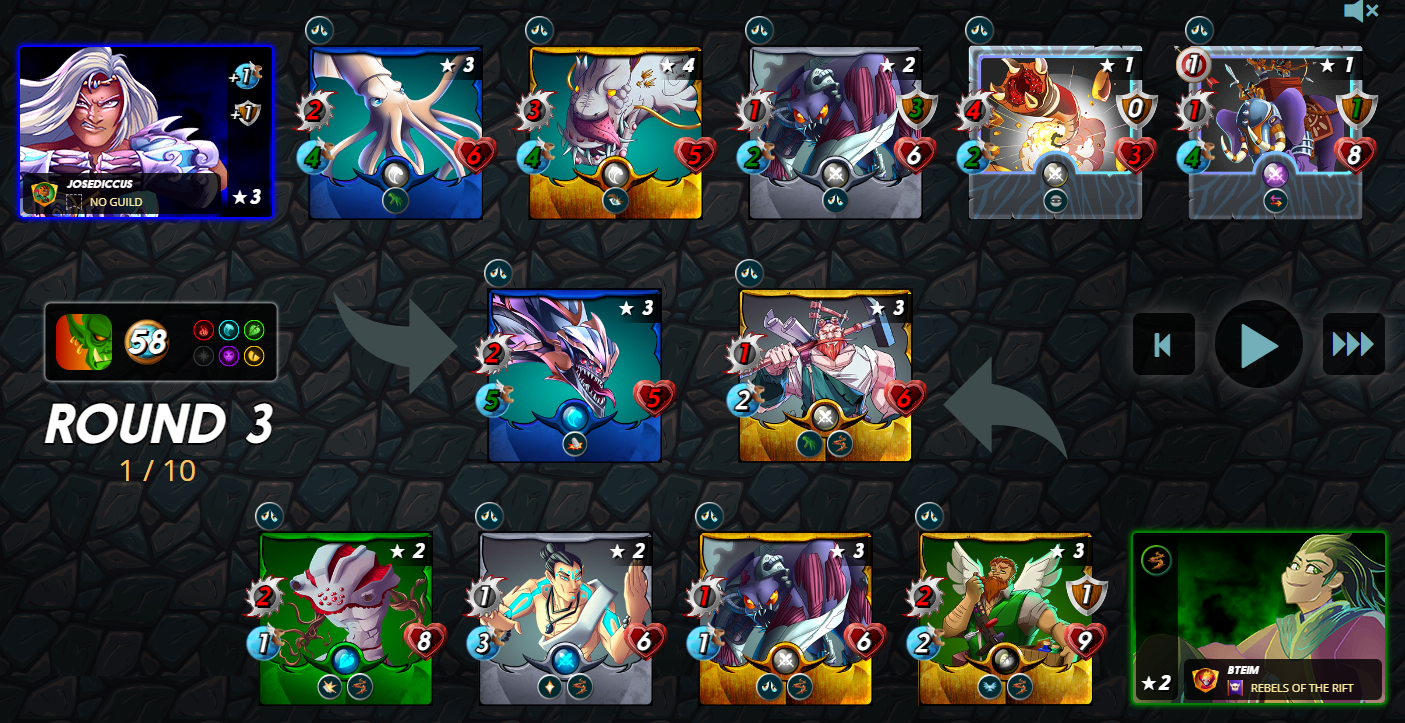 --- As the fight progresses, all of the enemy monsters which are able to attack due to Opportunity or Sneak eventually end up killing themselves on Thorns. Mycelic Infantry does an amazing job of protecting my team from attacks at the back, managing to outlast that pesky Sand Worm while still having half of its health remaining. 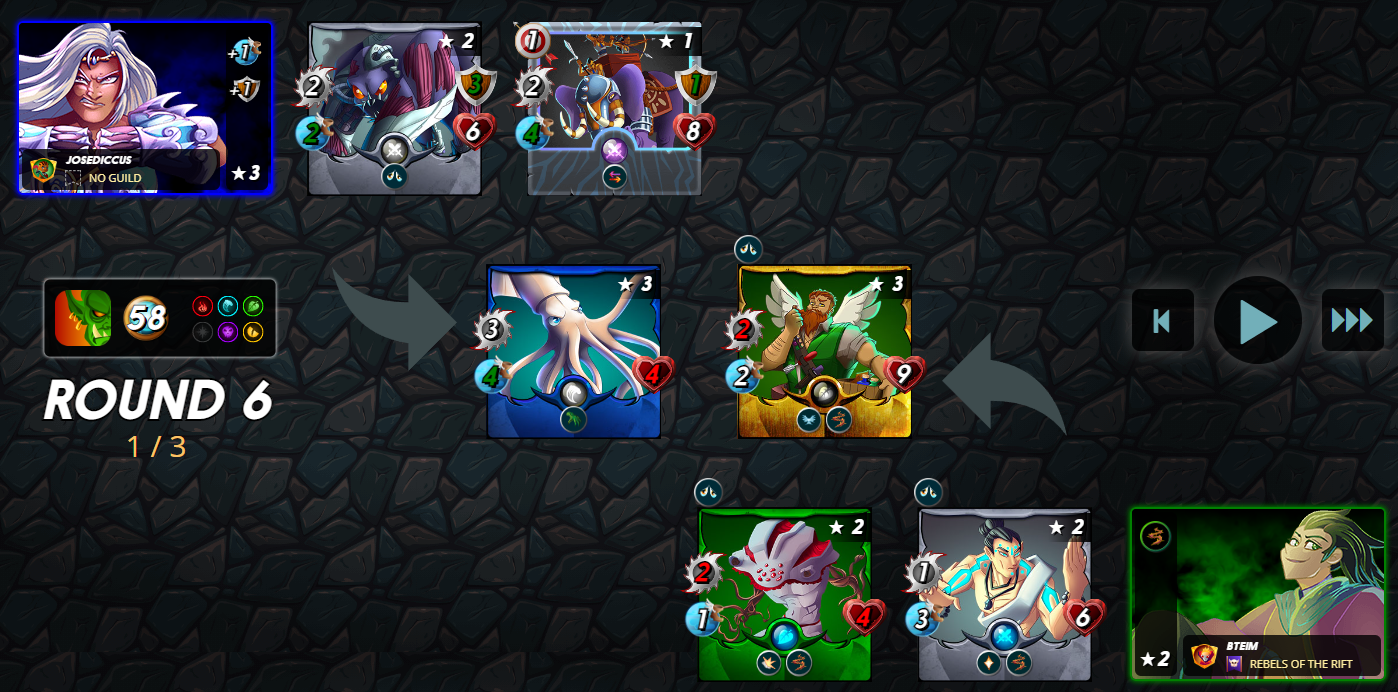 --- This ended up being a rather long battle - that's what happens when half of the monsters are only able to attack when they are in front! But thanks to a whole lot of Thorns damage, my team was able to outlast my opponent's monsters and grind them down for the win. And again, if you wanted to see the whole battle for yourself, [you can see it right here.](https://splinterlands.com?p=battle&id=sl_65a6cb96e783bb3ef299ec67f1907cba&ref=bteim) 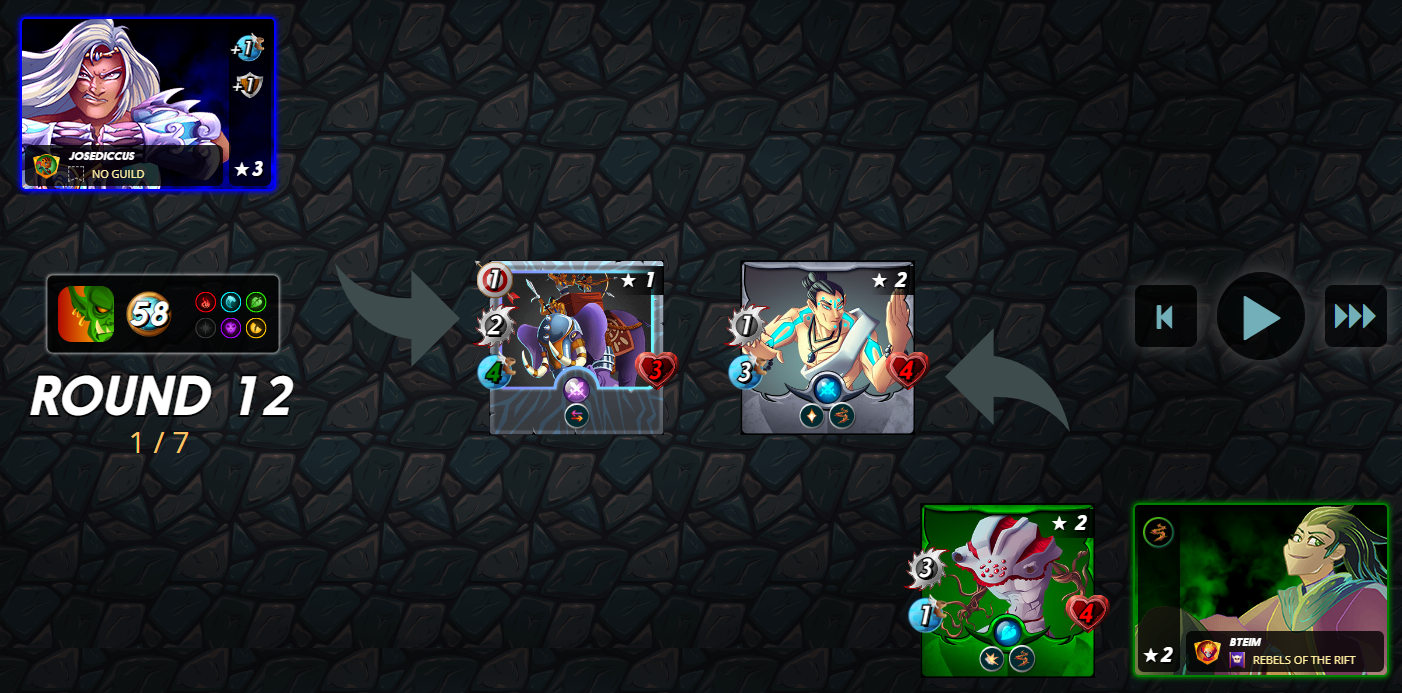 --- My strategy for this battle worked out perfectly. My monsters were able to win the battle of attrition thanks to the combination of Thorns and Demoralize. Mycelic Infantry was a champ holding the back line and preventing my opponent's Sand Worm from mowing through my monsters. I am a big fan of Mycelic Infantry. It performs admirably as a front line tank, and can even stand in at the back in certain situations, as shown by this battle. It is a staple of my Earth play in ranked battles, and will continue to be one going forward.  Thank you so much for reading all the way to the end. Interested in seeing some more of my writing in the future? Be sure to give me a follow! In the meantime, if you'd like to see some of my recent posts: - [Splinterlands Economics: Capital](https://peakd.com/hive-13323/@bteim/splinterlands-economics-capital) - An overview of the concept of capital, and how we can apply it to Splinterlands! - [A River-sal of Fortune - Using River Nymph in Battle!](https://peakd.com/hive-13323/@bteim/a-river-sal-of-fortune-using-river-nymph-in-battle) - Last week's battle challenge, featuring River Nymph! - [Splinterlands Economics: Leverage](https://peakd.com/hive-13323/@bteim/splinterlands-economics-leverage) - An introduction to the concept of leverage, and how we can apply it to Splinterlands! ___ Thinking about giving Splinterlands a try but haven't signed up yet? Feel free to use my referral link: https://splinterlands.com?ref=bteim, and be sure to reach out to me if you have any questions! All images used in this article are open source and obtained from [Pixabay](https://pixabay.com/) or [Unsplash](https://unsplash.com/). Thumbnails borrowed with permission from the Splinterlands team or made in [Canva](https://www.canva.com/).
👍 he-index, blainjones, realmankwon.scot, elianaicgomes, cbridges573, axlertwinblade, splinterboost, happyberrysboy, namelessvault, atnep111, steemincome, donekim, stophersdinnerz, nameless112, ajpl, antonine, yixn, kvm86, cheeseywonder, brawlers, traianus, reazuliqbal, monstermarket, unitmaster, philipp87, krymprents, kvm86jr, kvm86jrjr, namelessgoldmine, basileios, krympton, tarabh, josieb, llamakronapins, nameless113, smartvote, marianaemilia, fatman, dosh, brucolac, felipejoys, fireguardian, viniciotricolor, pedrocanella, sanjeev021, bolachasmonster, furiousfighter, splintercell-01, kraaaaa, elfino28, eijibr, genepoolcardlord, dudeontheweb, carl05, bastter, carlosro, hkinuvaime, genepoolchlrn8r, jagmeet12, dragonmk47, giemo, oadissin, da-dawn, jaybart, dylanhobalart, sd974201, sketchygamerguy, cashheaven, sodom-lv, lordtimoty, olaf.gui, pwbanker, catharsis, hivebuzz, lizanomadsoul, manncpt, globalschool, schmidi, mammasitta, fengchao, steemitboard, bdvoter, tomlee, minhajulmredol, mahirabdullah, dogancankilment, zaku, deepu7, zayedsakib, zaku-spt, bdvoter.cur, ash2-0, chrysanthemum, macaw, ophibious, linco, blind-spot, filler, reza-shamim, olaexcel, dubignyp, splinterl0rd, fallen.angels, vvgm, reycelpl, critical99, pablocss, danideuder, anaiak, jerson1231, jats-0, steemmonsters, reseller, sima369, braaiboy, monstermother, gannibal, thaddeusprime, malnavi, xsteemmonsters, hadley4, bscrypto, oac, goldmonsters, teteuzinho, ghostlybg, robtheranger, baasdebeer, afternoondrinks, ilanisnapshots, wynella, golddeck, thanksforplaying, flxlove, davideazul, jpleron, greengineer, master.battle,