Easter Bunny Mini Drawstring Bag - easy handmade how to plus hints
hive-127911·@devyleona·
0.000 HBDEaster Bunny Mini Drawstring Bag - easy handmade how to plus hints
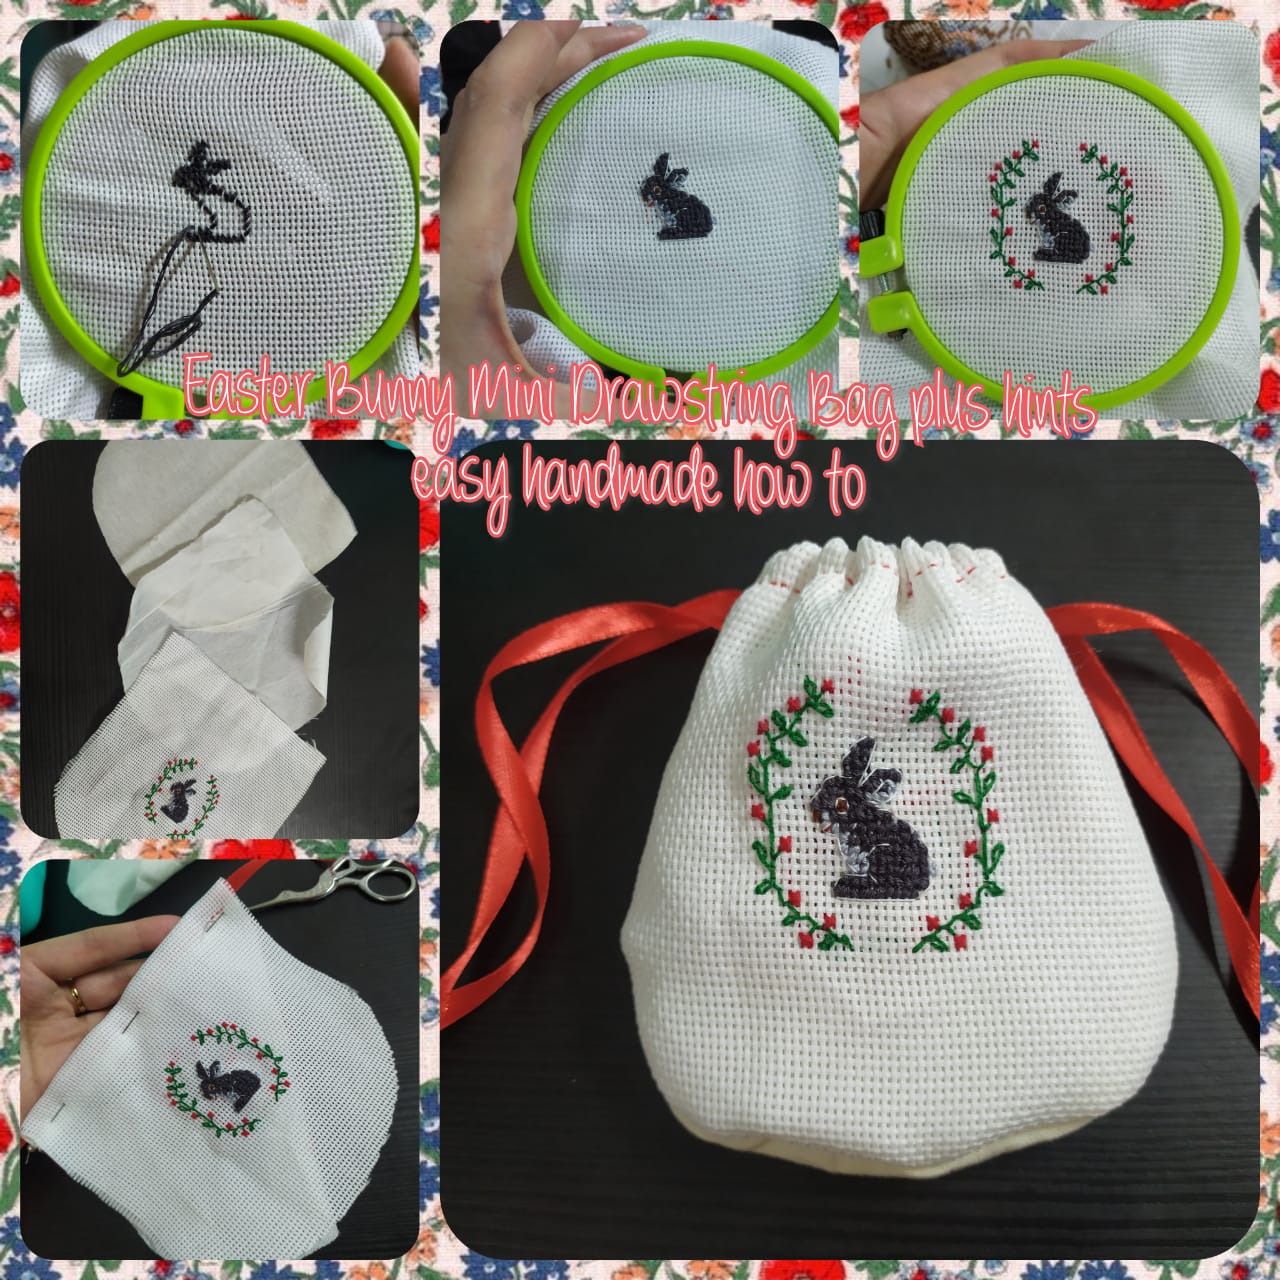 Hello, friends! <div class="text-justify">Easter is nearby, so yesterday i finally finished making this cute drawstring bag for easter. You could put anything inside, easter egg, chocolate or other things. It was fun to make and i will share the easiest way to make it.</div> # Materials and things needed: - a piece of unused paper - scissors - cross stitch fabric - two kind of natural fabrics: a thin one and a thicker one - embroidery hoop - embroidery floss in red, green, brown, white, light grey and grey colour. - embroidery needle - sewing needle - sewing thread (maroon, red and white) - pins - straight pin - red ribbon # How to make it: ## Cross Stitch Part <div class="text-justify">Hint: For the cross stitch we used 4 strains of floss, while the back stitch i used 2 strains of floss.</div> <div class="text-justify">First put the cross stitch fabric inside the embroidery hoop. Cross stitch the bunny with grey embroidery floss. Hint: Stitch from the outter to make it easier, so you would have the border line.</div> 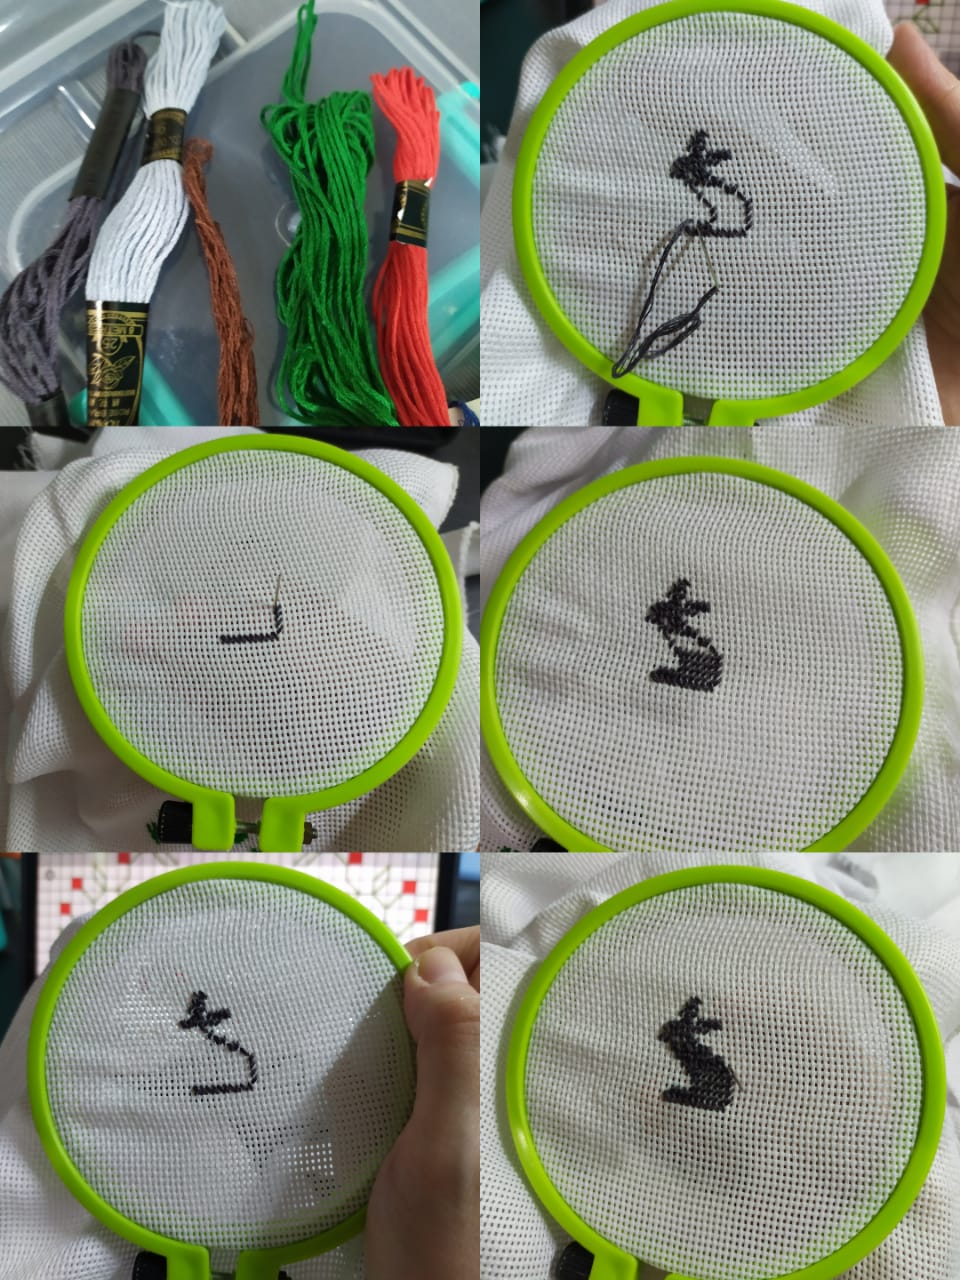 <div class="text-justify">Cross stitch the light grey for inside of the ears, the tummy and also tail. Cross stitch the eye with brown. Last back stitch with white. Hint: back stitch also the eye to make it clearer.</div> 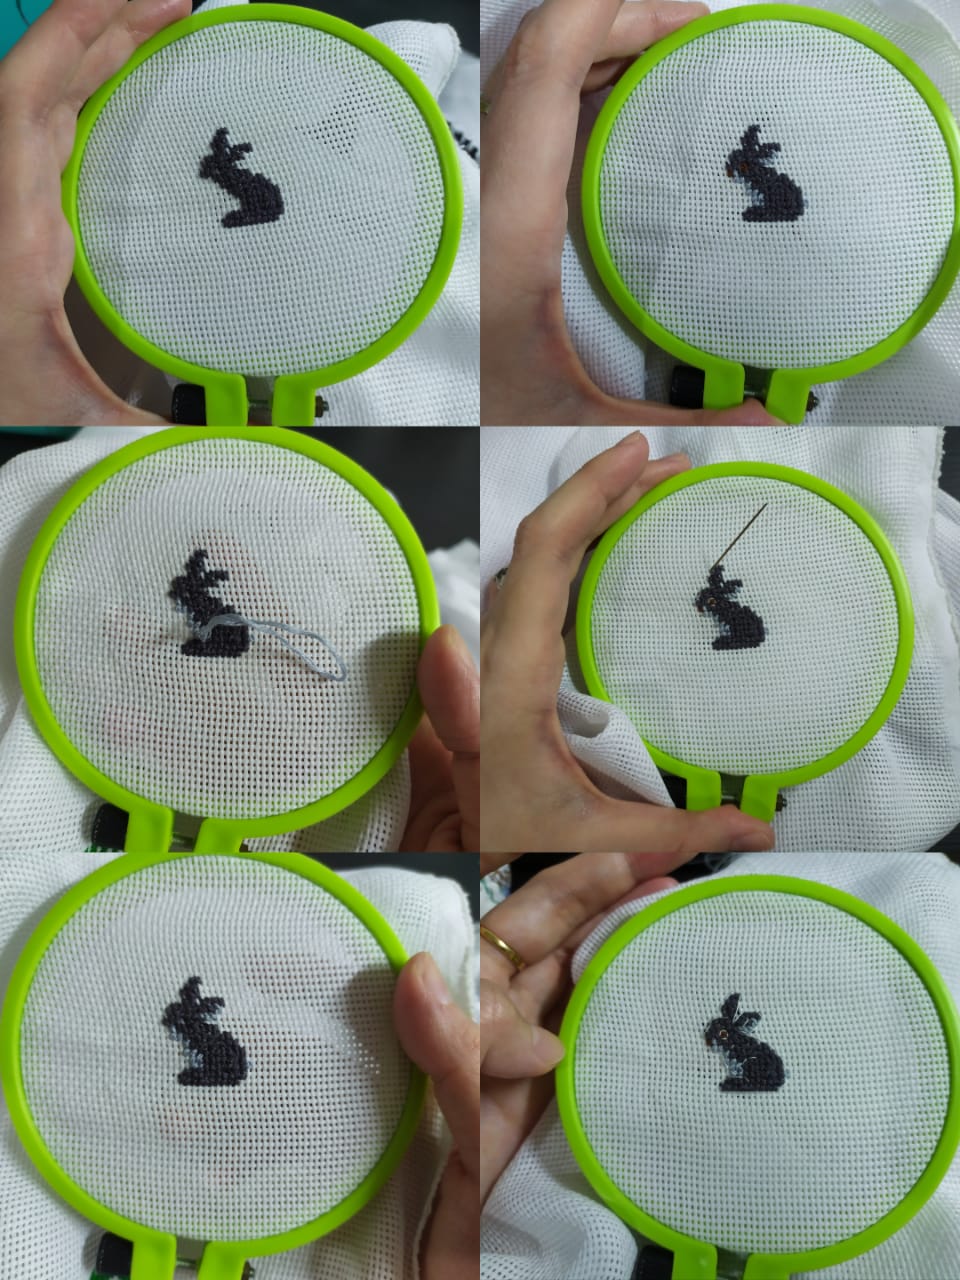 <div class="text-justify">Cross stitch red flowers around. Back stitch the green leaves. Remember to make it on left and right. For the flowers i cross stitch from right top to the right bottom, also do the same for the left side. Then back stitch with green for the right side.</div> 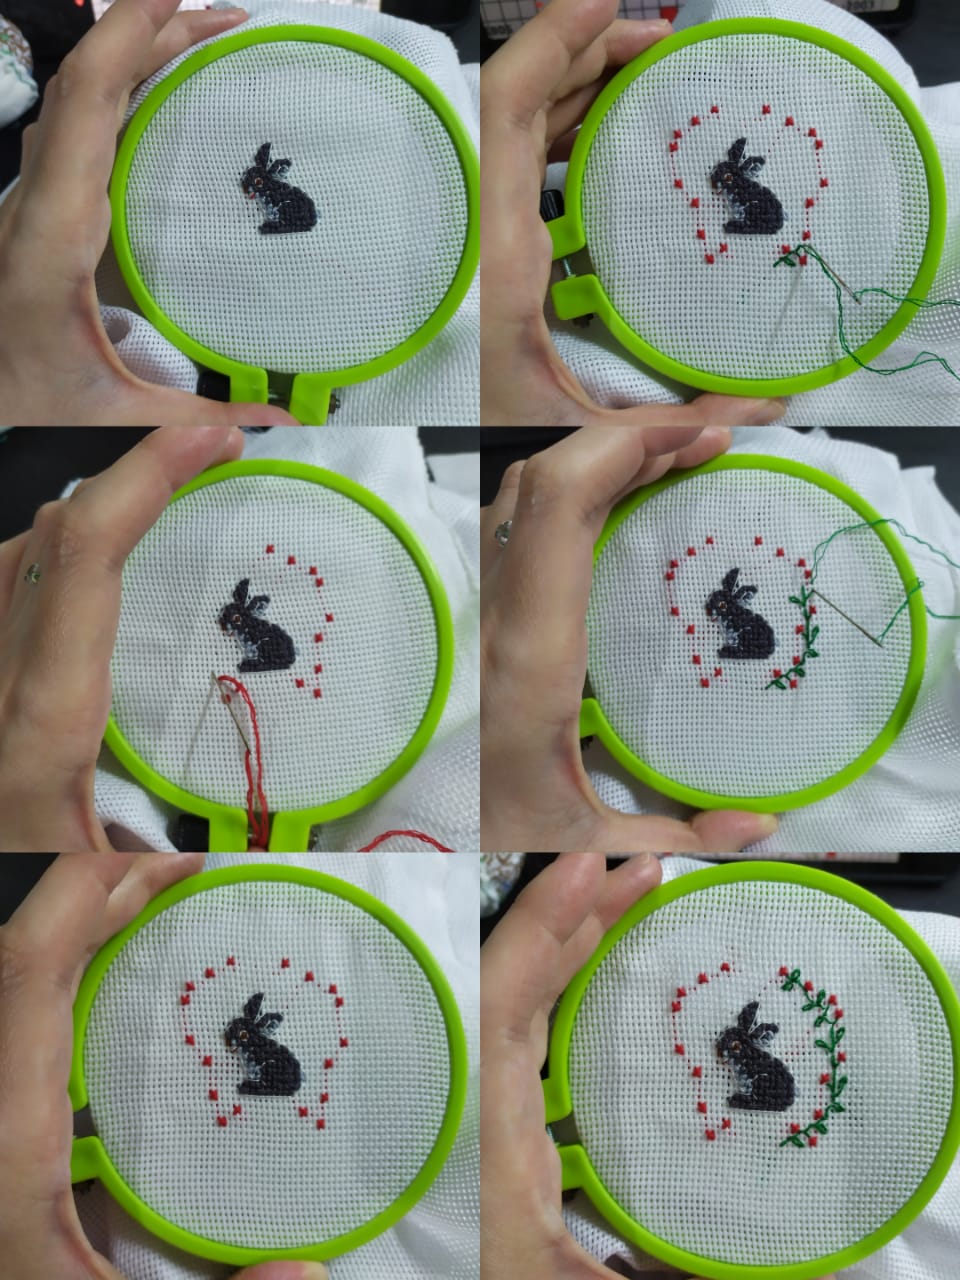 <div class="text-justify">Do the same for the left side then the cross stitch part is finished.</div> 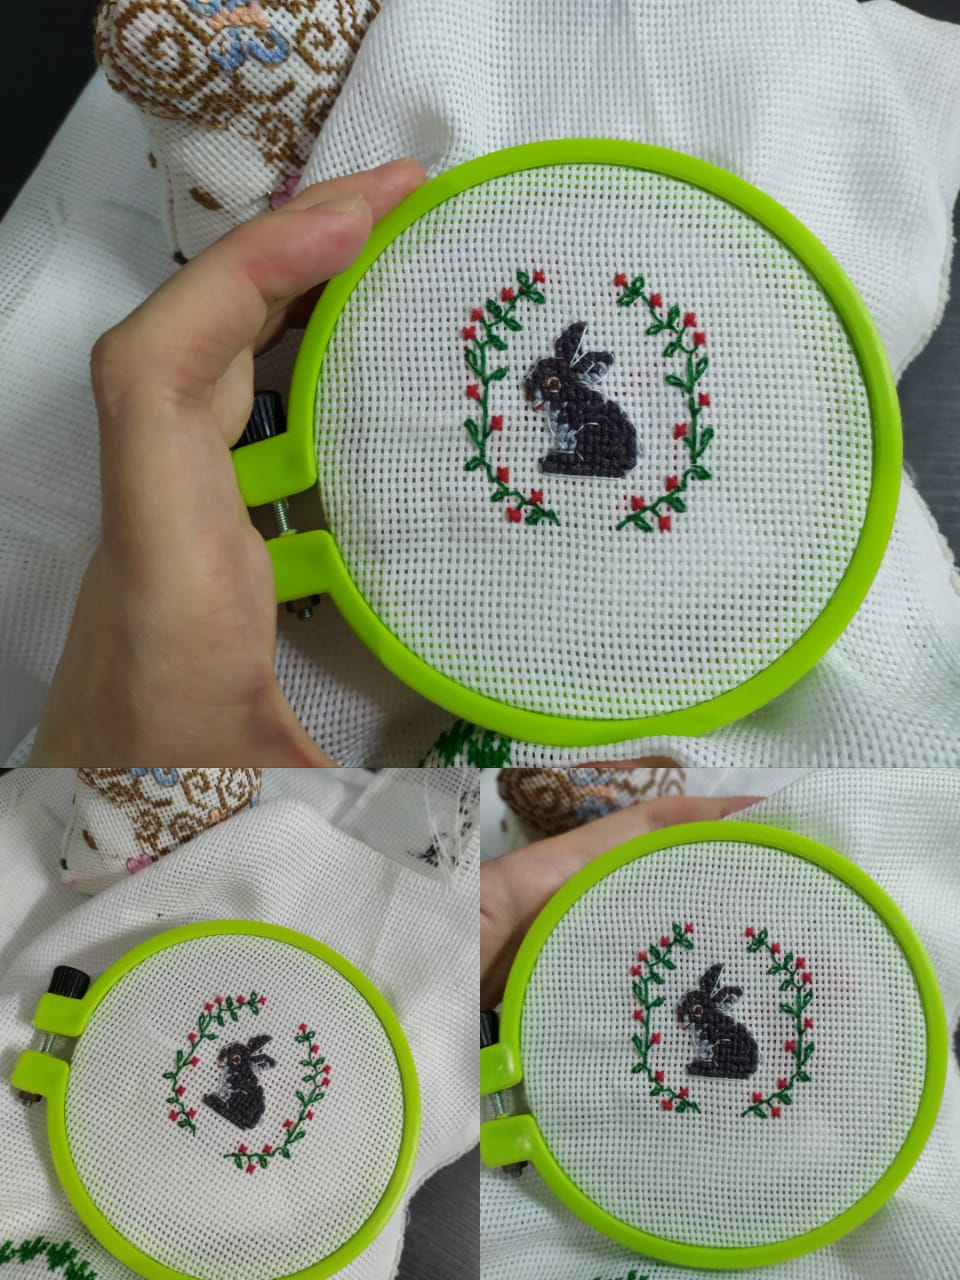 ## Handsewing Part <div class="text-justify">Cut the pattern on a piece of unused paper with scissors. Pin the pattern on the fabrics (all of the fabric i used here), one by one, cut them out. Hint: be careful when you cut the cross stitch fabric, make sure that the bunny a bit down from the top of it. Remember that we want to make the drawstring bag here.</div>  <div class="text-justify">For the front part, join the cross stitch fabric with a thin fabric with a sewing but fold the top part first. I used red thread for this part, used two strains. Hint: i used the straight pins to help me in handsewing it.</div> 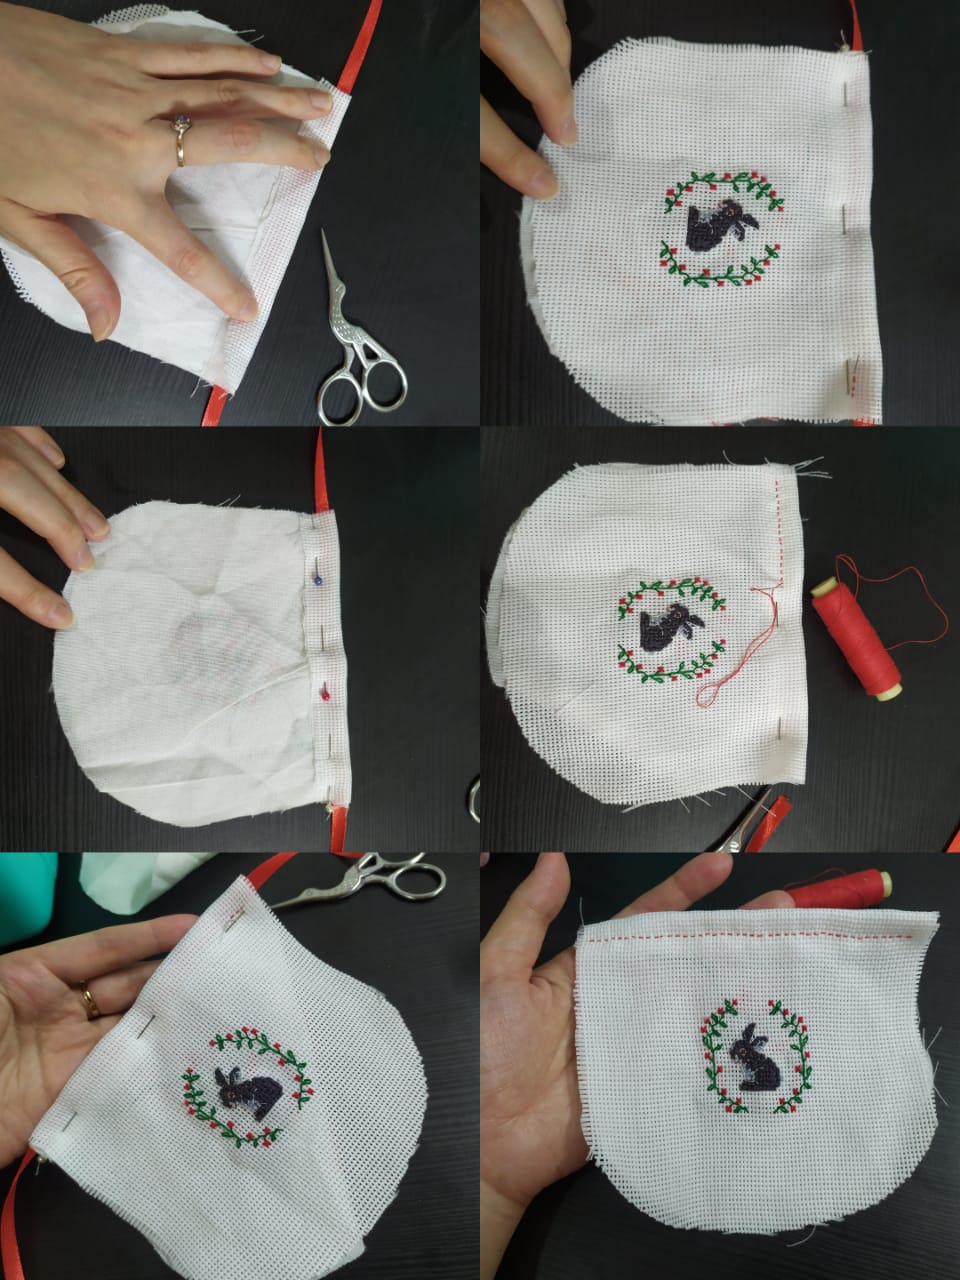 <div class="text-justify">Also fold a bit for the thick fabric for the back. I also used red double thread here. Hint: first i used the maroon thread to help sew it. It is called the helper, next after i had finished sewing with red, i released it.</div> 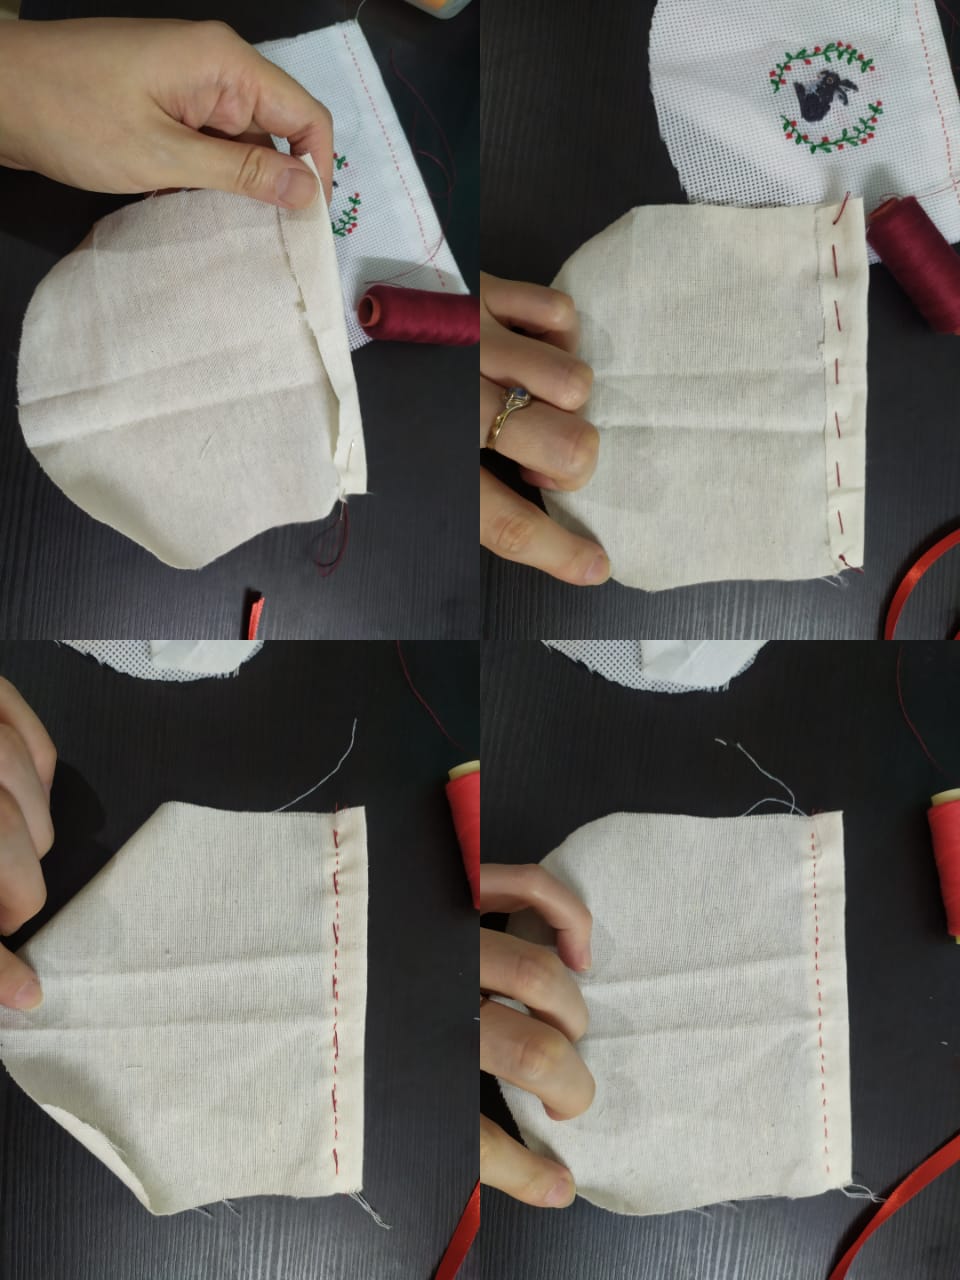 <div class="text-justify">Join the front and back part together with double white thread. Hint: do the same method, maroon sewing as the helper and release after the white sewing finished.</div>  <div class="text-justify">Turn it upside then put the ribbon inside for the back and front part. After finished, make two bundles on left and right. Hint: used the pin for this. You could see it more clearly from the pictures below.</div>  <div class="text-justify">Voila, it's finished. Now you could use the bunny to put chocolate, candies or even easter egg.</div> 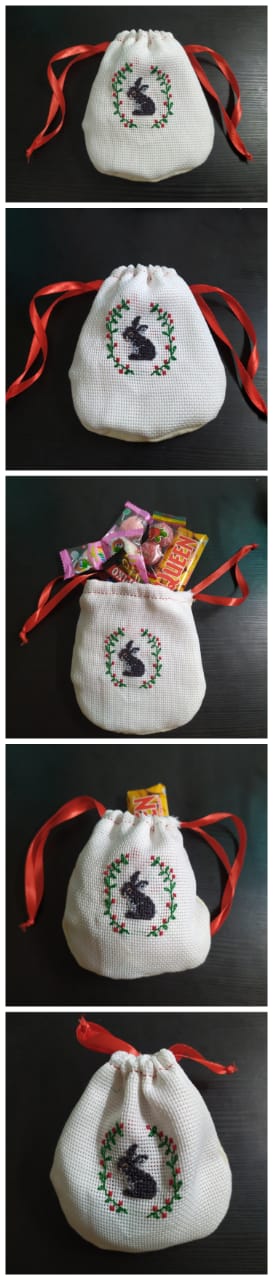 Happy early easter!
👍 tonimontana.neo, toni.ccc, toni.pal, moeenali, cyberspacegod, build.del, oldman28, aleister, life-timer, portugalcoin, warnas, cn-trail, tensaix2j, justyy, btshuang, devilwsy, aaronli, shenchensucc, davidmendel, everrich, syh7758520, nicolemoker, mrspointm, yellowbird, winniex, nileelily, cheva, kirato, nostalgic1212, also.einstein, ericet, aellly, huangzuomin, xiaoliang, i-d, chick-fil-a, redlobster, chilis, olive-garden, shine.wong, sunai, julian2013, artsymelanie, cherryzz, davidchen, happygoluckynow, mayiloveyou, cn-hello, mylord1992, kgame, hertz300, koei, steem-drivers, xiaoq.sports, annzhao, steem.buzz, wongshiying, janiceting, guyverckw, wilkinshui, marylaw, krischy, biuiam, mrpointp, mygod, liumei, waiyee422, davidke20, jianan, windowglass, zmx, angelina6688, maiyude, john371911, emmali, shentrading, andrewma, ronbong, robertyan, xiaoyuanwmm, kidsreturn, team-cn, fiveguys, marcoy2j, bonefish, shuxuan, melaniewang, wenxuecity, mitbbs, raynopssgold, annepink, teamcn-shop, kelvinzhang, honey00, morningshine, devyleona, goodsimplelife, yanhan, lovelemon, delta-clan, boylikegirl, ericetchen, ladyalkaid, lnakuma, kenchung1, catanknight, littleksroad, kitrewq000, weiweilove, zeteli, leir, honoru, hmayak, teamcn-news, elizacheng, kimzwarch, fun2learn, fishbb, liewsc, tanzy, fishdd, archisteem, tydebbie, ybeyond, bichen, steemegg, nympheas, aaronli.sct, jacktan, jfdesousa7, rosatravels, zerofive, kymio, veenang, fishlucy, sasaadrian, maxsieg, abbenay, jicrochet, zullyscott, eturnerx, marleyn, milamarkn, vicnzia, wolfofnostreet, neumannsalva, needleworkmonday, crosheille, ocd, roelandp, kharrazi, therealwolf, critic-on, jlsplatts, itchyfeetdonica, ricardo993, madefrance, miroslavrc, ocdb, rem-steem, squareonefarms, blocktrades, fiveboringgames, steempress, walterjay, detlev, ma1neevent, dante31, howo, hanggggbeeee, eonwarped, smartmarket, ocd-witness, sanderjansenart, racibo, indigoocean, nateaguila, olumzy, athunderstruck, athomewithcraig, zeesh, ausbitbank, thatsweeneyguy, paulmoon410, smartsteem, variedades, kevinwong, marblely, crypto-gamer, tombstone, epicdice, dandays, obsesija, jayna, gabrielatravels, lightcaptured, daniky, soyunasantacruz, kemmyb, originate, mammasitta, beerlover, wandergirl, yo-hoho,