Devil Gundam: Shield Modification Part 1
gundam·@devytan·
0.000 HBDDevil Gundam: Shield Modification Part 1
Hi guys! Here are my update on Project Devil Gundam. Today I'm going to make a custom shield for the Devil Gundam. I used the gundam face from the Devil Gundam and turned it into a shield that will be mounted on the back. ### Custom Shield to be Mounted on the Back  ### Creating a Connector for the Gundam Face 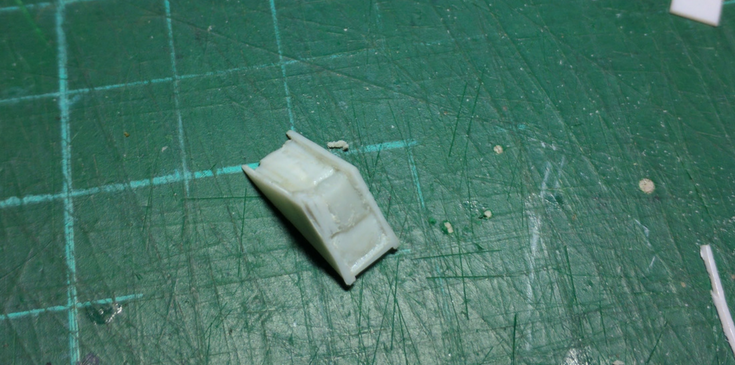 This was a scrap from my previous modification when I was making a 3 way connector. I reshape this triangle to give it more even surface by using several pla plates. 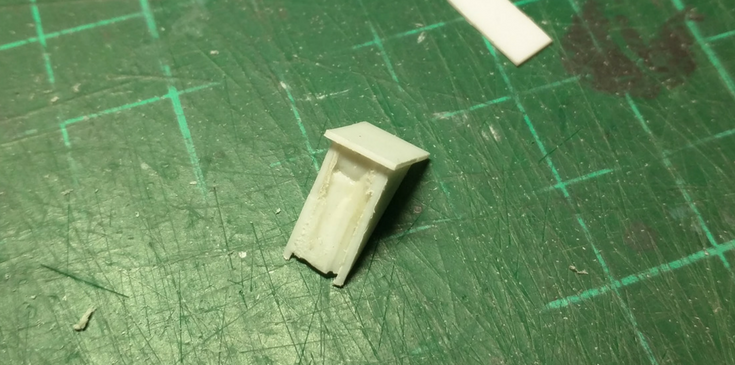 ### Drill Carefully Using Manual Hand Drill 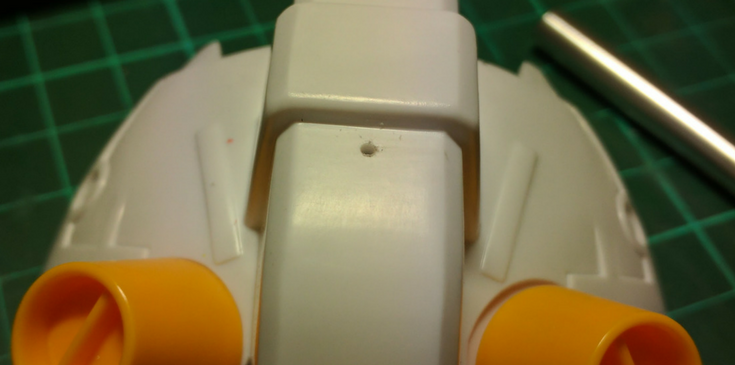 This is where the connector will go into later. ### Marked Using Pencil 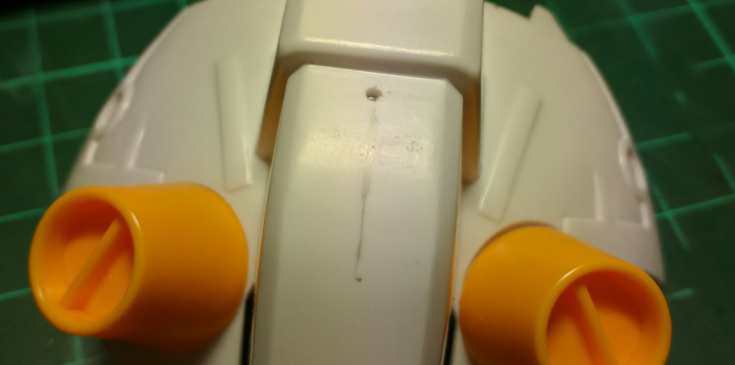 ### Increase the Drill Size Gradually 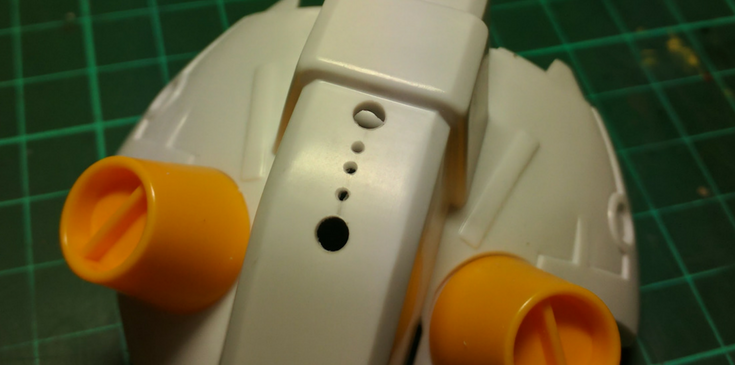 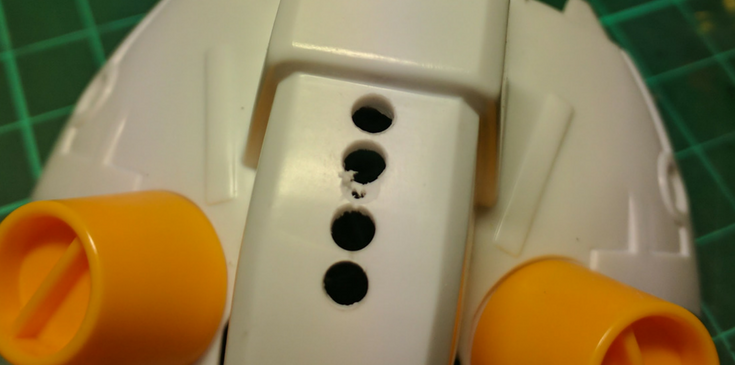 ### Marked Using Scribing Pen 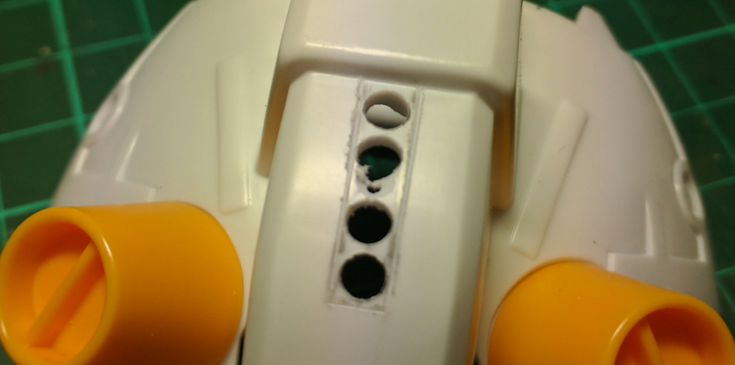 ### Cleanup Using Hobby Knife 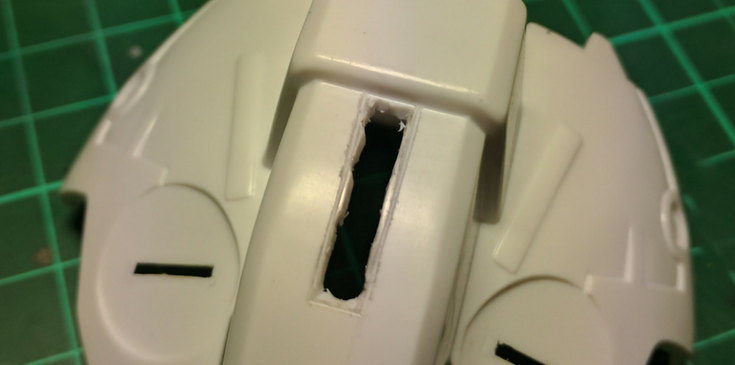 ### More Cleanup 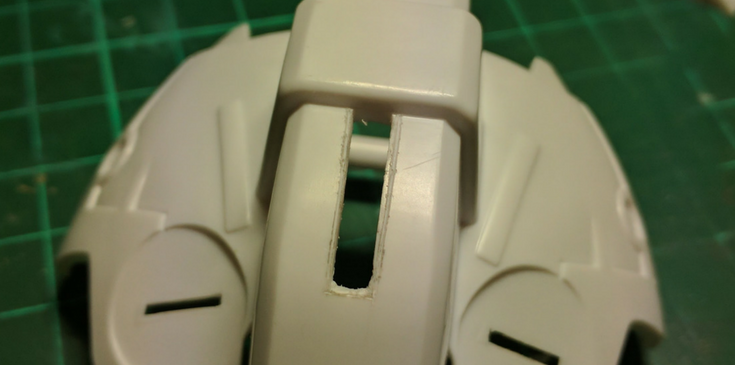 ### Cleanup Using File 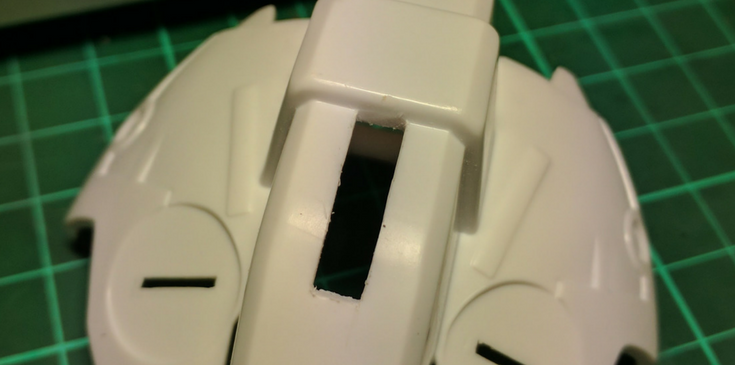 I will need to wait for the connector to properly cure since I'm using tamiya cement to glue the pla plates together. Also, still need to clean up the connector tomorrow to make sure it has a smooth surface. Then I have to add the connector itself so it would properly hold the mask/gundam face. So, those are my updates for today. Keep on building! Keep on steeming! Have a nice day!
👍 veerall, kxitizraj, shuhaib123, afnanbadshah, italianguy, macspeaks, oyver, knygarium, alejandromata, mohamed118b, hatuvera, corhevs, marylee2480, ramprasad, indralajuena, sheikhsayem, guidescrypto, lakra34, divk, syedazharuddin, banglaa, roboforex, rongtuli, tripto, linuslee0216, shaffrimohd, samirich, hridoy23, isaganispeaks, lemmybe, w-inv, vempromundo, kivsha, sameer777, anforo, mindforfun2, natord, muhammad.asad, neumannsalva, malekalmsaddi, devytan,