First Arduino lesson: Blinking LEDs
arduino·@etschgi1·
0.000 HBDFirst Arduino lesson: Blinking LEDs
# Hi there!
#
### This is my first basic tutorial on how to program your Arduino microcontroller
#
### And that's your finished result, hopefully
https://youtu.be/ahmqiqXWxEk
#
#### What you need:
1. Microcontroller (Arduino, Elegoo,...)
2. two 330 Ohms resistors
3. a blue and a red LED
...and of course some jumper wires
#
#### Ok let's start!
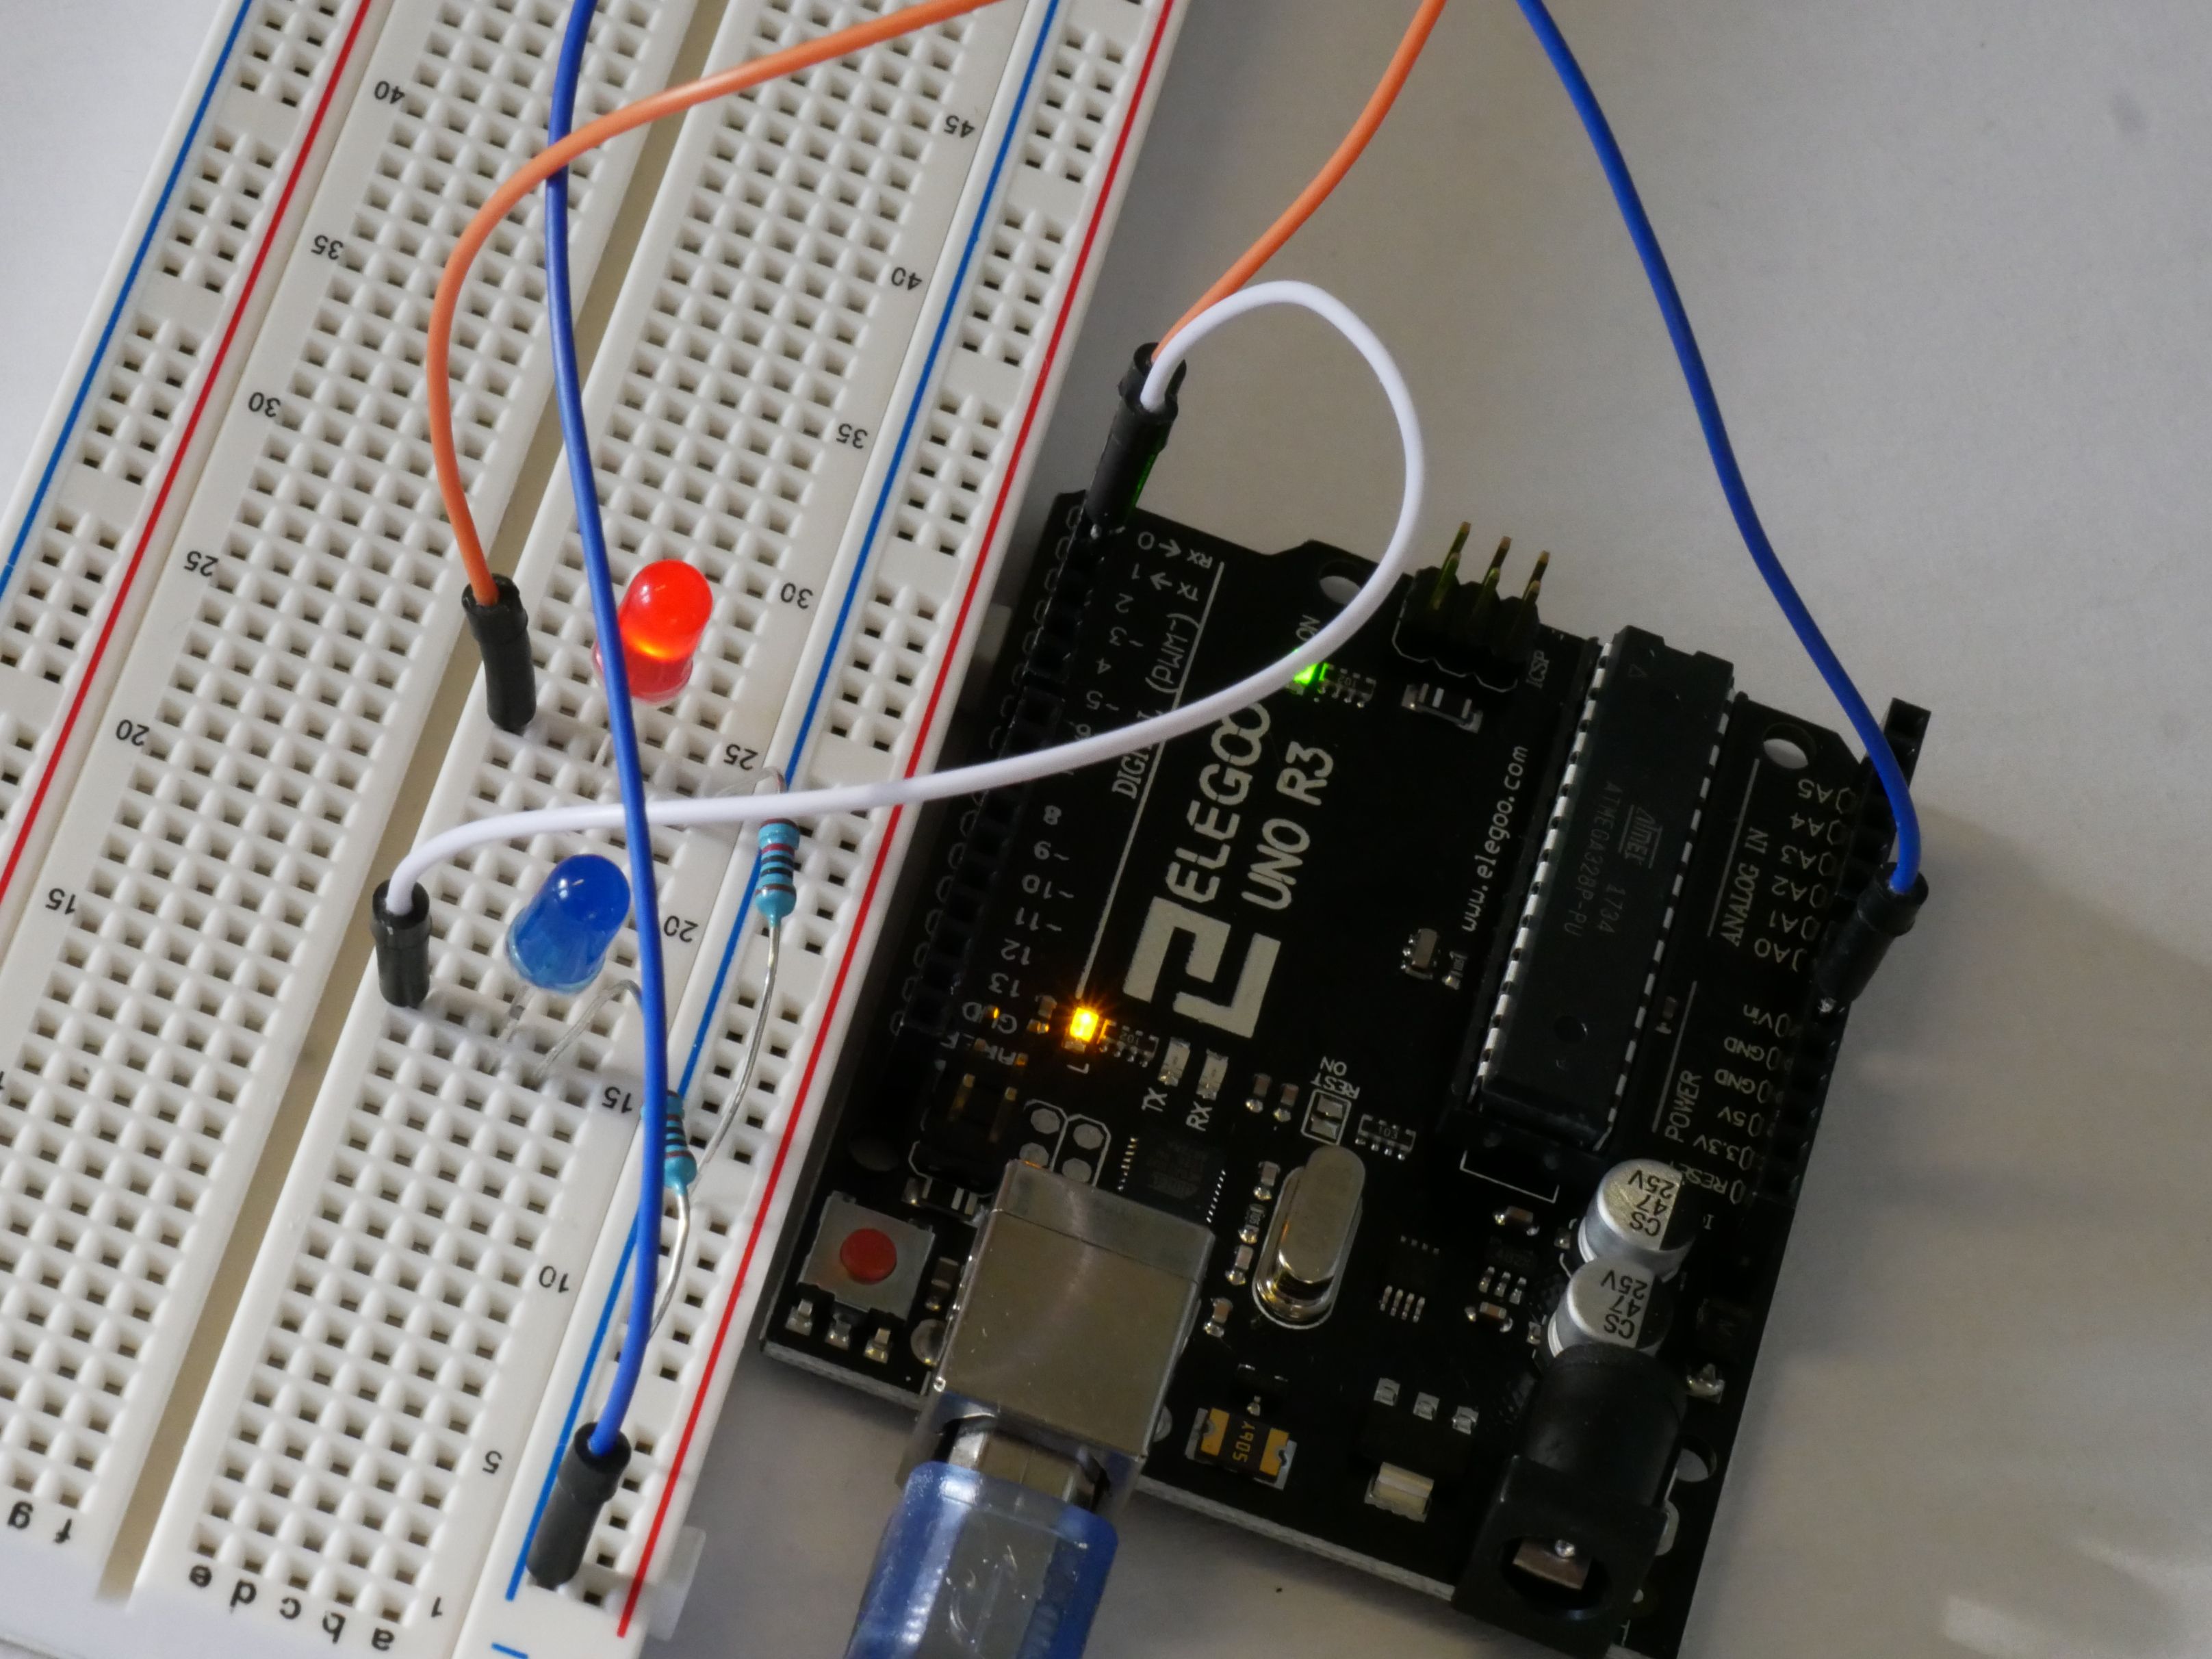
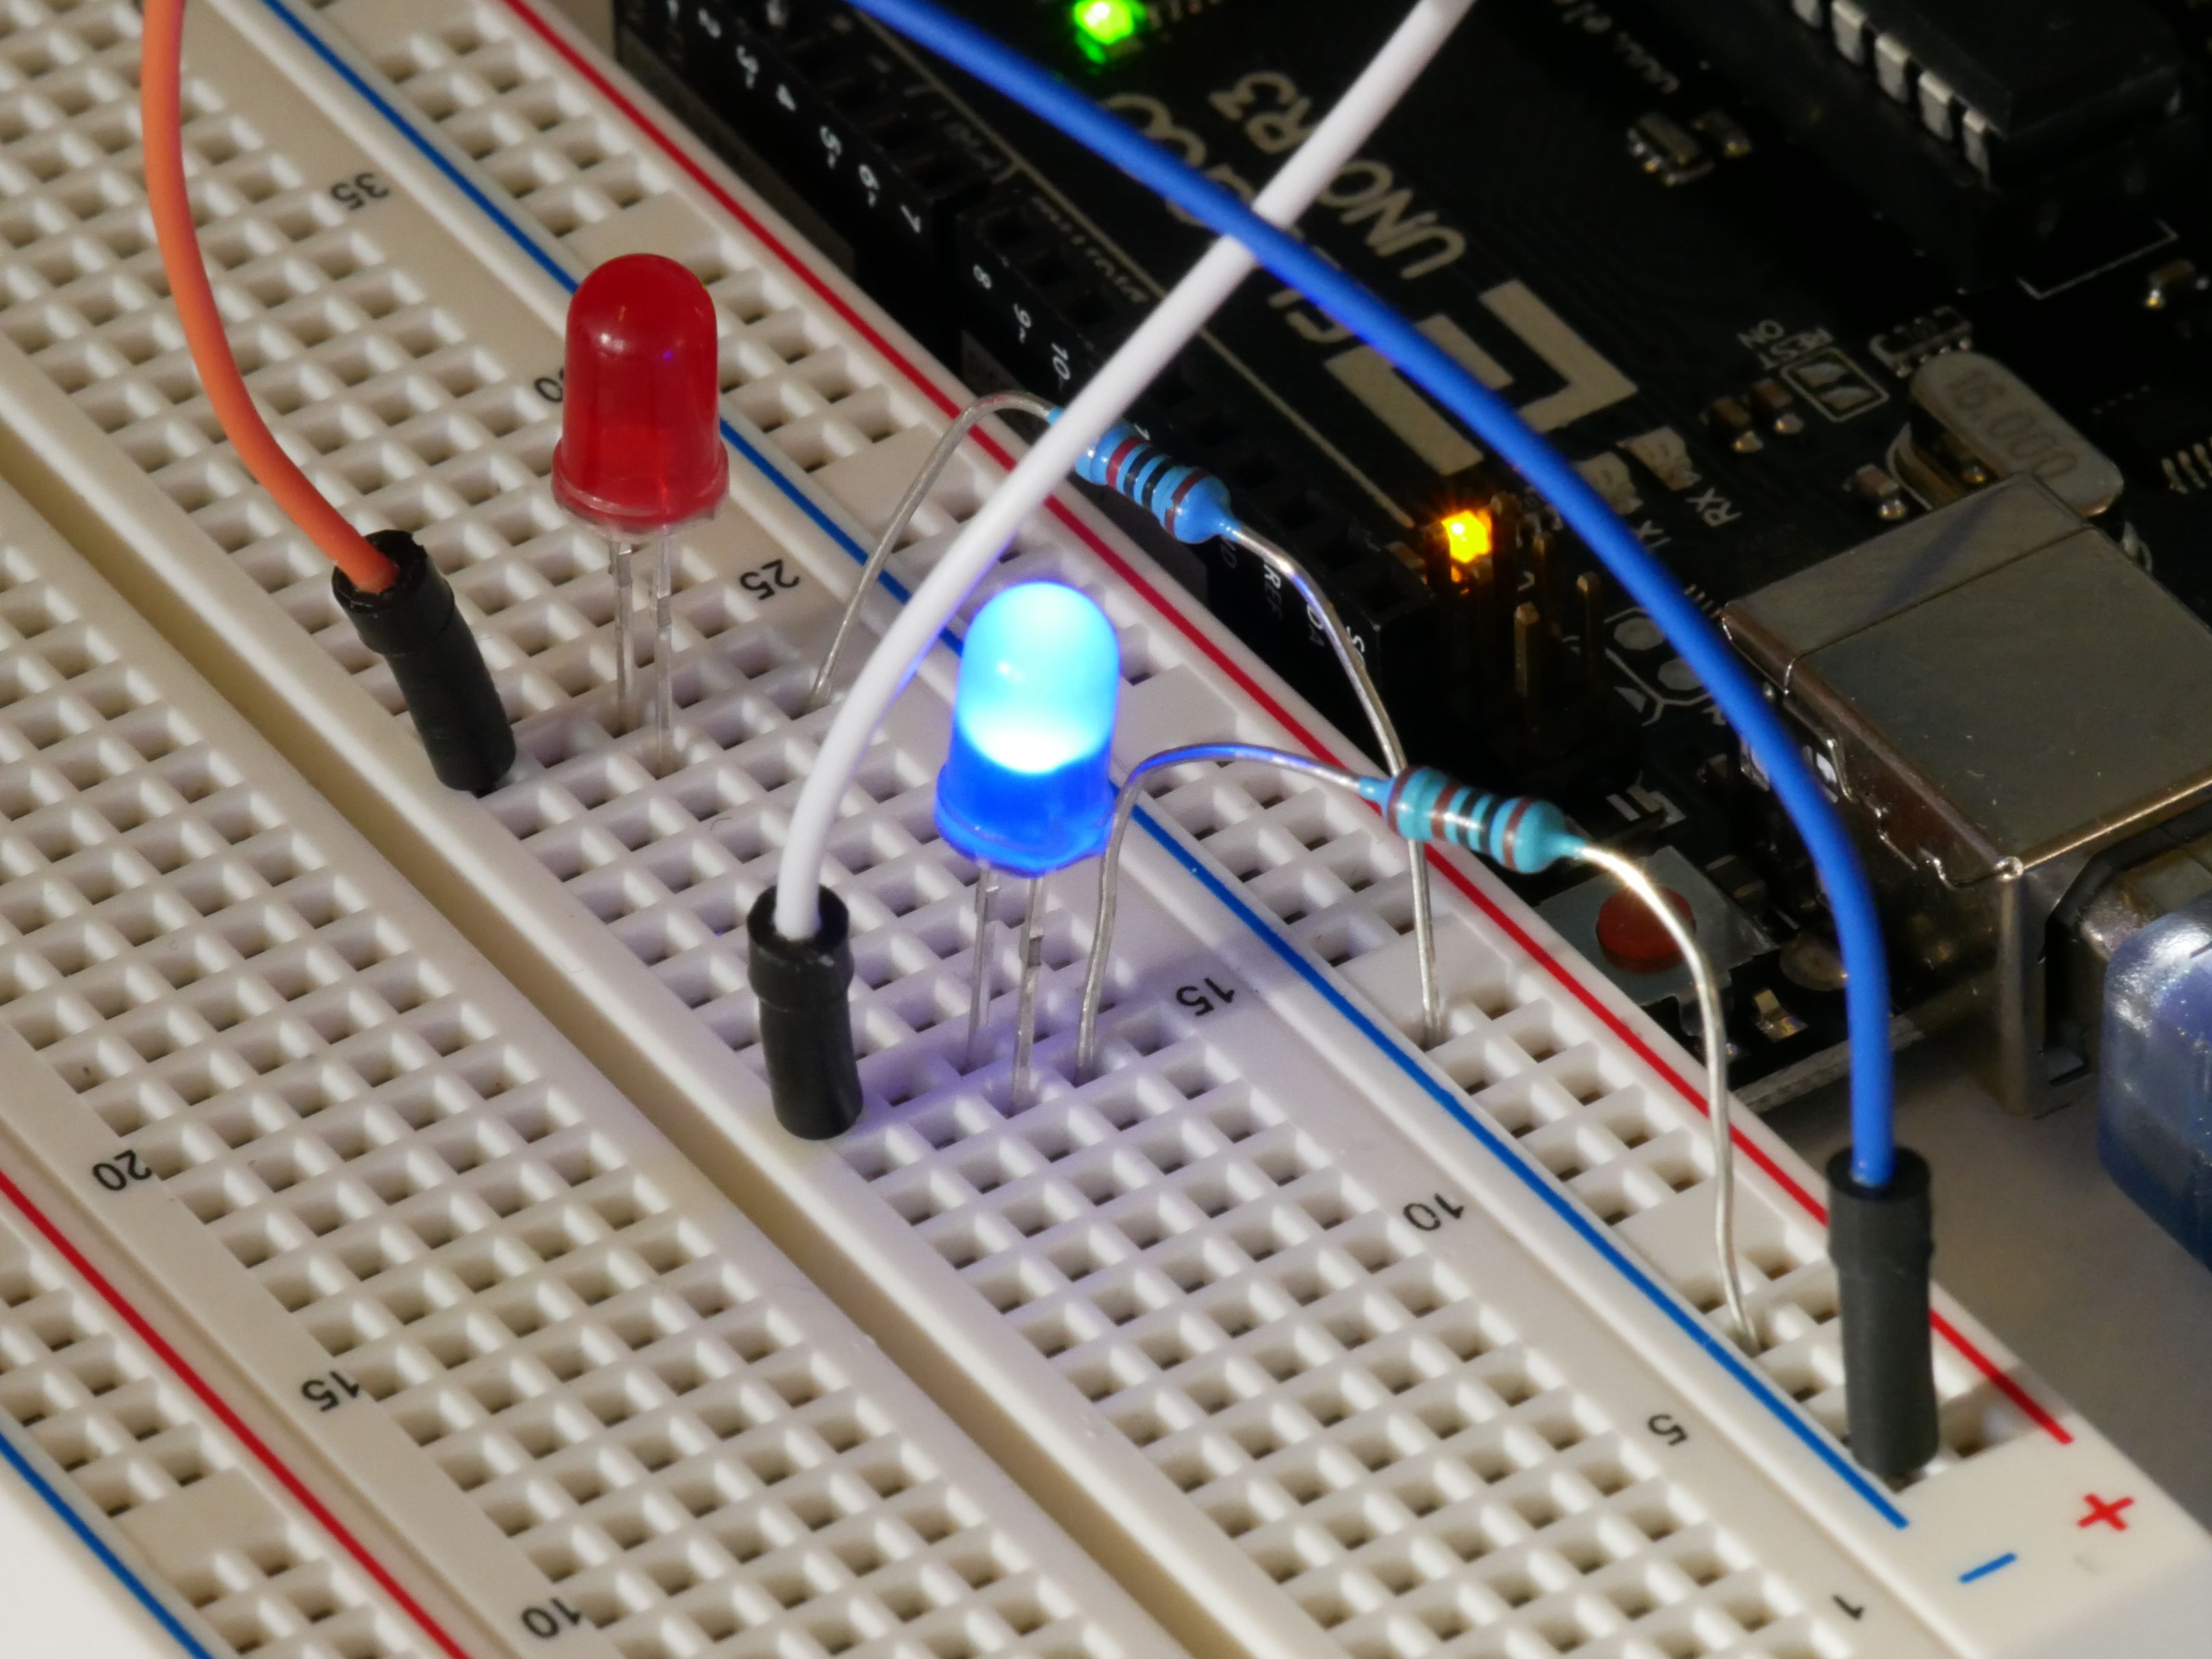
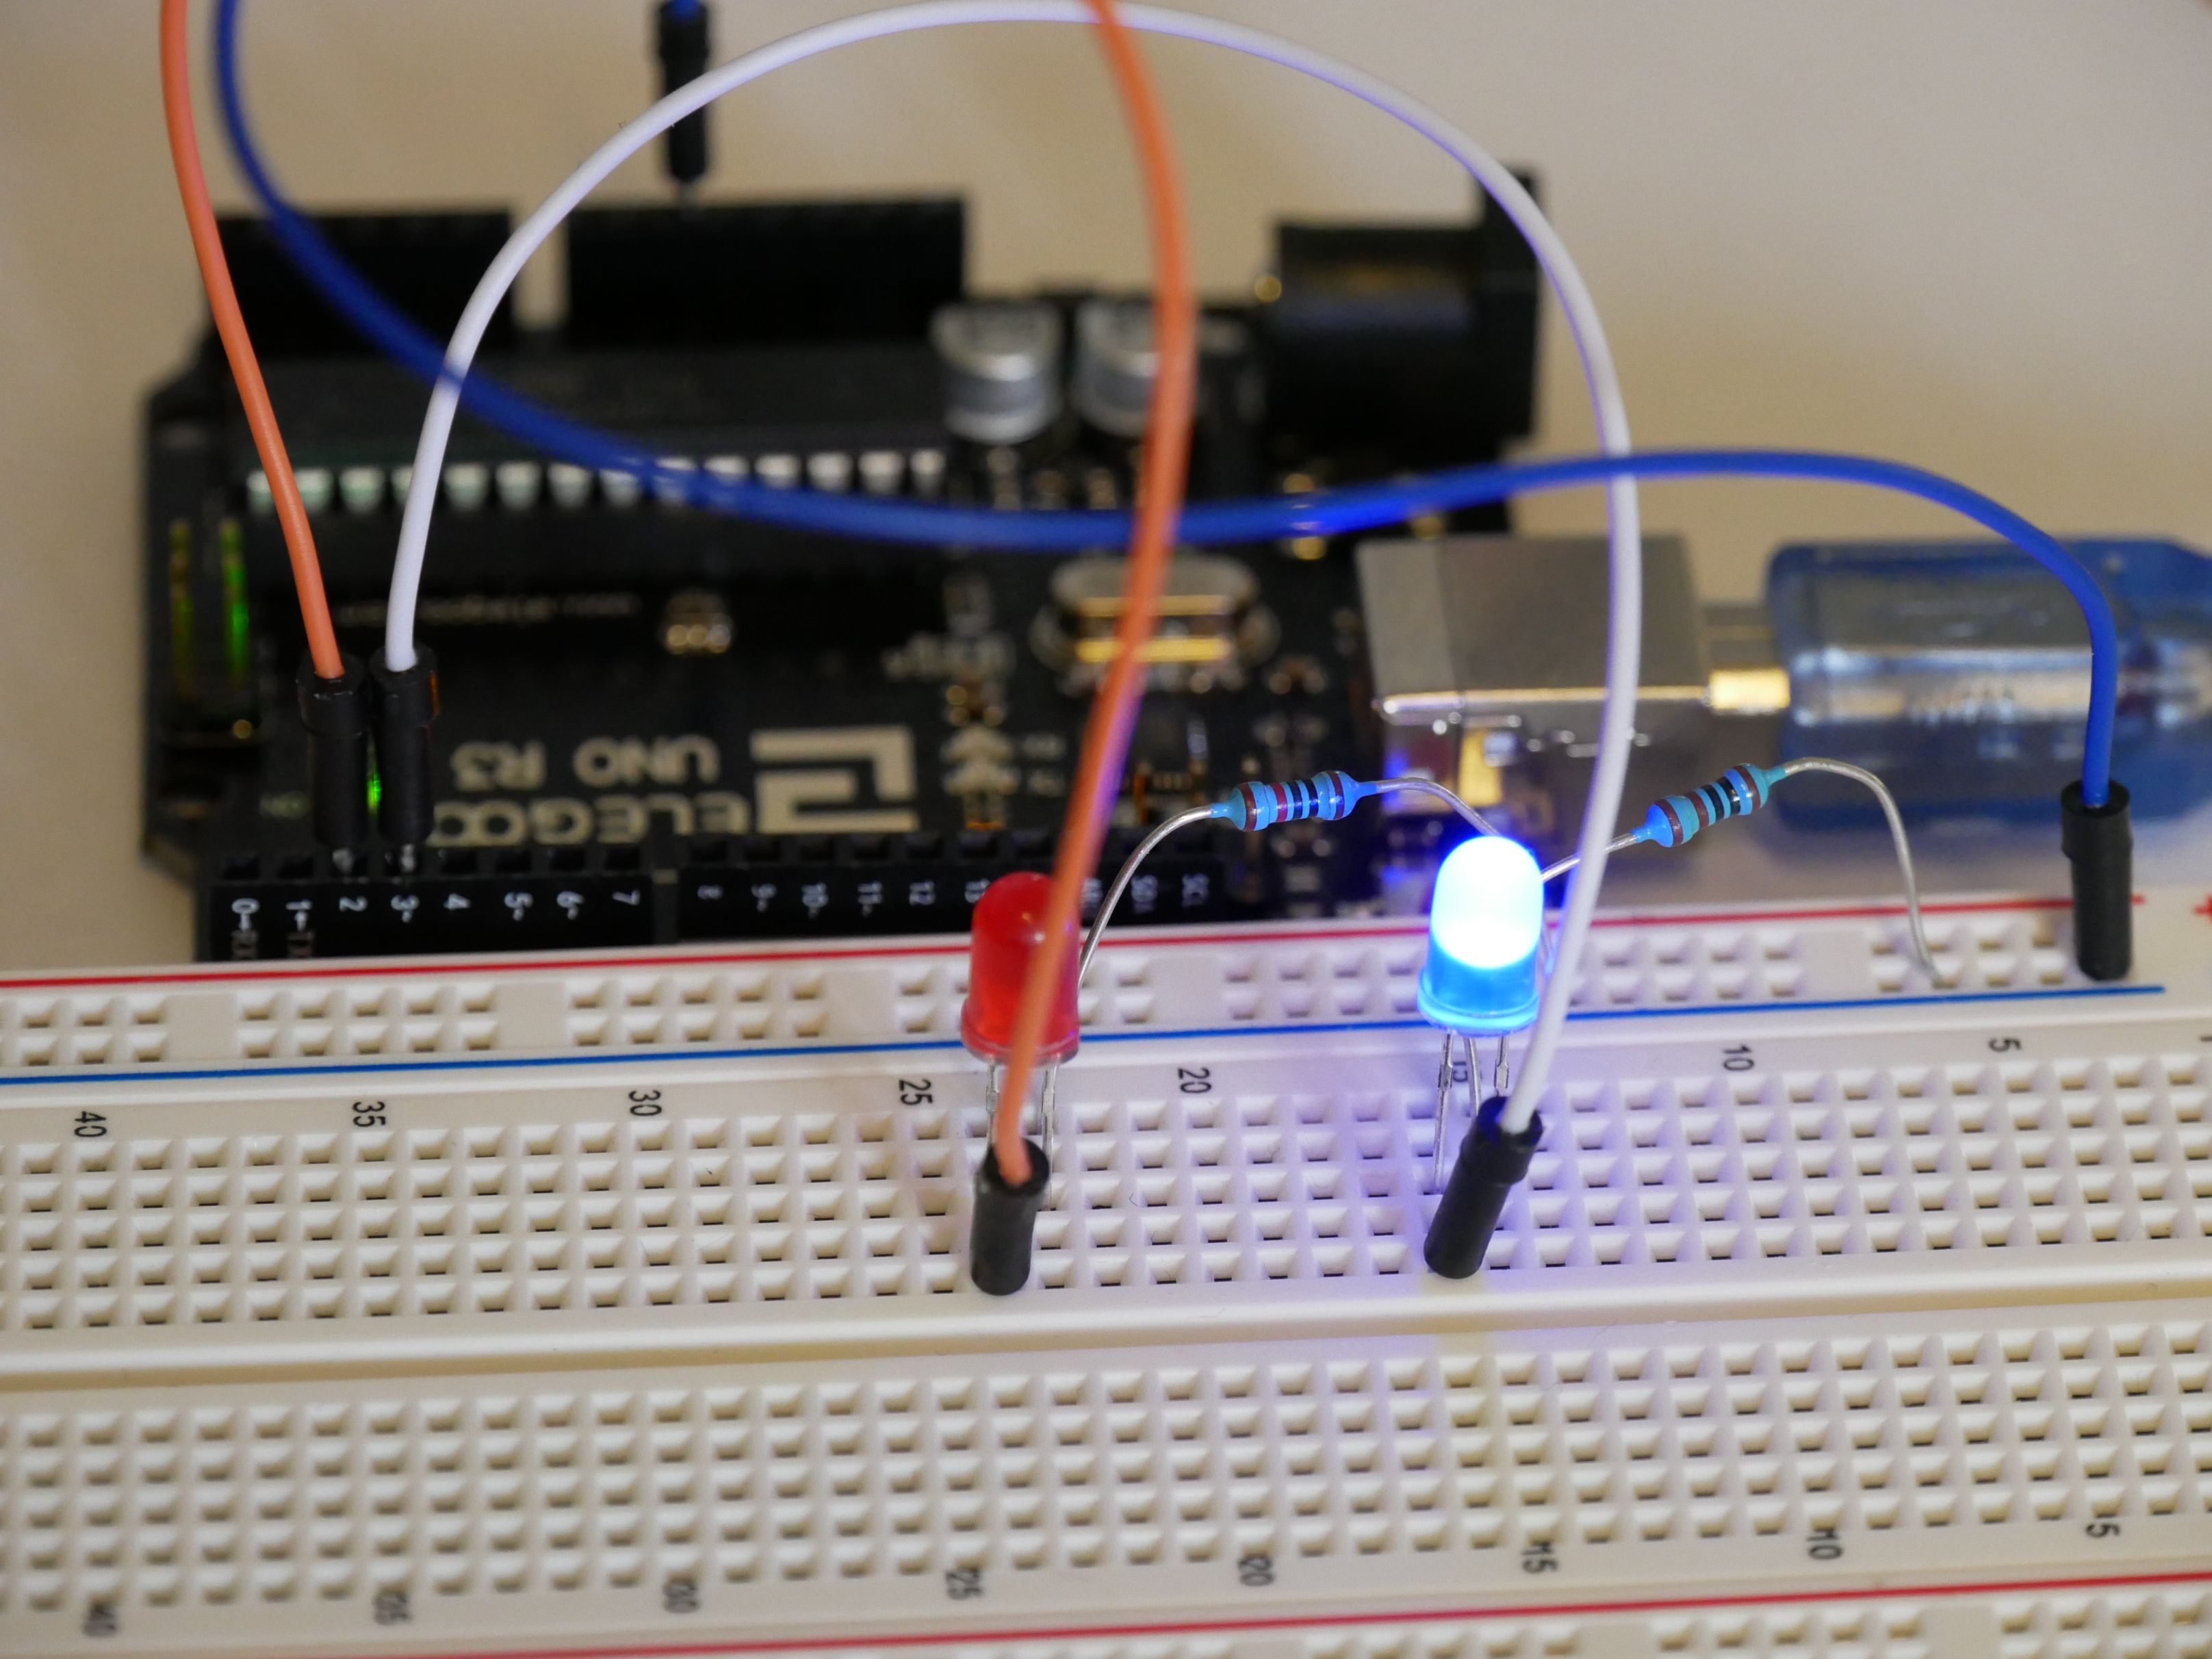
So first of, connect the red and the blue LED to your Arduino.
It's __importante__ to connect them the right way around.
Note that the longer Leg of the LED is the + and the shorter the - pole.
Connect the - to ground and + to the corresponding digital pins __red__ to pin __2__ and __blue__ to pin __1__.
__*Don't forget to use your 330 Ohms resistors in each circute as shown below, to avoid LED heat ups or damage.__*
Or just check out the pictures below.
##
###
###
##
#### Functions and Commands to learn:
1. _#define_ (to name a port e.g.: _#define blueLED 3_) Note that you must not add a ; after a #define
2. _int_ (to clarify a variable type int means Integer and it can store a value between -32,768 and +32,767 e.g.: _int delaytime = 1000;_)
3. _pinMode()_ (to set a pin as an OUTPUT or INPUT e.g.: _pinMode(blueLED, OUTPUT);_)
4. _digitalWrite()_ (to turn a signal on (HIGH) or off (LOW) e.g.: _digitalWrite(blueLED, HIGH);_)
5. _delay()_ (waits for a time in milliseconds e.g.: _delay(delaytime);_ You can also use variables!)
#### Next: program your microcontroller
First we have to think about our goal. The LEDs should blink alternating between blue and red.
To do that you have to set up your LEDs as OUTPUT, then you can write your loop. The loop should contain a function that turns on the blue LED, one waiting a delaytime till another turns the blue one off and the red one on; on more delaytime and a function that turns red off and then the loop starts again from top.
Here's my code:
>#define blueLED 3 //Defines digital Port 3 as blueLED
#define redLED 2 //Defines digital Port 2 as redLED
int delaytime = 1000; //Sets the delaytime (How long one LED is turned on)
//
void setup() { //Setup only runs once
pinMode(blueLED, OUTPUT); //Defines blueLED as an Output
pinMode(redLED, OUTPUT); //Defines redLED as an Output
}
//
void loop() {// Loop repeats itself the whole time until you shut your controller down
digitalWrite(blueLED, HIGH); //turns blueLED on
delay(delaytime);//arduino sleeps for delaytime (currently at 1000 ms)
digitalWrite(blueLED, LOW);//turns blueLED off
digitalWrite(redLED,HIGH);//turns redLED on
delay(delaytime);//arduino sleeps again for delaytime
digitalWrite(redLED, LOW);//turns redLED off
//Loop repeats itself
}
### And don't forget to upvote and resteem!!! 😛