Police Lights/Horn with microcontroller
arduino·@etschgi1·
0.000 HBDPolice Lights/Horn with microcontroller
# Hi there!
#
### in this post i'll show you how to build your own police lights/horn.
#
#### That's what it looks like:
https://youtu.be/y4IbJgYYbls
#### What you need:
1. Microcontroller (Arduino, Elegoo,...)
2. three 330 Ohms resistors
3. a blue and a red LED
4. a buzzer for sound playback
5. a button
...and of course some jumper wires
#
#### Ok let's start!
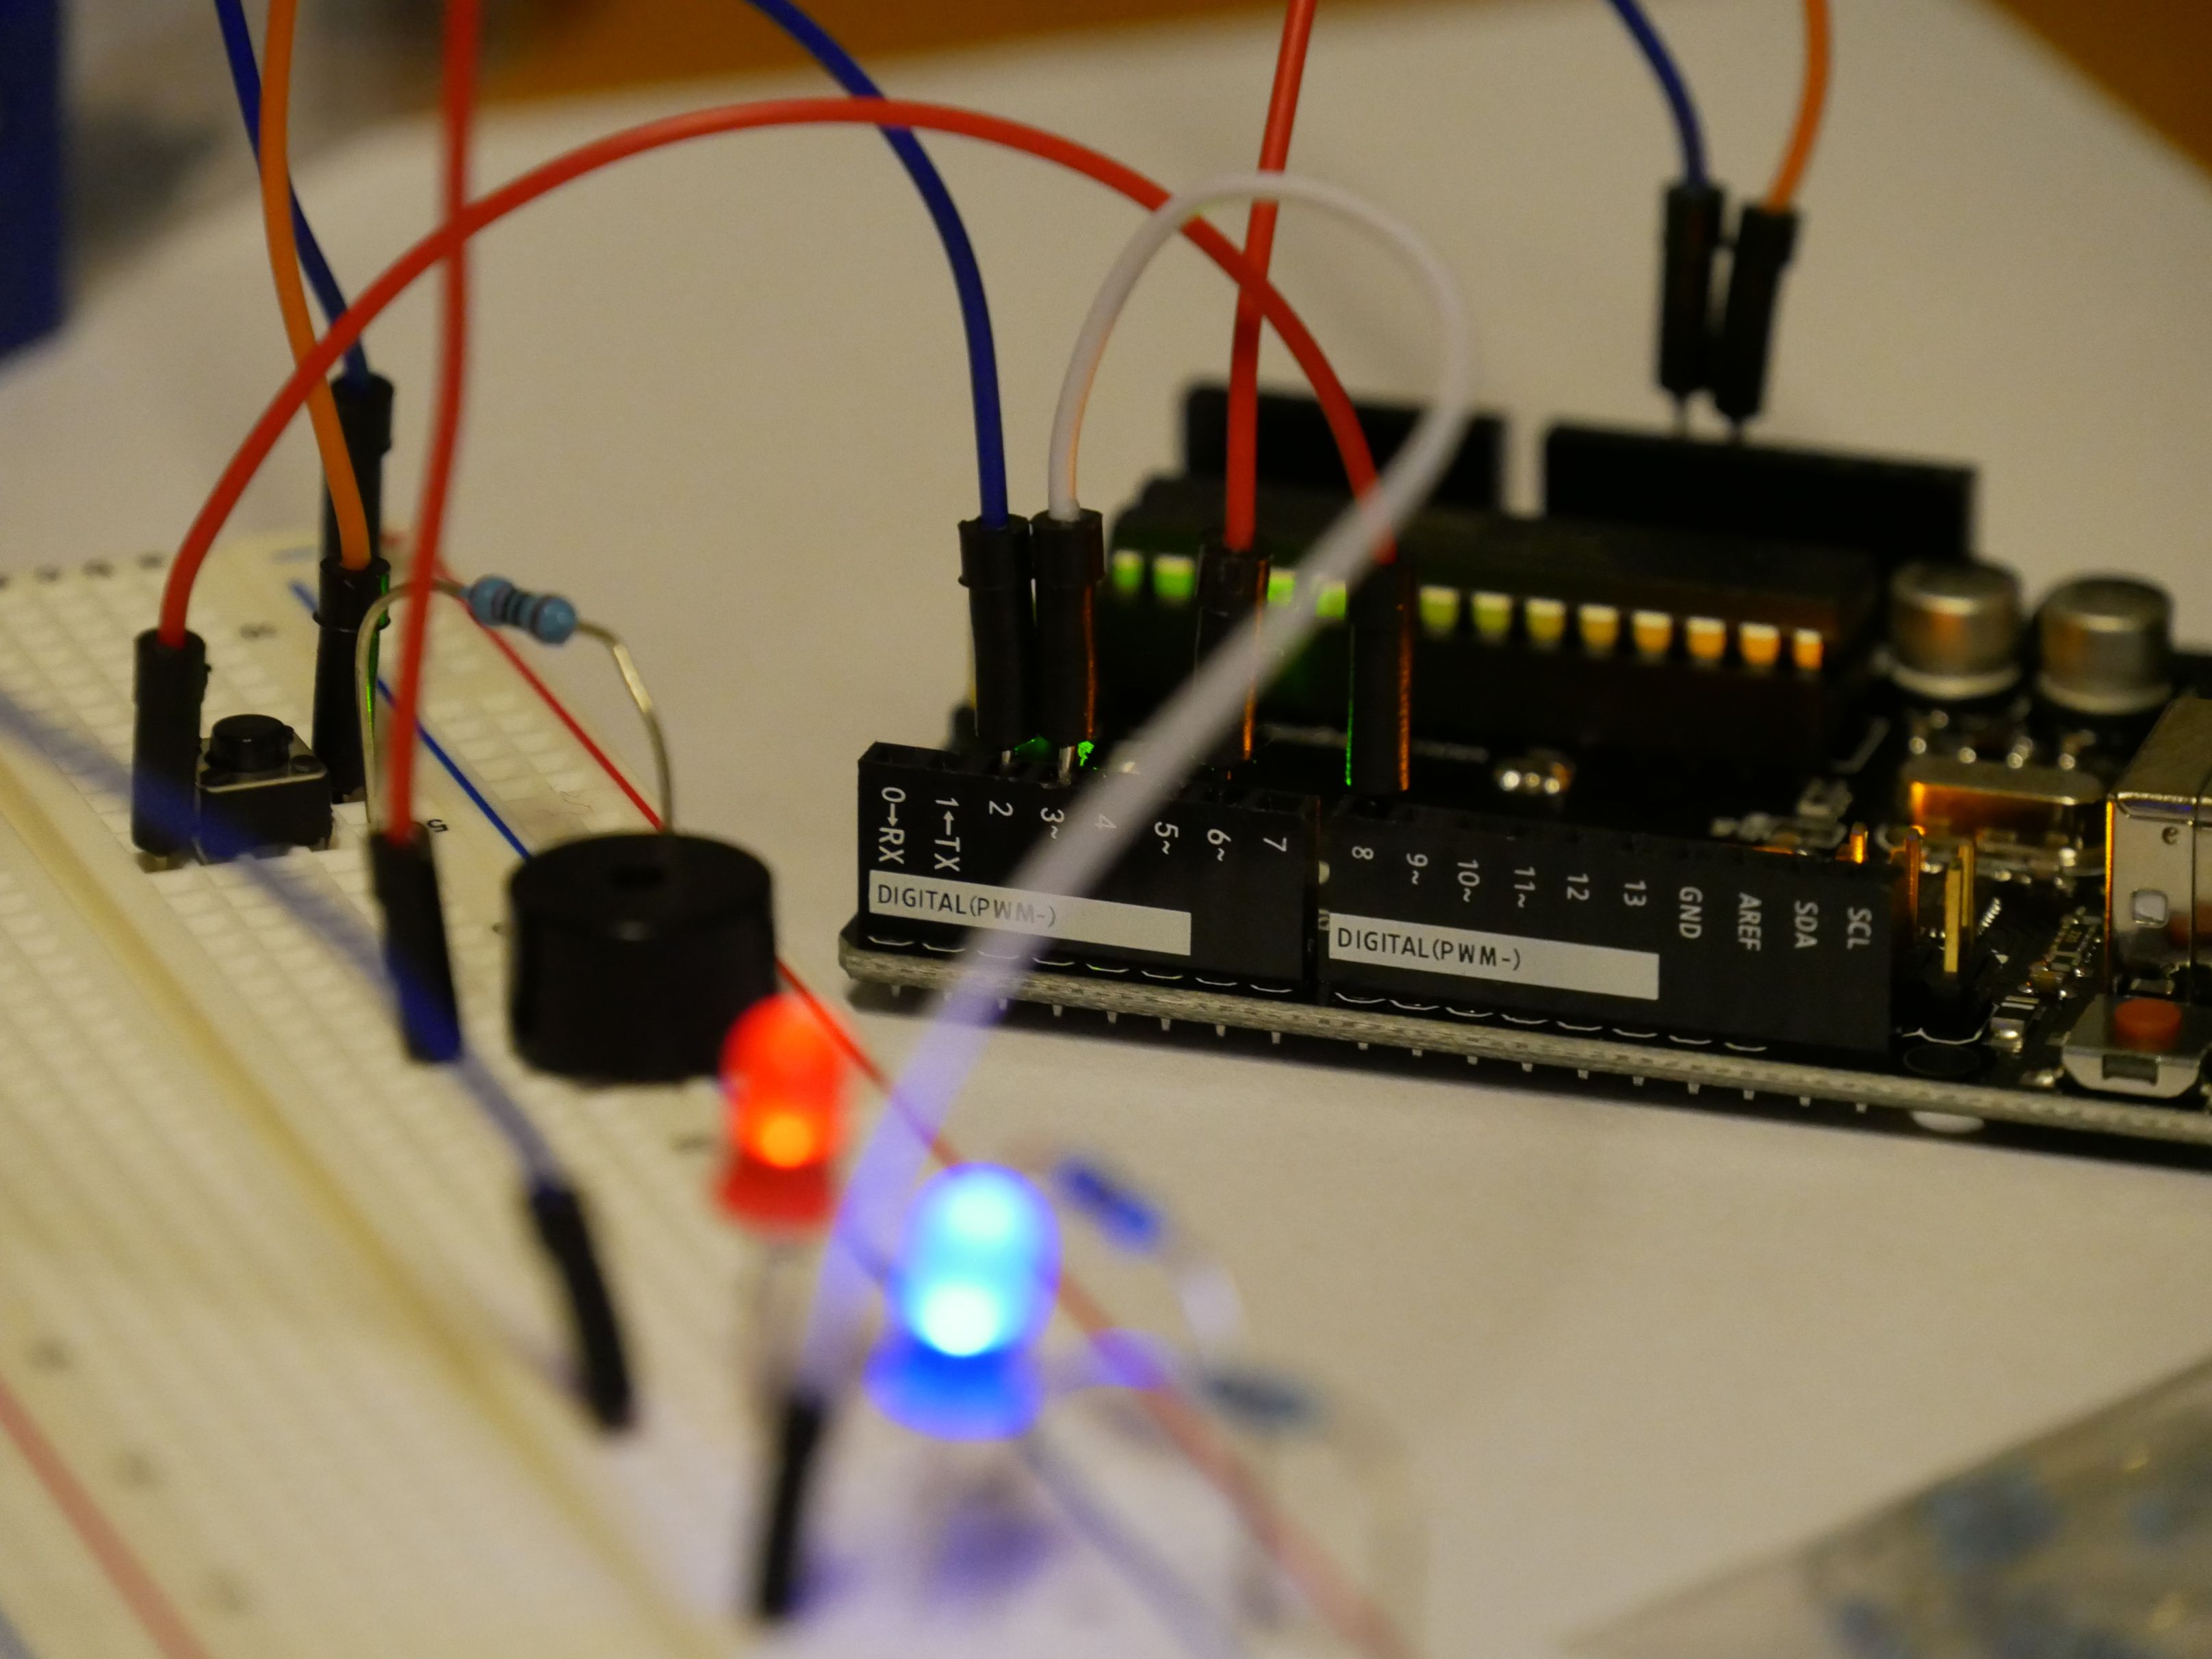
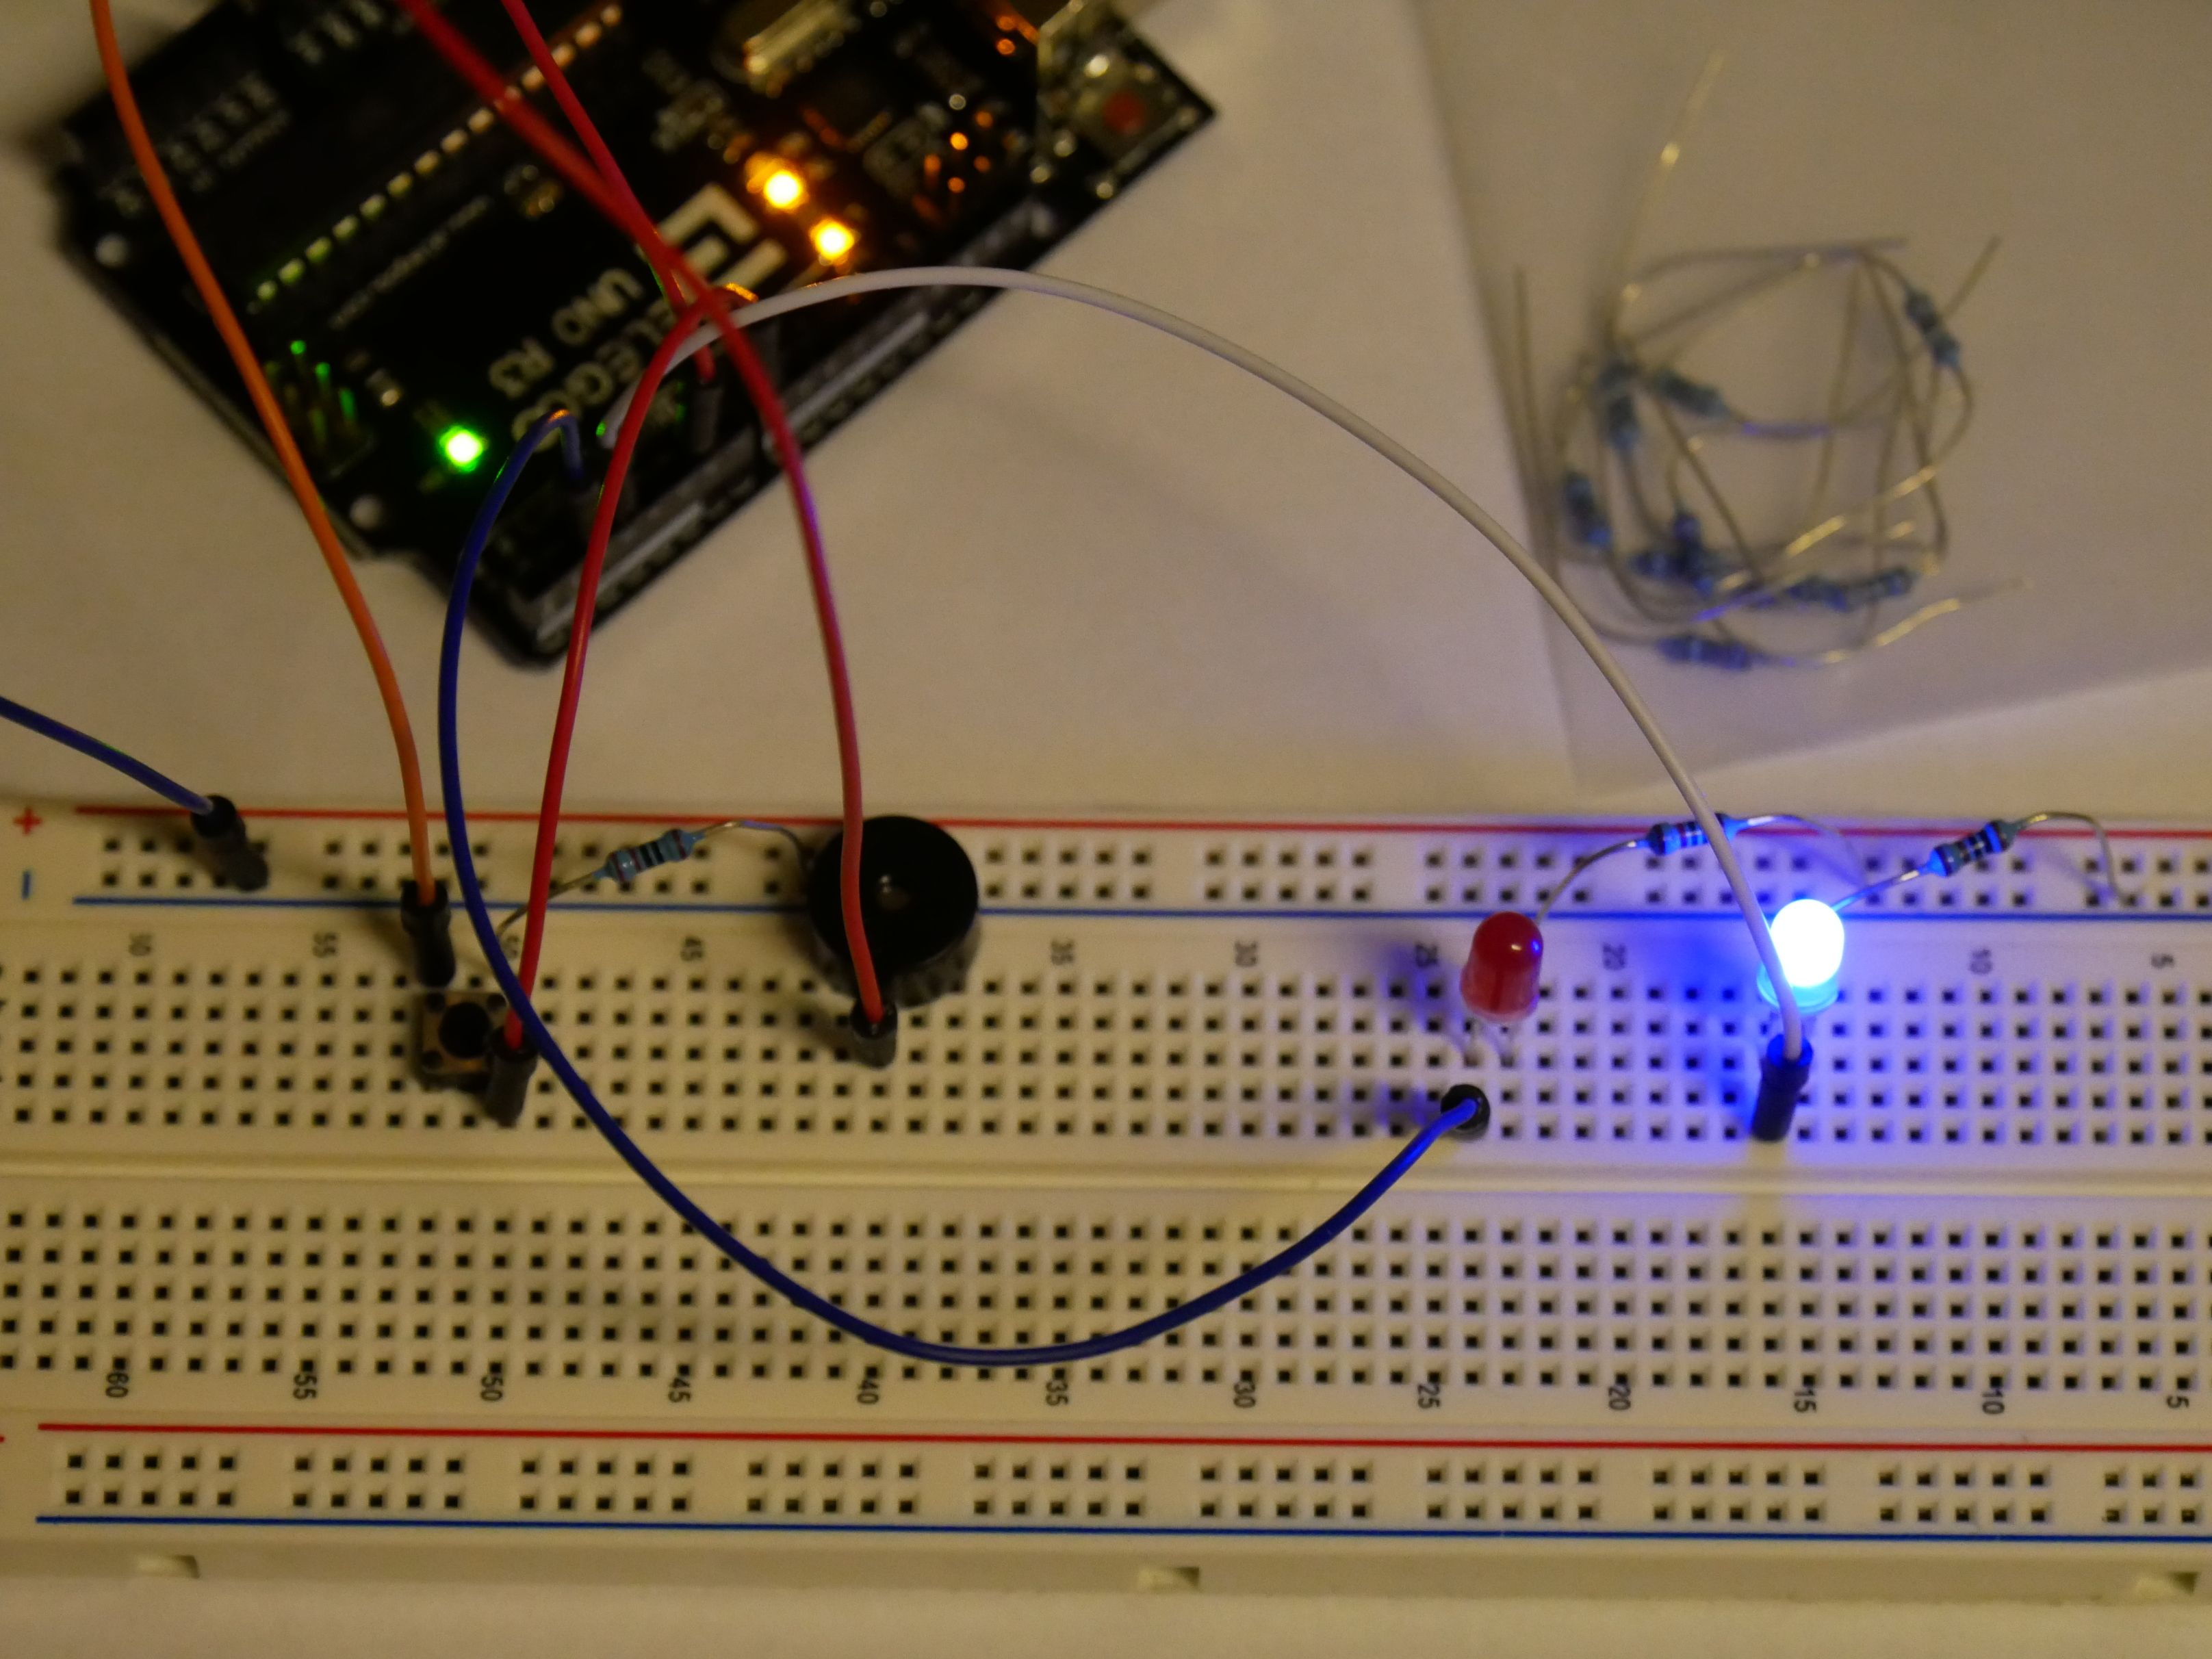
First you have to connect the two LEDs to the circute. It's __importante__ to connect them the right way around. Note that the longer Leg of the LED is the + and the shorter the - pole. Connect the - to ground and + to the 2nd and 3rd digital pin. Or just look at the image below 😎.
##
###
##
Next stop, the buzzer. Connect it to your digital pin 6. Don't forget to ground your buzzer to close the circute cause it wouldn't work otherwise.
##
Now connect your Button, noticed how the jumper wires are connected diagonal so that the button closes the circute when pressed.
Check if everything is grounded properly and you're done.
#### Next: program your microcontroller
You may have already noticed that an arduino is not cabable of running more than one loop at the same time.
However we need 3 threads running at the same time (LEDs blinking, Tone, and the Button).
So how could you do that?
Well the answer is: Try to run through all functions as fast as posible so that it looks like the controller is multithreading but isn't.
Anyway here is how I solved the problem, kind of...
__Comments are in German cause it's my native language, if you have any questions about the code feel free to comment below.__
### _And don't forget to upvote and resteem the post_ 😛
>#define blau 2 //Definiert den Pin des blauen LEDs
#define rot 3 //Definiert den Pin des roten LEDs
#define Buzzer 6 //Definiert den Pin des Buzzers
#define Button 8 //Definiert den Pin des Buttons
bool Pushbutton=false; //Button Variable (gedrückt oder nicht gedrückt)
unsigned long letztezeit = 0; //Letzte Zeit bei verlassen des "Zyklus"
int x = 0; //Variable fürs debugging Zählt die Nummer des Zyklus
int Zyklusdauer = 300; //Gibt die Dauer eines Zyklus an, Ein LED leuchtet die halbe Zyklusdauer
int y = 0;
int i = 0;
void setup() {
// put your setup code here, to run once:
pinMode(blau, OUTPUT); //Definiere blau als OUTPUT
pinMode(rot, OUTPUT); //Definiere rot als OUTPUT
pinMode(Button, INPUT); //Definiere den Button als INPUT
pinMode(Buzzer, OUTPUT);
Serial.begin(9600); //Started den Serialmonitor
}
void loop() {
if(millis()-letztezeit < (Zyklusdauer/2)) //Lässt das blaue LED bis 0,5 Sec. nach Zyklusbeginn brennen; Rot ist aus
{
digitalWrite(blau, HIGH);
digitalWrite(rot, LOW);
}
else{ //Lässt das rote LED von 0,5 Sec. bis 1 Sec. nach Zyklusbeginn brennen; Blau ist aus
digitalWrite(blau, LOW);
digitalWrite(rot, HIGH);
if(millis()-letztezeit > Zyklusdauer) //Fragt das Ende eines Zyklus ab
{
letztezeit = millis(); //Setzt letzte Zeit mit der aktuellen gleich, ein neuer Zyklus beginnt
Serial.println(x); //Zeigt die Nummer des Zyklus im Serial Monitor
x++; //Erhöht x um 1
}
}
if(digitalRead(Button) == HIGH) //Fragt ab ob der Button gedrückt ist
{Pushbutton = true;
if(i == 0)
{y++;}
Serial.println("PButton");
letztezeit = millis();
}
if(y % 2 == 0)
{
if(millis()- letztezeit <100){
tone(Buzzer, 440);
Serial.println("YES");
}
else{
tone(Buzzer, 440);
Serial.println("YES");
i = 0;
}
}
if(y % 2 != 0)
{
if(millis()- letztezeit <100)
{
noTone(Buzzer);
Serial.println("NO");
}
else{
noTone(Buzzer);
Serial.println("NO");
i = 0;
}
}
}