[ENG-ESP] Jungkook (BTS) portrait with colored pencils
hive-174301·@fixie·
0.000 HBD[ENG-ESP] Jungkook (BTS) portrait with colored pencils
<center>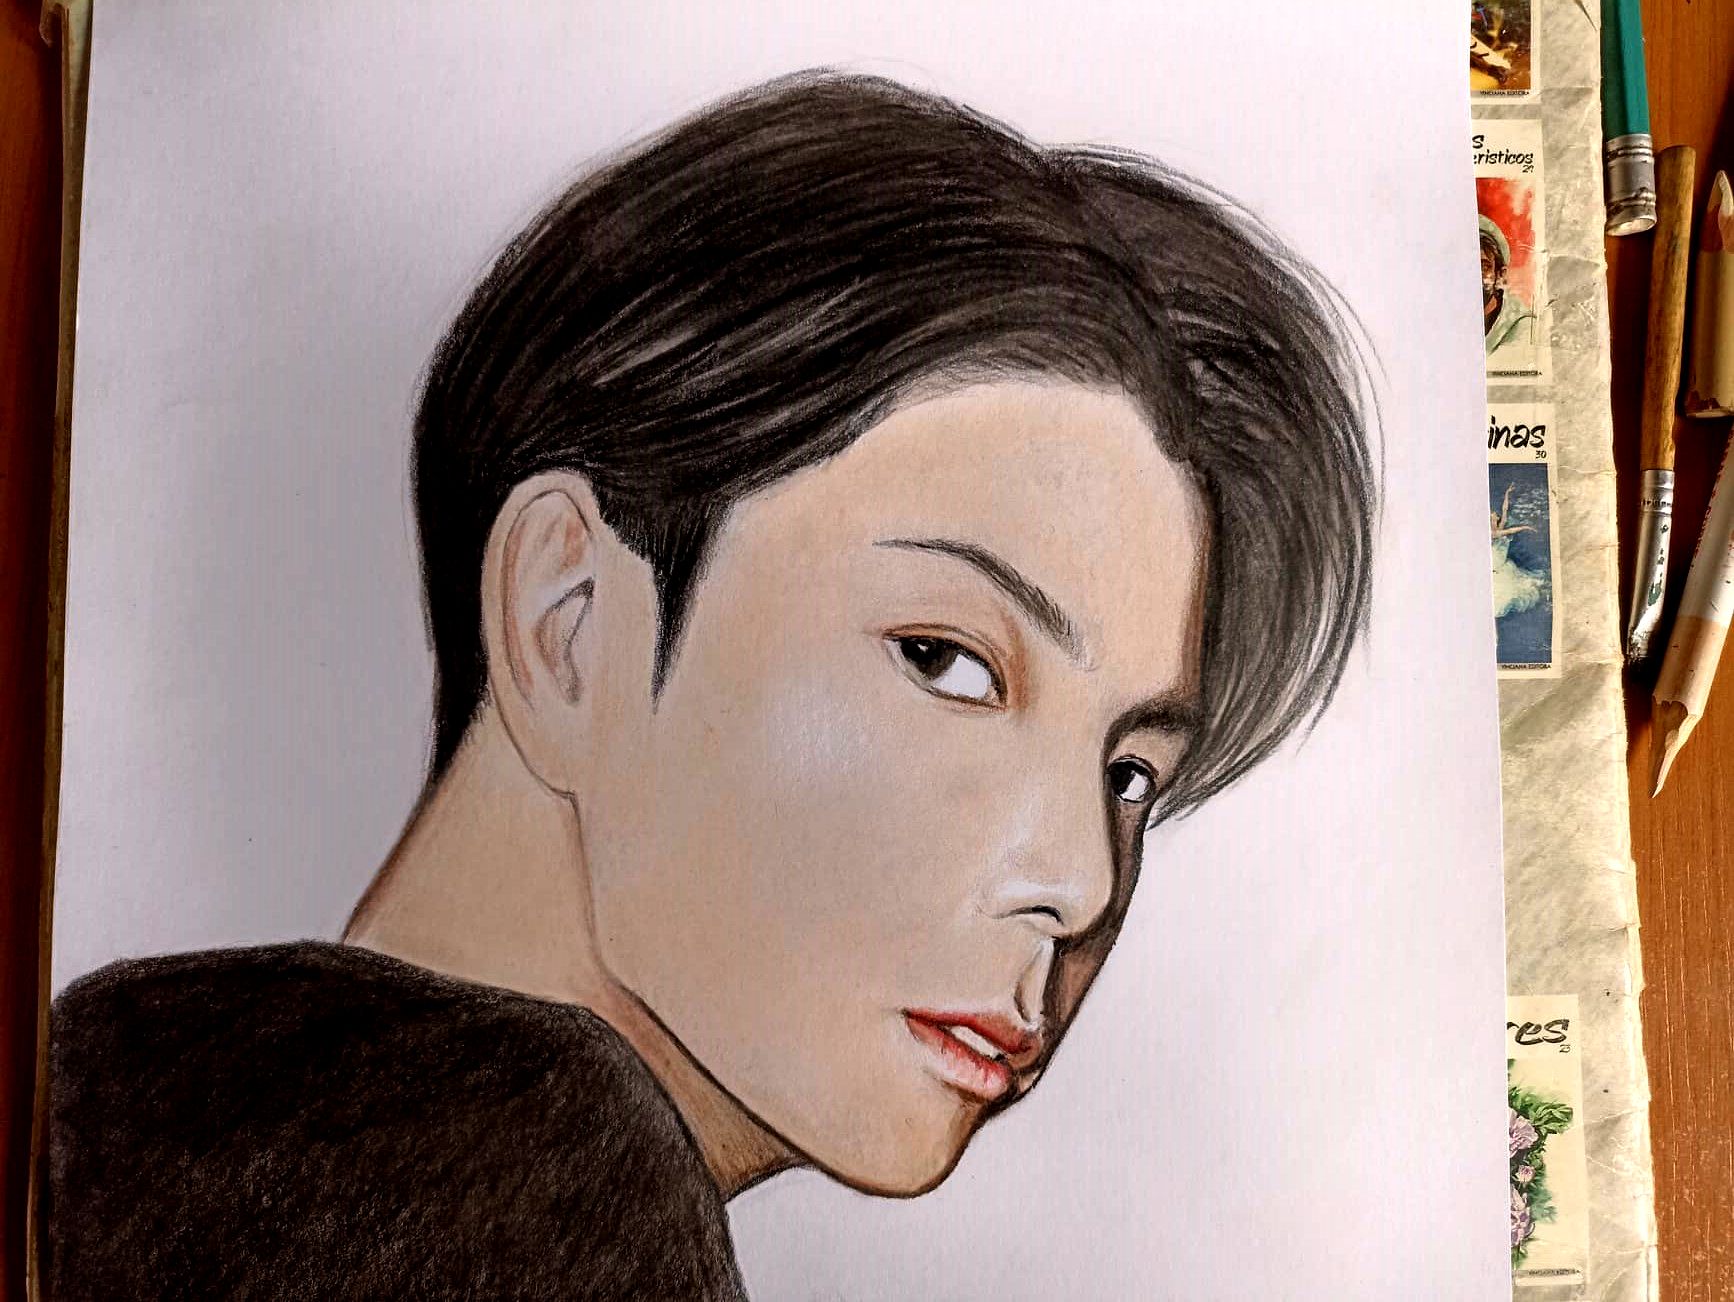</center> <div class="text-justify">Hello friends, I hope you are very well today I want to share my last drawing made with colored pencils, it is a portrait of the singer of the K-pop band known as Jungkook, I am not a big fan of K-pop, in fact I know relatively little about the genre, but I've heard some songs and I think they're good. I did this portrait to give it to my niece who is celebrating her birthday, because she really likes it and I could tell because her room is totally decorated with BTS singers so it was easy to tell... I hope you like it.</div> ><div class="text-justify">Hola amigos, espero que se encuentren muy bien hoy quiero compartirle mi último dibujo realizado con lápices de colores, se trata de un retrato del cantante de la banda de K-pop conocido como Jungkook, no soy muy fan del K-pop, de hecho se relativamente poco acerca del género, pero he escuchado algunas canciones y creo que son buenas. Este retrato lo hice para obsequiarselo a mi sobrina que está de cumpleaños, pues a ella si que les gusta y pude saberlo porque su habitación está decorada totalmente con los cantantes de BTS así que fue facil saberlo.. Espero que les guste.</div> <center></center> <center>PROCESS</center> <center>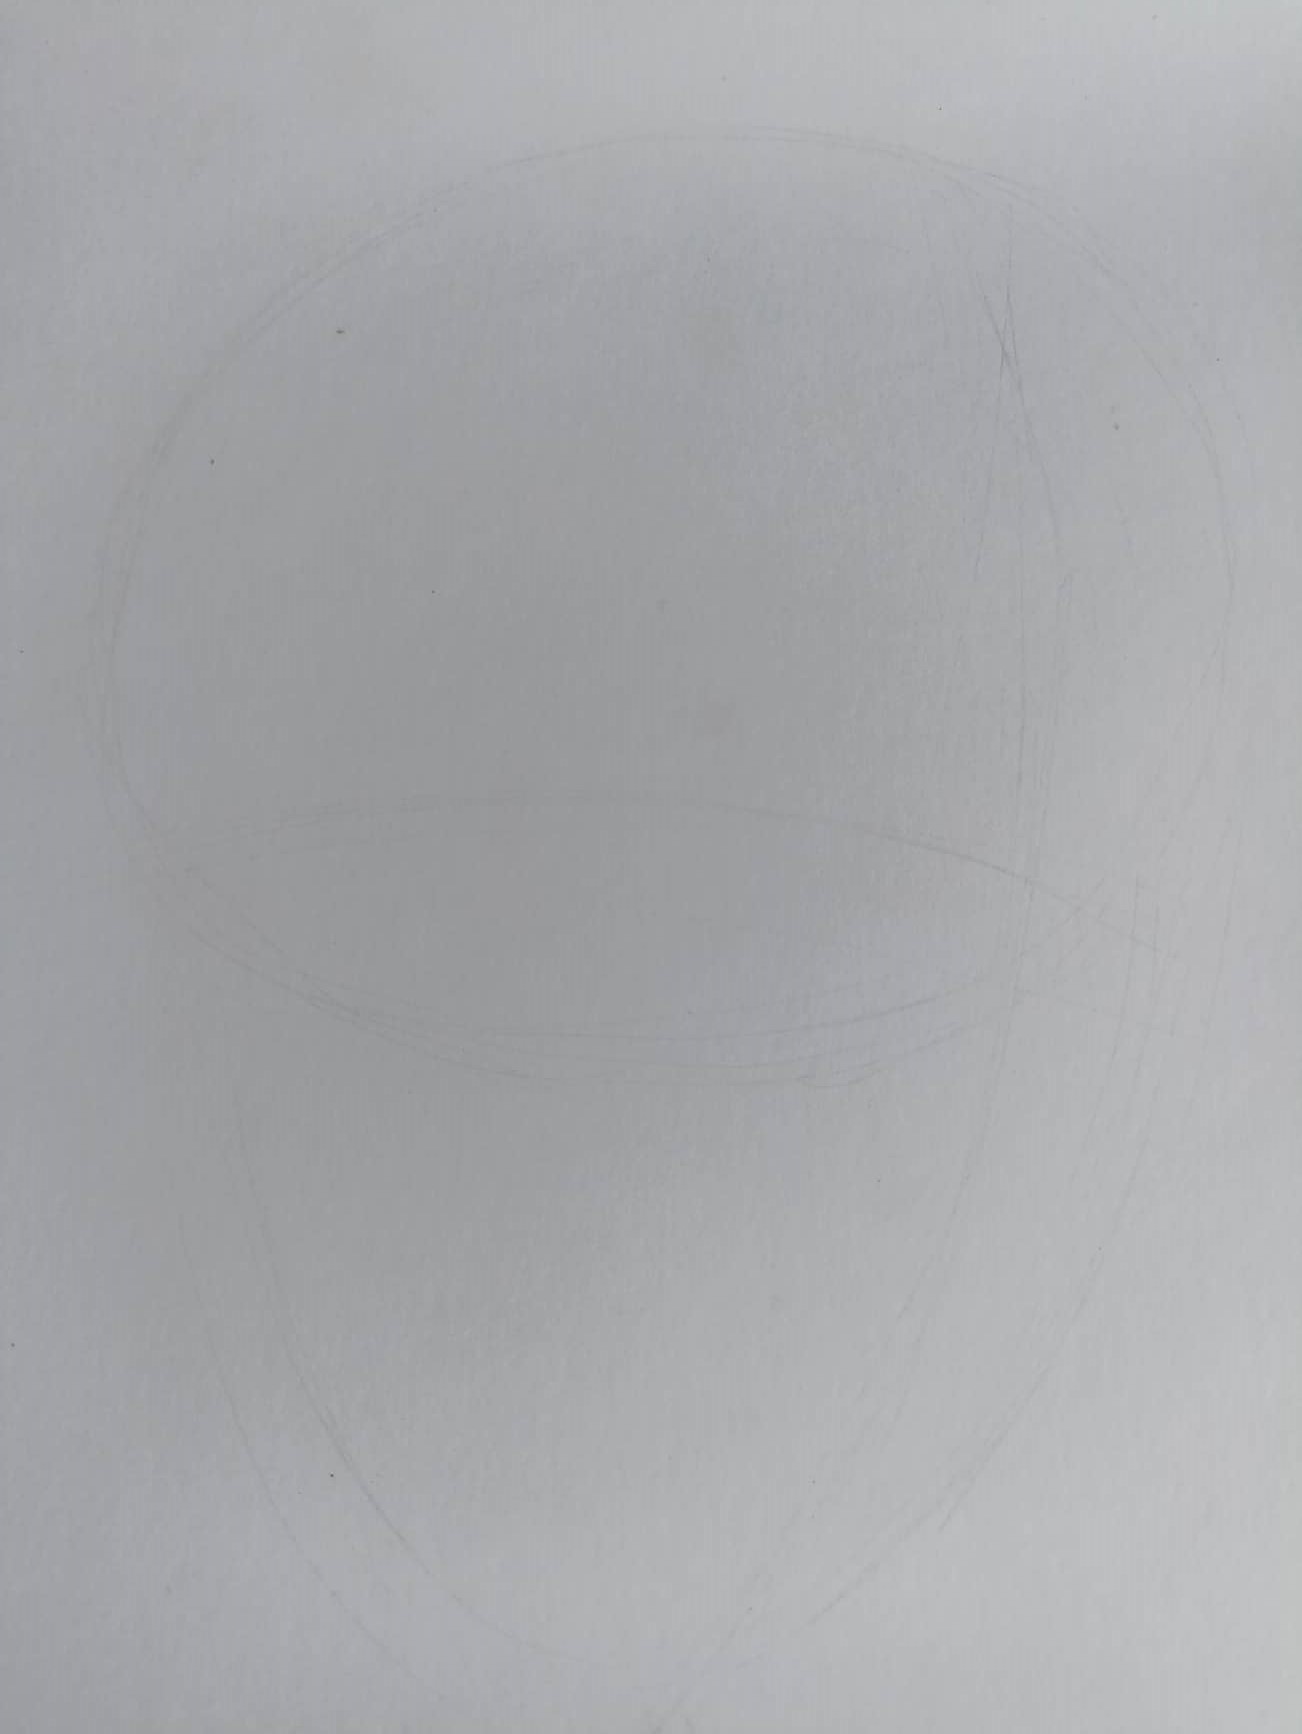</center> <center>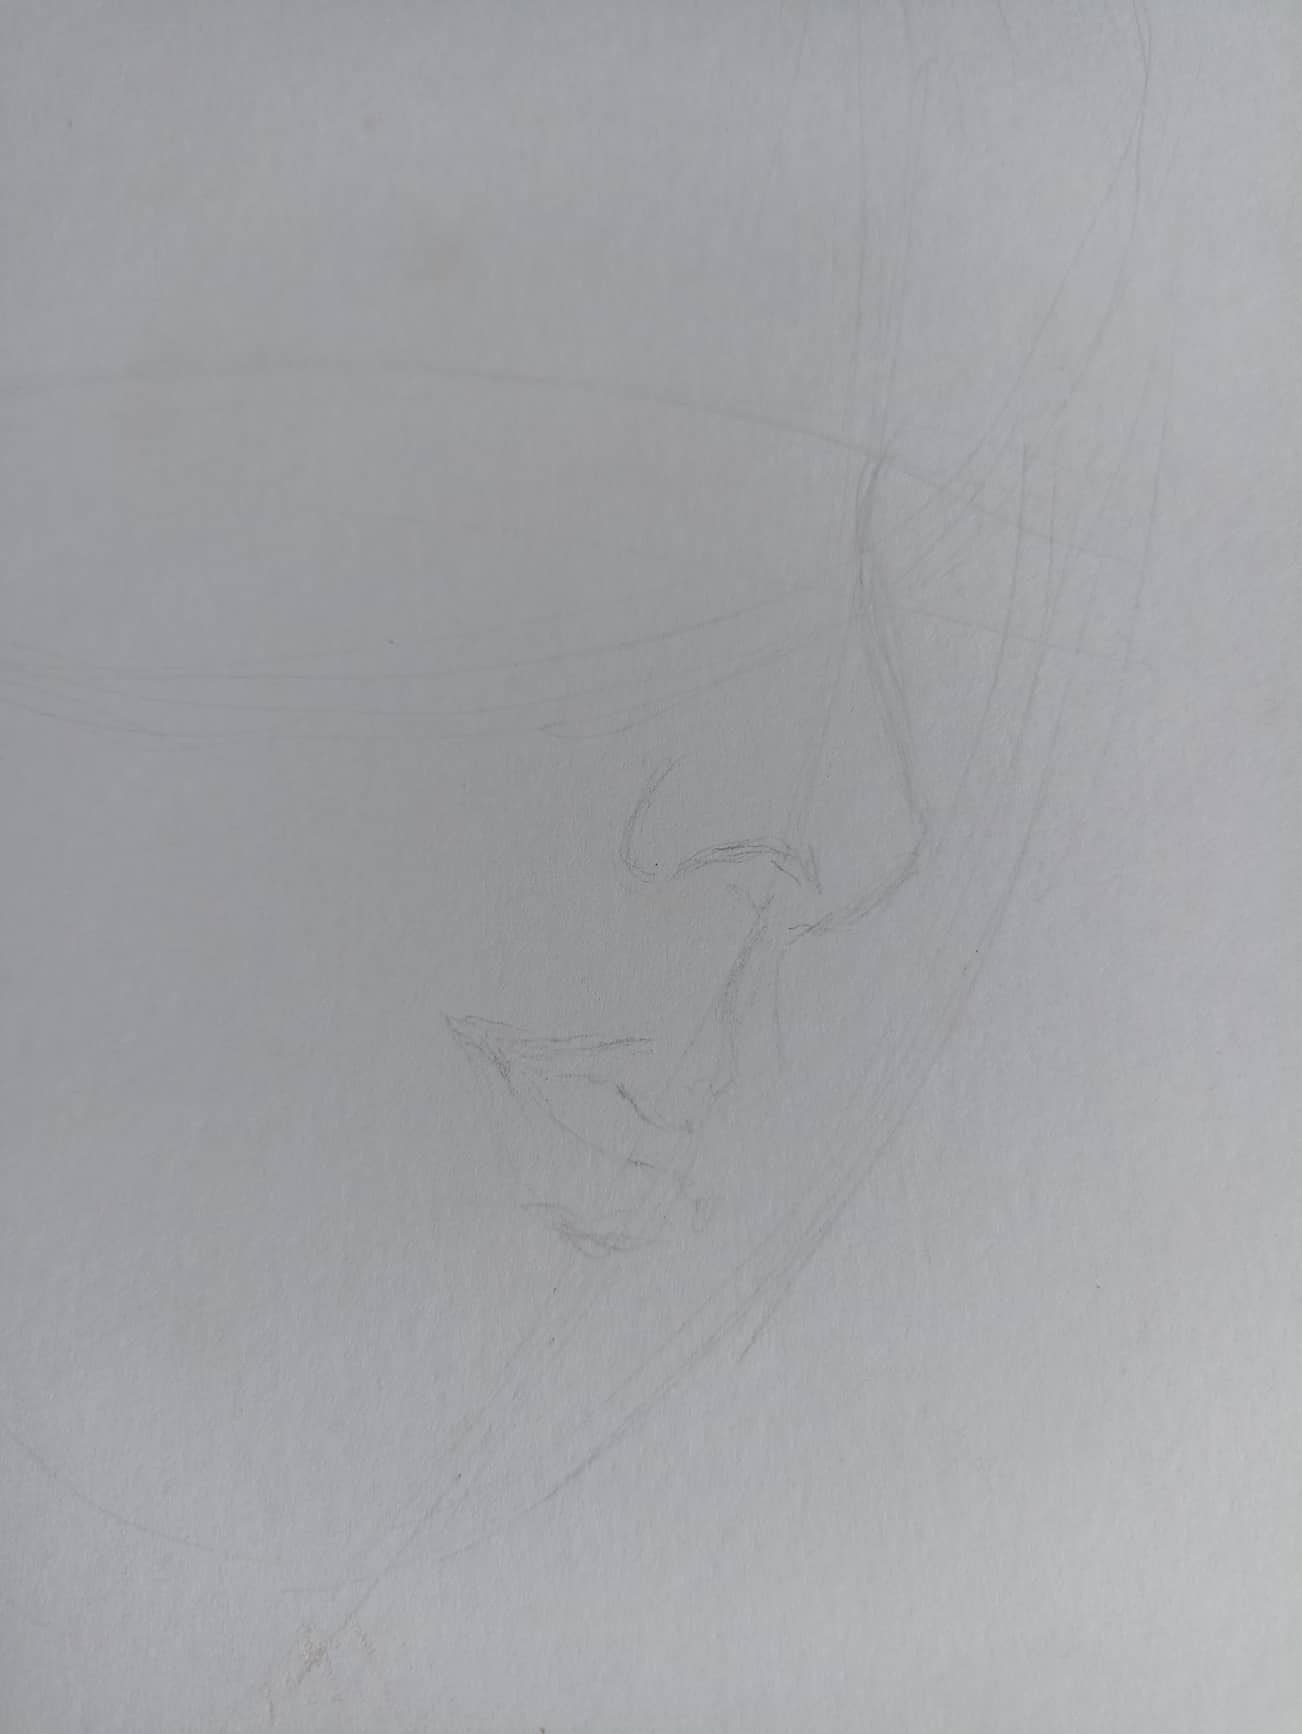</center> <center>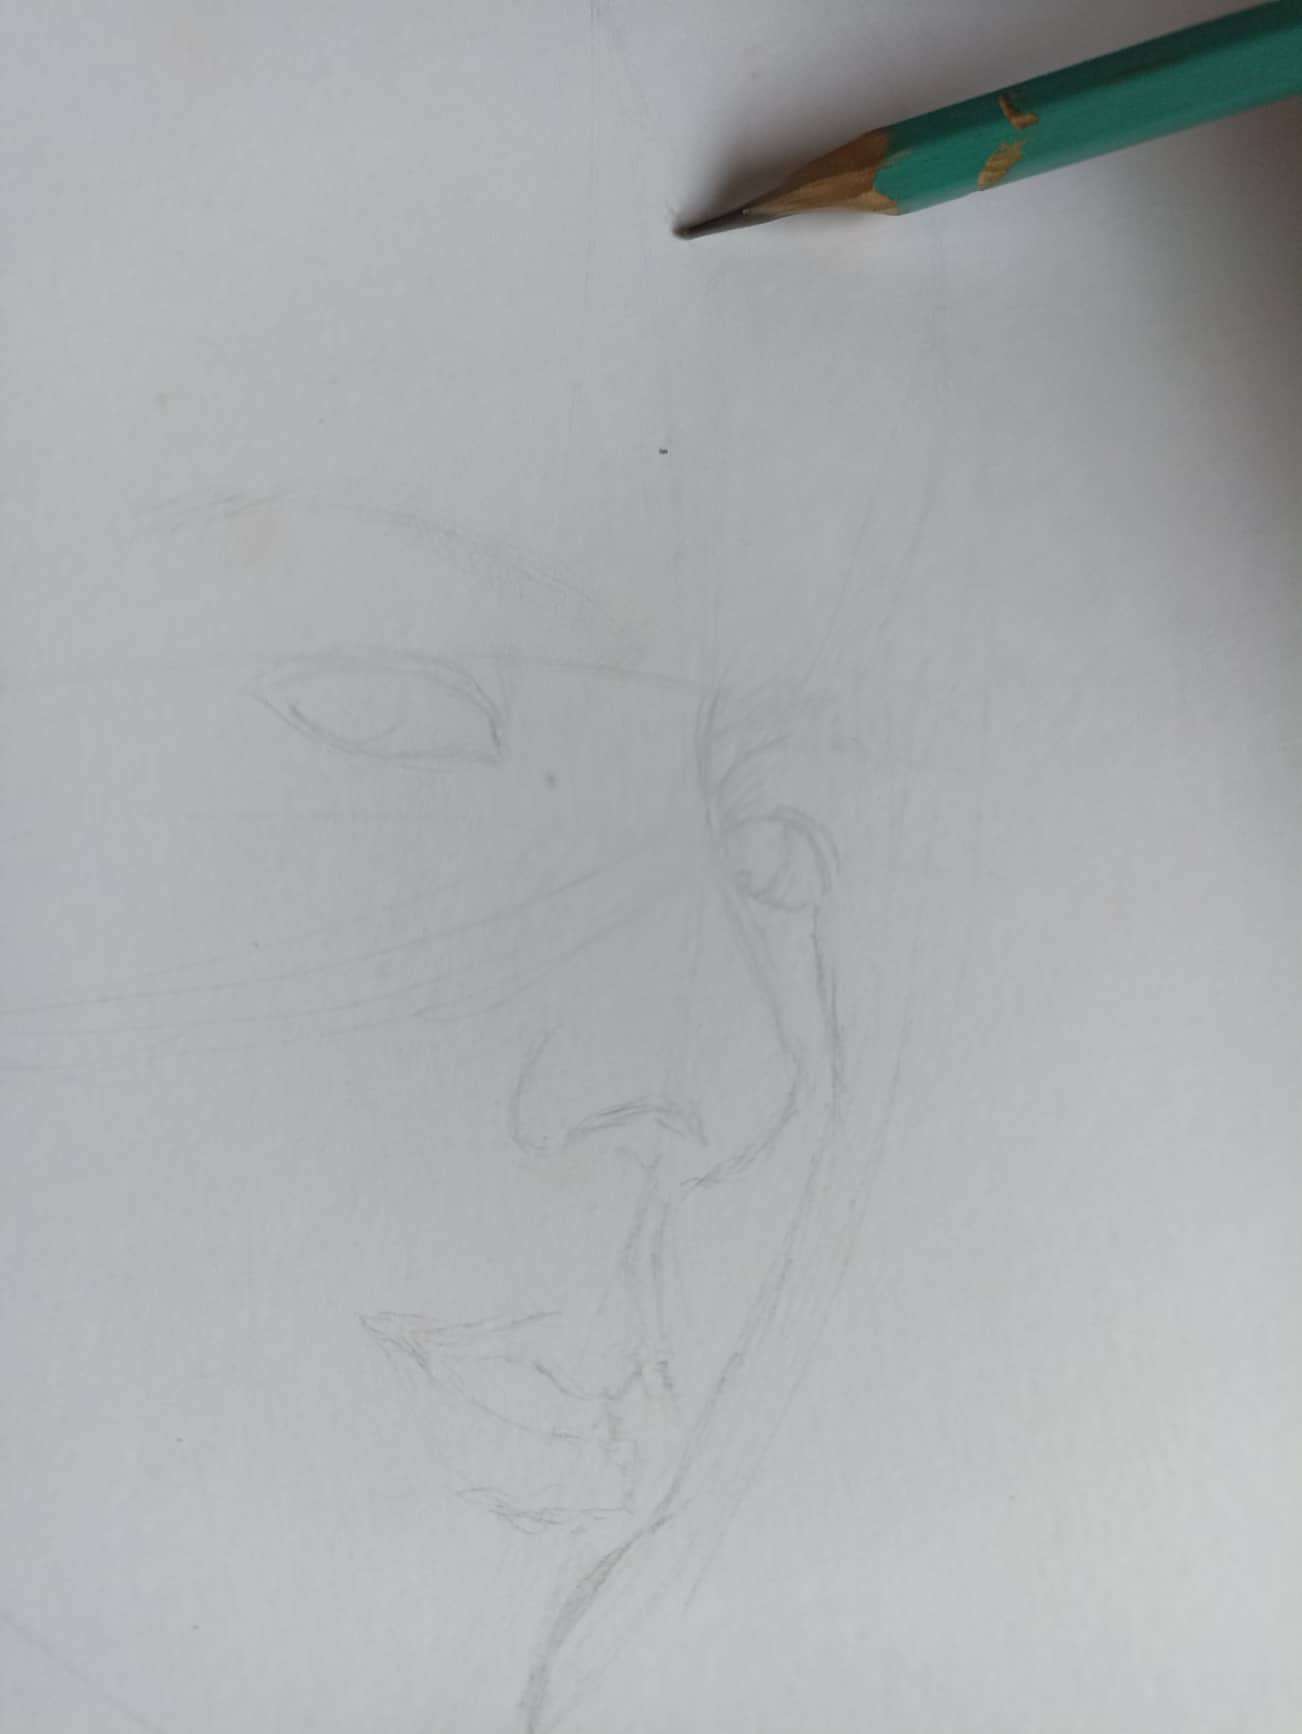</center> <center>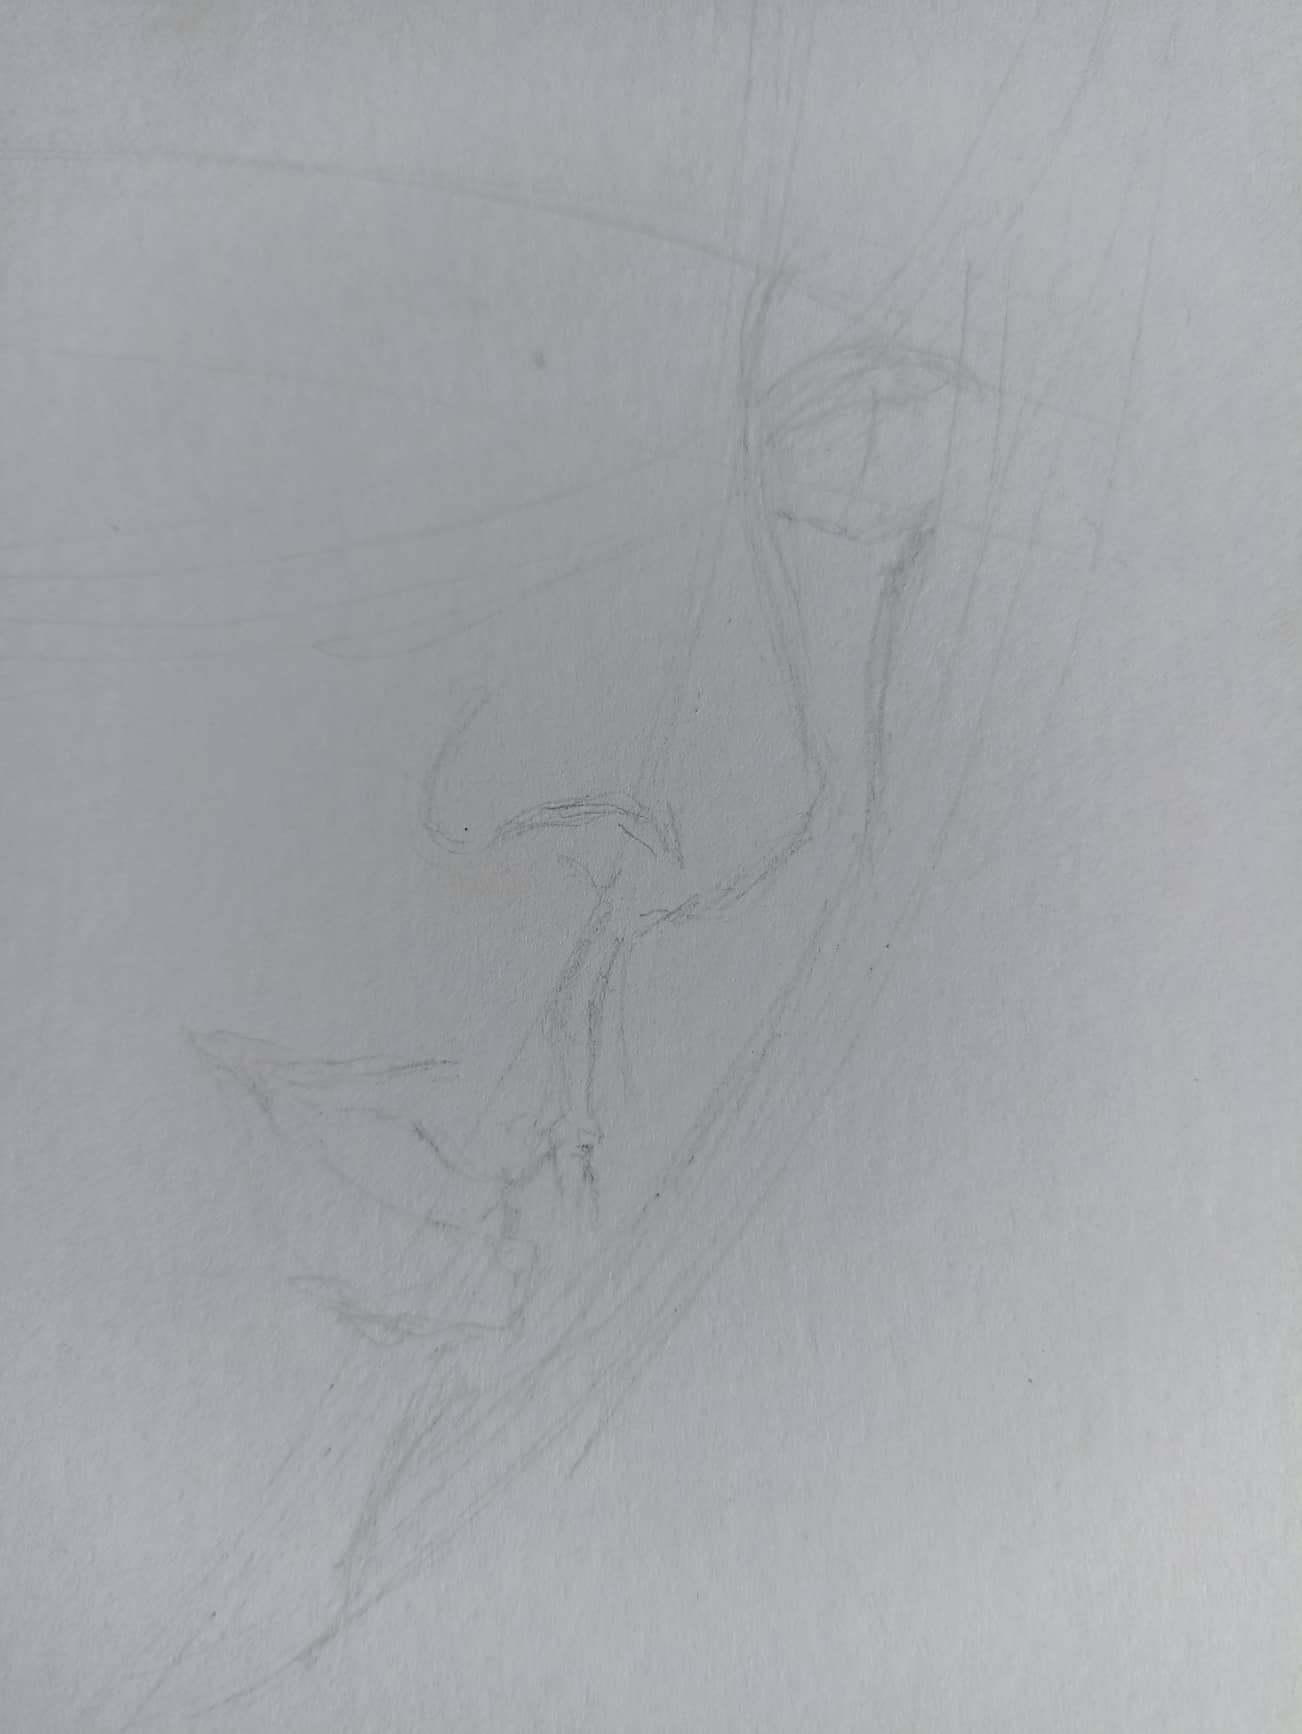</center> <center></center> <div class="text-justify">The paper used in this opportunity is white Opaline cardboard, this cardboard has an extremely smooth surface, but with the advantage that the color of the crayons adheres very well, you just have to be very careful not to stain it. To start I made a sketch of the face and the head leaning on circles, then I divided it with a line to make the 3/4 face and little by little I took out each of the parts, such as the nose, mouth and eyes.</div> ><div class="text-justify">El papel utilizado en esta oportunidad es cartulina Opalina de color blanco, esta cartulina tiene la superficie extremadamente lisa, pero con la ventaja de que se adhiere muy bien el color de los creyones, solo hay que tener mucho cuidado para no mancharla. Para comenzar hice un boceto del rostro y la cabeza apoyándome en circulos, luego lo dividí con una línea para hacer el rostro de 3/4 y poco a poco fui sacando cada una de las partes, como nariz, boca y ojos.</div> <center></center> <center>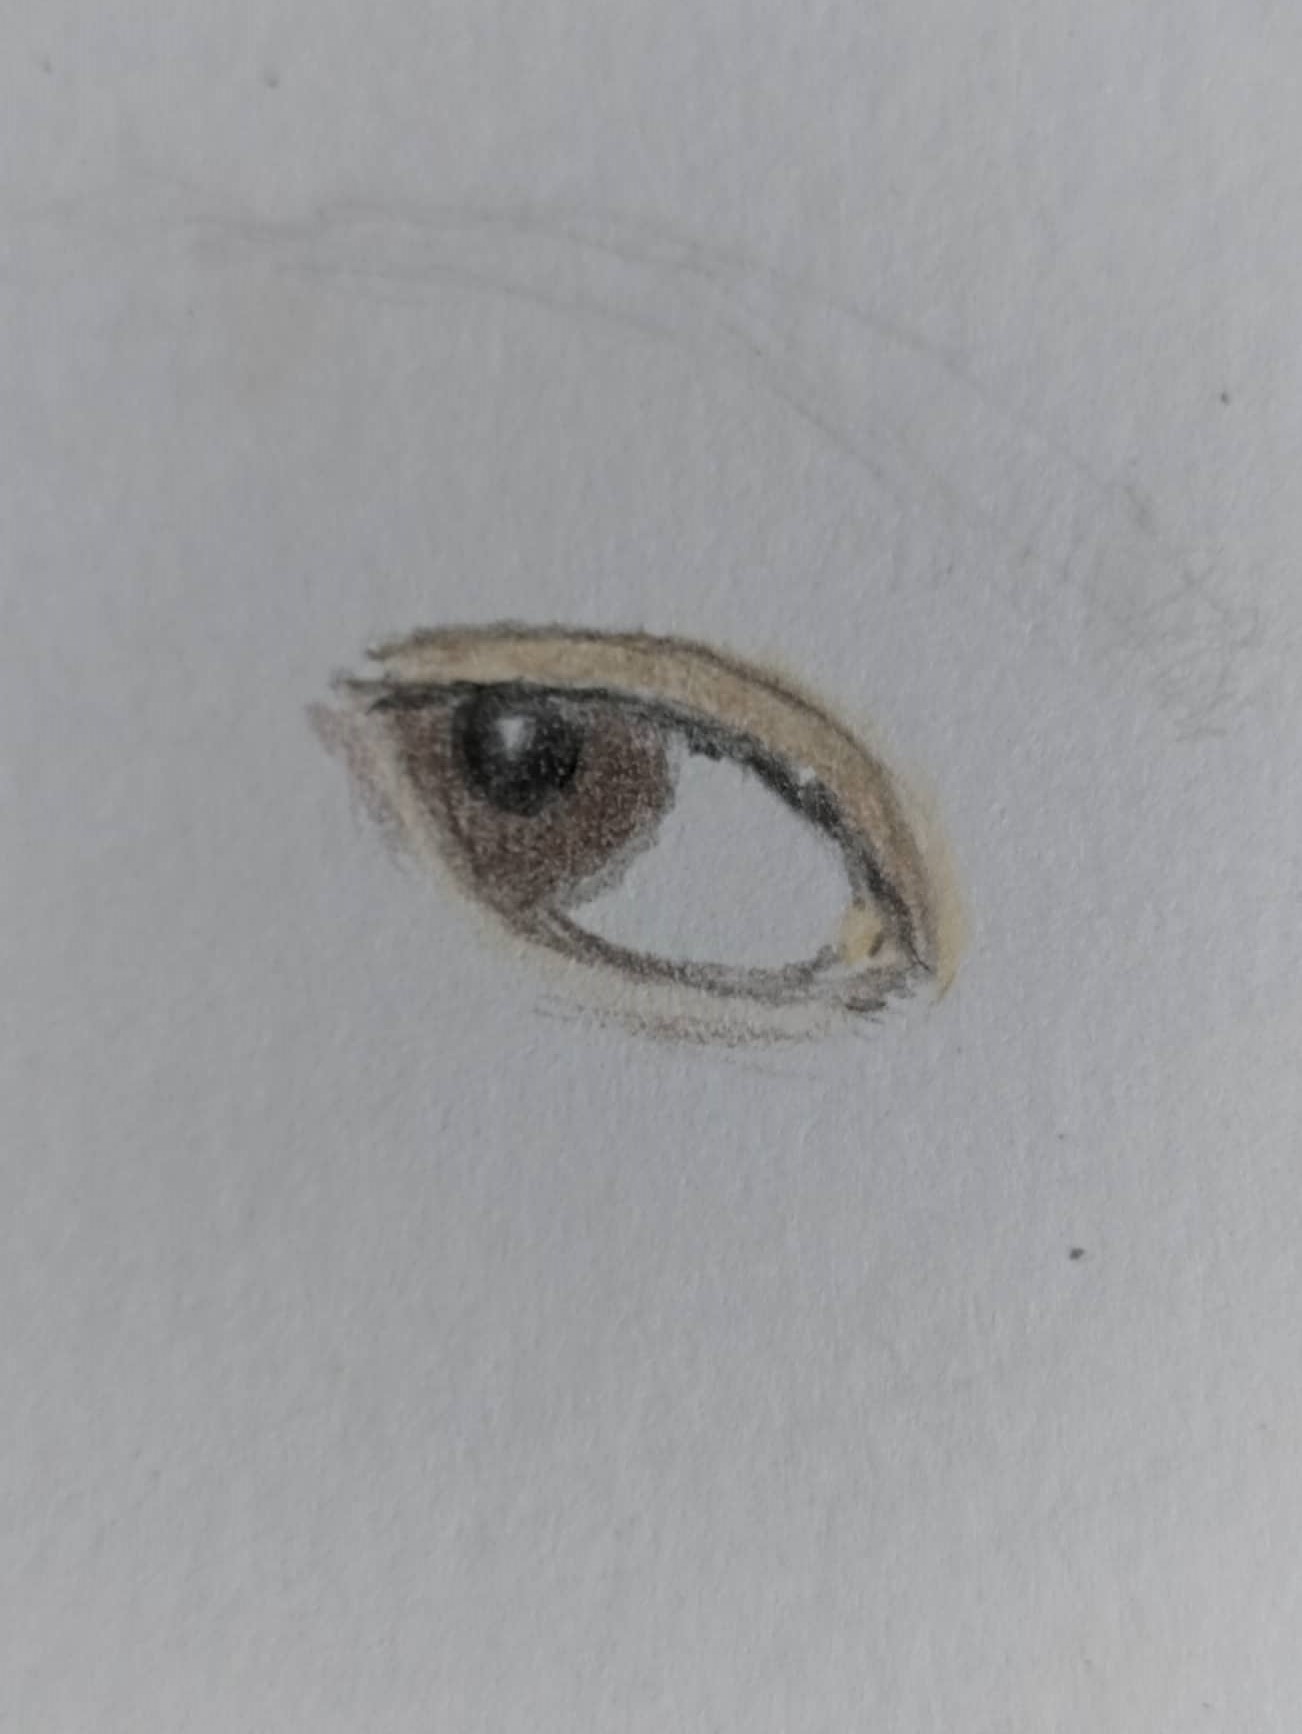</center> <center>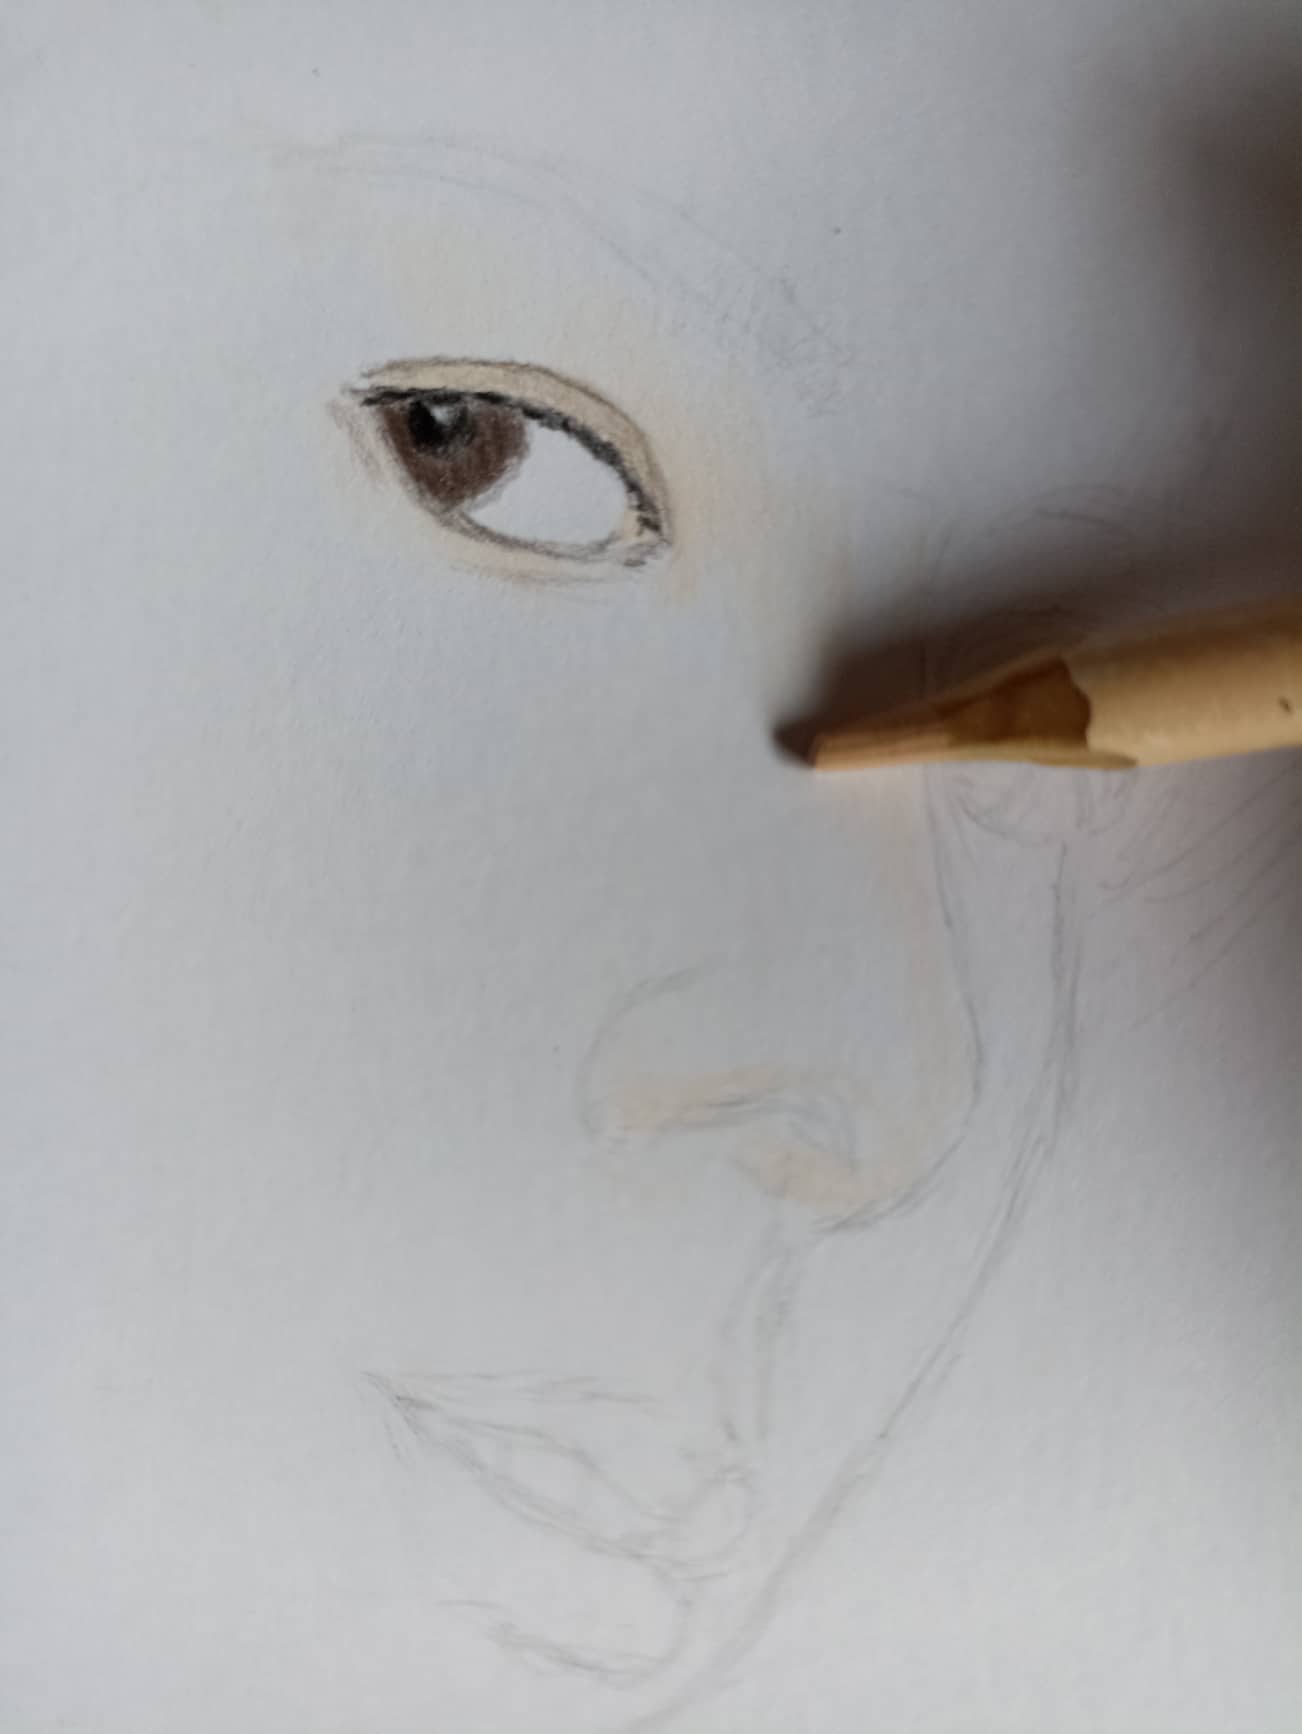</center> <center>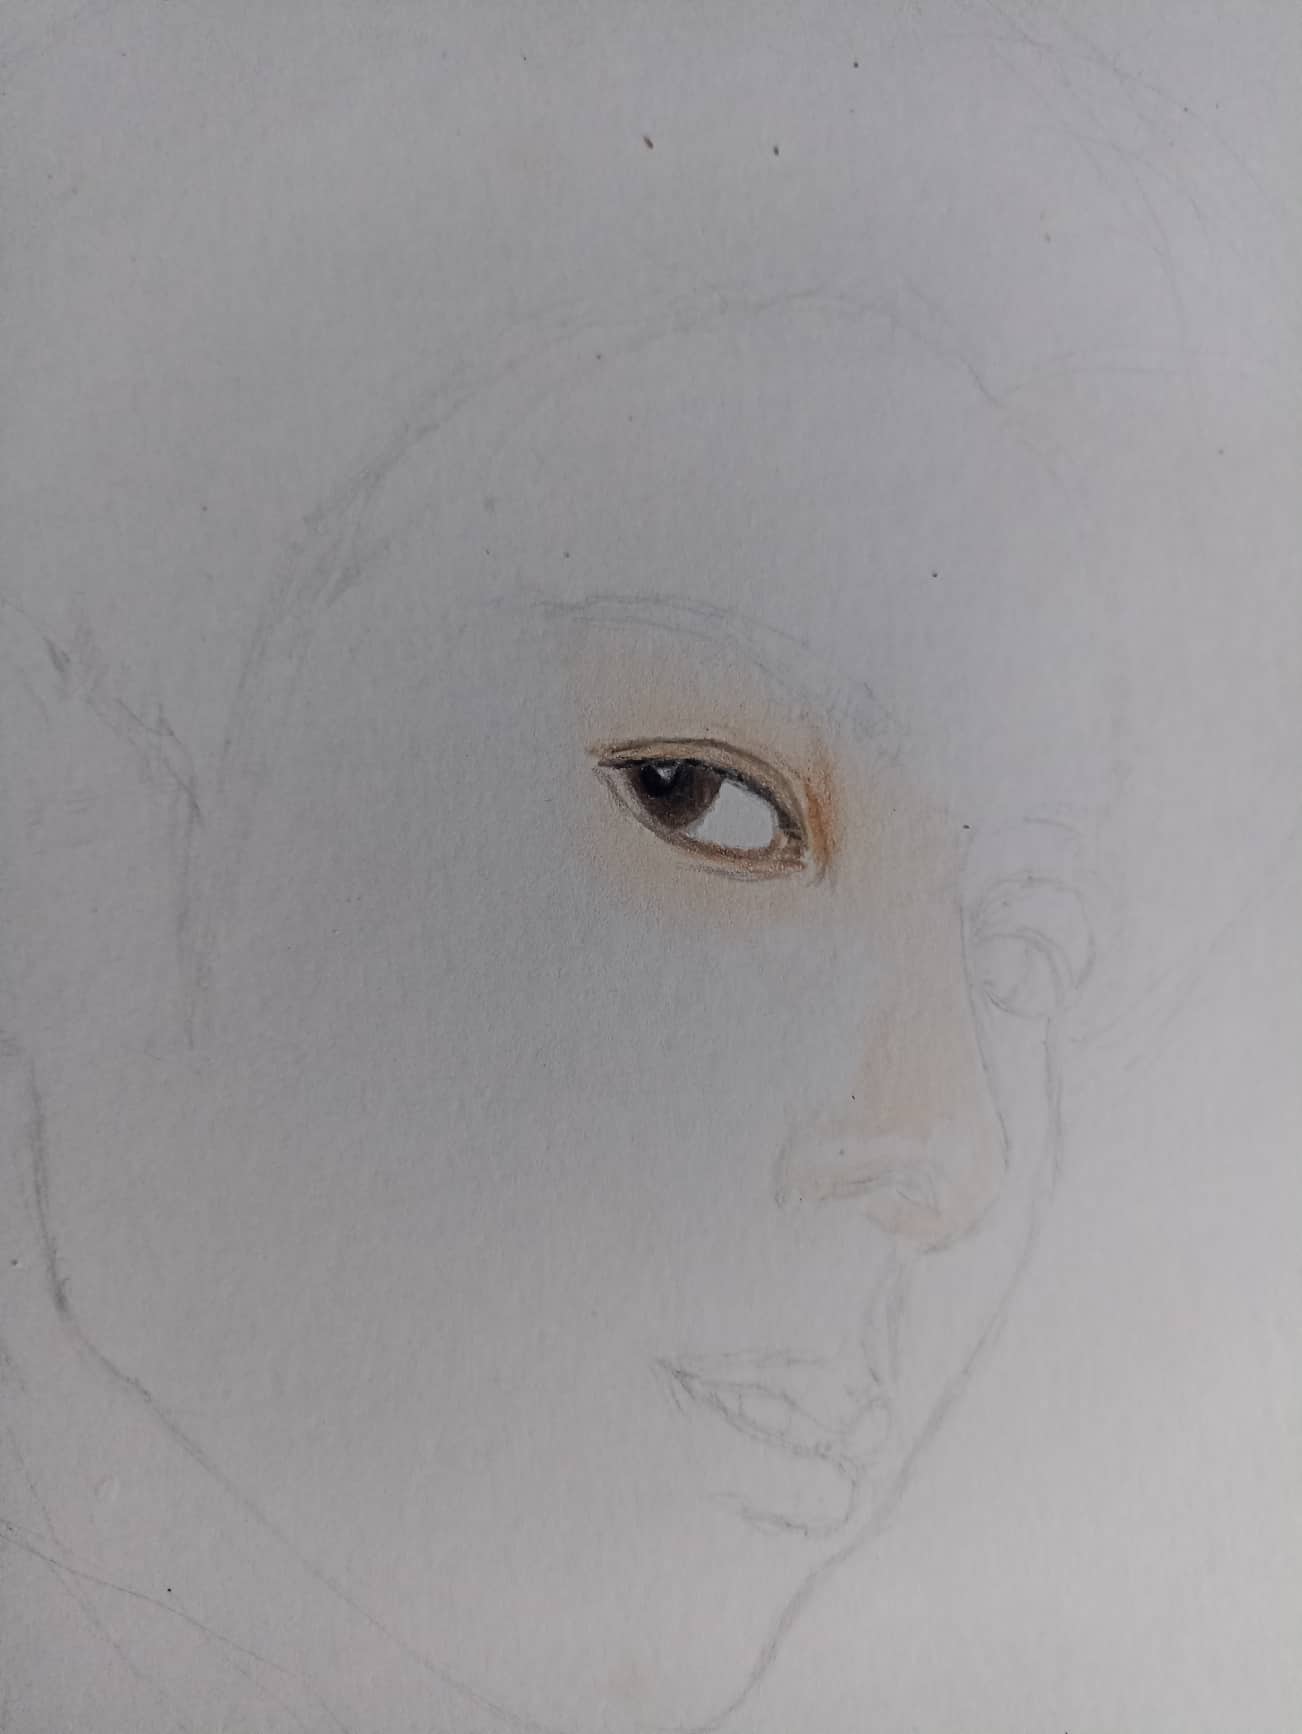</center> <center>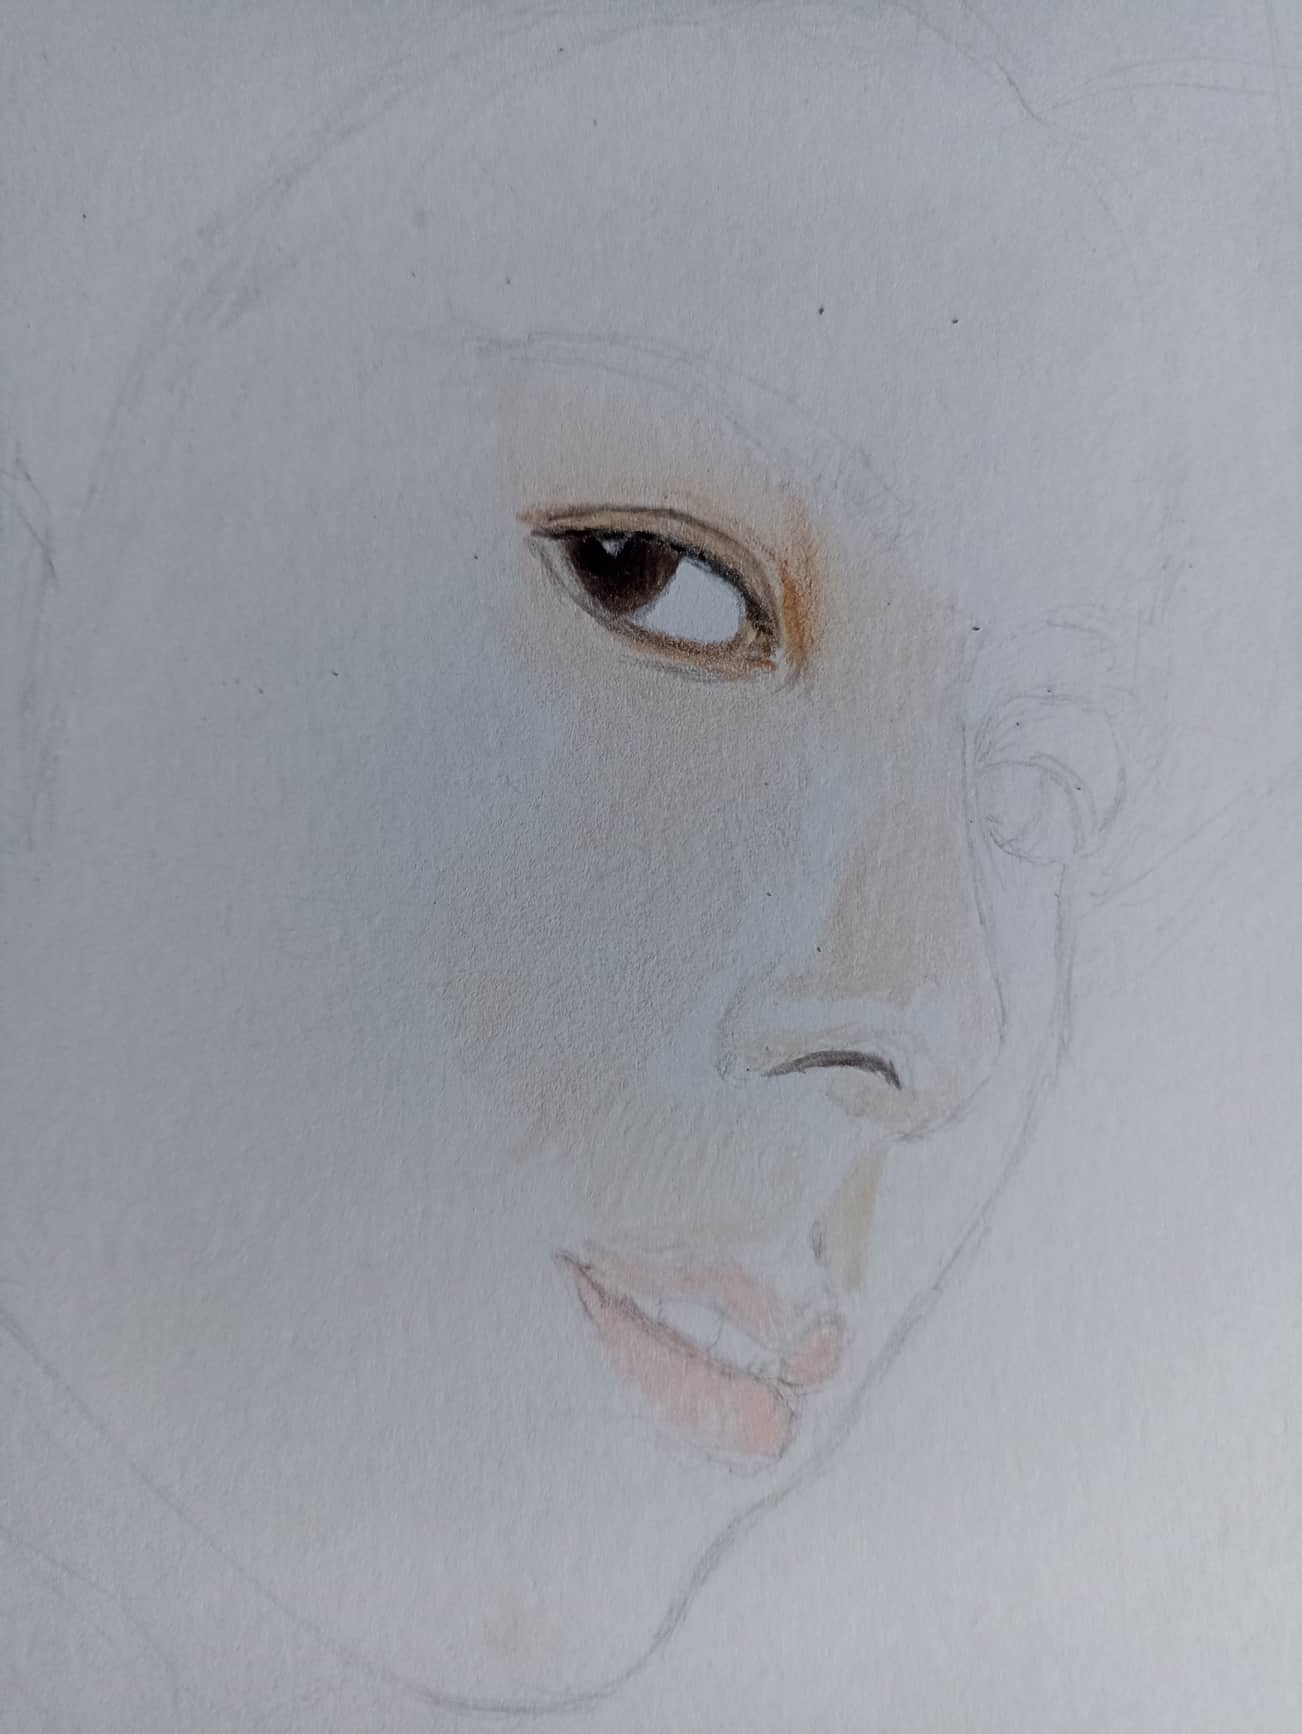</center> <div class="text-justify">After having the sketch ready, I began to paint it, starting with one of the eyes, in this way I will have a guide to address the entire face, for the skin I use the lightest pastel color as a base, and then use all darker ones. In the same way with the color we outline the nose, and using a very light pink color we shape the lips. We take these first steps very smoothly, without sticking the crayon too much because the cardboard can be damaged, so this first layer is to imitate the entire drawing.</div> ><div class="text-justify">Despues de tener listo el boceto comencé a pintarlo, iniciando por el uno de los ojos, de esta forma tendré una guia para dirigirme a todo el rostro, para la piel utilizo el color pastel más claro como base, para luego usar todos más oscuros. De la misma forma con el color vamos delineando la nariz, y utilizando un color rosa muy claro le damos formas a los labios. Estos primeros pasos los damos muy suave, sin afincar mucho el creyón porque la cartulina puede estropearse, así que esta primera capa es para dleimitar todo el dibujo.</div> <center></center> <center>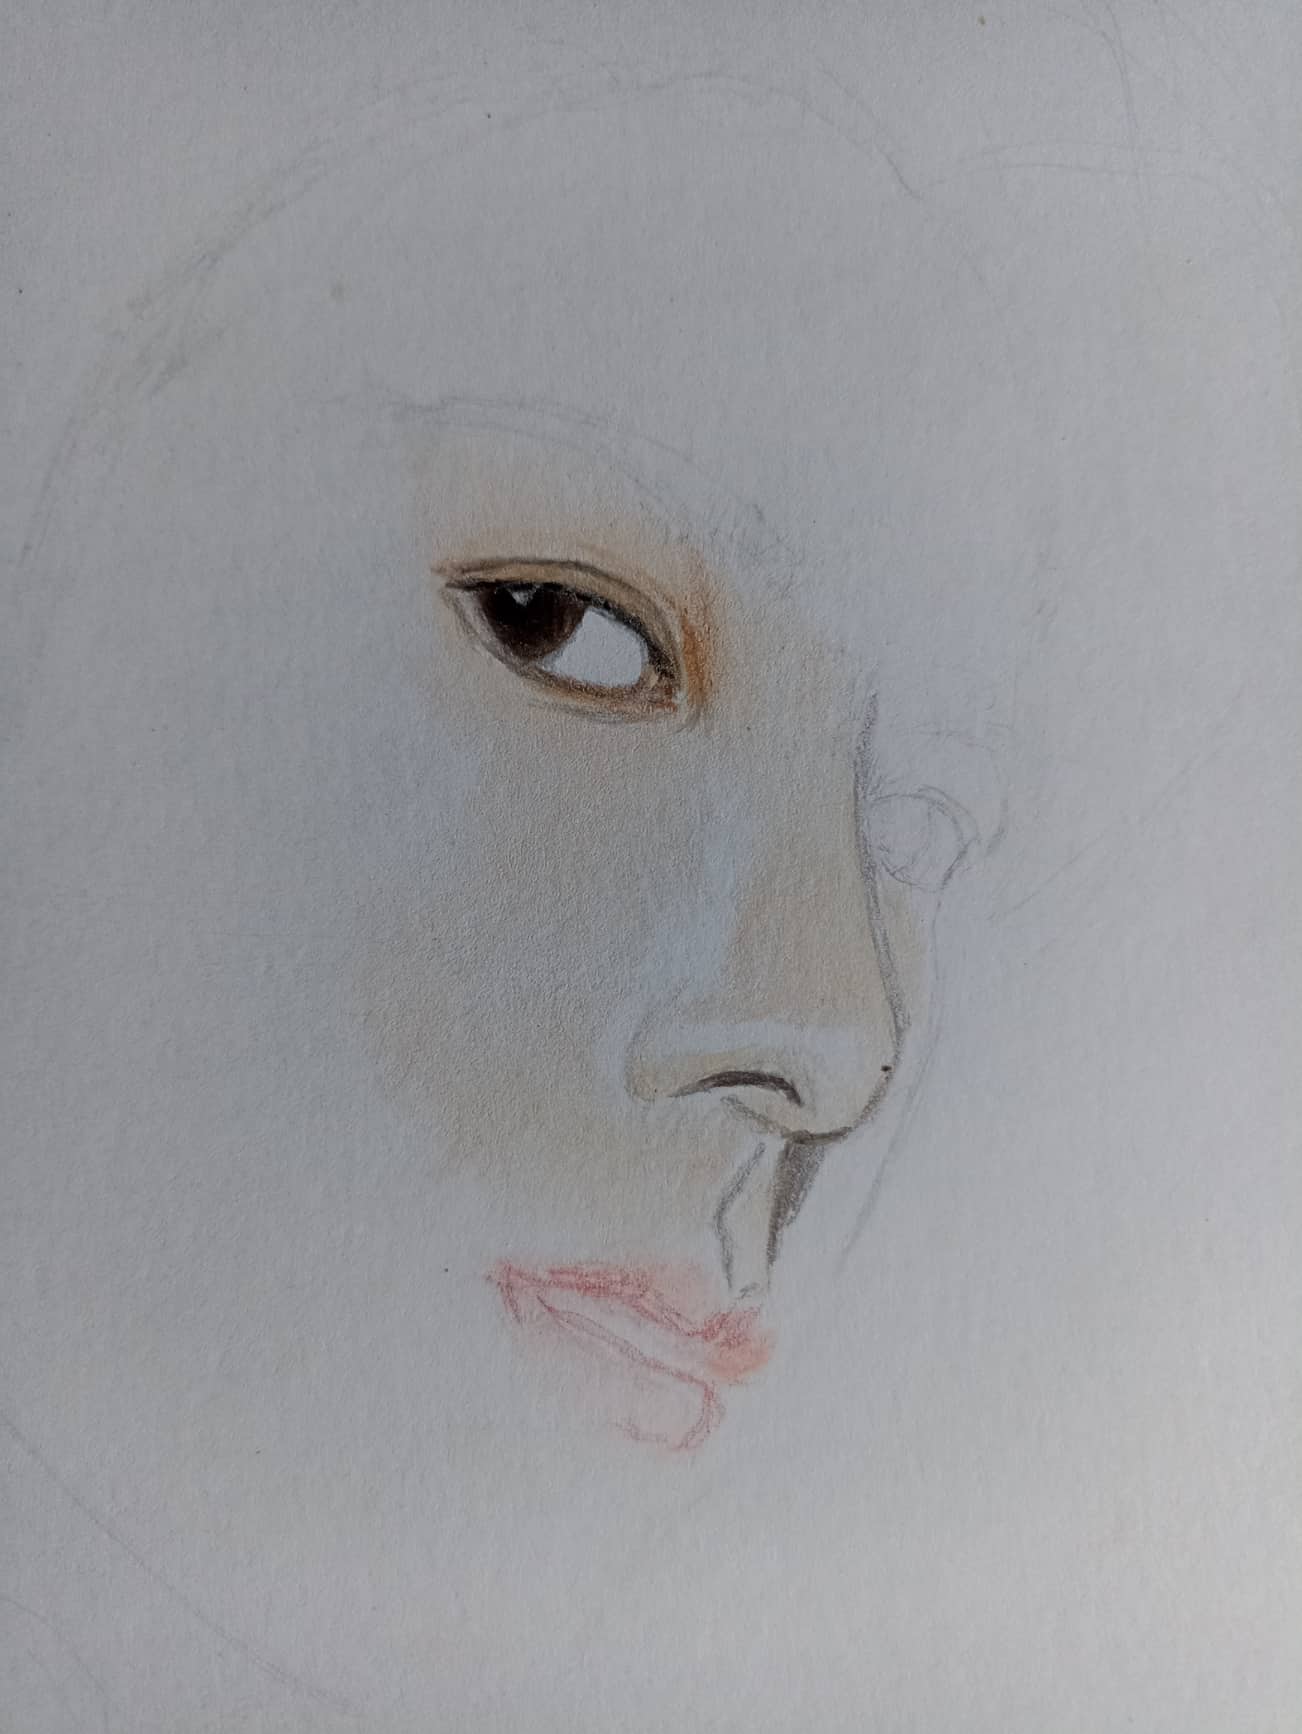</center> <center>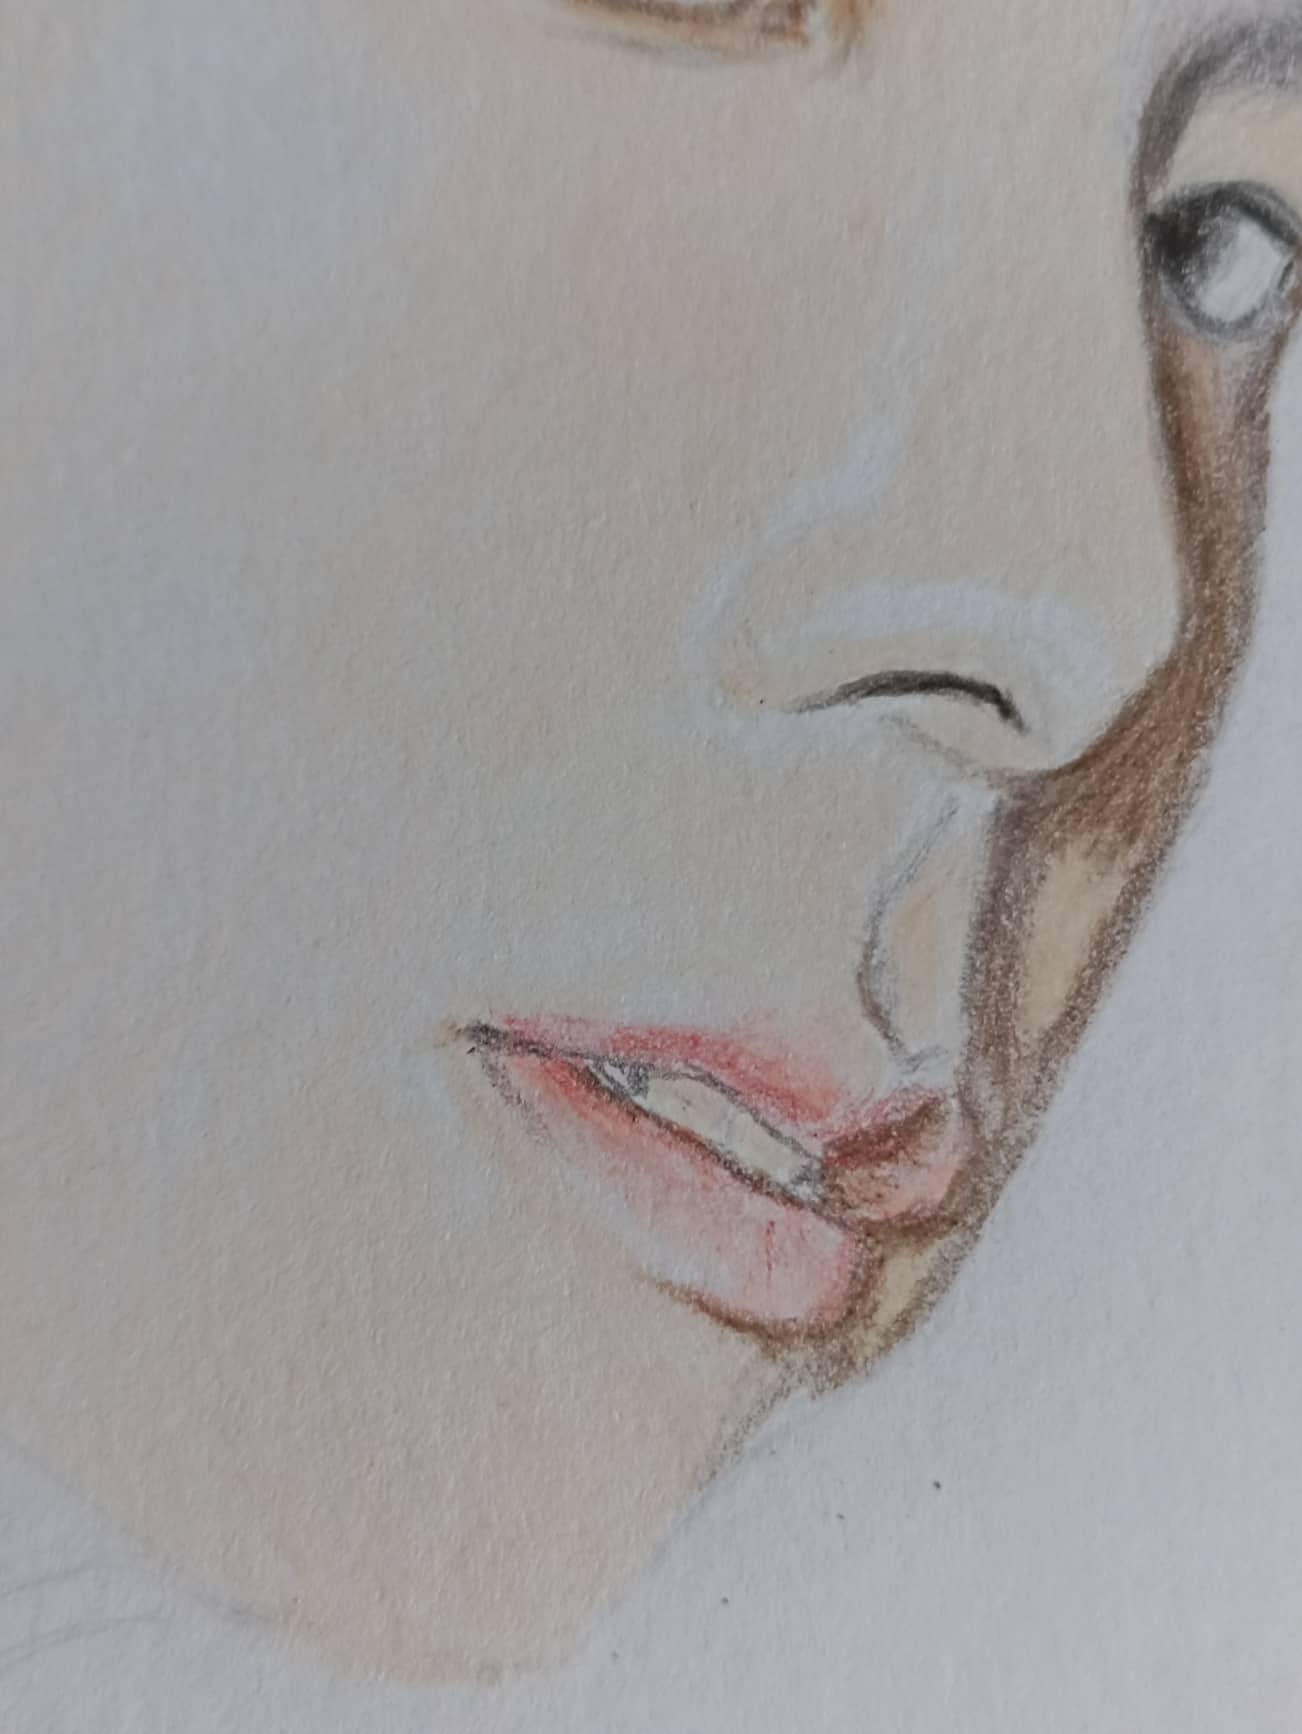</center> <center>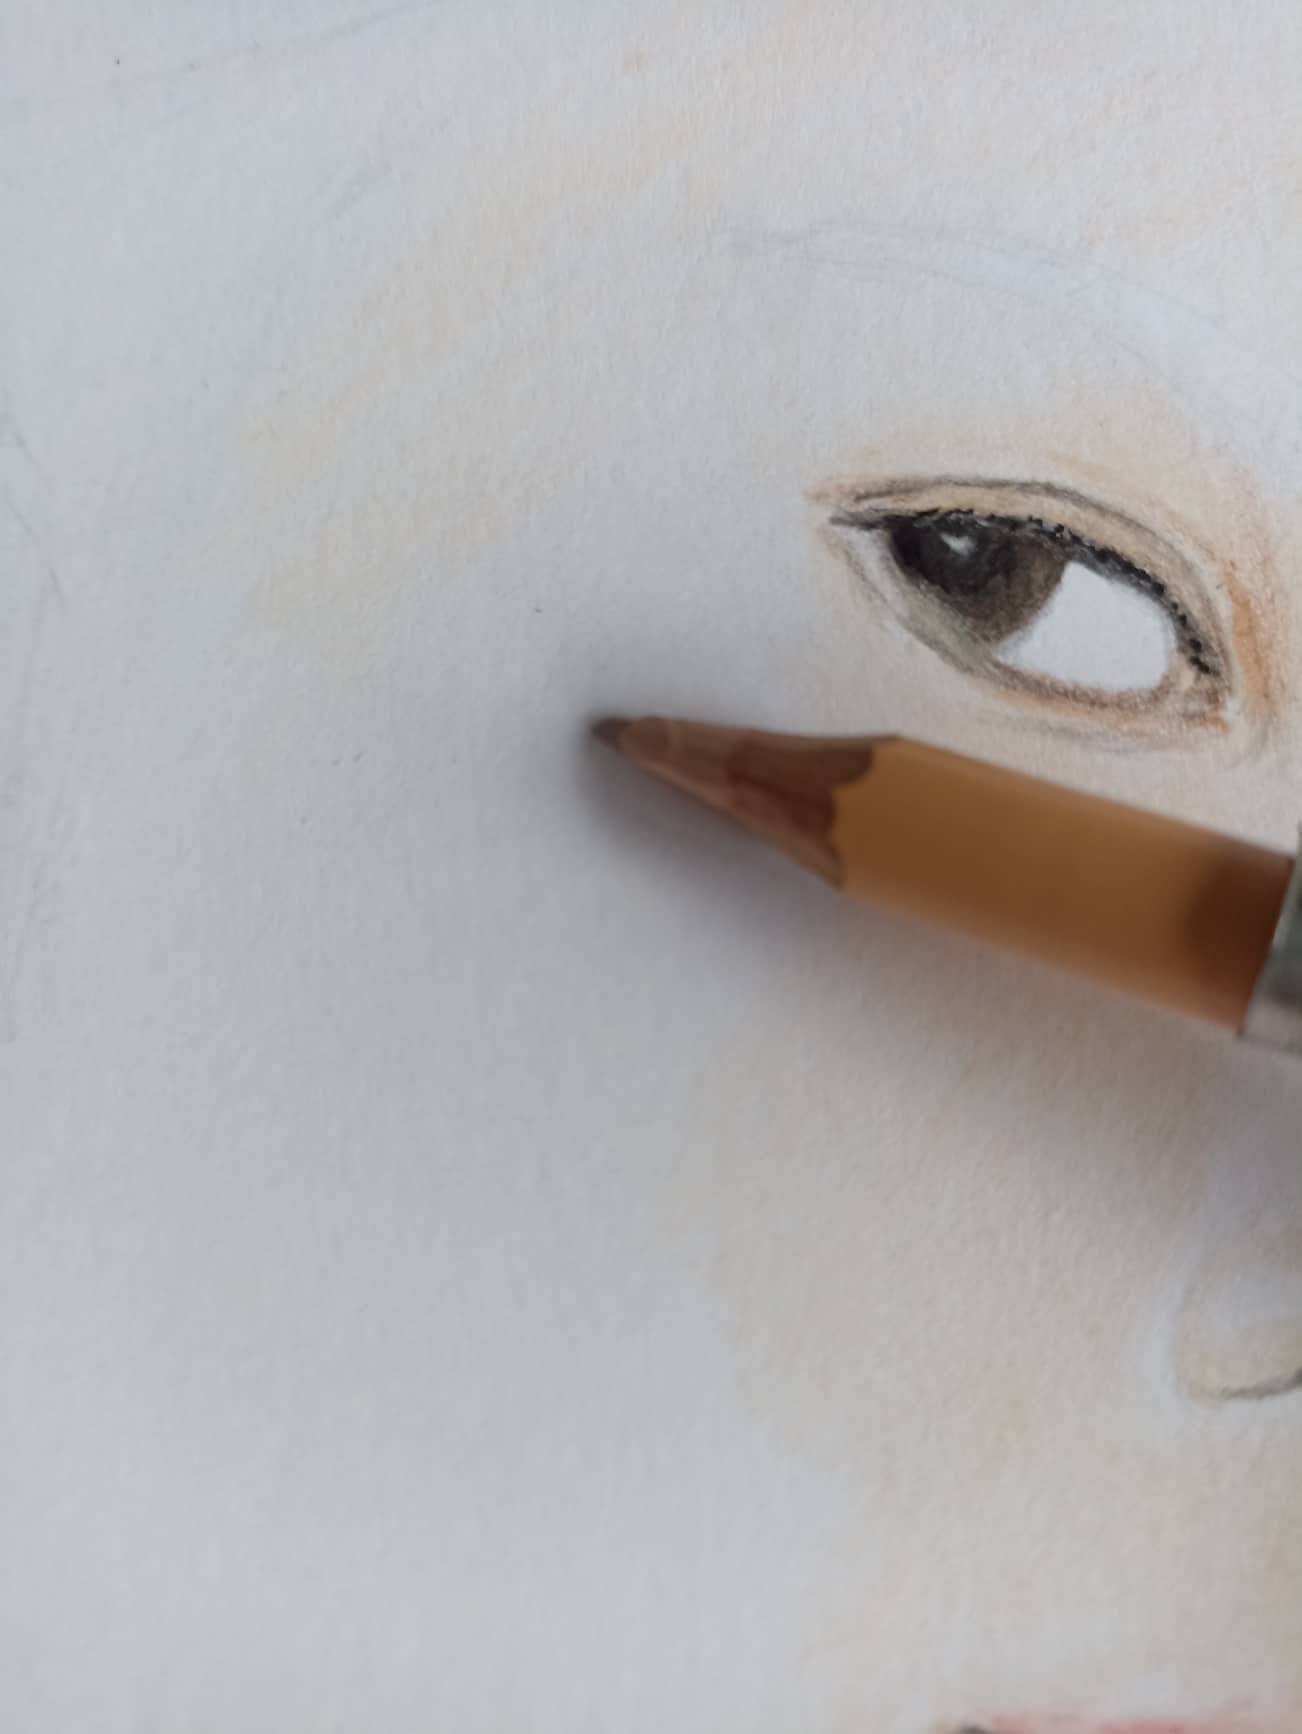</center> <center>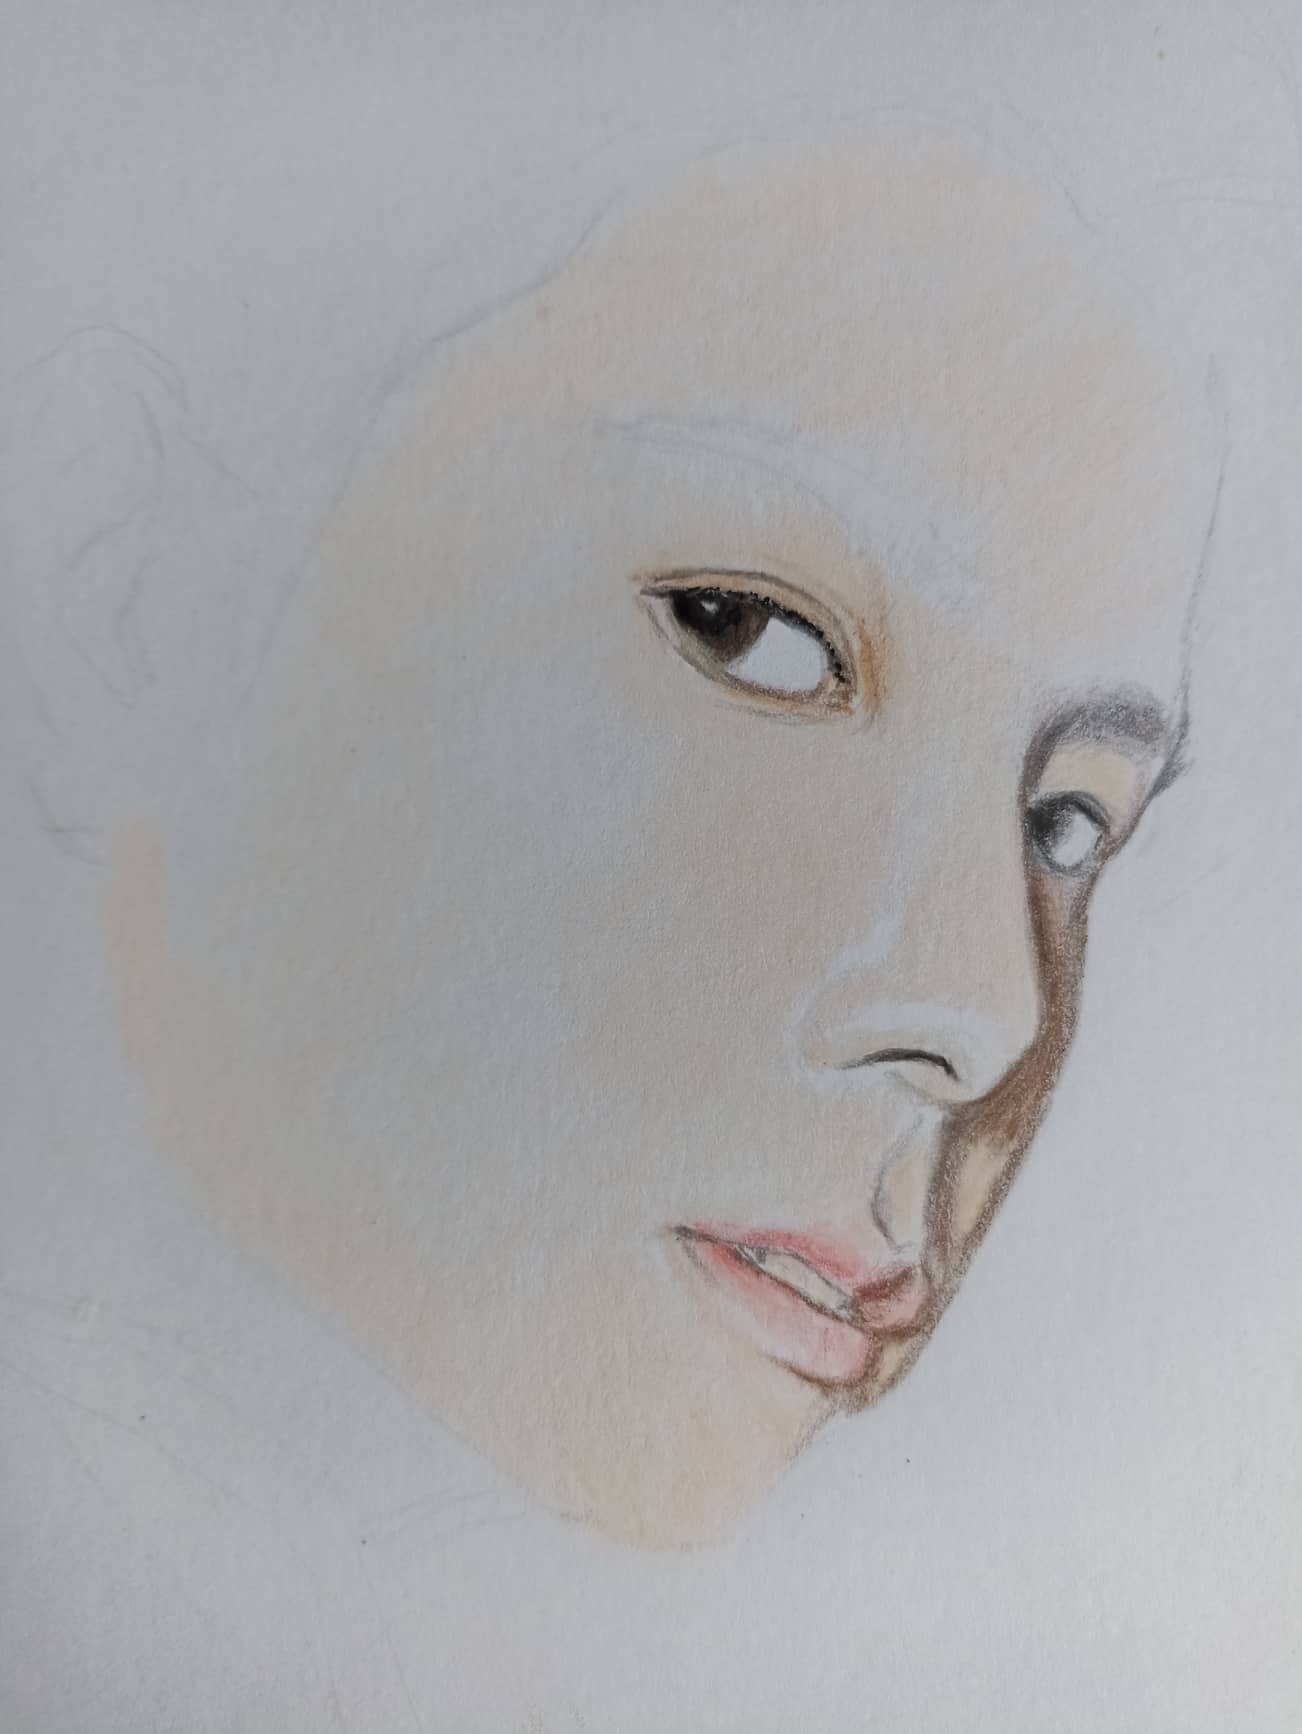</center> <div class="text-justify">The next step is to paint the other eye and that area of the face that is covered by shadow, here we can play with the dark colors of the brown tone, so we can make a color degradation and see the contrast. Also in the area of the lips we give more volume and more details, finally in the whole face we put the layer of light pastel color for the skin, after doing so we can blur with a brush and apply a second layer.</div> ><div class="text-justify">El siguiente paso es pintar el otro ojo y esa zona del rostro que esta cubierto por sombra, aquí podemos jugar con los colores oscuros del tono café, así podemos hacer una degradación del color y que se vea el contraste. Tambien en la zona de los labios le damos más volumen y más detalles, por último en todo el rostro ponemos la capa de color pastel claro para la piel, luego de hacerlo podemos difuminar con un pincel y aplicar una segunda capa.</center> <center></center> <center>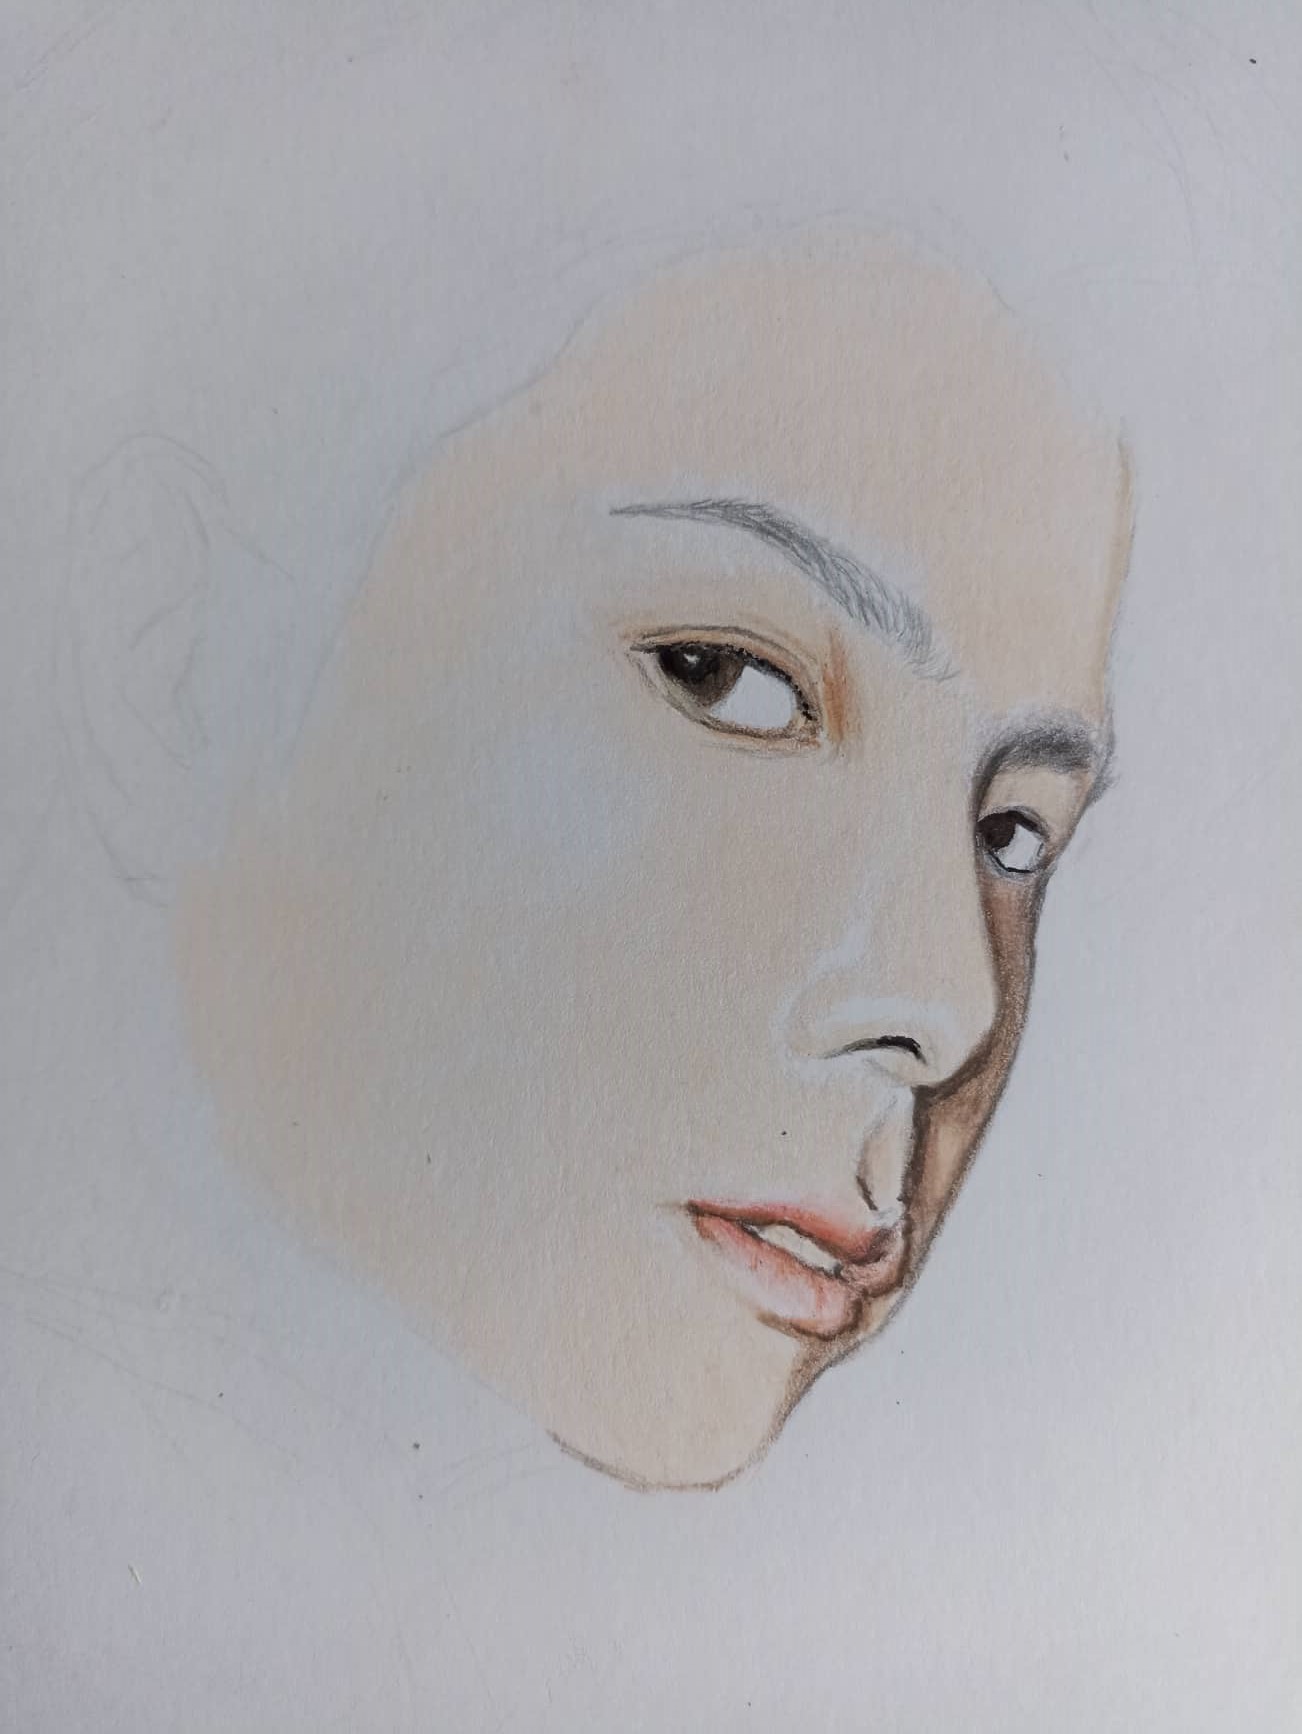</center> <center>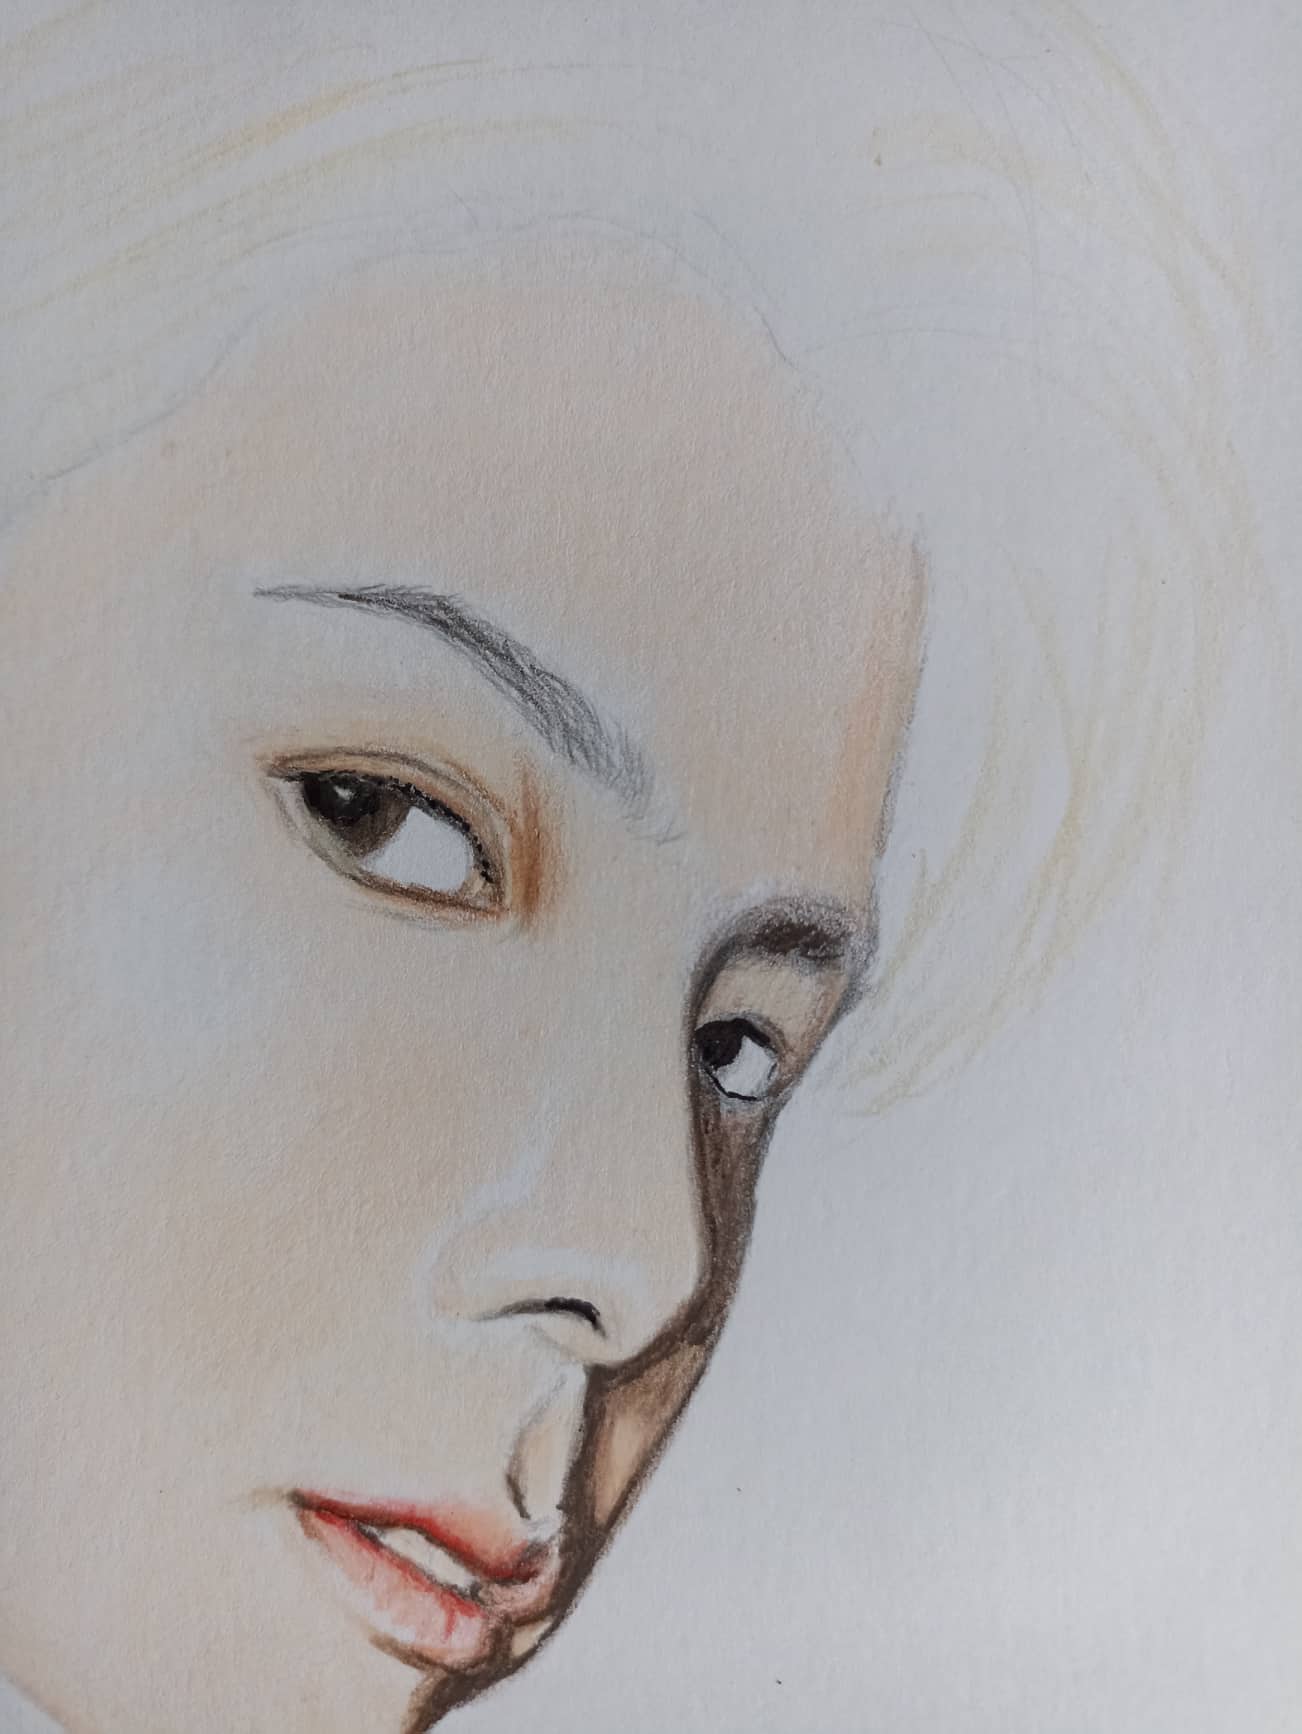</center> <center>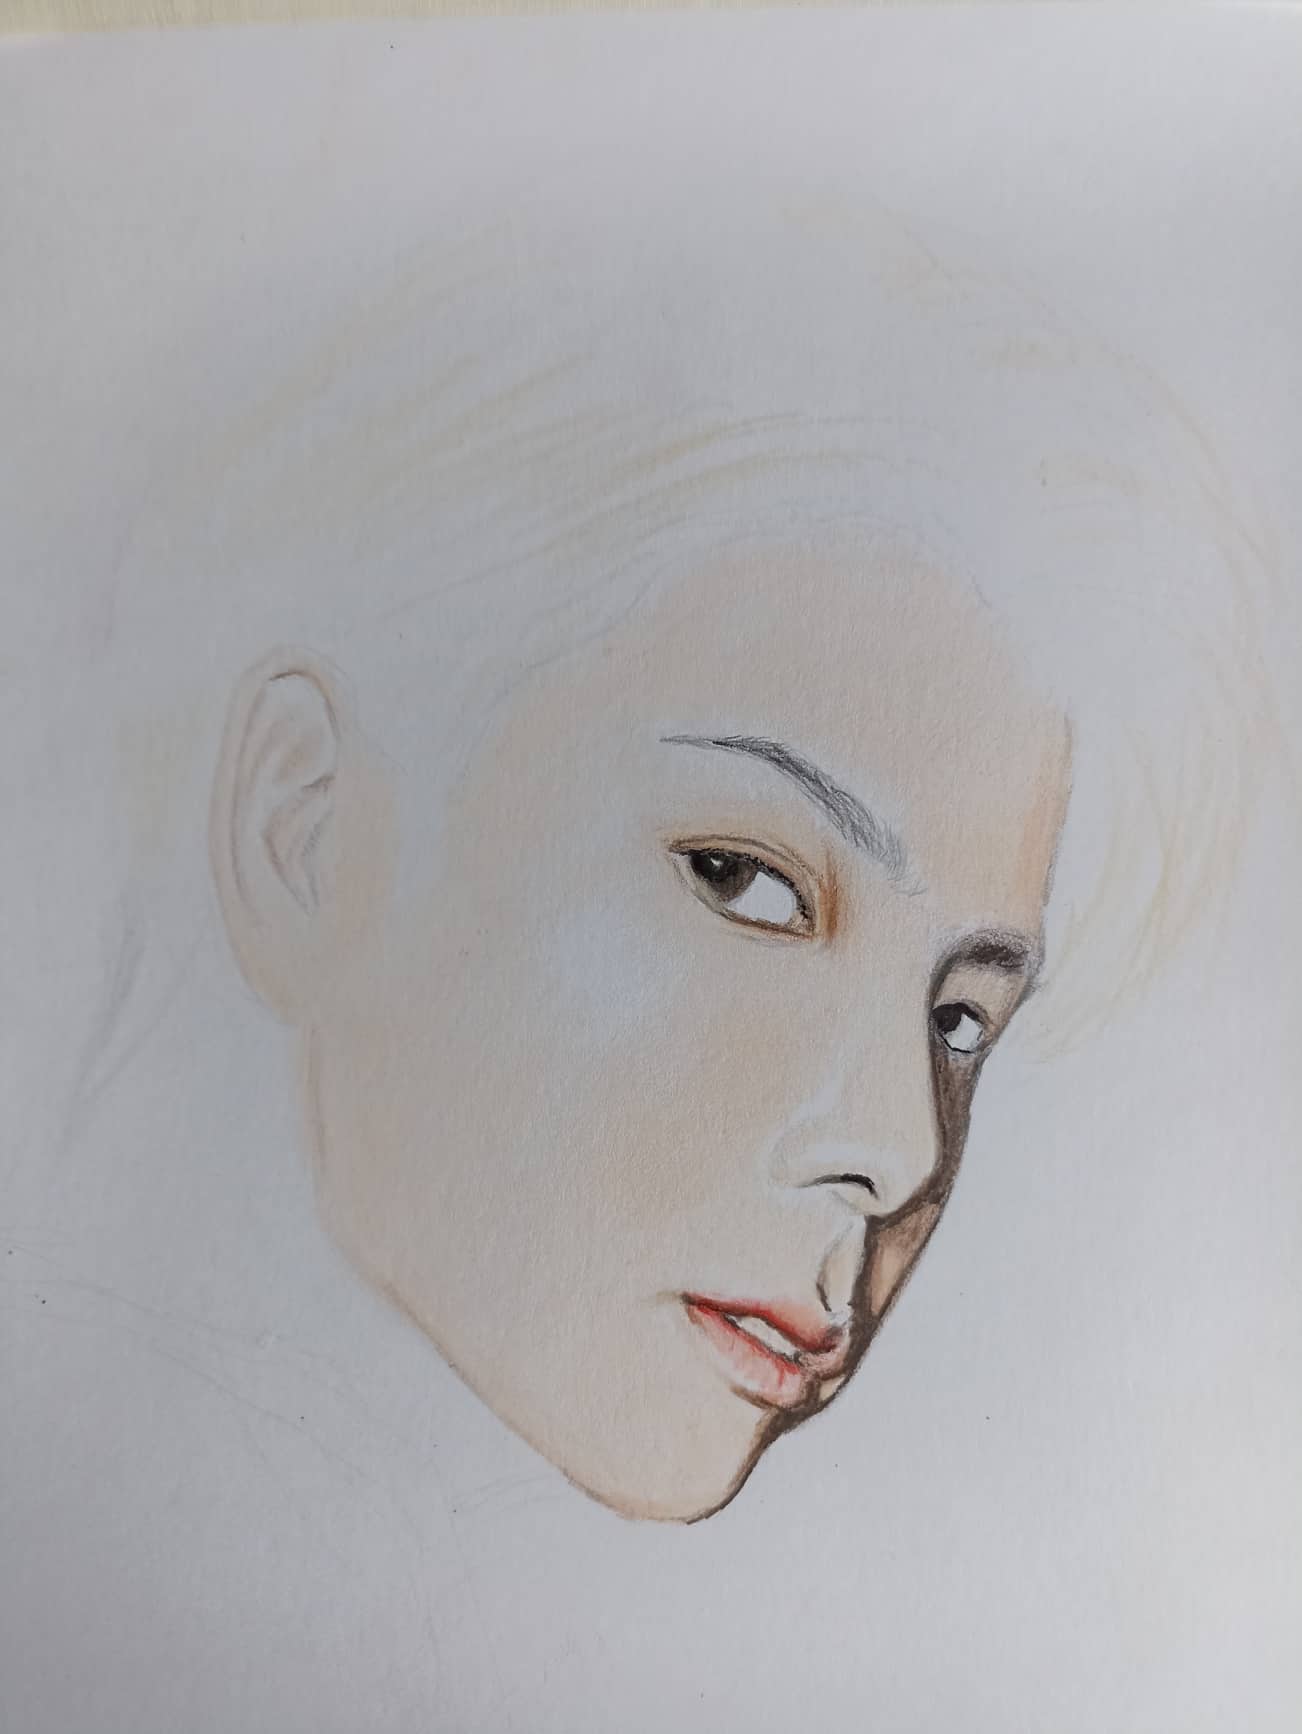</center> <center>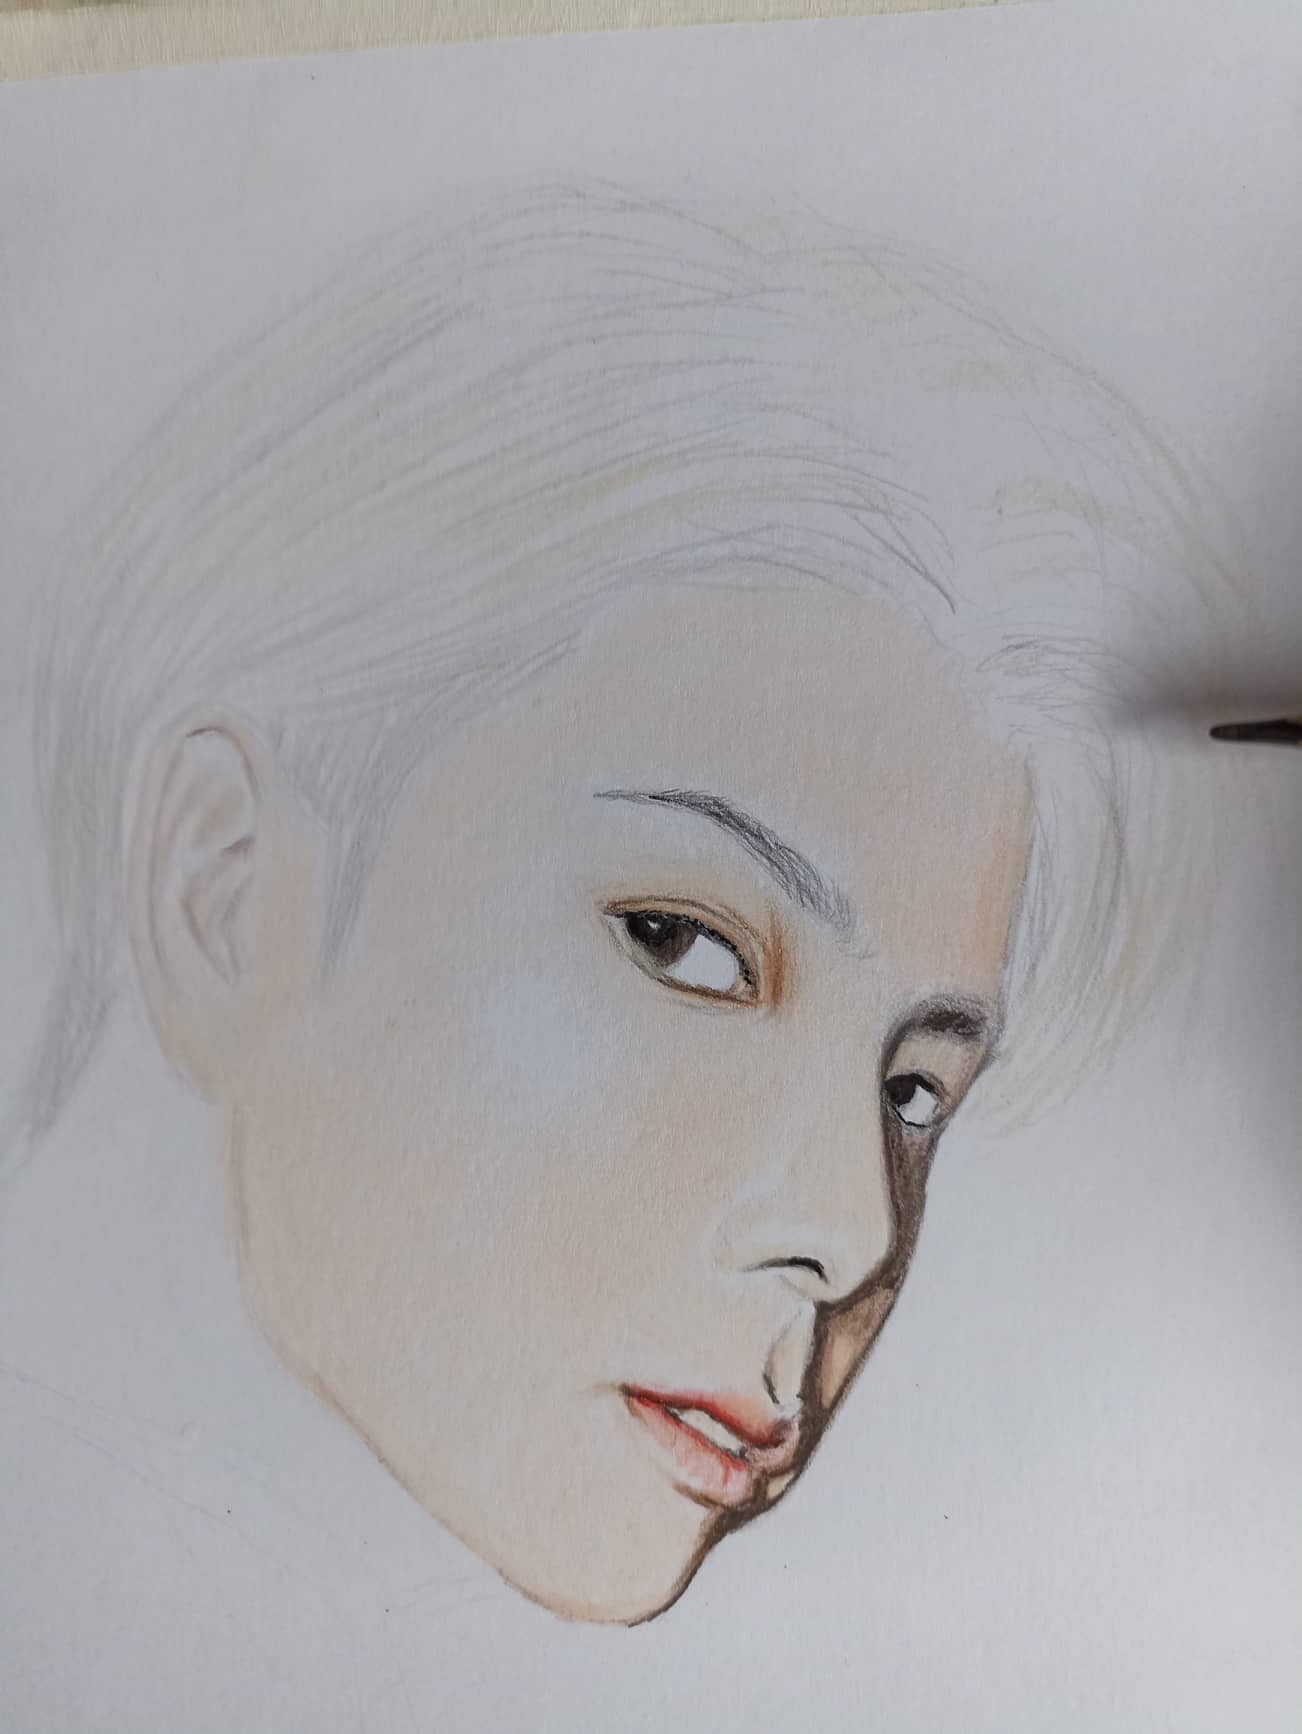</center> <div class="text-justify">Now that the first process is complete, what I do is repeat it again, this time if I make the stroke with the crayons stronger to take advantage of all the color tone, I will only leave those parts that I need to mix with other slightly lighter tones. When outlining the skin of the face now I continue with the hair, which I use a beige color, I use this to mark the parts that I will leave unpainted with dark colors so that later it works as the shine of the hair in the light.</div> ><div class="text-justify">Ahora completado el primer proceso, lo que hago es volver a repetirlo, esta vez si hago el trazo con los creyones más fuerte para aprovechar todo el tono del color, solo dejaré aquellas partes que necesite mezclar con otros tonos un poco mas claros. Al delinear la piel del rostro ahora sigo con el cabello, el cual utilizo un color beige, este lo uso para marcar las partes que dejaré sin pintar con colores oscuros para que luego funcione como el brillo del cabello en la luz.</div> <center></center> <center></center> <center>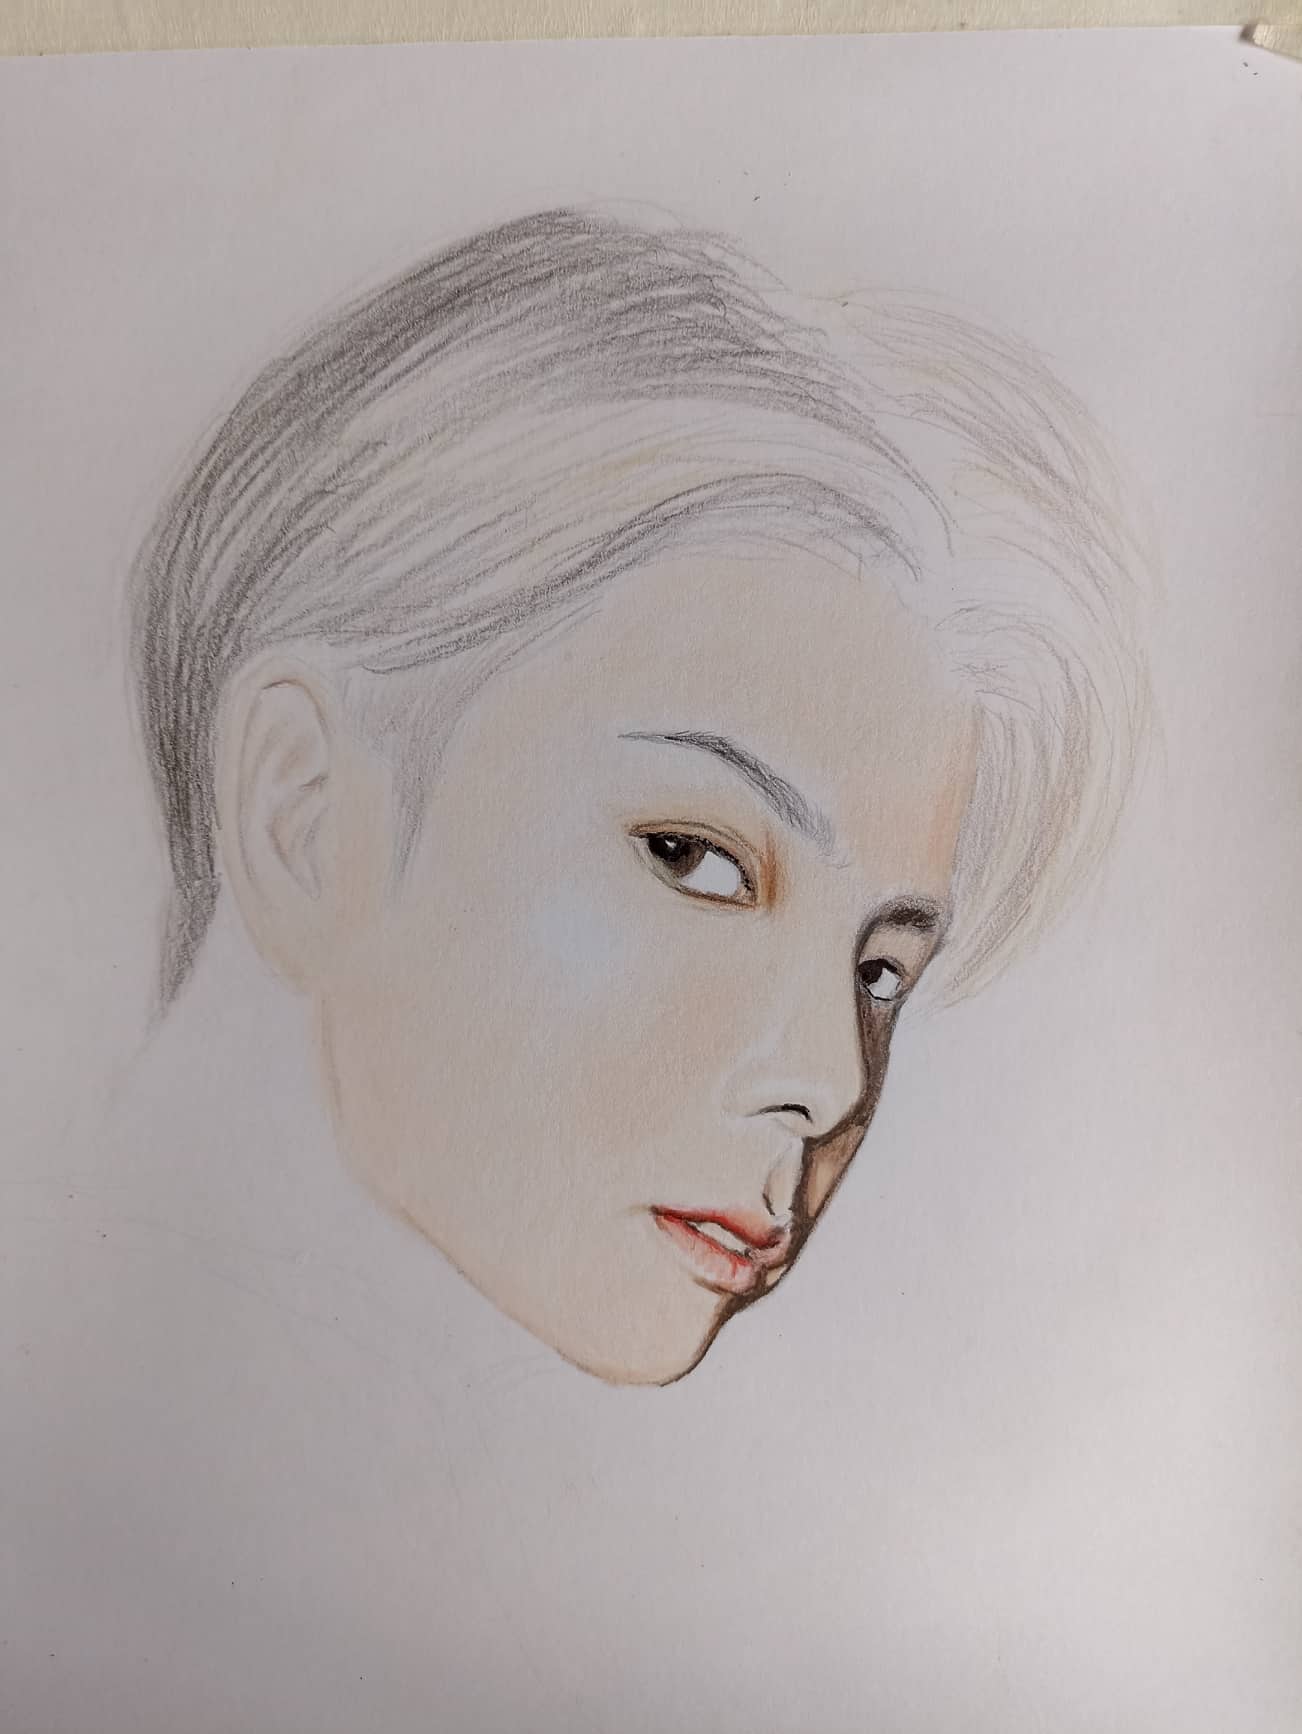</center> <center>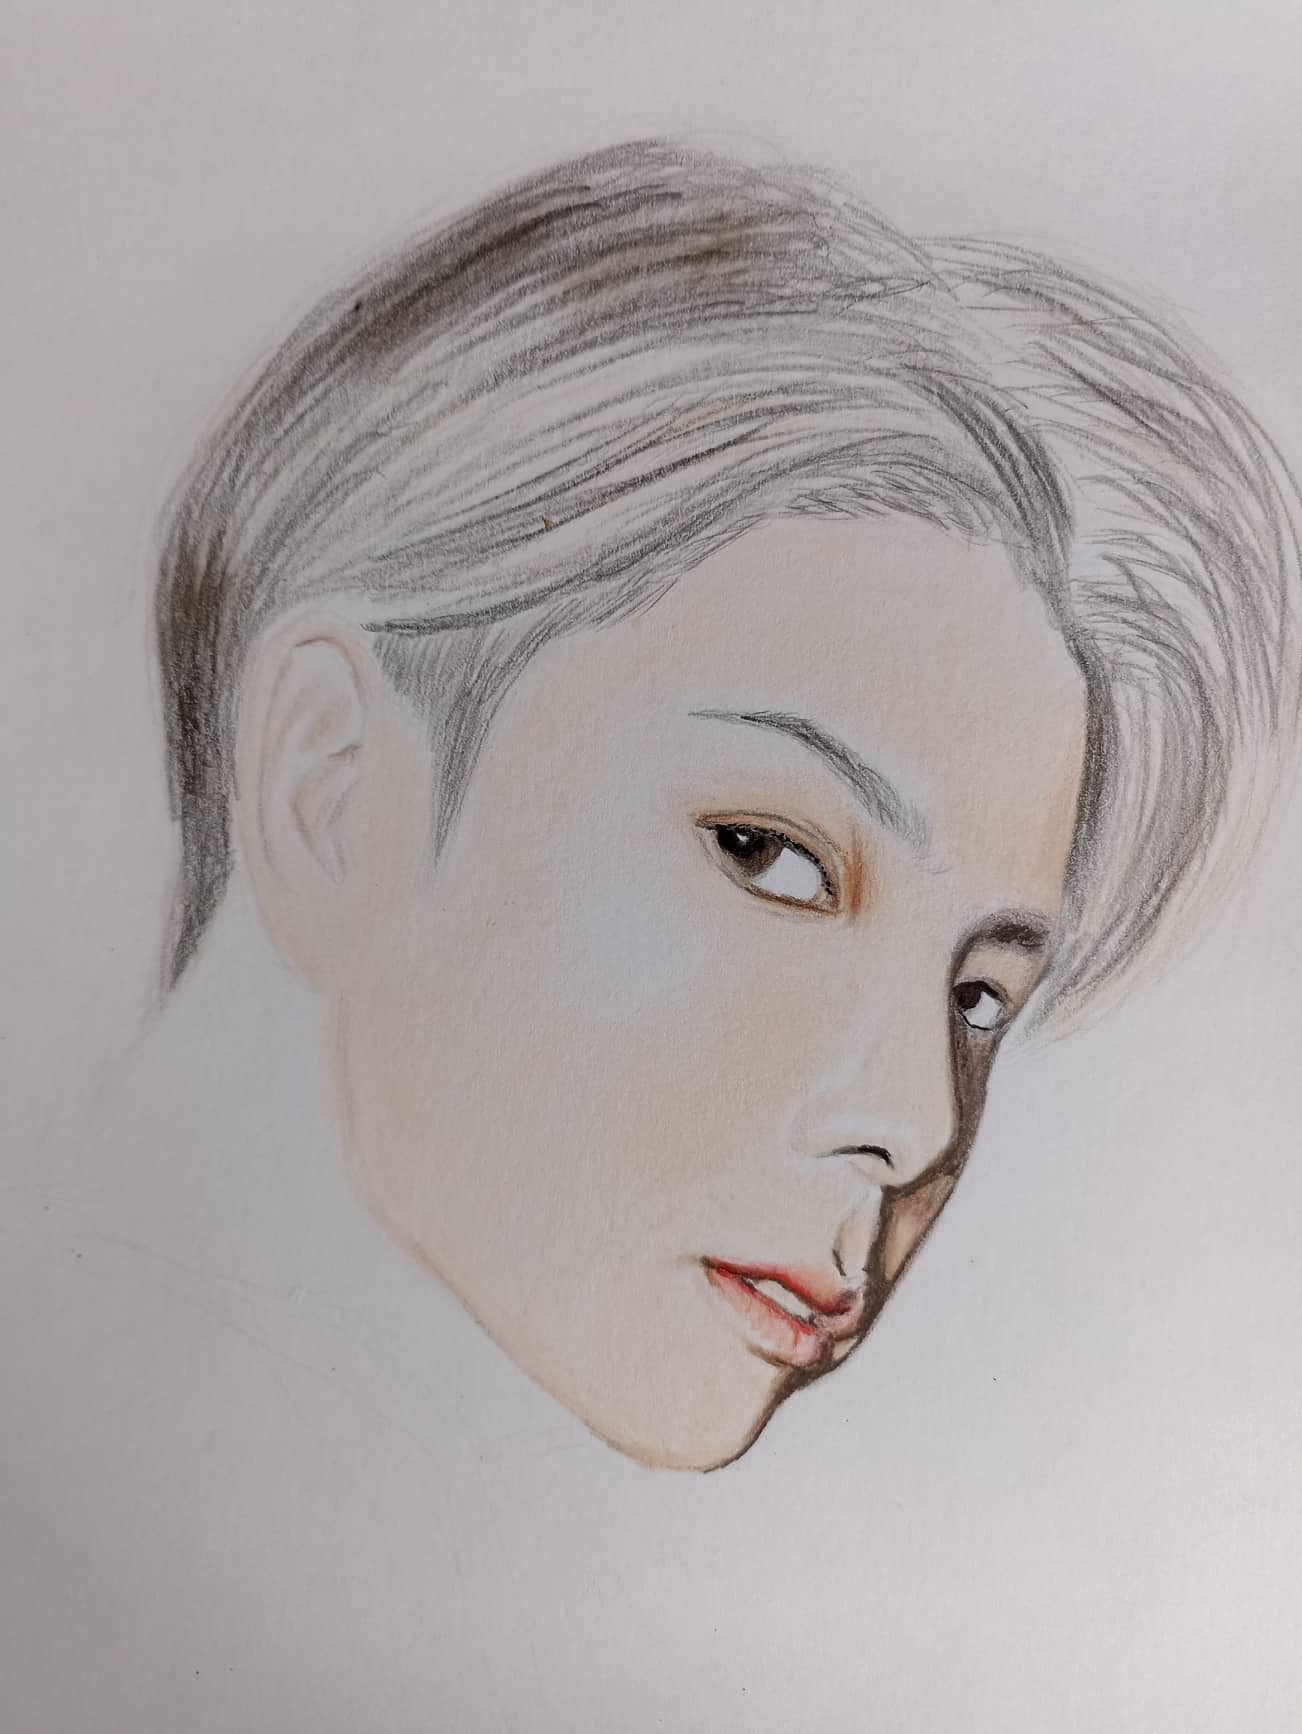</center> <center></center> <center>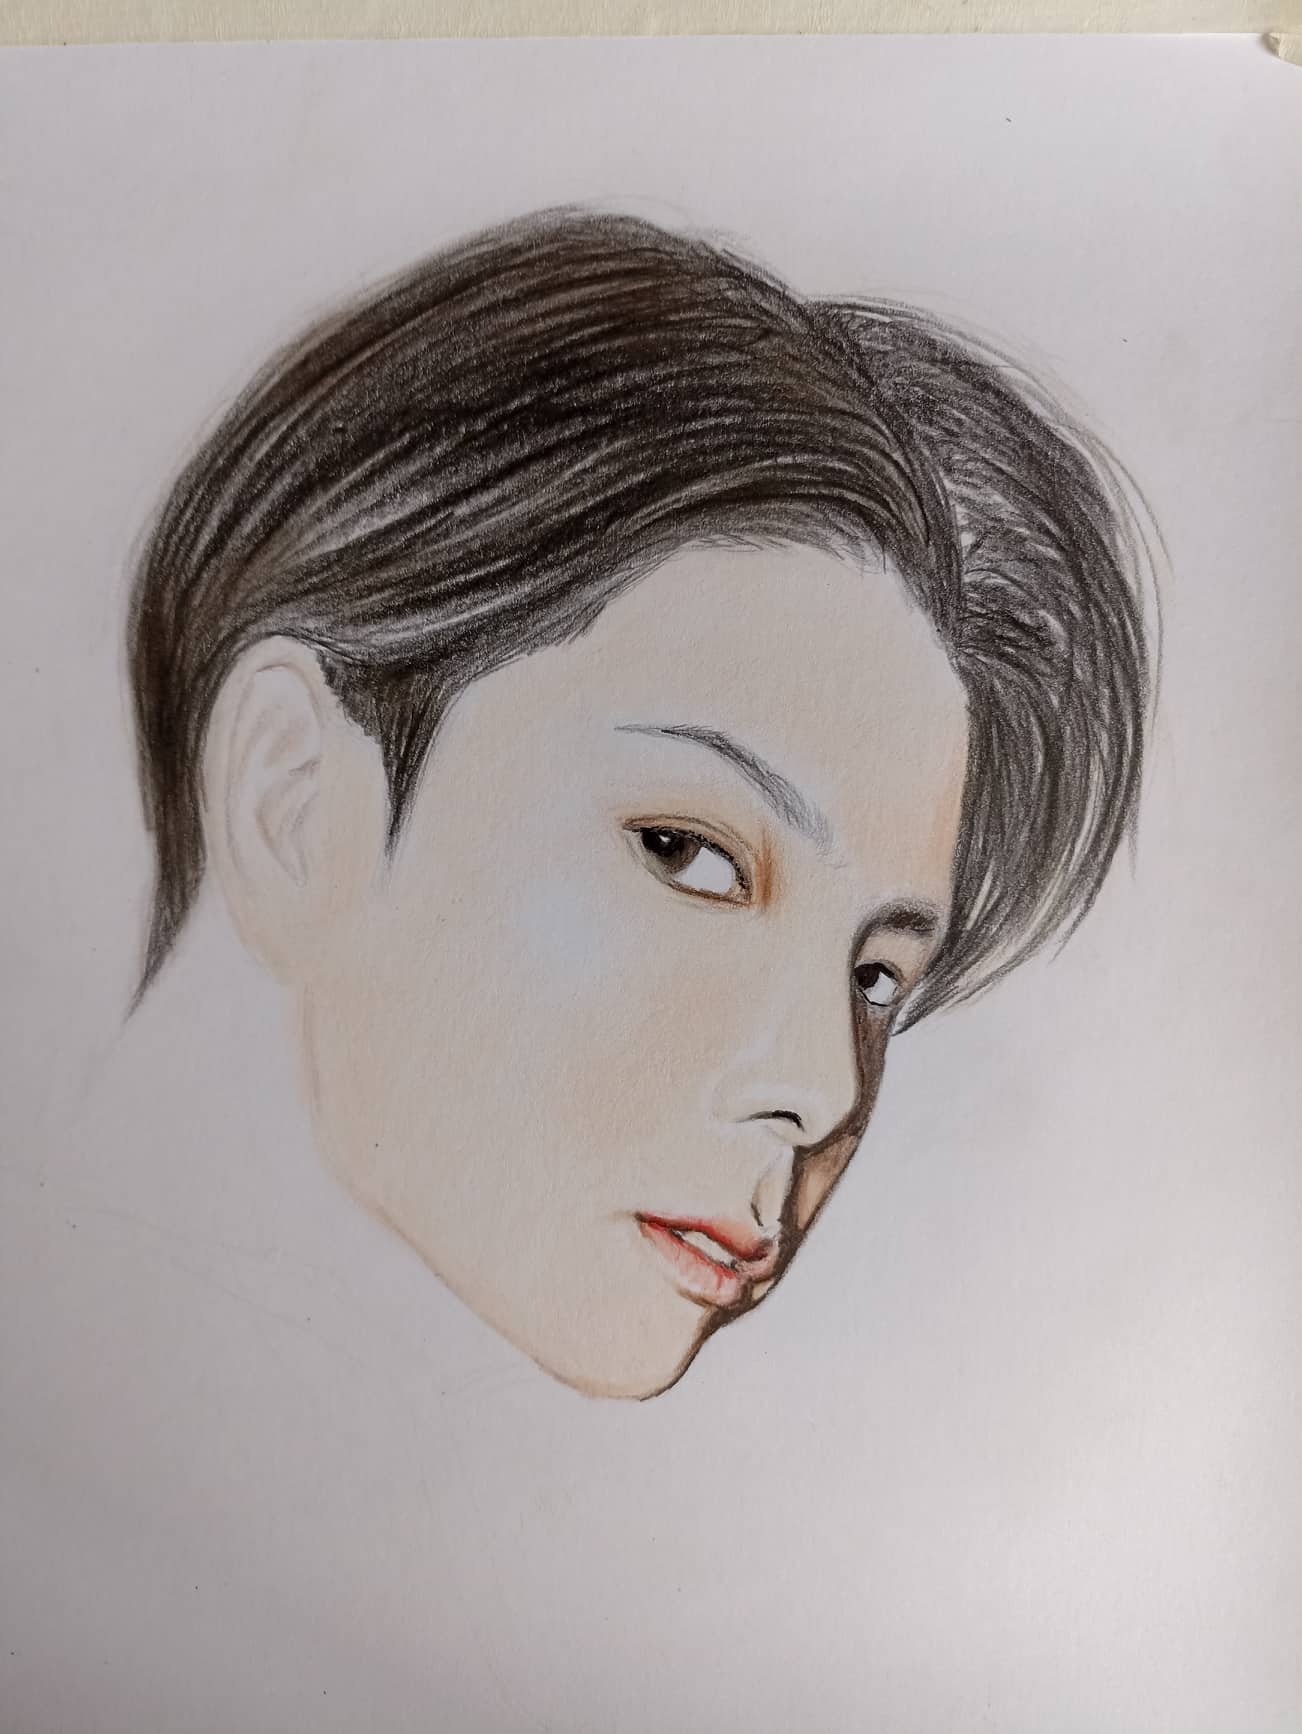</center> <div class="text-justify">Here you can see step by step how I painted the hair, from the lightest to the darkest, you can see how the strokes are fast and elliptical in shape. When I draw hair this way I feel like it looks more realistic and natural. I use all the shades of brown and finally I use the black color to further accentuate the details of the lights and shadows and the reflections of light in the hair.</div> ><div class="text-justify">Aquí pueden apreciar paso a paso como fui pintando el cabello, desde lo más claro hasta lo más oscuro, puede verse como las trazos son rápidos y con forma de elíptica. Cuando dibujo el cabello de esta manera siento que se ve más realista y natural. Uso todos los tonos del color café y por último utilizo el color negro para acentuar más los detalles de las luces y sombras y los reflejos de luz en el cabello.</div> <center></center> <center>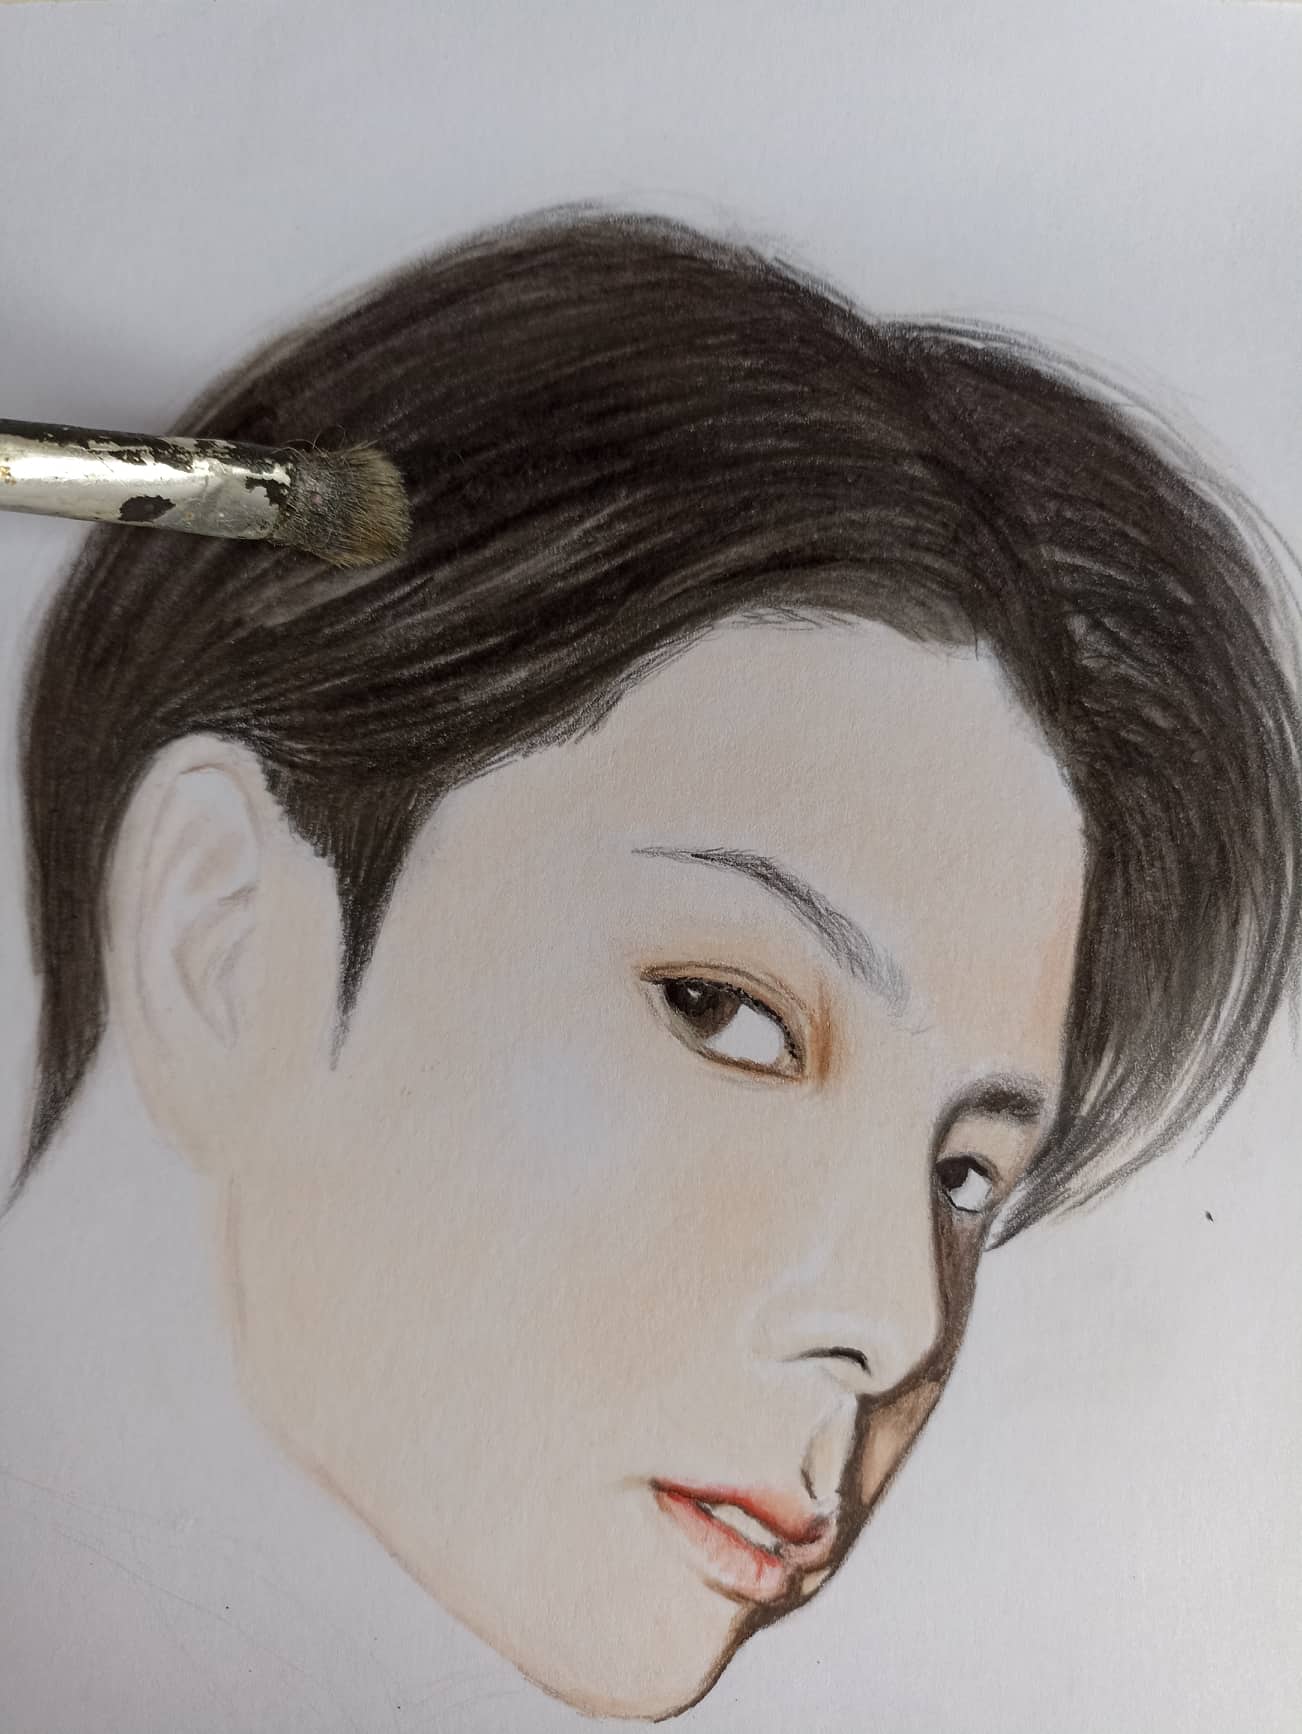</center> <center>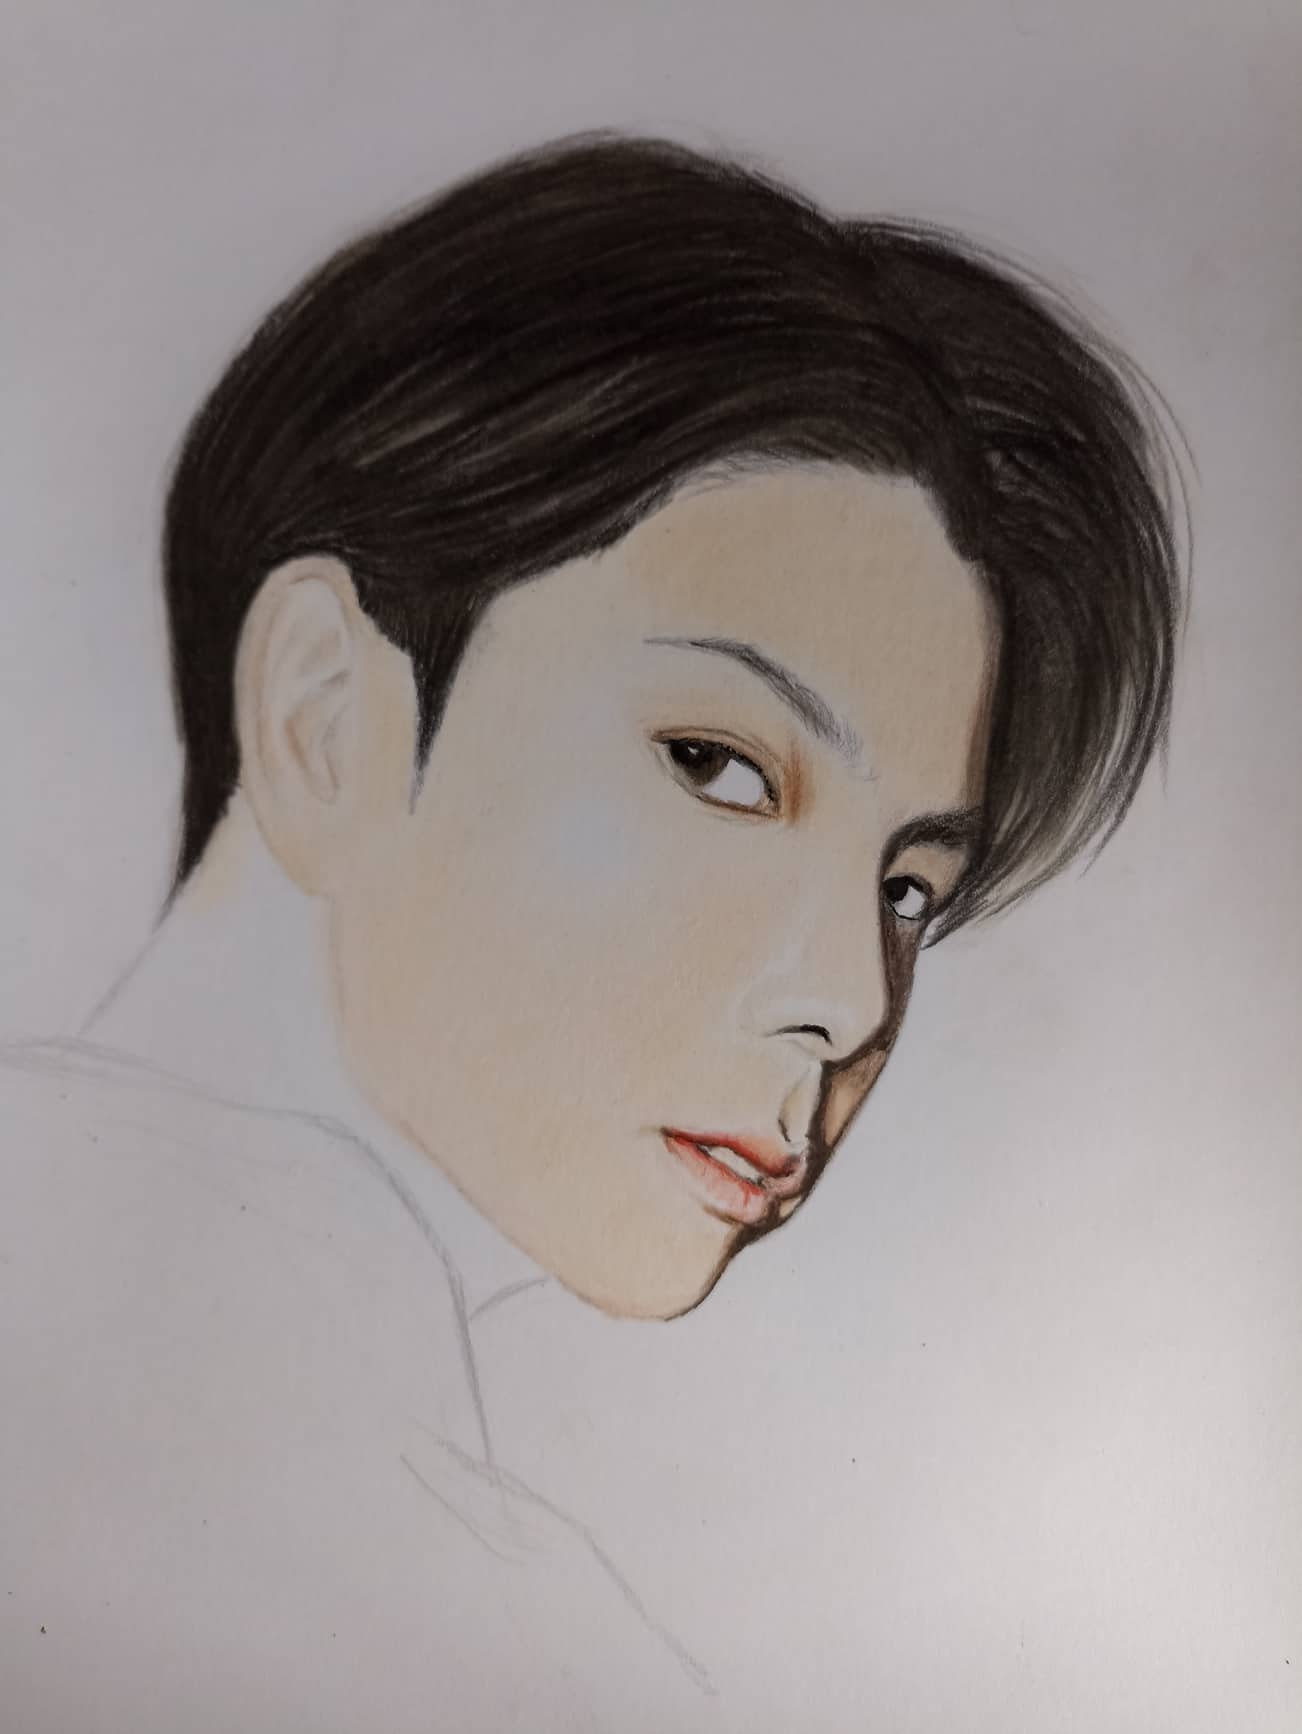</center> <center>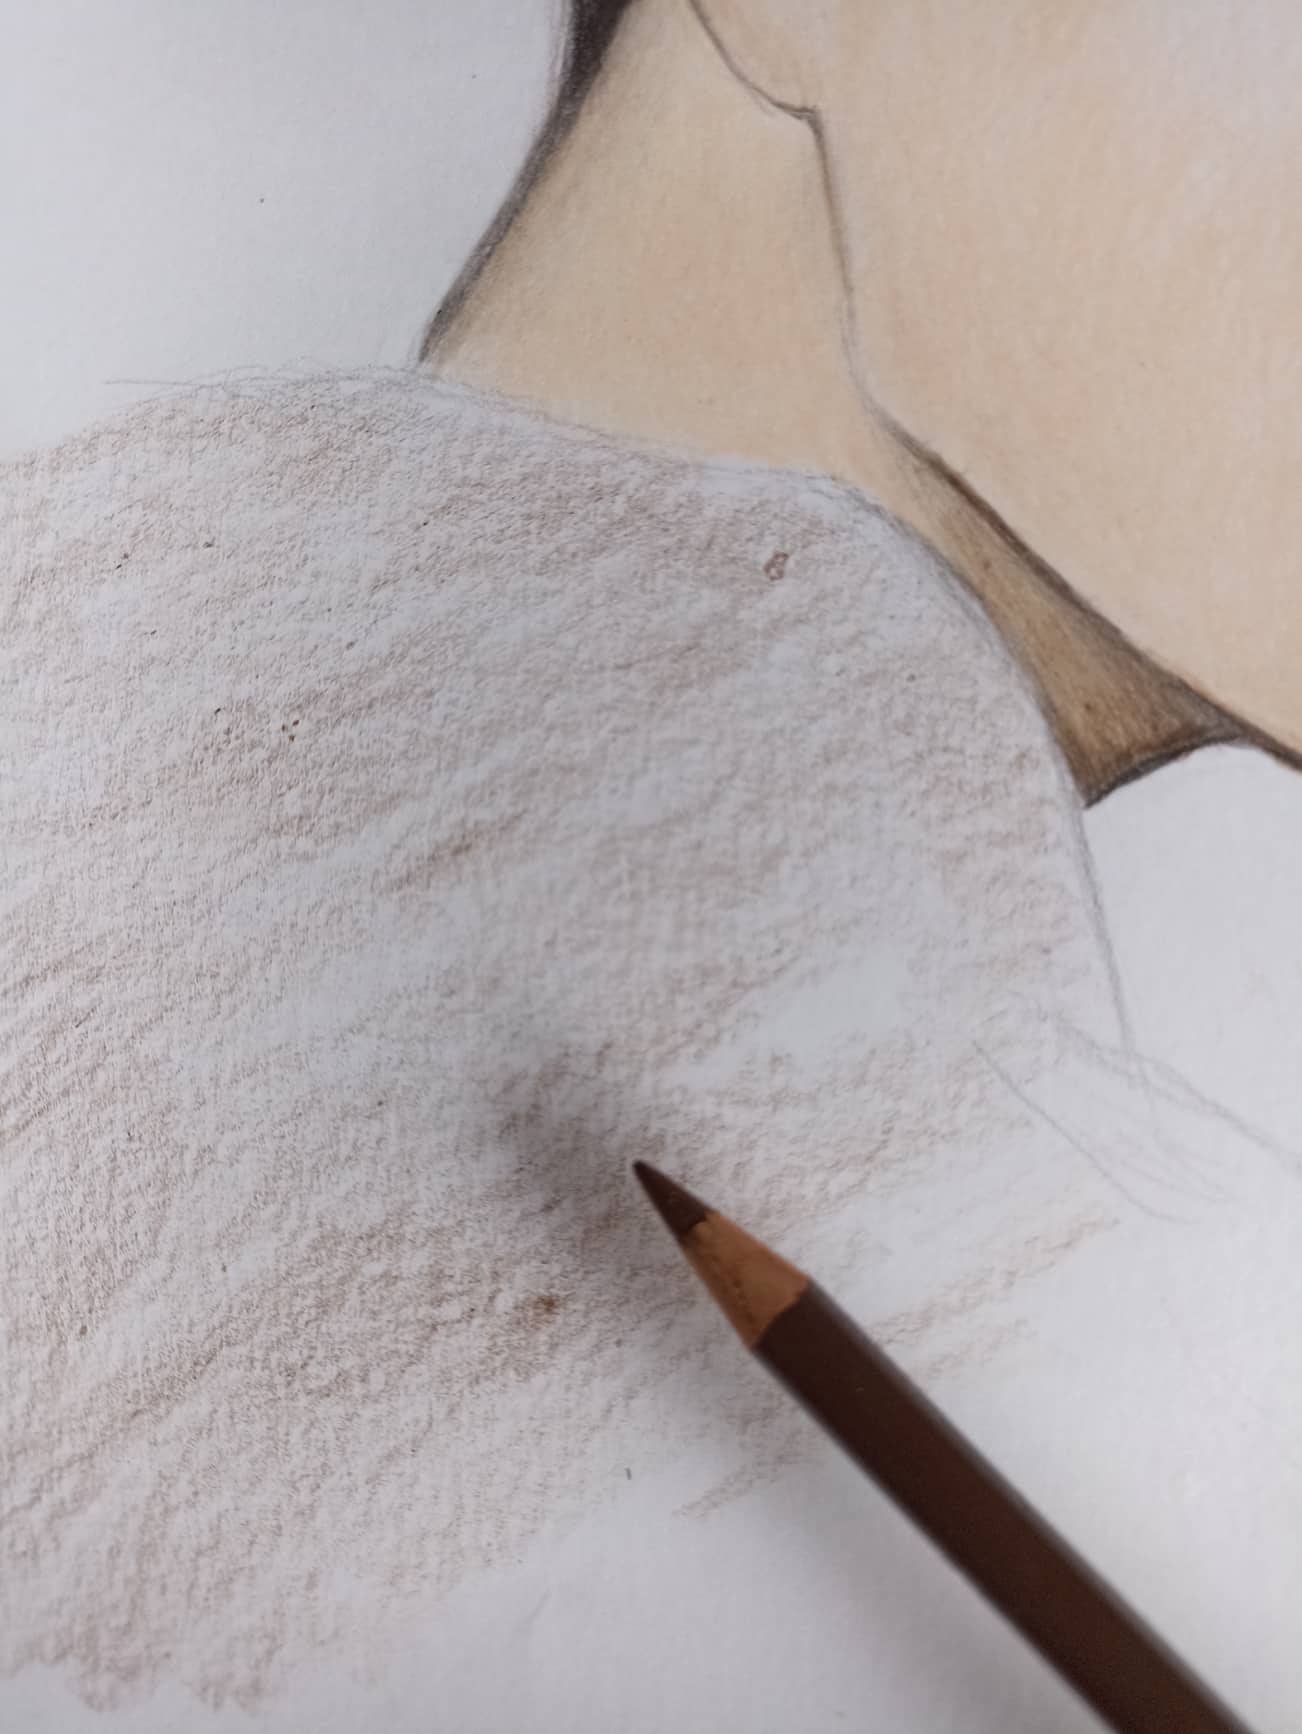</center> <center></center> <center>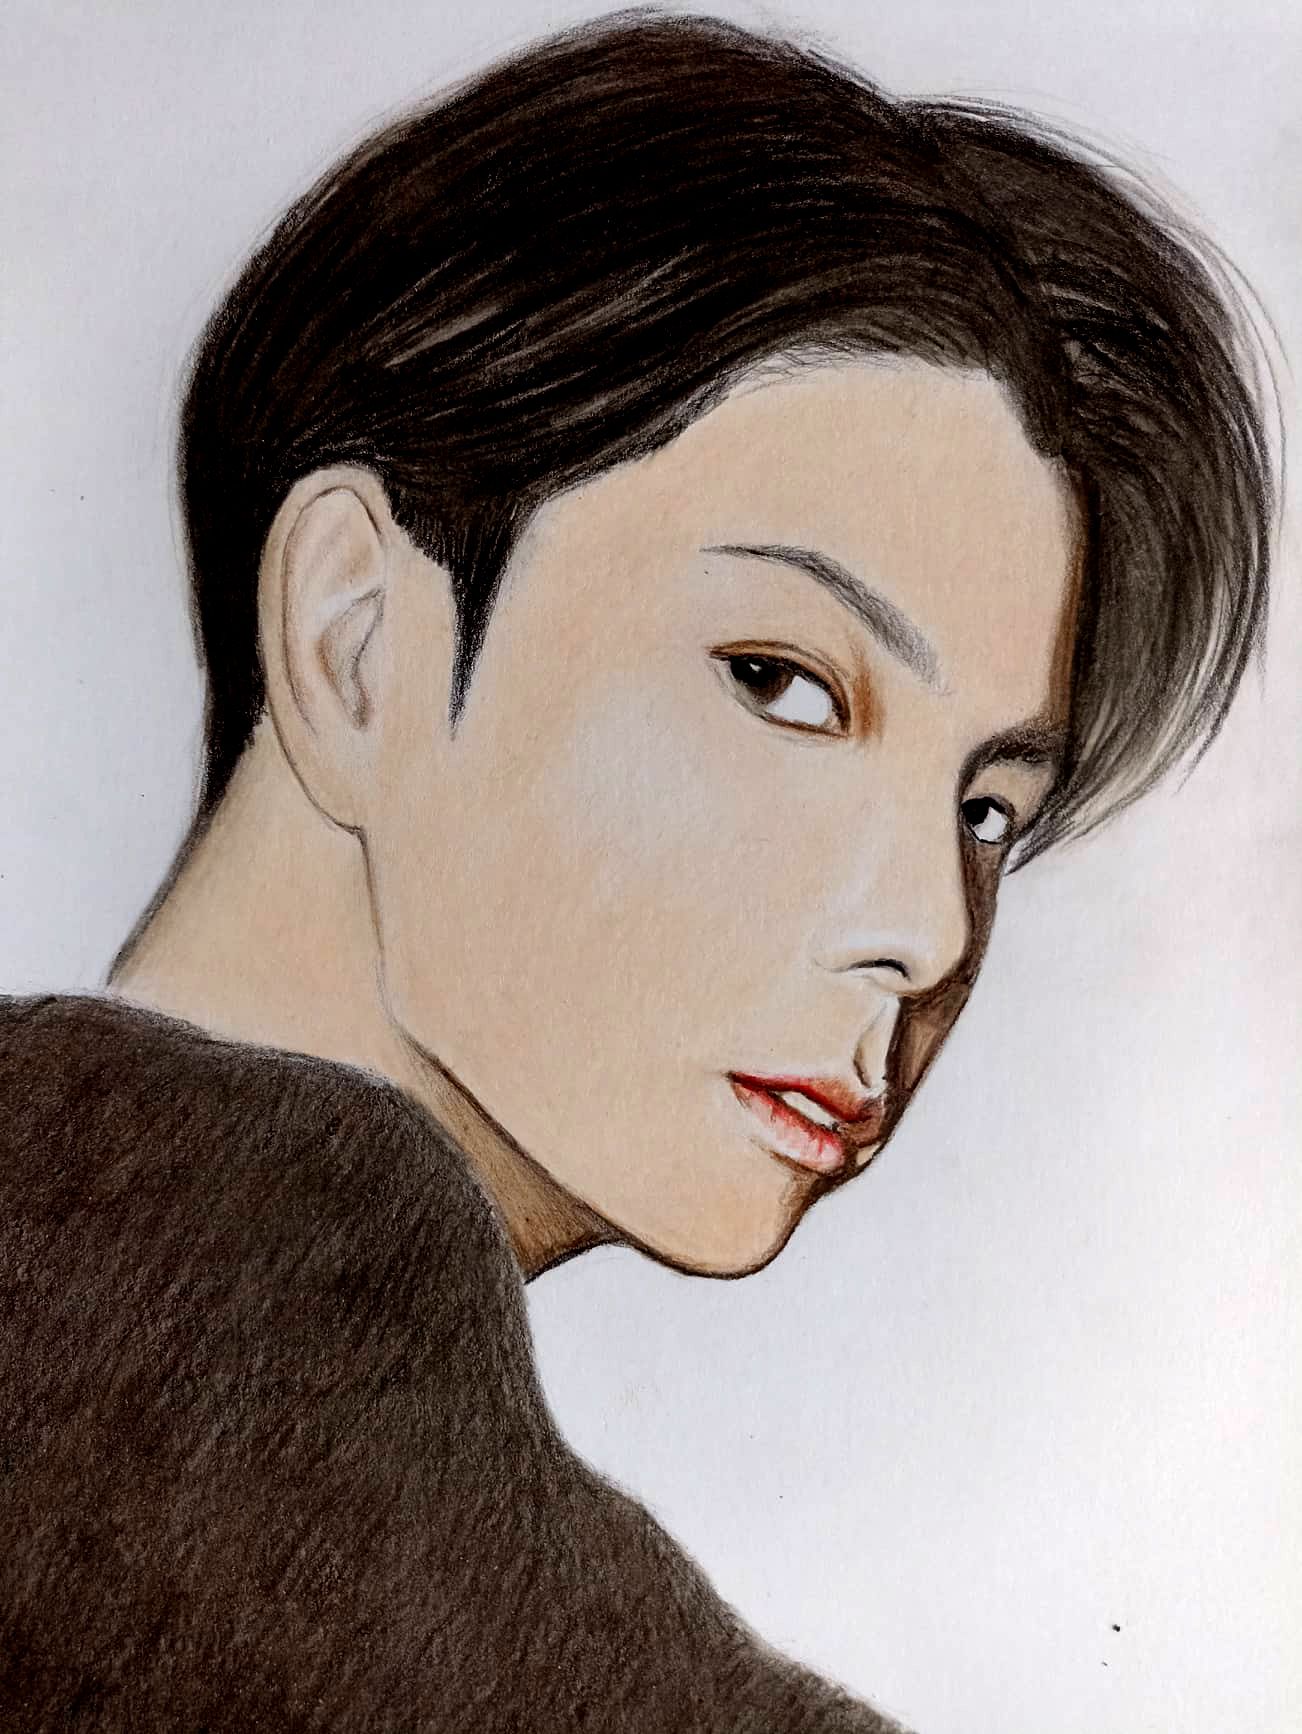</center> <div class="text-justify">Then to give volume to the hair I applied the technique of blurring with a brush, here I used a mineral oil to better mix the colors, after passing the brush the colors are mixed, you can continue making more strokes for the hair. Then paint the neck area and clothes. In this way the portrait was completed.</div> ><div class="text-justify">Luego para darle volumen al cabello apliqué la técnica de difuminar con un pincel, aquí utilicé un aceite mineral para mezclar mejor los colores, luego de pasar el pincel los colores se mezclan se puede seguir haciendo más trazos para el cabello. Luego pinte la zona del cuello y la ropa. De esta manera quedó finalizado el retrato.</div> <center></center> <center>FINAL WORK</center> <center>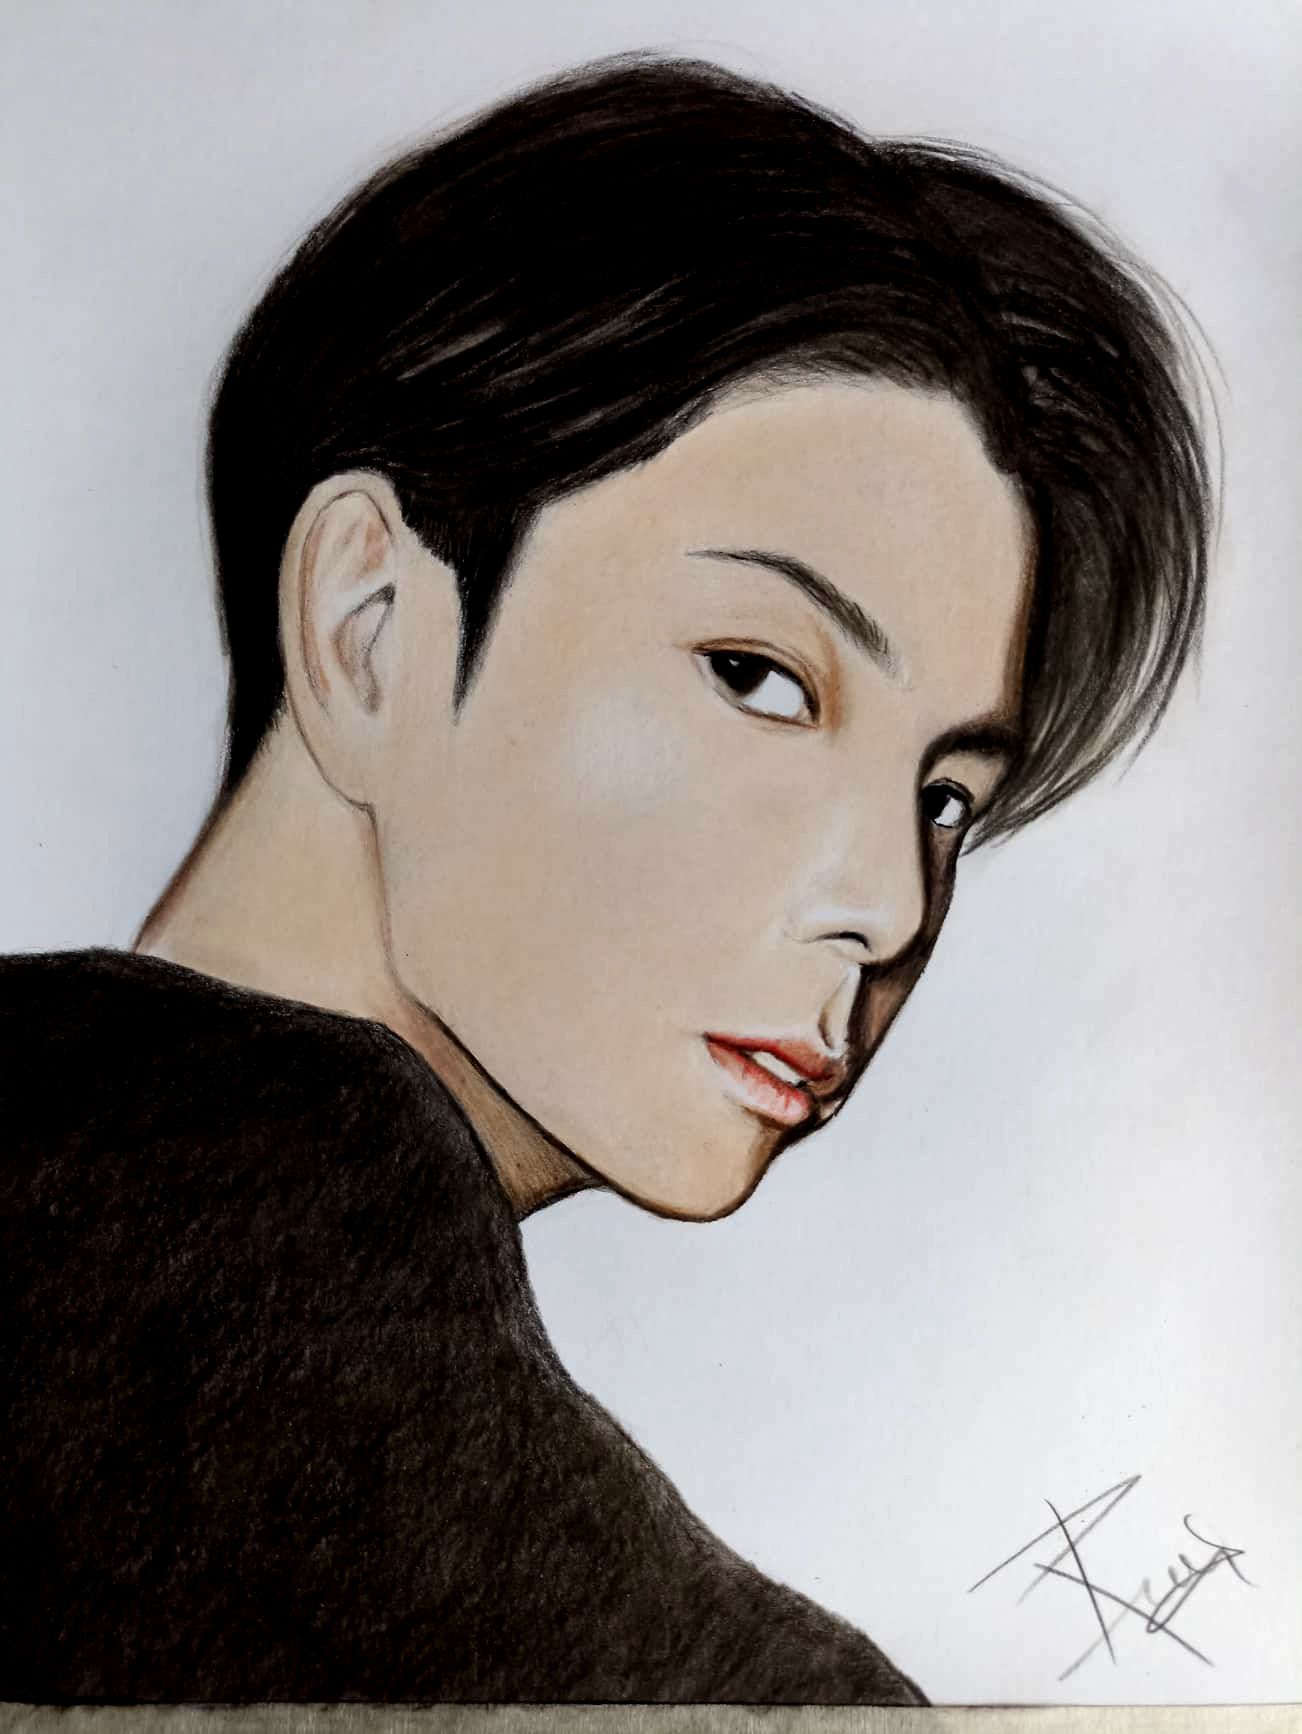</center> <center>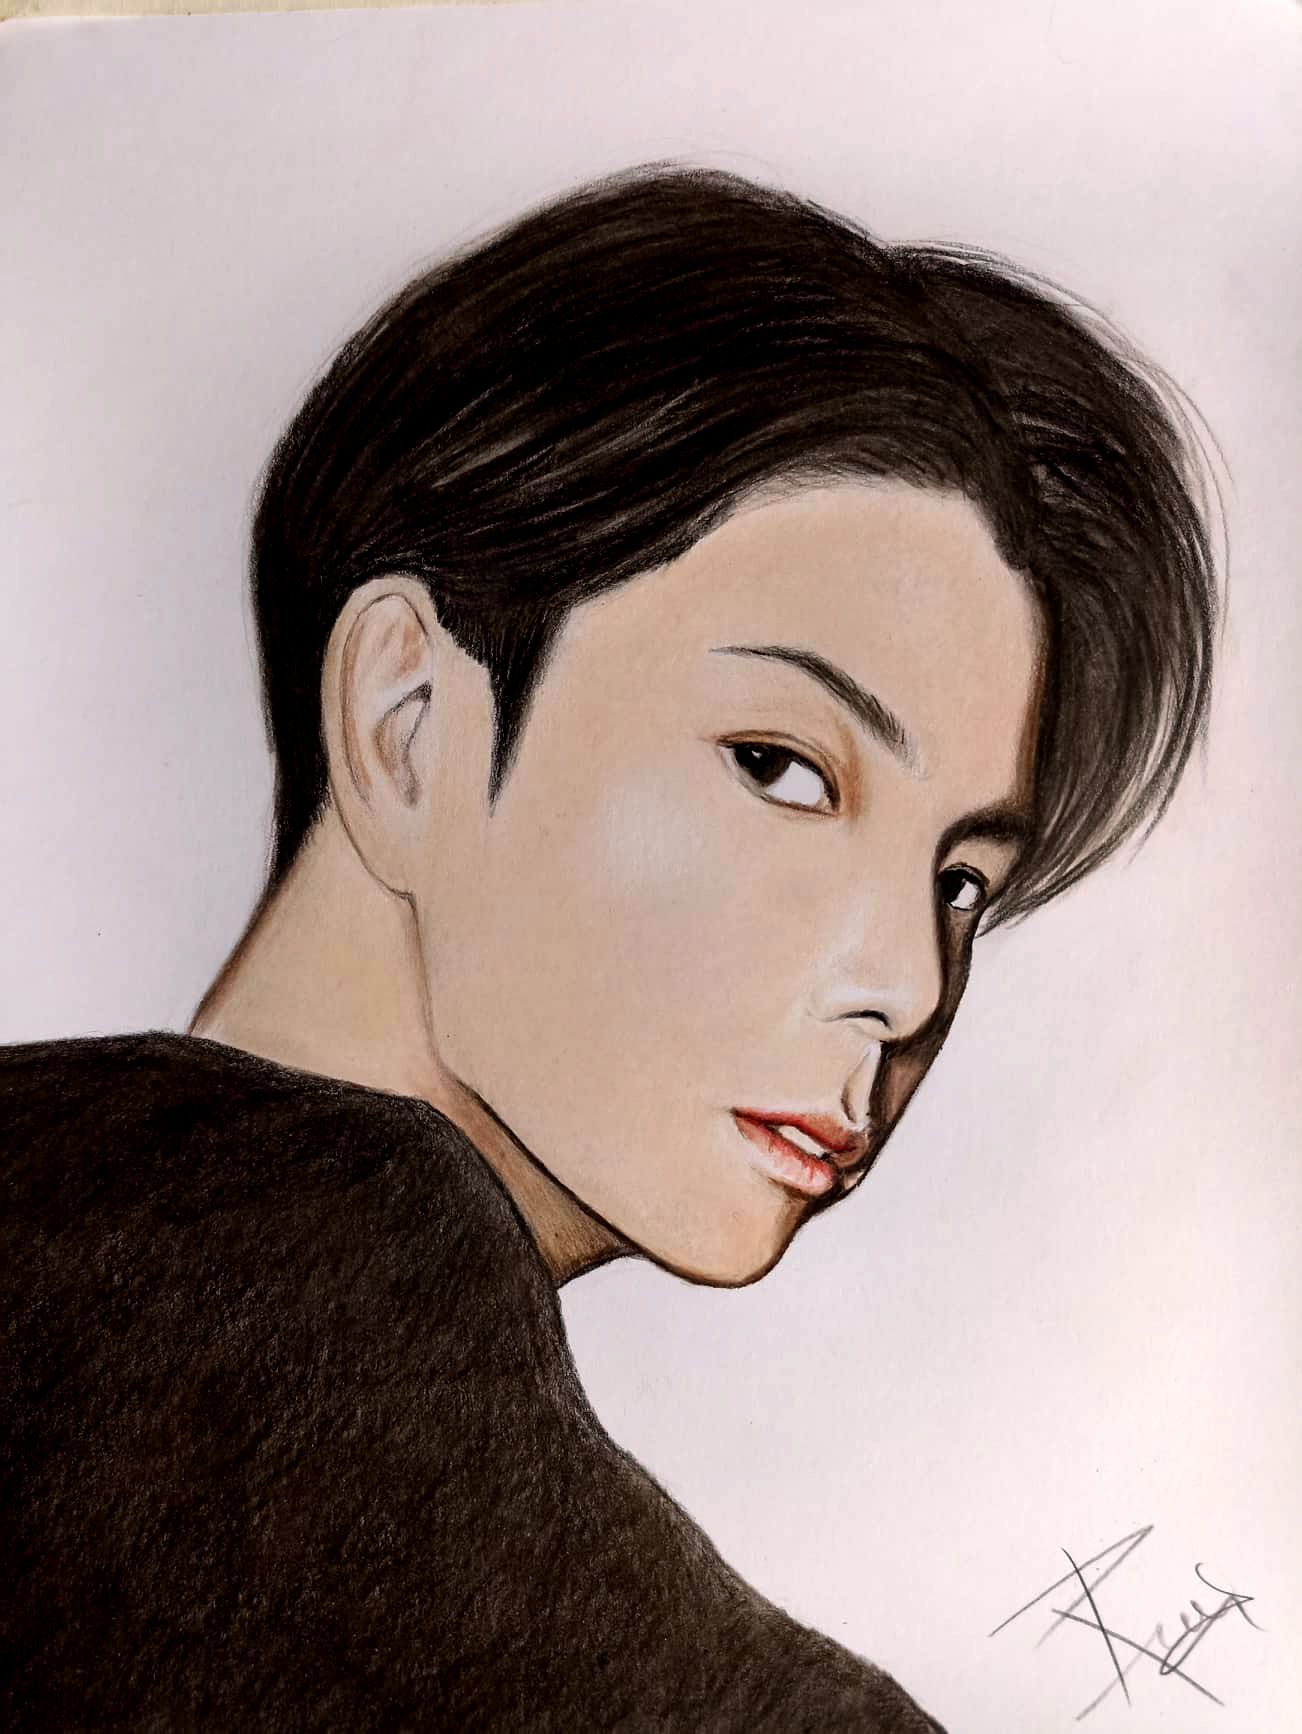</center> <center>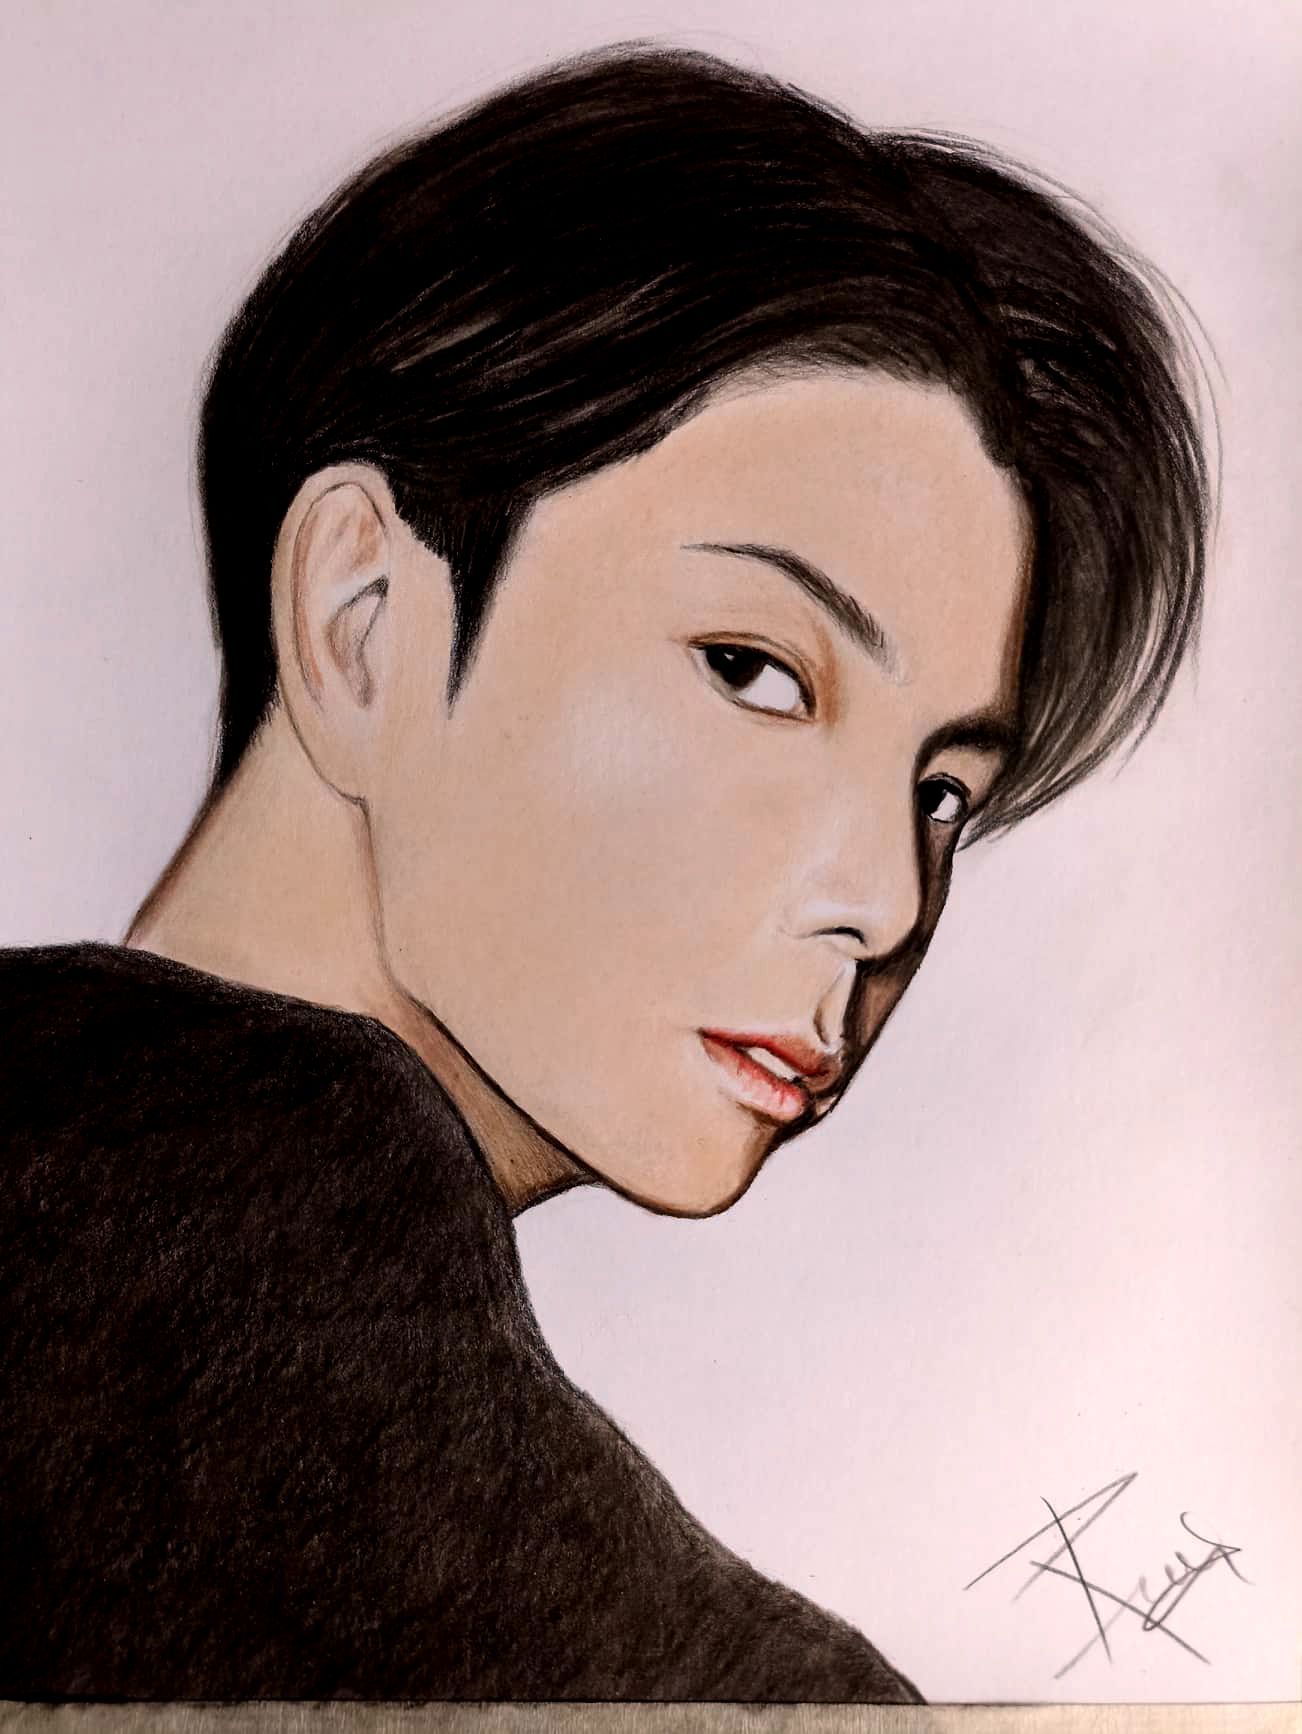</center> <center>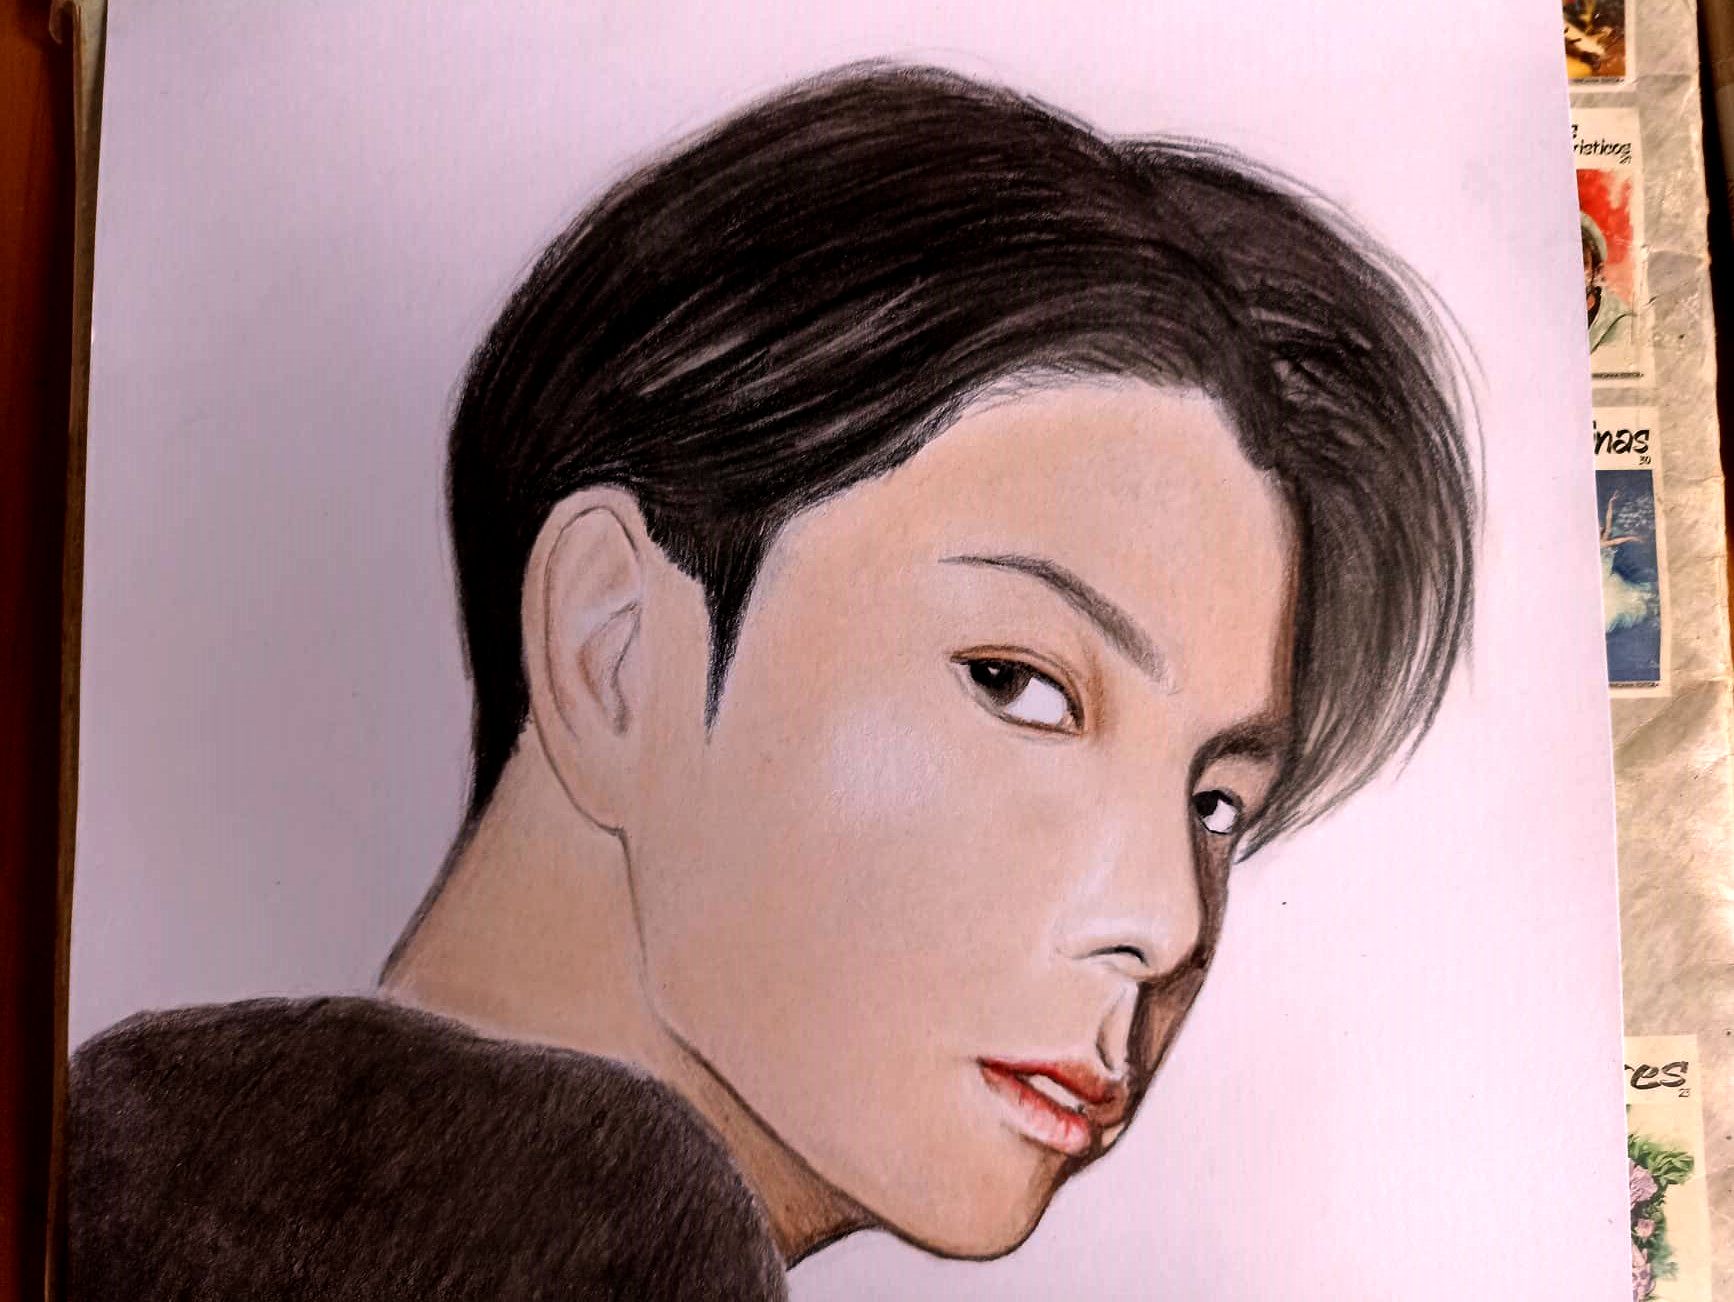</center> <center>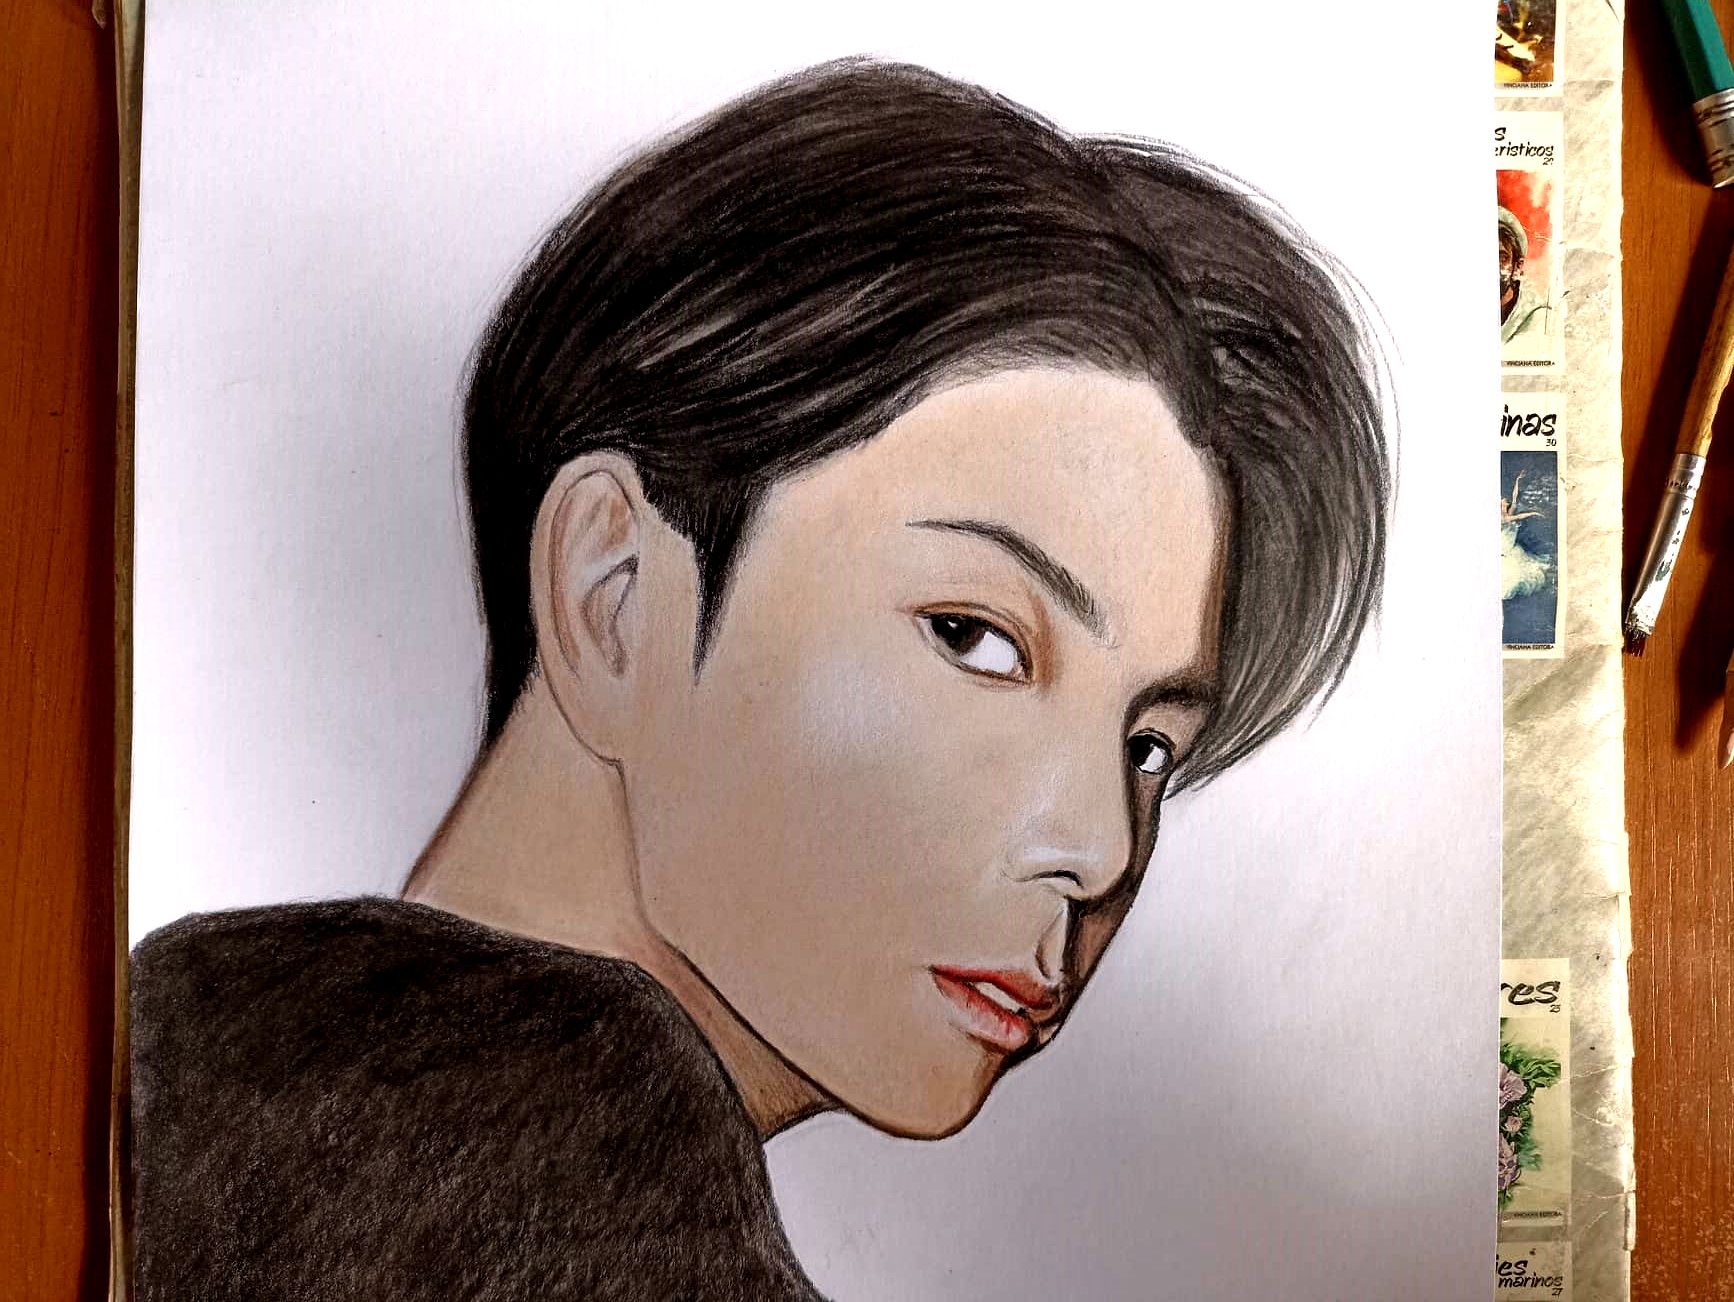</center> <center></center> <div class="text-justify">This is how the portrait has been finished, as is also my custom, finally I put transparent varnish on it, to preserve the color better, tomorrow I will go to put a frame on it so that it has a better presentation and my niece likes her gift a lot . I hope you liked it, this is the technique and the steps that I use to draw faces, we always have to practice more often so that our skills grow and our drawings look better. I say goodbye see you soon, do not forget to comment what you think. Greetings to all.</div> ><div class="text-justify">Así es como ha quedado finalizado el retrato, como también es costumbre en mi, por último le puse barniz transparente, para conservar mejor el color, mañana iré a ponerle un marco para que tenga una mejorm presentación y le guste mucho a mi sobrina su regalo. Espero que les haya gustado, esta es la técnica y los paso que utilizo para dibujar rostros, siempre hay que practicar más seguido para que nuestras habilidades crezcan y nuestros dibujos se vean mejor. Me despido hasta pronto, no olviden comentar que les ha parecido. Saludos para todos.</div>
👍 roelandp, ripusun, hive-data, seeger, palasatenea, wix, dayadam, artemisart, review-master, curie, waivio.curator, carn, cliffagreen, alt3r, minnowbooster, jasimg, qberry, raynen, altleft, lenasveganliving, kgakakillerg, robmolecule, quentinvb, mistural, sustainablyyours, neumannsalva, steveconnor, cakemonster, tfeldman, revo, r00sj3, chipdip, hairgistix, goodcontentbot, kgswallet, miroslaviv, zerotoone, superlotto, netzisde, iamsaray, monsterjamgold, utube, epicdice, entrepreneur.one, manic.calm, riazud, failingforwards, cardcompounding, the-grandmaster, mahdiyari, professorbromide, rambutan.art, driptorchpress, investingpennies, aaronleang, punchline, minerthreat, pateldhawal4, nbs.gmbh, sam99, coindevil, trevorpetrie, hijosdelhombre, didic, laxam, okluvmee, cassioandro, djennyfloro, detlev, steemwizards, travelingmercies, thelordsharvest, karaoke1850, notb4mycoffee, silverwhale, steemvault, sportscontest, photohunt, vonaurolacu, fotogruppemunich, cryptocoinkb, steemstorage, rtron86, knightsunited, lemouth, michelle.gent, takowi, genepoolrentsclr, the-burn, cnfund, ambyr00, bil.prag, aries90, zerofour, sunsea, kylealex, rosana6, ew-and-patterns, bartosz546, justyy, quinnertronics, dipom98, pipiczech, treefiddybruh, bitrocker2020, upme, newtrailers, hiveonboard, indigoocean, kevinwong, yadamaniart, roomservice, martibis, fineartnow, dhimmel, movingman, nateaguila, schmidi, clpacksperiment, princessmewmew, proxy-pal, stephen.king989, zyx066, yoghurt, traderhive, seinkalar, stayoutoftherz, steemed-proxy, bflanagin, steemean, apsu, hhayweaver, louis.rentals, positiveninja, deeanndmathews, peterale, artsyproxy, bgmoha, roguewriter, brianoflondon, minas-glory, federacion45, pab.ink, jjerryhan, diabonua, labeba1969, hdmed, dumitriu, frissonsteemit, the.success.club, rawecz, thelittlebank, thecryptodrive, modernzorker, sorin.cristescu, gogreenbuddy, meritocracy, bananass, sc000, juanmiguelsalas, irgendwo, armandosodano, redrica, meno, aboutyourbiz, djlethalskillz, torico, cahlen, soufiani, vittoriozuccala, yaelg, devann, aicu, cloh76, therising, dcrops, postpromoter, zipporah, steemcryptosicko, double-negative, tggr, hurtlocker, therealwolf, bscrypto, koenau, mind.force, roamingsparrow, mugueto2022, kaylinart, cheese4ead, kristall97, ausbit.dev, albuslucimus, gunthertopp, hetty-rowan, pandasquad, ambicrypto, smartsteem, blewitt, hive-127039, jayna, stahlberg, russellstockley, gohive, pandapuzzles, tinyhousecryptos, shell2, chaoswhale, goblinknackers, ibt-survival, forykw, mproxima, sanderjansenart, vixmemon, elements5, robibasa, lordvader, grapthar, pladozero, atheistrepublic, dondido, jerrybanfield, proto26, yehey, dandays, uche-nna, abachon, fatkat, drifter1, mammasitta, binkyprod, prapanth, cordeta, beerlover, marcoriccardi, kieranstone, vaultec, eric-boucher, stevenwood, nicole-st, esthersanchez, lk666, flatman, chrisdavidphoto, bluefinstudios, billytercero, sarau, elvlogdedany, xmauron3, elybert24, photographercr, gamersclassified, rahim.art72, mdriart, smartvote,