BATTLE MAGE SECRETS Weekly Challenge! - Up Close and Personal Ruleset
hive-13323·@genming·
0.000 HBDBATTLE MAGE SECRETS Weekly Challenge! - Up Close and Personal Ruleset
 Hi Guys! In this post we are exploring on another Splinterlands ruleset. The ruleset we are focusing on today is Up Close and Personal.  In a Up Close and Personal ruleset, only units with melee attacks can be used. My usual strategies when facing with Up Close and Personal ruleset include using units with the following abilities: 1. Thorns - Units with Thorns ability will reflect melee damage back to opponent melee units. 2. Demoralize and Inspire - Units with Demoralize ability will reduce opposing melee units melee attack by 1 while Inspire increase my melee attack by 1. 3. Shield and Repair - Units with Shield ability will take 50% less melee damage rounded up. 4. Retaliate - Units with Retaliate ability have a 50% chance of attacking back at the melee units that attack it. 5. Protect and Repair - Units with Protect will provide 2 armor to all units while units with Repair will repair the armor lost.  Lets take a look at a Wild Silver ranked match with Up Close and Personal as one of the ruleset and where I used Demoralize and Inspire as my strategy to fight the battle. The battle restrictions are: Healed Out and Up Close and Personal with a max mana of 45. Fire, Water, Life and Death splinters are allowed in this battle. The Video for the Full Battle can be seen here: https://splinterlands.com?p=battle&id=sl_373ca8825a21cf0b923cb8e609c15be7&ref=genming  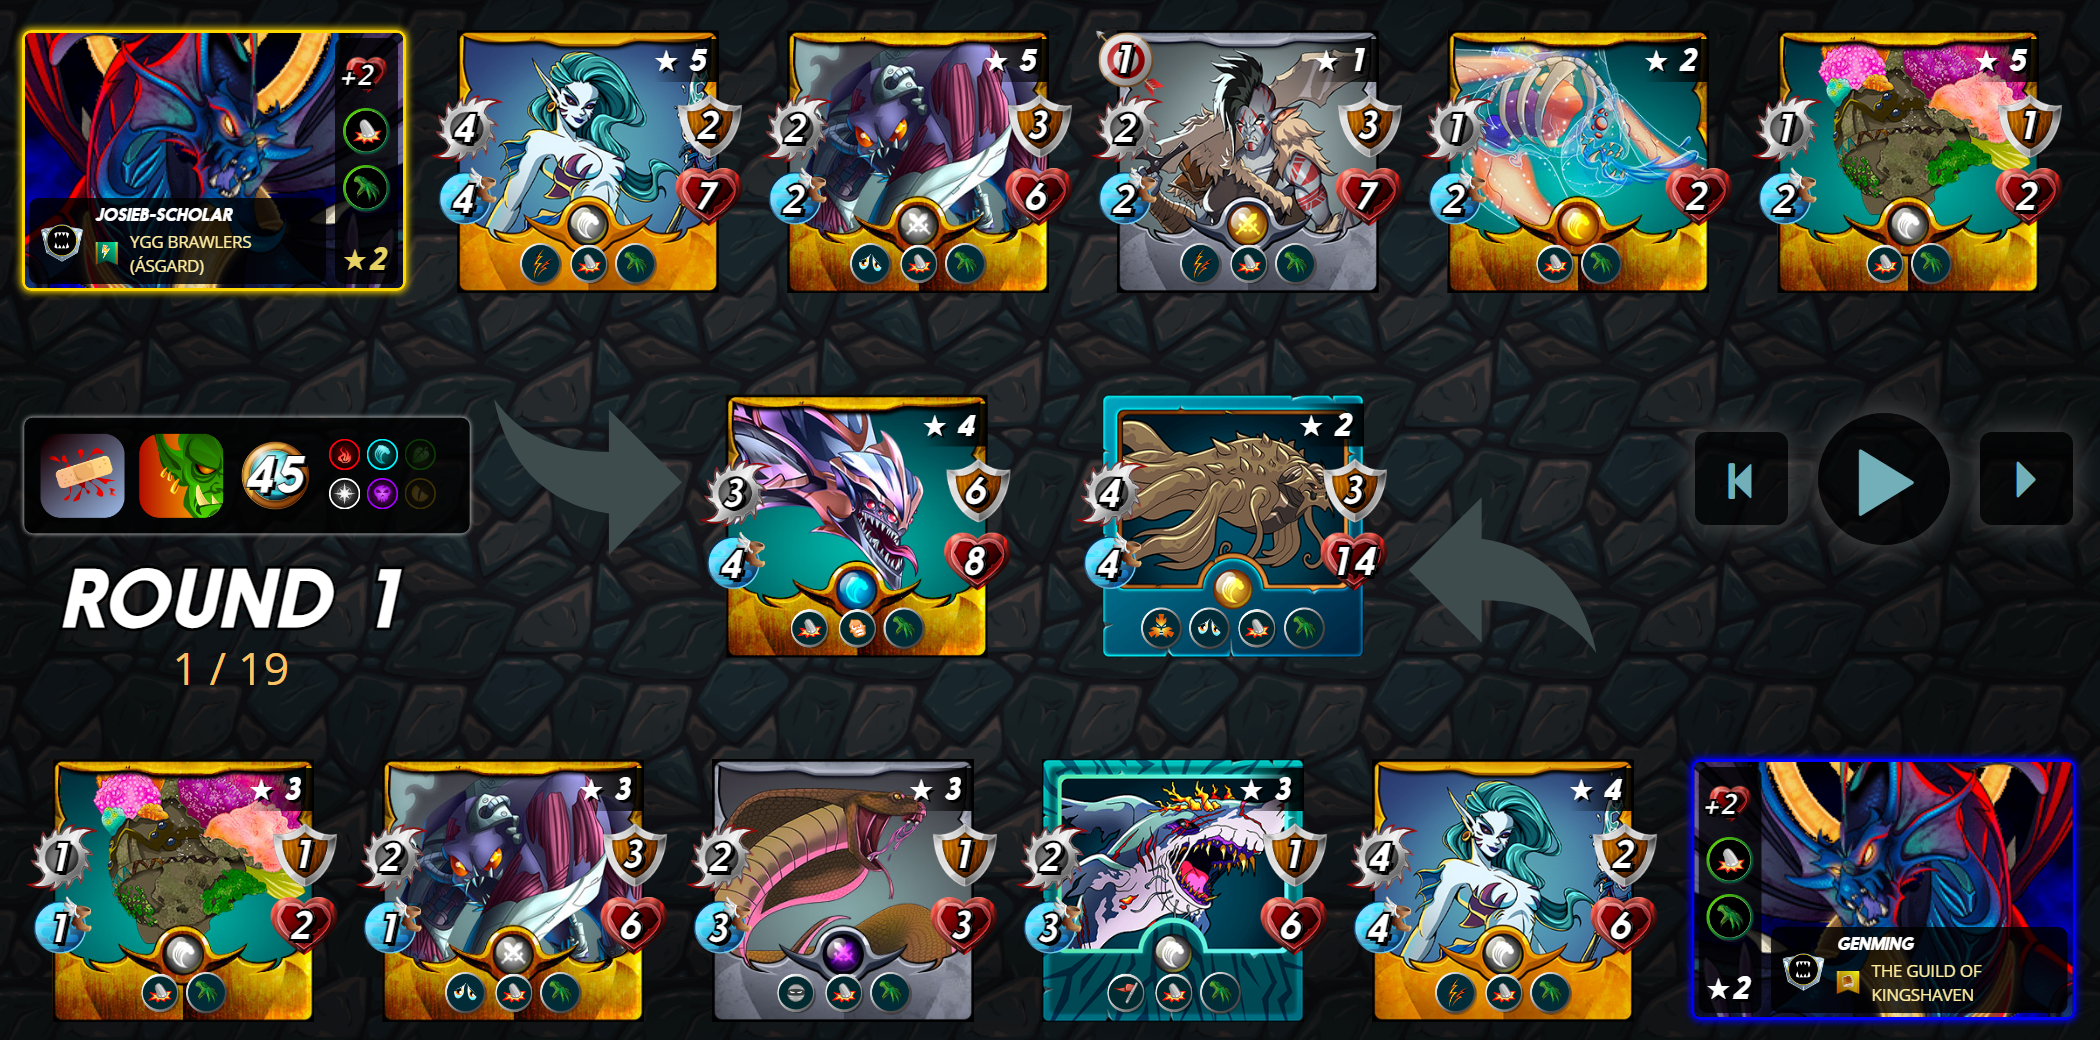 |Splinter|Mana Cost|Position|Reason| |---|---|---|---| |Possibilus the Wise|6|Summoner|I took a while to decide between using Possibilus and Astral Entity as the summoner in this match. In the end I decided to use Possibilus considering this is a high mana match and I can use Kraken and Coastal Sentry together to form a deadly 1-2 punch at the front. Astral Entity is also feasible using the Dodge and Thorn combination but dodging has too much luck element in it.| |The Kraken|12|1st|My main tank and probably most important unit. The Kraken has Demoralize and thus can decrease enemy units' melee damage by 1. The Kraken is also a great tank with high health. Only issue here is there is no way of healing it up due to Healed Out ruleset.| |Coastal Sentry|10|2nd|Another very important unit for me in this battle. I am depending on Coastal Sentry's Double Strike ability to tear down the opponent lineup while hiding behind The Kraken.| |Demented Shark|6|3rd|Demented Shark has Inspire ability will give my melee units a +1 melee damage. I placed it at the 3rd position so that it can also attack once my Kraken fall.| |Uraeus|3|4th|Uraeus is there to take up the last remaining few mana. I chose it for its extra armor.| |Disintegrator|7|5th|I added Disintegrator here because it also has Demoralize ability. I need my Kraken alive as long as possible to give time for my Coastal Sentry to do its damage.| |Hardy Stonefish|1|6th|Last mana I put onto Hardy Stonefish since it also has 1 armor and would last 2 melee attack (unless I am facing a unit with Piercing).| |Total Mana:|45||| ---- Opponent Lineup: My opponent went Possibilus as well with Diemonshark as the tank and Coastal Sentry in the 2nd position and also deployed a Disintegrator. It is quite a similar setup but I have 2 units with Demoralize against the opponent 1 unit. I also have a unit with Inspire.  End of Round 1: 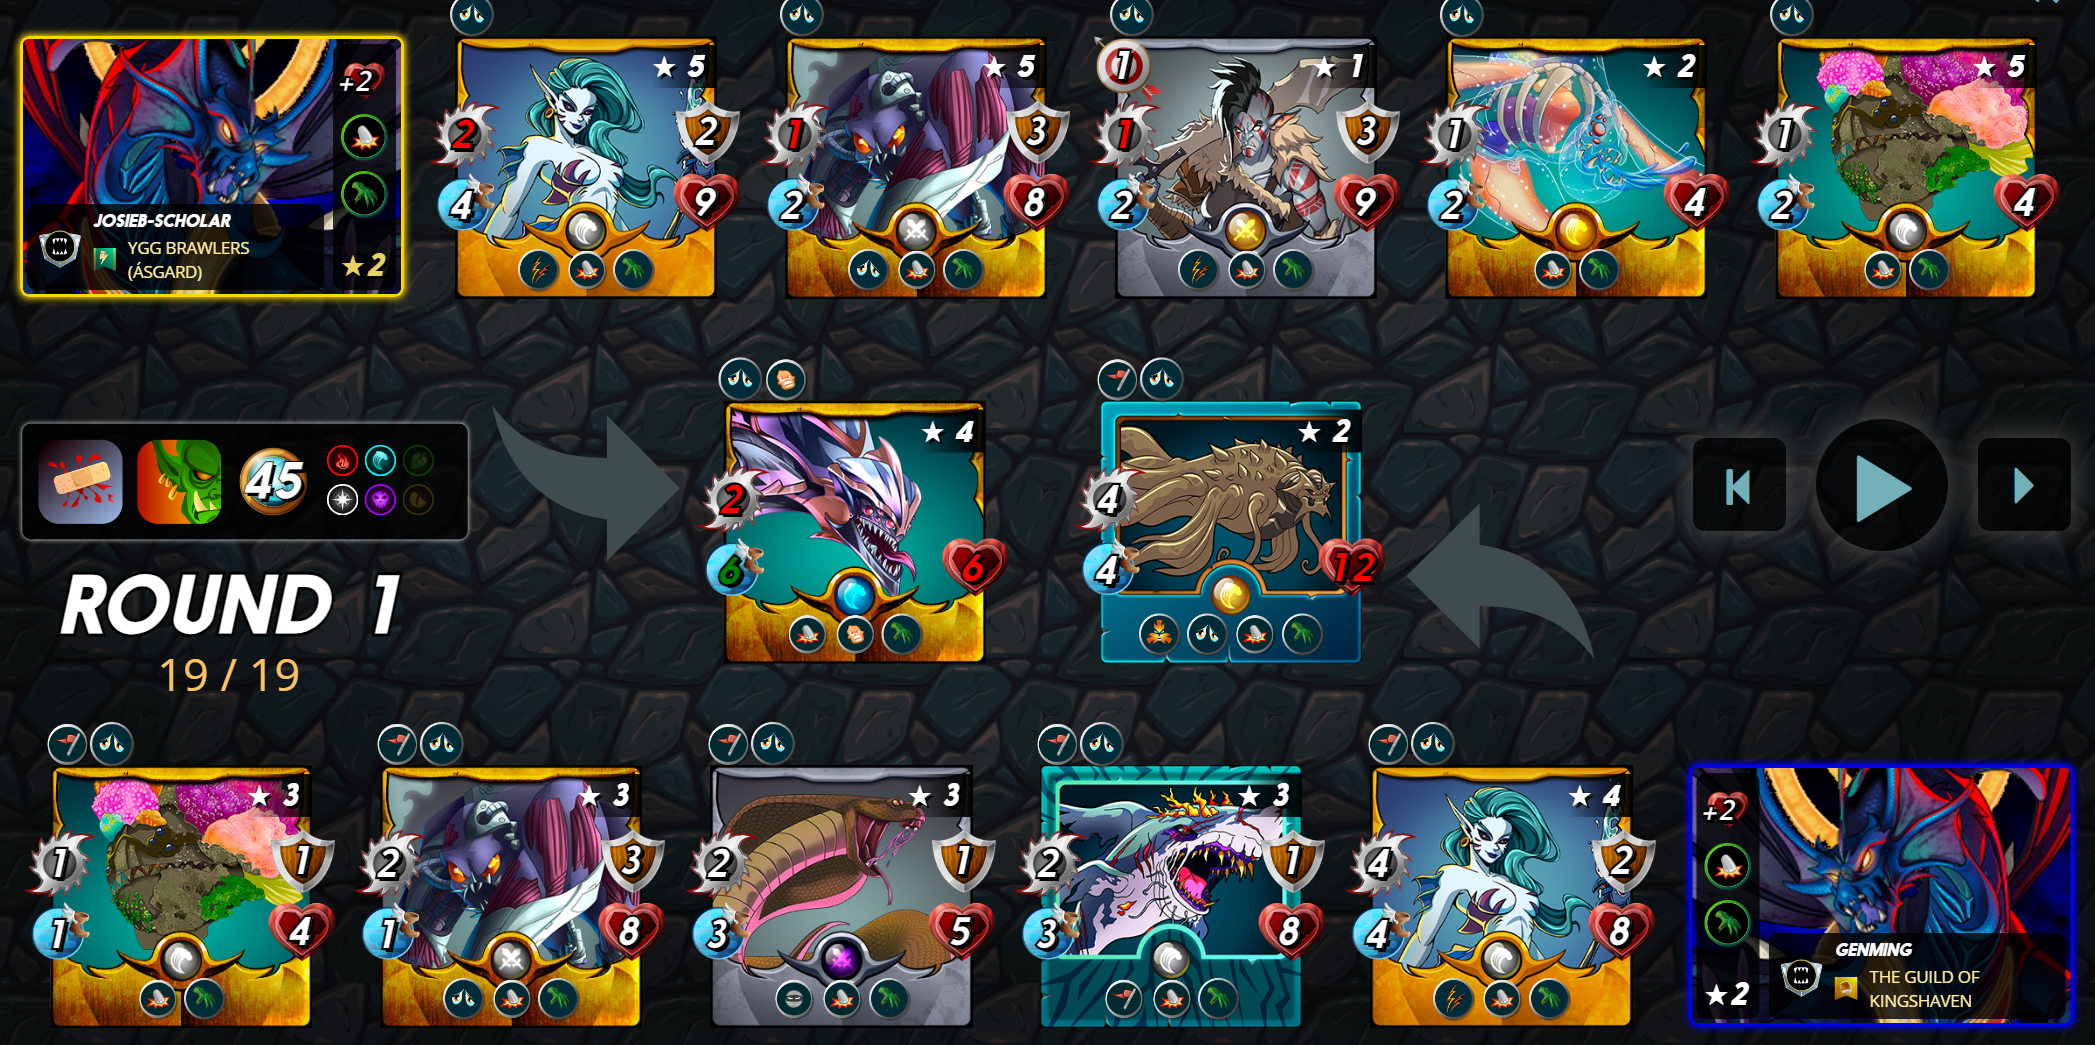 My Kraken took the initial attack well and held its ground as the melee attacks of my opponent has been greatly reduced. Even an enraged Diemonshark only had 2 melee attacks because of the Demoralize I placed on the opponent unit. Without Demoralize, that Diemonshark would have been scary. End of Round 2: 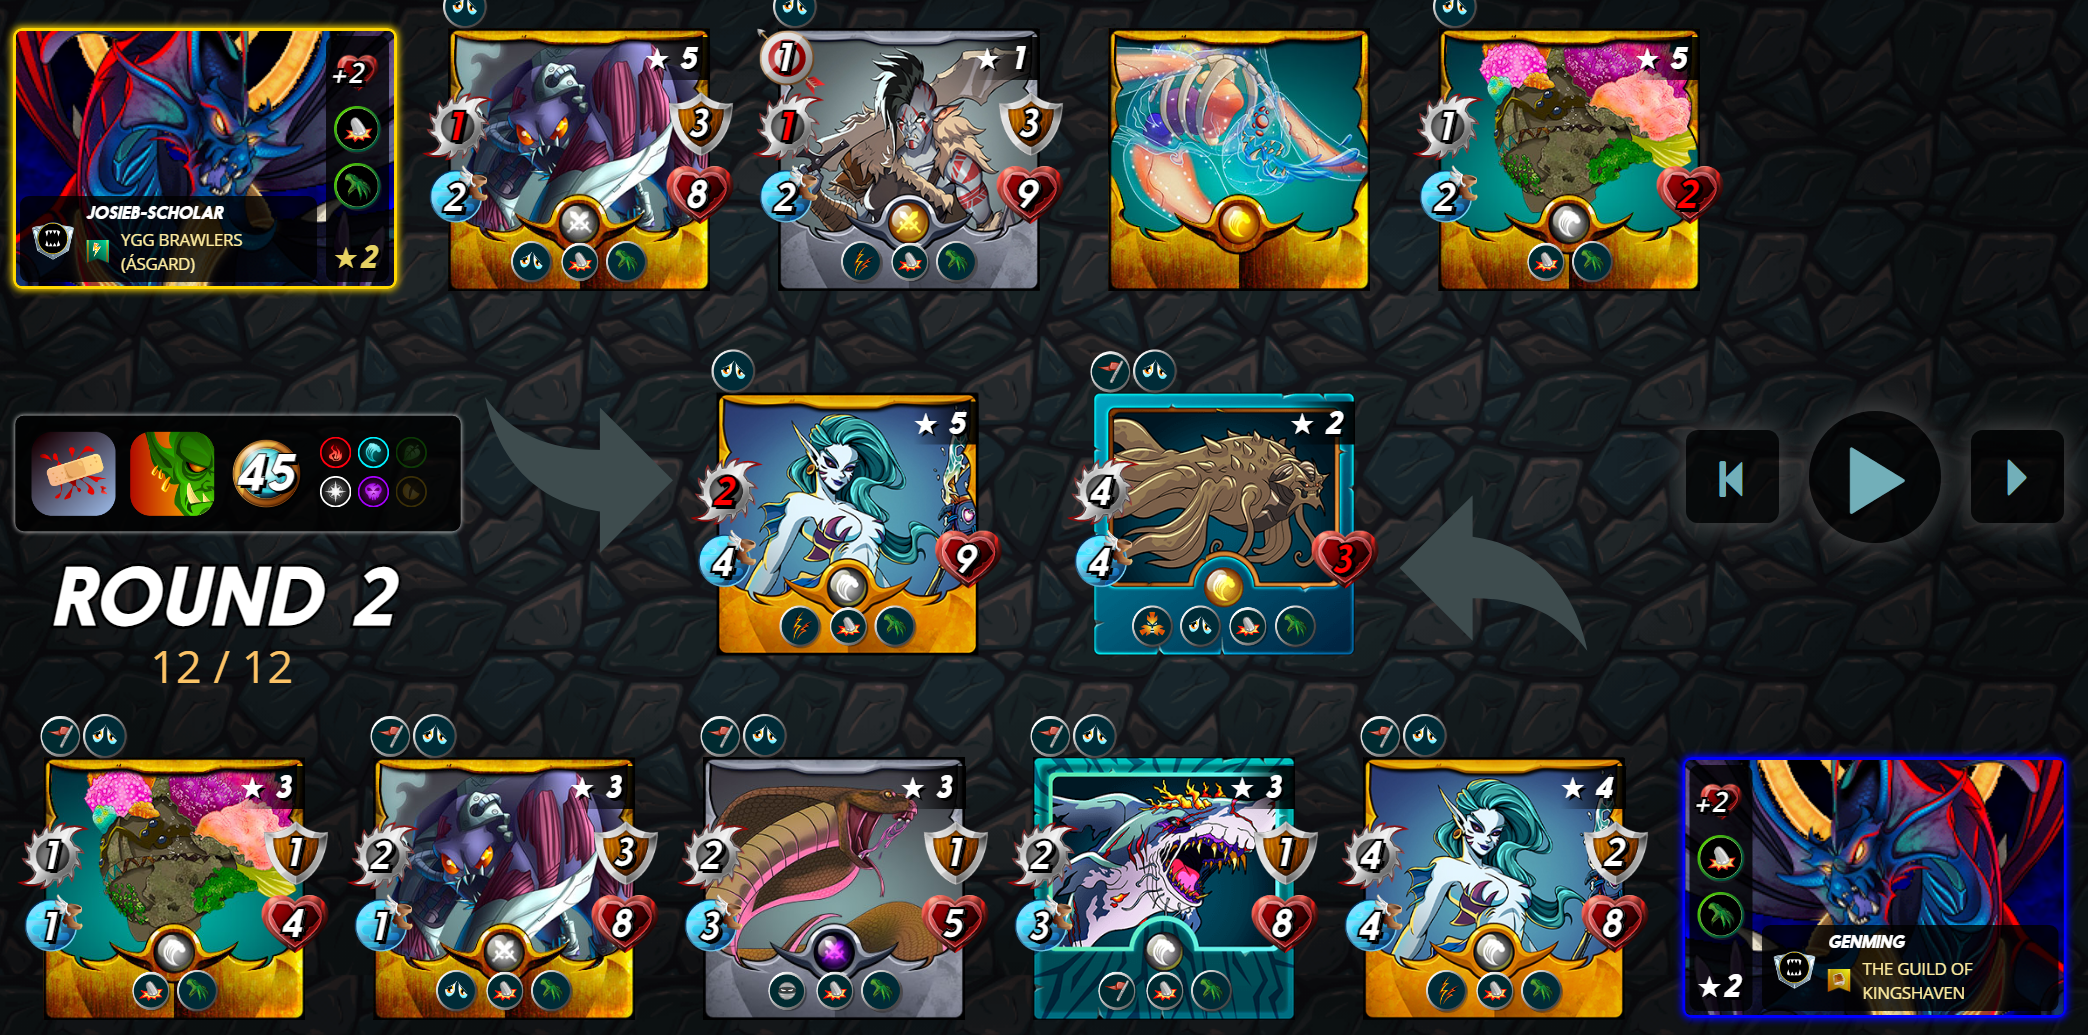 The enemy Diemonshark was killed in this round but it did dodge a crucial attack from my Kraken. That dodge might be critical as my Kraken is also dying and would be killed in the next round. End of Round 3: 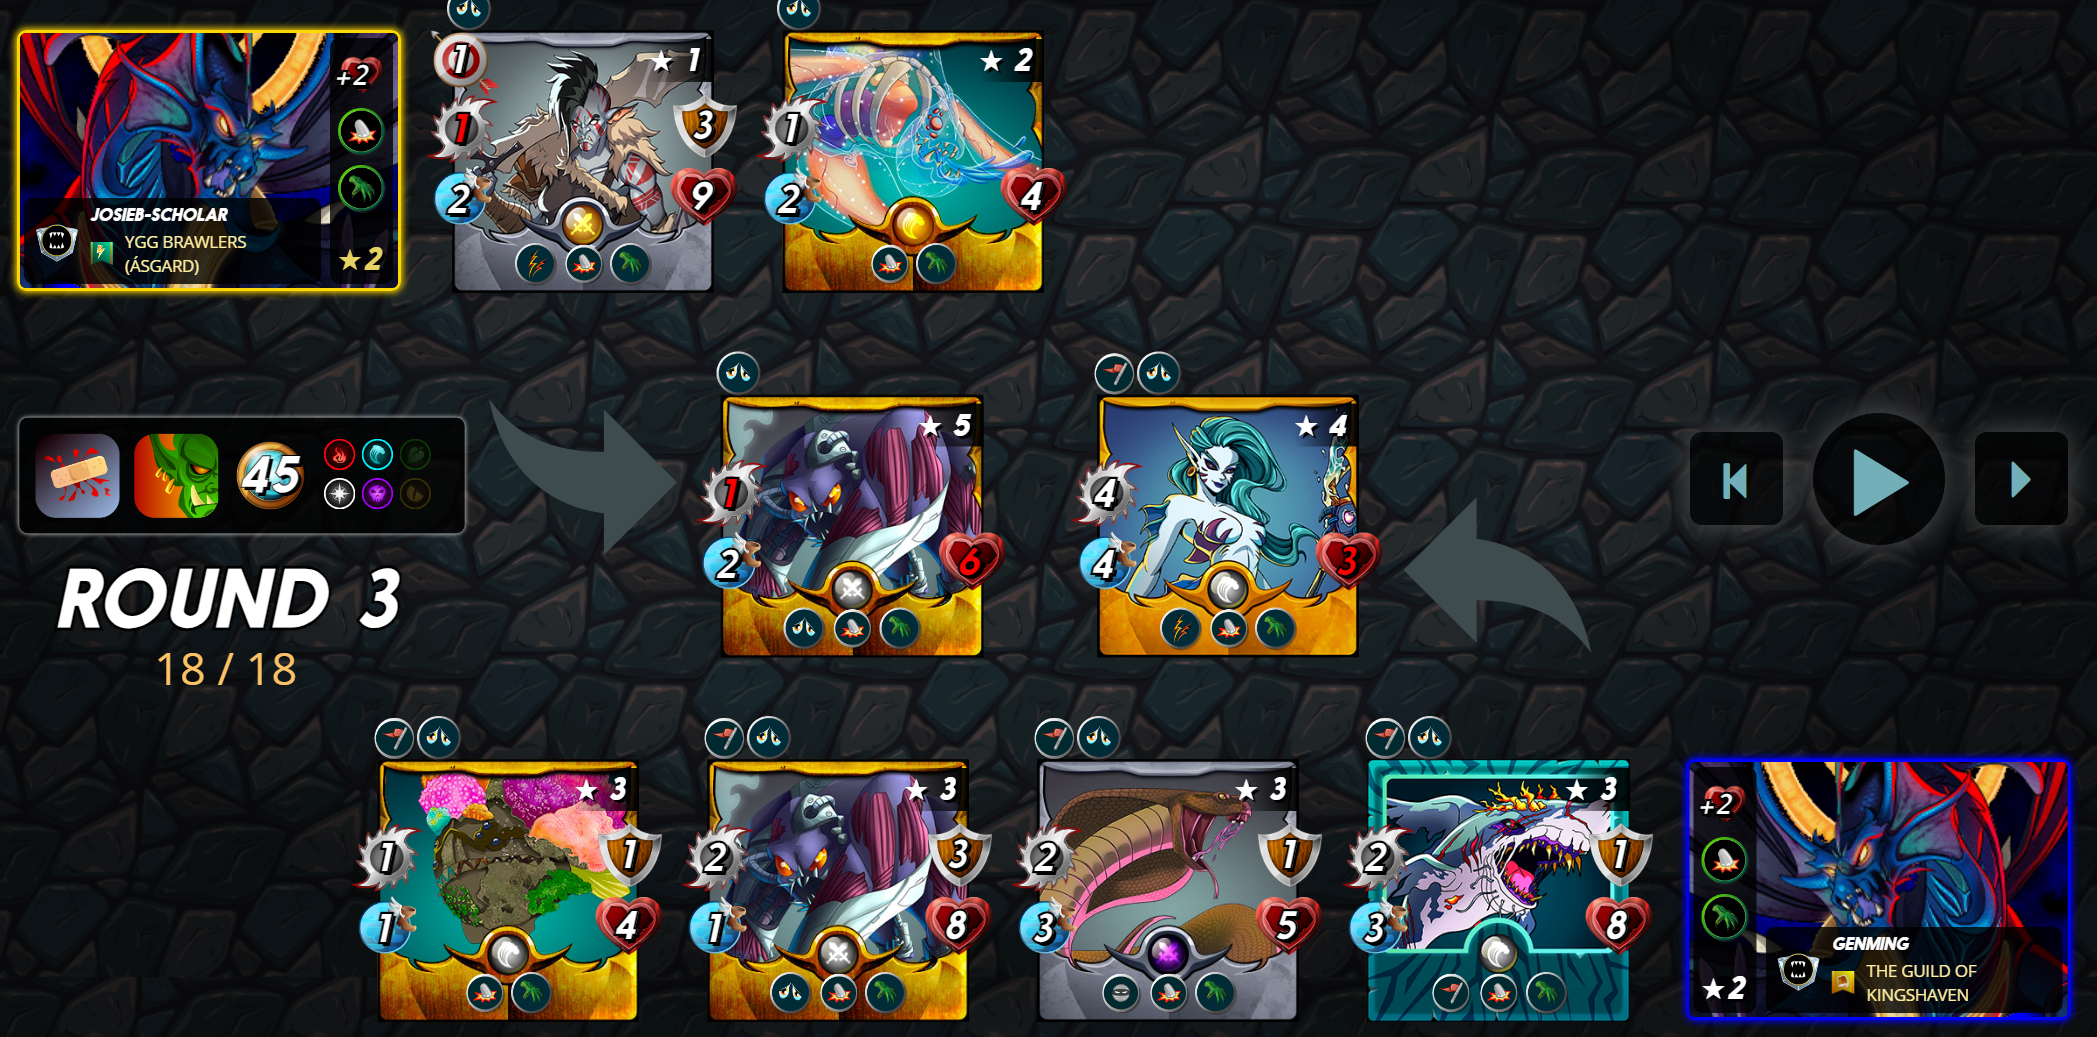 I lost my Kraken but I also took out the opponent Coastal Sentry. However the opponent Drybone Rider is now in the 2nd position and is now able to hit me 4 times because it had Double Strike and also 1 ranged and 1 melee attack. I need to quickly bring it to the first position to remove its range attack. End of Round 4: 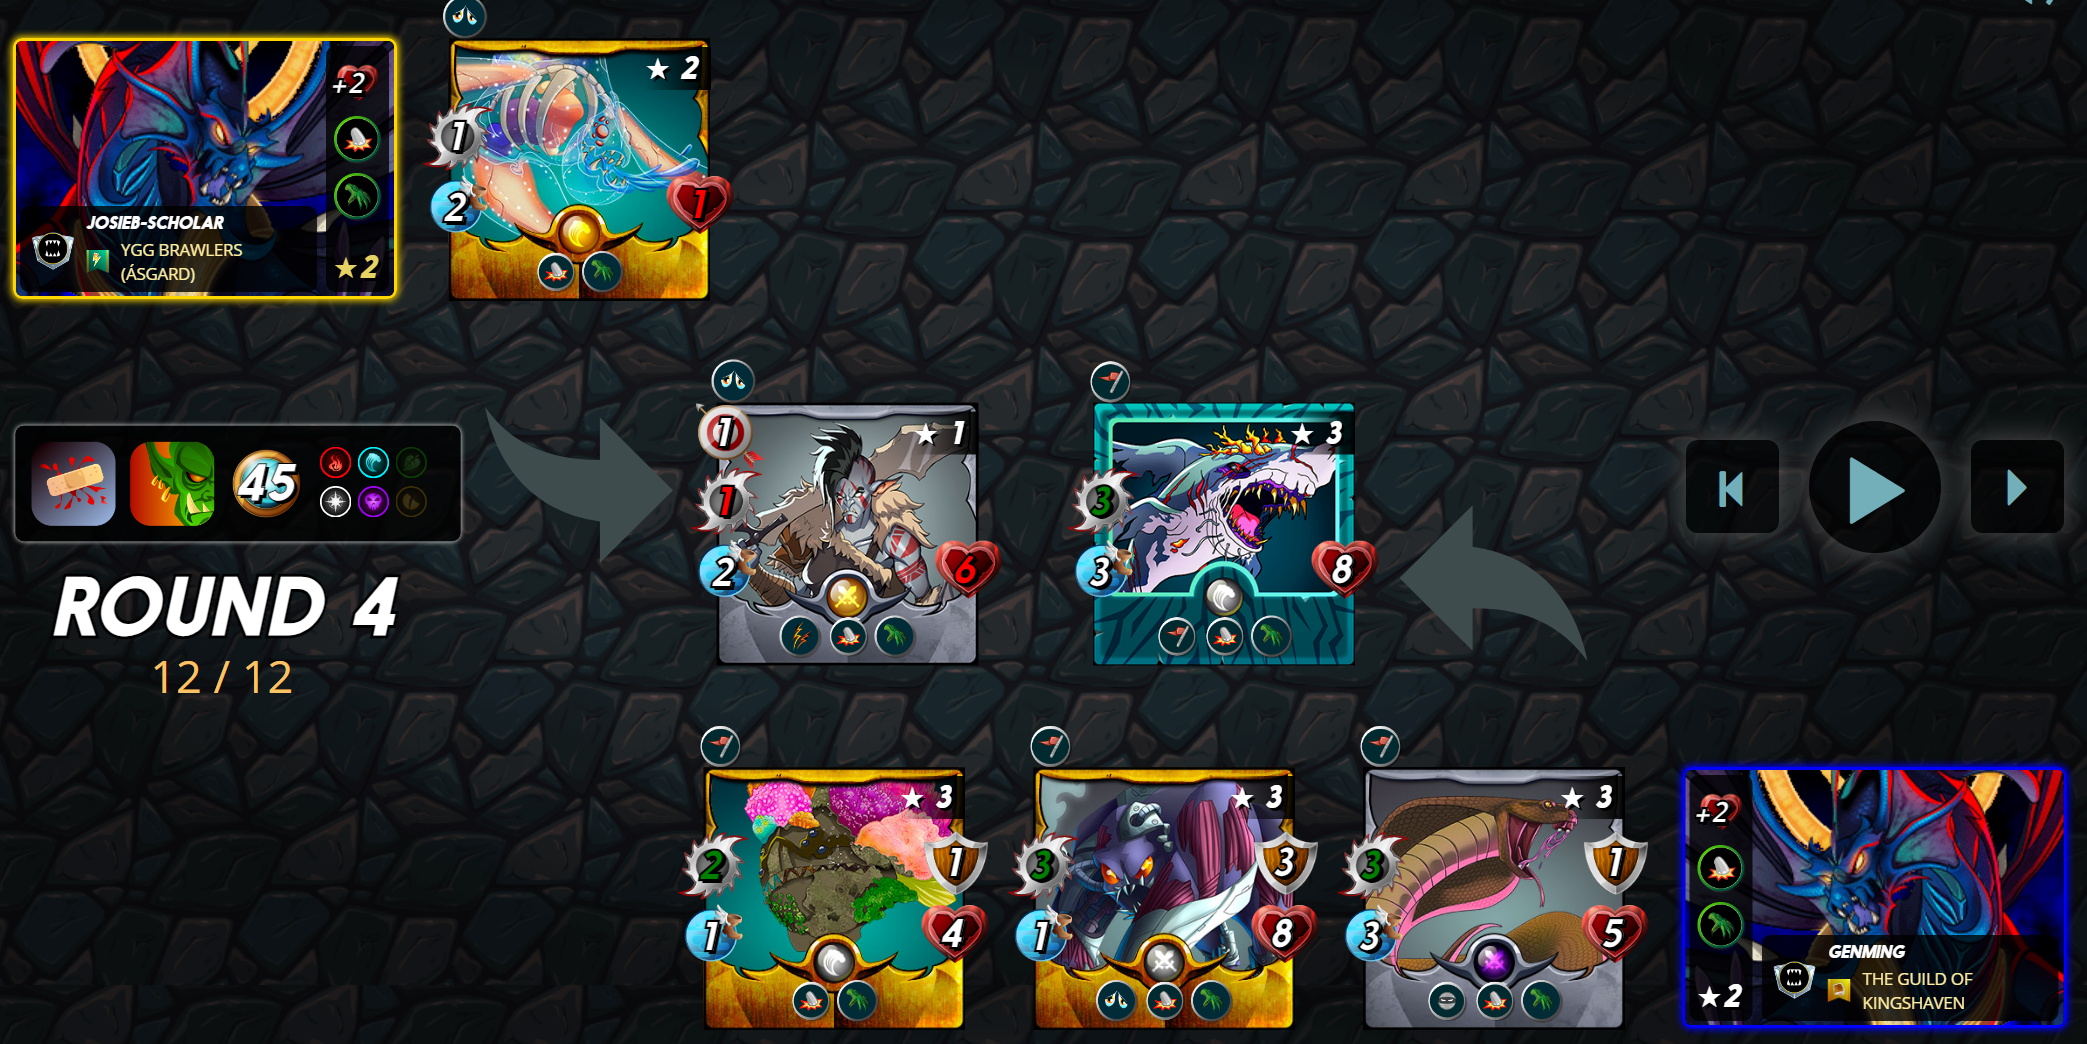 Thankfully my dying Coastal Sentry was abled to kill off the enemy Disintegrator and bring the enemy Drybone Rider to the first position before dying. In the first position the enemy Drybone Rider can no longer use its Ranged attack. End of Battle: 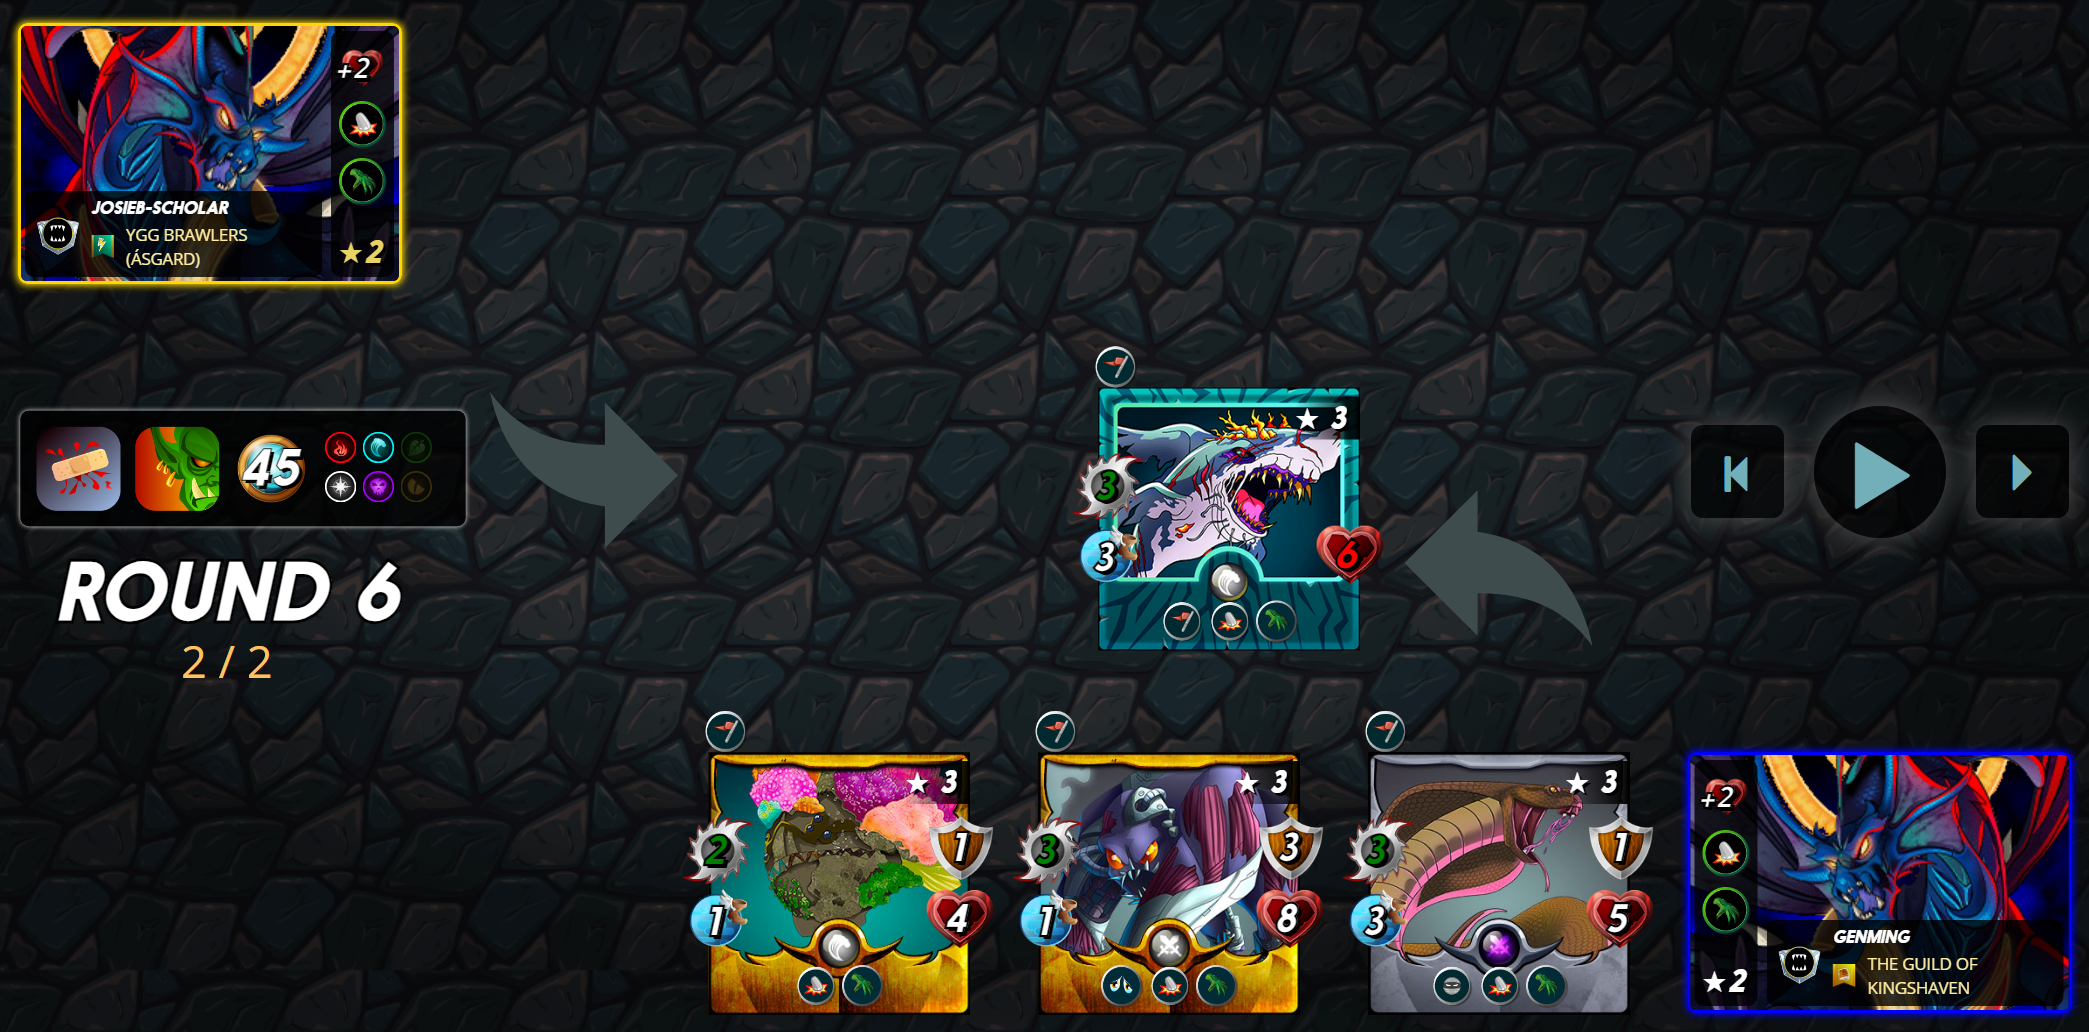 It took 6 rounds for me to win this battle. In the end I won because I used more units with abilities that will benefit from Up Close and Personal ruleset than my opponent. **KEY STRATEGY USED** My strategy was to use my Kraken to draw all the enemy melee attacks while demoralizing these melee attacks to allow my Kraken to stay alive. On the offensive portion I rely on my Coastal Sentry to dish out its Double Strike big melee damage and boosting the damage further with Inspire. It works well in this match. <center></center> To any new players who wish to explore the world of Splinterlands, do feel free to sign up with my [REFERRAL LINK](https://splinterlands.com?ref=genming) 😊. My guild, The Guild of Kingshaven, is also looking for new members. For added incentive to joining us, our guild leader will also be assigning Runi to any new member that can actively participate in brawl battles and give donation to our guild buildings. Runi is extremely powerful and is the only unit that has the Rebirth ability. Our guild link is https://splinterlands.com/?p=guild&id=07ab9325eea386c3570db41f53fd991e78806485&tab=
👍 limka, ctptips, splinterboost, terraboost, tobias-g, carl05, arc-echo, lucimorningstar, deveter, crypt0gnome, kryptogeier1, kryptofire, reazuliqbal, monstermarket, thranax, ejmh, apoloo1, sanchezro, nicolimitless, marsupia, kahyazhe, glimpsytips.dex, zallin.spt, cryptothesis, voter, steemincome, bert0, memeteca, tresor, bnk, terracore, gerber, ezzy, exyle, deathwing, steem.leo, mice-k, dcityrewards, someguy123, alphacore, emrebeyler, bestboom, themightyvolcano, dlike, permaculturedude, ribary, dcrops, hykss.leo, daan, felander, unconditionalove, bobby.madagascar, cakemonster, triplea.bot, ausbit.dev, merlin7, dpoll.witness, yogacoach, hoffmeister84, forykw, chireerocks, blazoblaz, yousafharoonkhan, hhguild-curator, jagged71, jagjnr, brain71, caimanx, beaker007, hive103505.spt, blitzzzz, ladymisa, politicalhive, quigua, relf87, vaynard86, hivebuzz, lizanomadsoul, manncpt, jnmarteau, crypticat, steemmonsters, reseller, oadissin, monstermother, hadley4, bscrypto, athunderstruck, gannibal, goldmonsters, nozem01, djrockx, fallen.angels, ghostlybg, joeyarnoldvn, dracrow, vvgm, danideuder, iasplan, javivisan, giemo, jpleron, genming, waivio.welcome,