BATTLE MAGE SECRETS Weekly Challenge! RULESET: Fog of War
hive-13323·@ghostlybg·
0.000 HBDBATTLE MAGE SECRETS Weekly Challenge! RULESET: Fog of War

<div class="pull-right">

</div>
<div class="text-justify">After debuting for the first time 14 weeks ago, the Battle Mage Secrets Weekly Challenge is back and this time all Monsters lose the Sneak, Snipe and Opportunity abilities. Yeah, I know you've already read the title but even if you haven't, you have positively figured out that the Challenge this week is to display a battle involving the Fog of War ruleset. </div>
Let us see what this ruleset does before we get into the nitty-gritty of the line-up and the battle itself.
<div class="text-justify">The Fog of War ruleset is pretty straight-forward - All Monsters lose the Sneak, Snipe and Opportunity abilities. Scattershot still works in this ruleset. Well that's definitely as easily understandable as a Ruleset can get.</div>

<div class="text-justify"> Now that we've got a good idea of what the Fog of War ruleset practically does, let's see now how it can be effectively utilized.</div>

<div class="text-justify"> Well there is no much to be said here really. Just be sure not to use Monsters who you have gotten used to relying on due to their abilities which cannot be used in Fog of War. I've displayed some of the most frequent "offenders" for each Splinter and each ability in the picture above. The 1st row consists of Sneak Monsters, the 2nd of Monsters with Opportunity Strike and the 3rd one of Monsters with the Snipe ability. </div>

Now that we have a decent understanding of the featured Ruleset and its potential advantages and disadvantages, let us have a look at the battle I have chosen to showcase.
<>>>>>>>>>>>>>>>>>>>>>>>>>>>>>>>>>>>>[BATTLE](https://splinterlands.com/?p=battle&id=sl_17f85862d06d8aca3395d96317ee0272)<<<<<<<<<<<<<<<<<<<<<<<<<<<<<<<<<<<<<<>
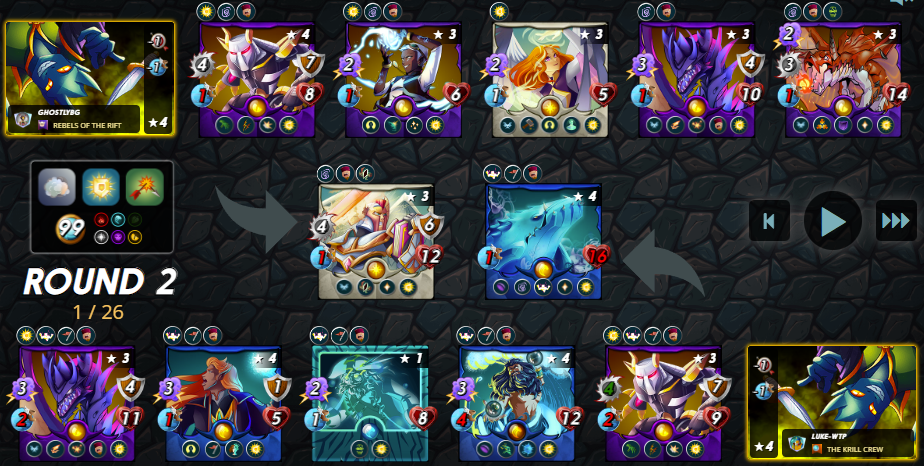
- The line-up of the Battle and the Ruleset:

<div class="text-justify">The rulesets for this battle are Fog of War (Monsters lose the Sneak, Snipe and Opportunity abilities), Holy Protection (all Monsters have the Divine Shield ability) and Broken Arrows (Ranged attack Monsters may not be used in battles). The mana budget is 99 which is the maximum amount possible so I can choose all most expensive Monsters I have available if I want to and if they fit my battle plan. All Splinters but the Earth one are available. I am going to choose the Dragon Splinter and my secondary Splinter will be Life.

<div class="pull-left">
</div>
<div class="text-justify">
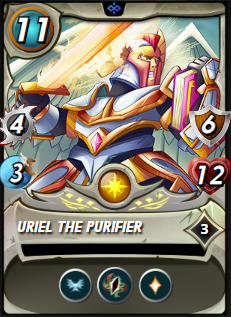
I have chosen to go with my Uriel as the main tank. I like it a lot due to its considerable armor amount and self-heal. Its other upside is that it has the Flying ability so that makes it 25% harder to hit (by ranged and melee attacks) which also could be huge. Also bear in mind that while Uriel might be in the main tank spot, a lot of damage will actually be aimed at Agor and not him due to Agor's taunt ability.

<div class="pull-right">
</div>
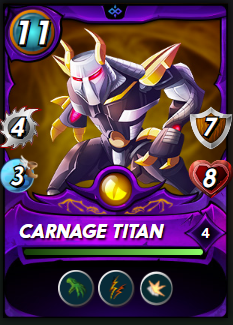
<div class="text-justify">The 2nd place in the line-up goes to a Monster I have also already blogged about, namely the Carnage Titan. It's currently the best off-tank in the game due to its Reach and Double Strike abilities.</div>

<div class="pull-left">
</div>
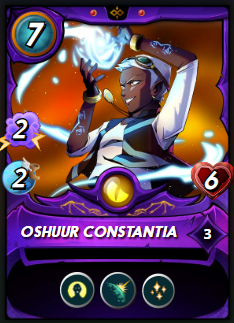
<div class="text-justify">Following immediately after the Carnage Titan is Oshuur Constantia. I've got her here to support my front line Monster as long as possible. She can also take a hit or two if it gets to that, while healing herself in the meantime. What's important is that she has the Reflection Shield (This Monster doesn't take damage from Blast, Magic Reflect, Thorns, or Return Fire) ability so she does not suffer any damage when her Magic Attacks are reflected back to her.
</div>

<div class="pull-right">
</div>
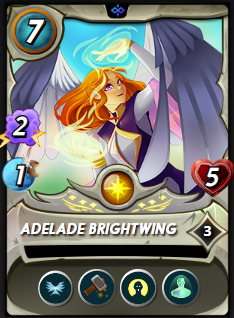
<div class="text-justify">The 4th spot is for Adelade Brightwing. This is another Monster I basically constantly use due to its ability to repair amor, paired with its ability to Resurrect a fallen ally (once per battle) which is also huge if the right friendly Monster gets to be revived. It also has Flying which is also really helpful.</div>

<div class="pull-left">
</div>
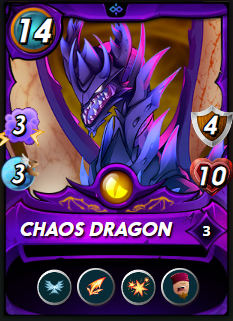
<div class="text-justify">The 5th place in the line-up goes to the Chaos Dragon. I have in this spot since it is a flying Monster (a true dragon) with a decent health pool and armor so it can evade a few hits or take a few hits if it has to. It also has the Blind ability in its arsenal. We know that every miss is important.</div>

<div class="pull-right">
</div>
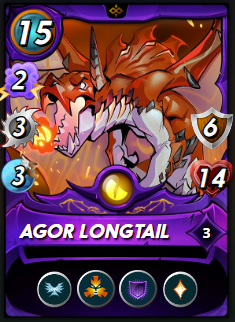
<div class="text-justify">Last in the line-up is Agor Longtail. She is a great taunt Monster and a definite must-play, in my humble opinion, when the mana cap can accommodate her as she costs the whooping 15 mana, taking the crown for the most expensive (in terms of mana) Monster in the game from the Chaos Dragon. She has Flying (has an increased chance of evading Melee or Ranged attacks from Monsters who do not have the Flying ability), Taunt (all enemy Monsters target this Monster (if they are able to)), Void Armor (Magic attacks hit this Monster's armor before its Health) and Heal (restores a portion of the Monster's health each round). Basically she is a perfectly well-rounded tank. No wonder her mana cost is so high. </div>

It is time for a quick round by round analysis:
- So the Summoner I am going with for this battle is my very own Quix. My enemy, who is none other than a Luke-WTP (a known figure in the community) is also rocking a level 4 Quix so our powers are matched as far as Summoner levels are concerned.
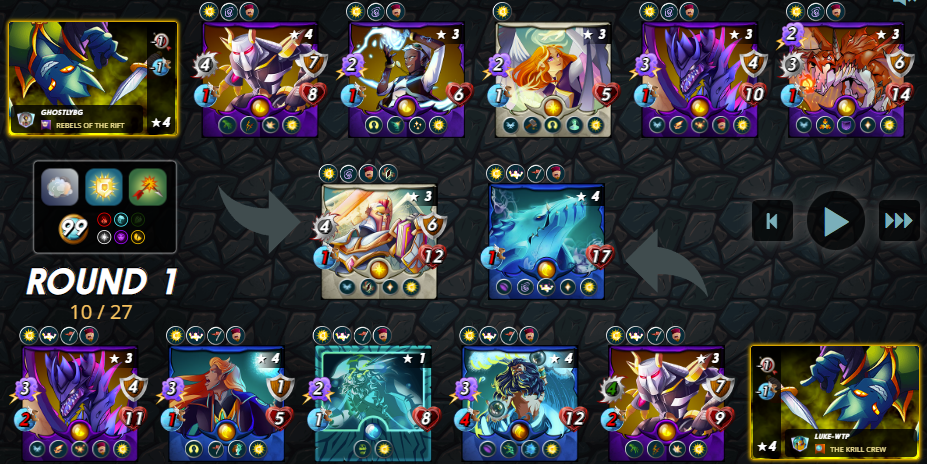
- After 1 round of exchanging blows nothing substantial has occurred. There are still no deaths on either side. That's to be expected as all Monsters on both sides are very beefy and in addition to that they are immune to 1 hit thanks to the Holy Protection ruleset.
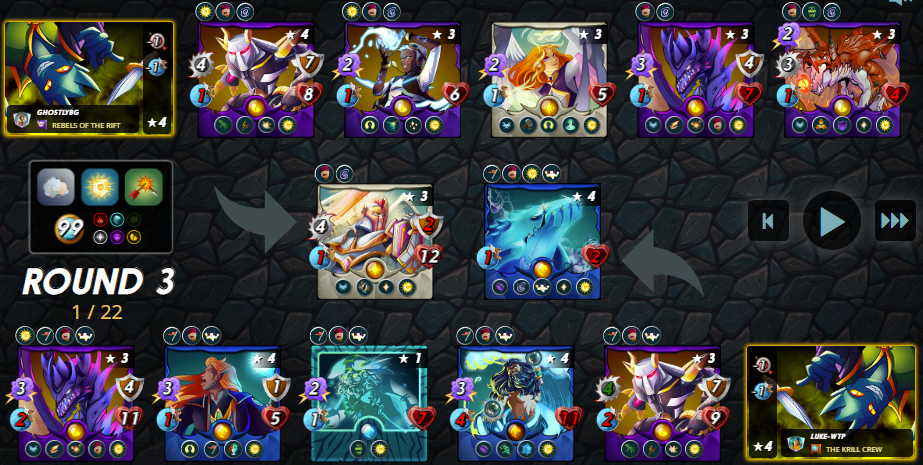
- At the start of Round 3 there has been some development on the battlefield. Luke's Bakjeera died and got revived only to probably die very soon after the beginning of the round. My Agor Longtail is also probably going to die but I still have 2 revives queued up for her.
- Round 4 is here and the enemy Bakjeera is only a memory. My Agor Longtail is still alive and kicking with the friendly help of her teammates.

- Round 5 - my Chaos Dragon has managed to take down Luke's River Hellondale, and his Carnage Titan is basically a goner as well. At this point of the battle it can be seen that my chances of winning are pretty high.

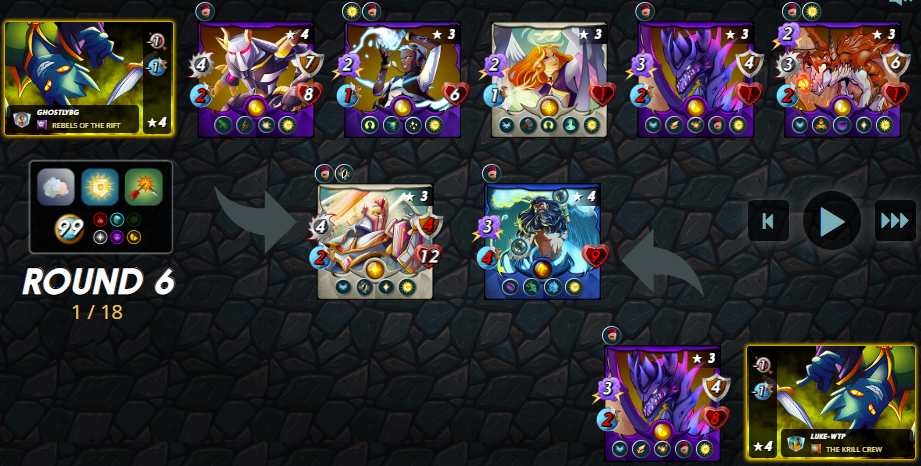
- Round 6 marks the approaching end of the battle. My opponent has just two remaining Monster on the battlefield while my team is still complete.
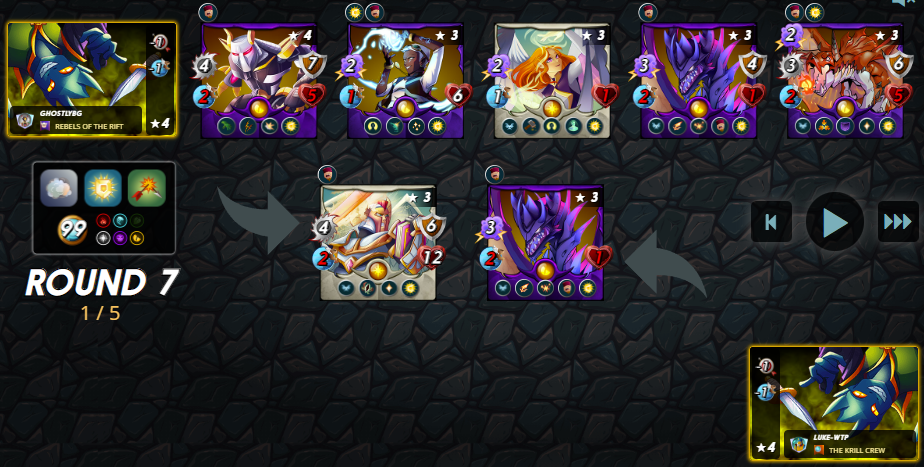
- Round 7 - all that is left for me is to deal 1 damage to Luke's Chaos Dragon which will also mark my victory in this battle.
- I was curious to check what the supposed win % for this battle was according to [Splintertools](https://splintertools.io/) and it seems my chances were... 98%. Actually I am a bit surprised there was a 2% chance for me to lose the battle.


Well this was definitely a fast but fun battle, and an entertaining way to showcase the Fog of War ruleset. See you next week with another exciting post related to the brand new Battle Mage Secrets Weekly Challenge!
Over and Out,

[Referral](https://splinterlands.com?ref=ghostlybg)
👍 terraboost, splinterboost, zaddyboy, yozen, deveter, crypt0gnome, splinner4winner, carl05, smartvote, pocketjs, reazuliqbal, monstermarket, thranax, ejmh, realmankwon.scot, happyberrysboy, terracore, donekim, steemincome, blazoblaz, bteim, lorddiablo, catharsis, text2speech, photolovers1, fun.pravesh0, manojbhatt, pravesh0, zzzinnn, rc-assist, gaurav.art, bhattg, micay, eddqq, rtonline.spt, kevm, blrog, yousafharoonkhan, bdvoter, anhdaden146, drunksamurai, xawi, zayedsakib, zaku-ag, cryptosimplify, ash2-0, chrysanthemum, djrockx, slaifer-red-01, dhoangphat1, queenstarr, shawnnft, joeyarnoldvn, emekasegun, valchiz, rehan12, dogancankilment, bobaphet, kadoshmenorah, ifeoluwa88, deepu7, titopx, marianaemilia, rana2423, gerjer, tomlee, bilpcoinrecords, minhajulmredol, rosmiapure, iamgem005, xykorlz, marco77290, hiveborgminer, ophibious, ydaiznfts2, shiekhnouman, zaku, bdvoter.cur, carlosro, shaidon, sanjeev021, anjanida, michupa, funnel, blind-spot, vitoragnelli, scrubs24, hivedeb, genepoolcardlord, genepoolrentsclr, dudeontheweb, dragonmk47, filler, xtradition, crimianales, reza-shamim, olaexcel, xabi, multicastx7, hivebuzz, lizanomadsoul, manncpt, jnmarteau, crypticat, steemitboard, marivic10, splinterl0rd, steemmonsters, hadley4, monstermother, gannibal, ghostlybg, reseller, fallen.angels, mvl2304, thepeoplesguild, vvgm, iasplan, giemo, jpleron, wiseagent,