Spn/Eng/ montando cuerdas a mi guitarra / putting strings on my guitar
hive-189641·@liu205·
0.000 HBDSpn/Eng/ montando cuerdas a mi guitarra / putting strings on my guitar
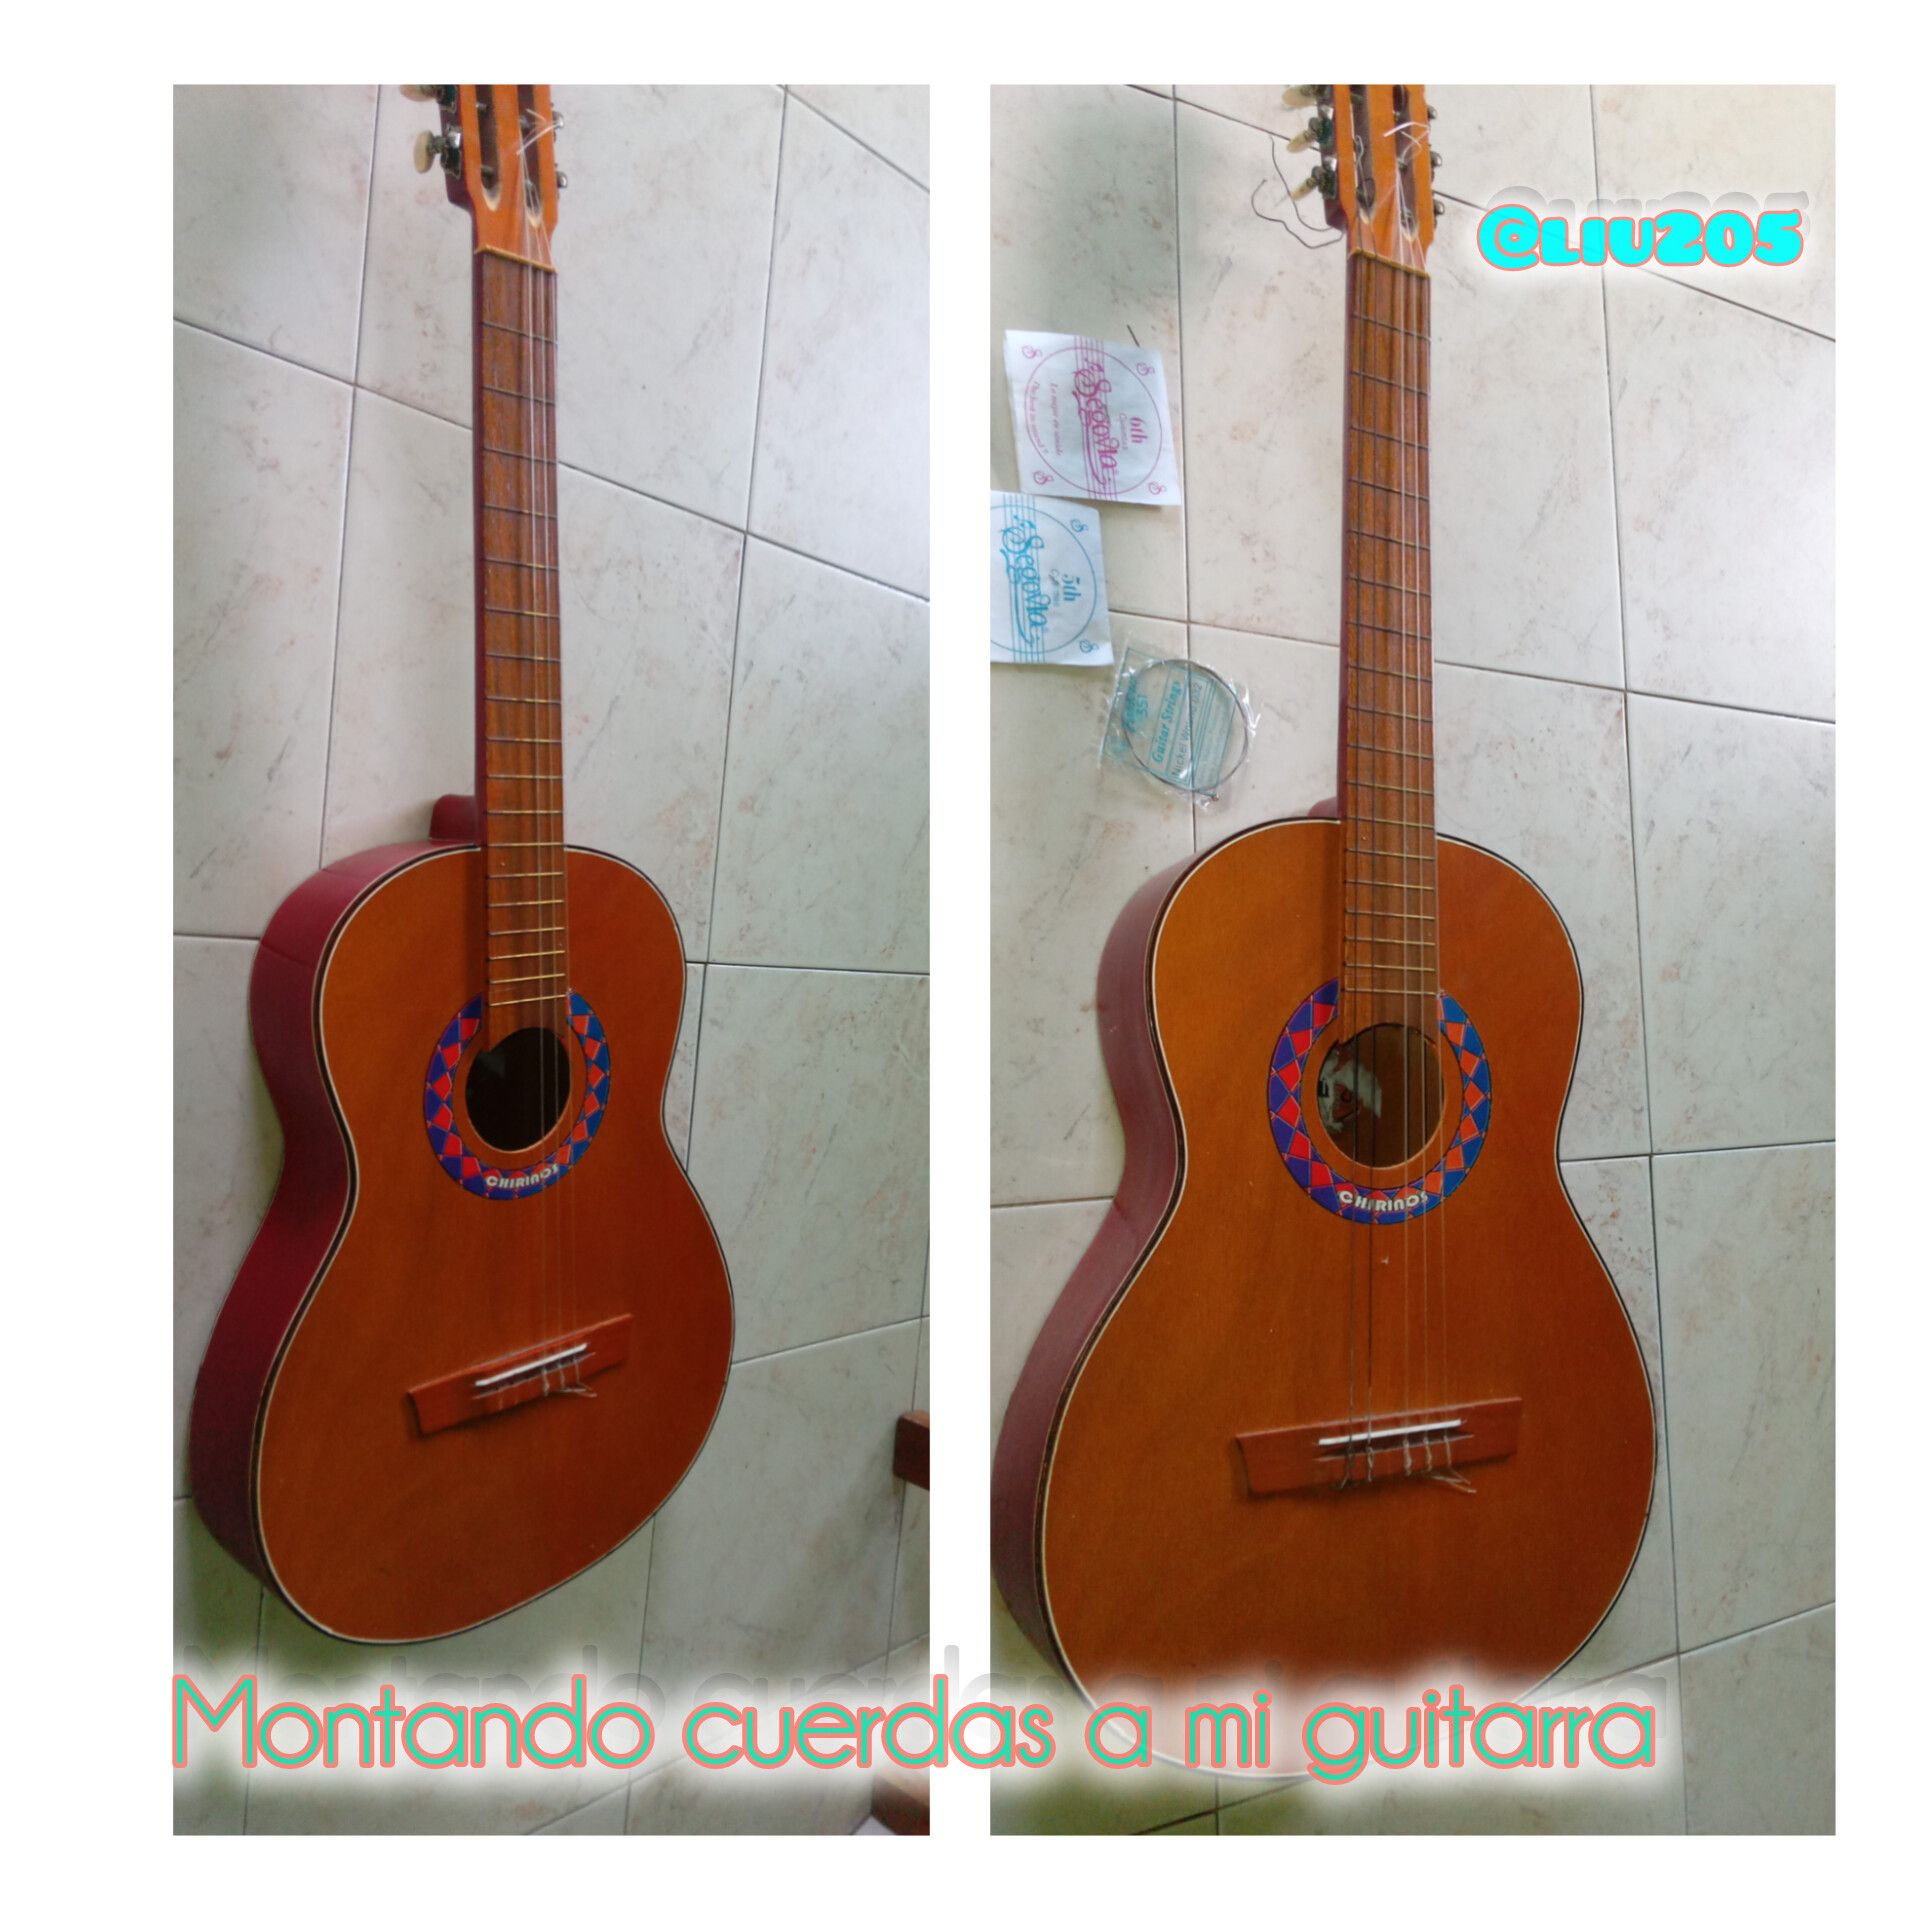 <hr> <div class=text-justify> <div class="pull-left"> **<center>ESPAÑOL</center>** Ayer me regalaron una cuerda que le faltaba a mi guitarra acustica y aproveché el momento para mostrarles lo que hice. Le cambié 3 cuerdas, la cuarta, quinta y sexta. La cuarta fue la que me regalaron. Ahora les voy a mostrar como las monté: Lo principal es quitar las cuerdas viejas, por supuesto, no podemos montar las nuevas con las viejas puestas jajjjajaj que locura. El segundo paso es empezar a aflojar las clavijas que están arriba. Por si no sabes, te digo por encima... las cuerdas, las clavijas son los ganchitos que están arriba, ellos funcionan para apretar o aflojar las cuerdas, dependiendo de la tonalidad que tengan. El puente es la otra parte donde están las cuerdas, es la parte de abajo donde (dependiendo del tipo de cuerda) se hace un nudo, o simplemente se pone la cuerda si está trae un ganchillo. </div> <div class=text-justify> <div class="pull-right"> **<center>ENGLISH</center>** Yesterday, I received a missing string on my acoustic guitar, and I took the opportunity to show you what I did. I replaced three strings: the fourth, fifth, and sixth. The fourth was the one they gave me. Now I'm going to show you how I set them up: The main thing is to remove the old strings. Of course, we can't set up the new ones with the old ones still on. Hahaha, how crazy. The second step is to start loosening the tuning pegs at the top. In case you don't know, I'll tell you briefly... the strings. The tuning pegs are the little hooks at the top. They work to tighten or loosen the strings, depending on the pitch. The bridge is the other part where the strings are. It's the bottom part where (depending on the type of string) you tie a knot, or you simply put the string in if it has a hook. </div> 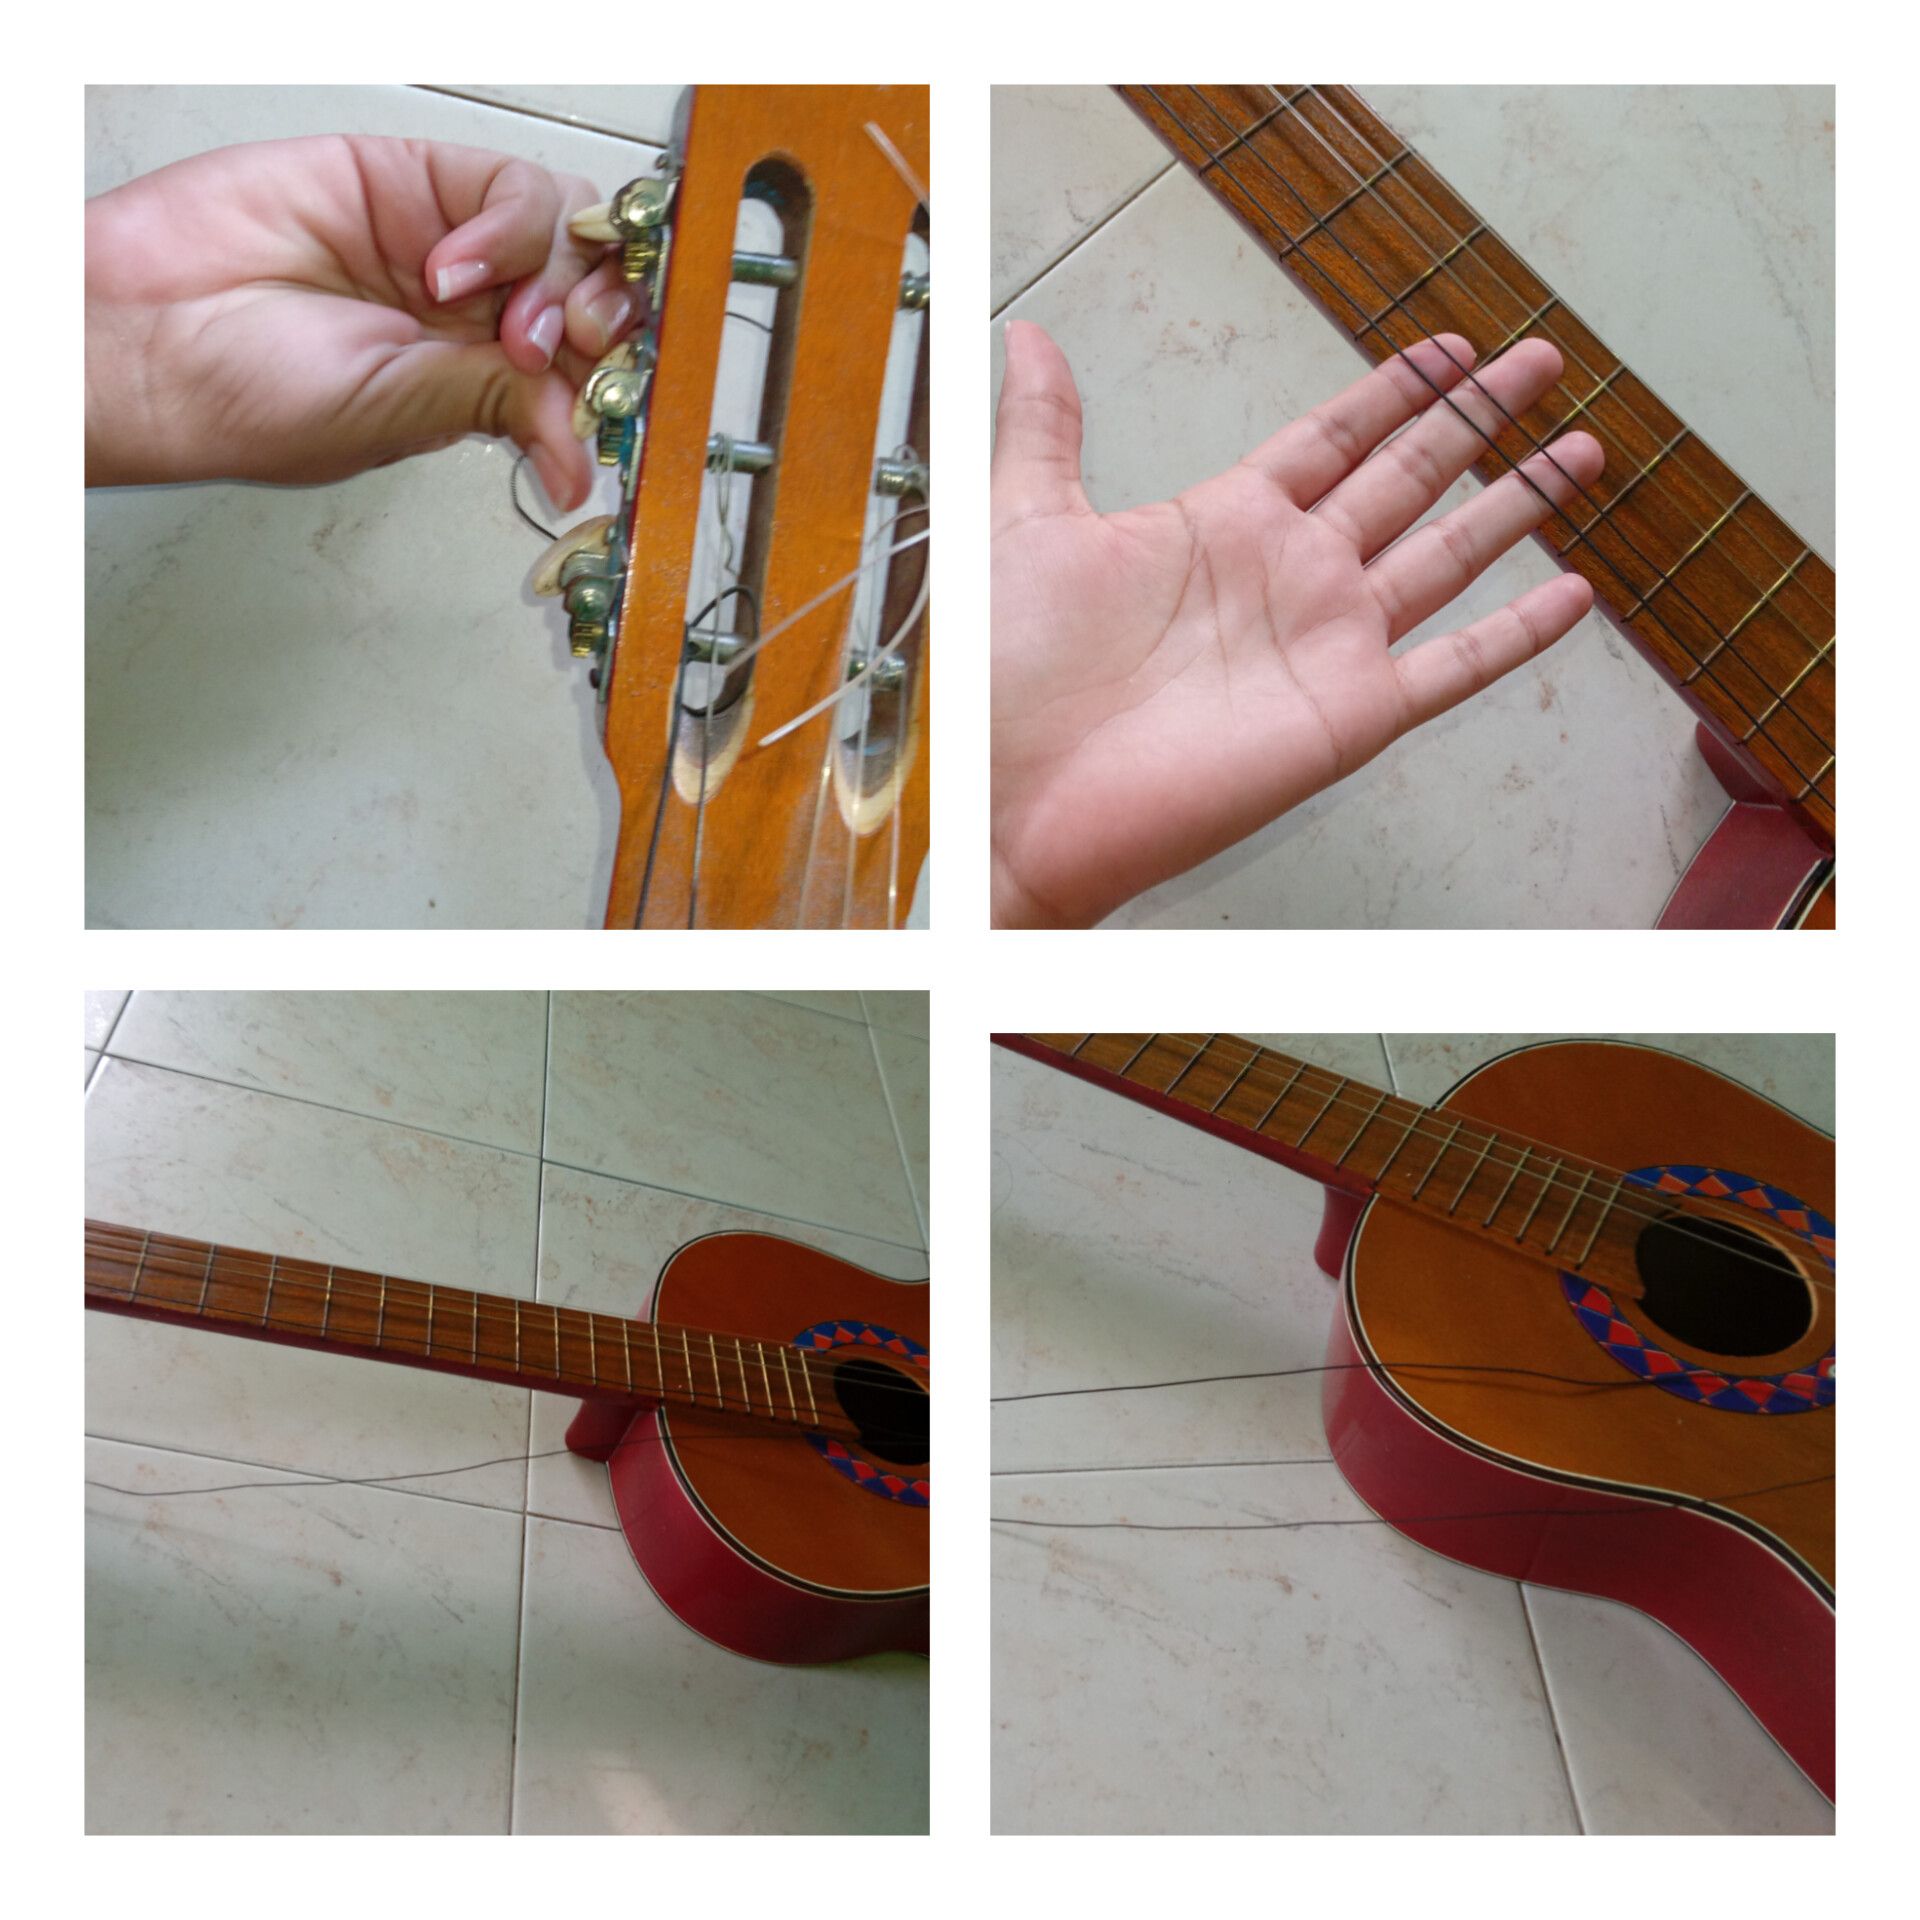 <hr> <div class=text-justify> <div class="pull-left"> Después de aflojada la clavija vemos que se suelta la cuerda desde arriba, eso quiere decir que vamos al siguiente paso que es... Quitar la cuerda desde la parte de abajo, aquí es más sencillo porque solo tienes que quitar el nudo que es un nudo simple. Ya después de haber logrado eso, cuerdas fuera, ya quitamos las cuerdas y vamos al siguiente paso, que es limpiar la quitarra si está sucia o simplemente vamos directo a montar las cuerdas nuevas. Esta cuerda que me regalaron es diferente a las otras, a parte de estar mucho más nueva tiene un ganchito, lo que quiere decir que solamente la vamos a colocar en el puente de afuera hacia adentro. Ya cuando eso está hecho vamos estirar la cuerda hasta que llegue a las clavijas que es donde la vamos a meter por un hoyito que ella tiene para ajustar y apretar la cuerda. Acabado de hacer eso se aprieta a tal punto de estar afinada. (Para eso necesitas un afinador) </div> <div class=text-justify> <div class="pull-right"> After loosening the tuning peg, we see that the string is released from the top. This means we're moving on to the next step, which is... Removing the string from the bottom is easier here because you only have to remove the knot, which is a simple knot. After having achieved that, with the strings off, we remove the strings and move on to the next step, which is to clean the tuning peg if it's dirty, or simply mount the new strings directly. This string I received is different from the others; besides being much newer, it has a hook, which means we're only going to place it on the bridge from the outside in. Once that's done, we'll stretch the string until it reaches the tuning pegs, where we'll insert it through a small hole in the tuning peg to adjust and tighten the string. Once that's done, it's tightened to the point where it's in tune. (For this, you'll need a tuner.) </div> 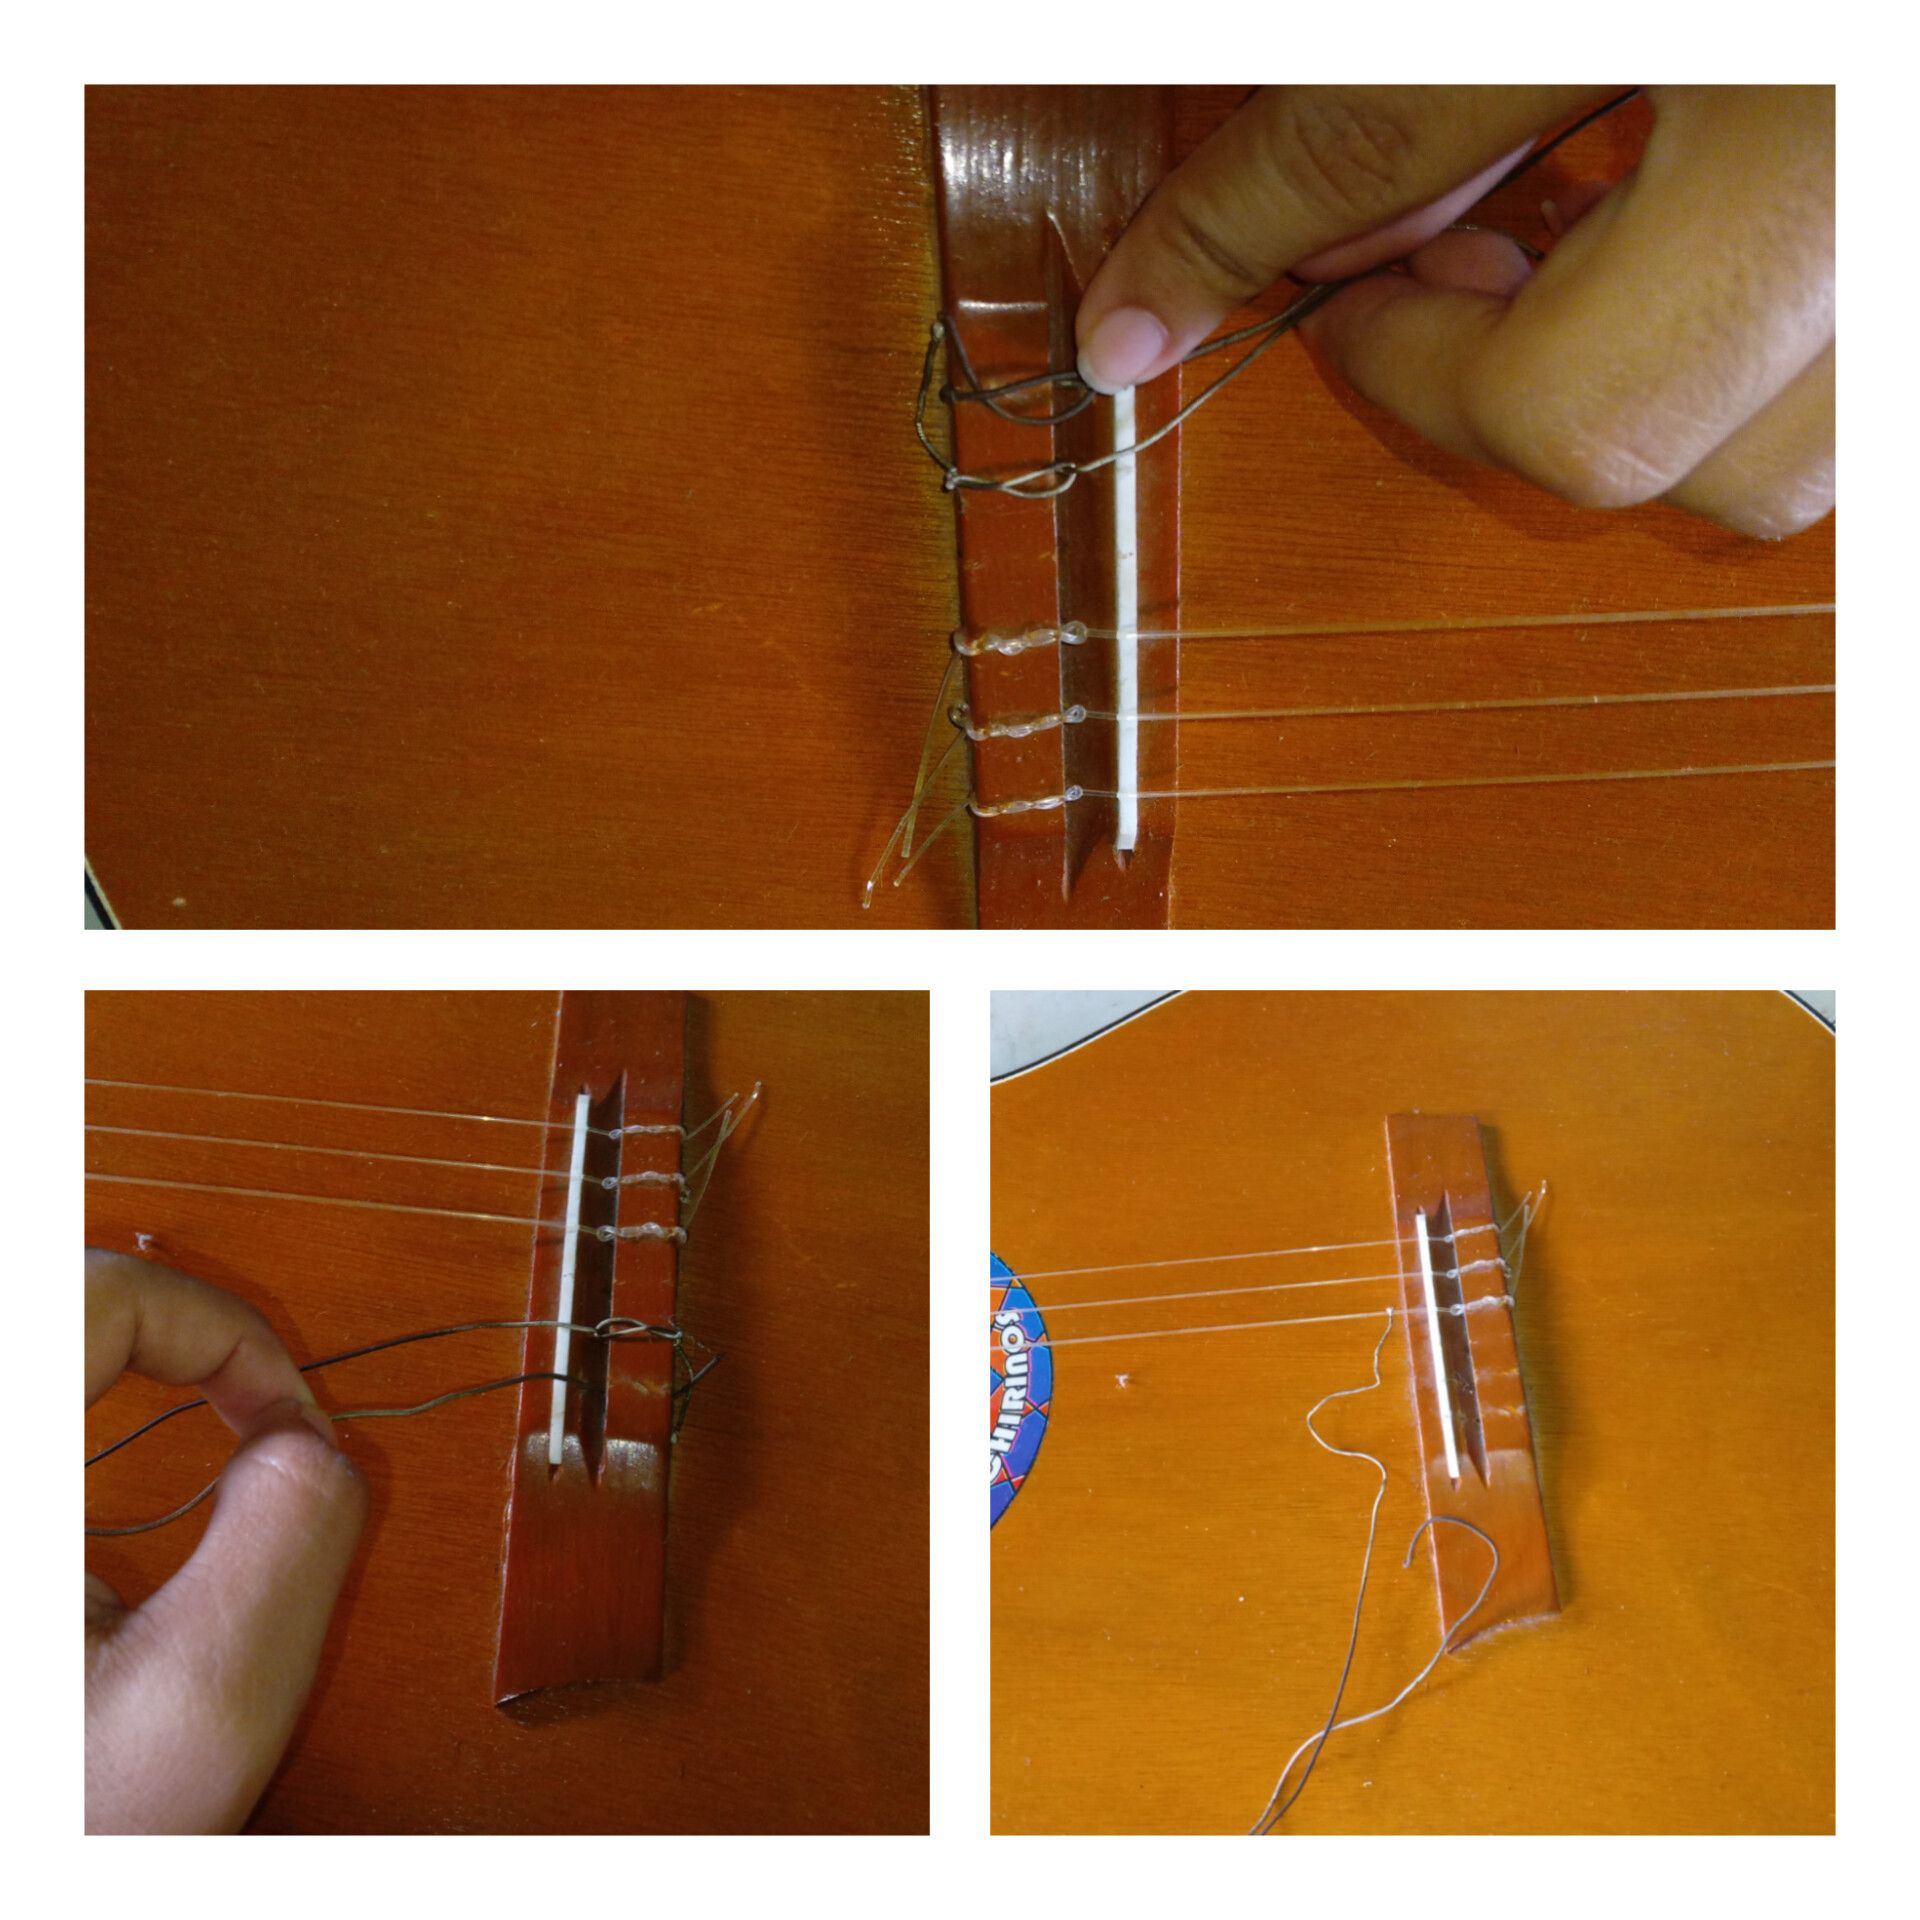 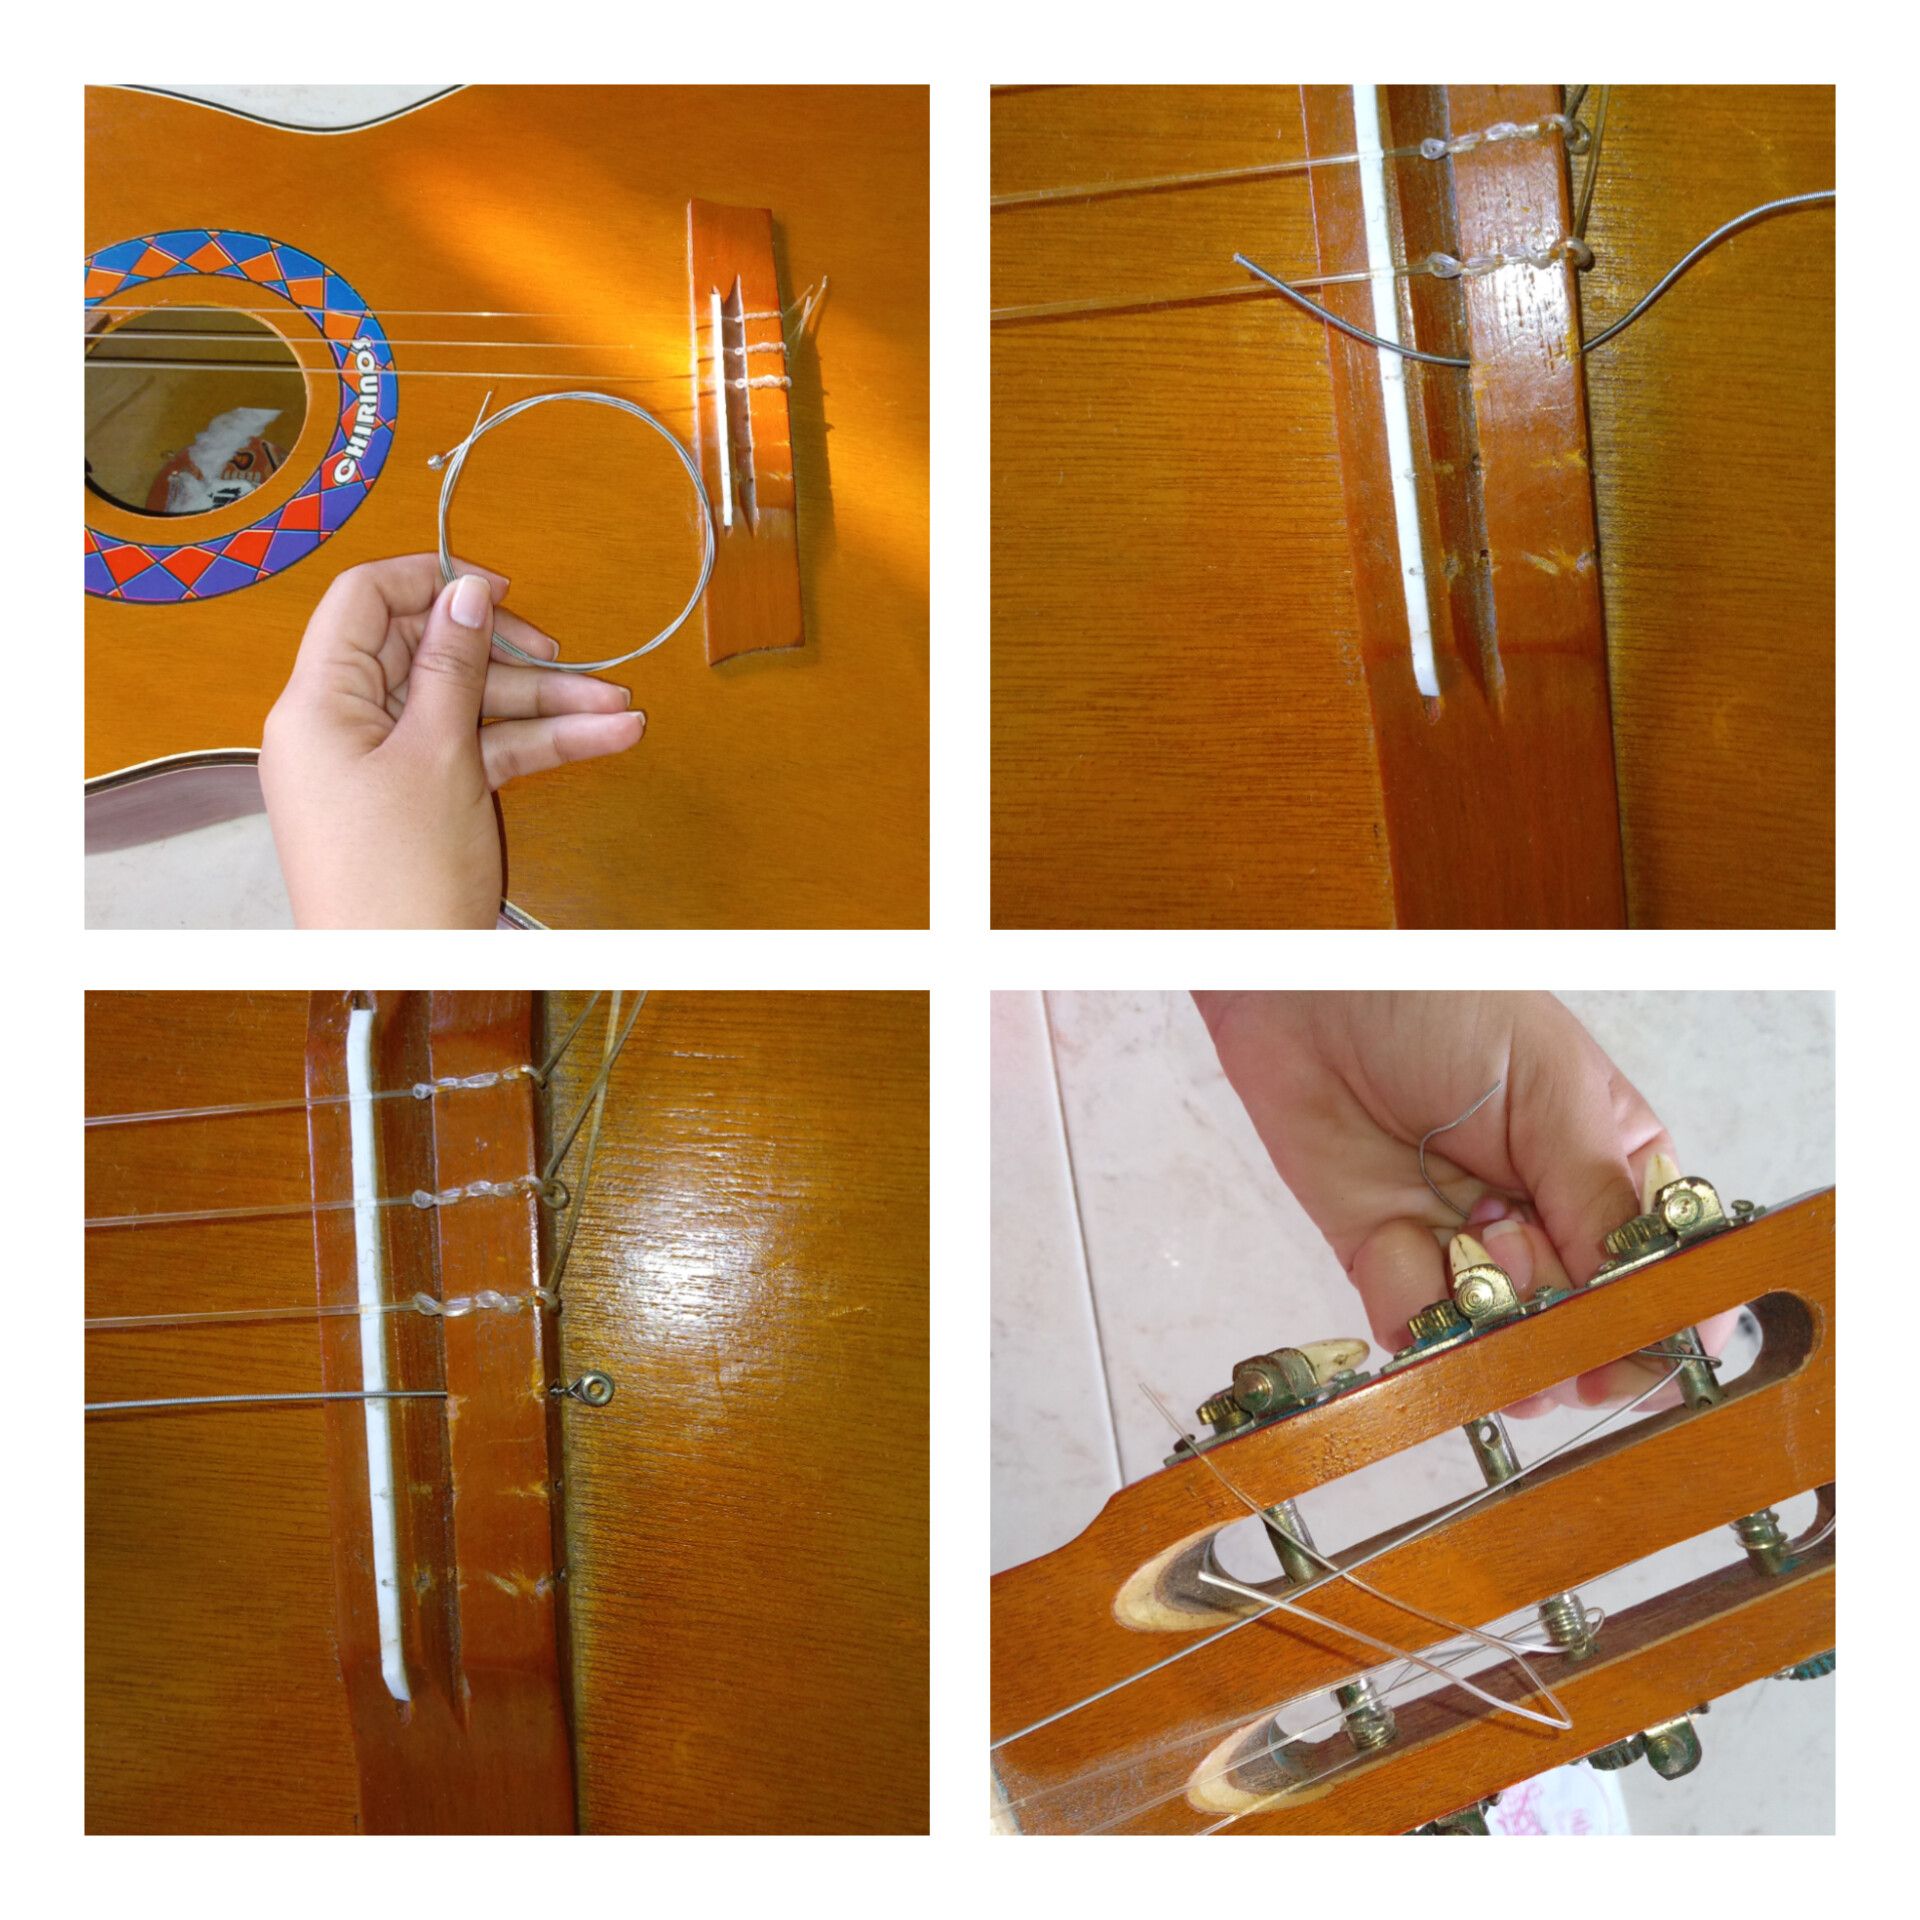 <hr> <div class=text-justify> <div class="pull-left"> Viene la otra cuerda, pero esa no tiene ganchito, así que, se va a colocar de la manera contraria a la otra. Si la otra fue de afuera a adentro está será de adentro hacia afuera, dejamos unos 4 dedos de cuerda para poder hacer el nudo. Este es sencillo, es como amarrar el zapato, entrelazar uno con la otra. Ya el siguiente paso es lo mismo que la otra cuerda. Lo llevas hasta arriba, lo pones en el hoyito y empiezas a apretar hasta afinar. Y LISTO!! </div> <div class=text-justify> <div class="pull-right"> The next string is coming, but it doesn't have a hook, so it's going to be placed the opposite way. If the other one went from the outside to the inside, this one will be from the inside to the outside. We leave about 4 fingers of string to tie the knot. This one is simple; it's like tying your shoe, interlacing one string with the other. The next step is the same as the other string. You take it to the top, put it in the hole, and start tightening until you get it right. AND THAT'S IT! </div> 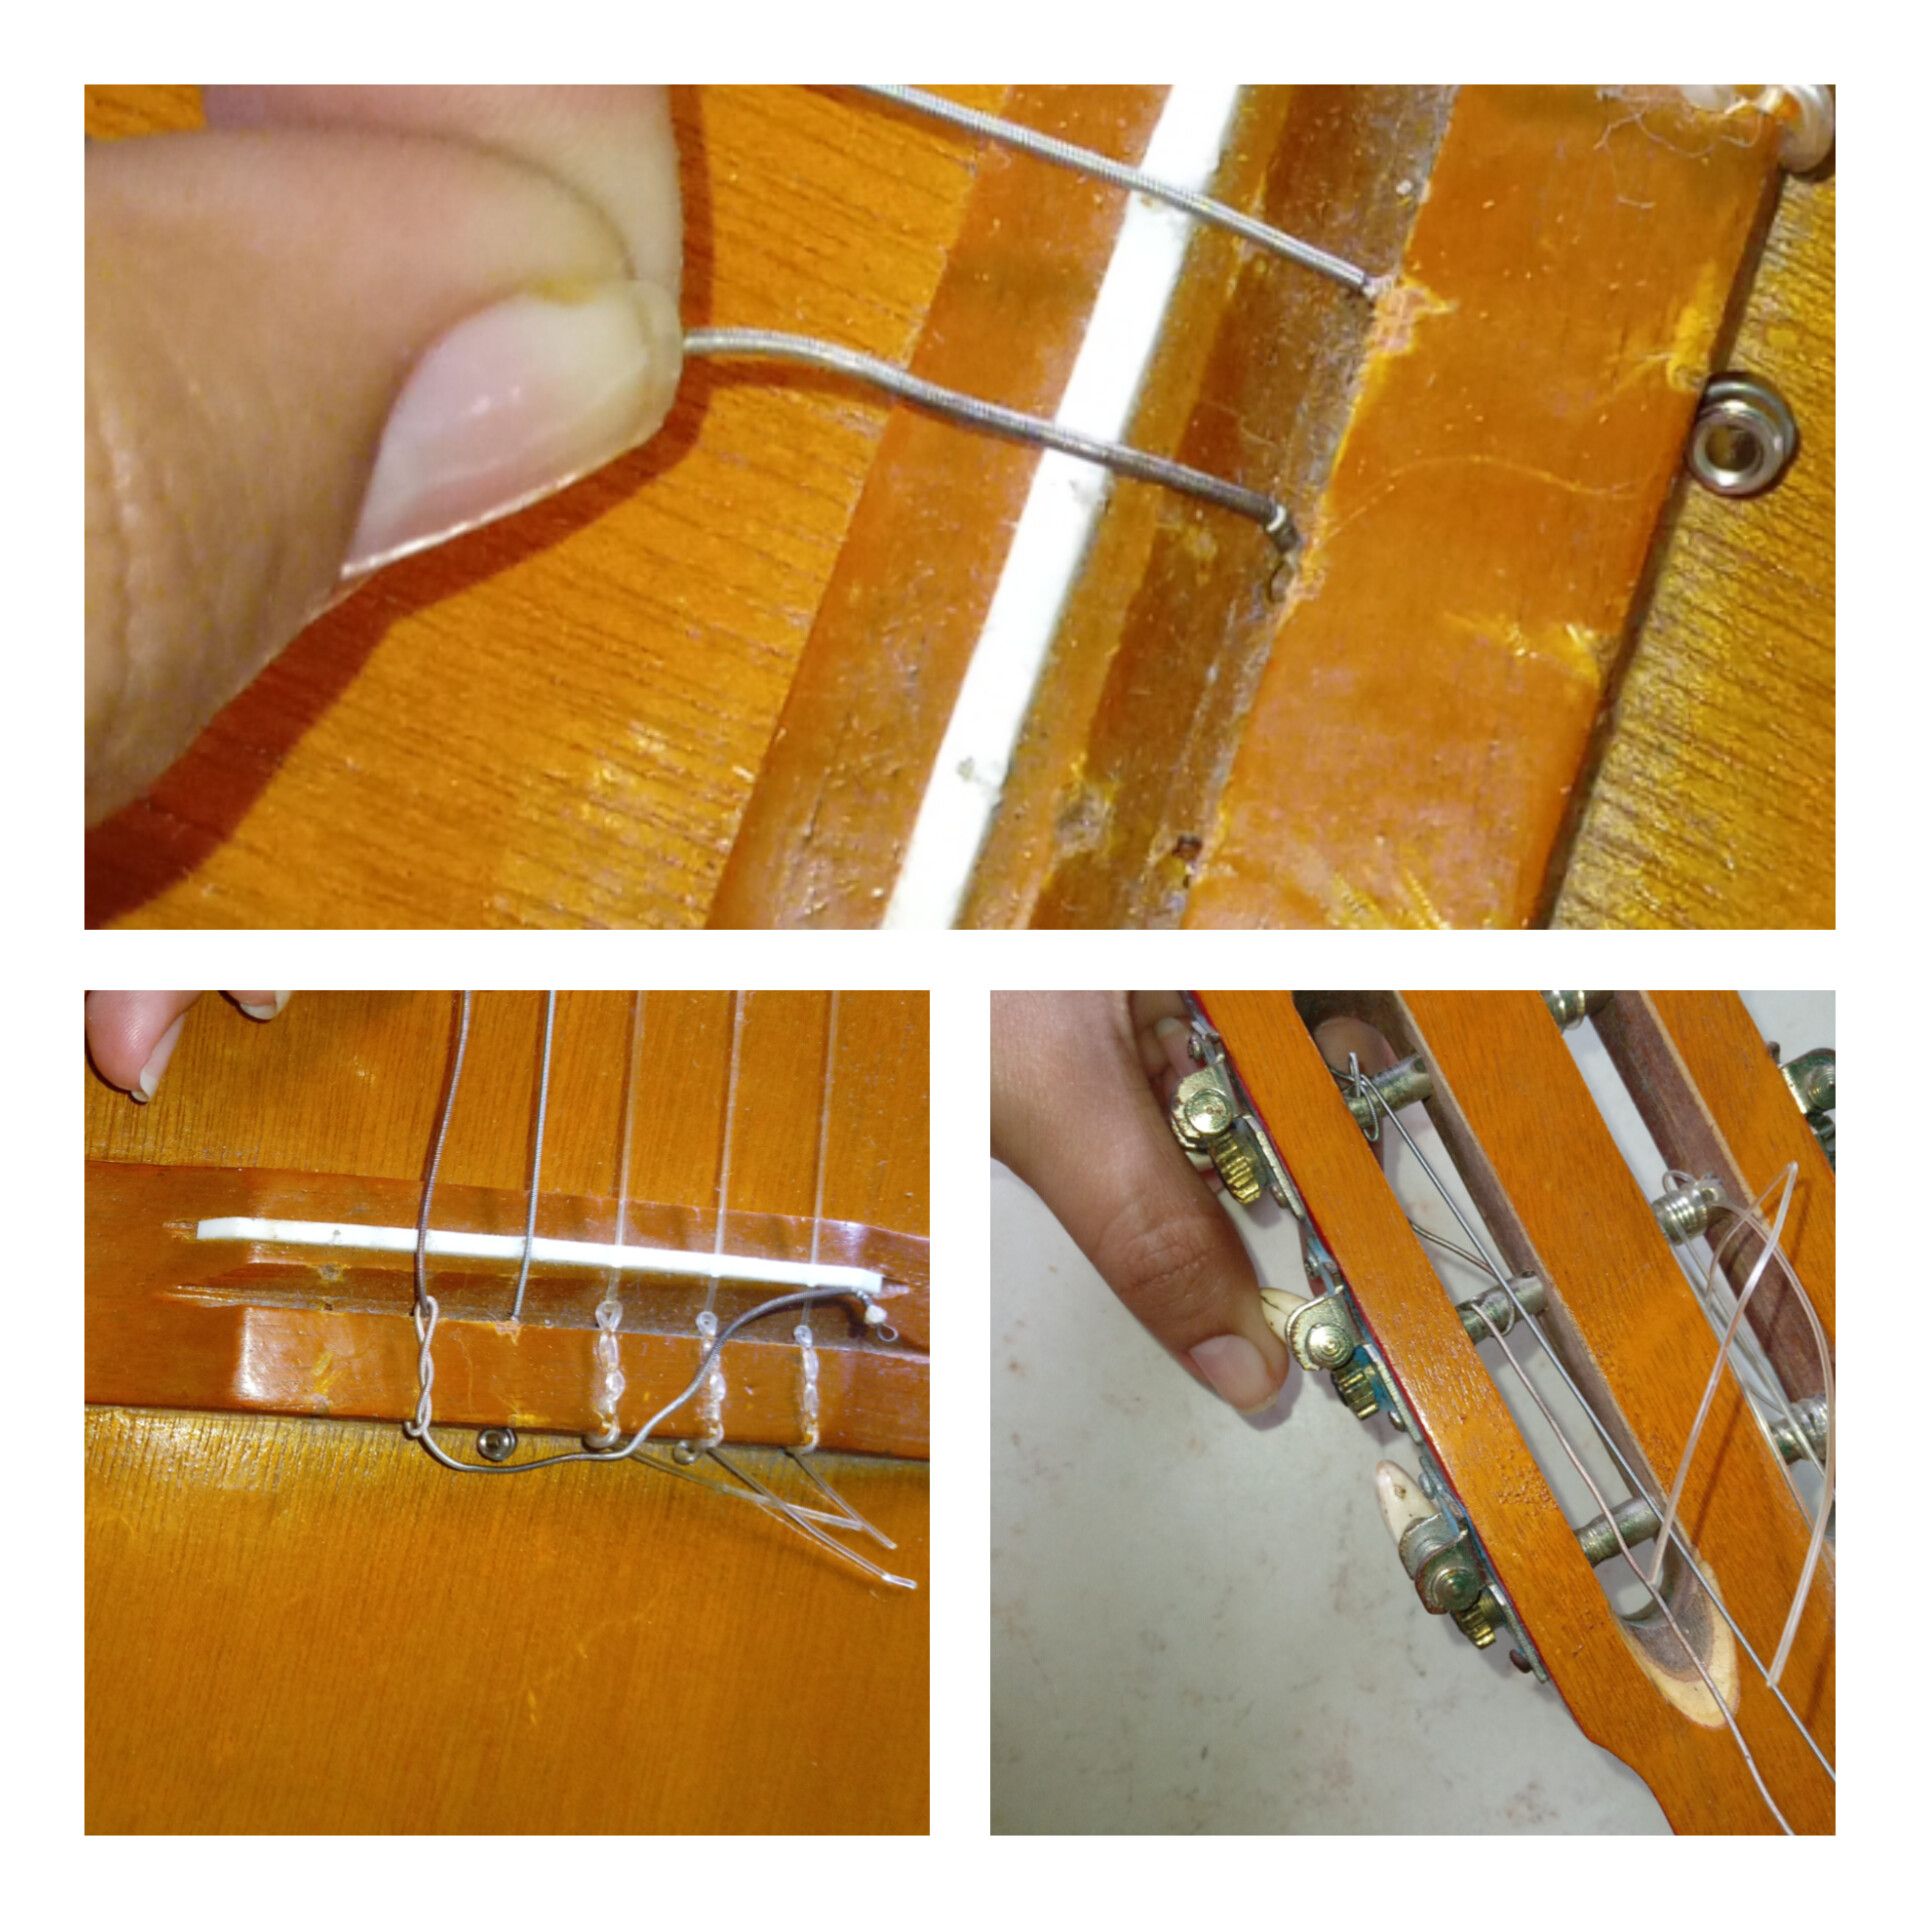 <hr> </div> <hr> <center></center> <hr> Translated with https://www.deepl.com/translator
👍 yessi08, ranajoy15, eberechi01, diyhub, elizacheng, deepu7, diytube, arita992, jimah1k, sabrinah, amarachi22, perfect20, ladyyunajay, stevenson7, desro, sodom, rafa06, marydeluz, thonyt05, valued-customer, paradoxtma, freijspace, emilydbr, phoenixwren, opochtli, johncarpenter, skatergirl, bawltricka, kiwibloke,