Tutorial: Creating a lovely crochet napkin holder - Creando un porta servilleta encantador en crochet. 🌹🧶
hive-127911·@maricrochets·
0.000 HBDTutorial: Creating a lovely crochet napkin holder - Creando un porta servilleta encantador en crochet. 🌹🧶
<div class="text-justify"> Hello hello how are you friends Hive, happy and blessed Wednesday, today I bring you the creation of a new crochet project, this time it is a napkin holder, very easy to make and this way we can keep the napkins organized. I hope this publication is very useful to you. >Hola hola cómo están amigos Hive, feliz y bendecido miércoles, hoy les traigo la creación de un nuevo proyecto en crochet, en esta ocasión se trata de un porta servilleta, muy sencillo de realizar y así podremos mantener ordenadas las servilletas. Espero que esta publicación les sea de gran utilidad. </div> <p><center> 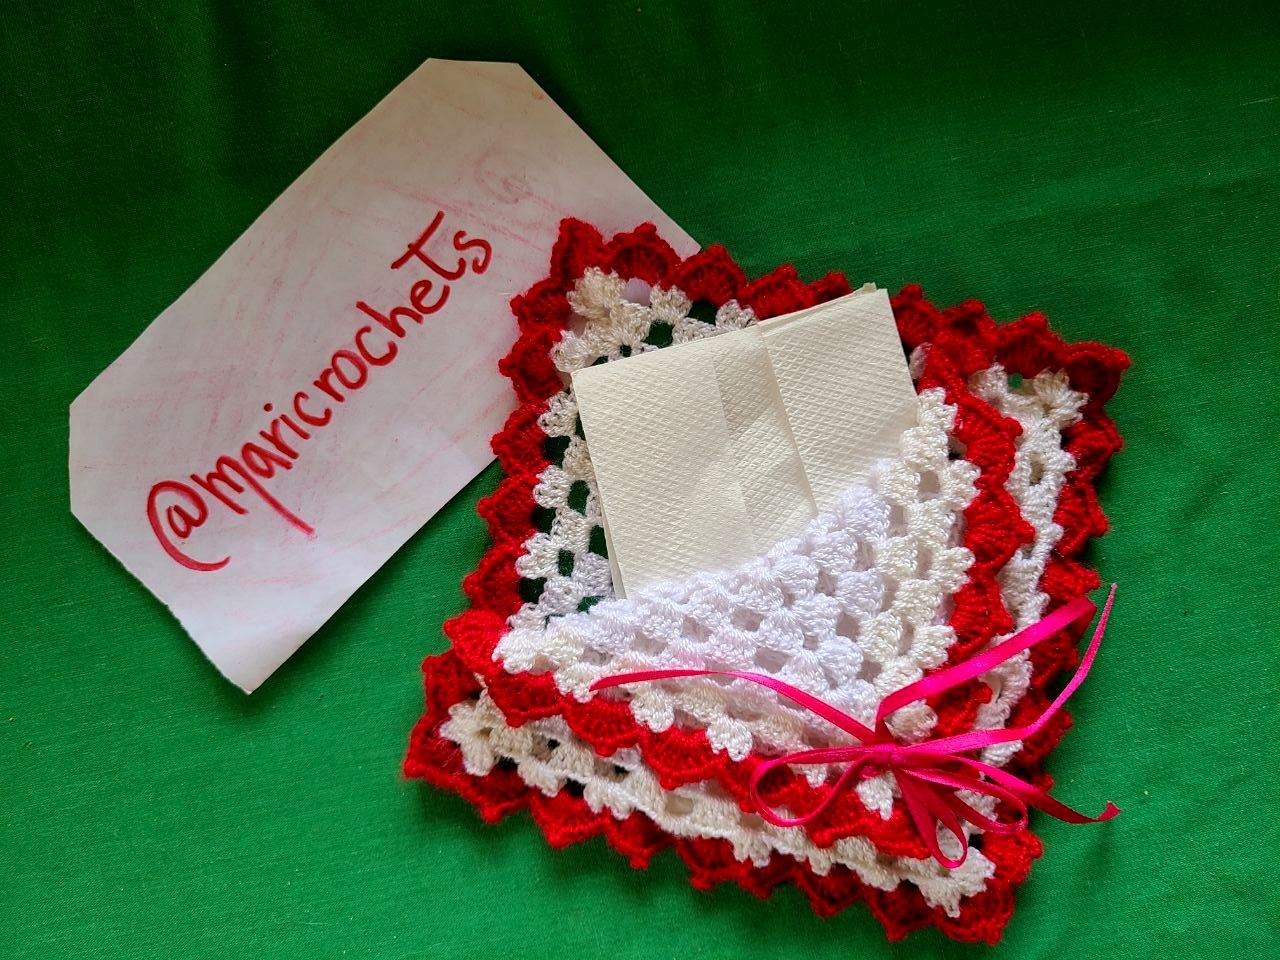 </center><p> <div class="text-justify"> 🧶 **Materials to use:** ✓Crochet threads: White and red. ✓Crochet needle number 2. ✓1/2 meter red ribbon. ✓Scissors. 🧶 **Points to use:** ✓Normal high point. ✓Chains. ✓Slided stitch. ✓Picot point. >🧶 **Materiales a utilizar:** >✓Hilos de crochet: Blanco y rojo. ✓Aguja crochet número 2. ✓1/2 metro cinta roja. ✓Tijeras. >🧶 **Puntos a utilizar:** >✓Punto alto normal. ✓Cadenas. ✓Punto deslizado. ✓Punto picot. </div> <p><center> 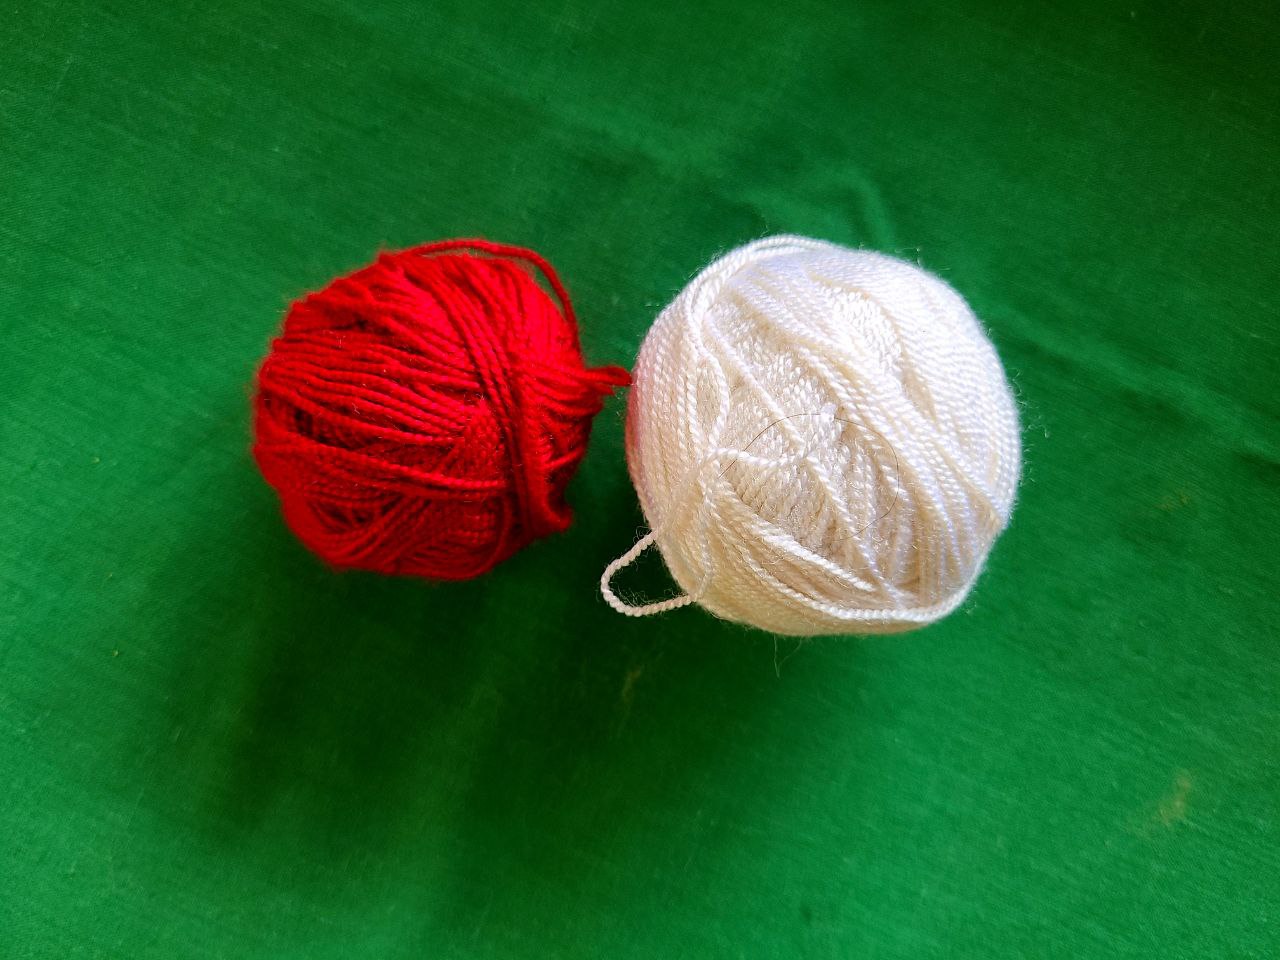 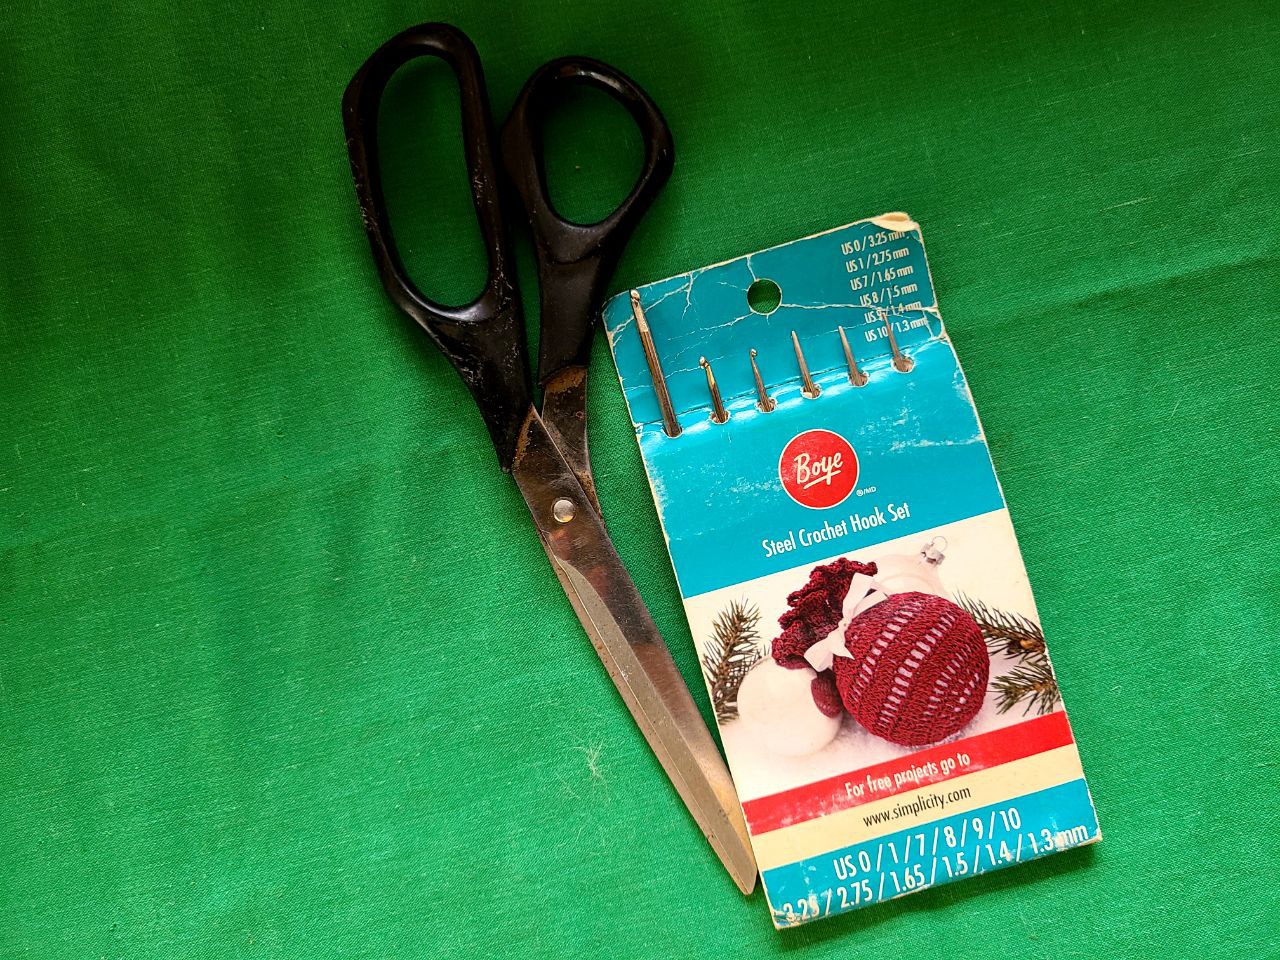 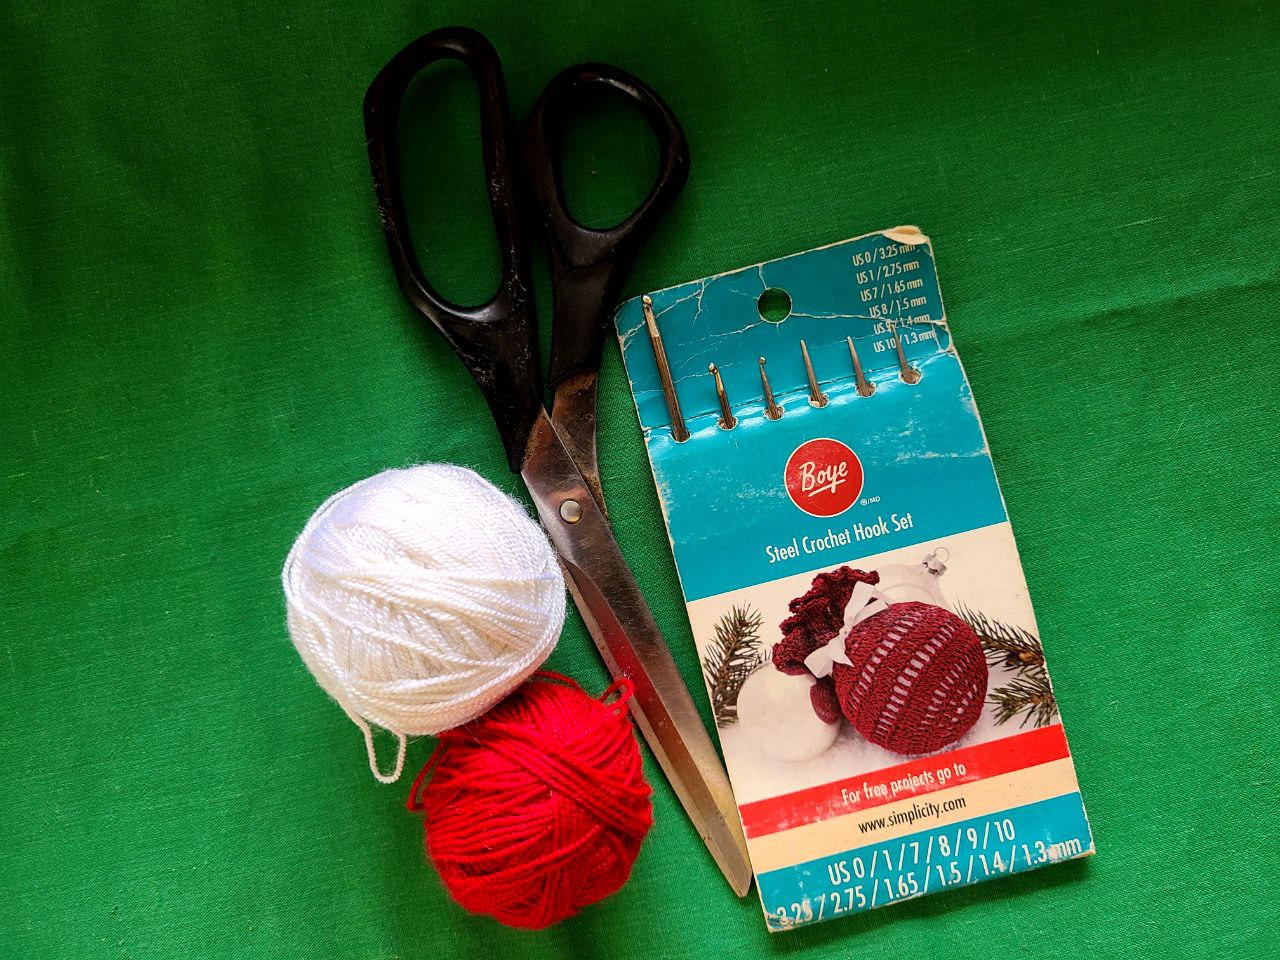 </center><p> <div class="text-justify"> 🧶 **Step 1: White Thread.** **Row 1:** We make a ring with 6 chains, we close it and inside we make, 4 normal double crochets, 3 chains, 4 normal double crochets, 3 chains, 4 normal double crochets, 3 chains, 4 normal double crochets, 3 chains, we close the row. All rows are closed with slip stitch. **Row 2:** In this row we make 4 normal double crochets in each hole, 3 chains 4 normal double crochets within the same hole, and 3 chains to separate each group, we must have 4 groups of shells, we close the row as usual . **Row 3:** We make the 4 normal double crochets, 3 chains, 4 normal double crochets inside the same hole making the shell, 3 chains separating and in the space of the next 3 chains, we make 4 normal double crochets, 3 chains of separation, and we make another shell, so we have until we finish the row. **Row 4:** We make the 4 normal double crochets, 3 chains, 4 normal double crochets inside the same hole making the shell, 3 chains separating and in the space of the next 3 chains, we make 4 normal double crochets, 3 chains separating, another group of 4 normal double crochets separated by 3 chains, and we make another shell, so we have until we finish the row. **Rows: 5, 6, 7 and 8** are worked in the same way, in each row you increase in groups of 4 stitches separated by 3 chains, until you reach 6 groups in total. In order to finish this product we will need two equal squares, and thus be able to form the napkin holder. >🧶 **Paso 1: Hilo Blanco.** >**Fila 1:** Hacemos un anillo con 6 cadenas, lo cerramos y dentro hacemos, 4 puntos altos normales, 3 cadenas, 4 puntos altos normales, 3 cadenas, 4 puntos altos normales, 3 cadenas, 4 puntos altos normales, 3 cadenas, cerramos la fila. Todas las filas se cierran con punto deslizado. >**Fila 2:** En esta fila hacemos en cada orificio 4 puntos altos normales 3 cadenas 4 puntos altos normales dentro del mismo orificio, y 3 cadenas para separar cada grupo, debemos tener 4 grupos de conchas, cerramos la fila como siempre. >**Fila 3:** Hacemos los 4 puntos altos normales, 3 cadenas, 4 puntos altos normales dentro del mismo orificio haciendo la concha, 3 cadenas de separacion y en el espacio de las 3 cadenas siguientes, hacemos 4 puntos altos normales, 3 cadenas de separacion, y volvemos hacer otra concha, así tenemos hasta terminar la fila. >**Fila 4:** Hacemos los 4 puntos altos normales, 3 cadenas, 4 puntos altos normales dentro del mismo orificio haciendo la concha, 3 cadenas de separacion y en el espacio de las 3 cadenas siguientes, hacemos 4 puntos altos normales, 3 cadenas de separacion, otro grupo de 4 puntos altos normales separados por 3 cadenas, y volvemos hacer otra concha, así tenemos hasta terminar la fila. >**Las filas: 5, 6, 7 y 8** se trabajan de igual forma, en cada fila se va aumentando en grupo de 4 puntos separados por 3 cadenas, hasta llegar a 6 grupos en total. >Para poder terminar este producto necesitaremos dos cuadrados iguales, y así poder formar el servilletero. </div> <p><center> 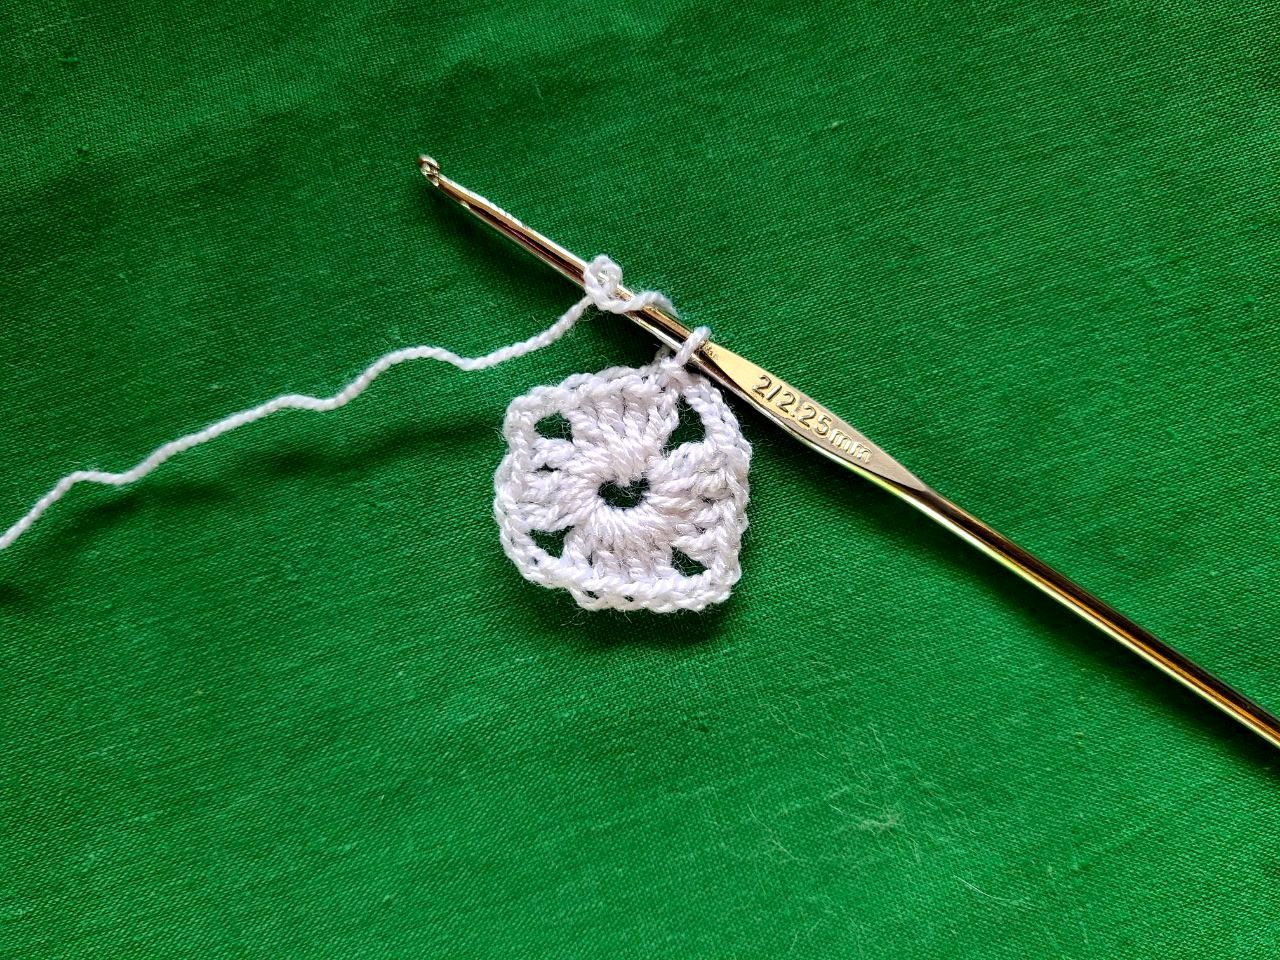 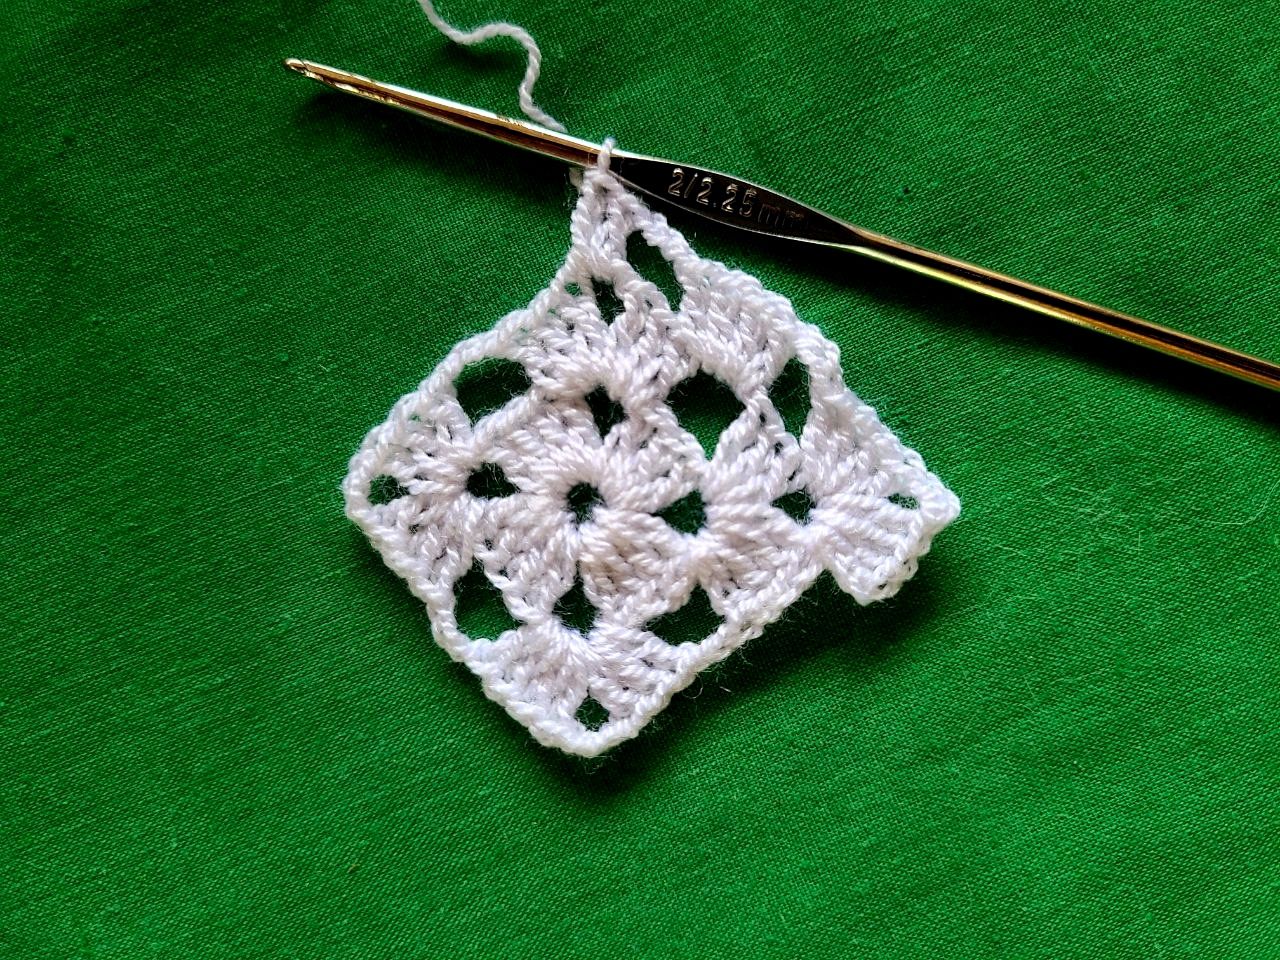 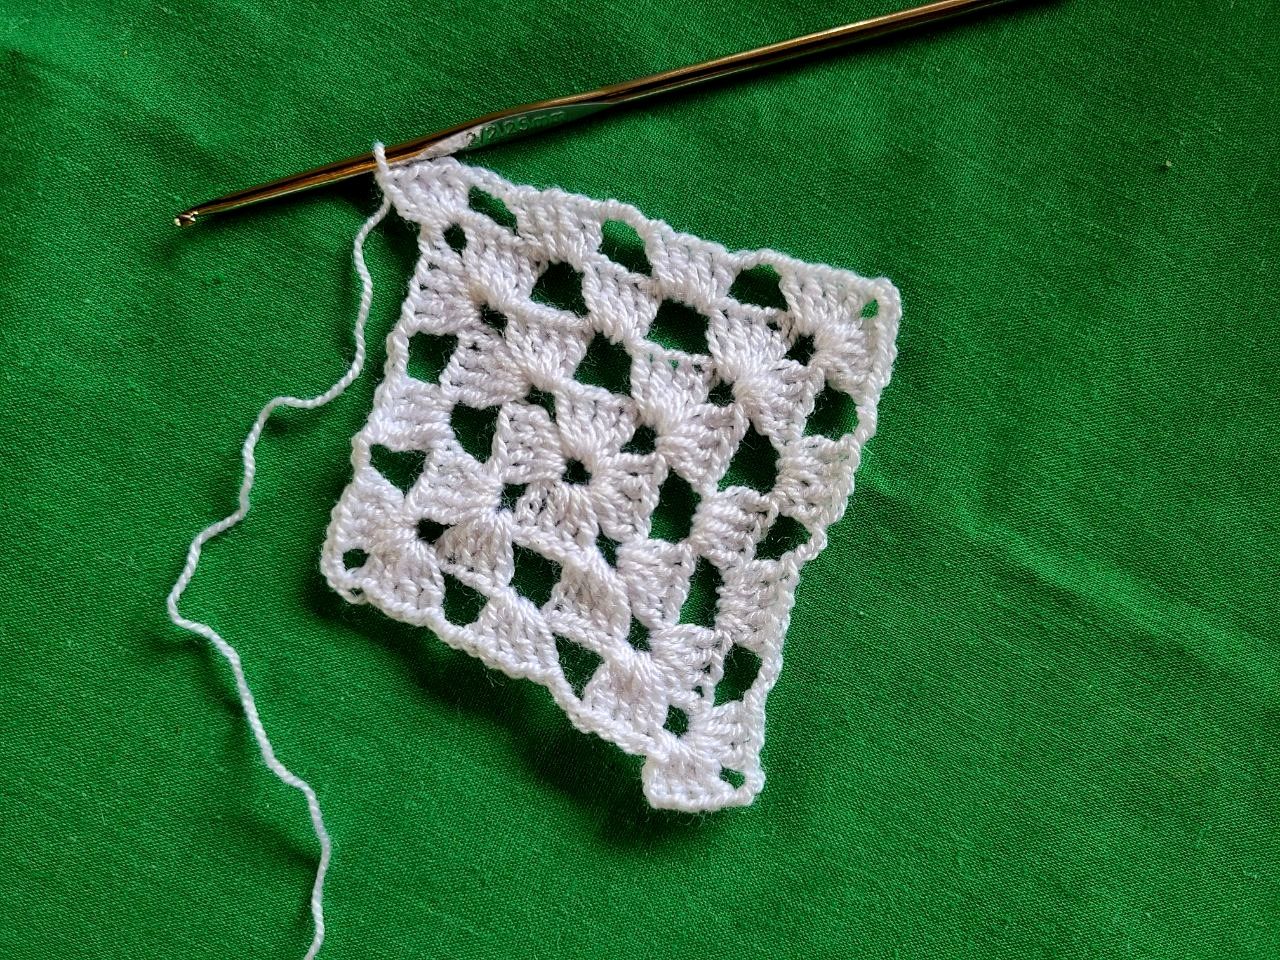 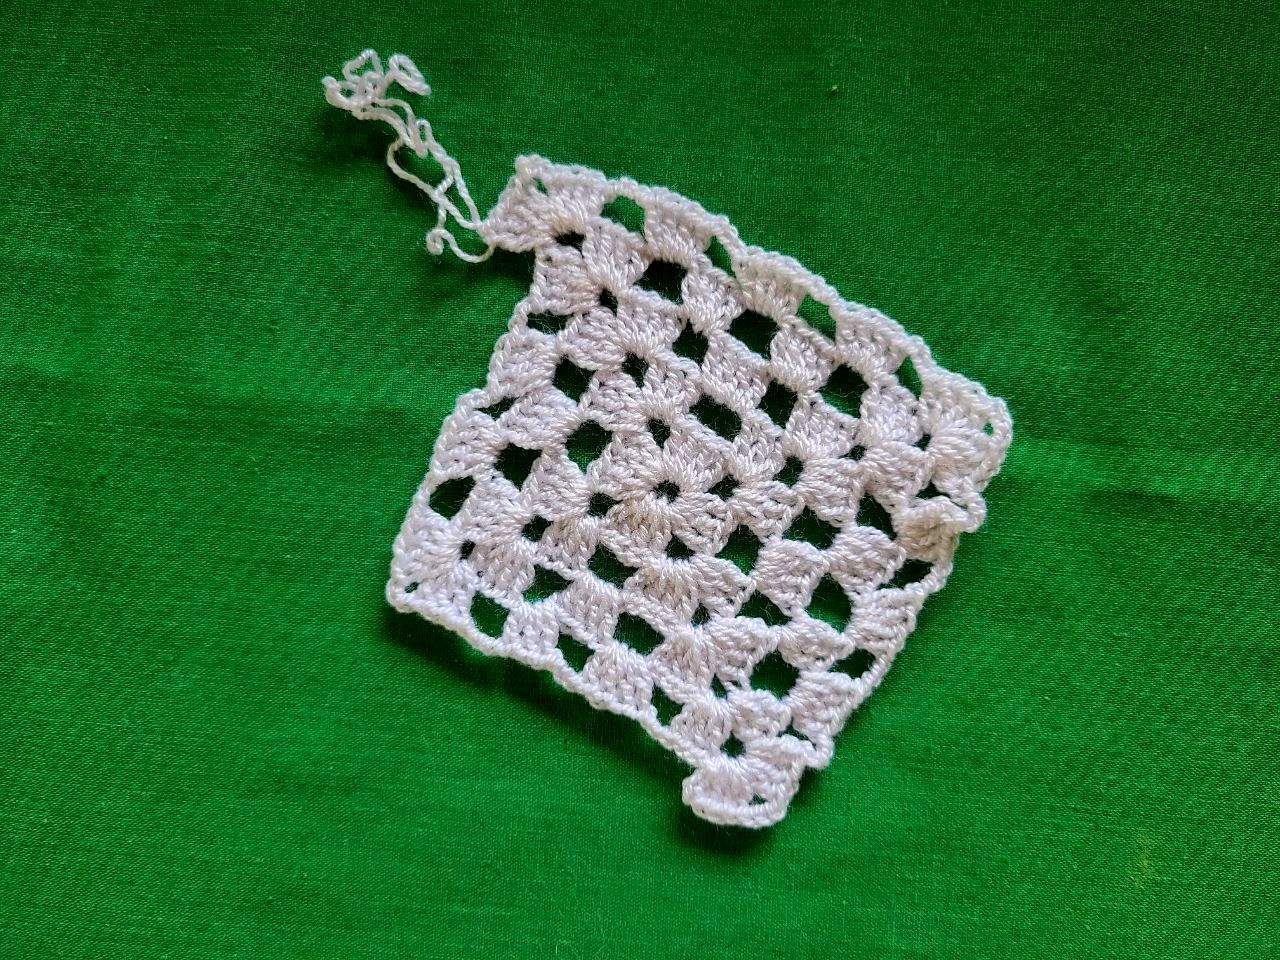 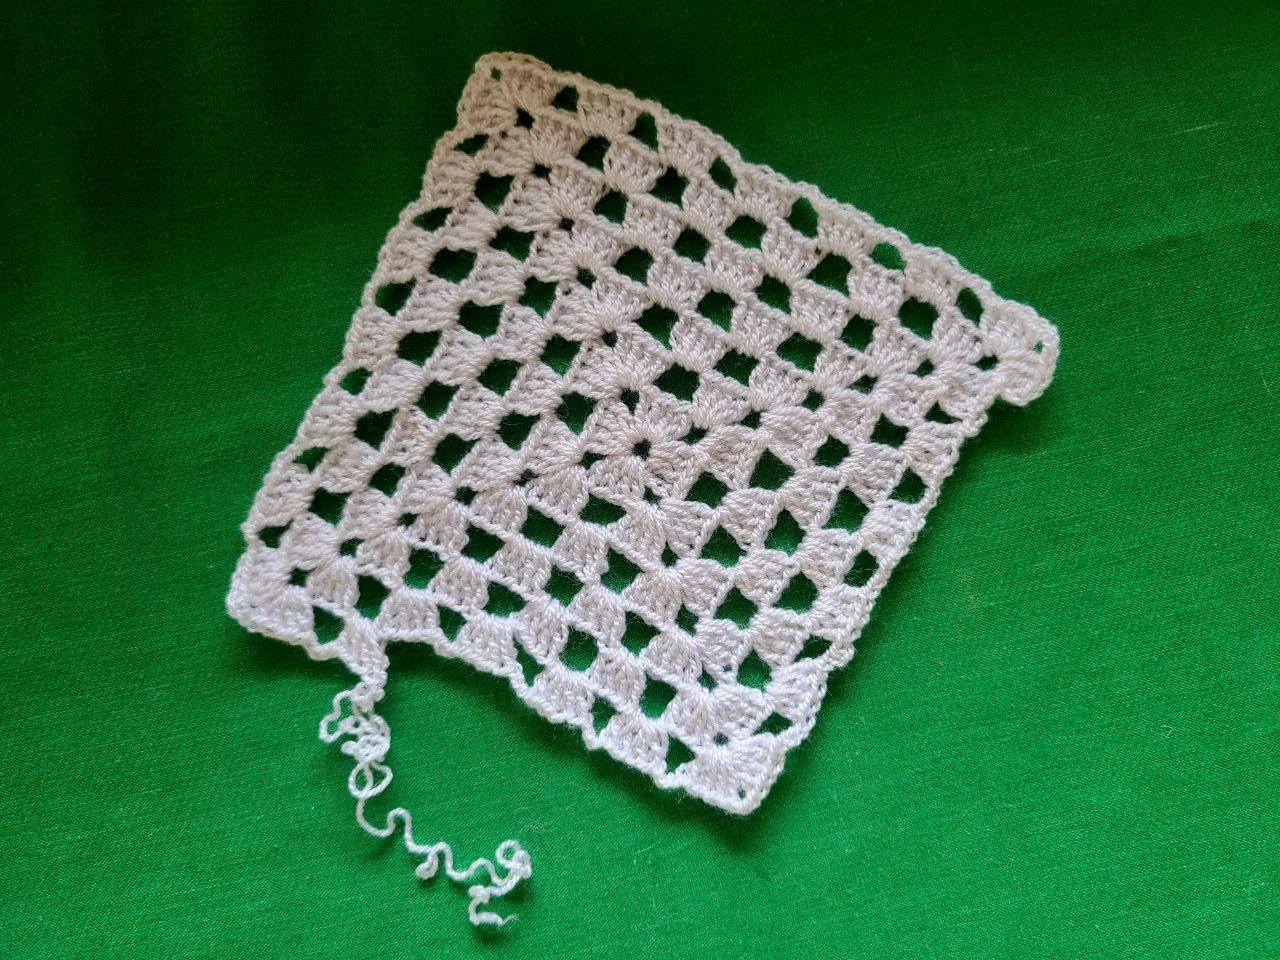 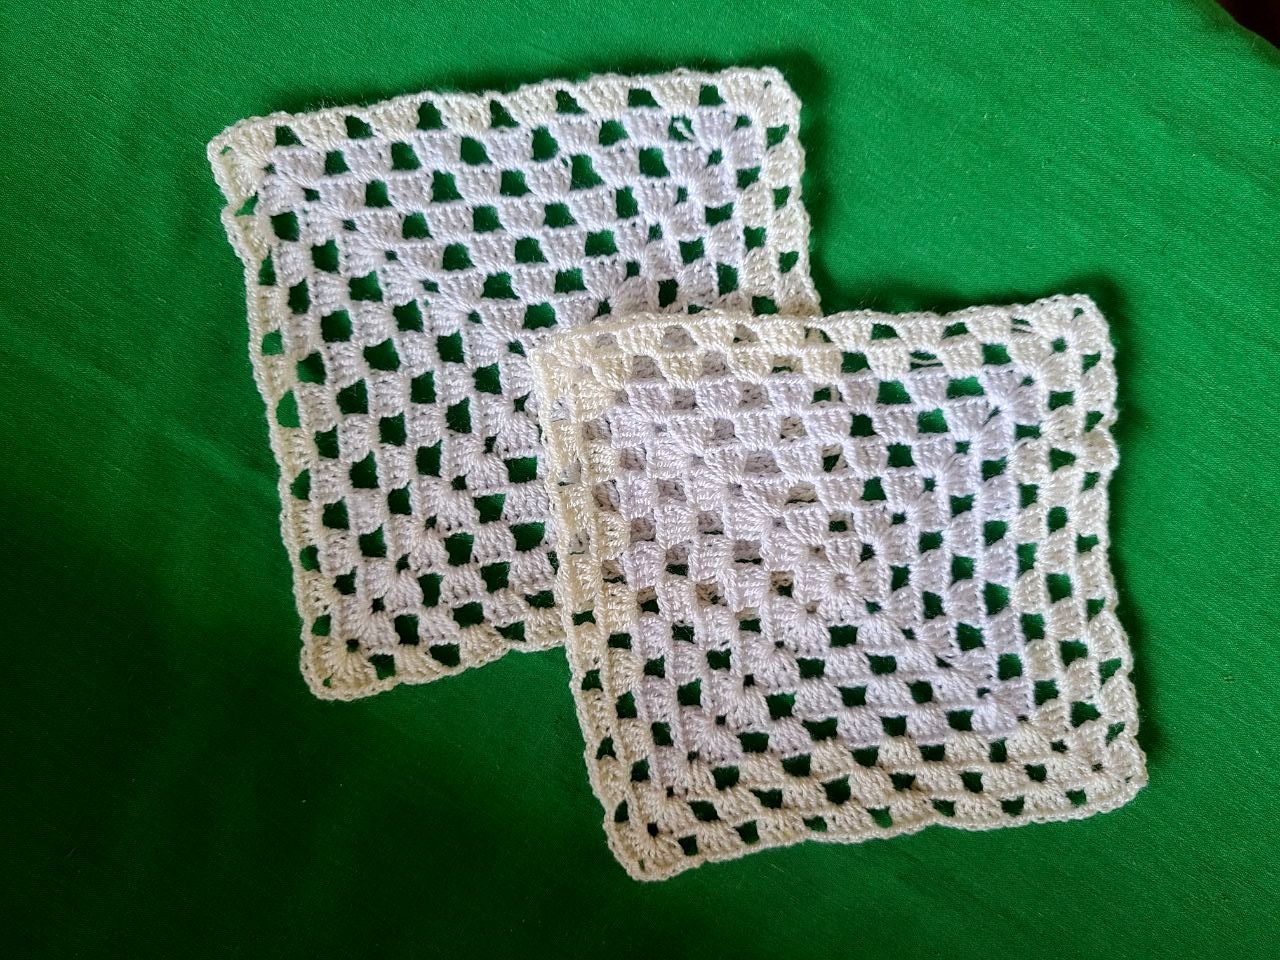 </center><p> <div class="text-justify"> 🧶 **Step 2: Red Thread.** With the red thread we are going to make a decoration around it, joining both squares, so that it looks like an envelope, leaving two sides decorated separately, and thus being able to store the napkins inside. **Single row:** We begin in the center of the 4 double crochets of the shell, making a single crochet in point 2, and in the space of 3 chains a shell like this: 4 double crochets, 3 chains and there a picot, 4 double crochets again, over the two previous double crochets 1 single crochet, and so on two sides taking the two squares at the same time. When we reach side 3, we separate the pieces and decorate them individually, taking each piece separately, so that the opening remains and we can insert the napkins. Once the decoration is finished, we fold one of the squares upwards making it like a lid and decorate it with ribbons, a flower, a button or any detail of your preference, and the piece is finished. In this case it is decorated with some ribbons, making a small bow or detail. >🧶 **Paso 2 : Hilo Rojo.** >Con el hilo rojo le vamos hacer una decoración alrededor, uniendo ambos cuadrados, para que quede como un sobre, dejando dos lados decorados por separado, y así poder guardar las servilletas dentro. >**Fila única:** Comenzamos en el centro de los 4 puntos altos de la concha, haciendo en el punto 2 un punto bajo, y en el espacio de 3 cadenas una concha así: 4 puntos altos, 3 cadenas y allí un picot, 4 puntos altos nuevamente, sobre los dos puntos altos anteriores 1 punto bajo, y así sucesivamente dos lados tomando los dos cuadrados al mismo tiempo. >Al llegar al lado 3 separamos las piezas y las decoramos individualmente, tomando cada pieza aparte, para que quede la abertura y poder introducir las servilletas. Finalizada la decoración, uno de los cuadrados lo doblamos hacia arriba haciendo como una tapa y decoramos con cintas, una flor, un botón o cualquier detalle de su preferencia, y la pieza queda terminada. >En este caso está decorado con unas cintas, haciendo un pequeño lazo o detalle. </div> <p><center> 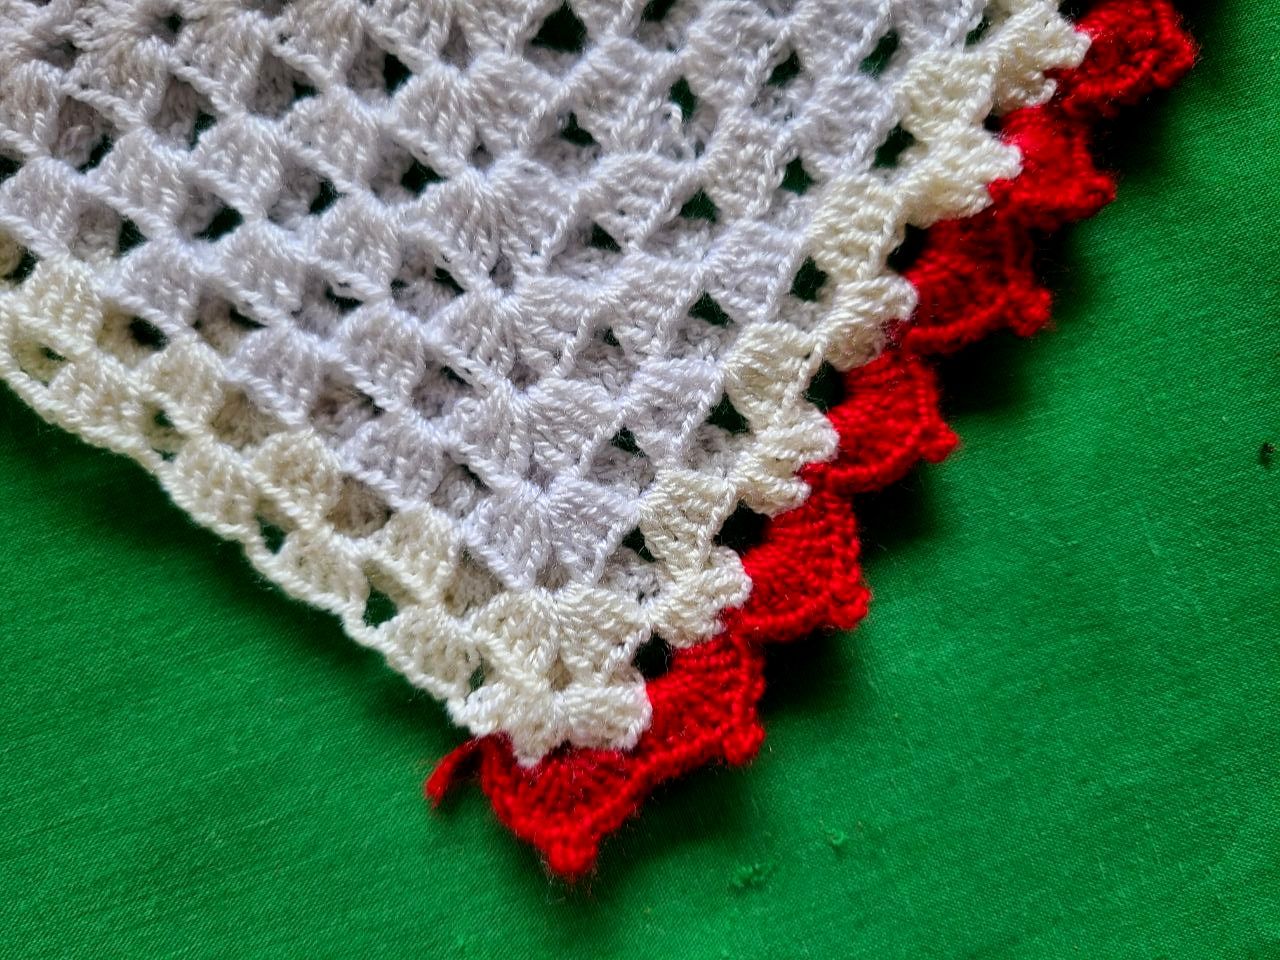 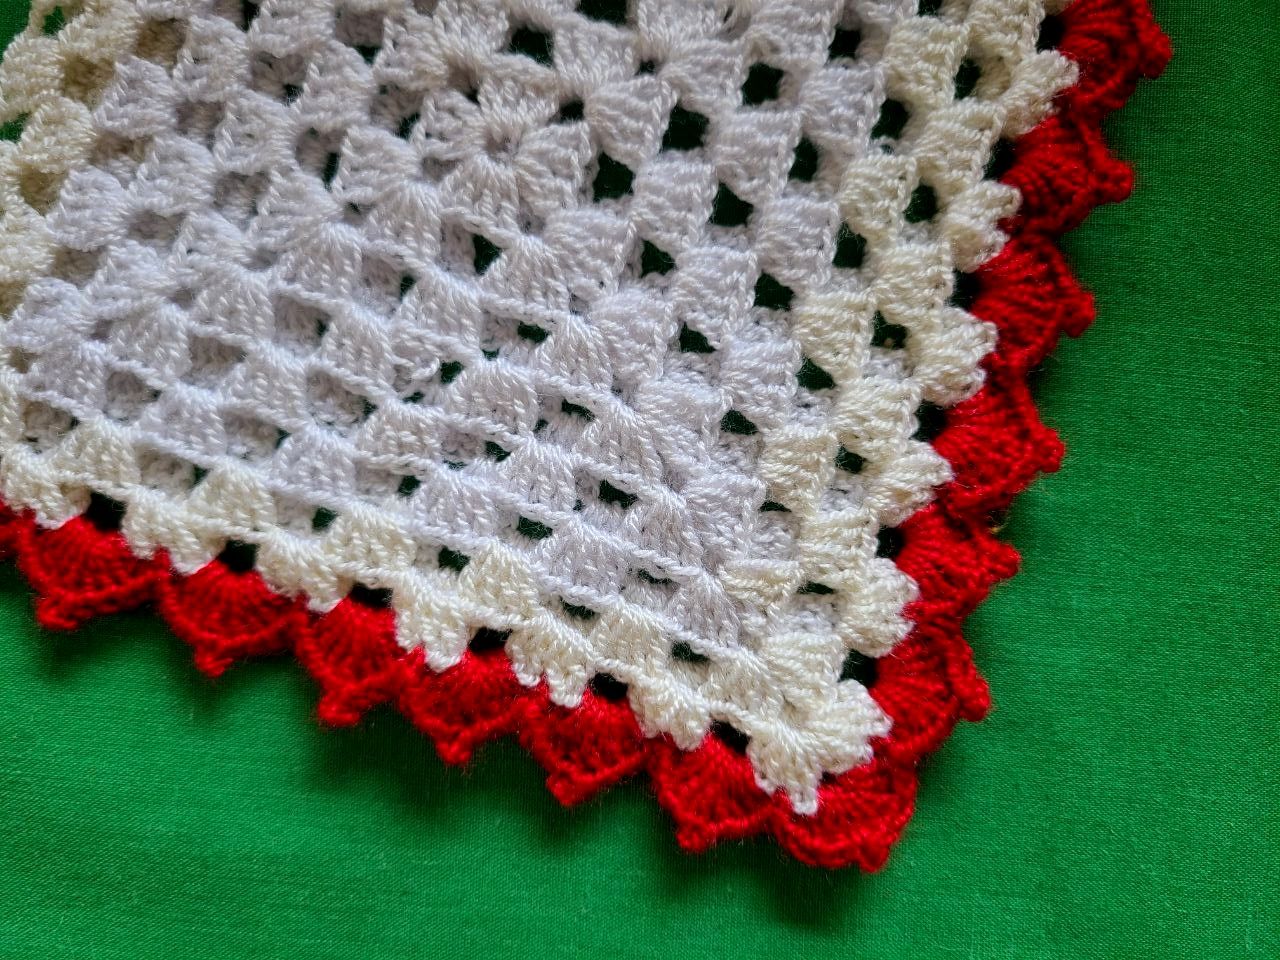 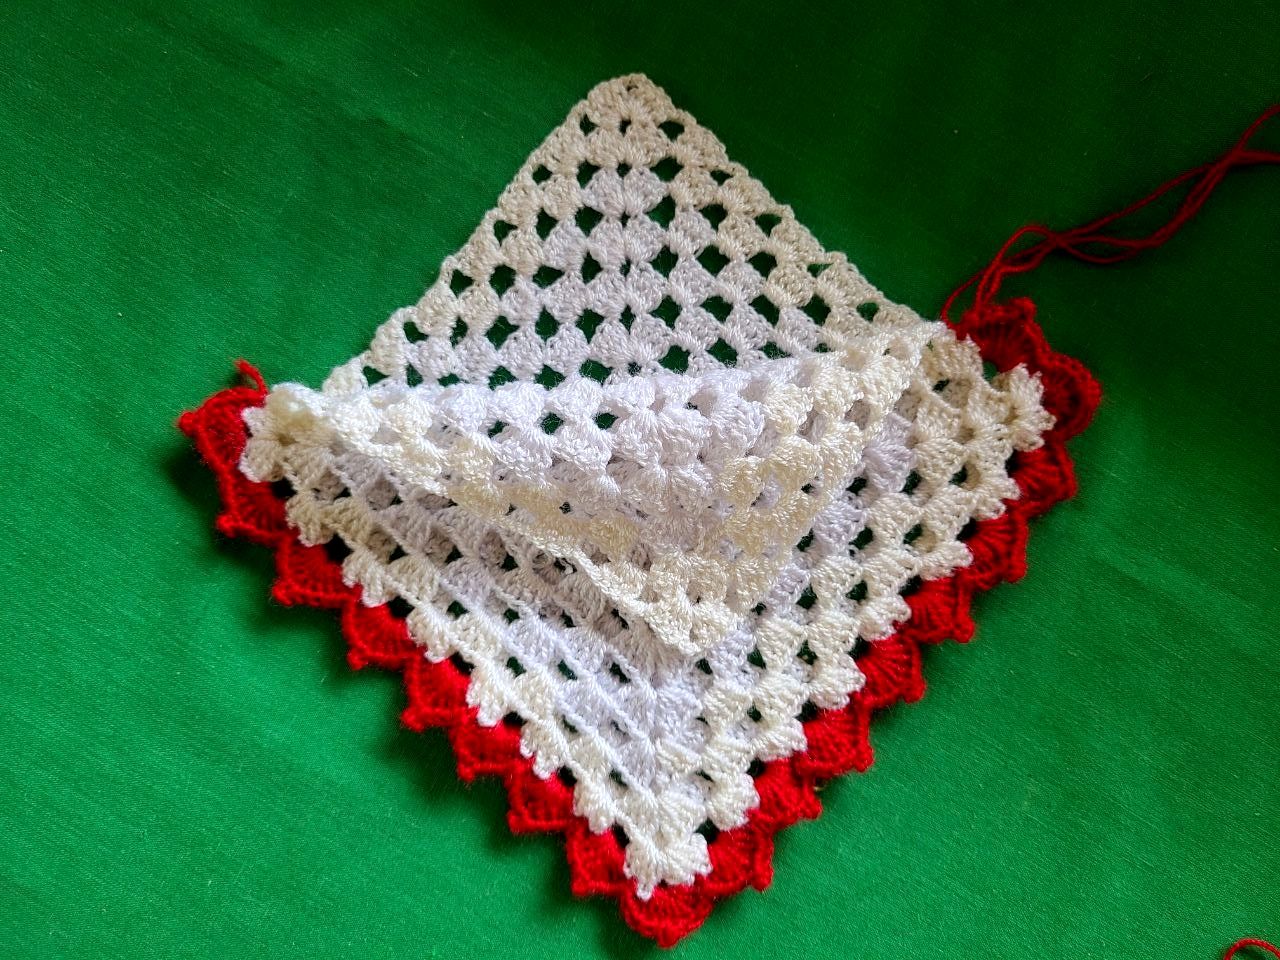 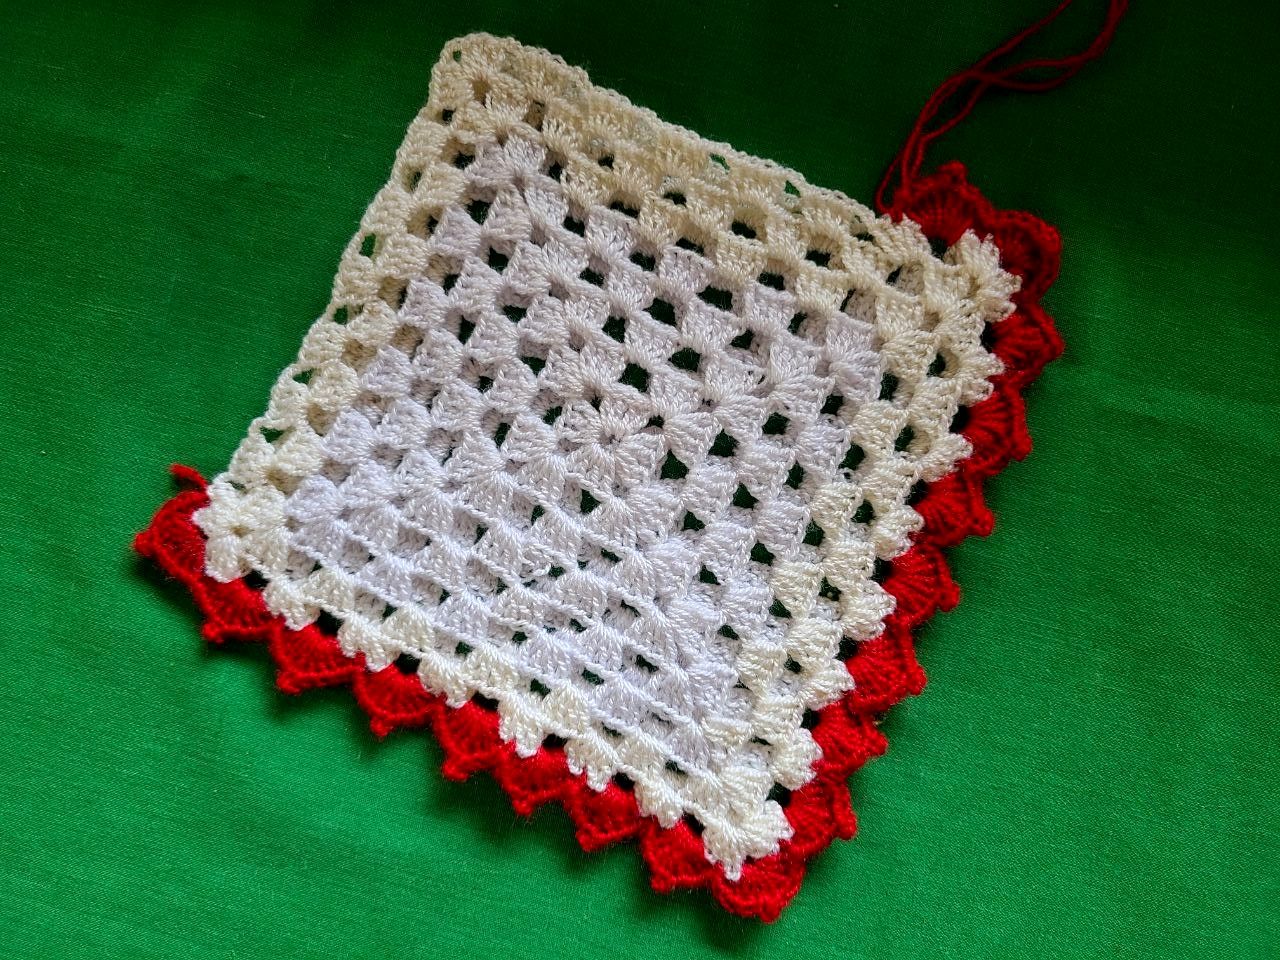 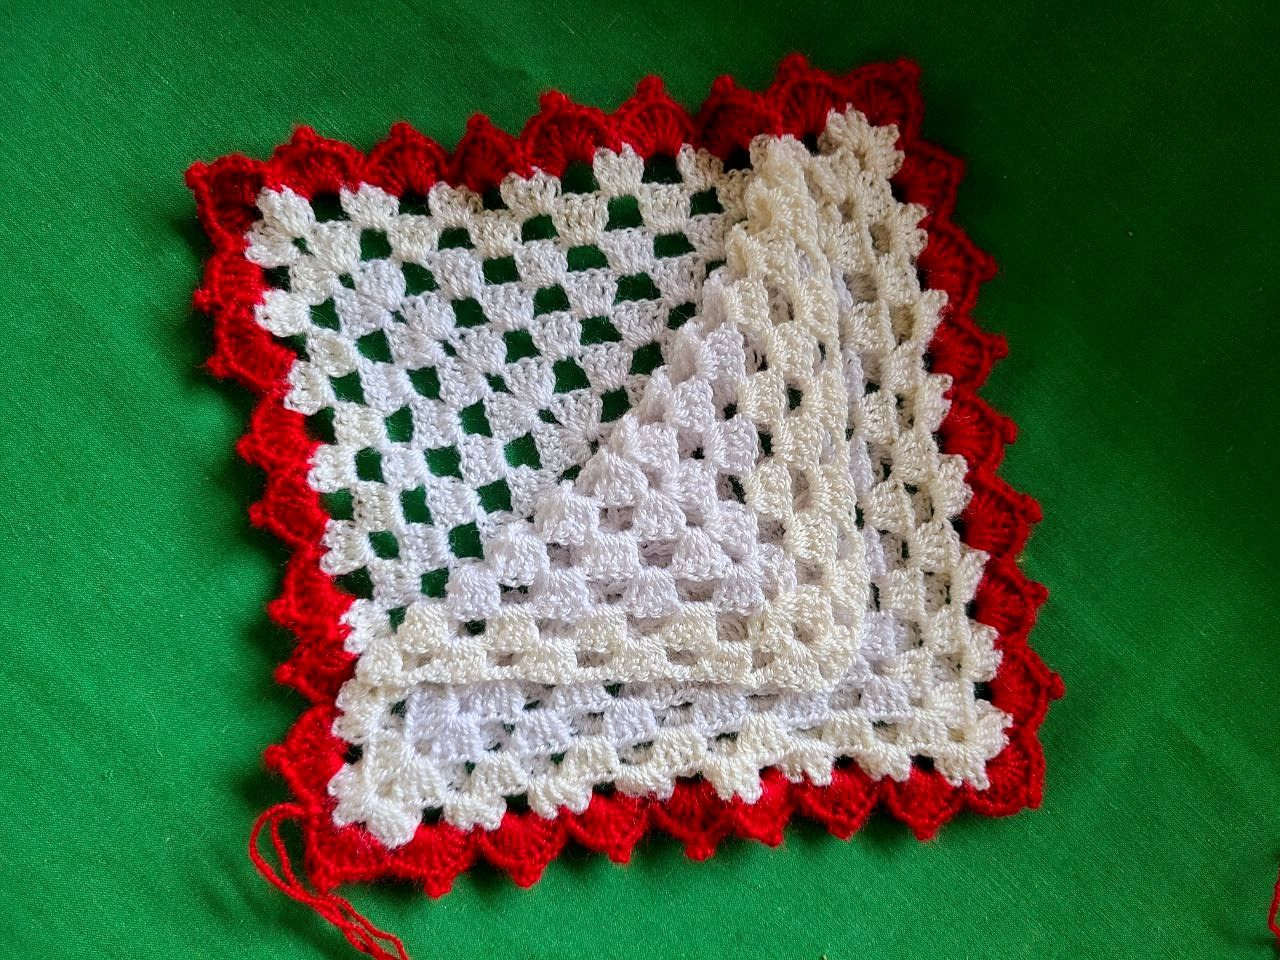 </center><p> <div class="text-justify"> Well friends, I hope you like this project, grateful once again for the attention you dedicate to my publications, thank you very much abrazo 🫂🙏🏻 >Bueno amigos(as), confiando les guste este proyecto, agradecida una vez más por la atención que le dedican a mis publicaciones, muchísimas gracias 🫂🙏🏻 </div> <p><center>  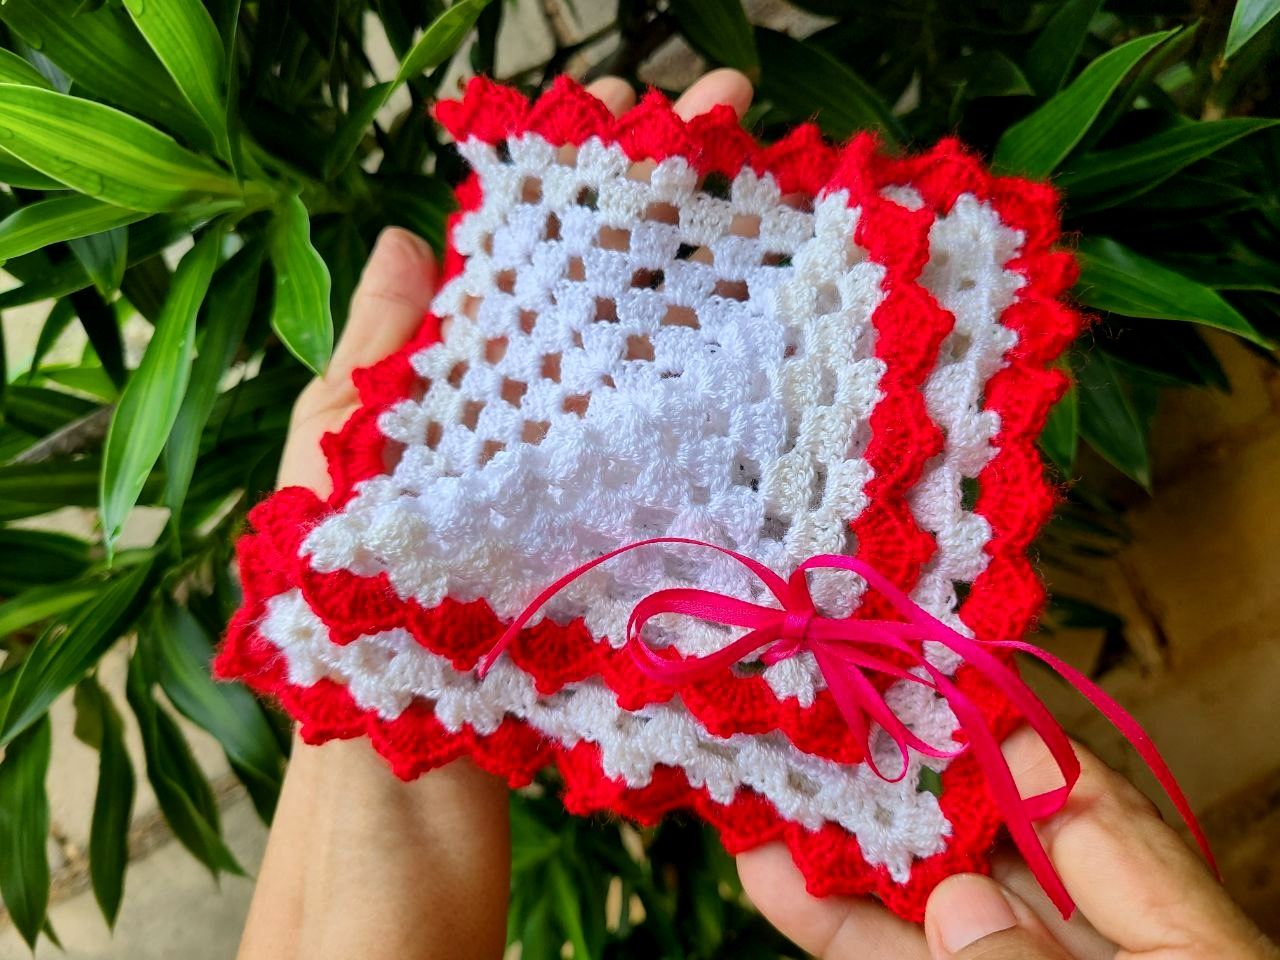 </center><p>
👍 maricrochets, dojeda, jim888, mayvil, hope-on-fire, da-dawn, dylanhobalart, romeskie, joeyarnoldvn, markjason, jemzem, jack4all, appreciator, actioncats, pinkchic, detlev, bertrayo, discoveringarni, lucianav, hexagono6, power-kappe, fotomaglys, seryi13, sunsea, dynamicrypto, ravenmus1c, marblely, gabilan55, noalys, rima11, elgatoshawua, aprasad2325, dahpilot, les90, buraimi, bluemist, kkarenmp, noelyss, inciter, marblesz, kattycrochet, thereikiforest, hivelist, ganjafarmer, thgaming, seattlea, beerlover, psyberx, mochilub, slothlydoesit, aurodivys, jane1289, lismar21, curangel, justinw, roelandp, gikitiki, sco, gerdtrudroepke, traderhive, propolis.wiki, taldor, allentaylor, the-burn, shaka, diabolika, grocko, felt.buzz, azircon, tijntje, cmplxty, altleft, jessicaossom, josdelmi, sidalim88, minas-glory, moretea, dandesign86, lenasveganliving, cherryng, louis88, doctor-cog-diss, bflanagin, nsfw-power, delilhavores, dpend.active, laruche, artistparthoroy, r-nyn, olusiu, paolazun, meritocracy, jijisaurart, actordontee, scraptrader, astronerd, itz.inno, pharesim, bryan-imhoff, sustainablyyours, jayna, lemony-cricket, antoniarhuiz, remotehorst23, ezunjoshy, coccodema, dawnoner, ssiena, ramisey, tawadak24, coinomite, robvector, collacolla, callmesmile, jloberiza, thevil, bluepark, walterjay, qsounds, diegoameerali, sorin.cristescu, auleo, greddyforce, coloneljethro, monster-one, littlesorceress, epicdice, issymarie2, hivechat, yoieuqudniram, blingit, warpedpoetic, milky-concrete, iamevilradio, jlsplatts, acgalarza, samic, saboin, voxmortis, josepimpo, flewsplash, macoolette, lettinggotech, itwithsm, lxsxl, cubapl, bluefinstudios, jonalyn2020, purpleglitter, diyhub, elizacheng, stevenson7, deepu7, diytube, arita992, good-karma, esteemapp, esteem.app, ladyyunajay, ecency, ecency.stats, lexansky, needleworkmonday, bimpcy, sodom, cassidydawn, marigerp88, laranitacrochet, daniery, karoly,