Let's make better music... Together! - Vocal Processing Basics
music·@novili·
0.000 HBDLet's make better music... Together! - Vocal Processing Basics
## Let's make better music... Together! - Vocal Processing Basics # Introduction: Hello my steemian friends! Today I want to go through the basics of vocal editing, meaning basic building blocks of any good vocal mix. I want to go through the processing chain of a vocal and touch on the important edits one generally makes to get clean sounding vocals. Let's begin! :) # The Recording: I wanted to start with the recording itself, because the cleanness of the vocal mix is limited by the cleanness of the recording. When recording you need to try to reduce the amoint of background noise your room generates. Ideally you have soundproofing, but I don't expect that anyone who is reading this guide has a proffesional studio, so I'll be going over some simple things you can do to reduce the noise from your enviroment and edit some of it out post recording. So first thing's first let's treat your room. Point the back of your mic to the loudest part of your enviroment. For example, if you live next to a loud street in the city, you'd ideally want to be facing it while recording. This is because microphones usually record loudest from one side – the front. Furthermore, to reduce the effect of your voice bouncing of walls, try to record with a bookcase or hanging blanket behind you. Hopefully with these changes we can get the background noise and resonance to a minimum. # Processing Chain Now that we've tooken steps to reduce the interference in our recording enviroment, it's time to make our vocals shine in our DAW. Before getting to any plug-ins, I'd like to take this moment to show you how to filter noise from the recording itself. Once you have a recording, you can process it through a denoising algorithim. In FL we do this by opening up the file in edison, selecting an area with noise, right clicking on the denoise tool, select the whole file and then left click on denoise and in the following menu accept. You can see these steps visually here: 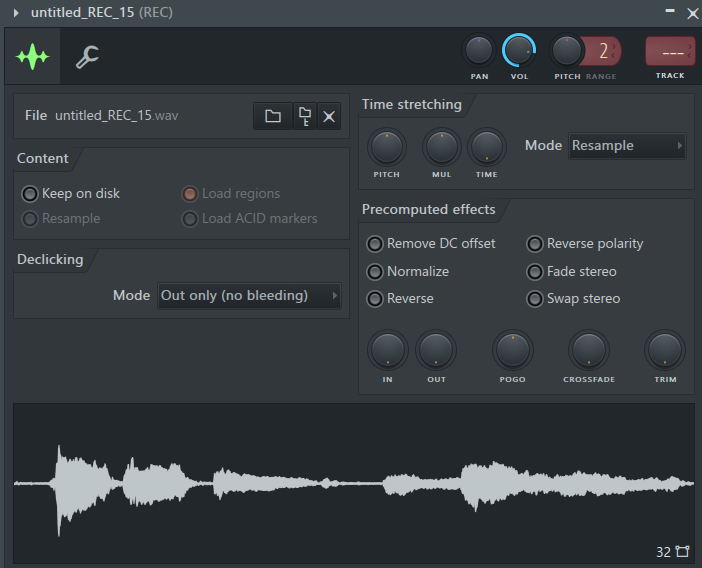 Step 1: In this window, right click on the audio and select 'Edit'. This will open up Edison like so: 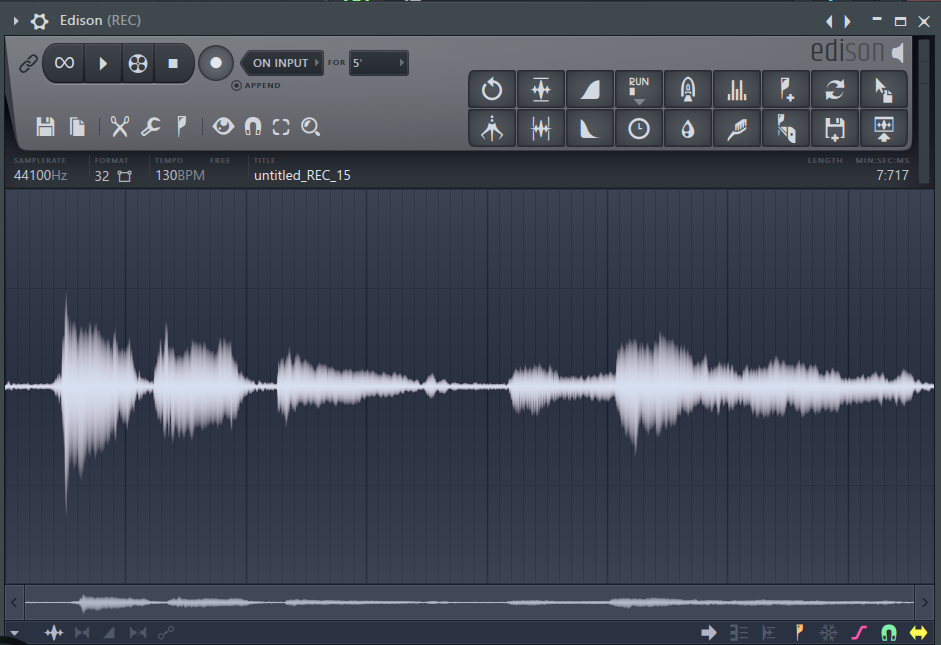 Next, select an area that only has noise. Simply left click and drag out the area you want. 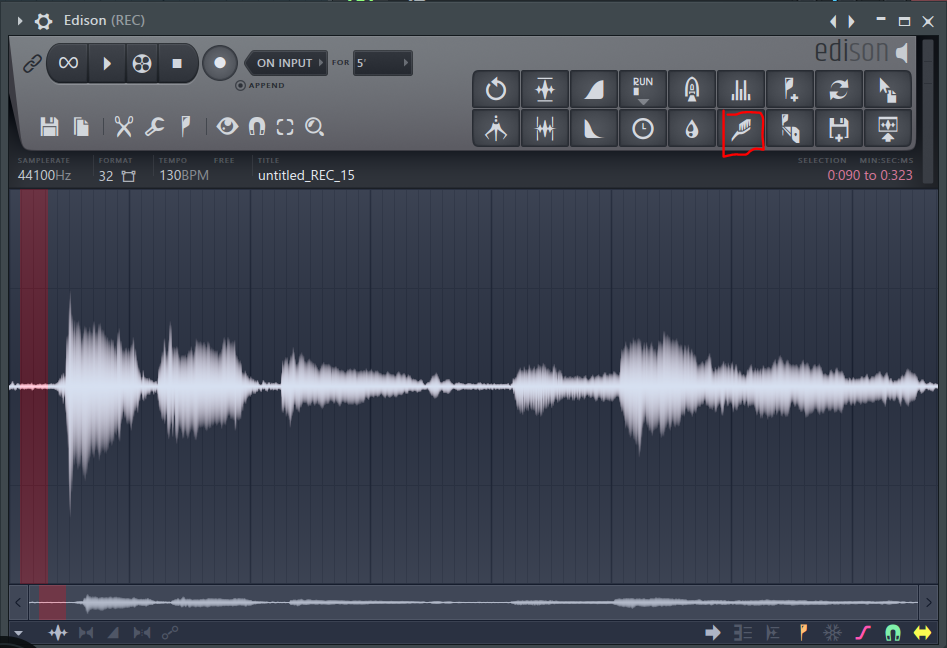 The selected area will look like the left portion of this picture. Now right click on the button that is in the red square to the top right of the picture. This tells the programm that the area you have highleted contains noise and it uses this section to remove noise from the clip. If it works you'll see a small 'noise profile aquired' message pop up. Now select the entire clip and left click the denoise tool.  If you've done everything correctly it'll look something like this. Now hit accept and drag the now clean file back into the playlist. Here's a side by side comparison of the before and after: 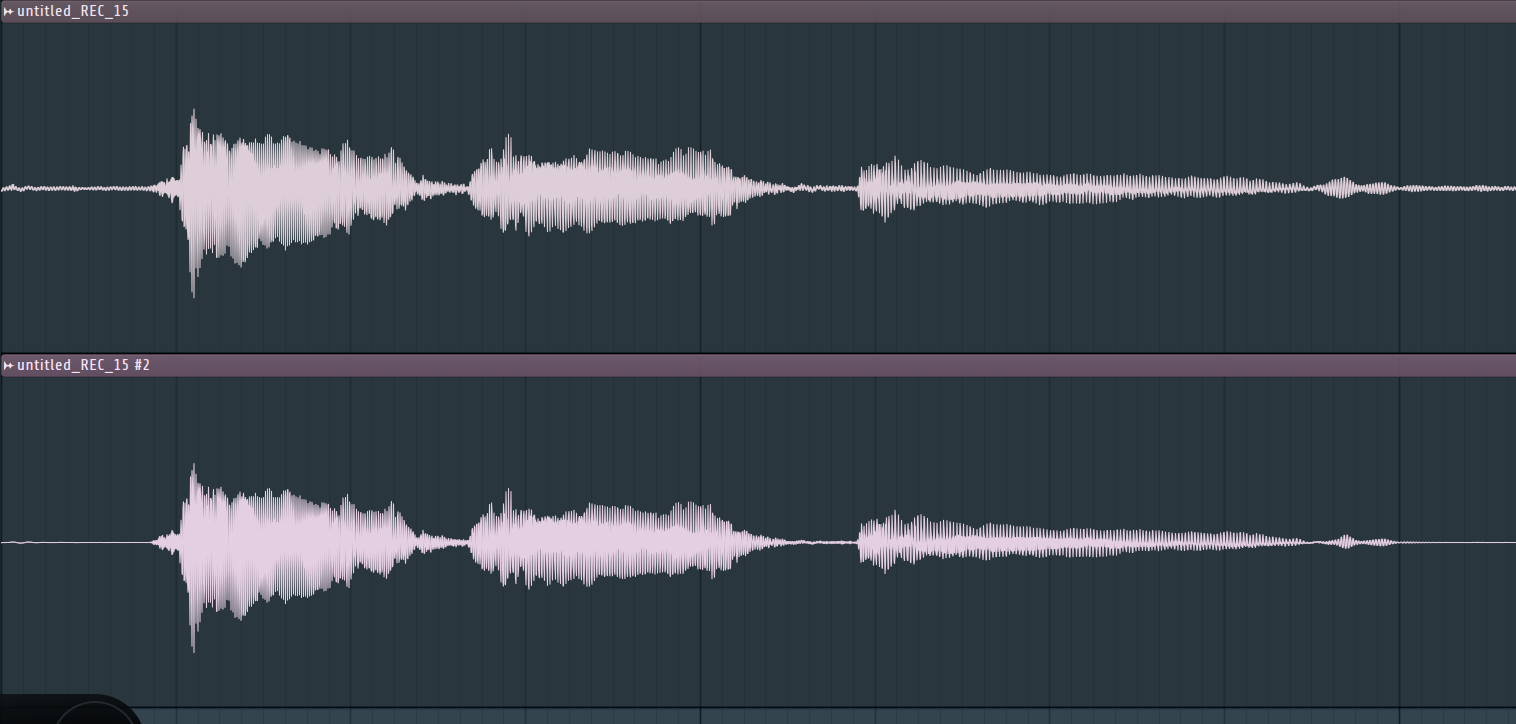 Notice how flat the area's between the words are :) Now that we've denoised it we should have a pretty ok sounding recording, so it's time to get into the fun part :p # De-essing. If you have a lot of 'S' sounds in you vocal, you want to use a de-esser to remove the hiss from the recording. I use a free de-esser called [spitfish](http://www.vst4free.com/free_vst.php?id=537), which looks like this: 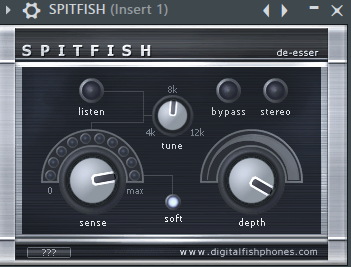 Generally speaking, I'm perfectly ok with using the set presets on this plug-in for male and female to do most de-essing and only really get into it if something is bugging me. I recommend that you try it out and play around with it. # Compression While there is a debate out there whether or not you compress or EQ your vocals first, I generally believe that, if you are a beginner, compressing first is more intuitive. This is because changes made with the EQ after compression are more noticable and getting compression settings after an EQ right requires more attention to detail. To get you started on compressing here is picture of the fruity limiter, an FL native compressor: 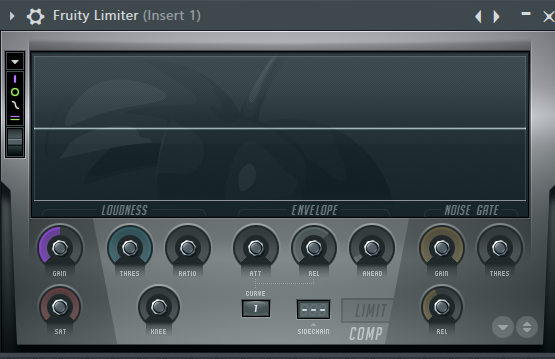 *Note that the things I go over work the same for any compressor. It's about the concept and less so the tool itself.* The main knobs we'll be using here are the knobs in the upper row excluding the noise gate knobs. These are, from left to right, gain, threshold, ratio, attack and release. Gain is quite simple it makes the sound louder or quiter. Threshhold designates from which volume upwards you want to compress. Ratio tells you how much quiter your making the sound For instance, a ratio of 2:1 means anything louder than the threshold will be cut by Input volume + threshold(which would be a negative number)/2 or if I have something that's +3db loud and a threshold of -20db and a ratio of 2:1 it means that ill be adding -17/2 so -8.5 decibels to the sound. Meaning that my +3db loud sound is now -5.5db. If you have gain it is added on before the compression. Under envelope you have attack and release, which basically say how strong the compression effect is over time. Less attack means that it compresses quicker and less release means that it stops compressing quicker. With these knobs you have pretty good control over how loud your vocal is and most importantly, how dynamic it is. The point of the compressor is to, well, compress. It makes the sound more streamlined by making loud parts quieter. To get you started, I'll give you a range knob values to play around with. Put your threshold at to a point where it's under the loudest parts of your sound, but still above the quieter parts and set your ratio somewhere between 2:1 and 3:1. This gives us a nicely compressed sound, without killing the dynamic range of the recording. If your vocals are more in your face and aggressive, having a higher attack can make them pop more( remember it means that it'll be louder at the start of input, because the compressor will turn itself up over the attack duration), which is good for rap vocals and a lower attack makes it flowier and smoother. The release in my opinion is very vocal specific, so play around with it until you like how it sounds. 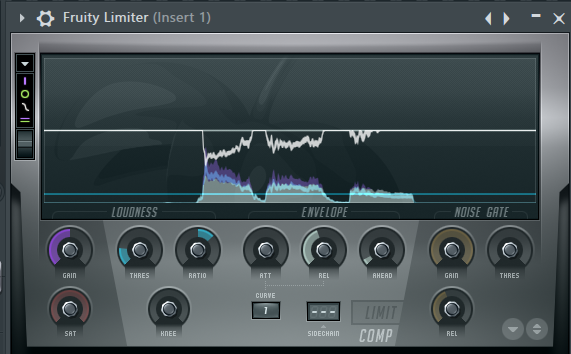 # EQ Next in the must-have section of our chain, comes the EQ. I won't go into what an EQ does, as I have covered that in another guide in this series, which you can find [here](https://steemit.com/music/@novili/let-s-make-better-music-together-what-do-that-eq-do), but I will connect some words you may use to describe a vocal to some frequency ranges. Boominess of a vocal, tends to come from its low end, somewhere between 20hz and 200hz. Nasalness is generally an aesthetic of the 200 – 1500 hz range. Presence can be associated with the 2000-7000 hz range. Airiness is an attribute of 10khz+. So if you feel that the vocal is too nasal, cut some of the frequencies in the 200 to 1500hz range and if you feel it needs more Presence boost it in the 2k-7k range. Important to note here, is that you don't want to be making huge changes and generally it's better to cut something than it is to boost it. So if your vocal doesn't have enough presence, for instance, consider lowering other ranges. All that being said, here's a good starter template for your EQ settings: 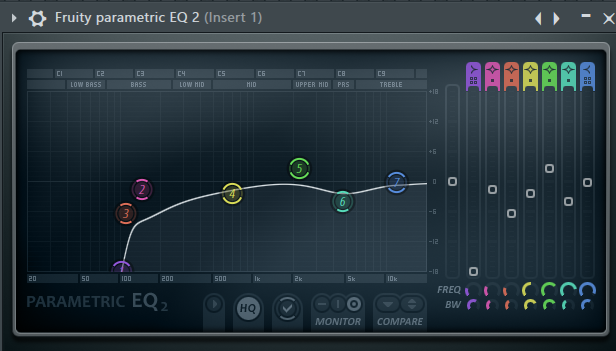 *Note: if you have a lot of background noise, consider lowering the 10khz+ range. This will get rid of any uncomfortable hissing due to recording issues, which even though it cuts intro the vocal, generally sounds better than leaving it in.* # Finishing up At this point you should have a clean sounding vocal, albeit a little bland. If you want to add some autotune, this is the time to do it, otherwise pick out some effects and play around with it. I generally put some autotune, reverb and delay on my vocals, cause I think it gives it a good vibe in the mix. There's a lot more to cover, but I think that the things you have read here will help you out if you're just getting started or haven't had much experience with vocals. If you have any questions ask away and if you want me to go more in-depth, I will consider that as a future topic. I hope you learned something and until next time... ## LET'S MAKE SOME AWESOME MUSIC!
👍 laritheghost, minnowsupport, sensation, vandigital, krazypoet, jamesgetsit, swagger, laumi, qsounds, edje, illuminati-inc, curie, liberosist, meerkat, locikll, cryptokrieg, ewuoso, plojslydia, jasimg, xanderslee, howtostartablog, ratticus, danieldoughty, sammarkjames, thelovejunkie, anwenbaumeister, hendrikdegrote, markangeltrueman, aboutyourbiz, justdentist, birgitt, spectrums, awolesigideon, jmdk2000, responsive, pichat, slickhustler007, makrotheblack, tstinfo, esaia.mystic, kushed, jga, atishdarpel, dethclad, raoul.poenar, positiveninja, pharesim, lenin-mccarthy, spiry-btc, legendarryll, teamhumble, steemulator, coloringiship, gohba.handcrafts, marianaceleste, jpkrs,