Steemit Coloring Contest: Under the Electric Sea, and how I made it using just my phone
art·@rachelburger·
0.000 HBDSteemit Coloring Contest: Under the Electric Sea, and how I made it using just my phone
 You know you're going old school with your painting software when you can't even crop your final image. @artwatch created a cool image for a coloring competition. [Definitely check it out](https://steemit.com/art/@artwatch/steemit-coloring-contest-theme-under-the-sea-win-steem-win-sd-win-whaleshares-plus-a-giveaway-and-so-much-more-coloring-pages). Of nothing else, their line work is worth applauding. This was the original image. 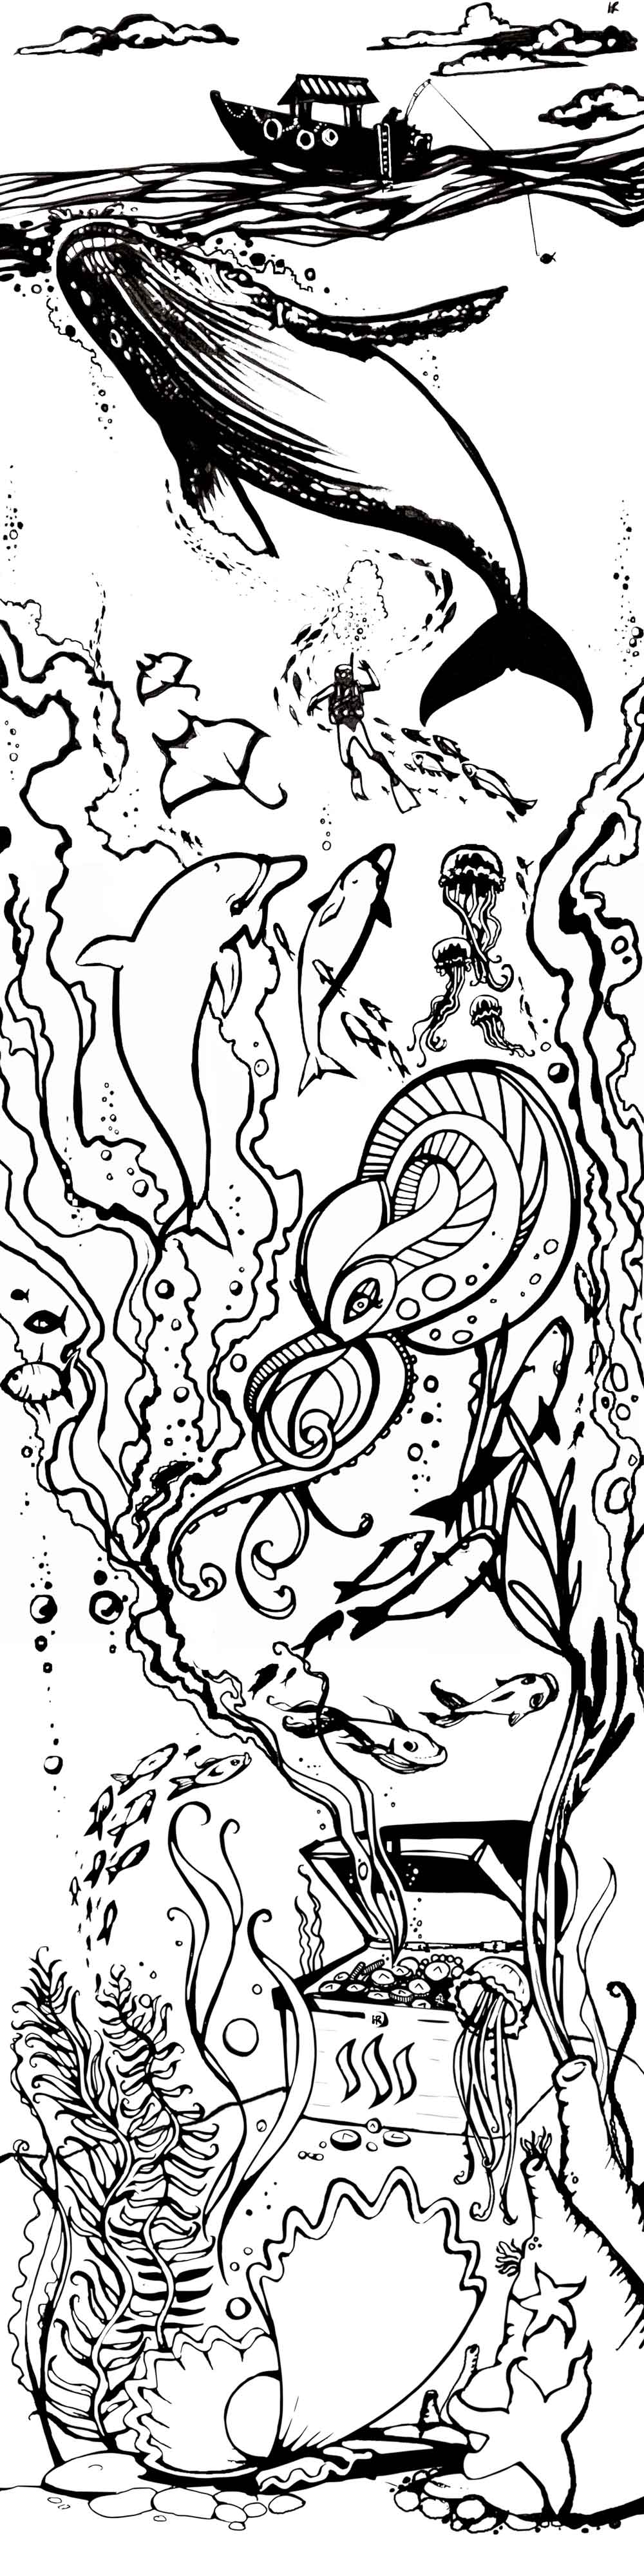 I used PaperOne, which is a painting app for Android. There's not much to it: a few brushes, color selection, and four layers. That's it. I started out with crayon. I intended to use that layer to map out where I wanted the coloring to go. 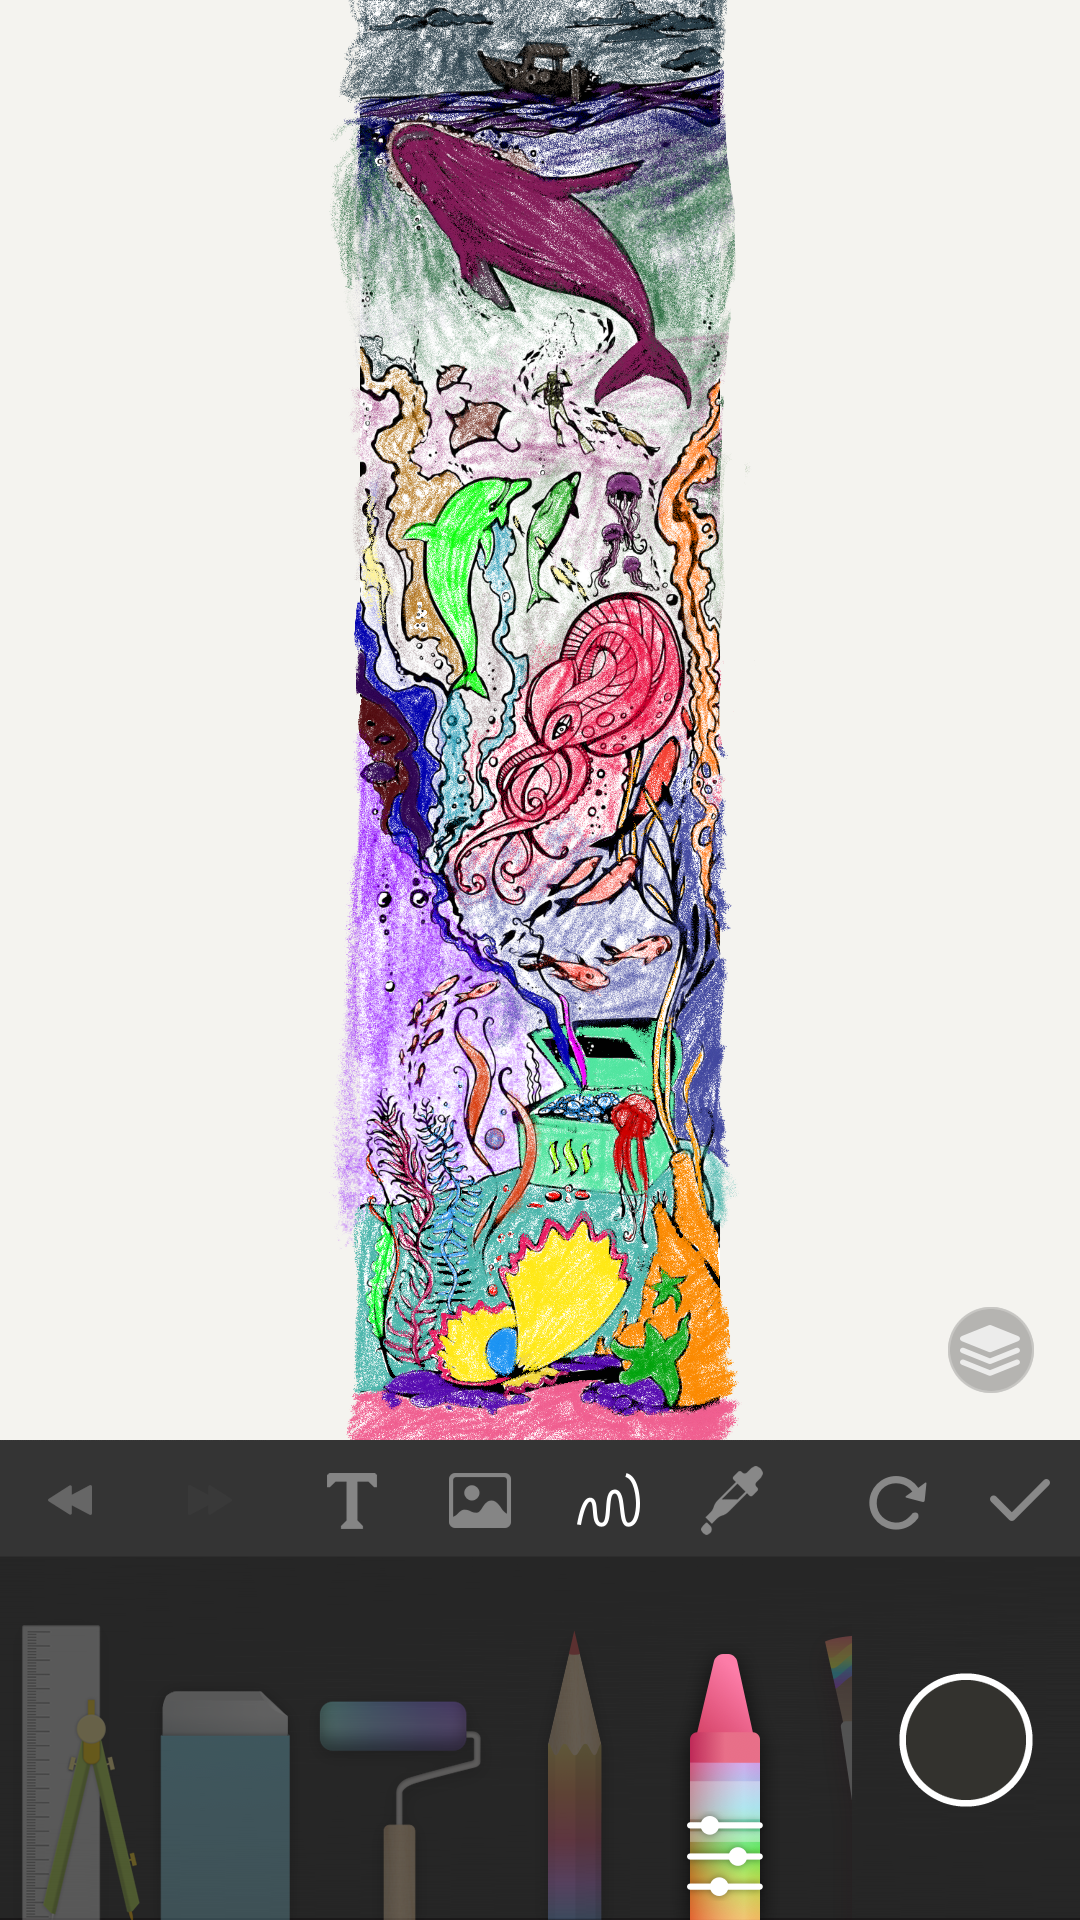 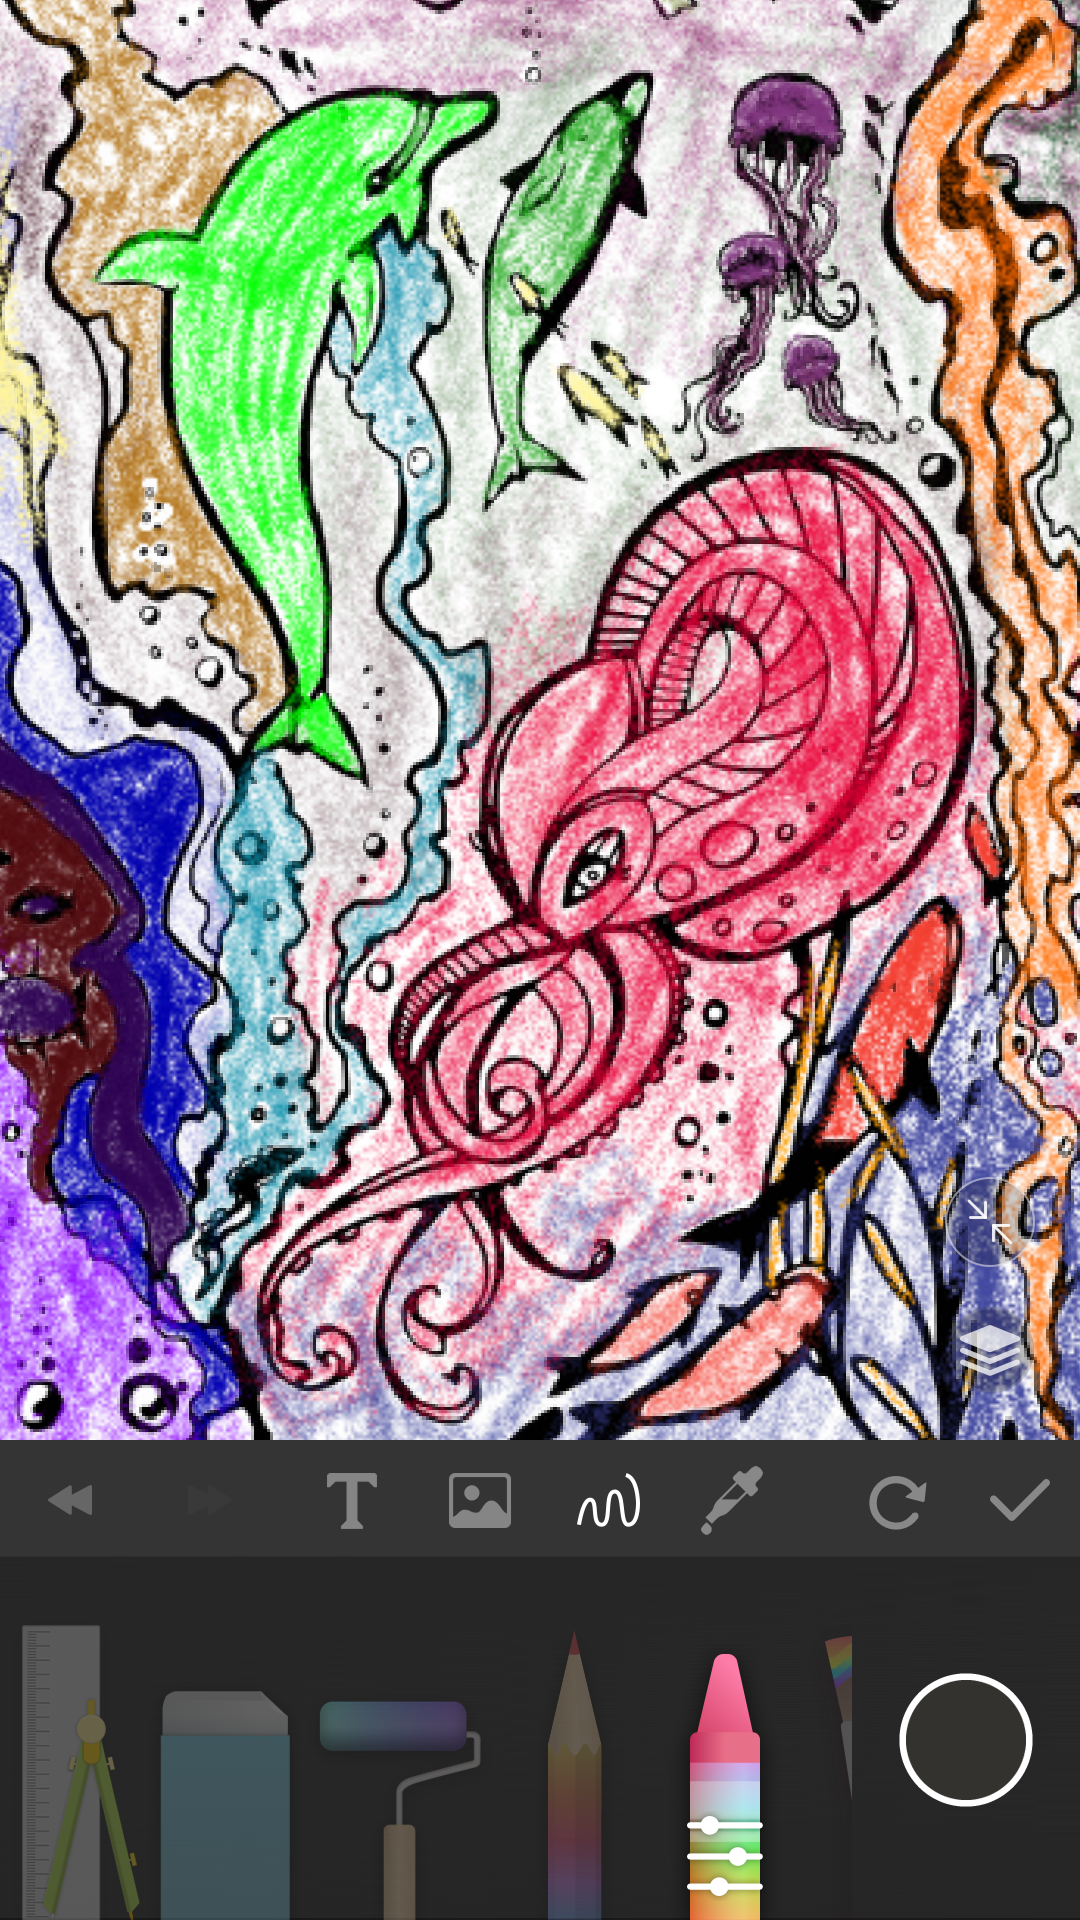 The work is intentionally rough. I am working with a tight max zoom and only my fingers; I only want to block out the basic colors, nothing more. From there, I spray painted on a background and cut out my lovely fishies. I always think that this art style looks cool. 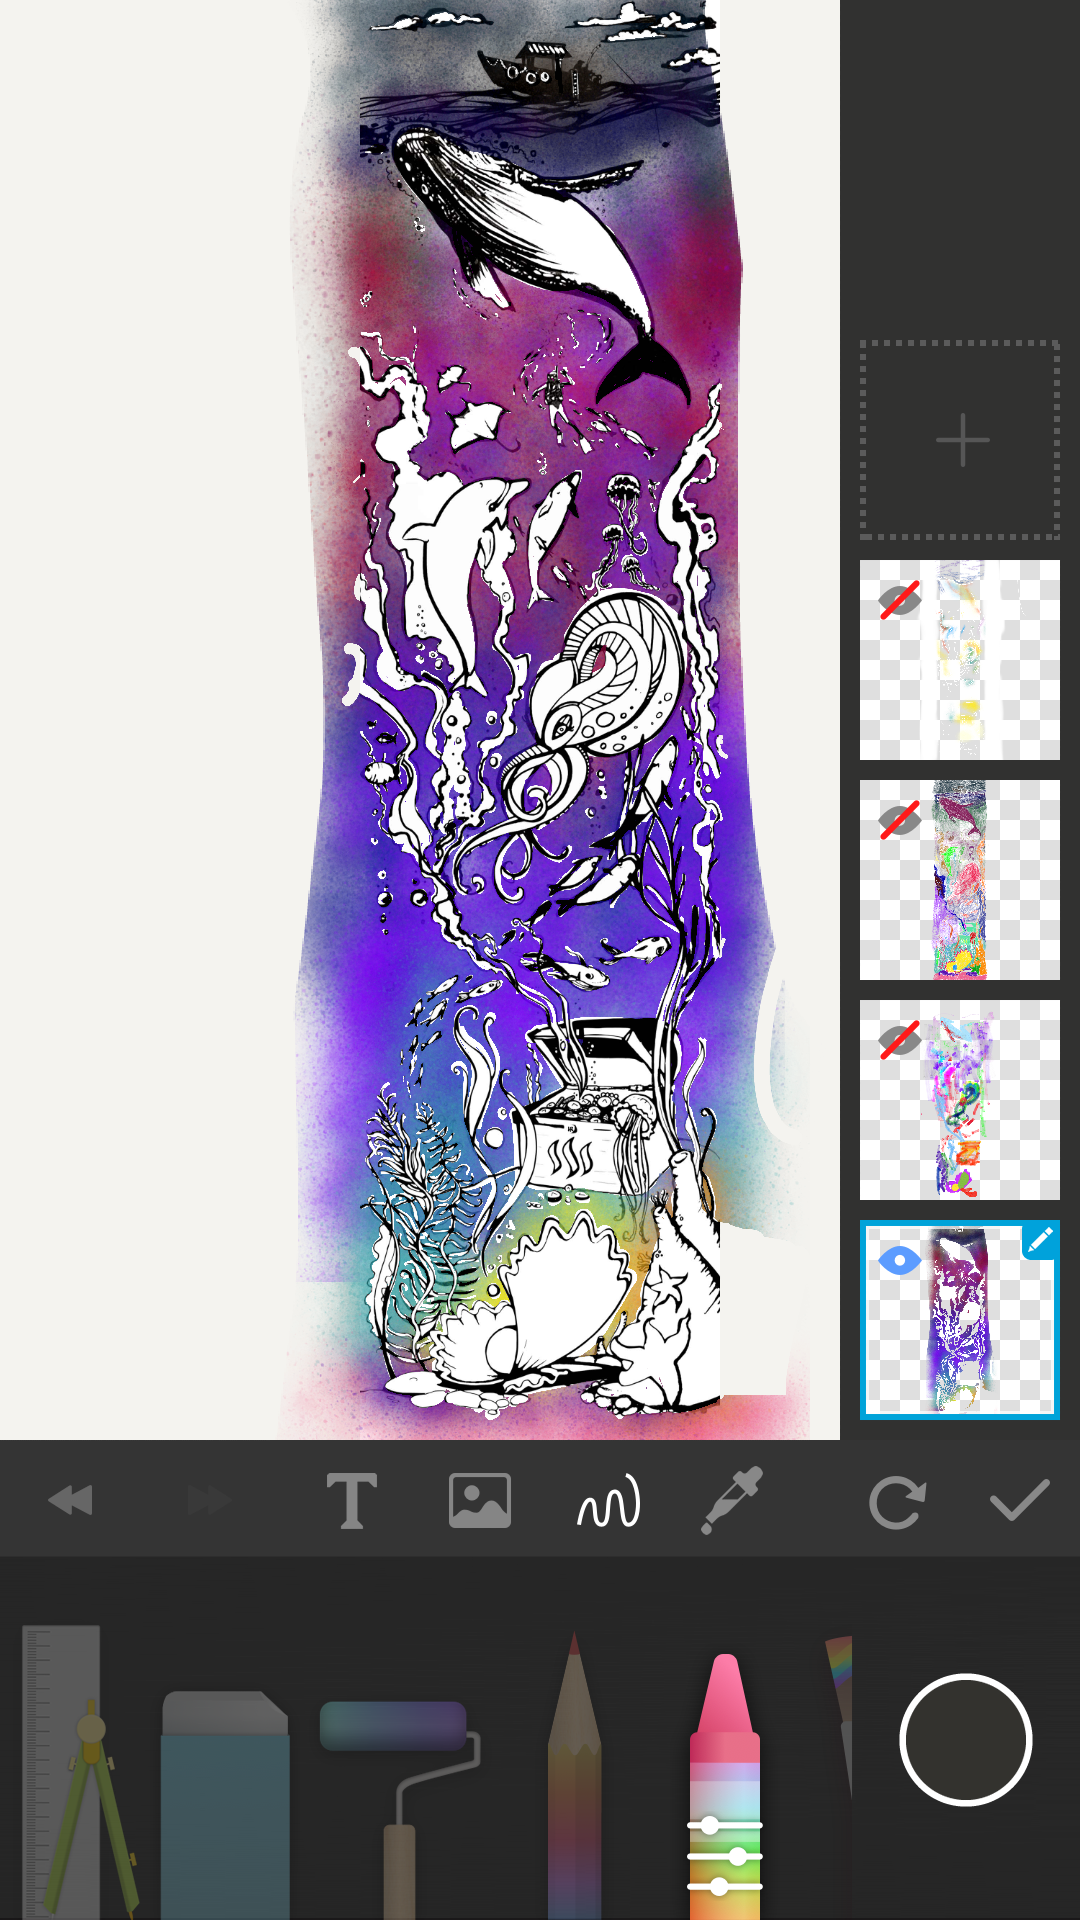 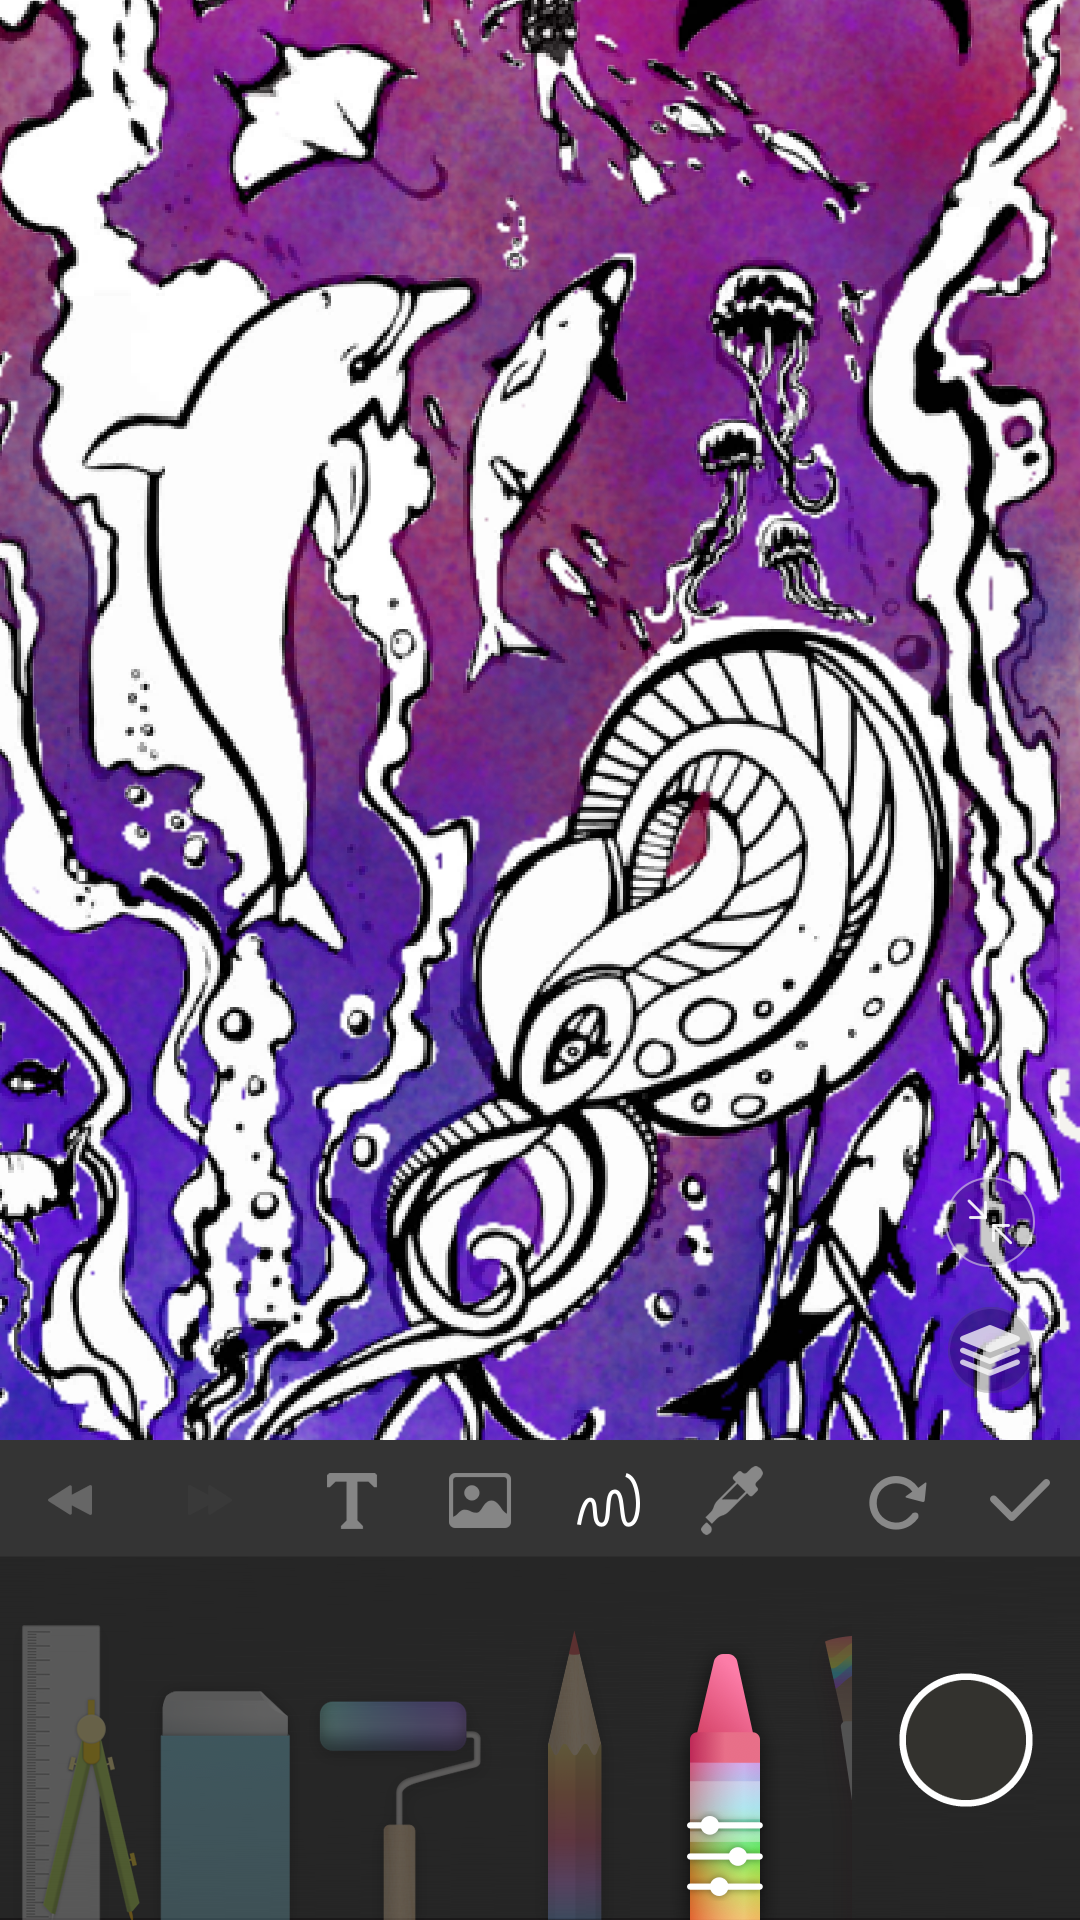 Then I added in some bright brush strokes and contrasting colors to make the pop feel. I used a dry brush and stuck to bright, rainbow colors. 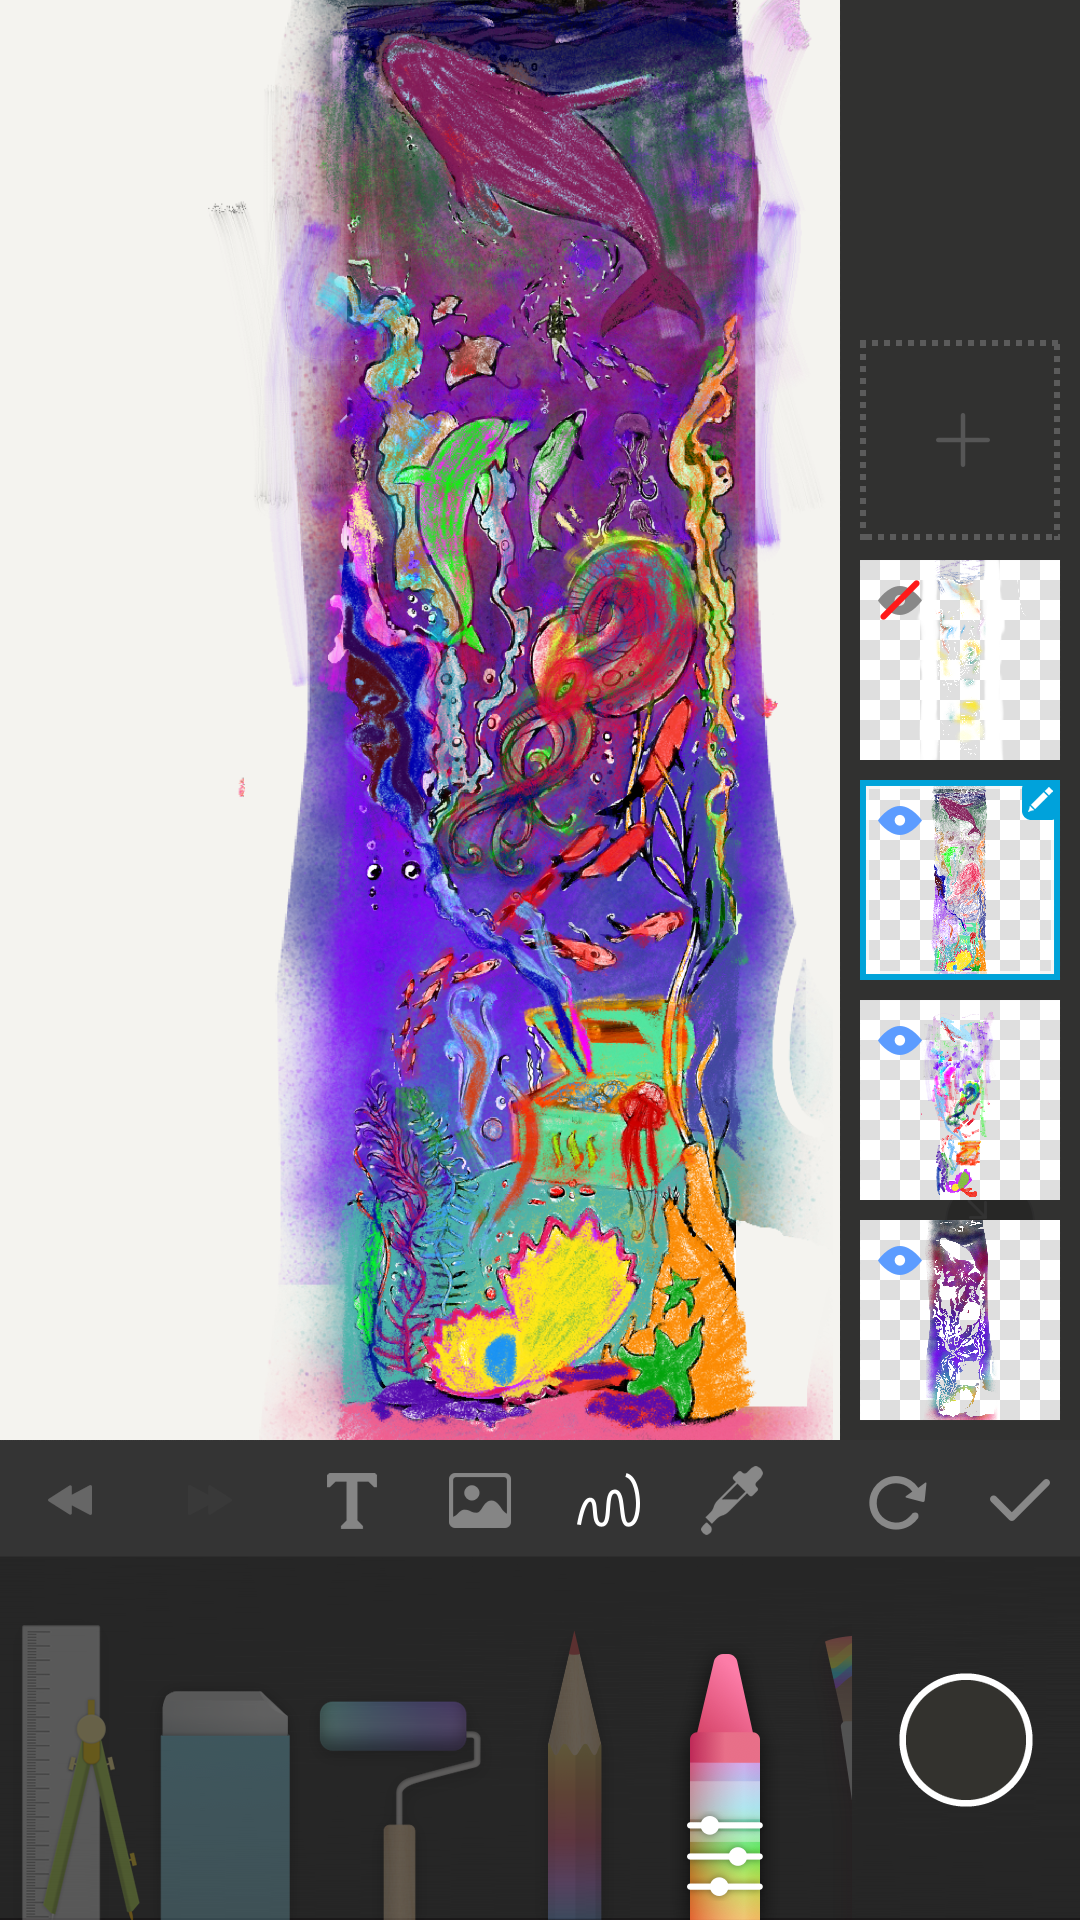 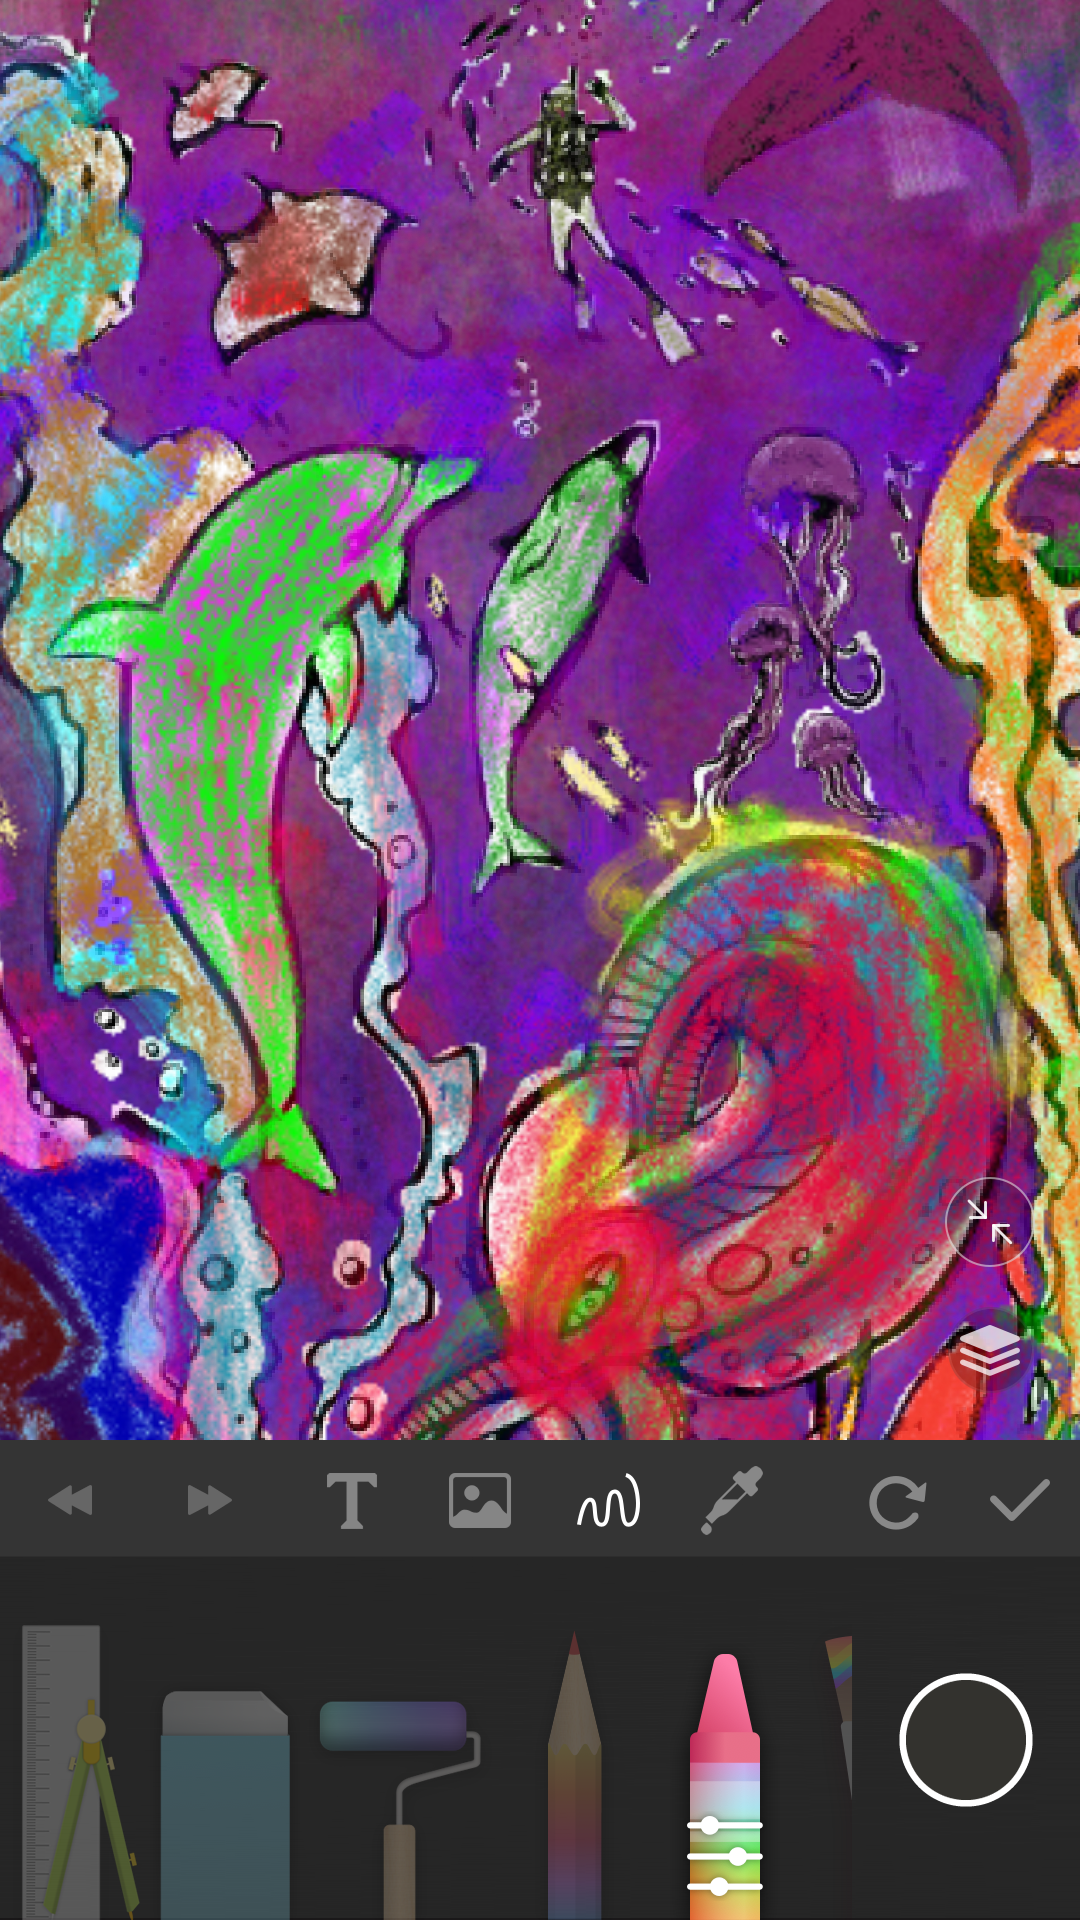 Of course, the consequence of this is that the lines start to disappear under the weight of the layers on top of them. I can't adjust the coloring layer to be transparent and on top. There's no fill button. So I have to define the line work myself or else it's a muddy mess. I used the final layer for highlights, lowlights, and crisp line definition. This was the final version. 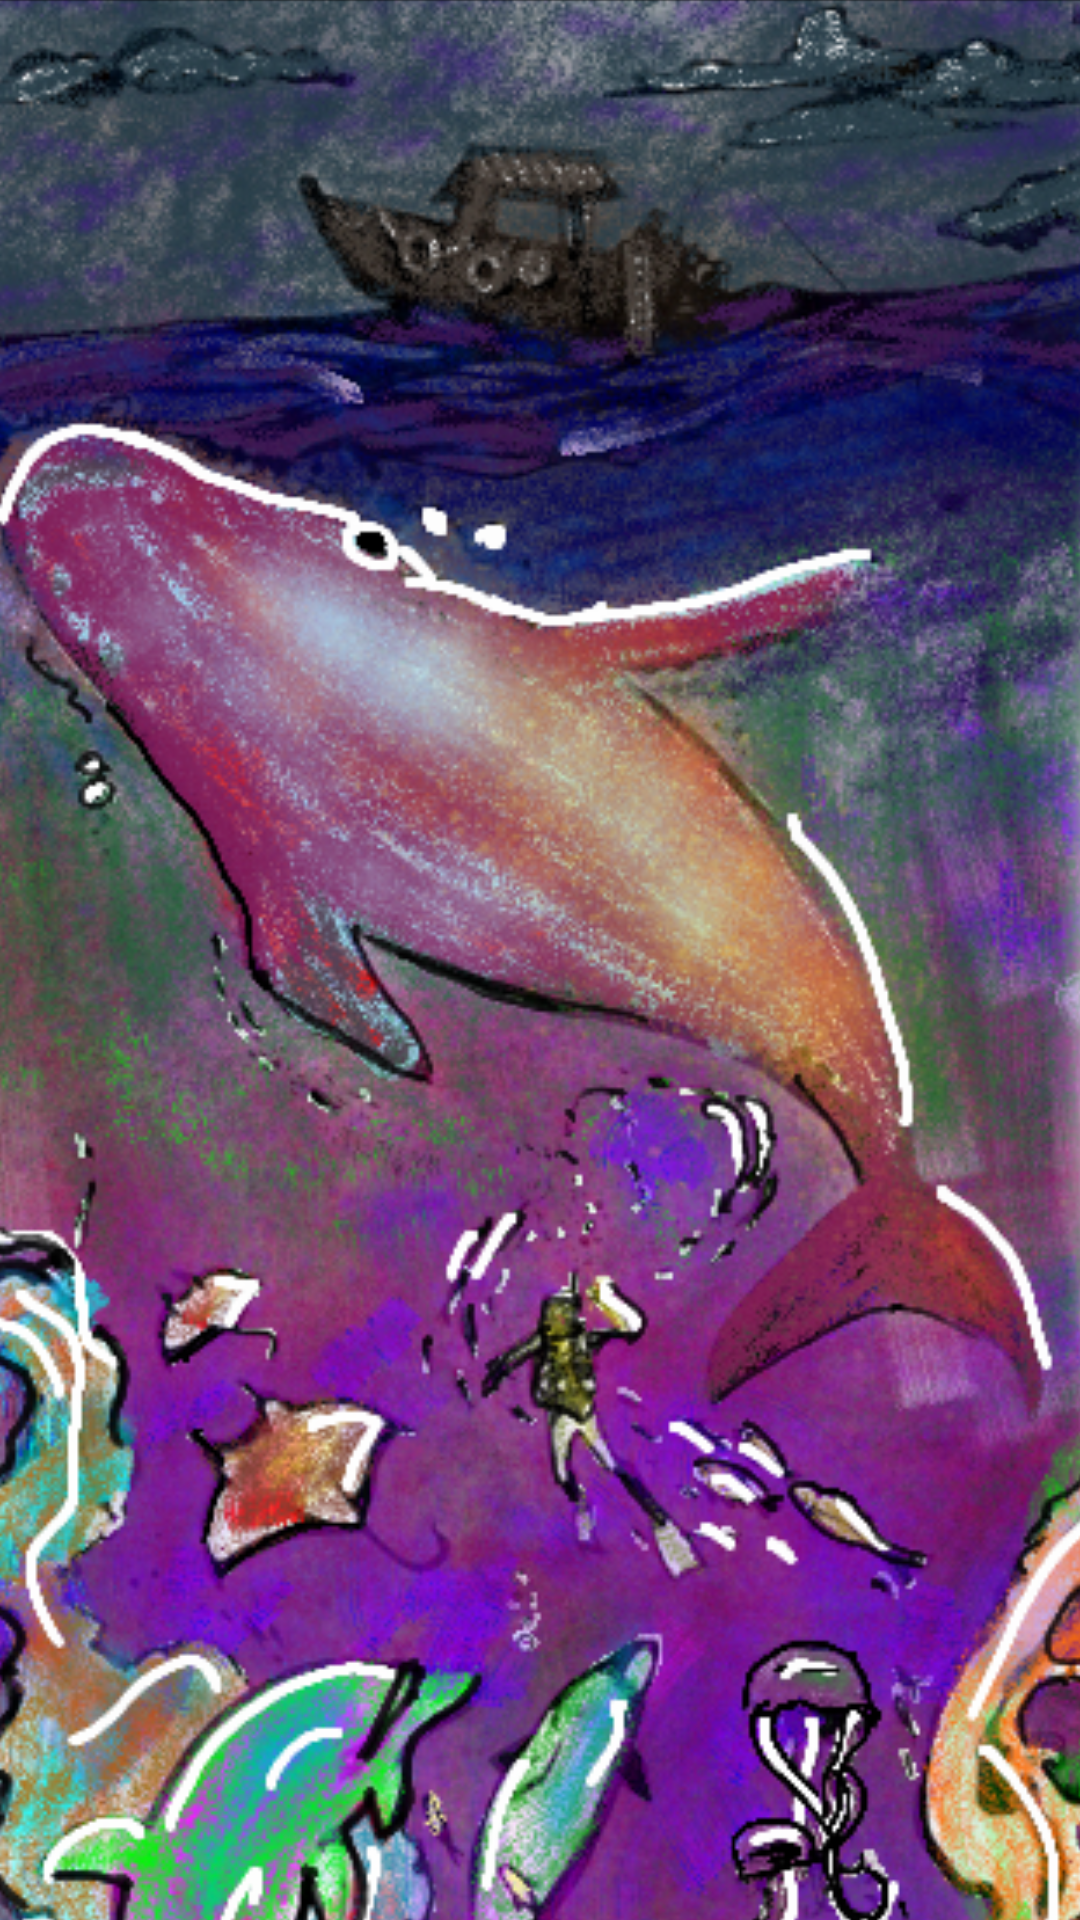 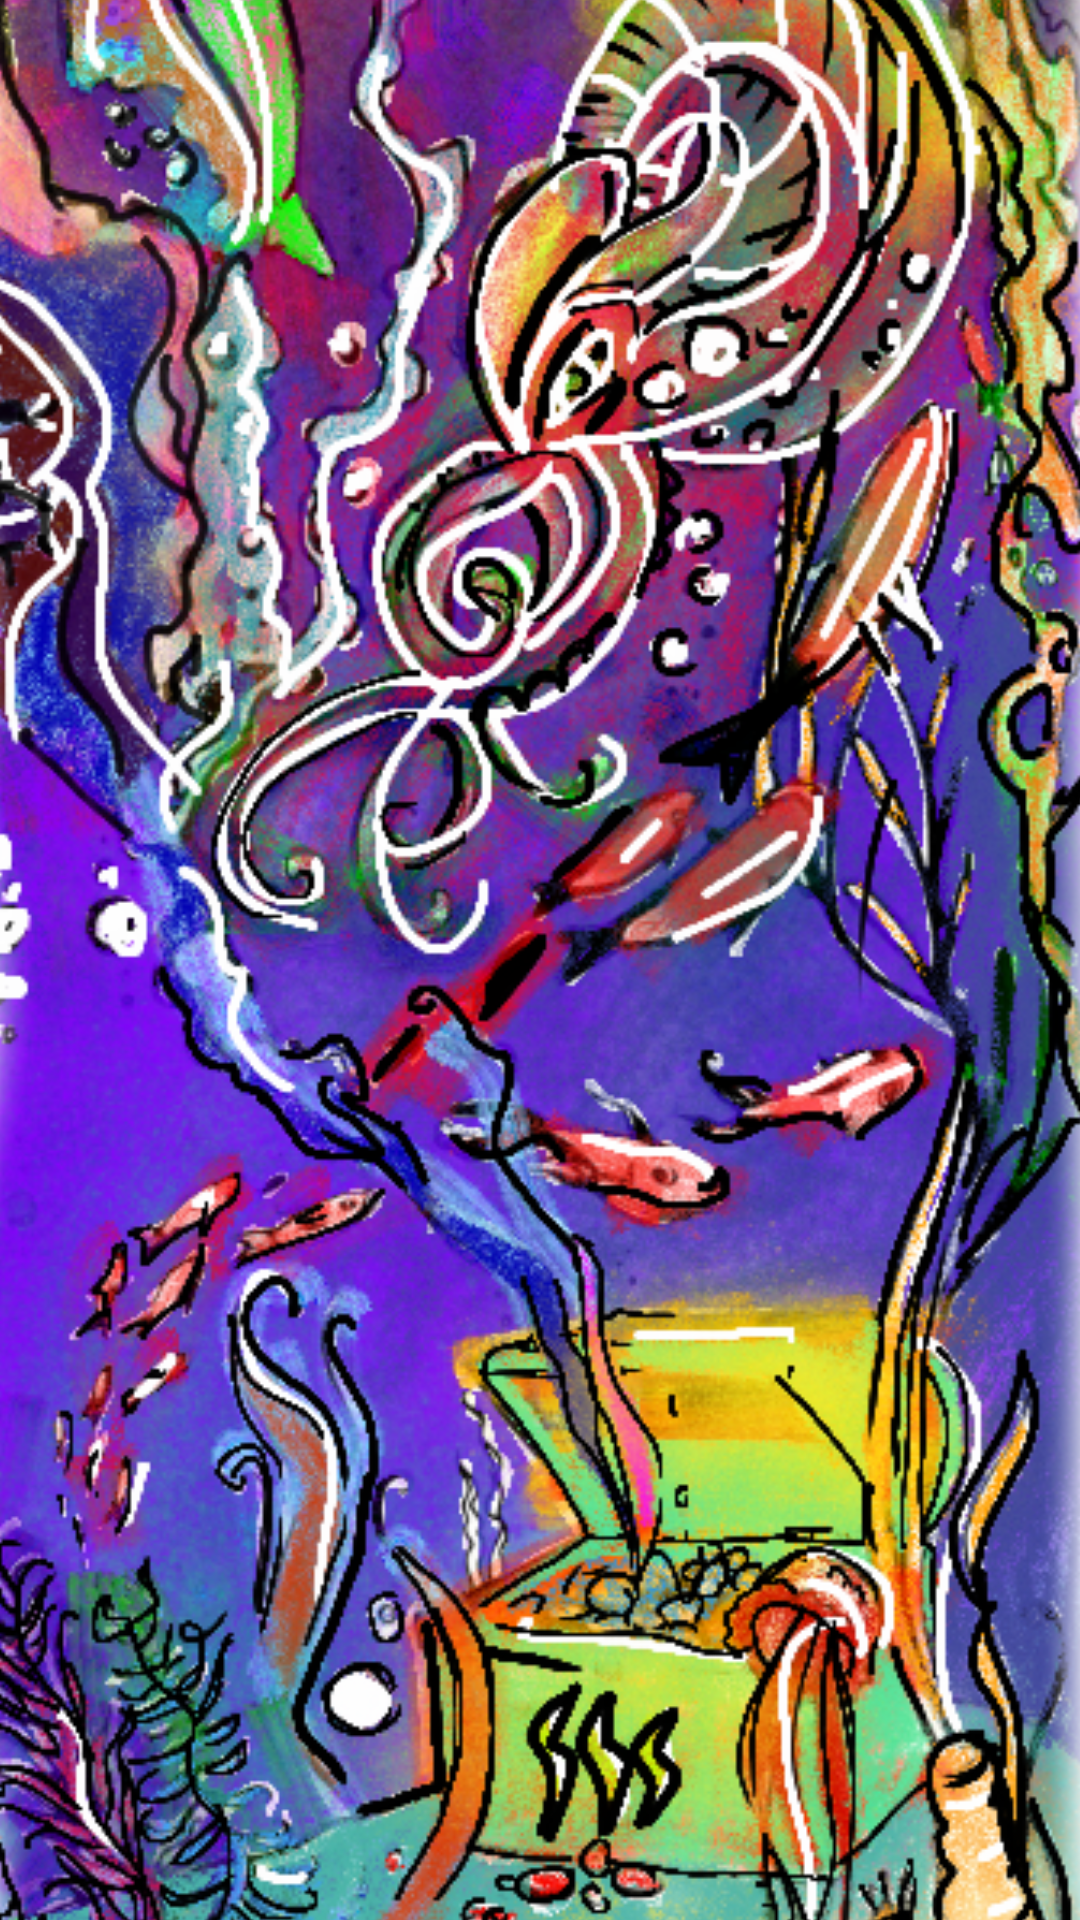  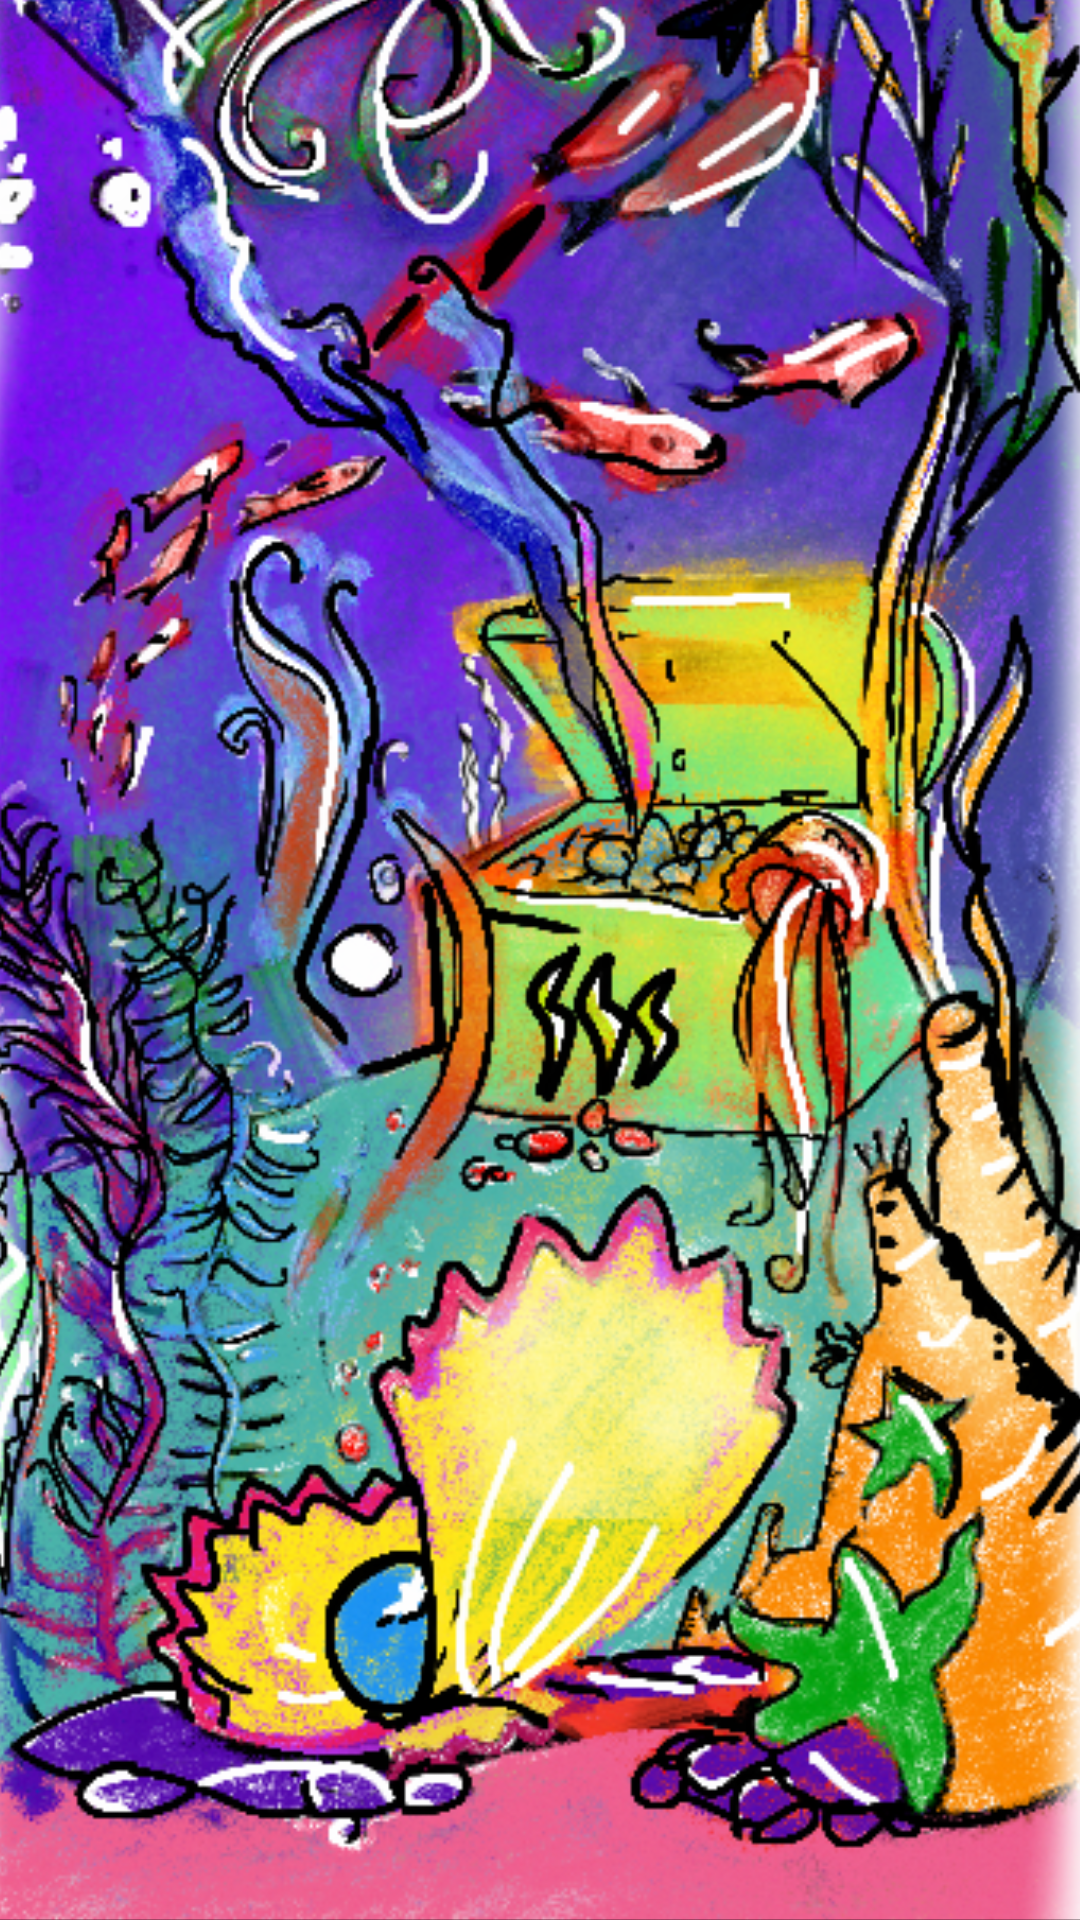 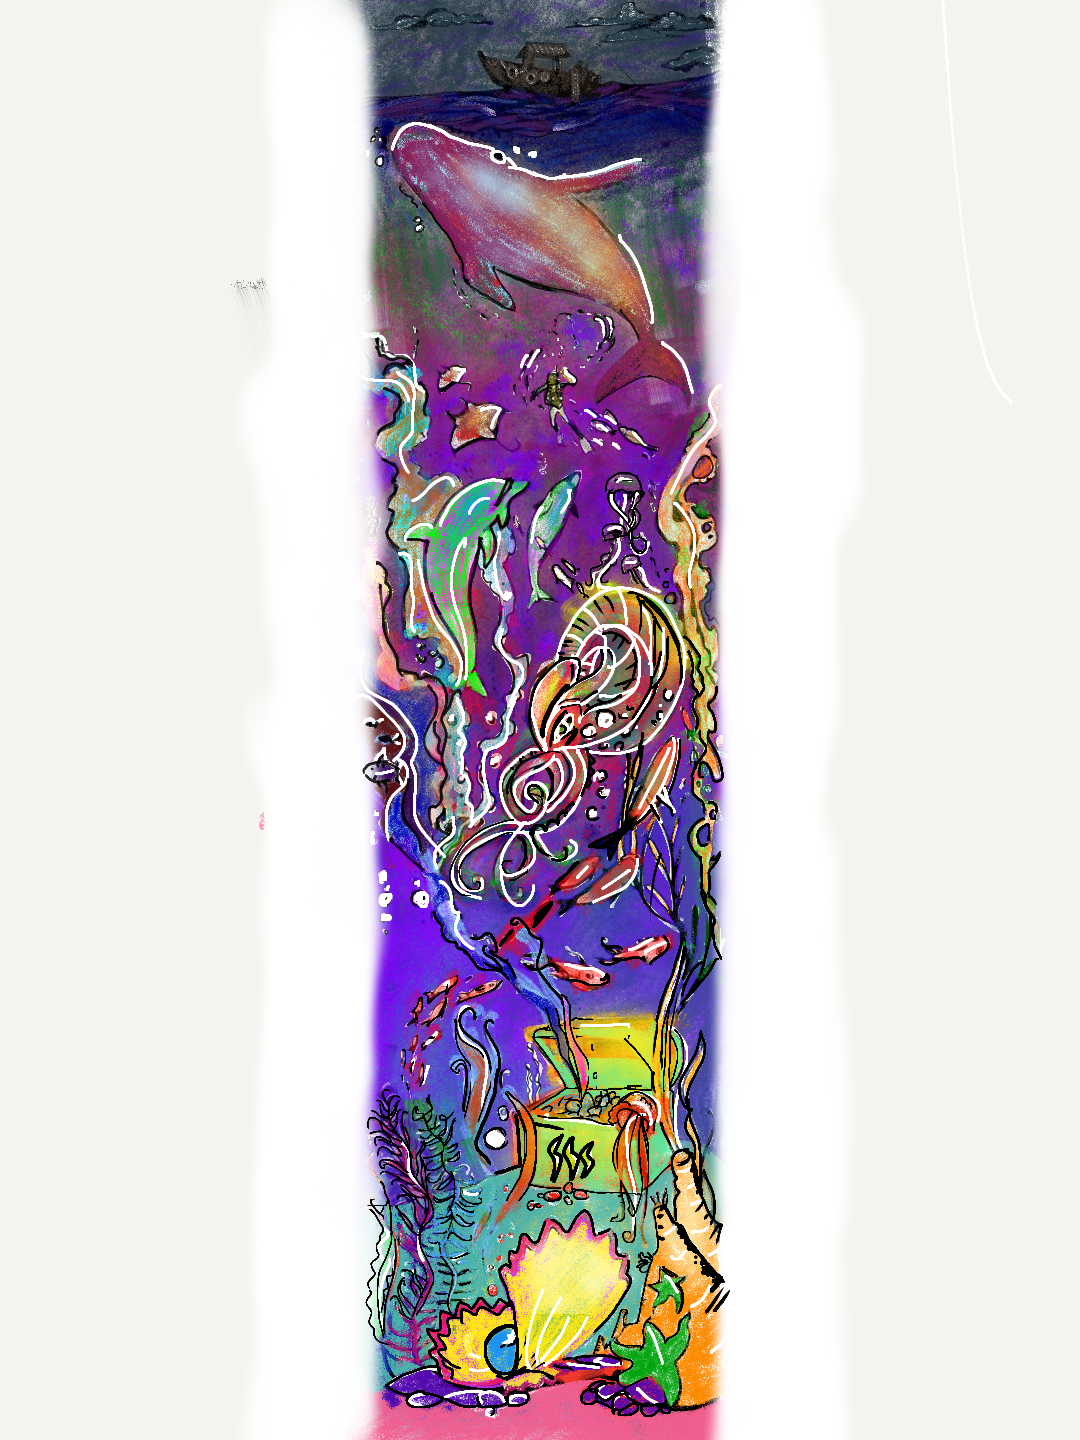 *Please follow me at @RachelBurger, upvote, and resteem to let me know you liked this post!*
👍 rachelburger, daodesam, mahdiyari, curie, dunia, anwenbaumeister, hendrikdegrote, kushed, pharesim, paxmagnus, xeroc, starrkravenmaf, andrusha.mef, septiyanachmad, ananiani, flaminghedge, feral-fractals7, mondeja, decebal2dac, deveerei, yurisincero, hisir, gandalf, adsactly, raymondspeaks, ben.zimmerman, tjtrusty, sammie, cebymaster, ninkhisibir, sstefan, cotidiana, m4wllt, cheah, centaurmystic, mckenziegary, choogirl, costopher, joelcaluza, locikll, rohitrajput, hoho, boosterpack, justaskbigjohn, ryssa, coldsteem, jeha7, diana.catherine, arconite, fatboy, toxichan, randyclemens, steemedia, beeskee, marcosespes1, cgame, krizia, caweyant, aarellanes, ilvacca, bitrocker2020, forestdweller, burnedpixel, shadeless, pjaypresunto, valderrama, palmtreetrading, philosophist, ttudor, vinyprop, ebis, mergesort, kevinwong, musicsteem, sethlinson, hilarski, ebargains, zoee, sellergenius, ammadkhalid, detlev, dirkzett-english, bp423, stegaru, hqmafa420, titotips, flauwy, greatvideos, dber, n1kofi, johnyboi, isohero, coupeborgward, mychild01, mychild02, mychild03, ehuston, pjheinz, brianjuice, kemal13, samether, nulliusinverba, rossco99, pheonike, michaelx, roelandp, adept, phenom, dan-bn, tracemayer, garvofe, wackou, blakemiles84, brendio, anu, steem-id, theshell, midnas-howler, albertogm, gomeravibz, letc, cmorton, someguy123, allyouneedtoknow, drwom, maorpop, agmalirsadi, aarkay, artystuff, dianadee, danielevergreen, angusleung100, pandamama, zararina,