A little work project: Cast Iron Lamp deconstruction (part 2)

View this thread on: d.buzz | hive.blog | peakd.com | ecency.com
·@ryanarcher·
0.000 HBD
A little work project: Cast Iron Lamp deconstruction (part 2)
The before and after shots of my work. 

![](https://steemitimages.com/DQmQJJ8bBDinthXtEme23ixn4YhyasDDChzpvVFBHDYx3Q6/image.png)
![IMG_6280.JPG](https://steemitimages.com/DQmSLSR45TbhaevWnpmBSebKq1euZQAGijTMZyqBZ8NuNBQ/IMG_6280.JPG)

![FullSizeRender (1).jpg](https://steemitimages.com/DQmUx5XdMRs9rvSjTE31dJk8UTSXc9pg8yqtDW9j3gNb8tb/FullSizeRender%20(1)
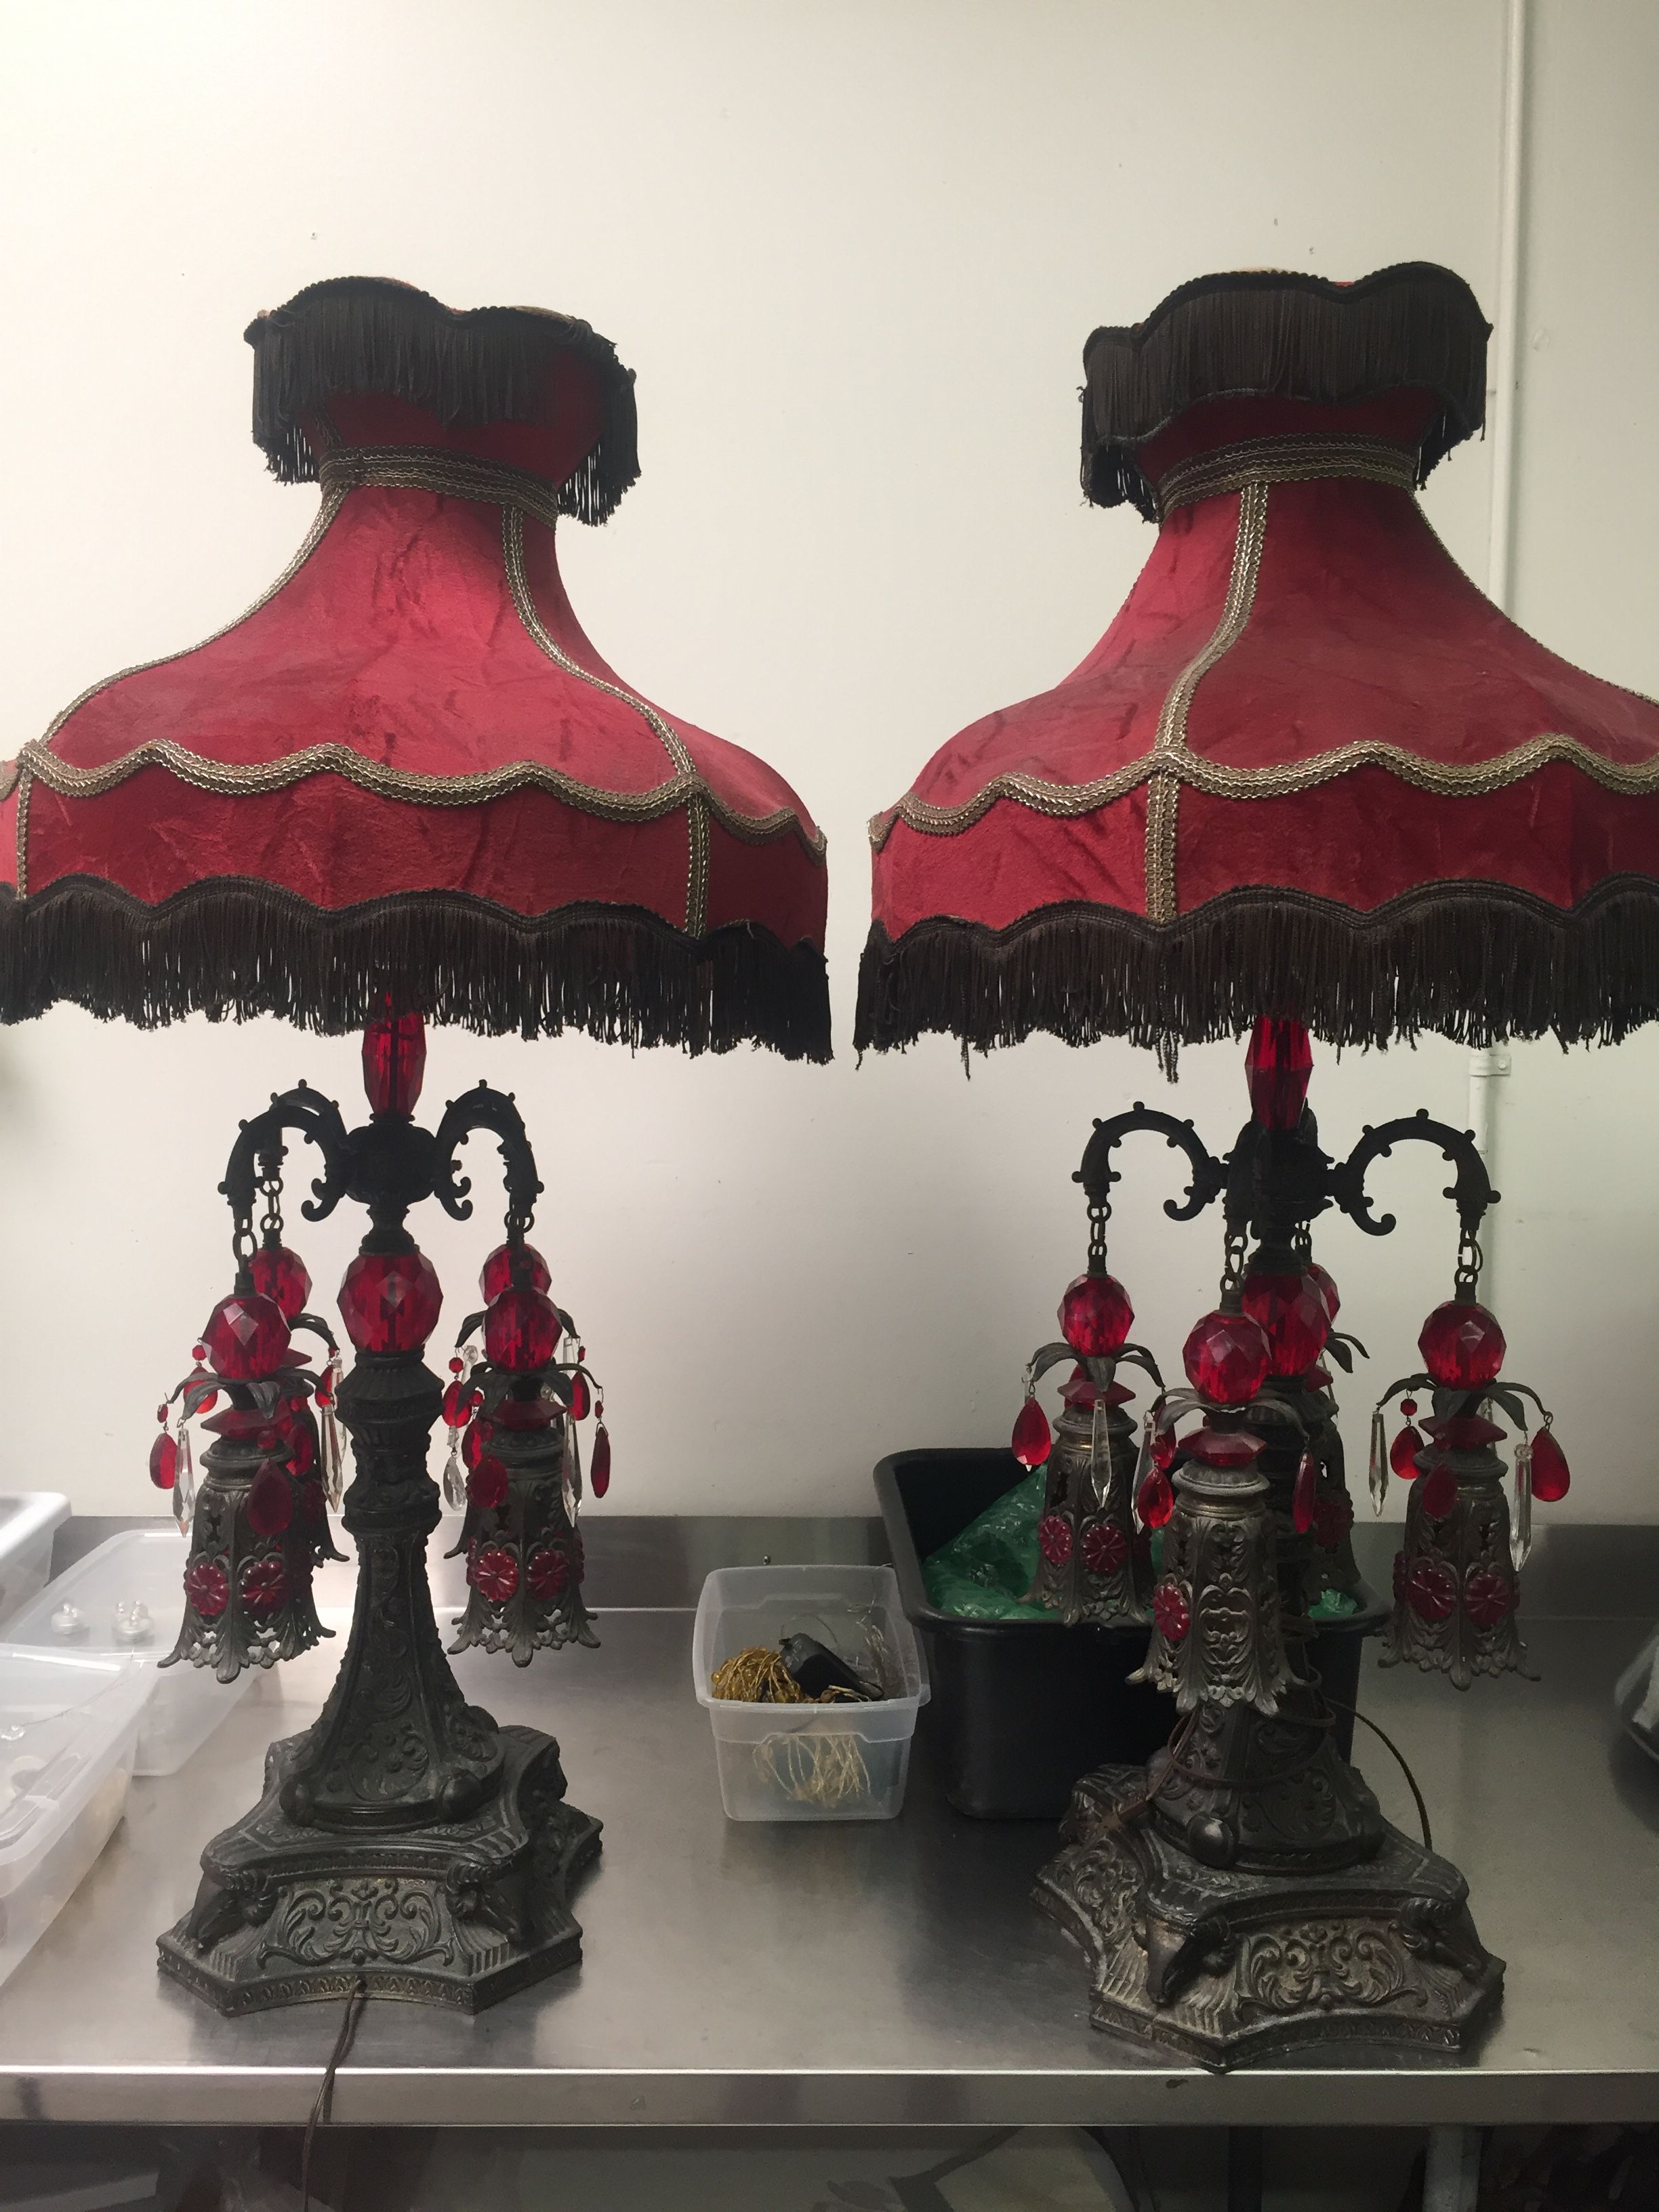
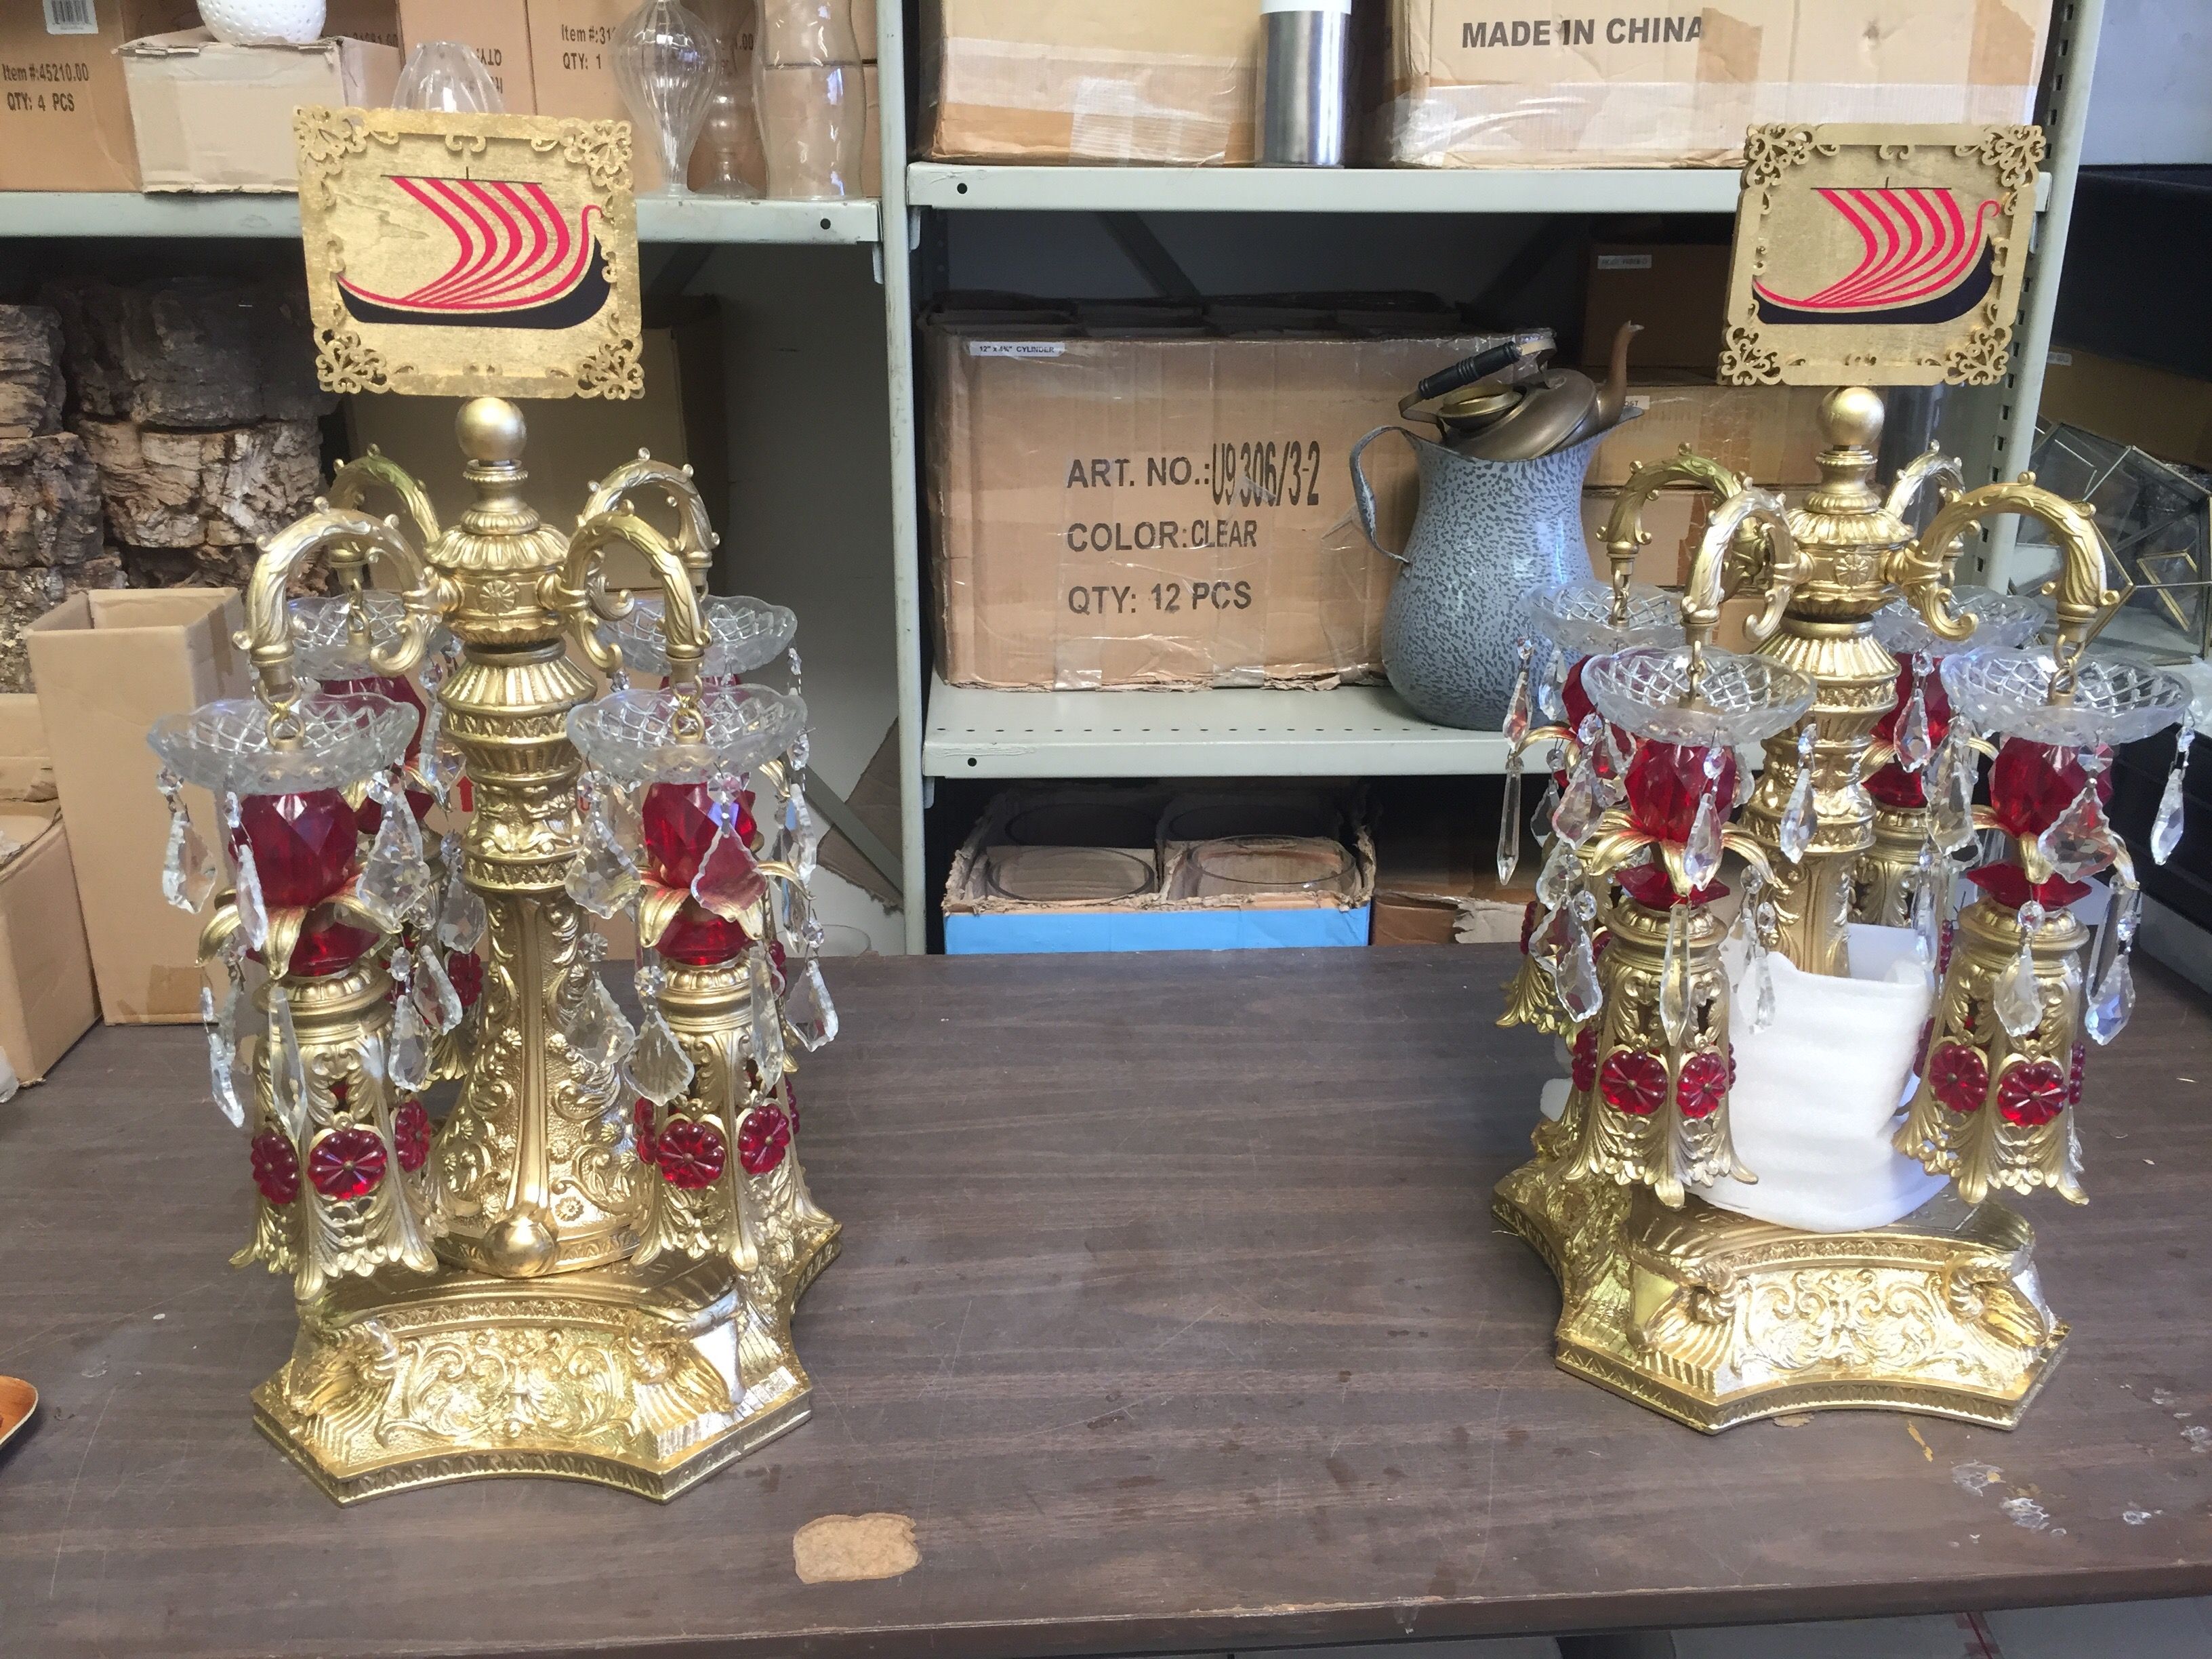
.jpg)
 

Continuing on from my last post, [A little work project: Cast Iron Lamp deconstruction (part1)](https://steemit.com/art/@ryanarcher/a-little-work-project-cast-iron-lamp-deconstruction), I needed continue the deconstruction.

![IMG_6294.JPG](https://steemitimages.com/DQmZ8QGZeXKXzrbRkEqeupHW87U7kfobN3jfW4MXJY5XSrR/IMG_6294.JPG)

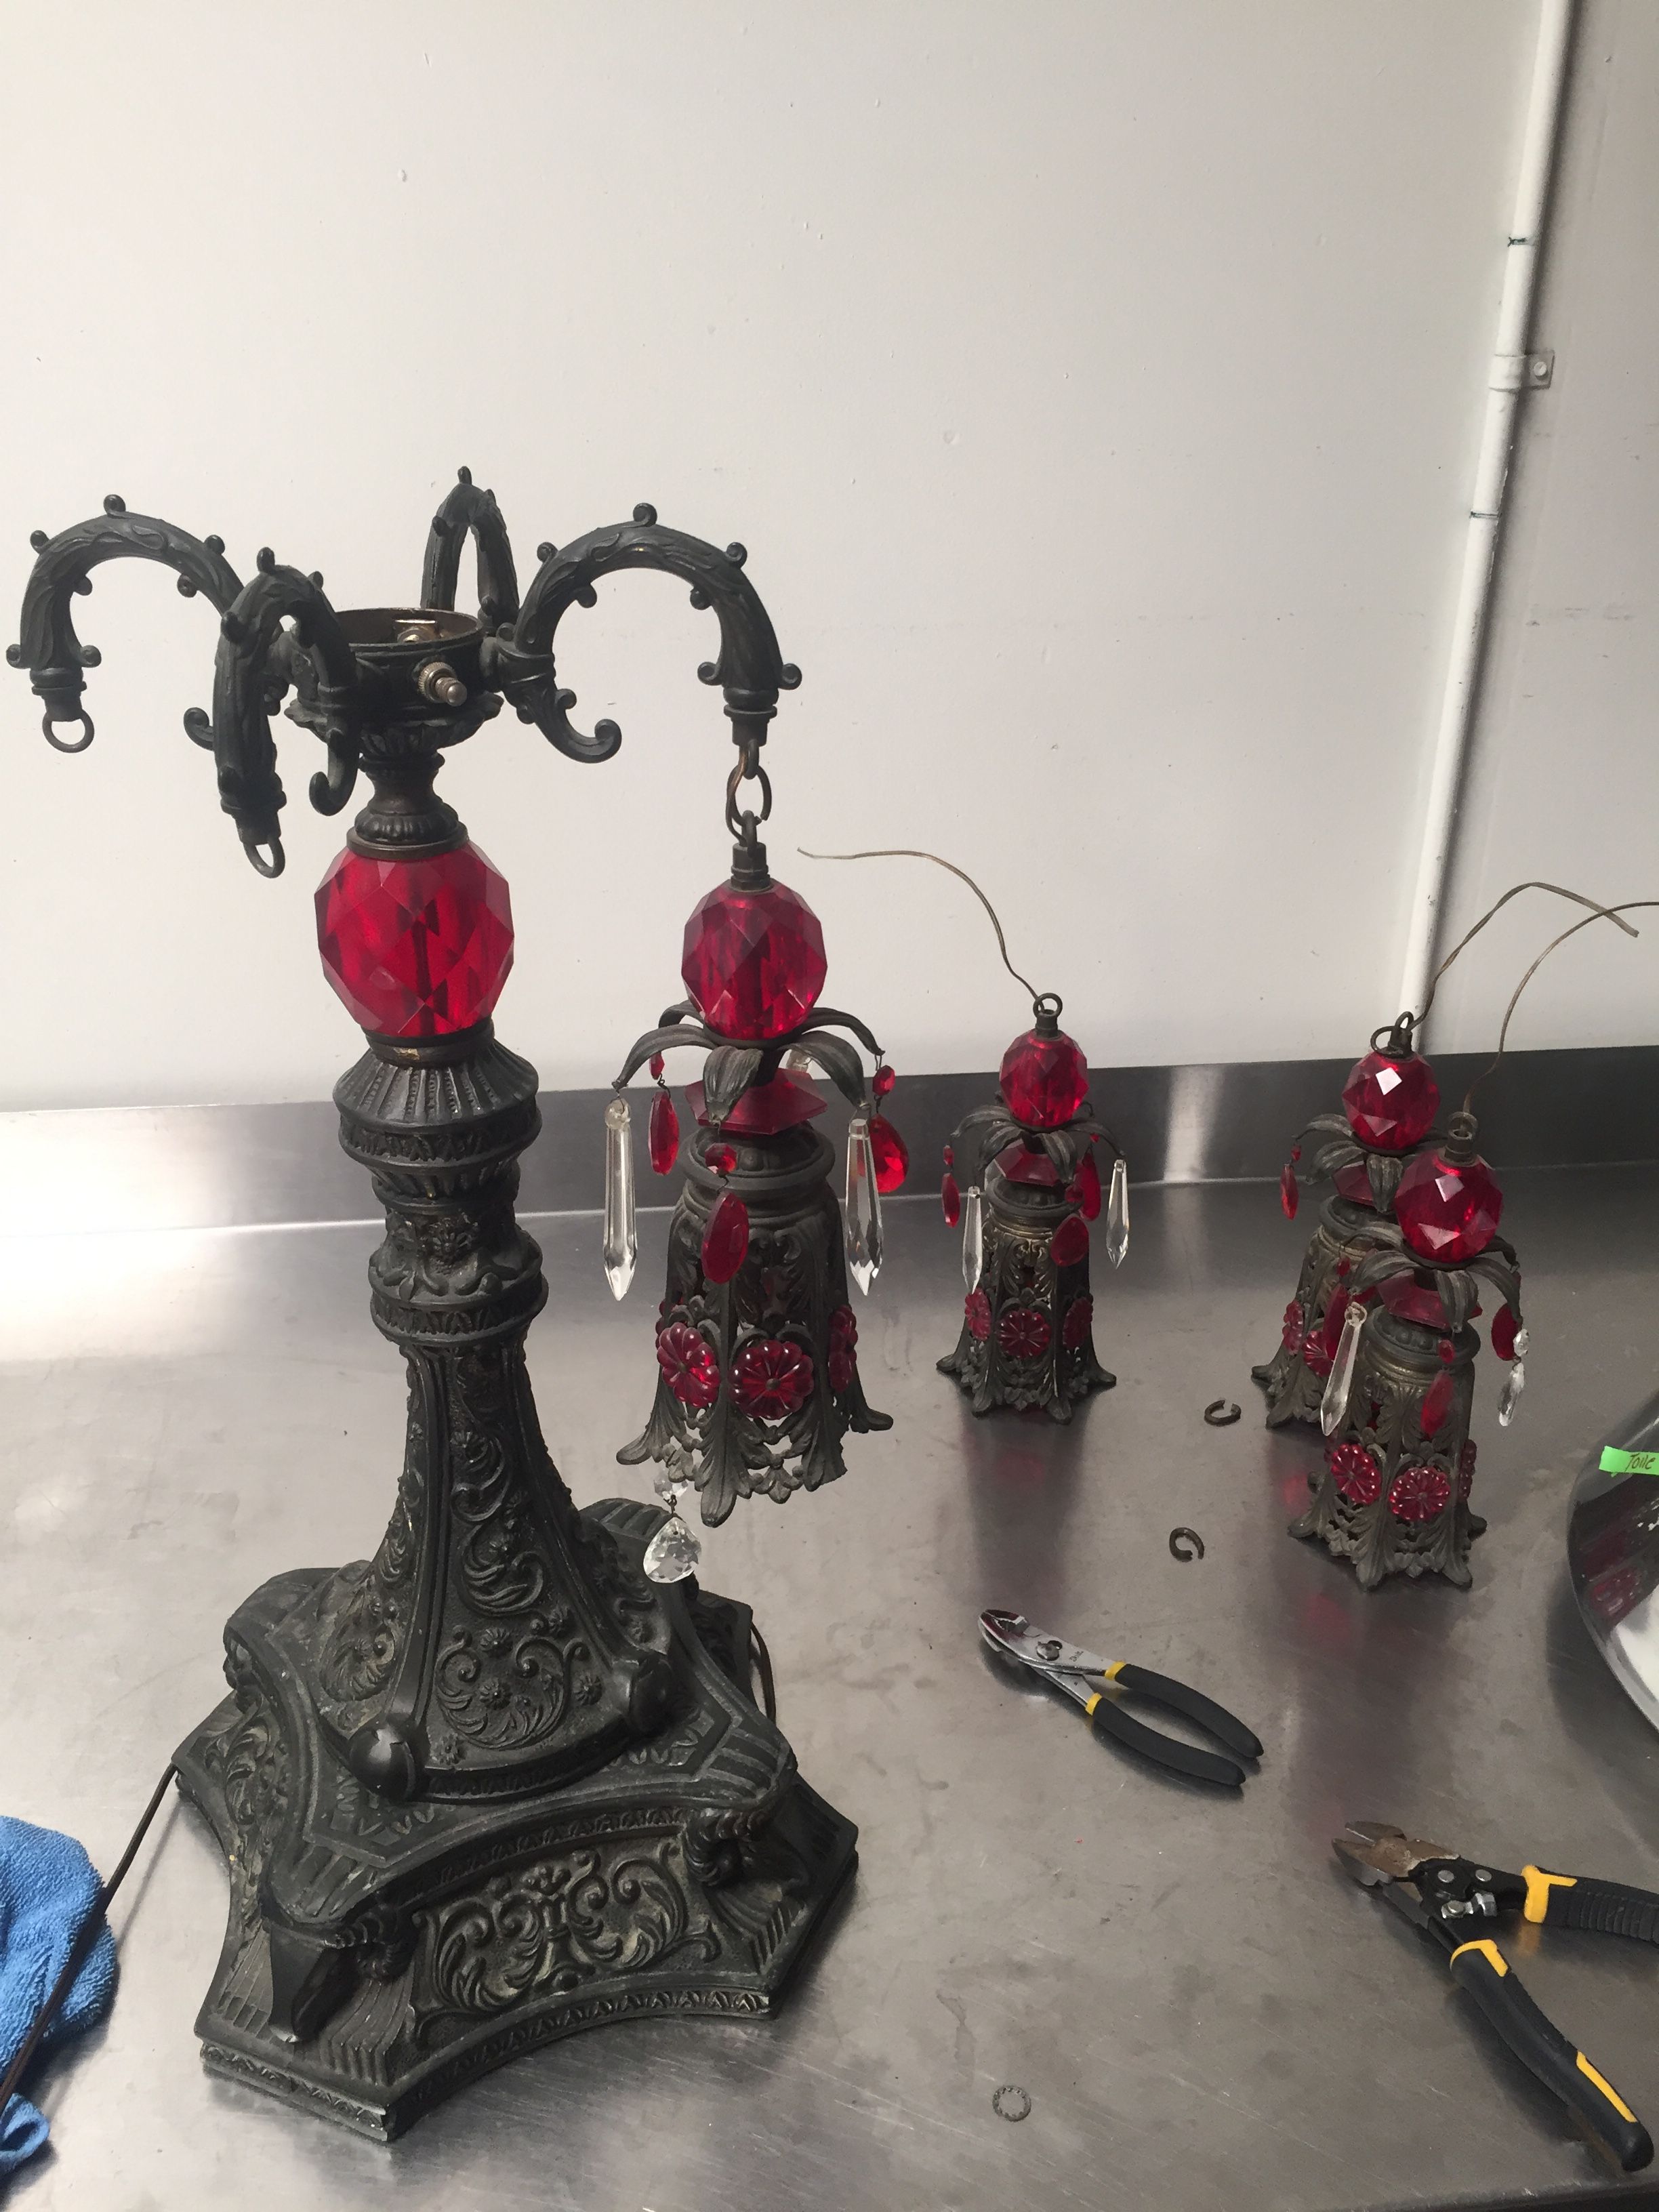
I needed to use a wire brush a lot of elbow greece to get most of the tarnish off.

![IMG_6295.JPG](https://steemitimages.com/DQmZFrPe789mjsoThNmU43CWokUow1fueTi3UsurVKG6wpH/IMG_6295.JPG)

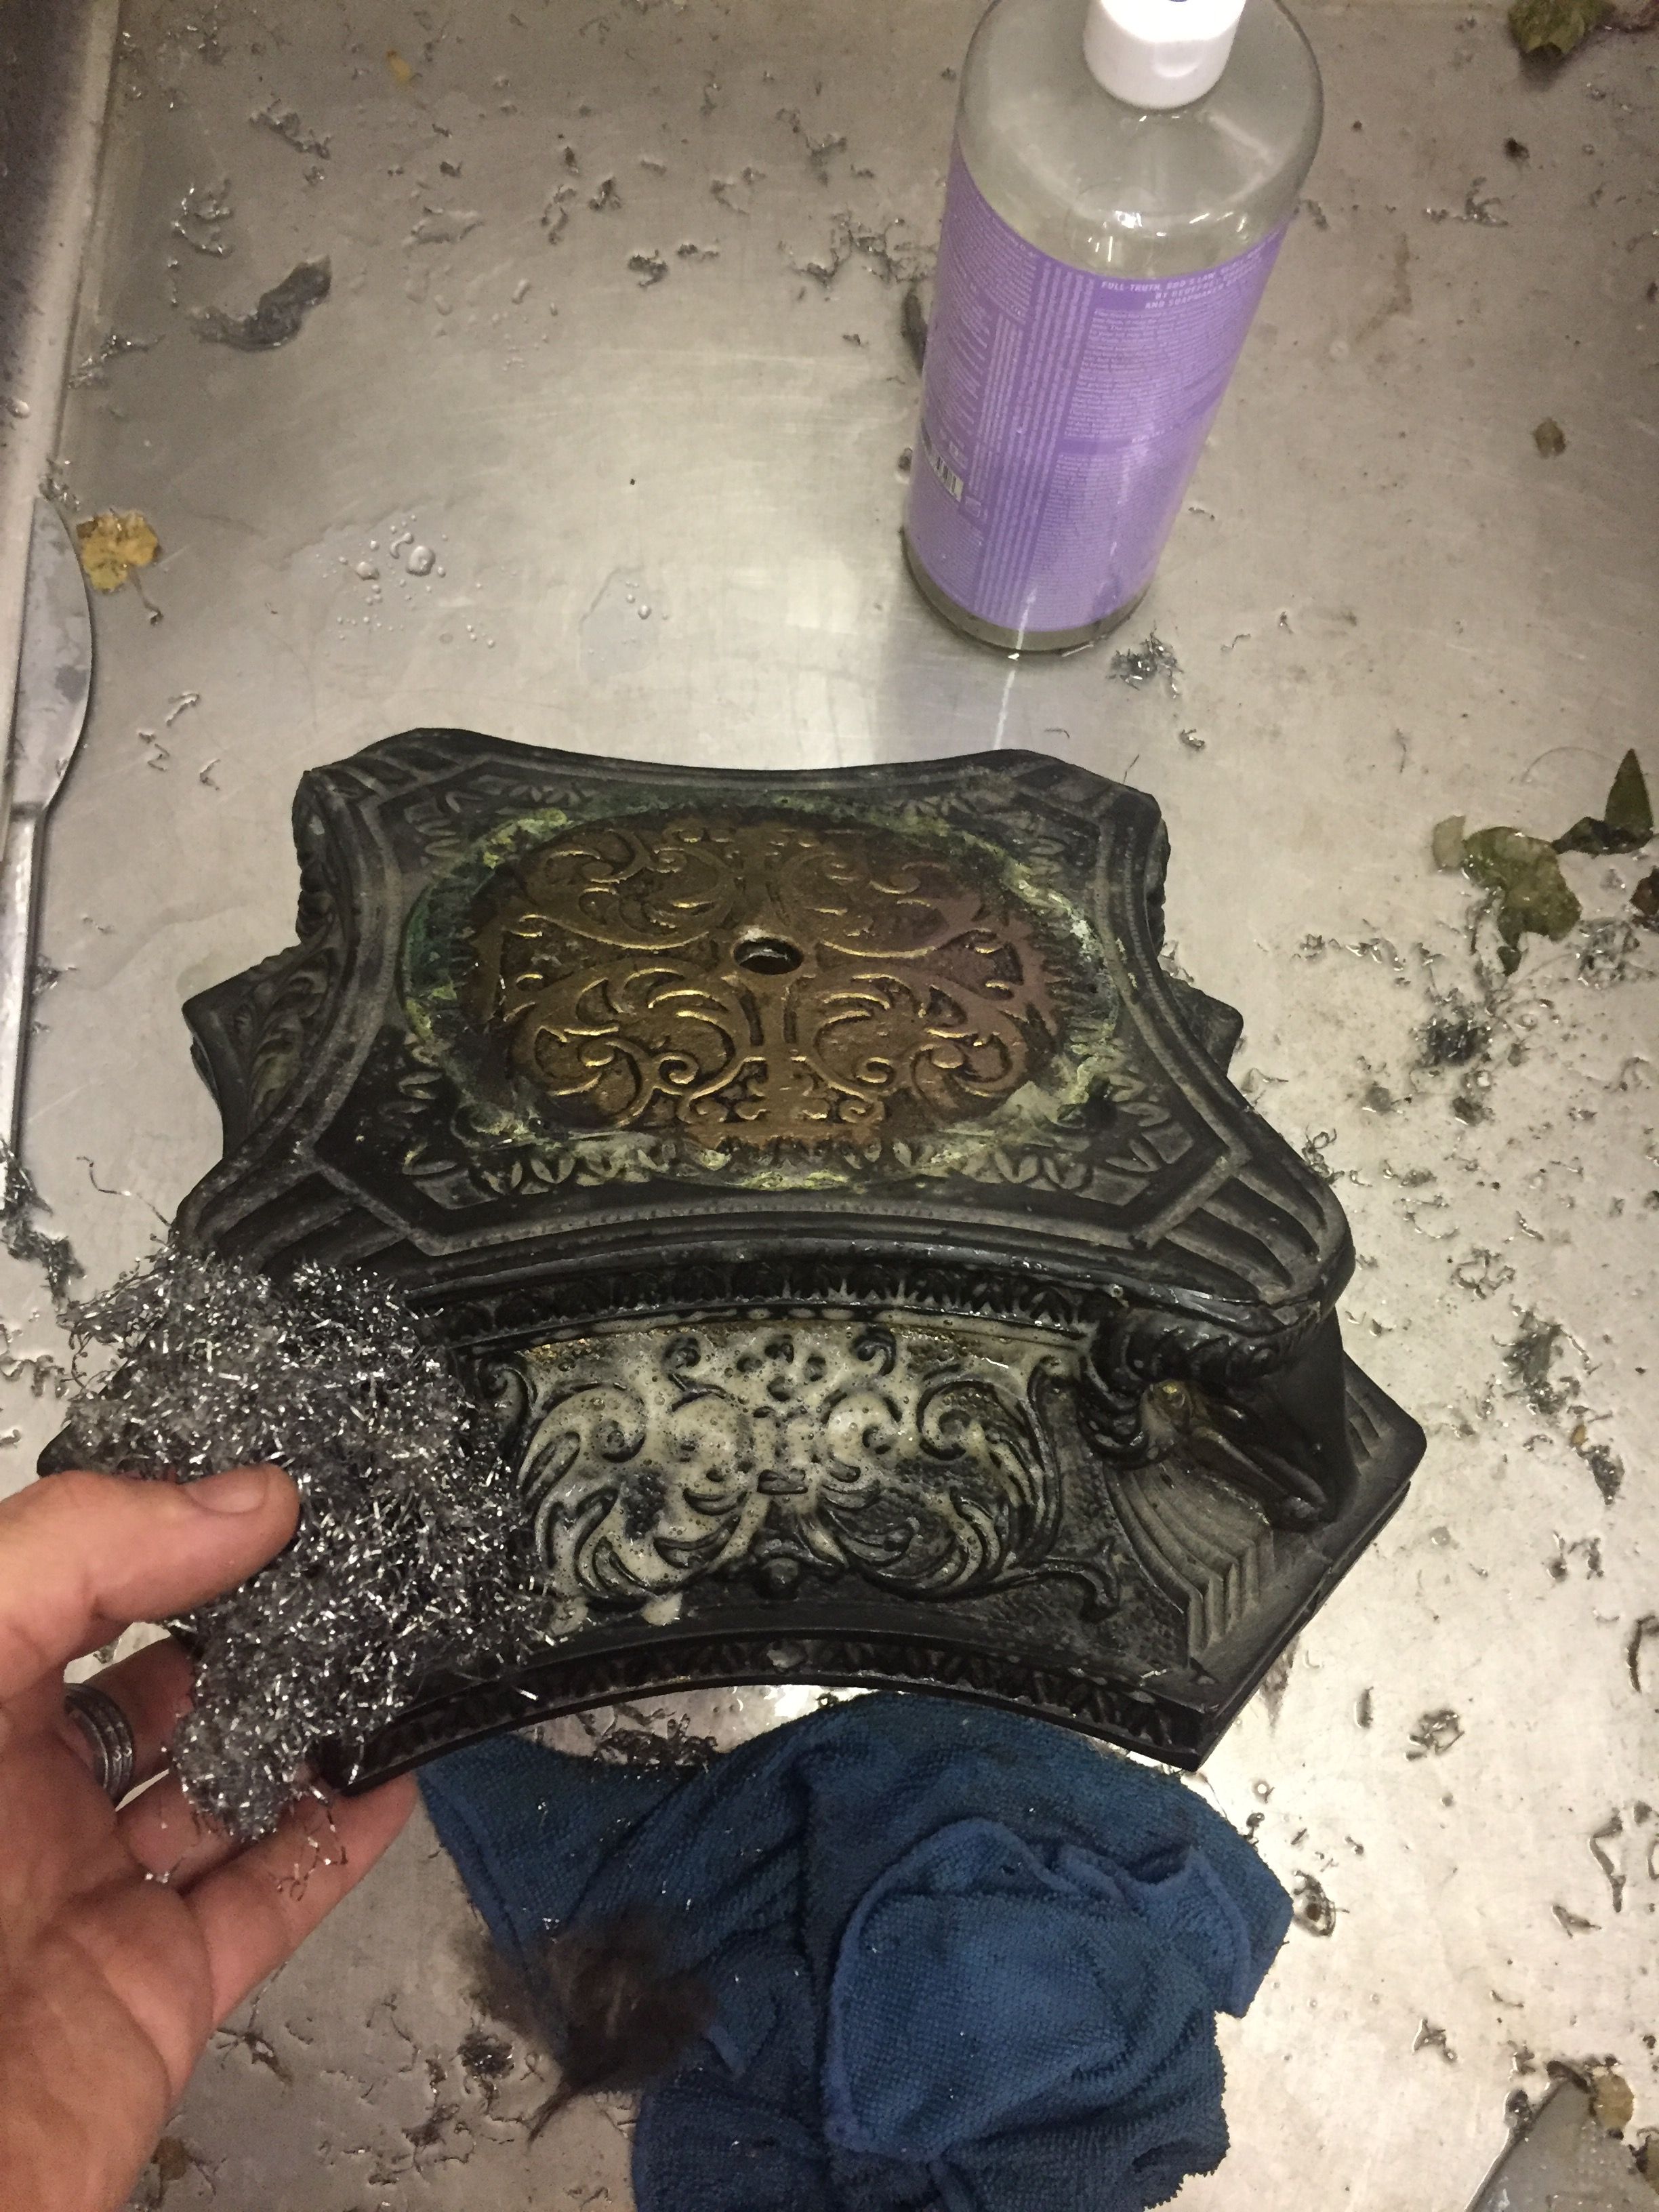
Now they need to dry.

![IMG_6297.JPG](https://steemitimages.com/DQmeKT4LuUvkPEsZauK5JShqGHqJ6uJ17Uo6kuAyih5hCYr/IMG_6297.JPG)


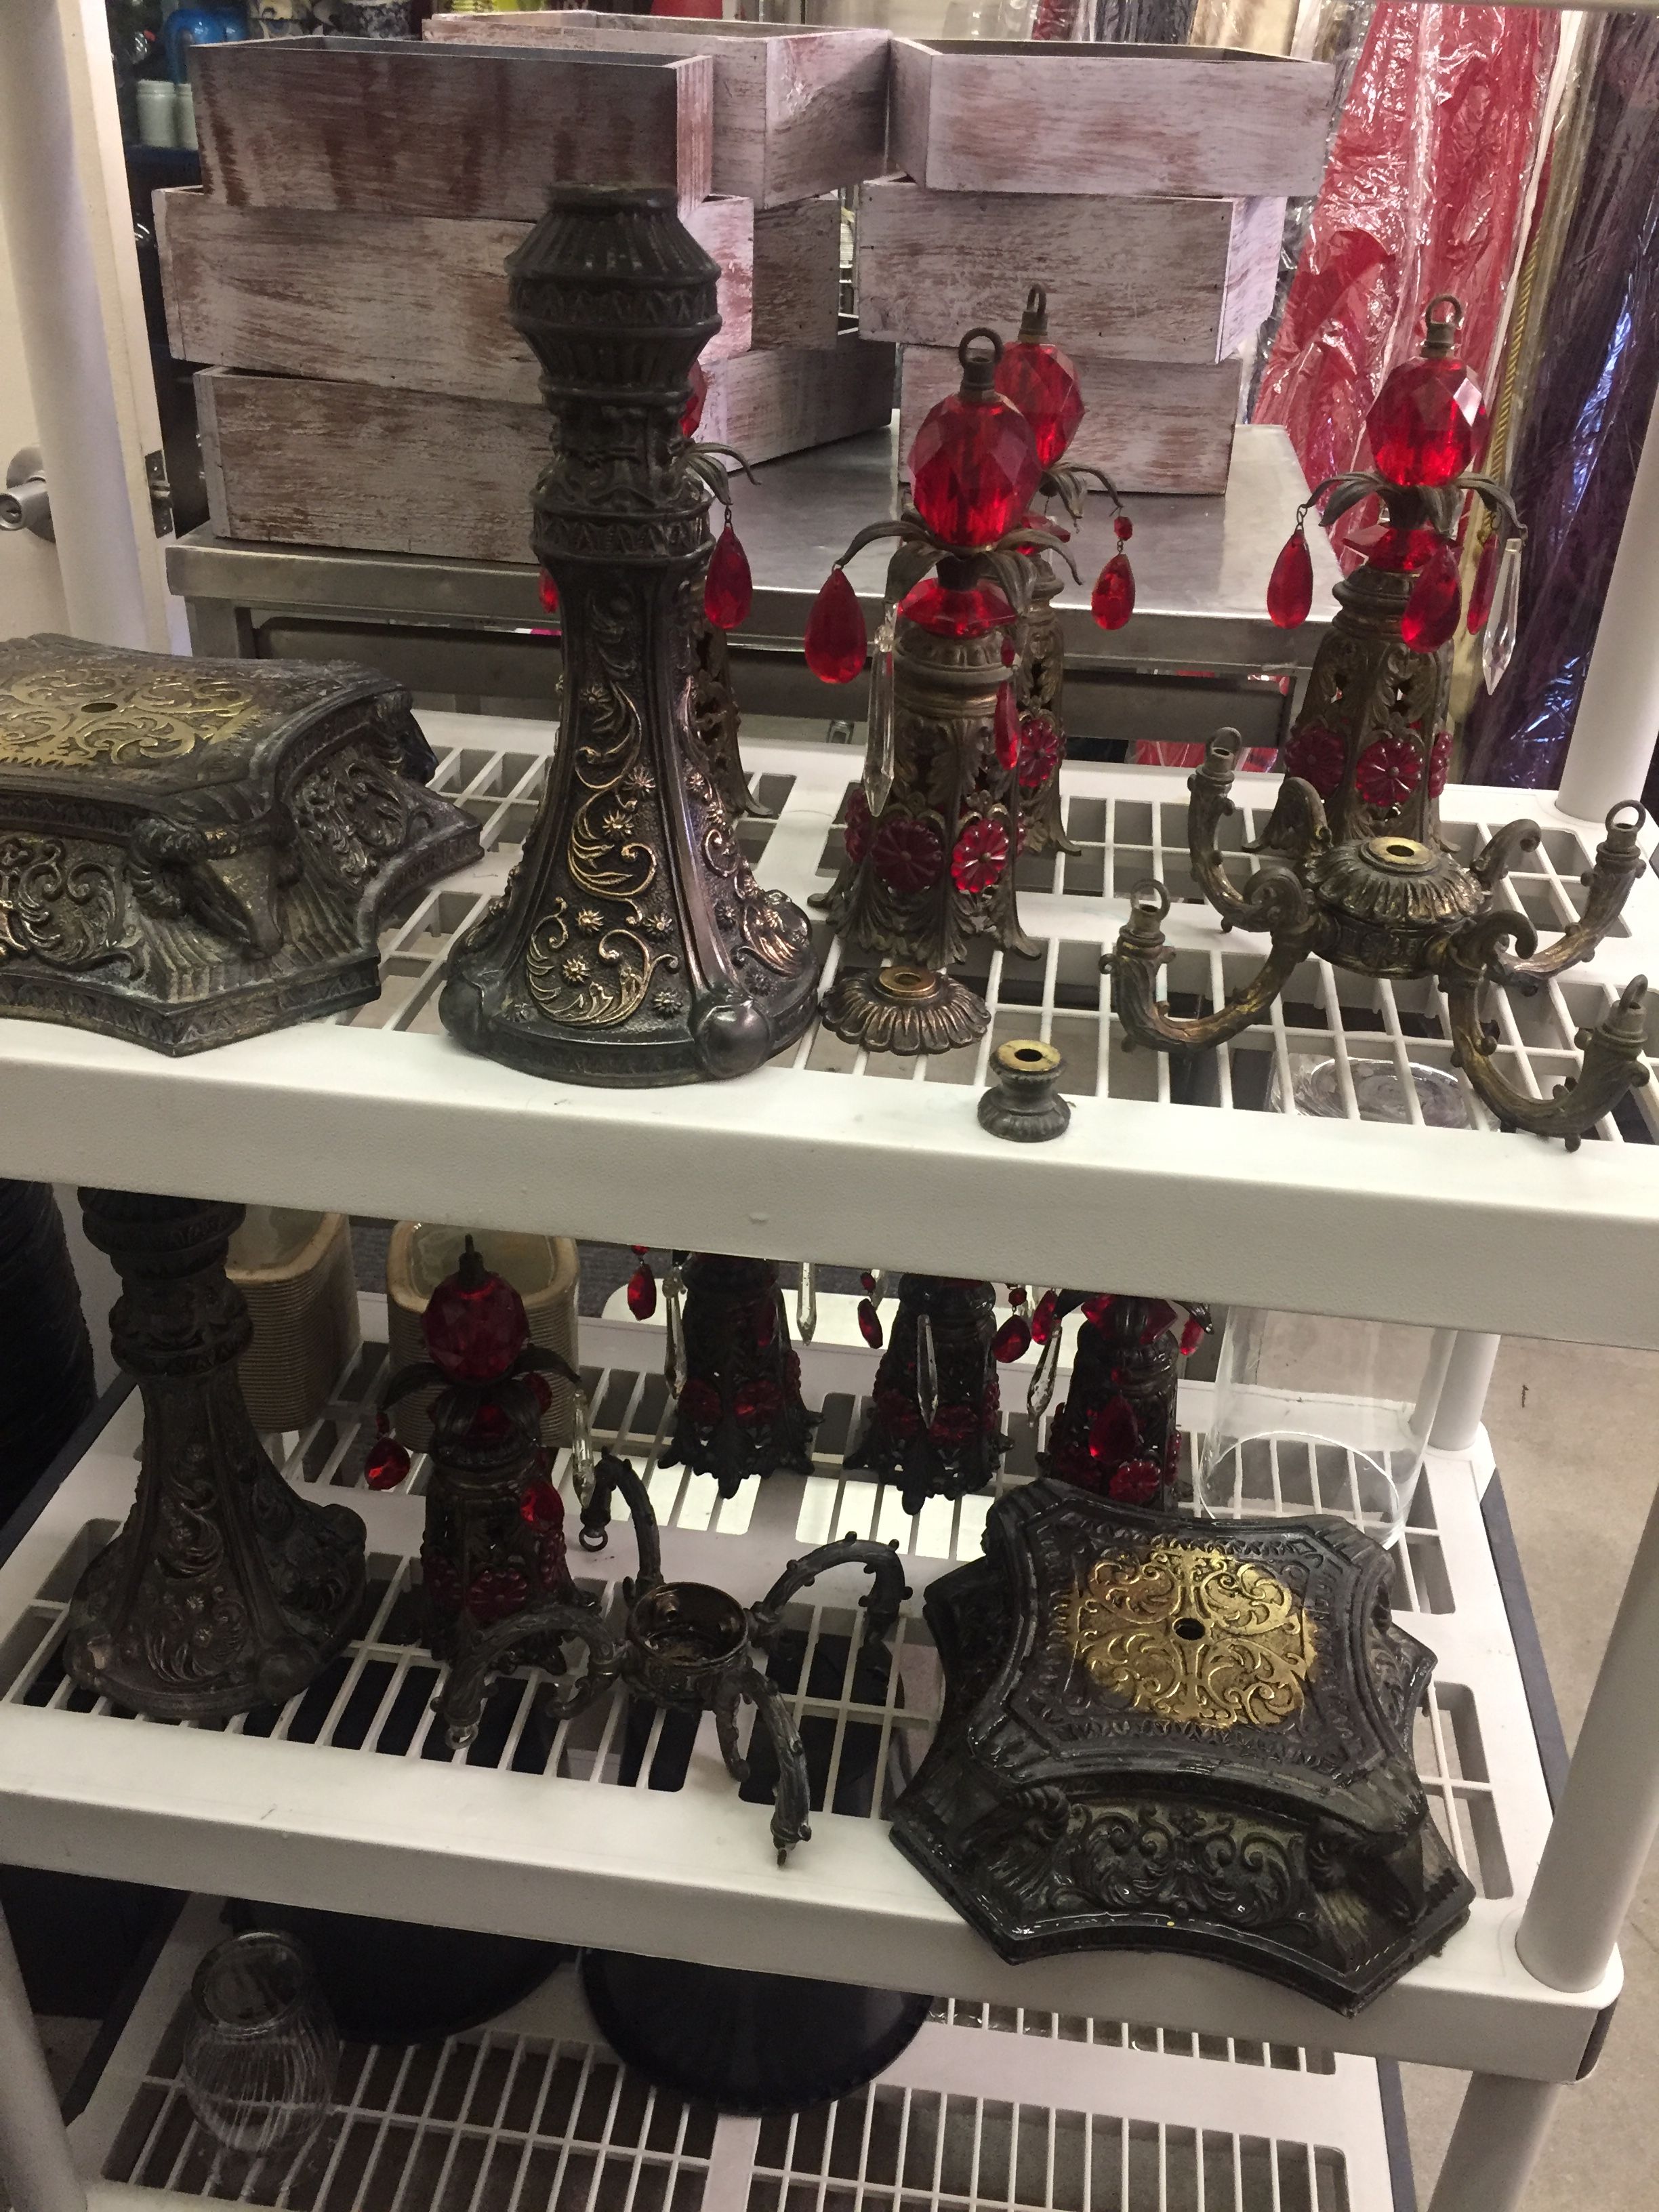
I'll need to disassemble these and clean them as well.

![IMG_6304.JPG](https://steemitimages.com/DQmdDKXLxZMGqzVsCnAwXPhdzMgMwPDVGJu7kN2qGfLwTFY/IMG_6304.JPG)

![IMG_6300.JPG](https://steemitimages.com/DQmWbvbEm4z7tMC5xuwq3yVBwxiR1wdcxexsNWus2quGAFg/IMG_6300.JPG)

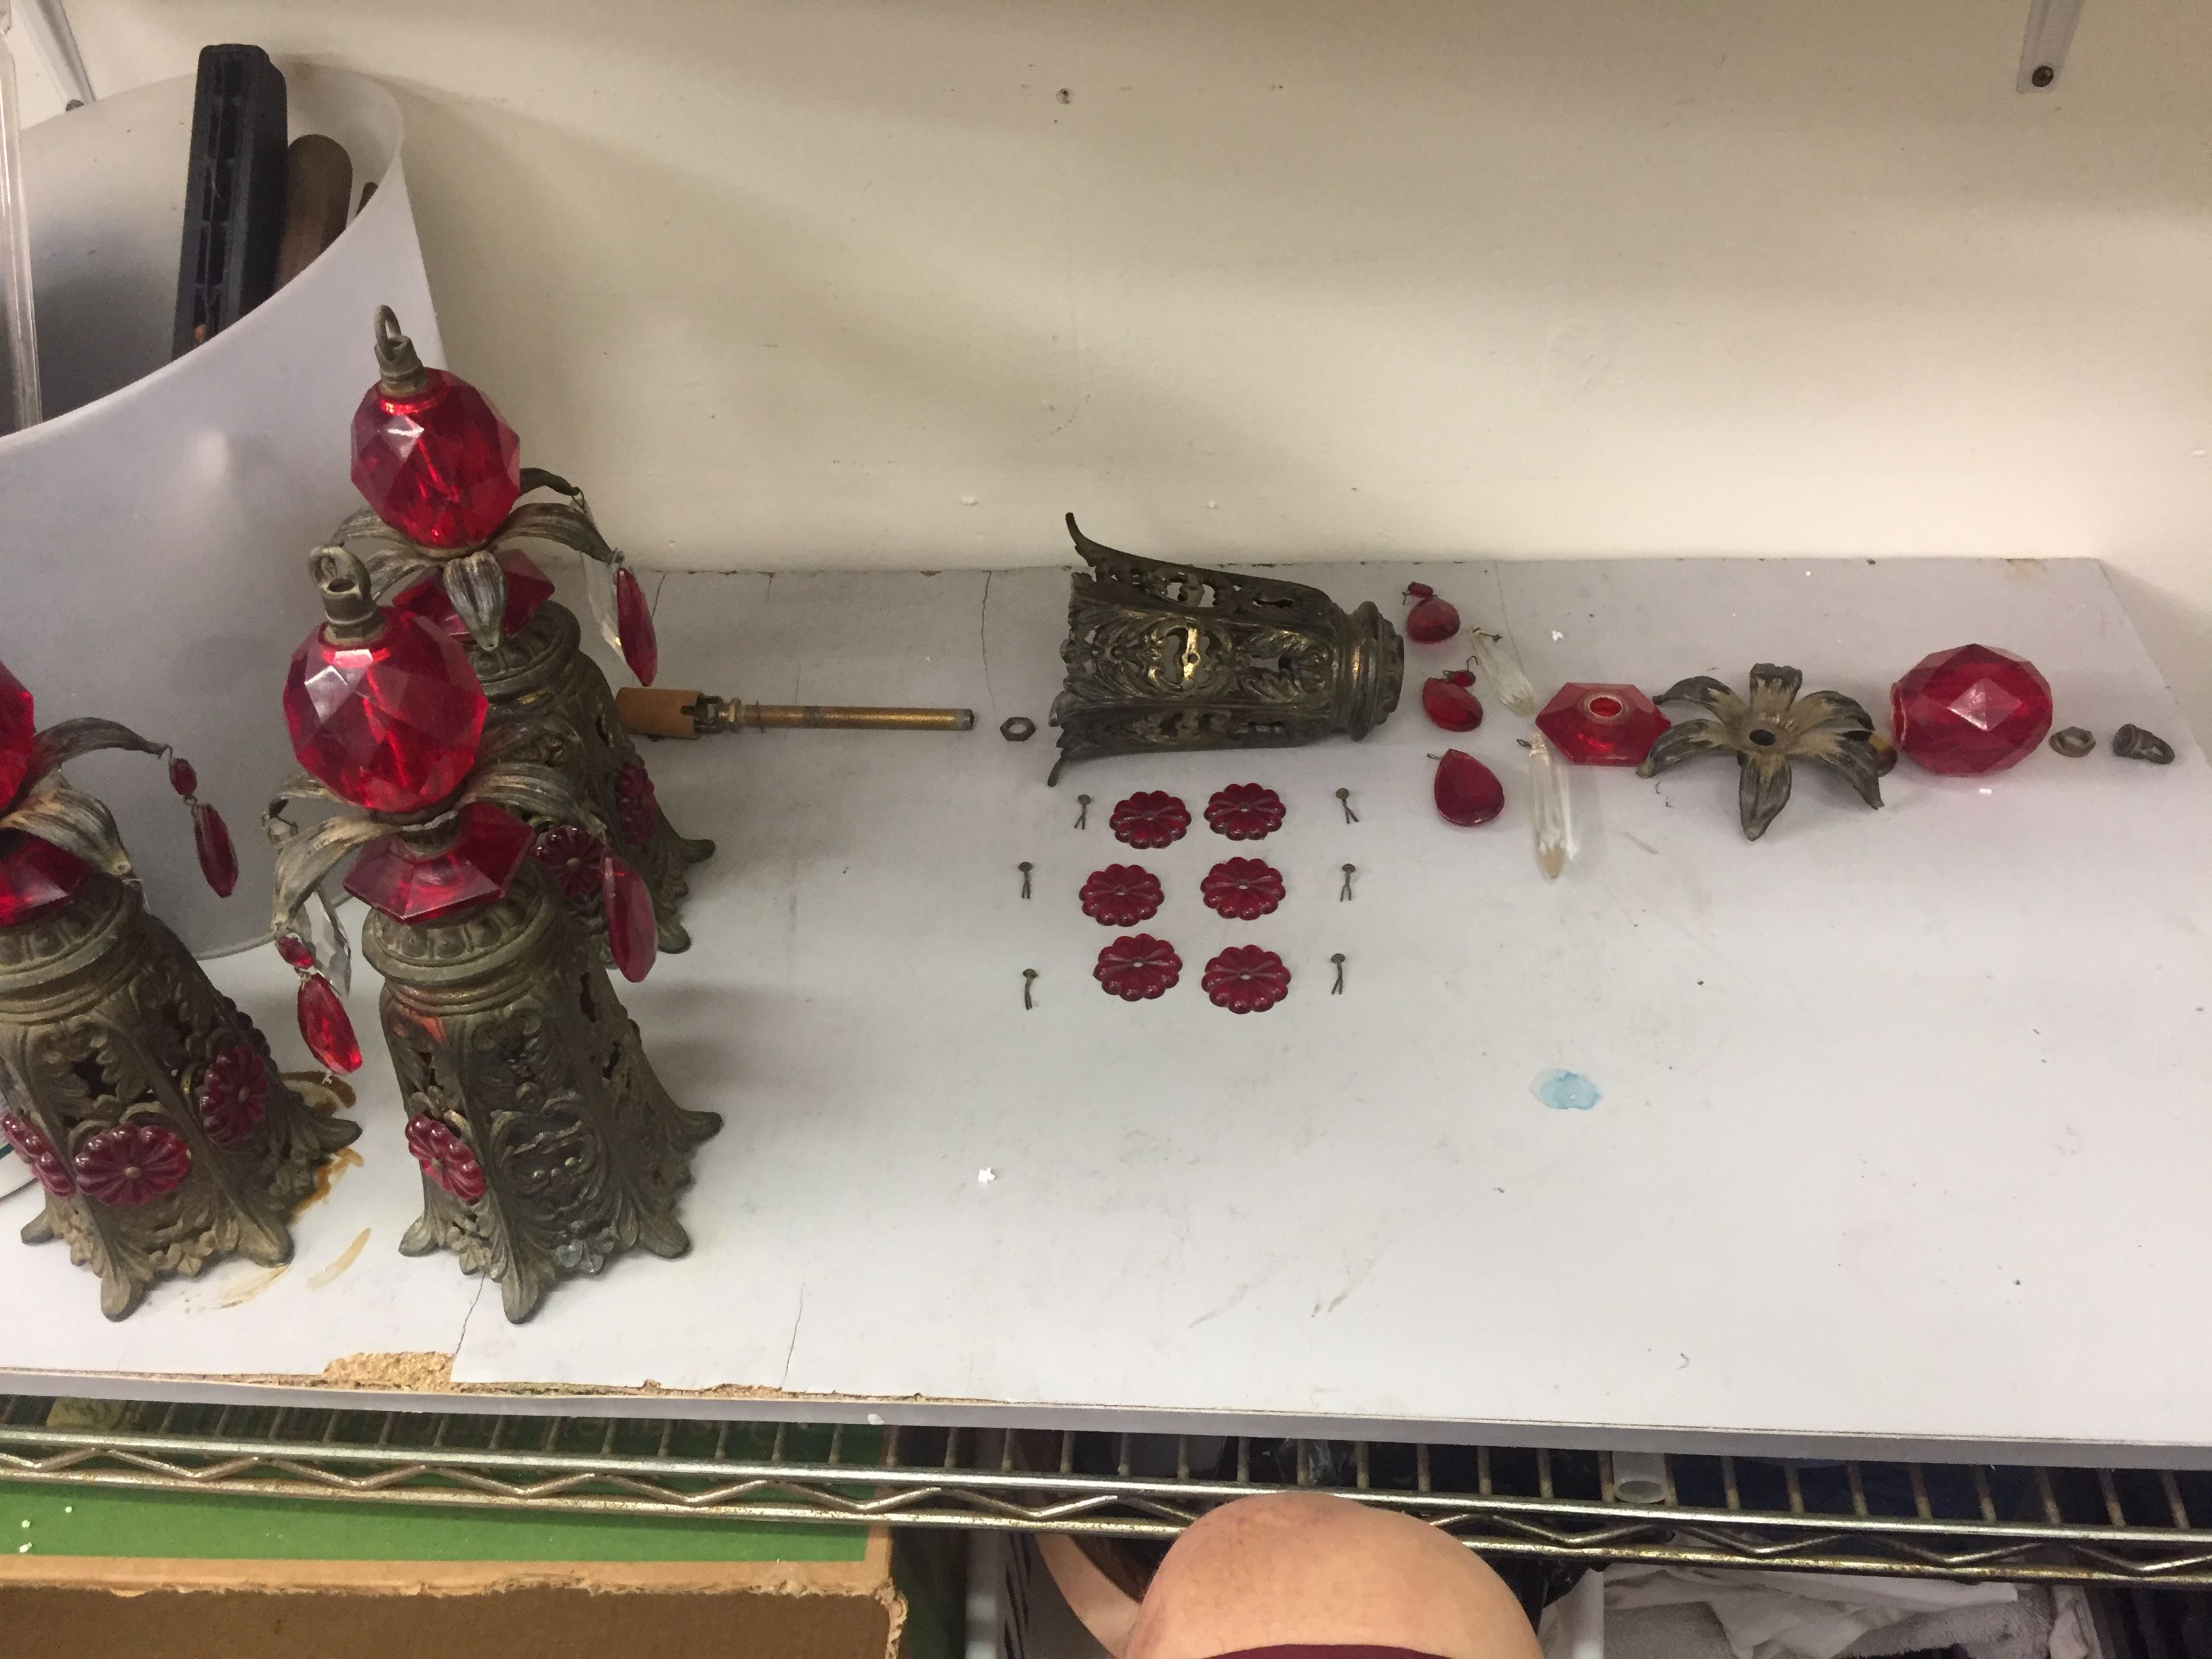
Now it's time for the gold paint before adding in the gold foil. 

![IMG_6310.JPG](https://steemitimages.com/DQmXubcq1NVb8BNKtPq8znh4vq2EMVF9zdqvr9B9eLdueJU/IMG_6310.JPG)

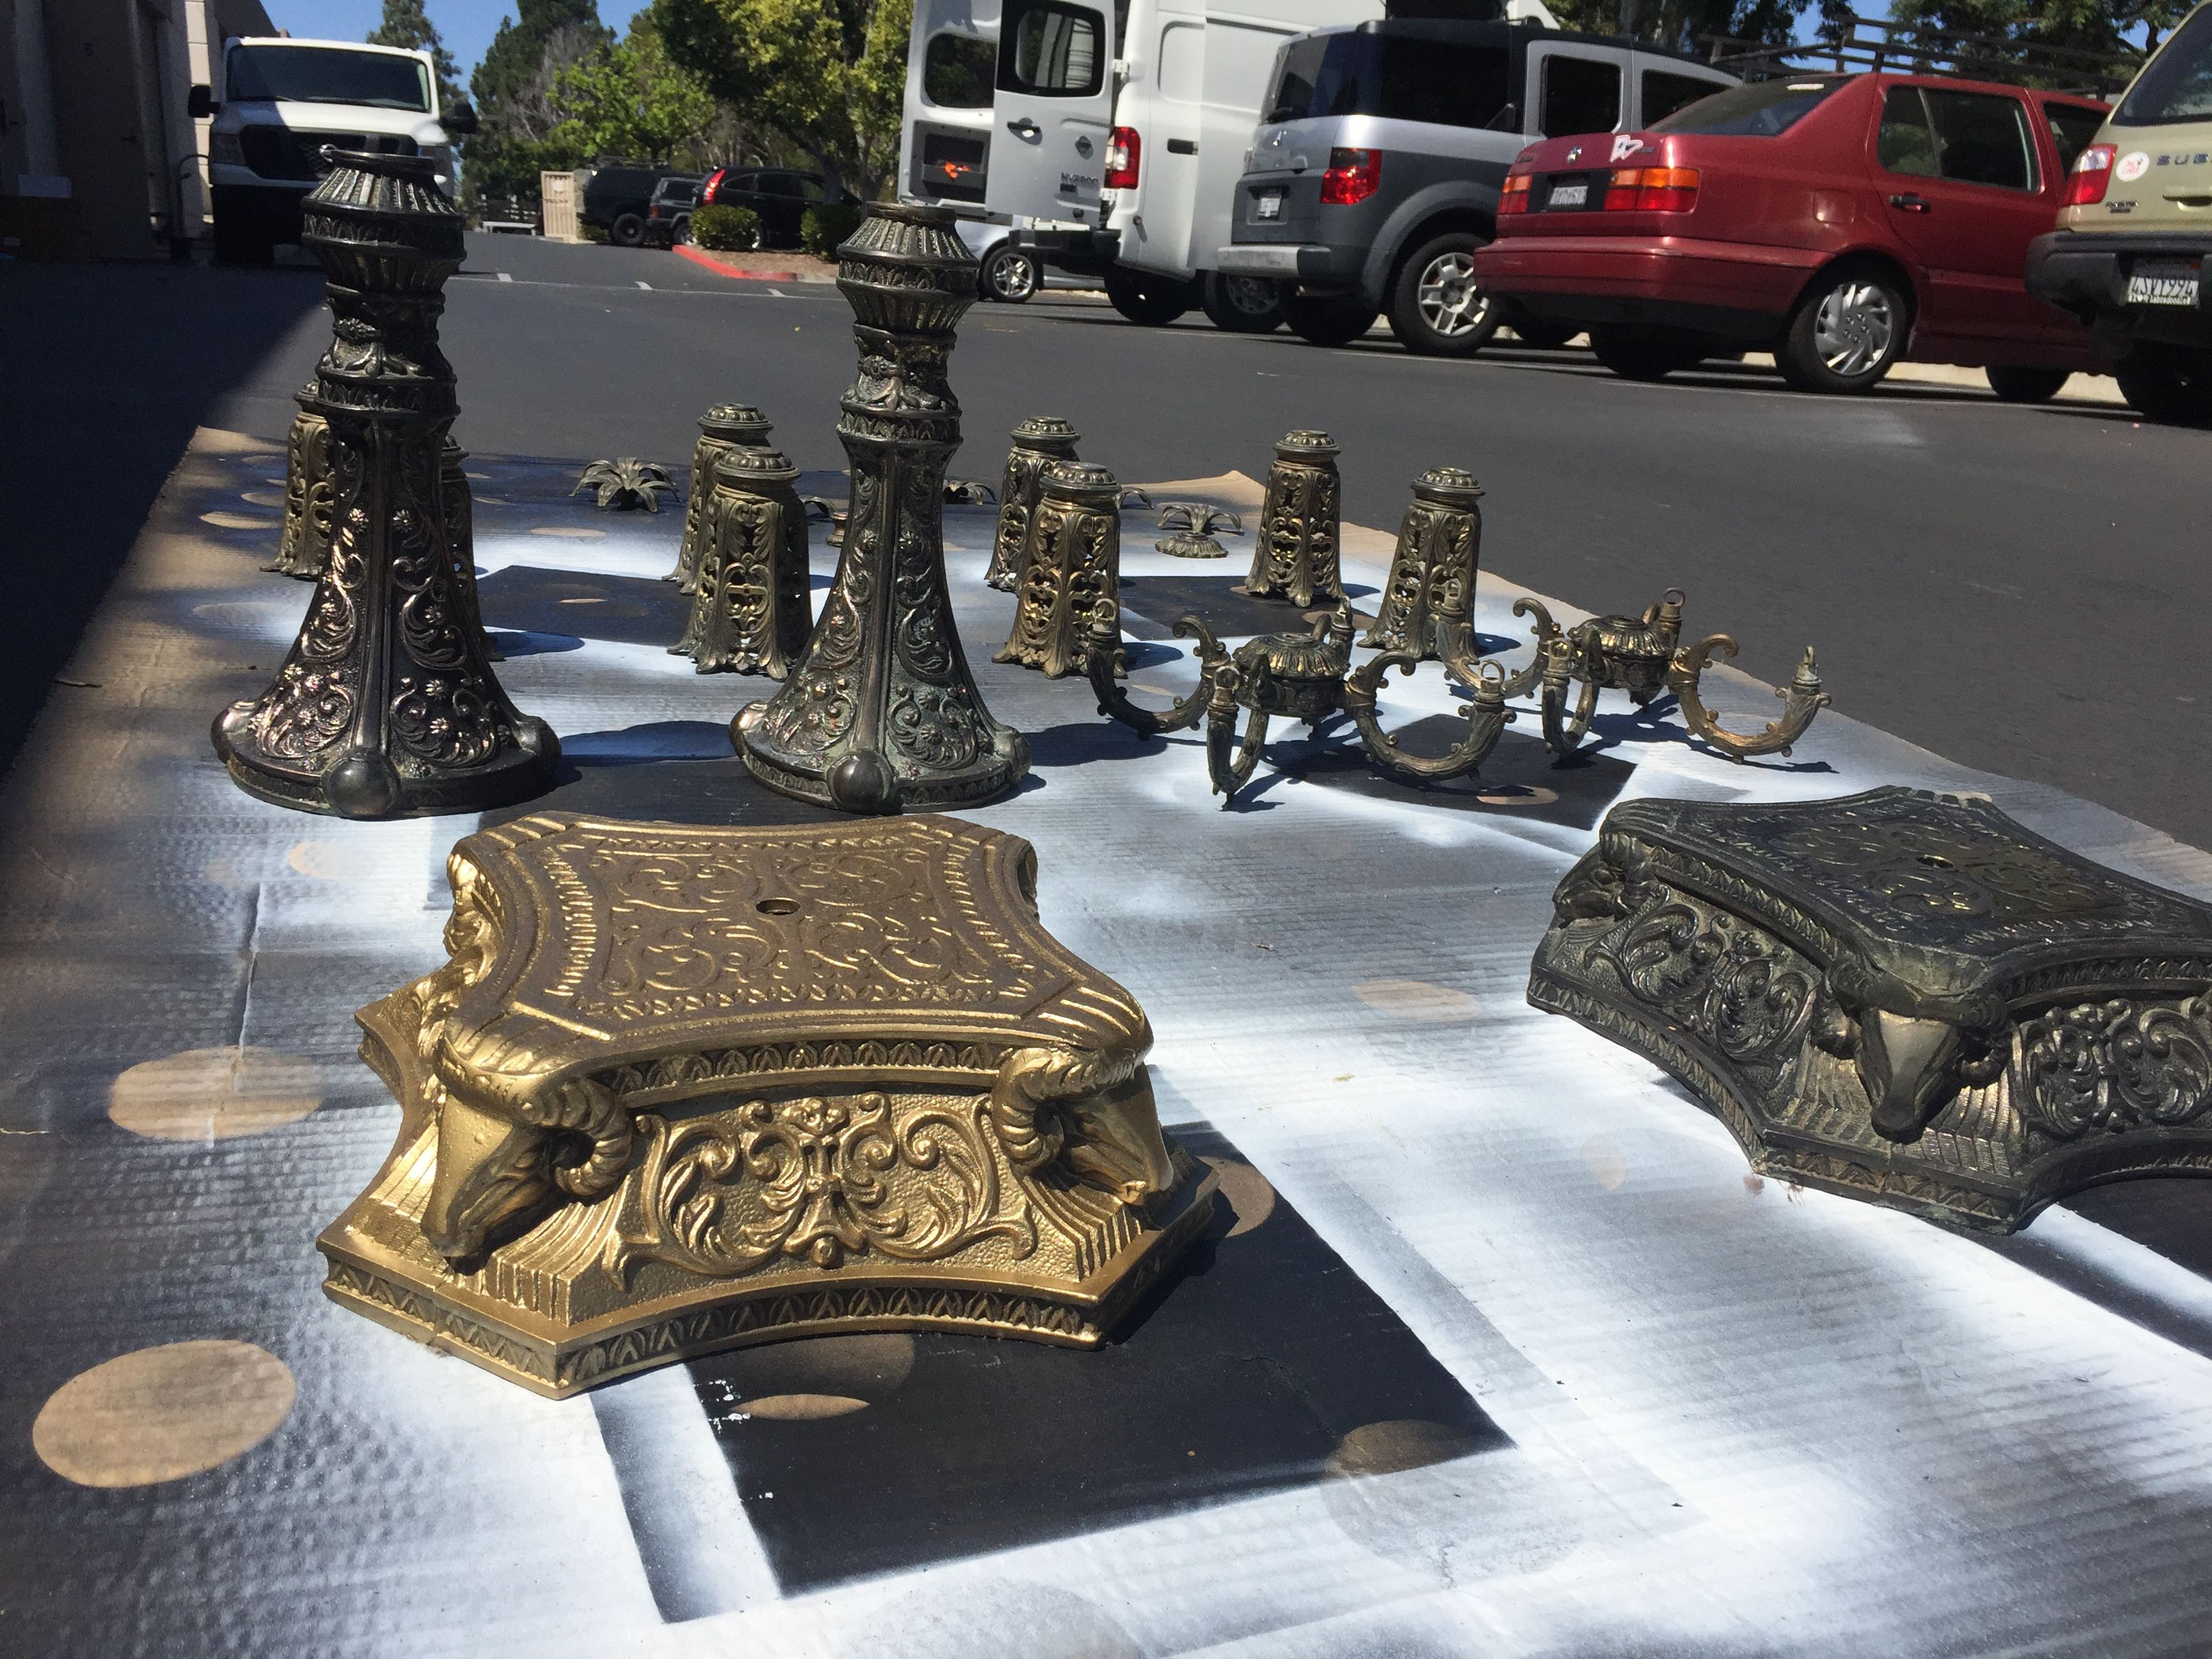
Painted and ready for the gold foil.

![IMG_6311.JPG](https://steemitimages.com/DQmRmkBGBSnUbiHPiwNKNYDAAs8op48ucmsqFFTQ6GYxyuK/IMG_6311.JPG)

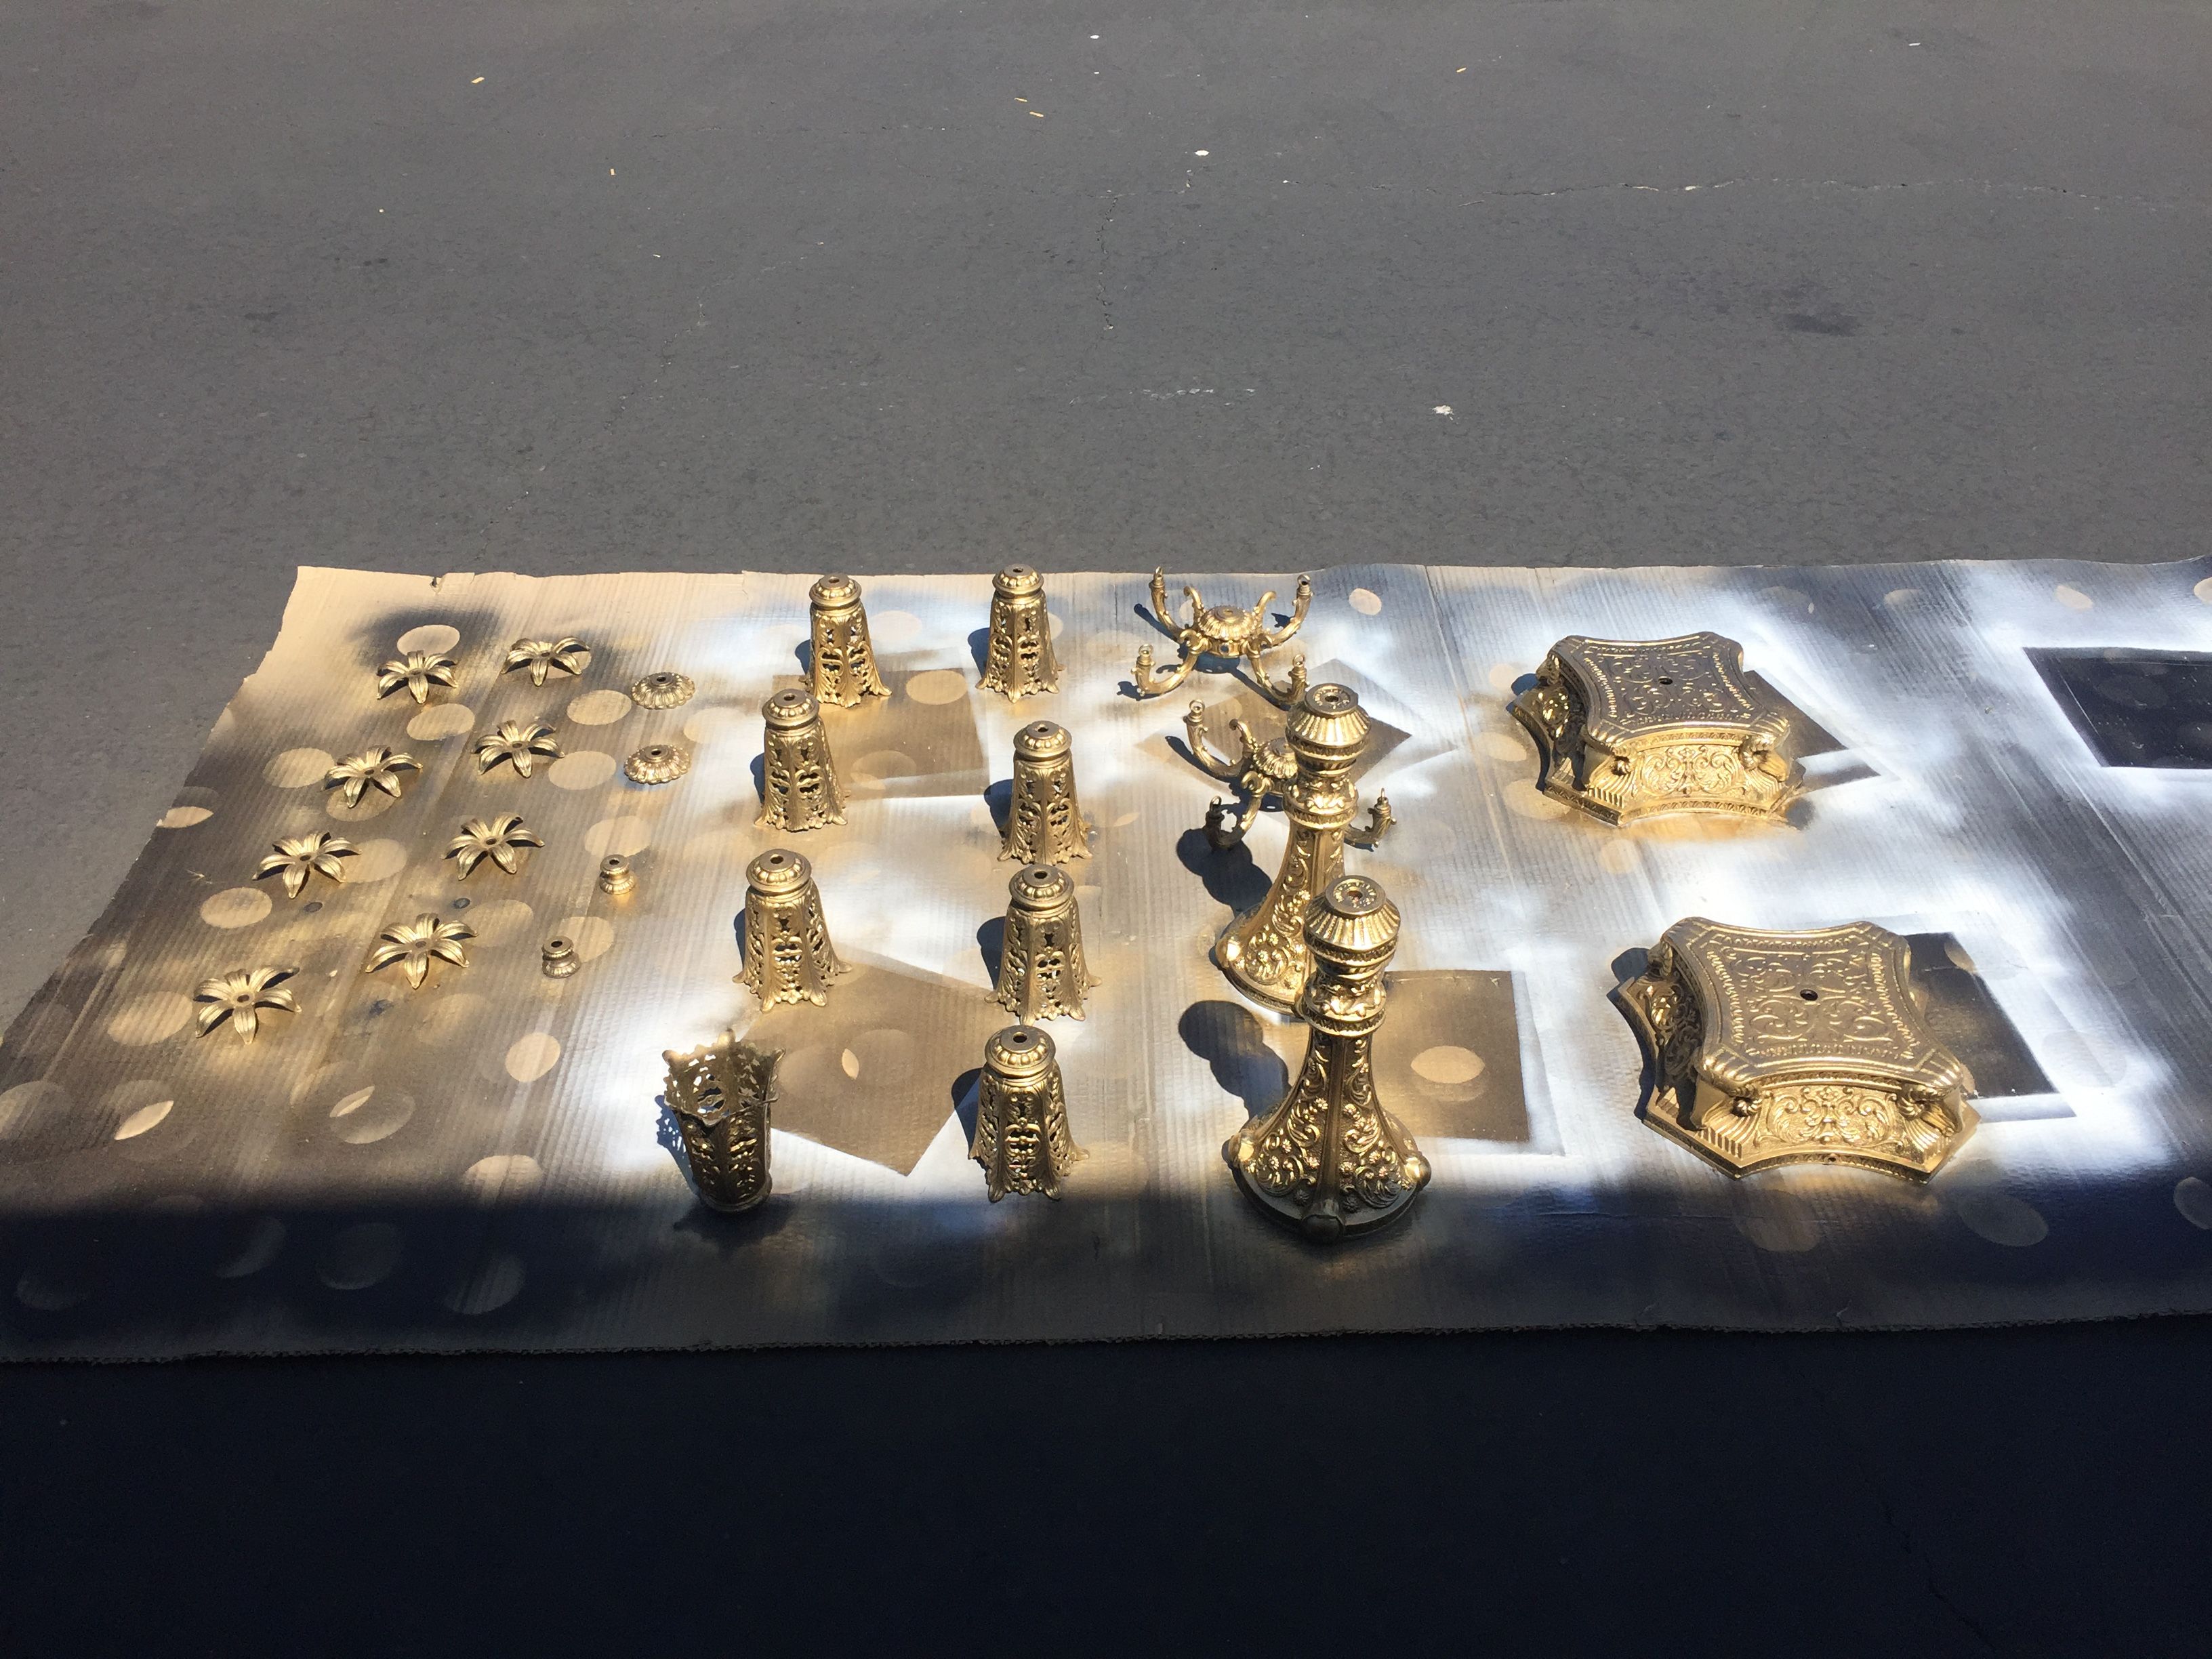
First you'll need to add the adhesive with a fine horse hair brush. Applying it evenly until transparent. 

![IMG_6319.JPG](https://steemitimages.com/DQmRaDHTeTtdAHGcpPgpKtpzfSu7iHpQ9WS7d1pA1T2Vbdi/IMG_6319.JPG)

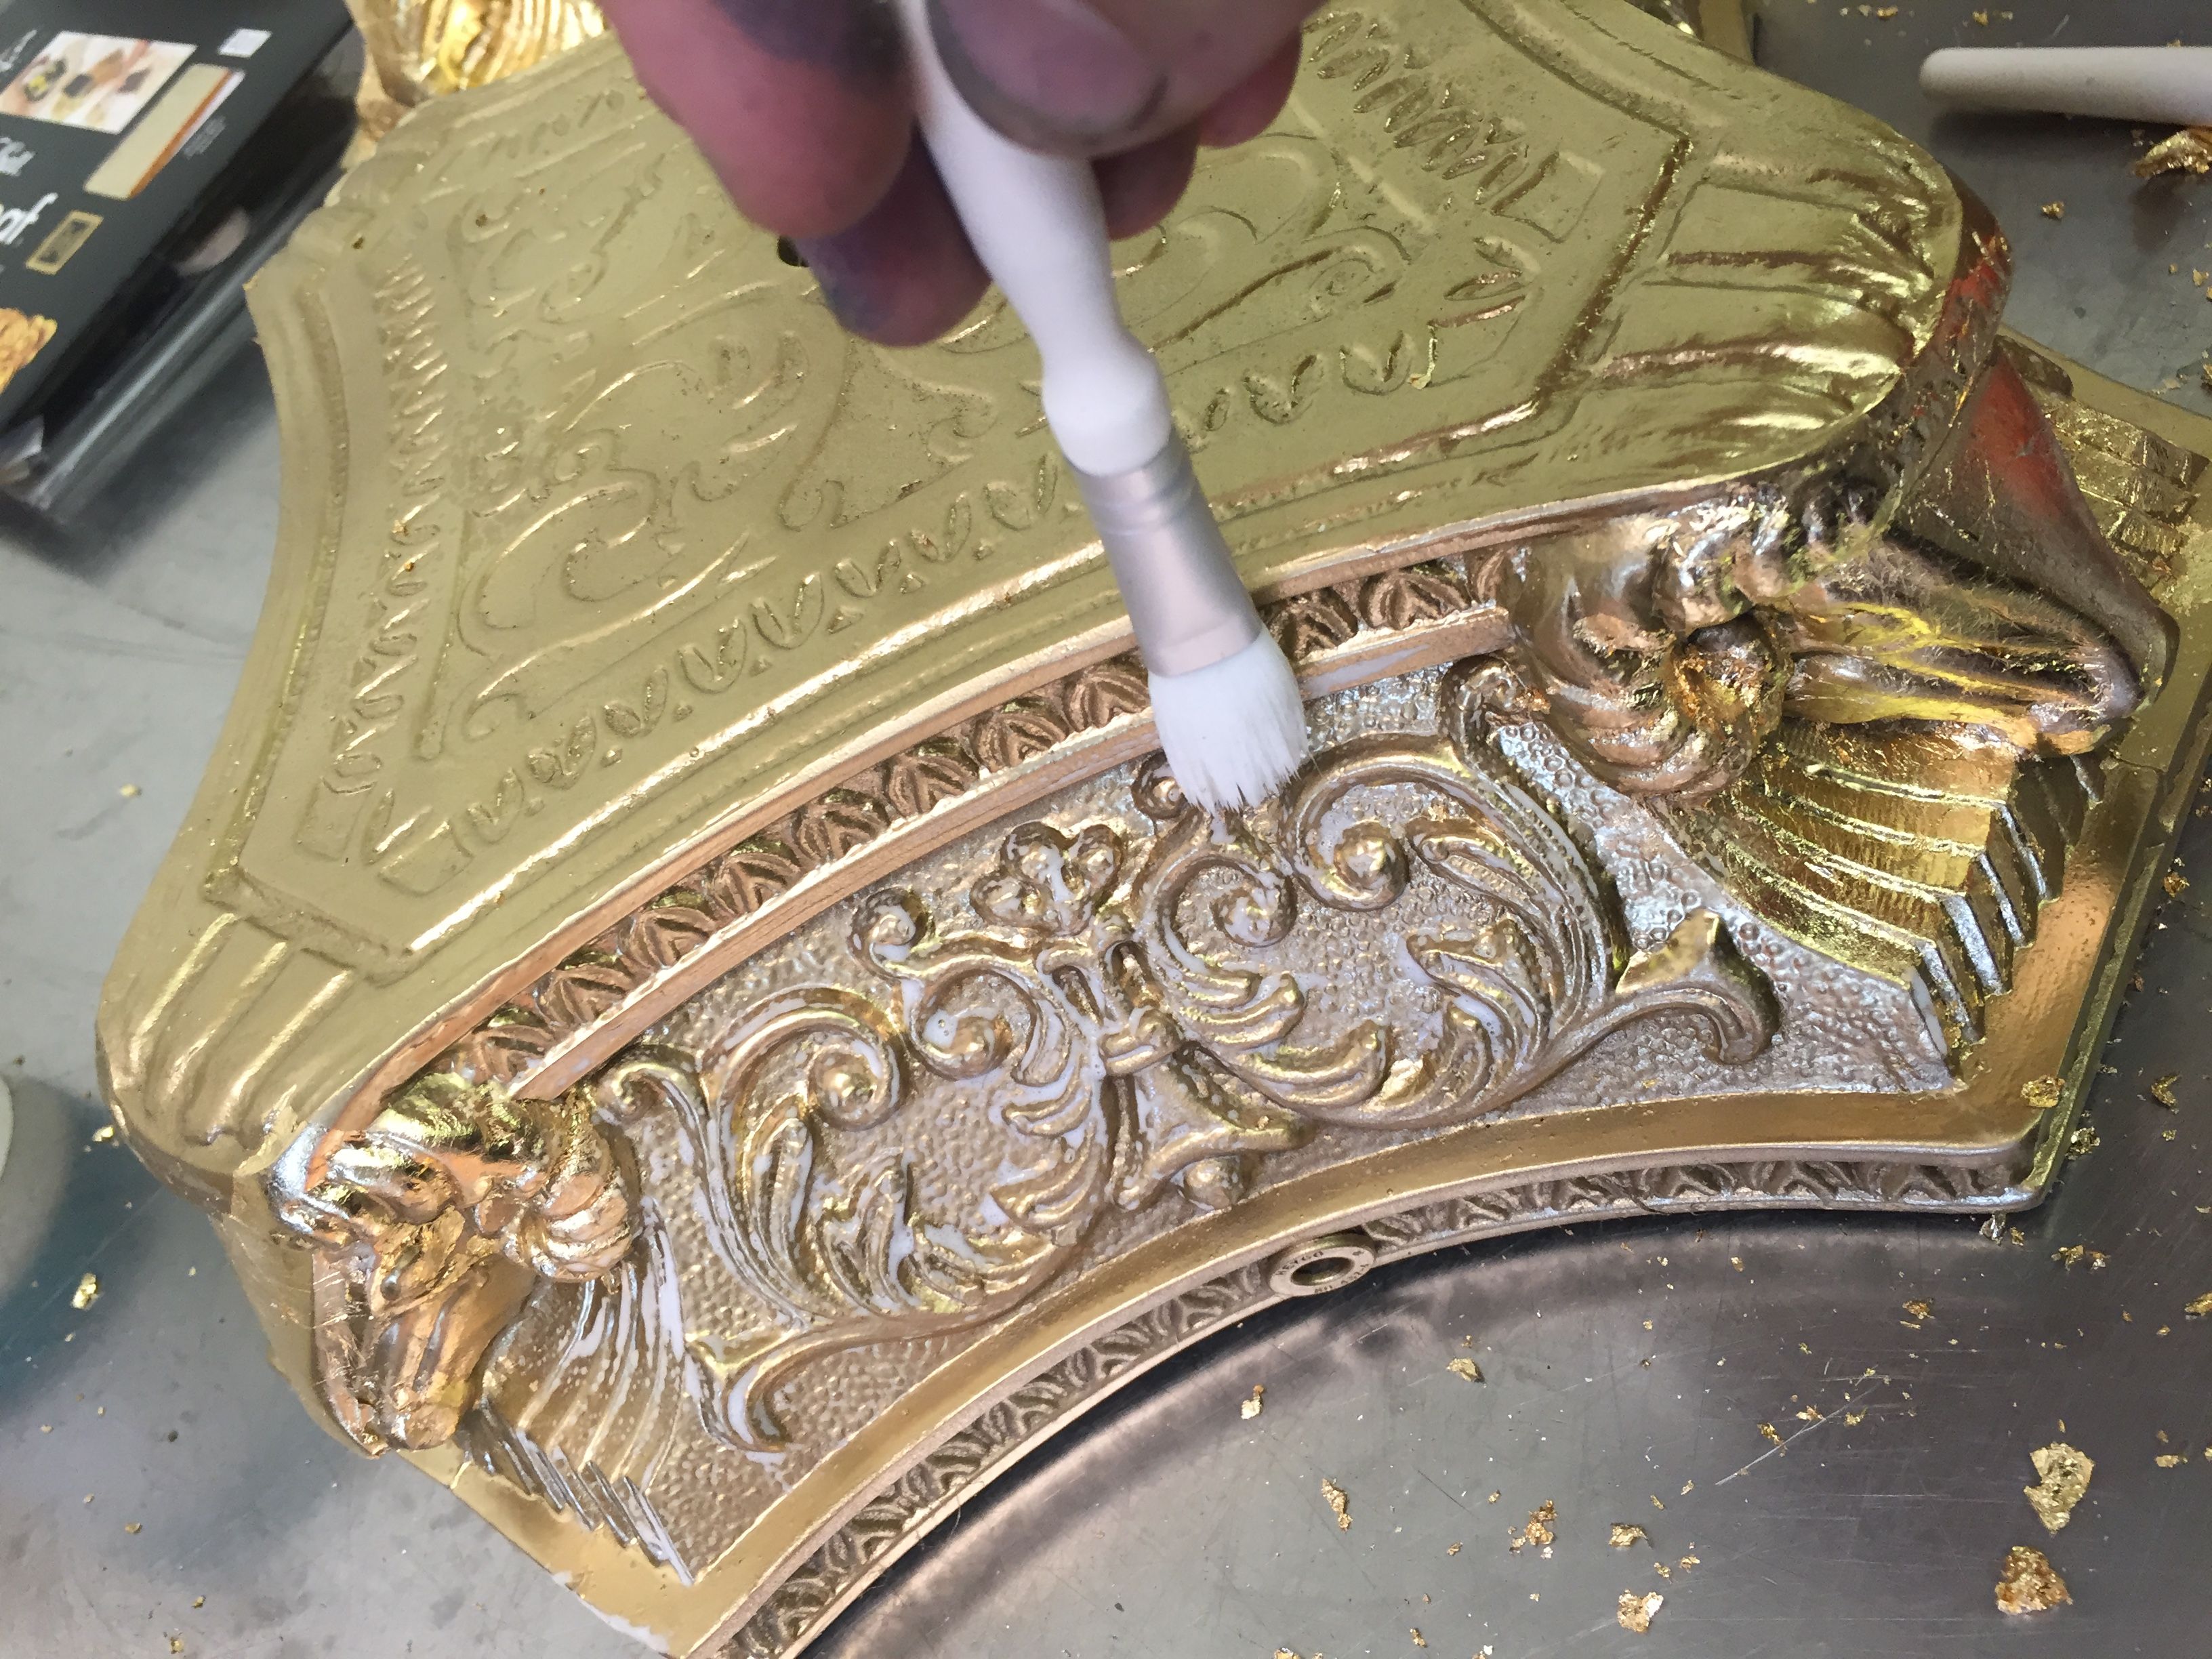
Then comes the gold foil.

![IMG_6316.JPG](https://steemitimages.com/DQmP256tdaHoJxc2cdALqPhnJHUG8bvNTumHQEbKfmjTvaG/IMG_6316.JPG)

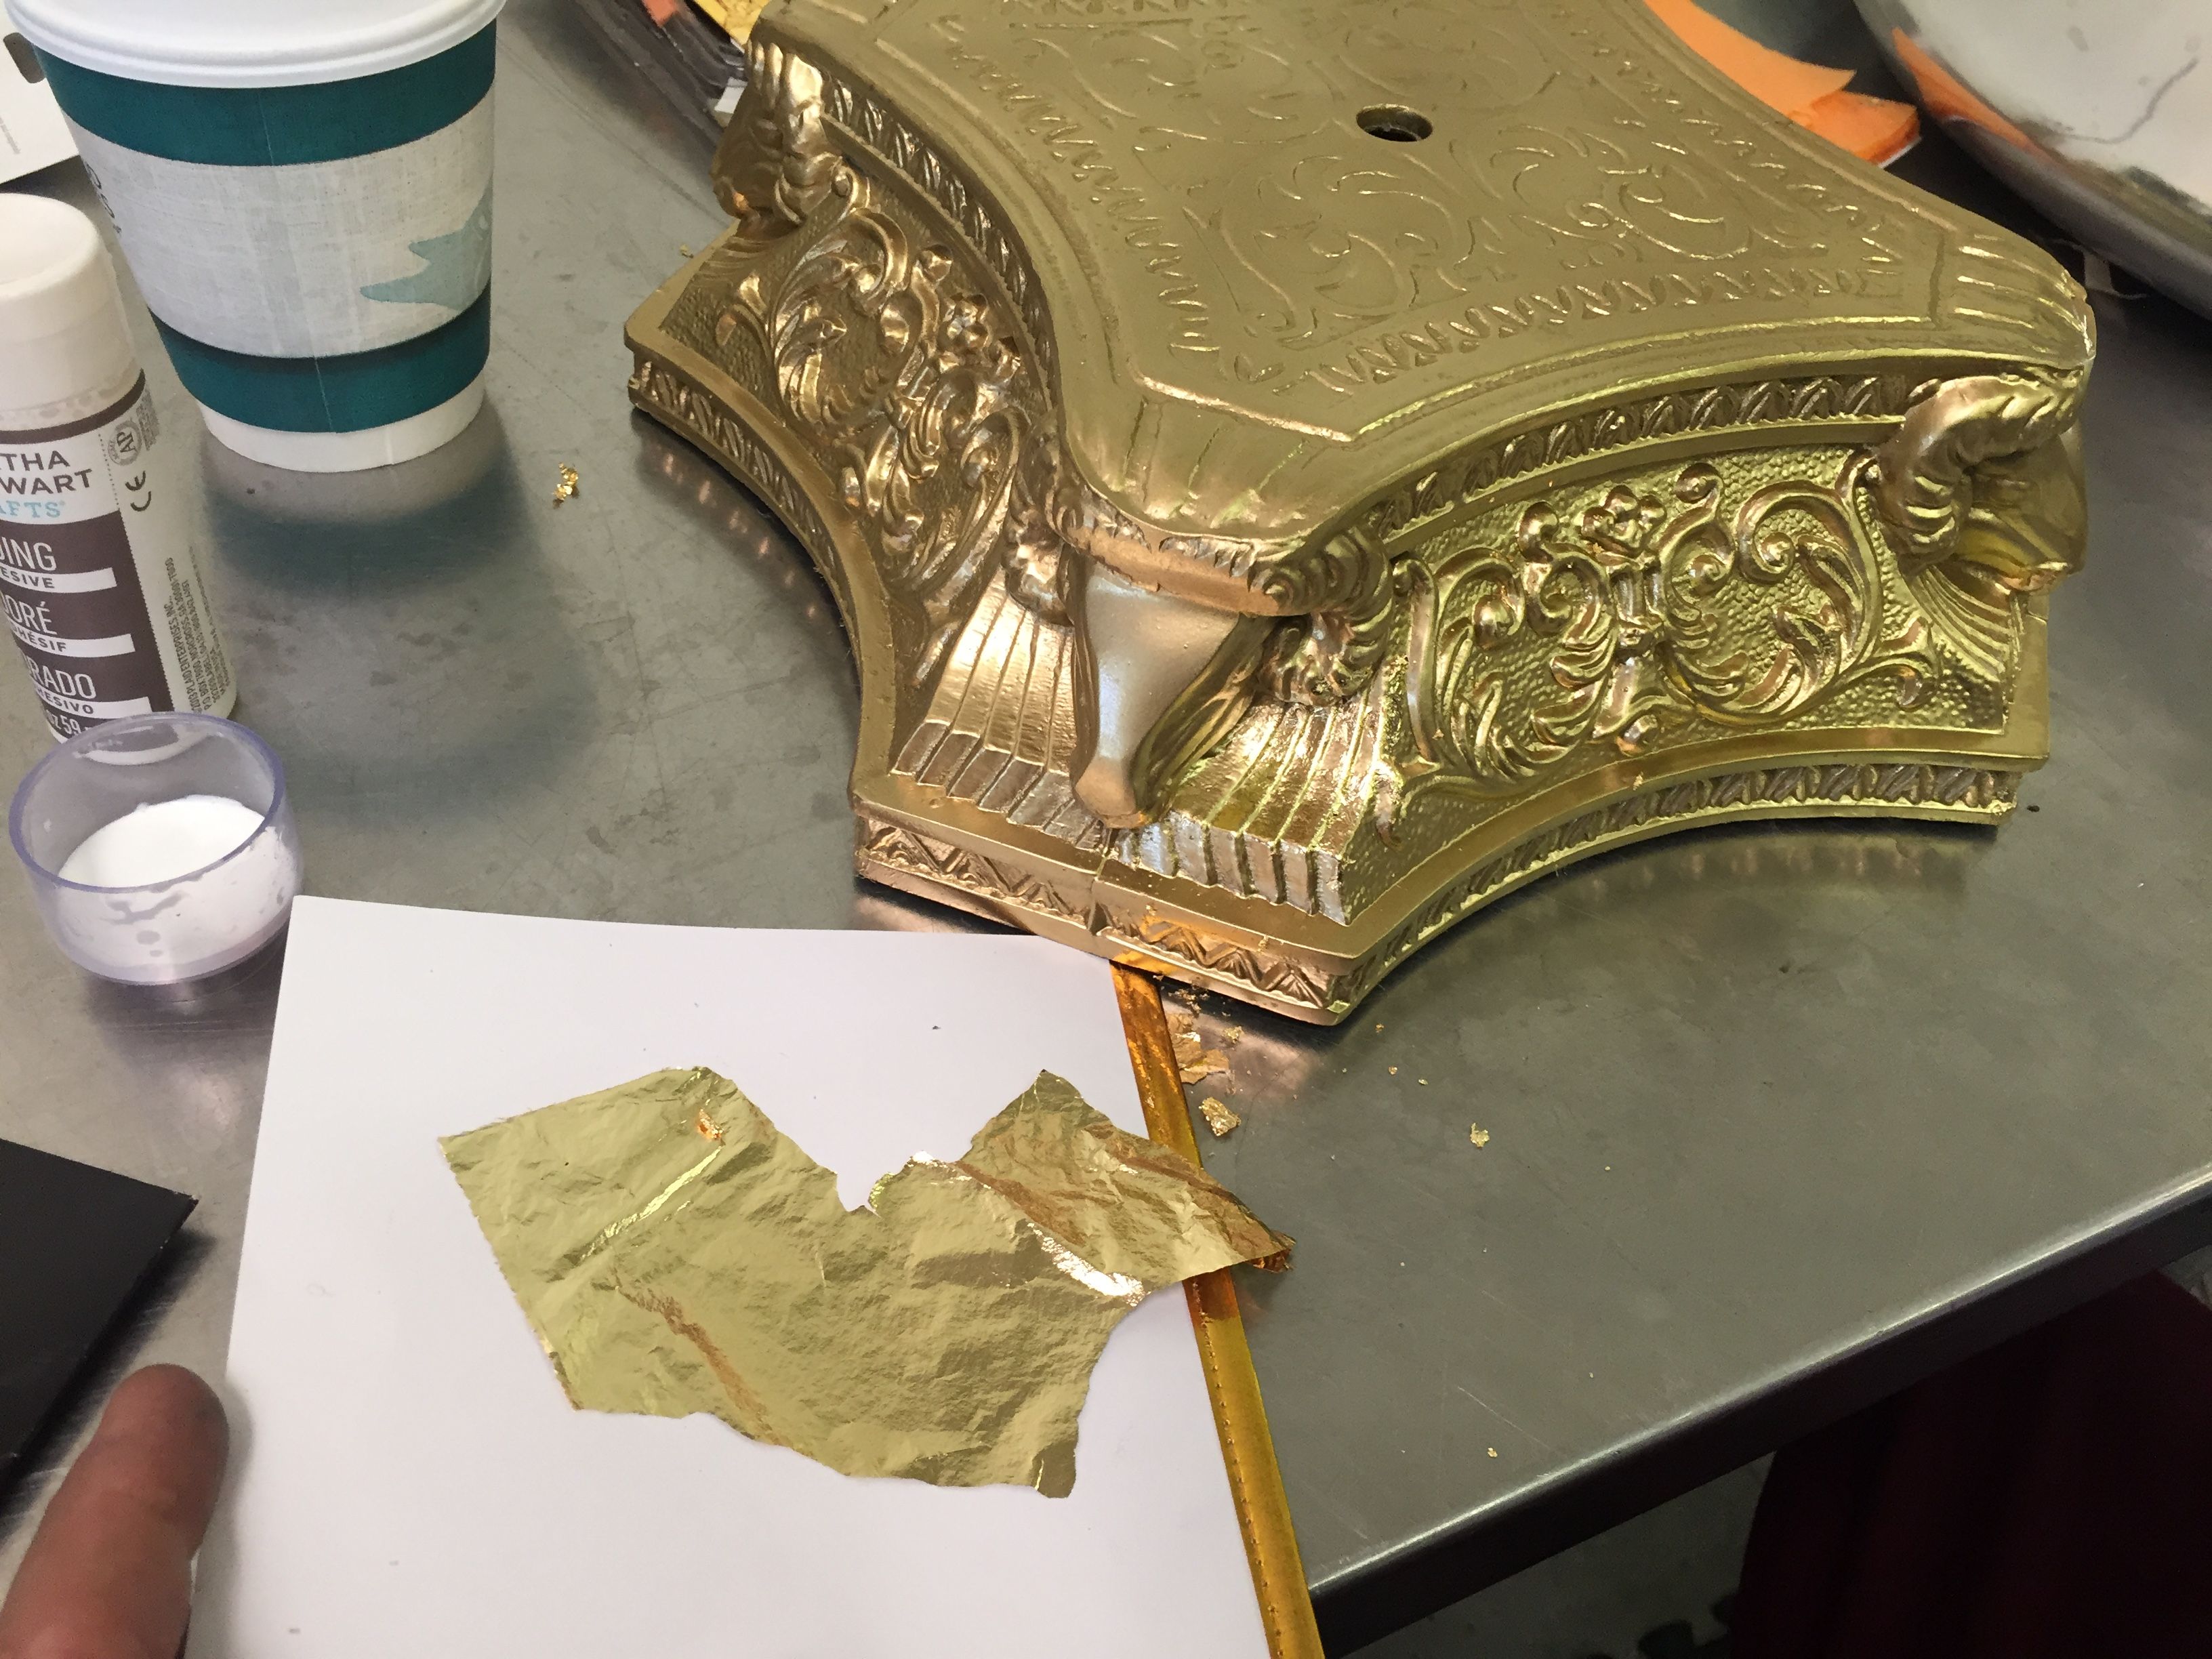
Then the application.

![IMG_6317.JPG](https://steemitimages.com/DQmQLzZucEtLHQ5e6CWZQFsRKCXhoMUDiMjdHg7x1RJRni2/IMG_6317.JPG)

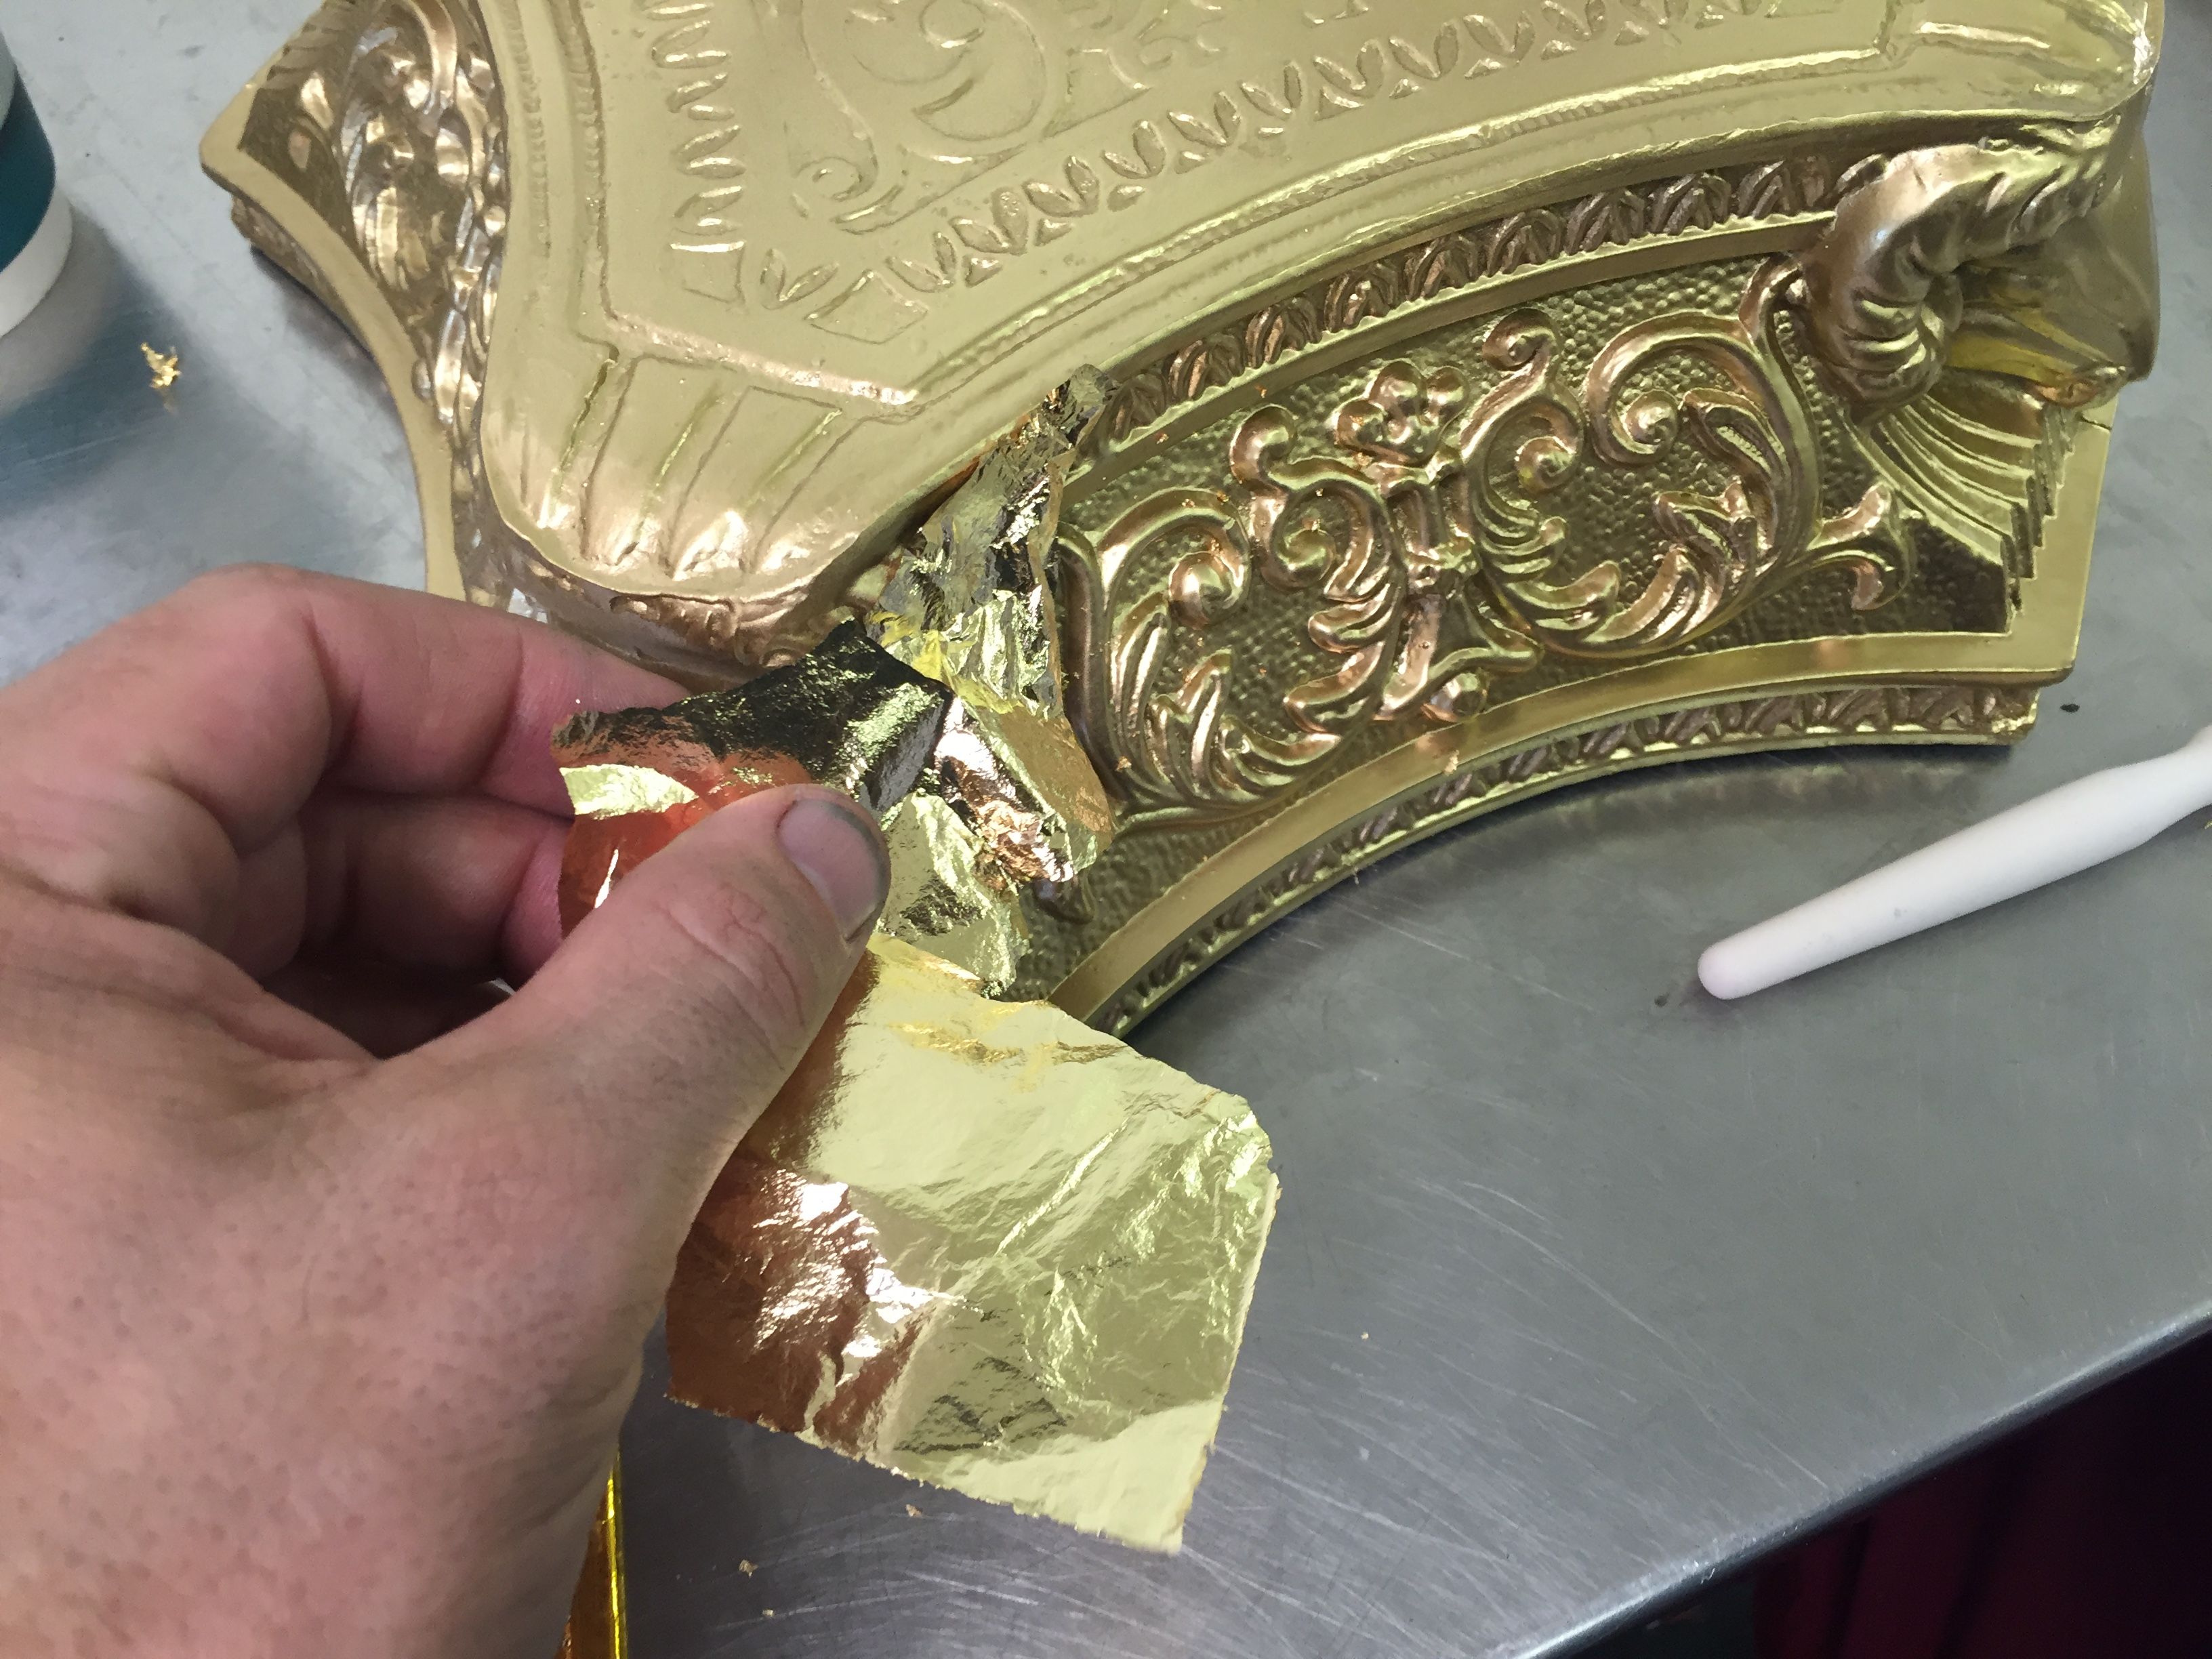
Then a different horse hair brush to push the gold foil into all the nooks and crannies.

![IMG_6318.JPG](https://steemitimages.com/DQmUJReiNB1jHNMqkLnW9uEa982JprbwvbdeKPe5inCFjiH/IMG_6318.JPG)

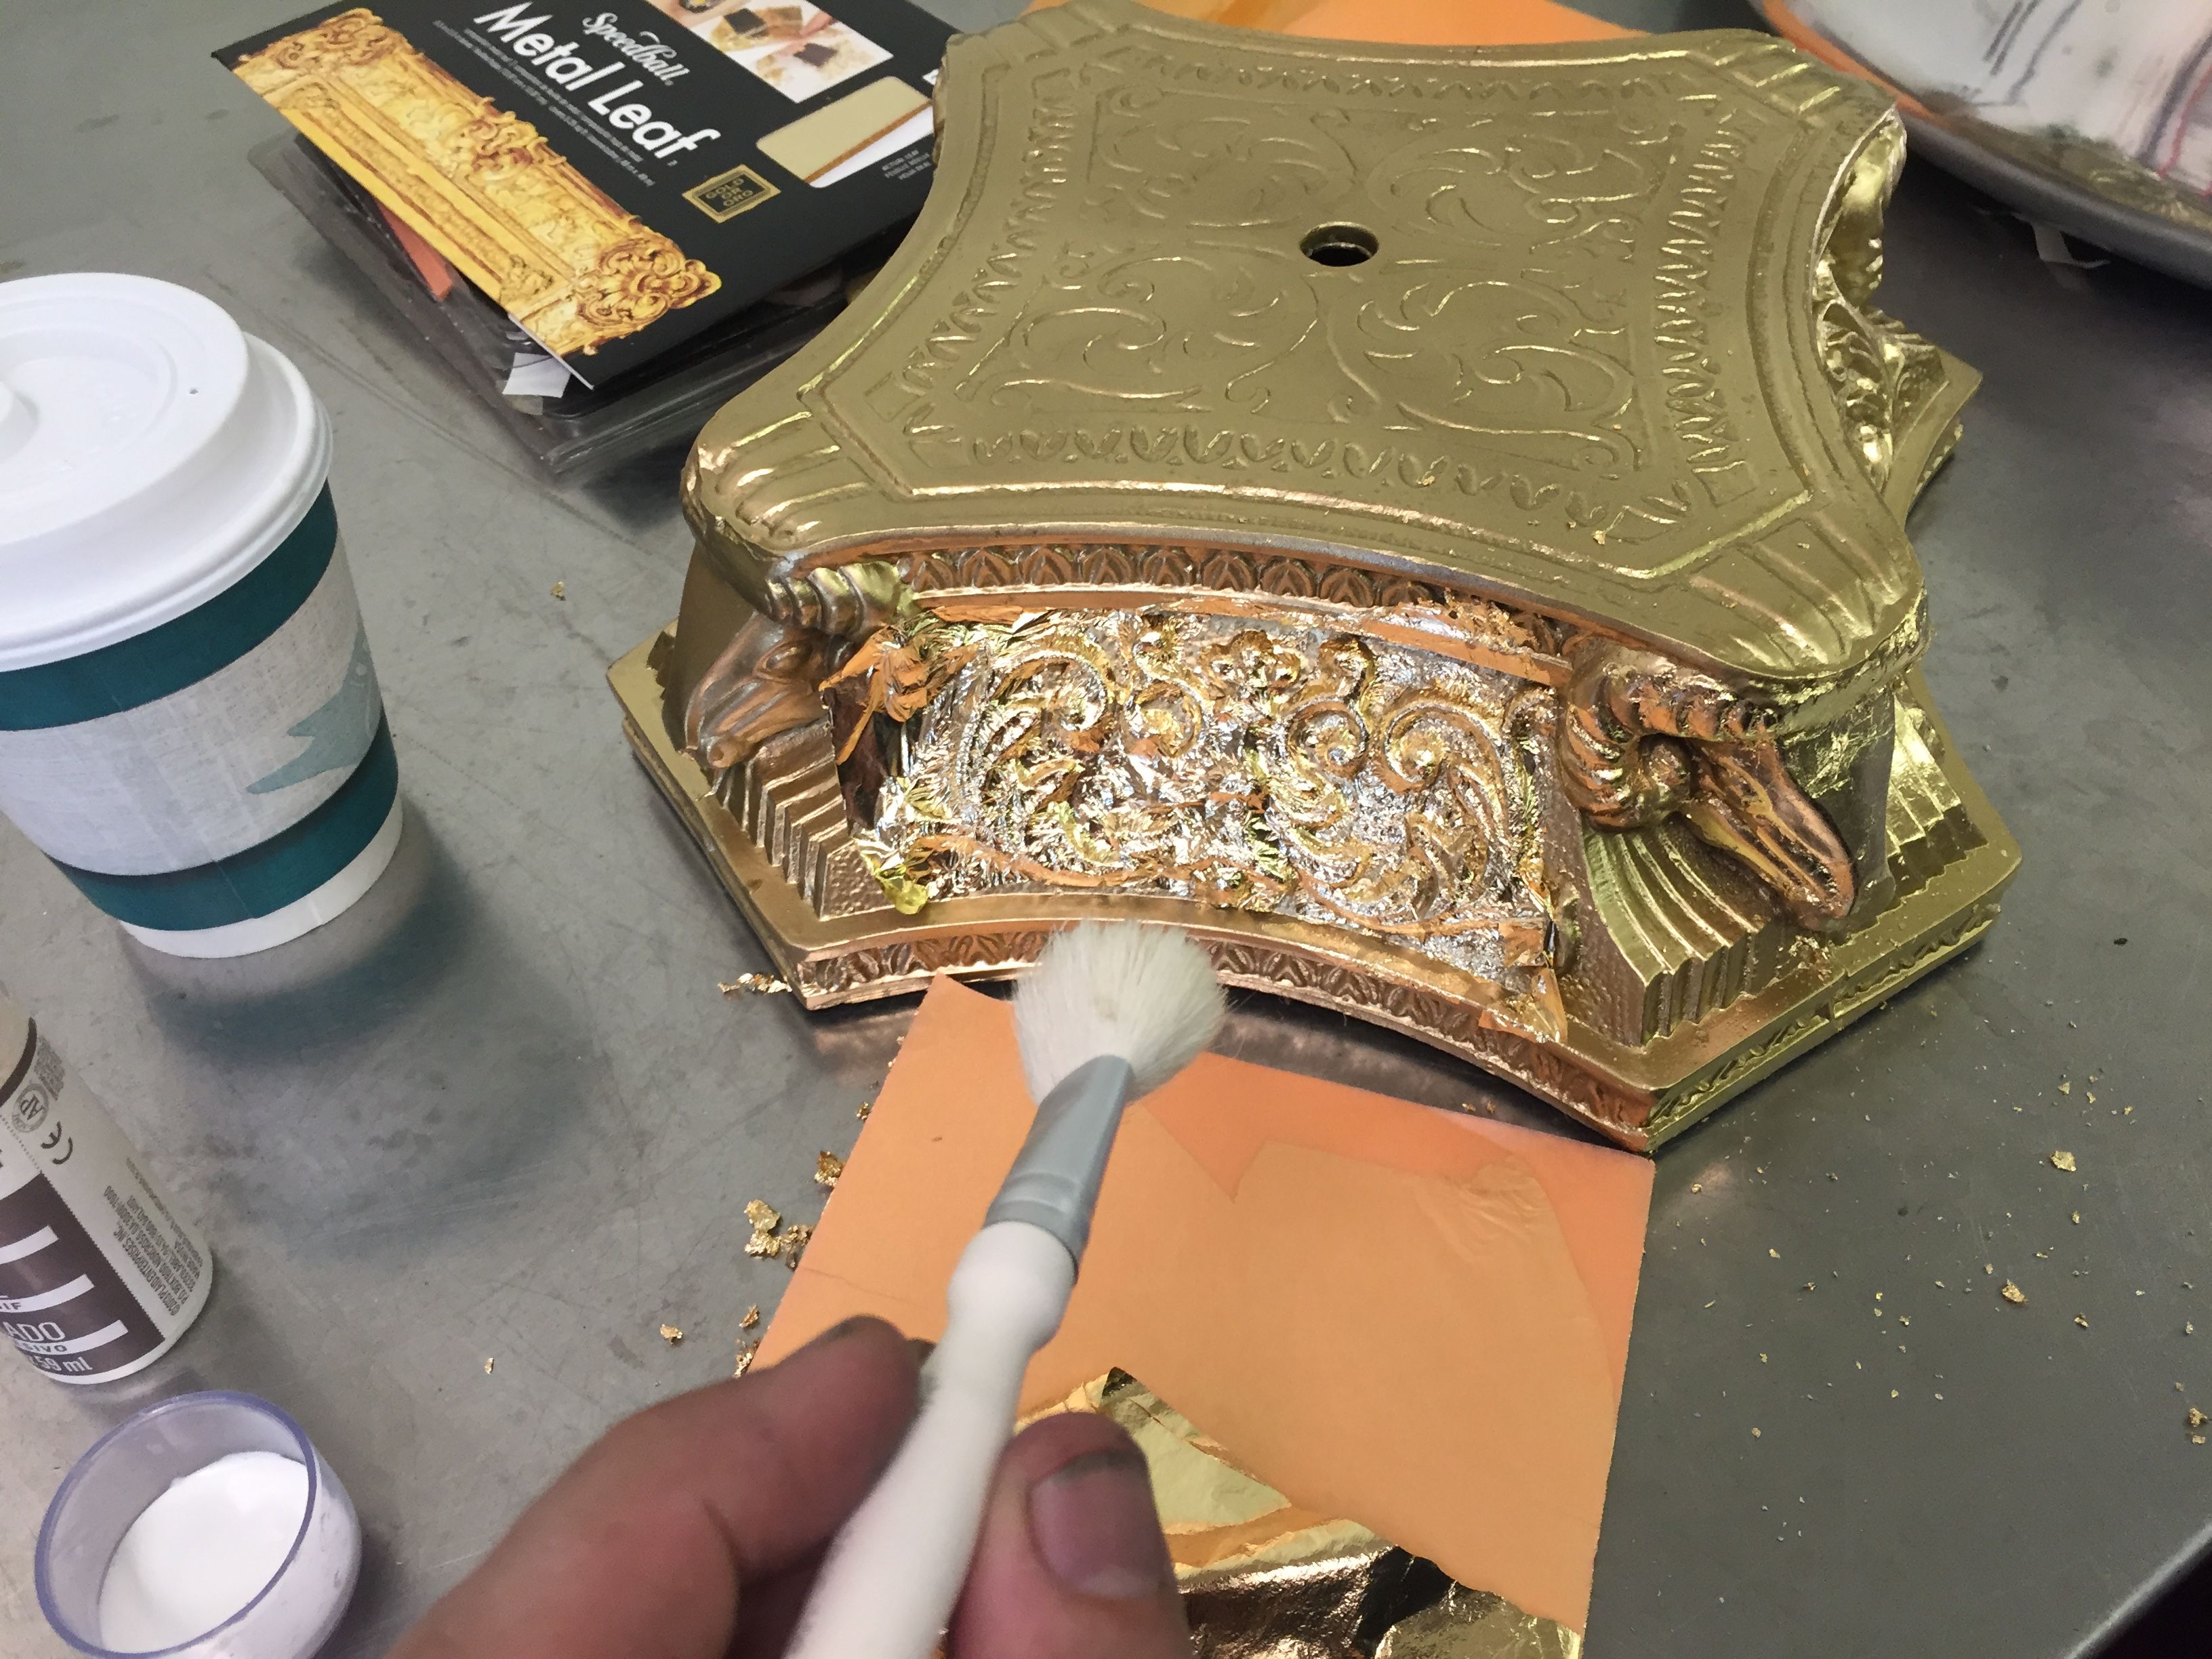
Now that's all done. lets move onto the assembly of the light bells. 

![IMG_6340.JPG](https://steemitimages.com/DQmRhuNrKvM6PMihpzPbn3LeHdPAzzFZkf2UoUZS2r67jhU/IMG_6340.JPG)

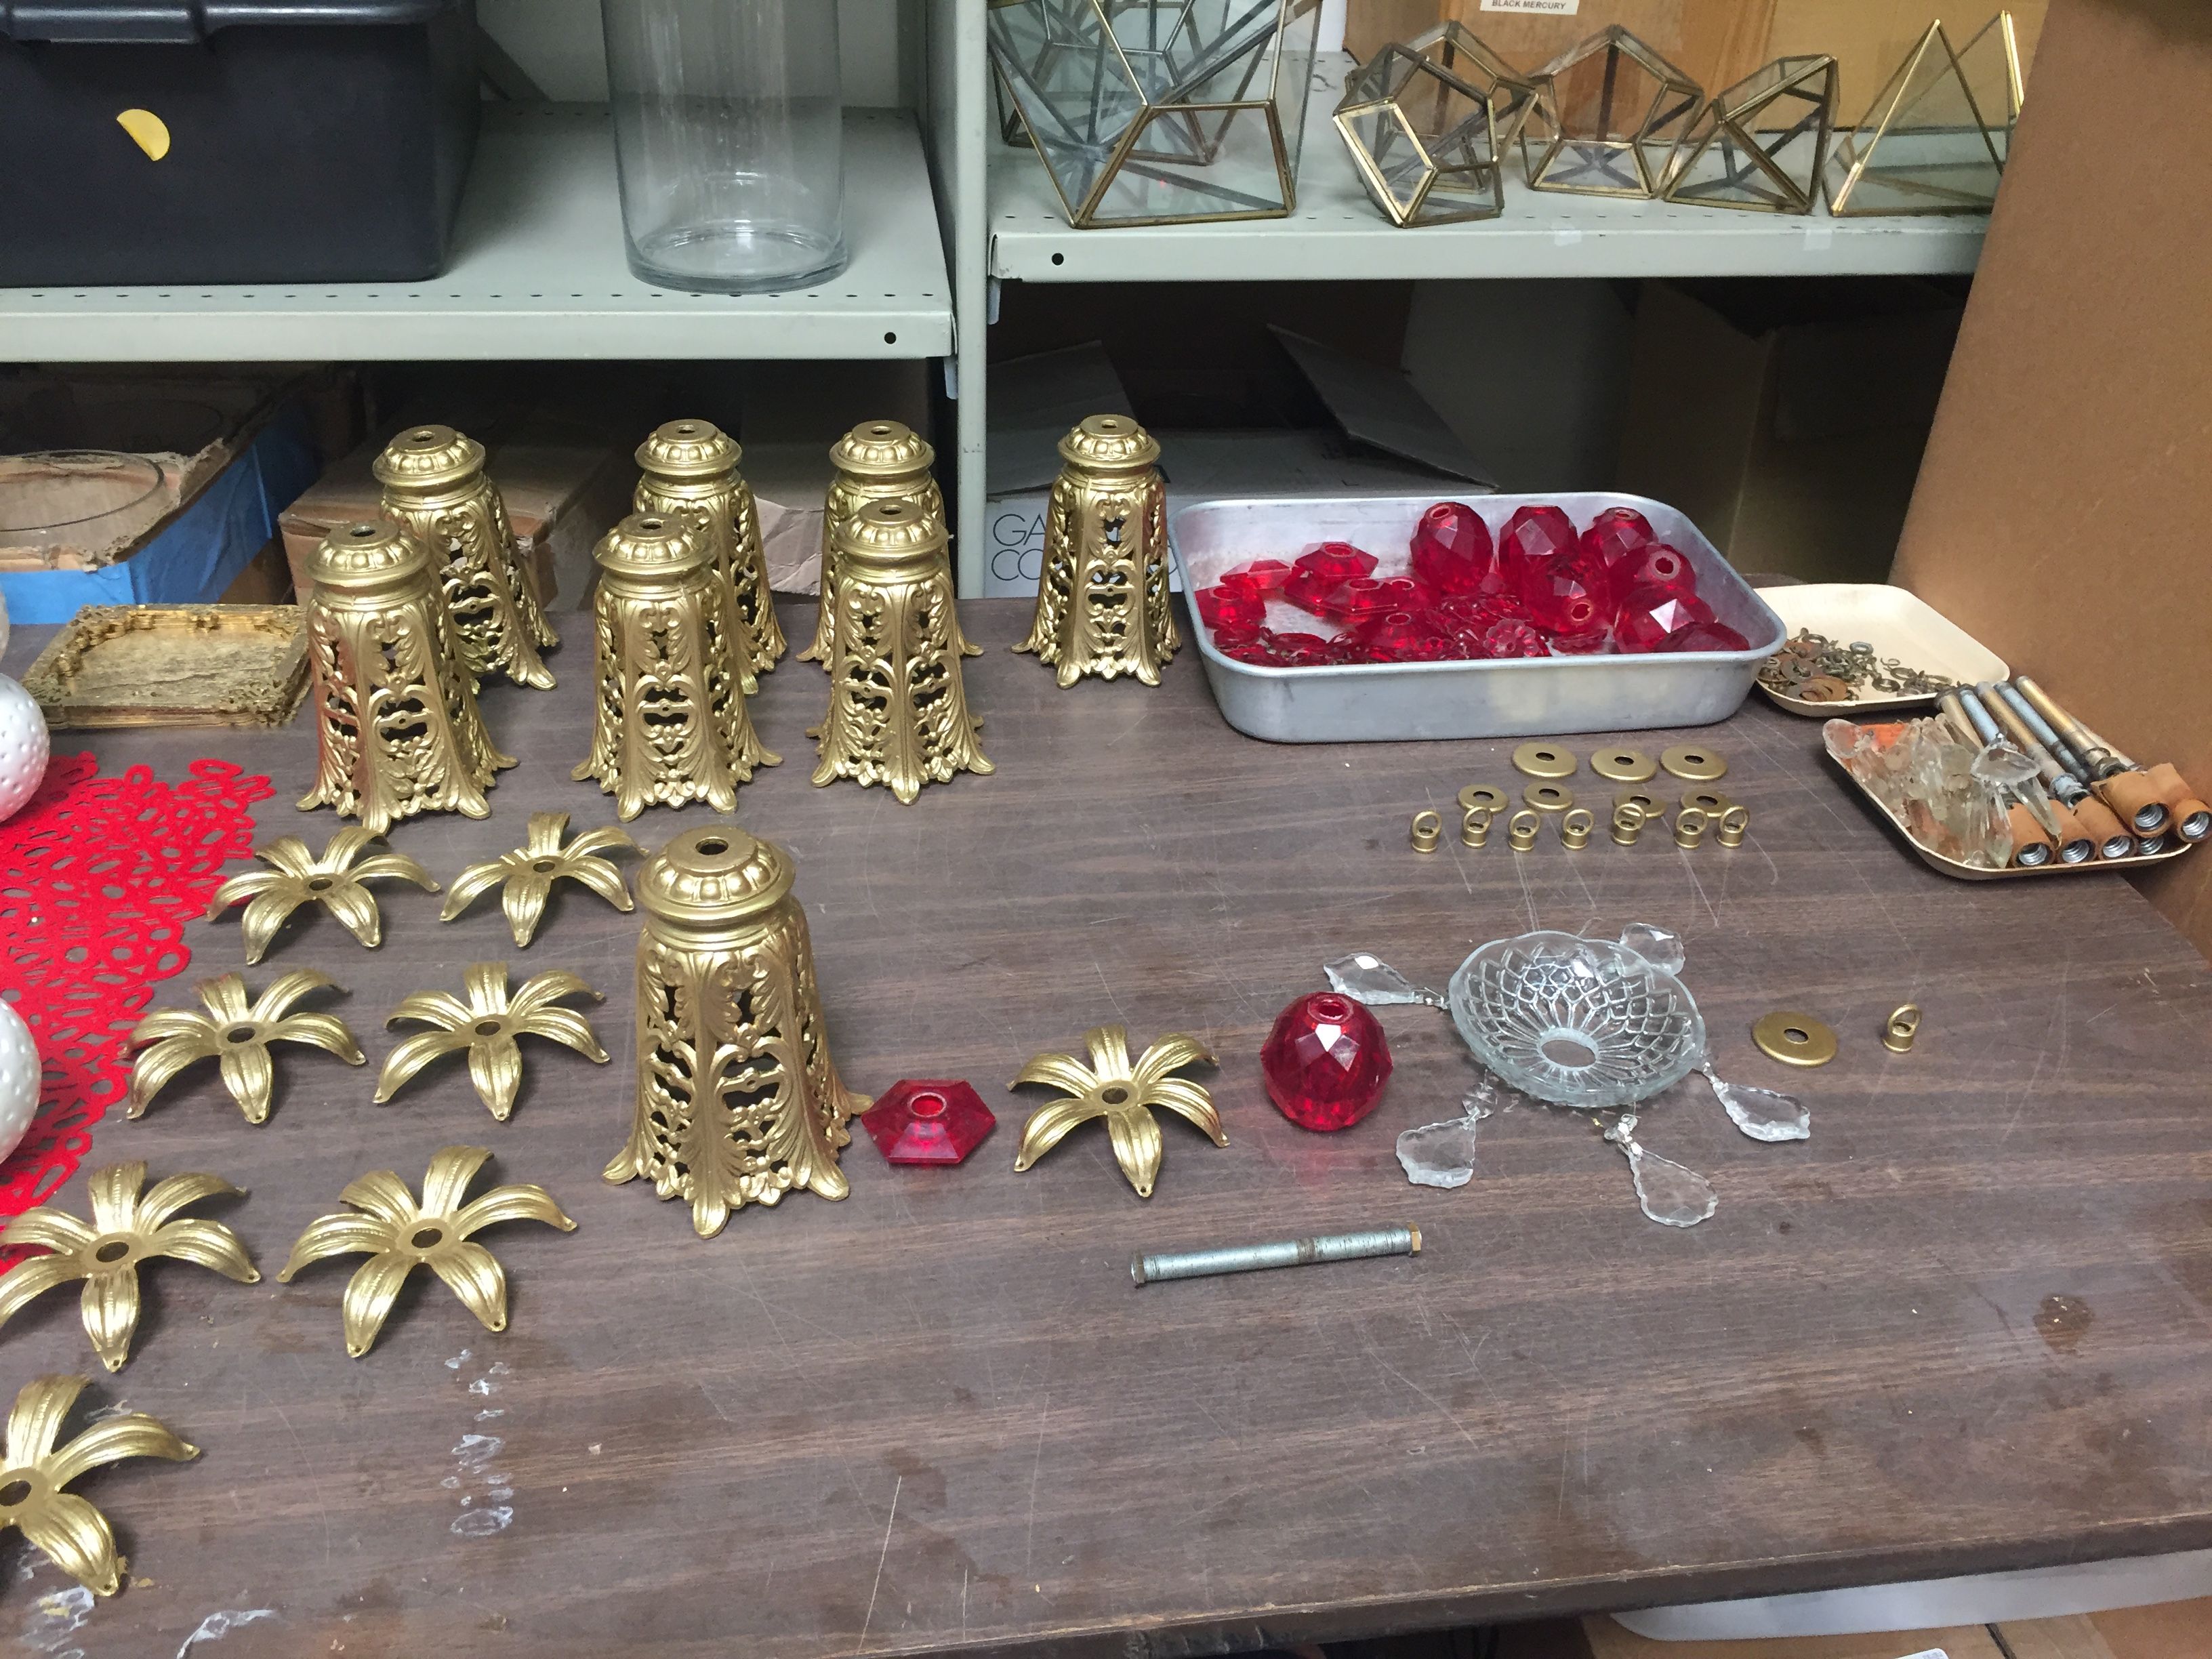
We added in these little beauties to add to go towards the desired look of the client.

![IMG_6338.JPG](https://steemitimages.com/DQmYpwSTEL6yKjrN9BW6GxDnbNeQCCPKG8BcvkF13T7VbyN/IMG_6338.JPG)

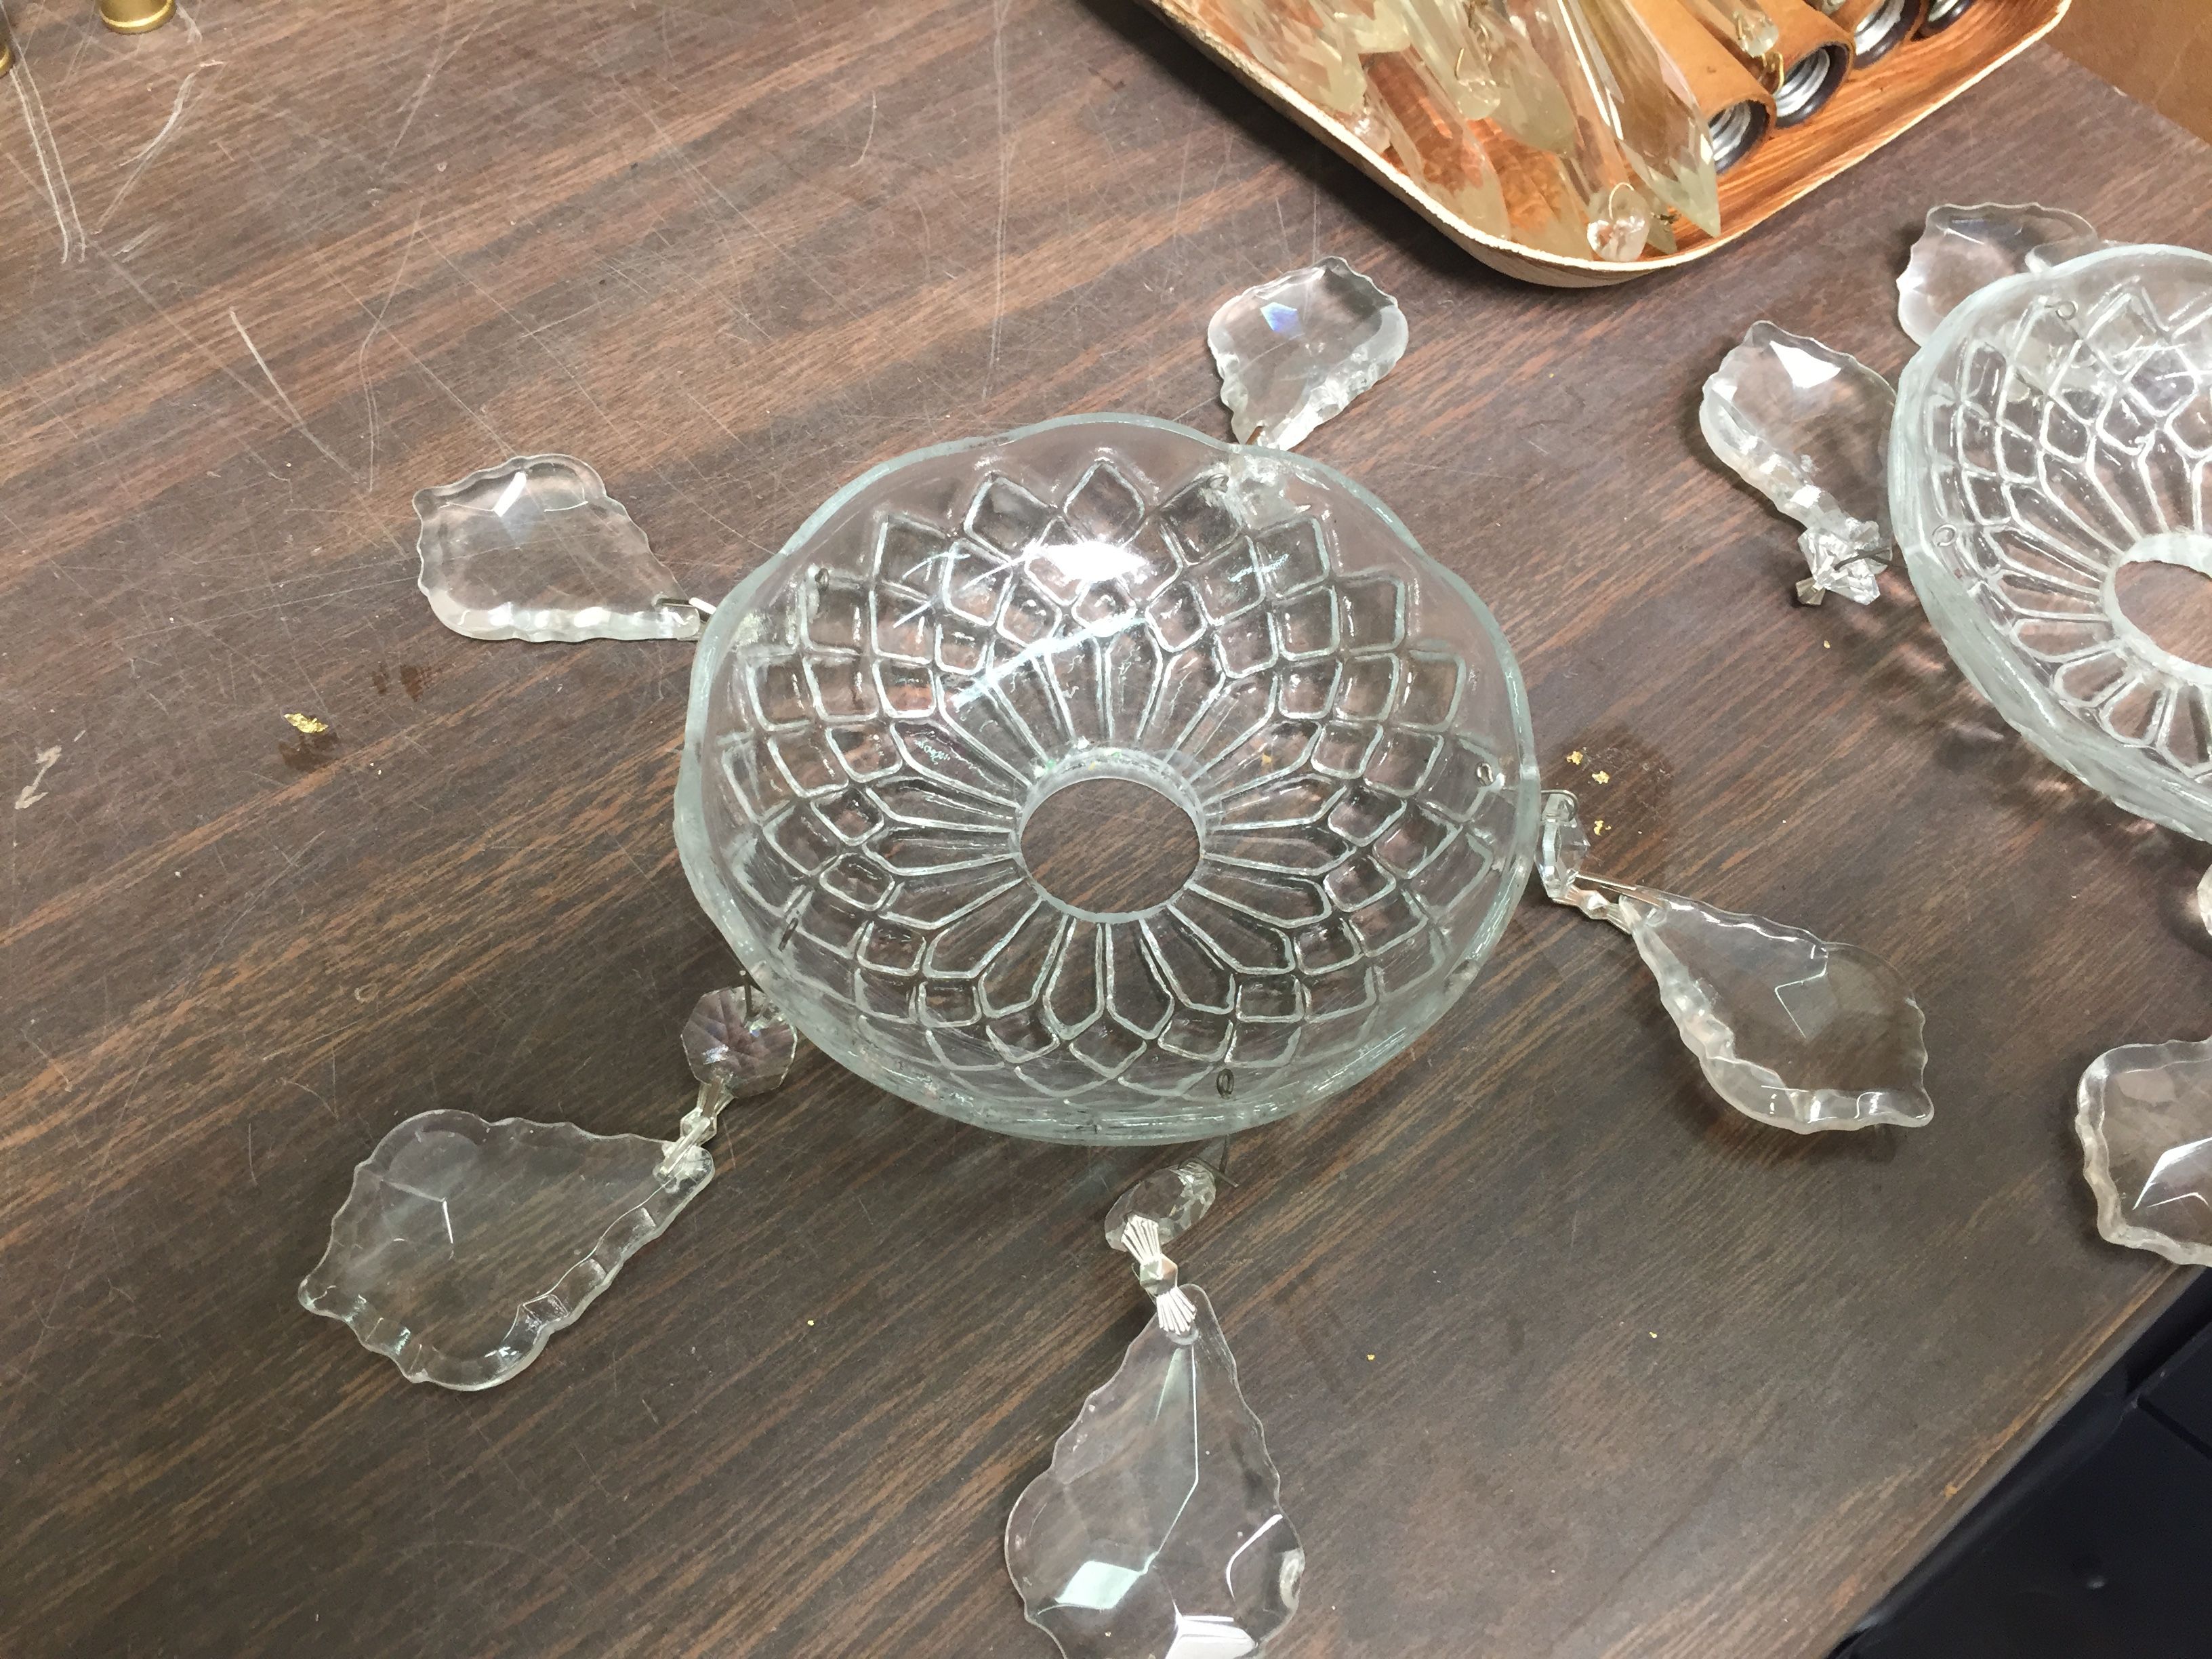
Here's some great results. =-D

![IMG_6343.JPG](https://steemitimages.com/DQmSxD3S123d7kfcrzGJjCtFtzVCPxqgPi1FMyc4LDbtYH9/IMG_6343.JPG)

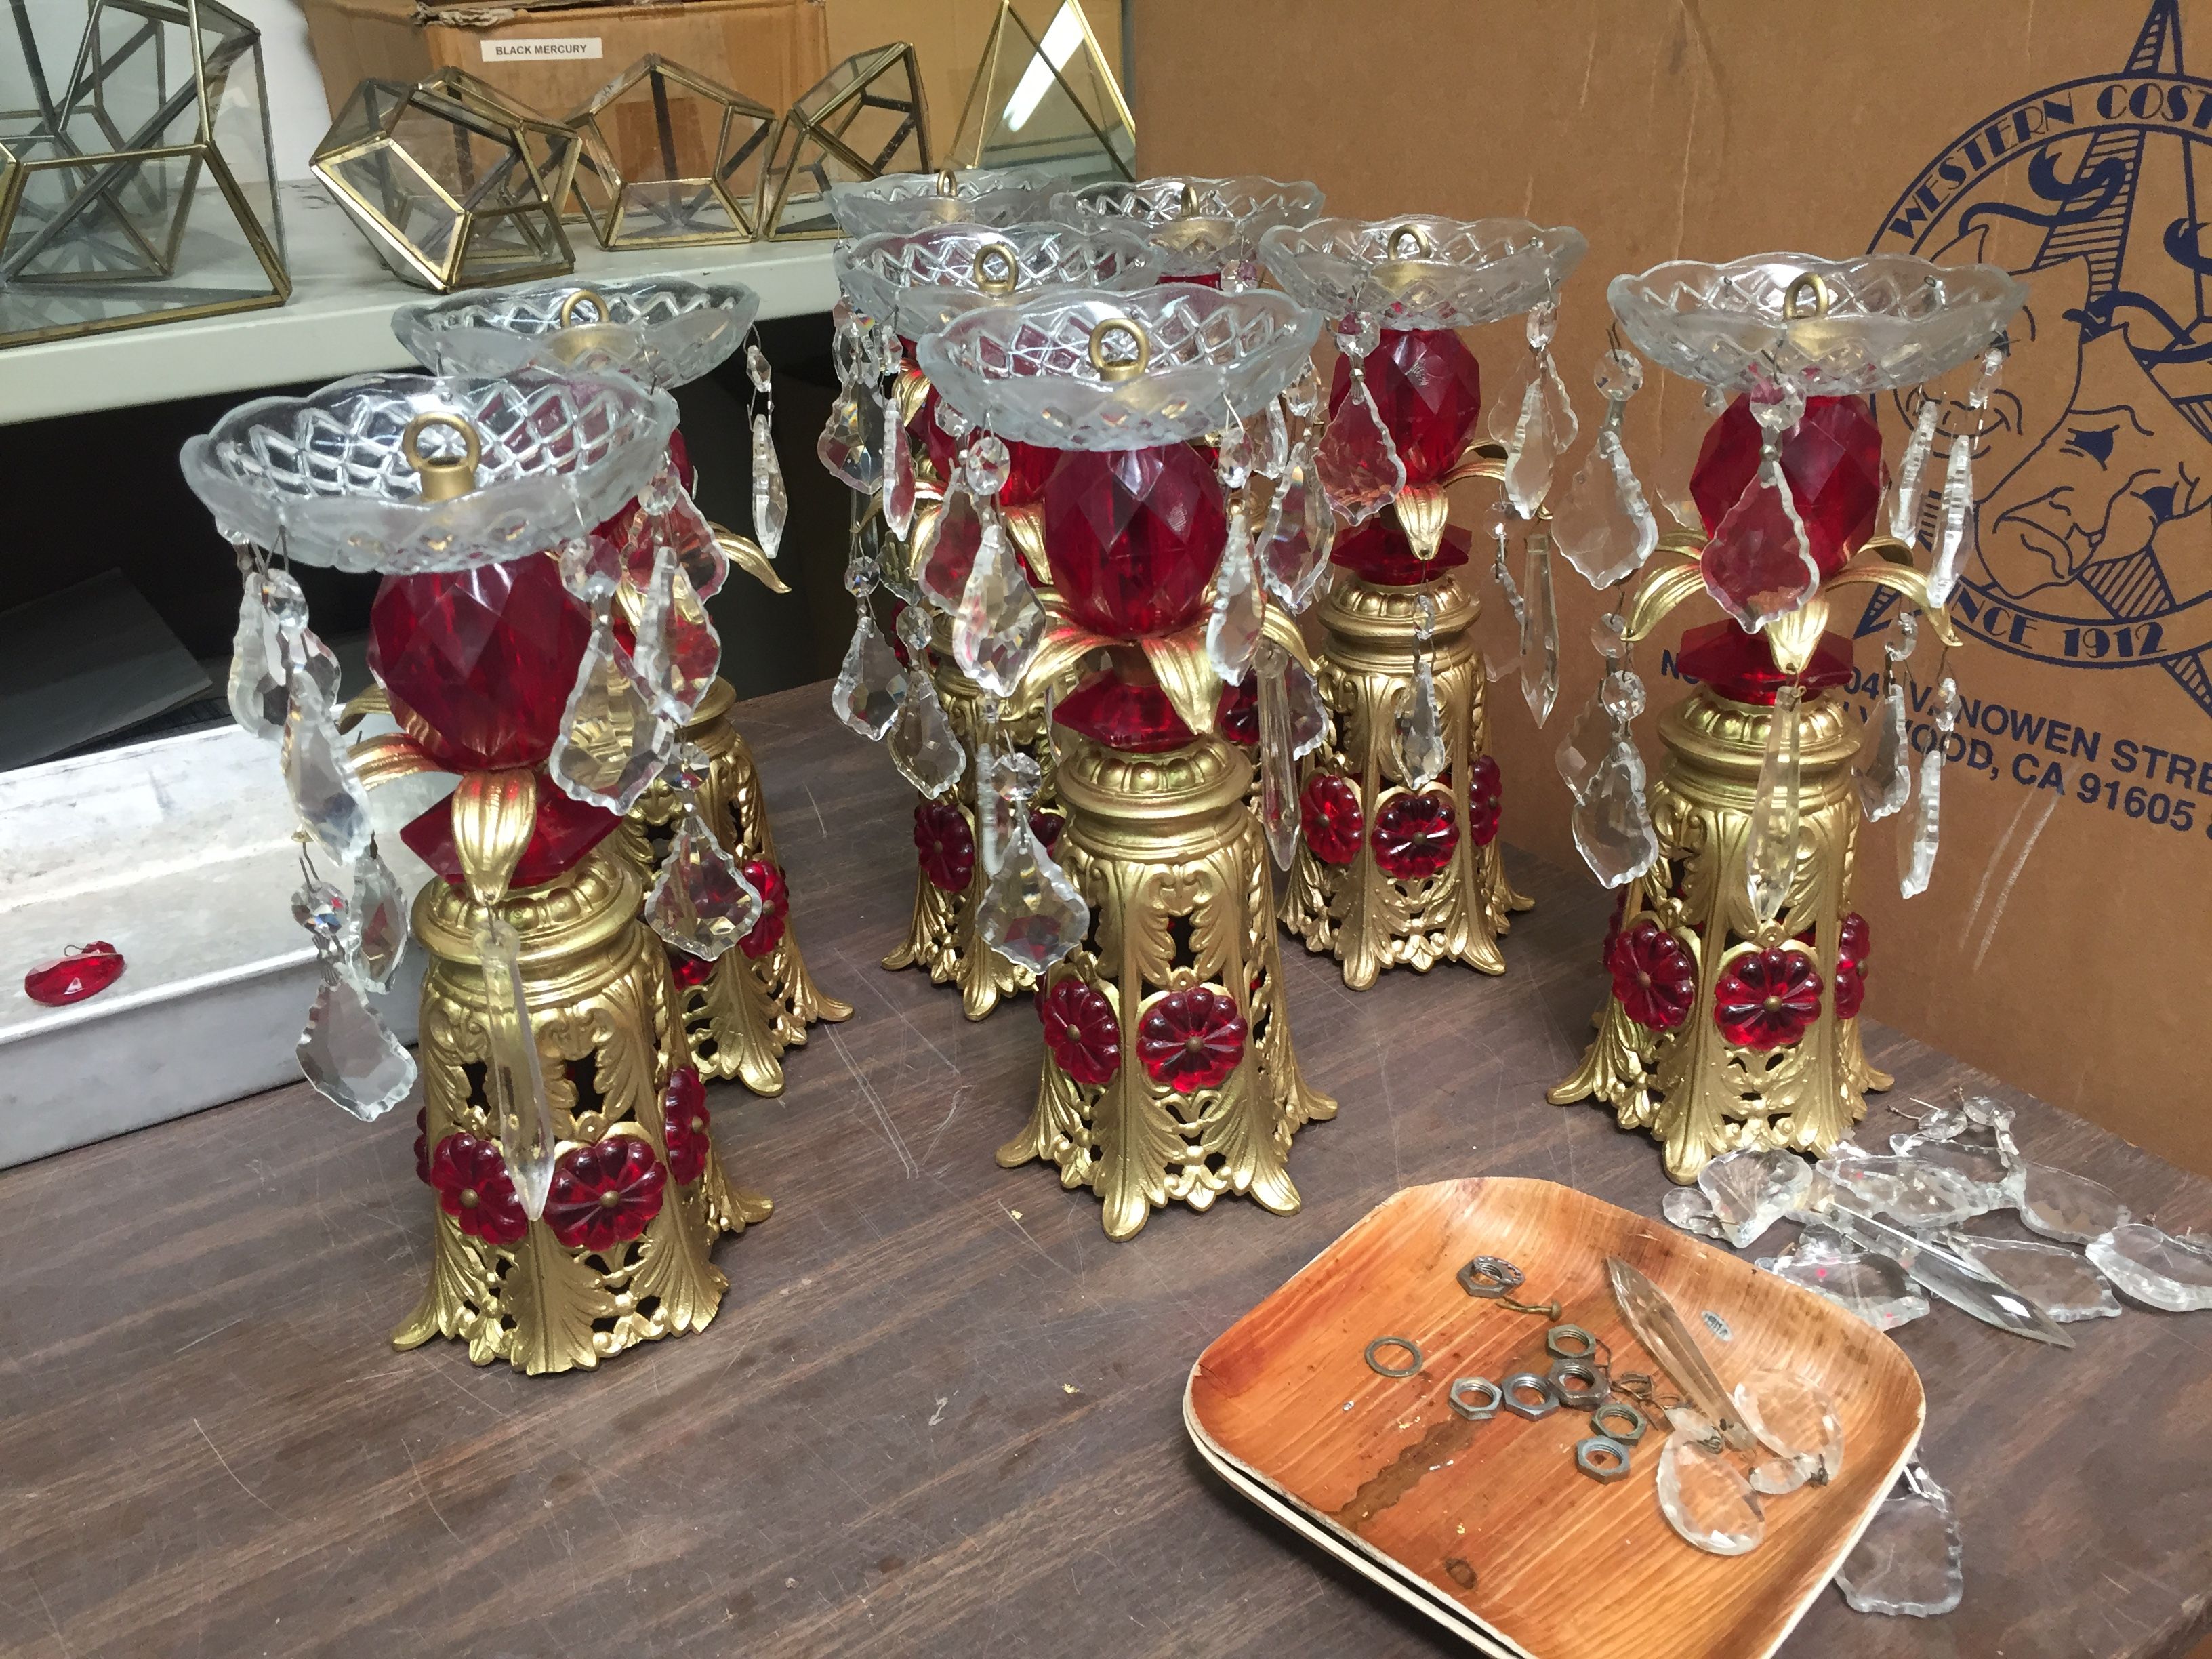
Now it's time to assemble all these parts. 

![IMG_6358.JPG](https://steemitimages.com/DQmRiFHoUmFXrKfdvf3wrfvQfcx2HXjN9aC1jVU4SRoFk89/IMG_6358.JPG)

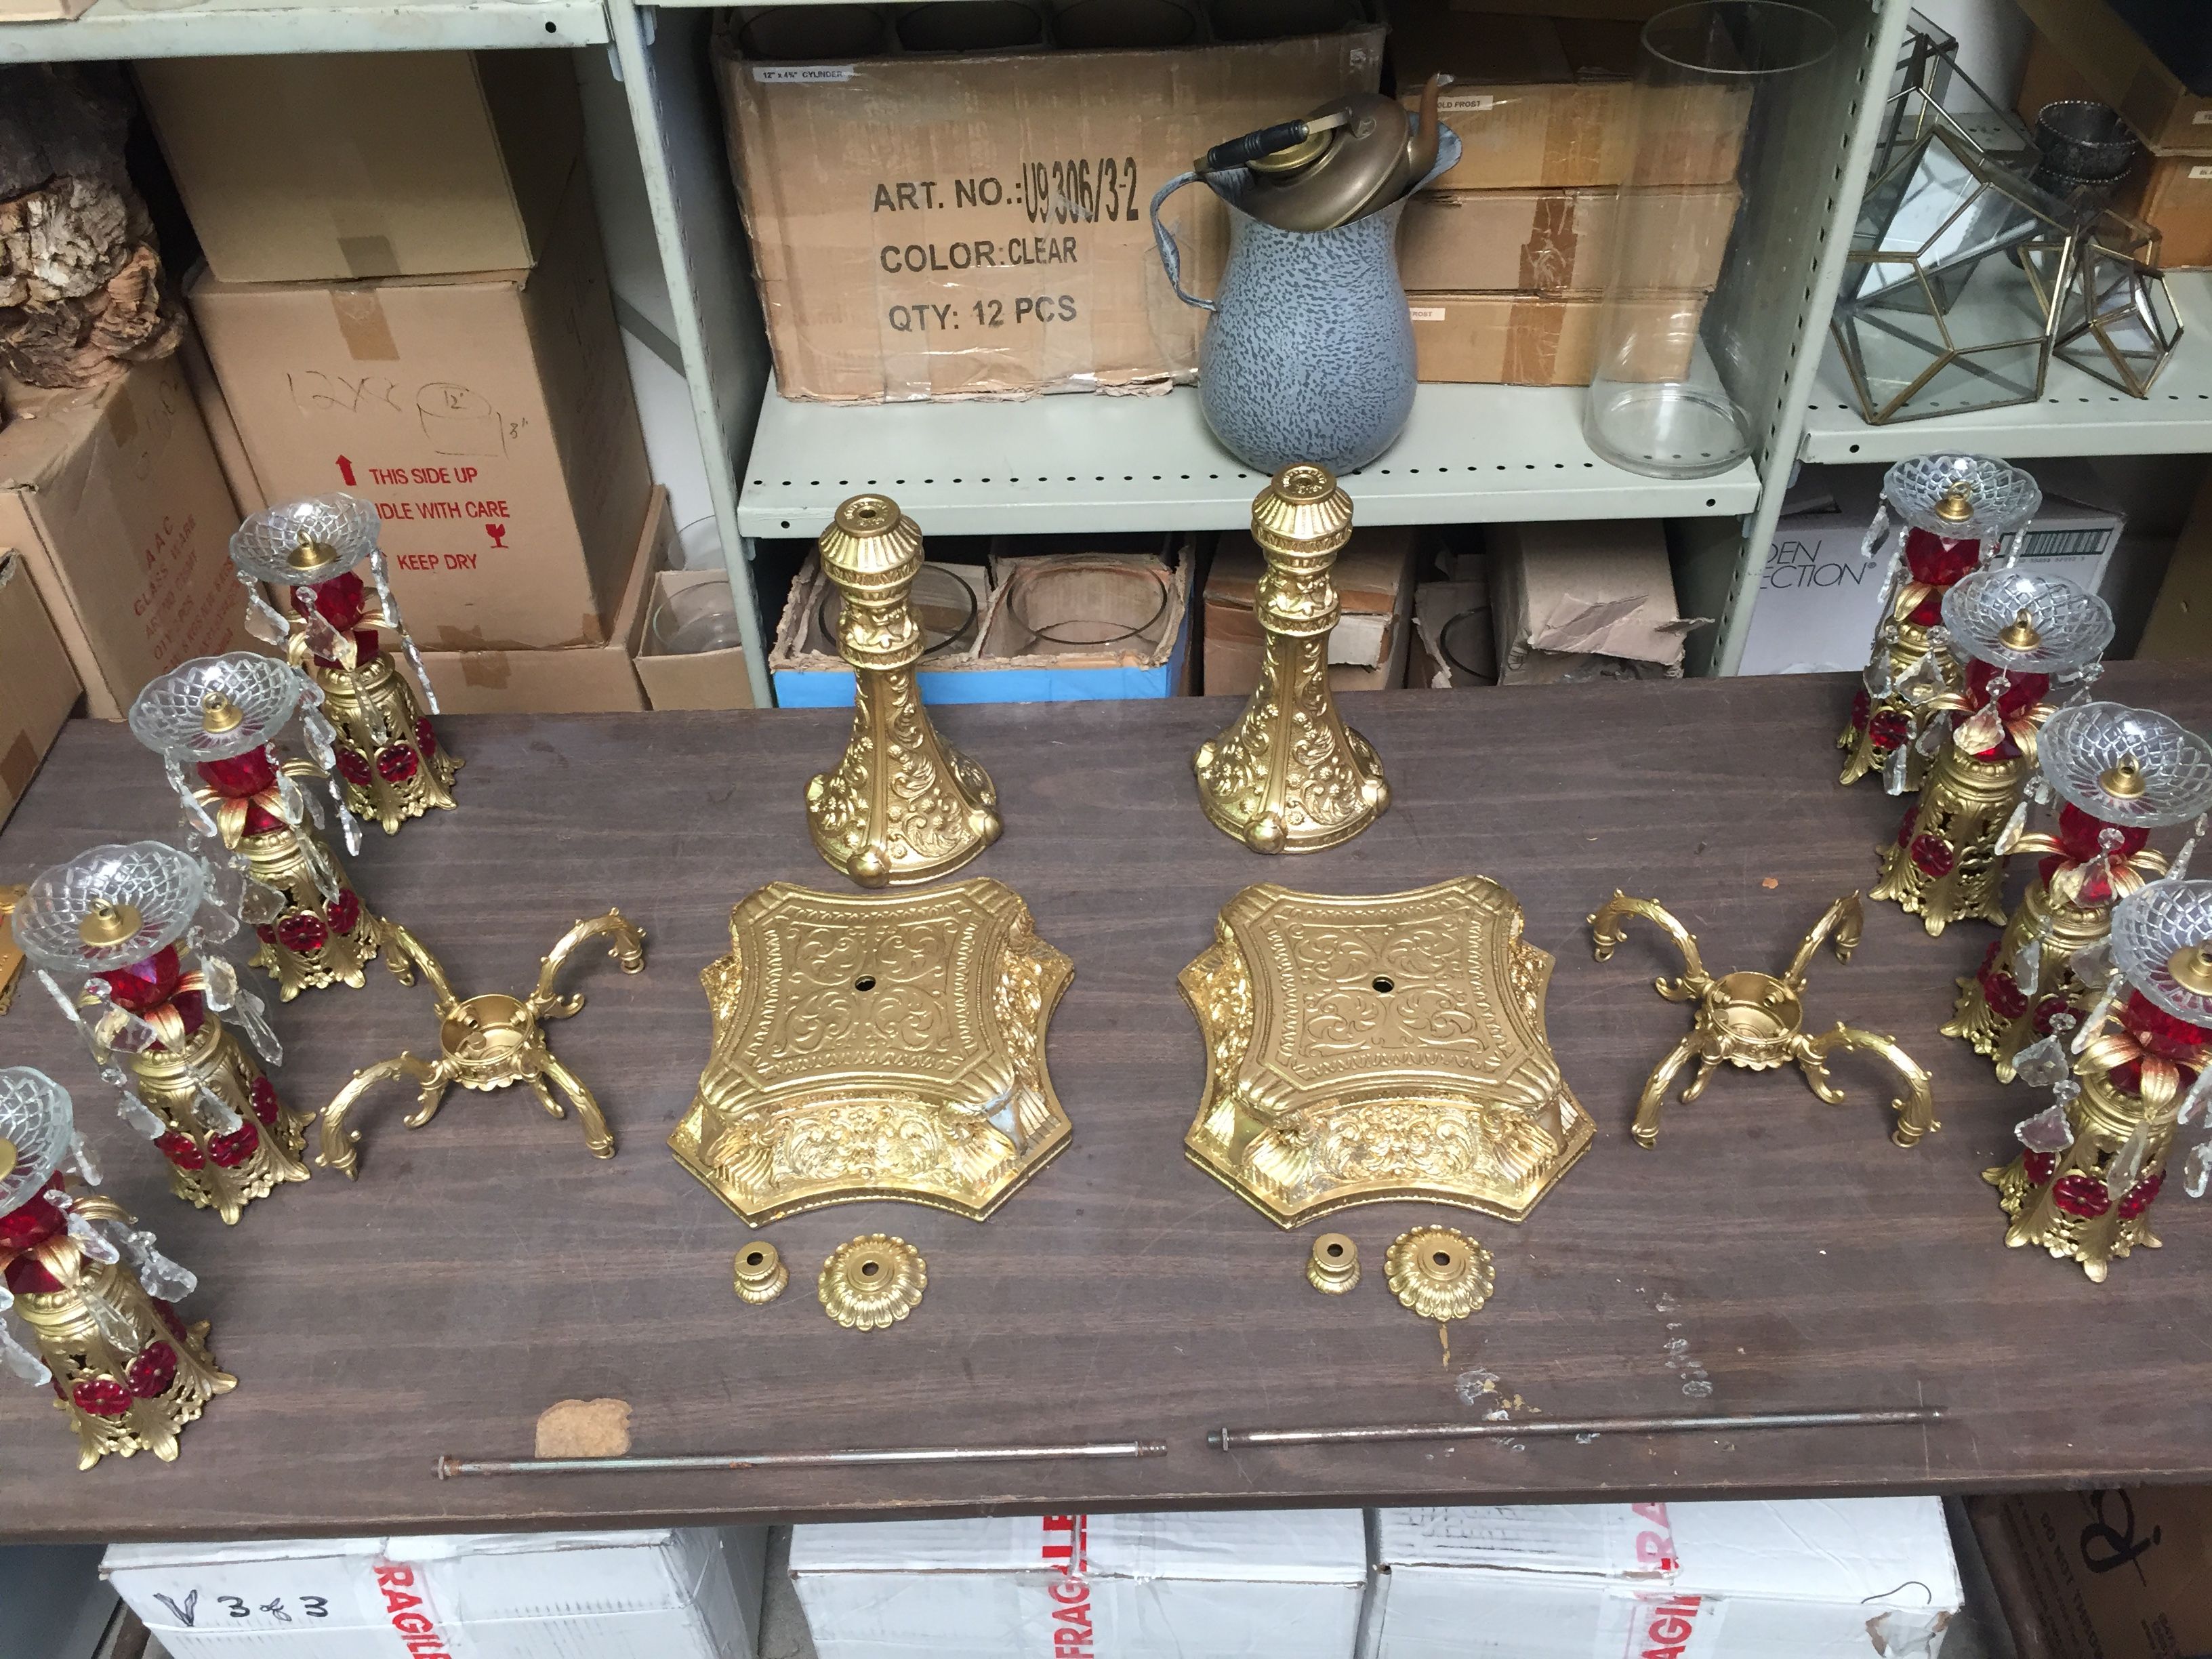
This is the bottem of the cast iron lamp where the rod is inserted to hold the whole project together. 

![IMG_6363.JPG](https://steemitimages.com/DQmYe3Sq4LvV7yk6UMvxCEQatSMkUdnxFTS5hMTaScJM2Ci/IMG_6363.JPG)

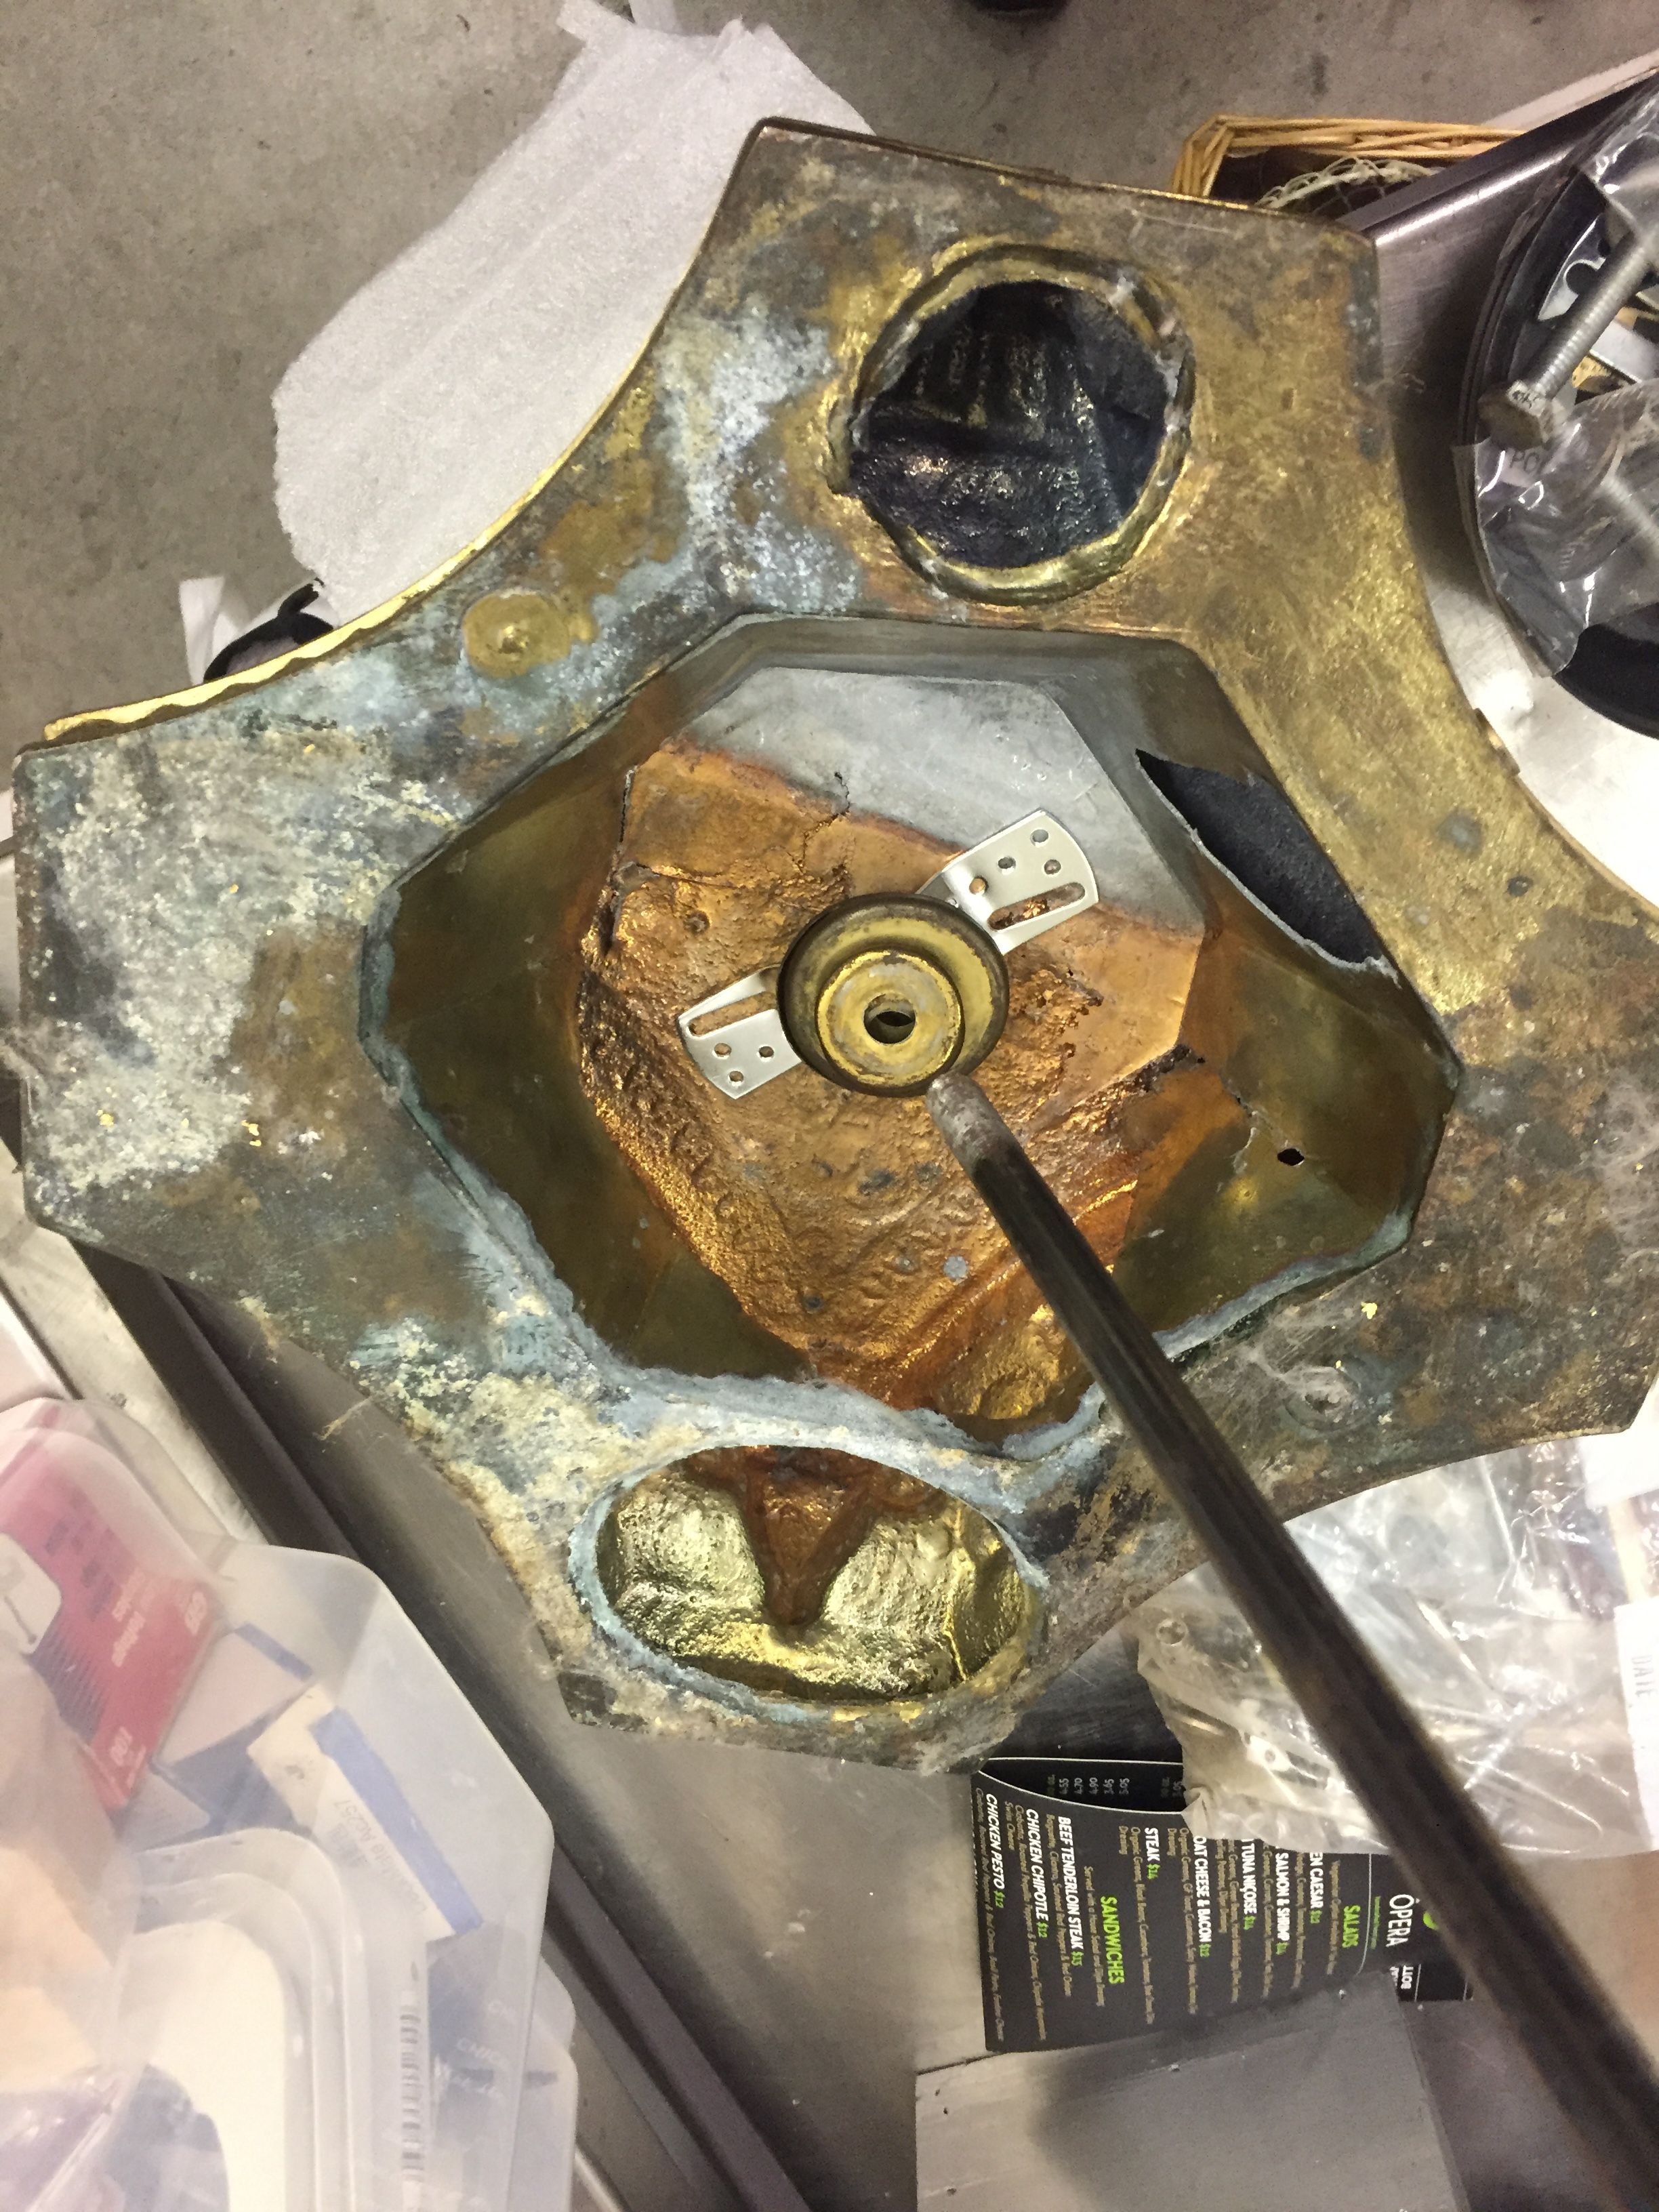
The gold wire, needed to connect the bells to the main frame of the project, was a tedious task. It took longer than needed to fish this wire through without affecting the new paint job.

![IMG_6360.JPG](https://steemitimages.com/DQmdcZwo9pYJ9cLLb5dTf7yStc5cpEKga1ky7377MKnAcco/IMG_6360.JPG)

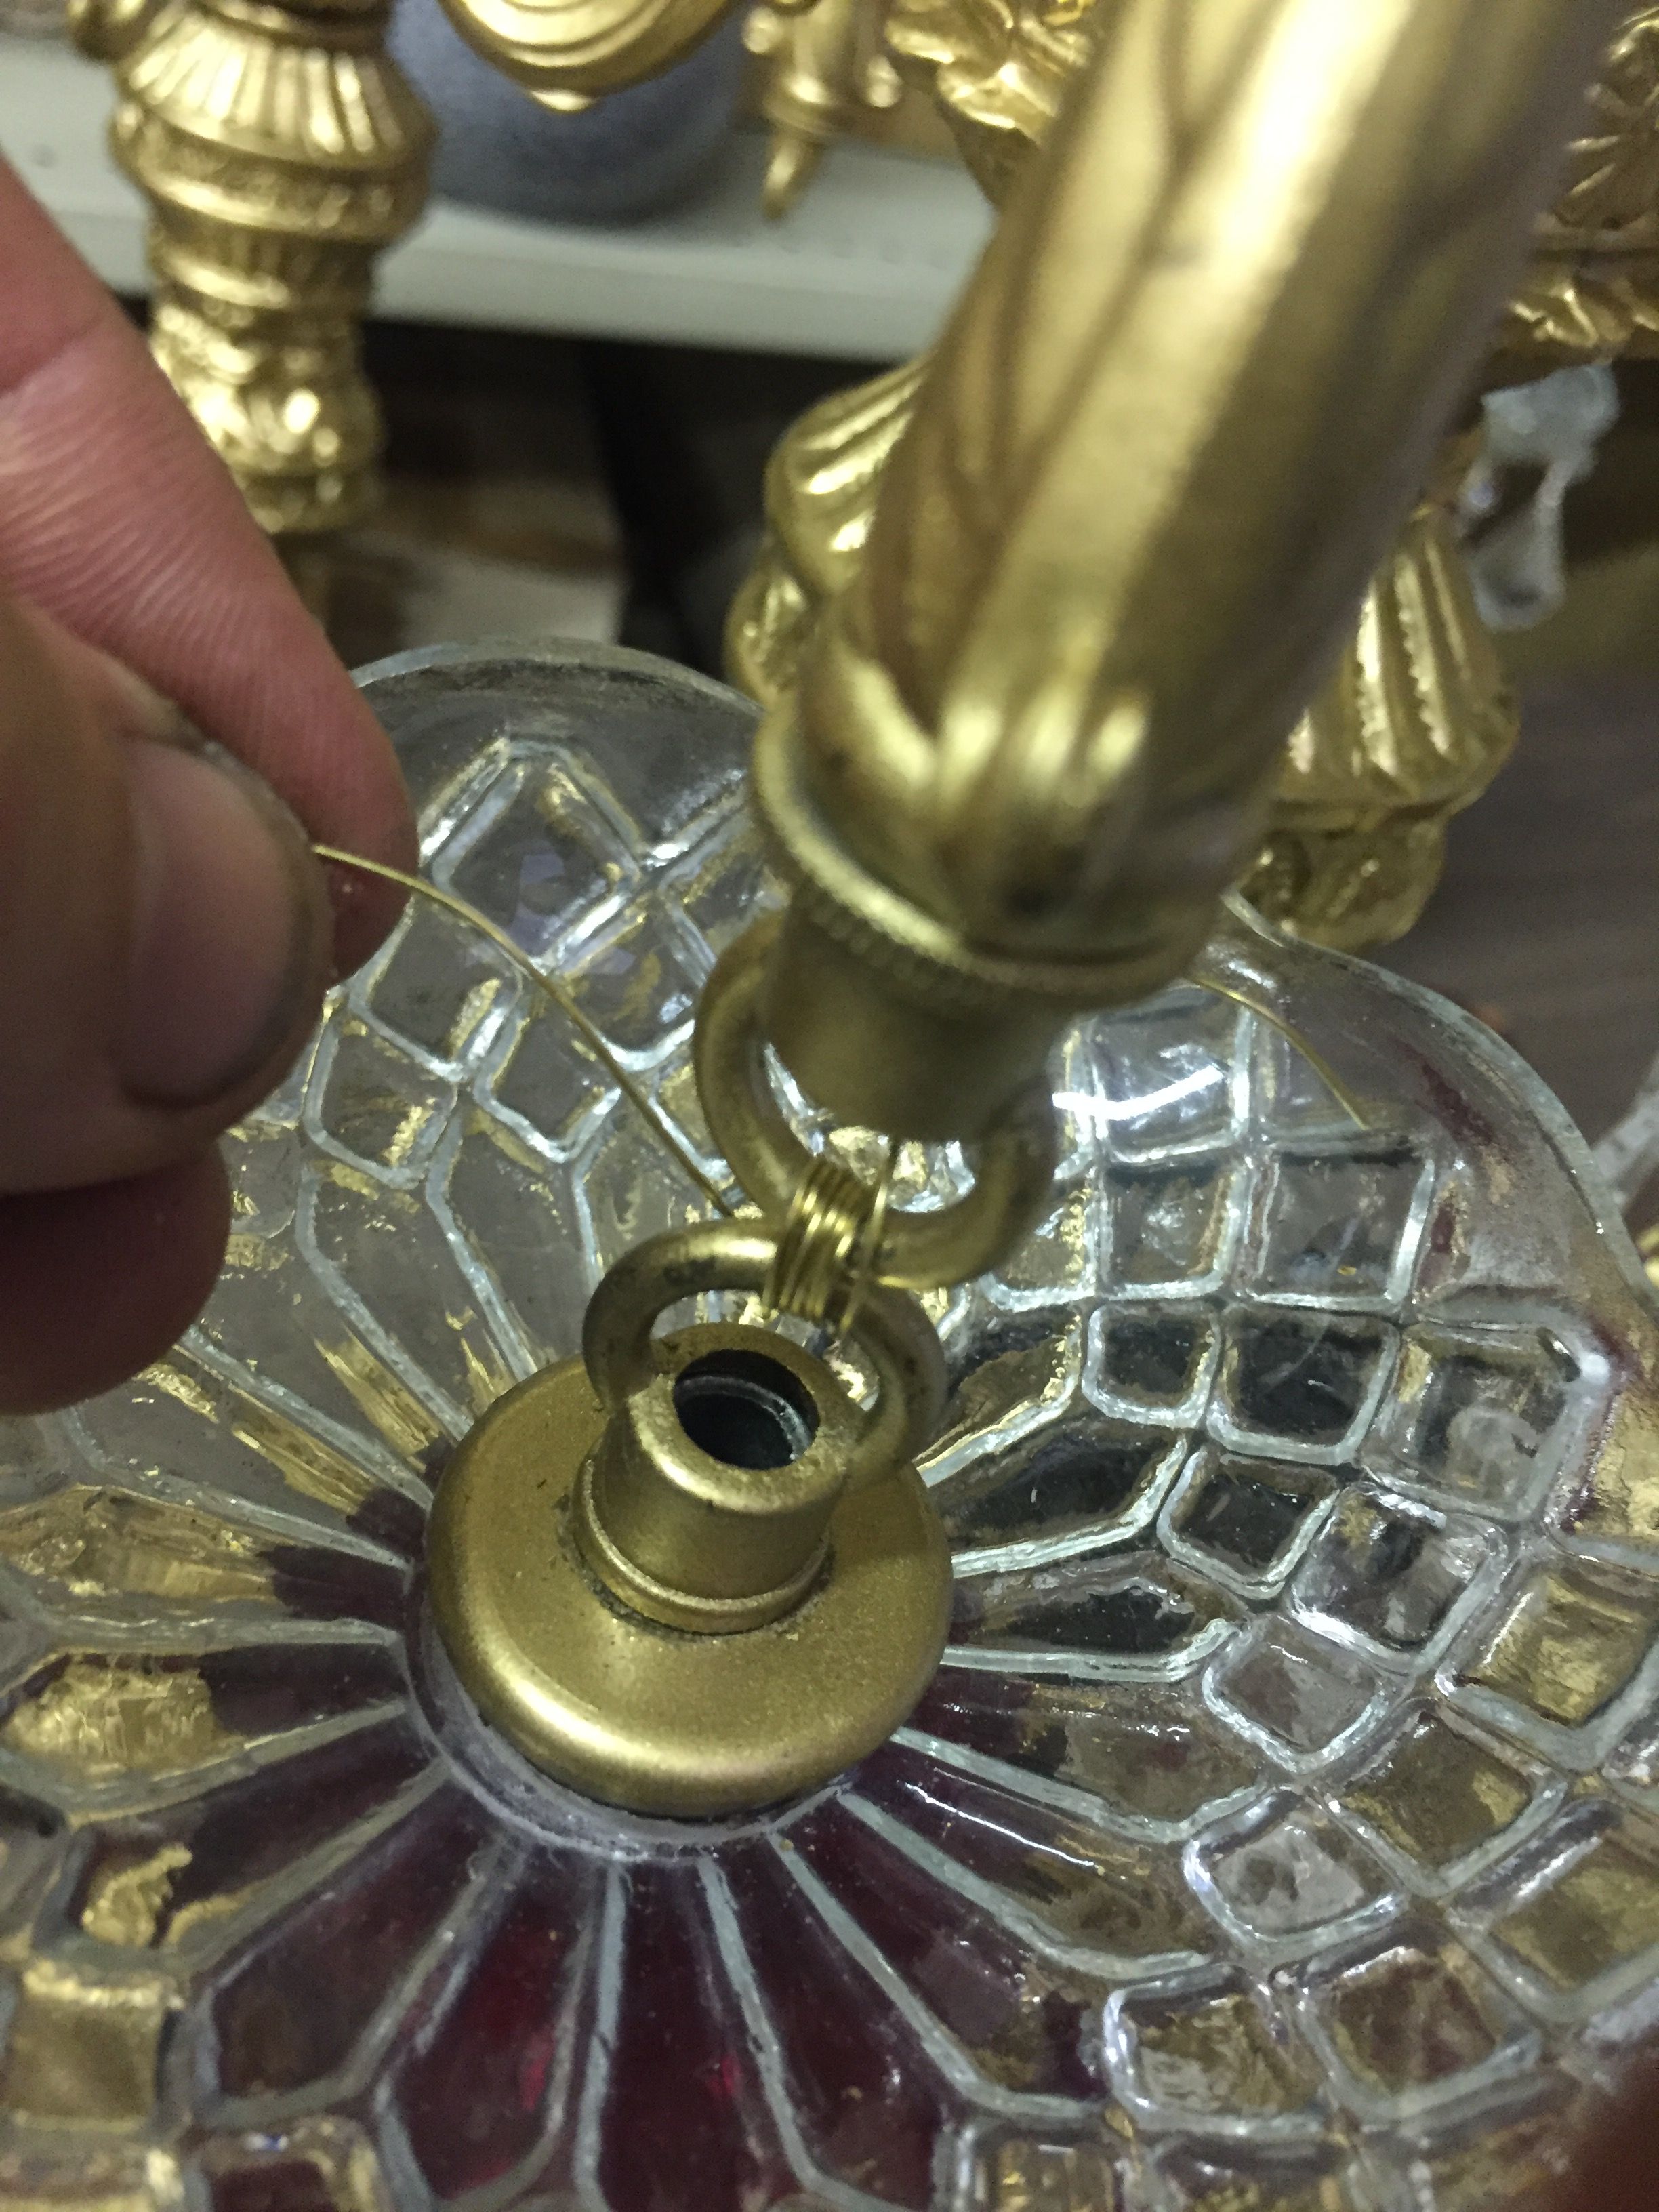
Here are some results without the main toppers. 

![IMG_6365.JPG](https://steemitimages.com/DQmQ4C6586qzUdYo3jhddQcNvrvxFgy6TDUBCcVAjPcLY1W/IMG_6365.JPG)

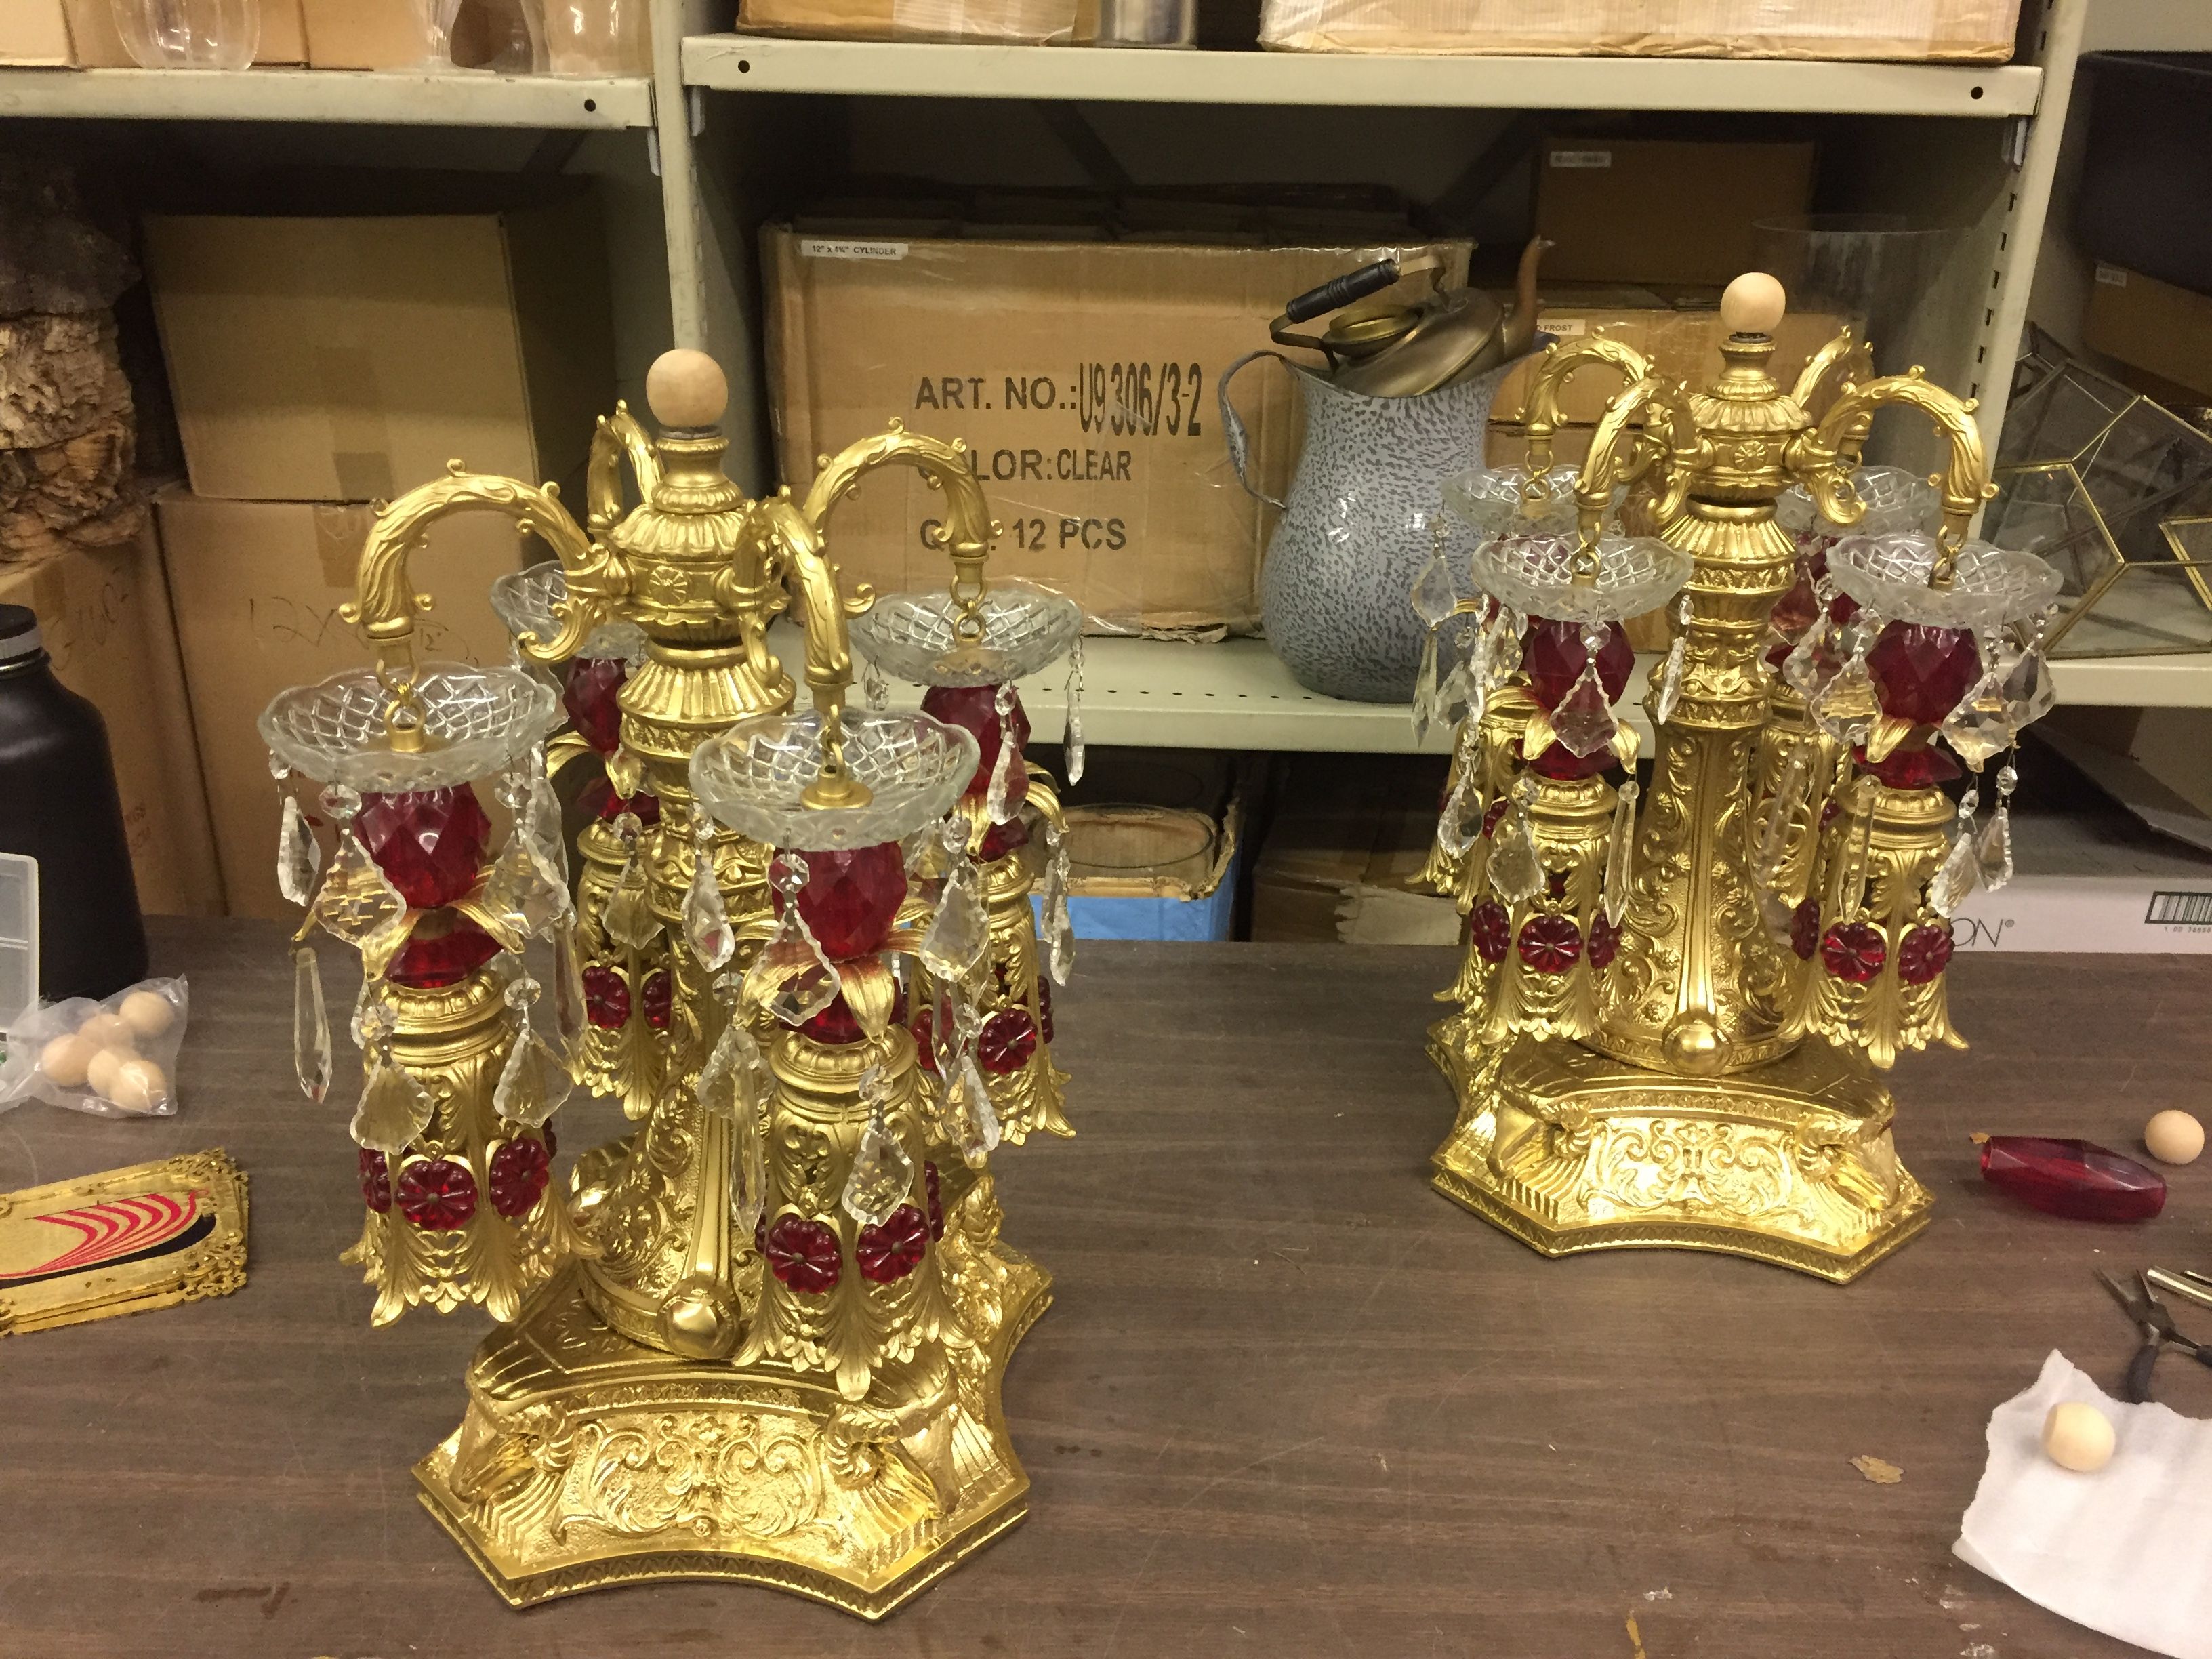
Here is the end result with the topper.

![IMG_6367.JPG](https://steemitimages.com/DQmdQugboDJnsQMXzUkzztWKDCGJt38KZsi9nHMYthXmziw/IMG_6367.JPG)

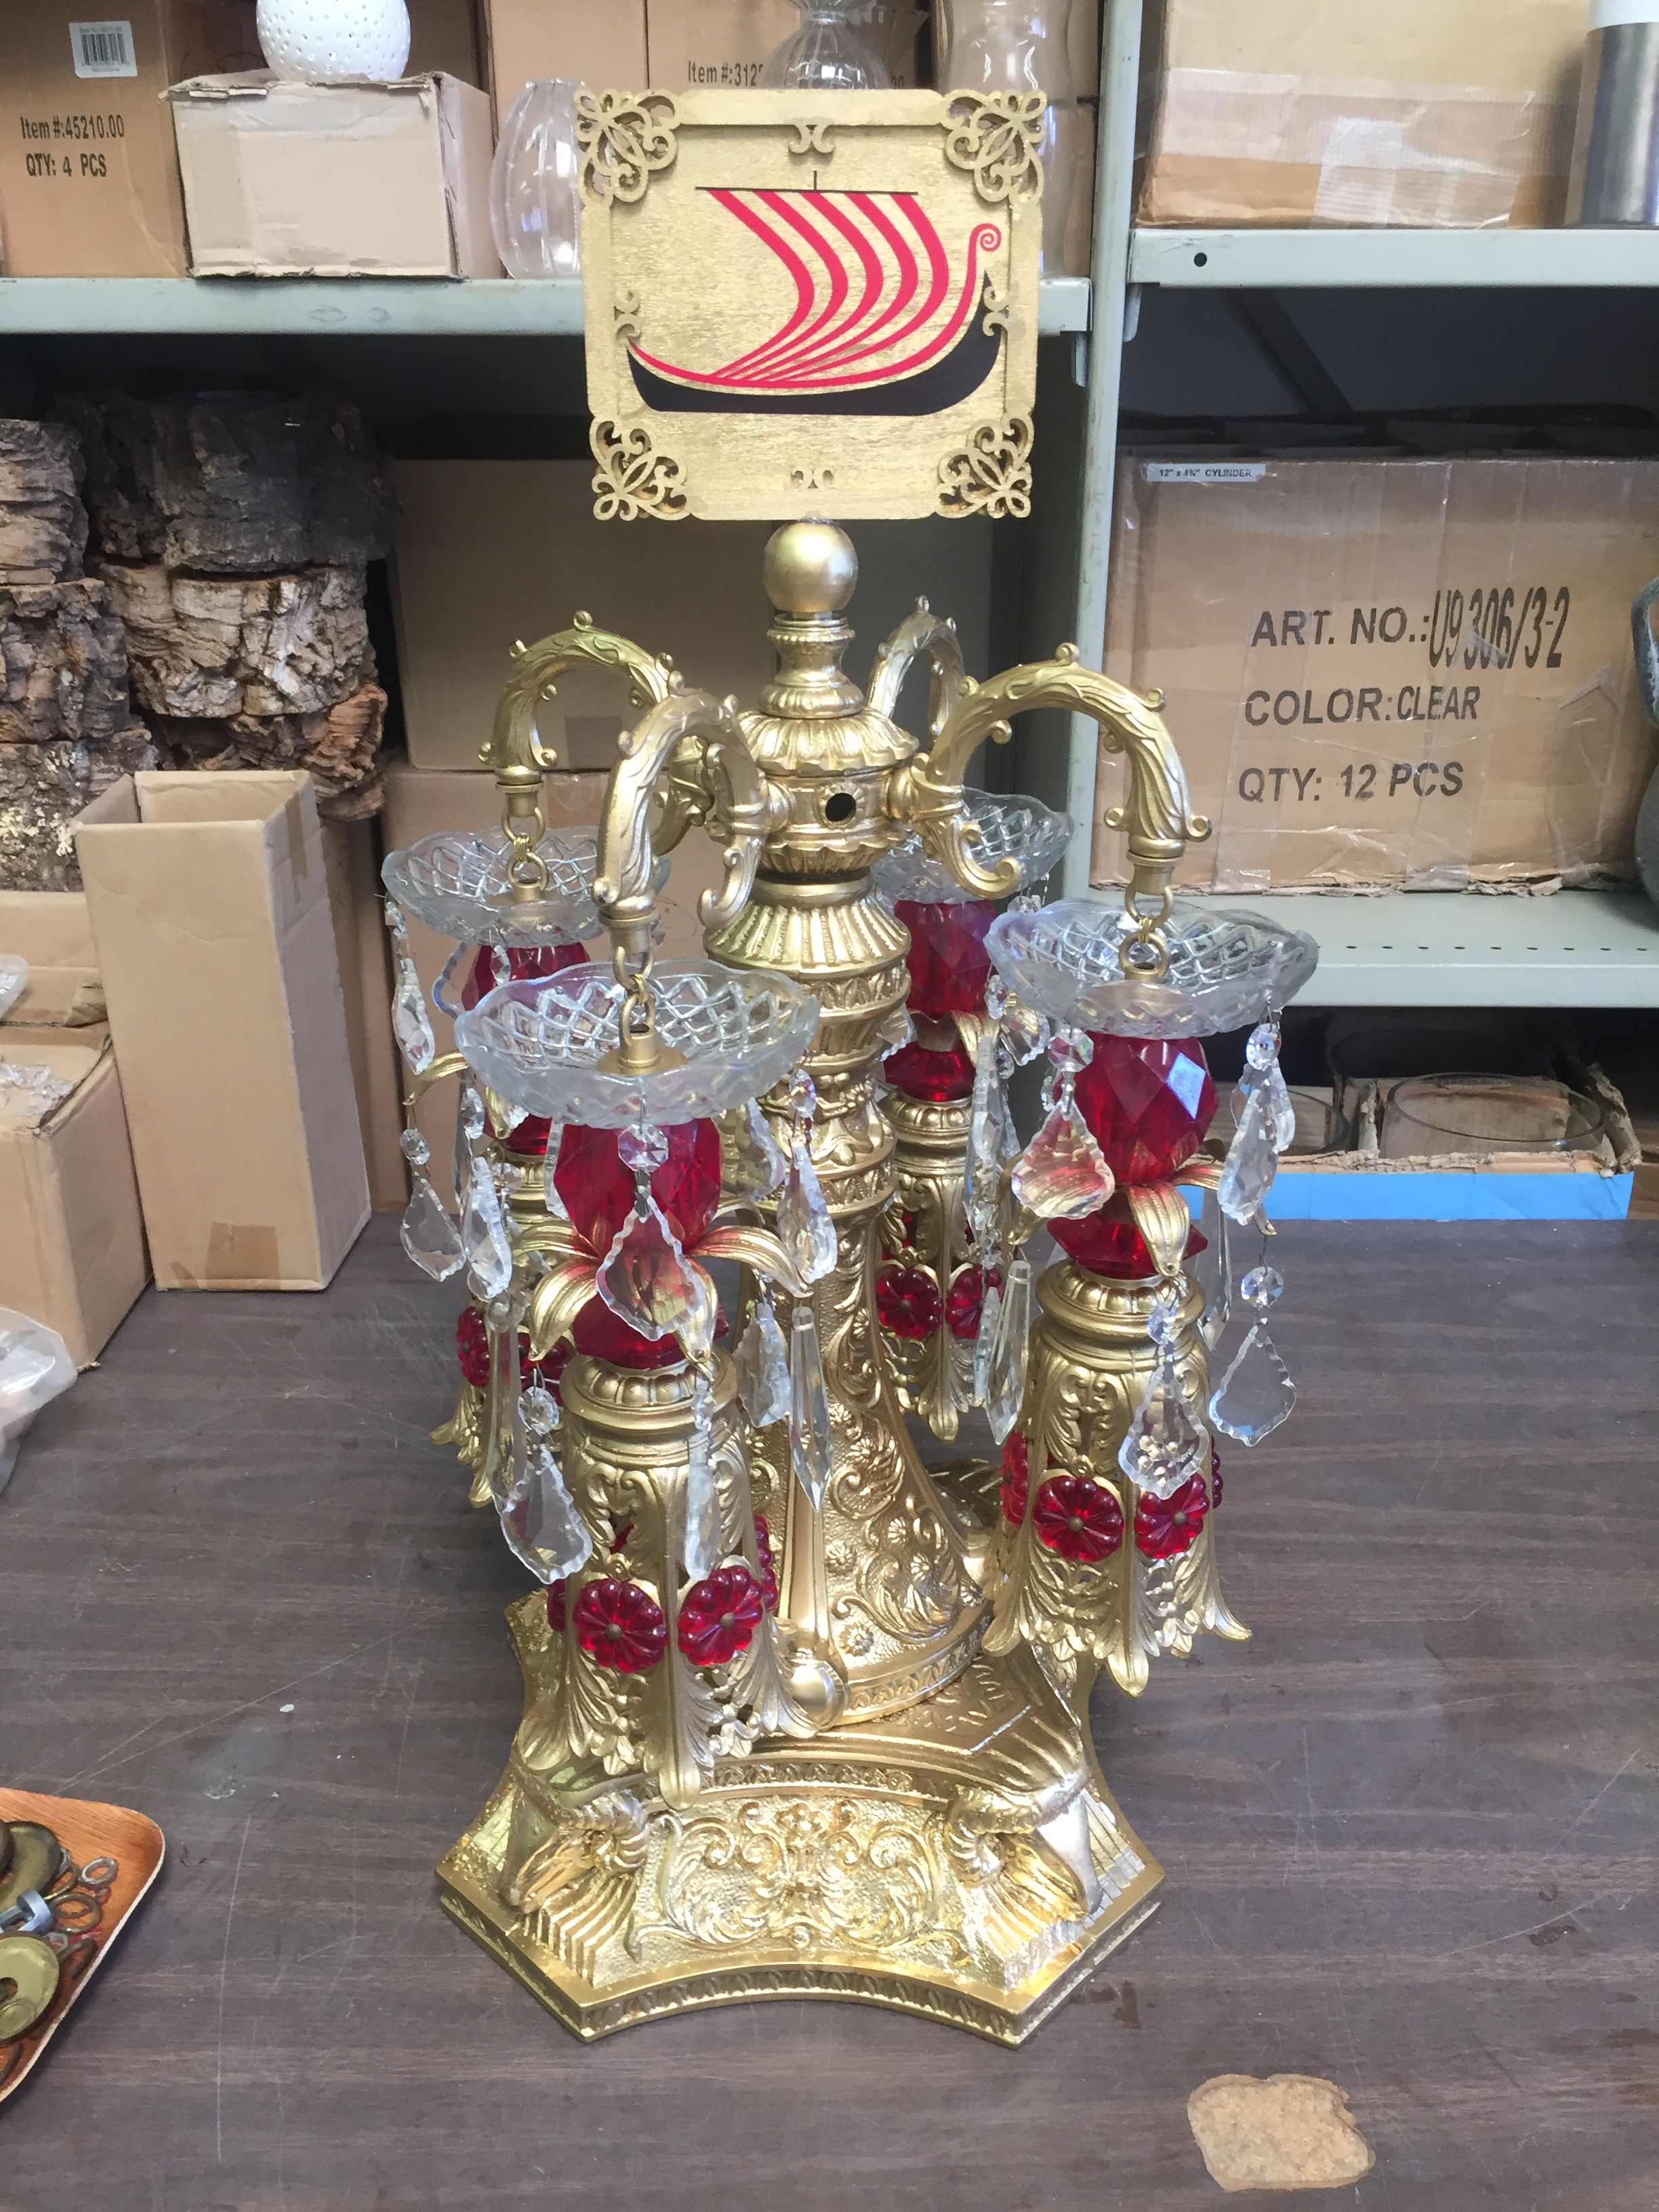
Here's the finished product as a table center piece. 

![IMG_6408.JPG](https://steemitimages.com/DQmZ9ywcP5HqAMx3DSCveeSNRabPHJxHiacQGPDJh5XU1ma/IMG_6408.JPG)

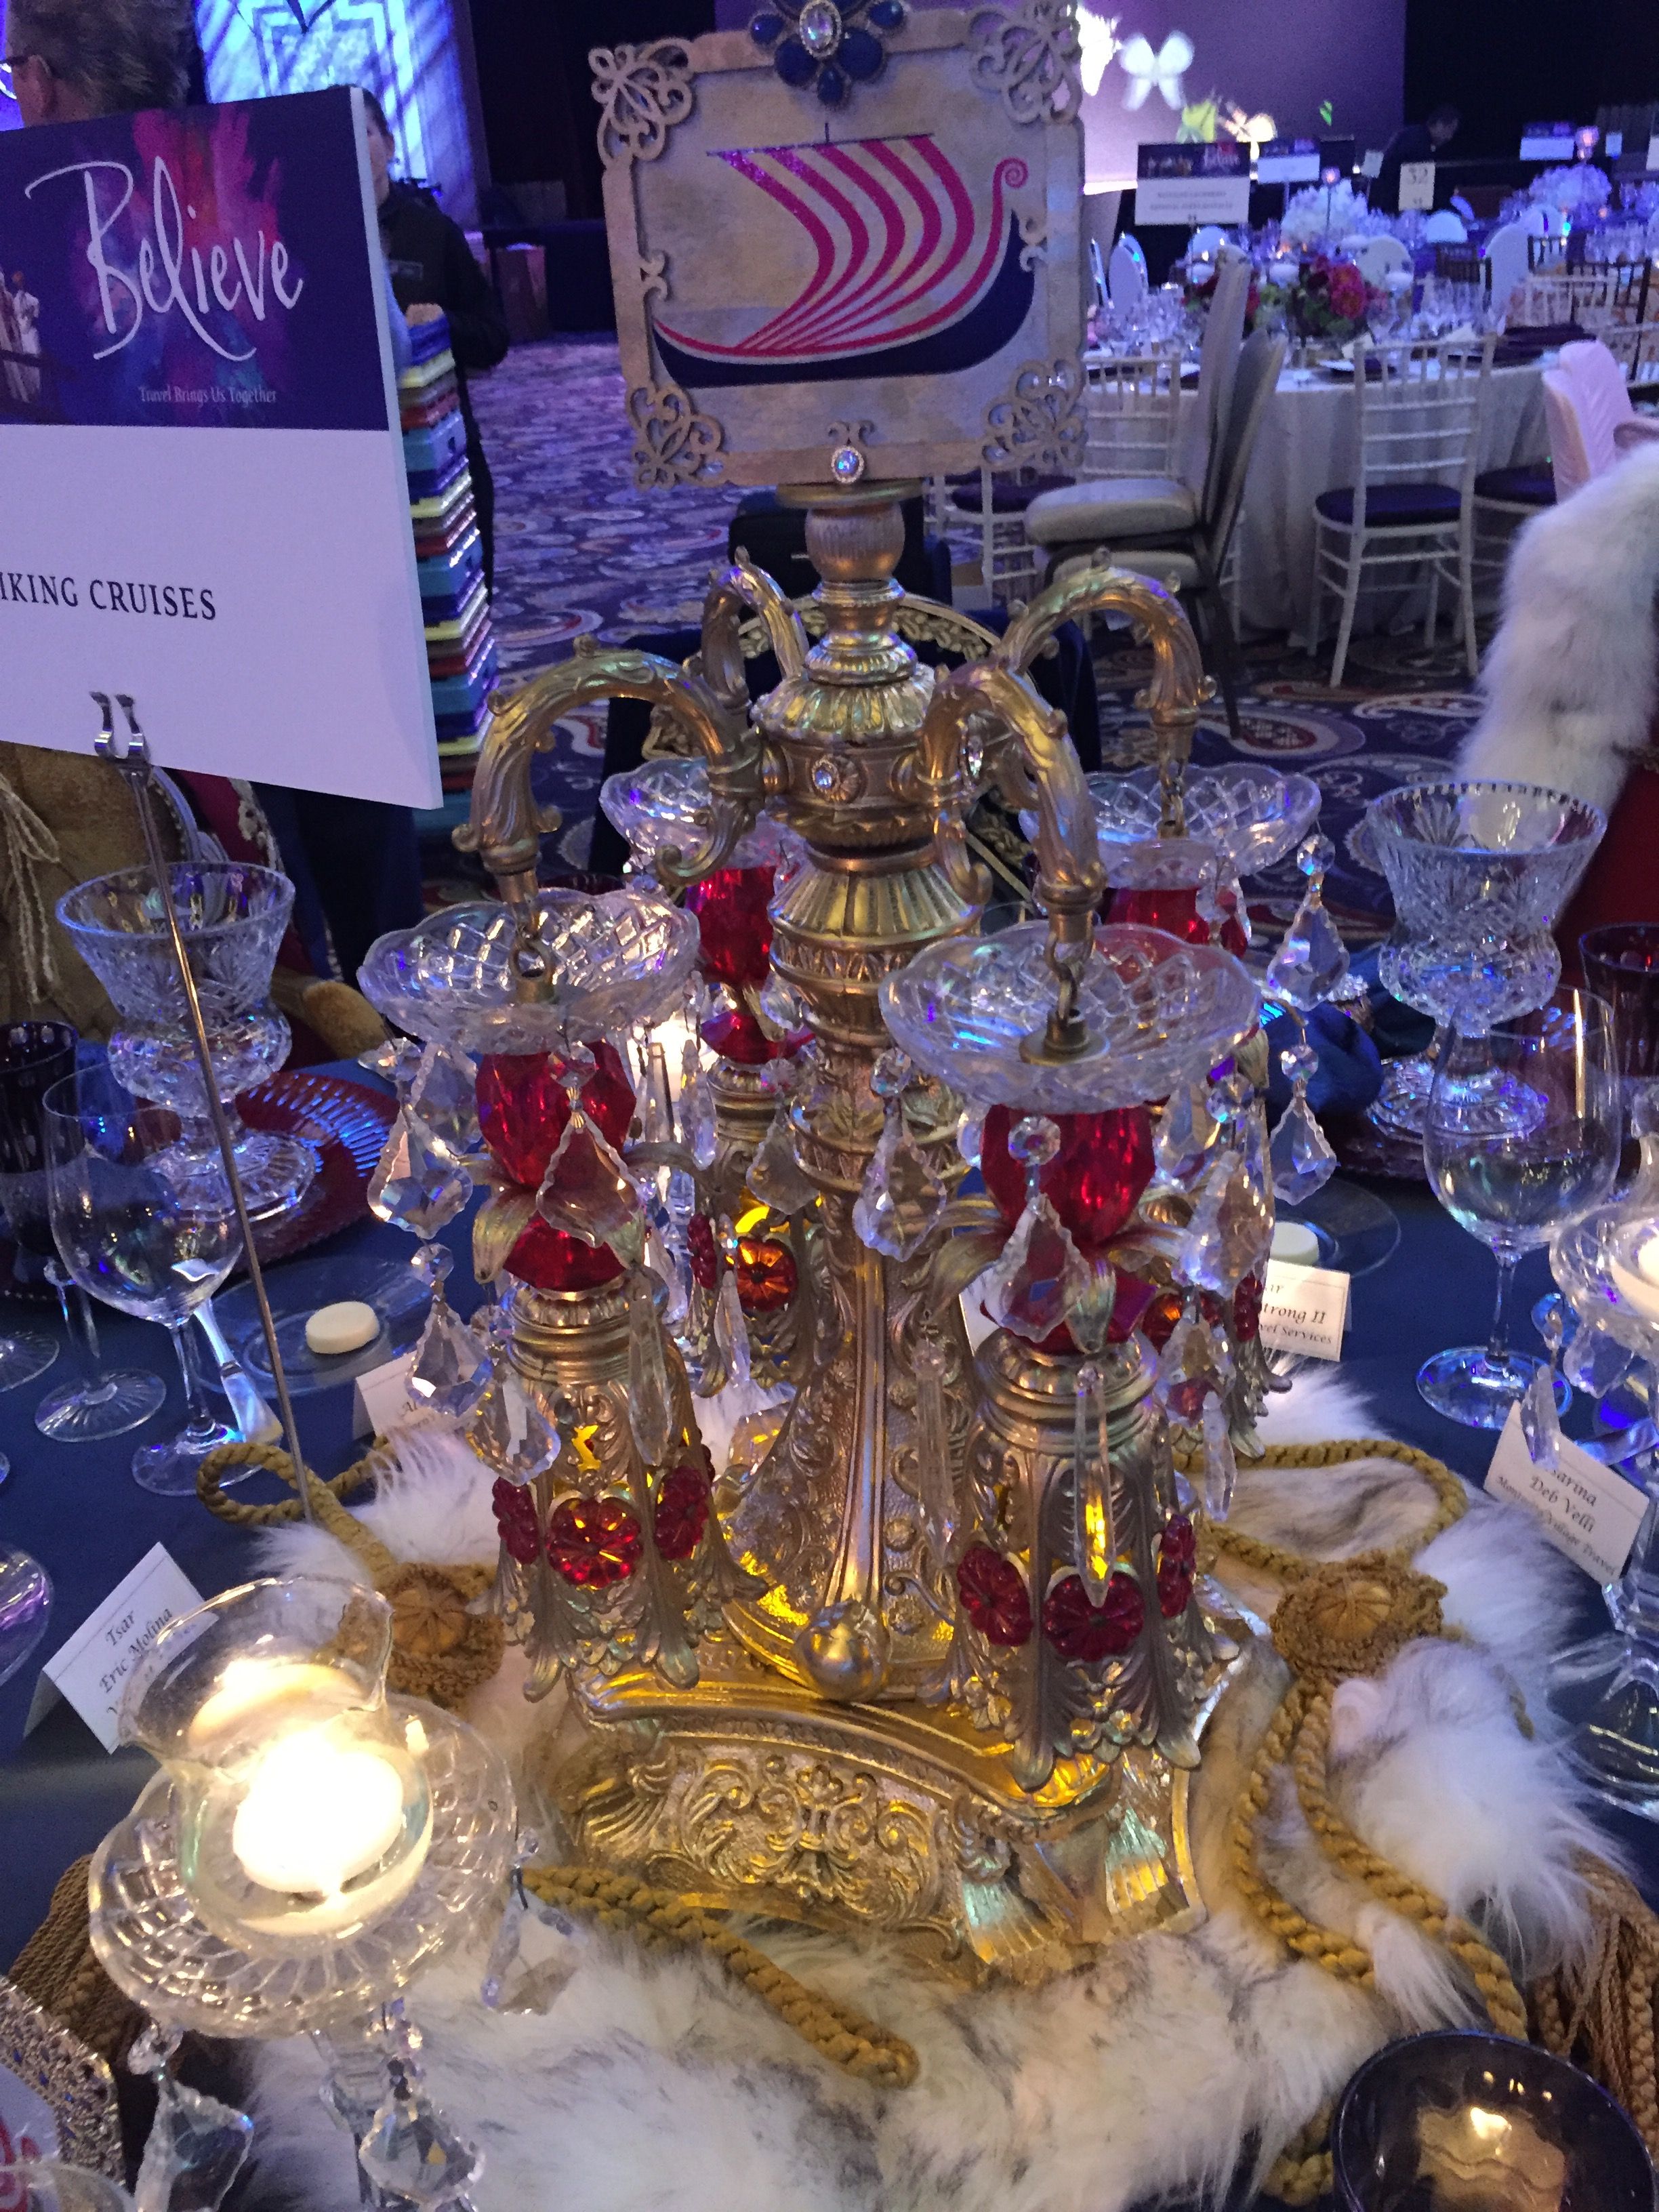
The Royal caps on the chairs were a borrow from a movie studio. The clients loved wearing those. :)

![IMG_6407.JPG](https://steemitimages.com/DQmXeD3Jv7gJJsXYcAKvhgqaRTSBYUa7QytytmYiMDcQVfy/IMG_6407.JPG)

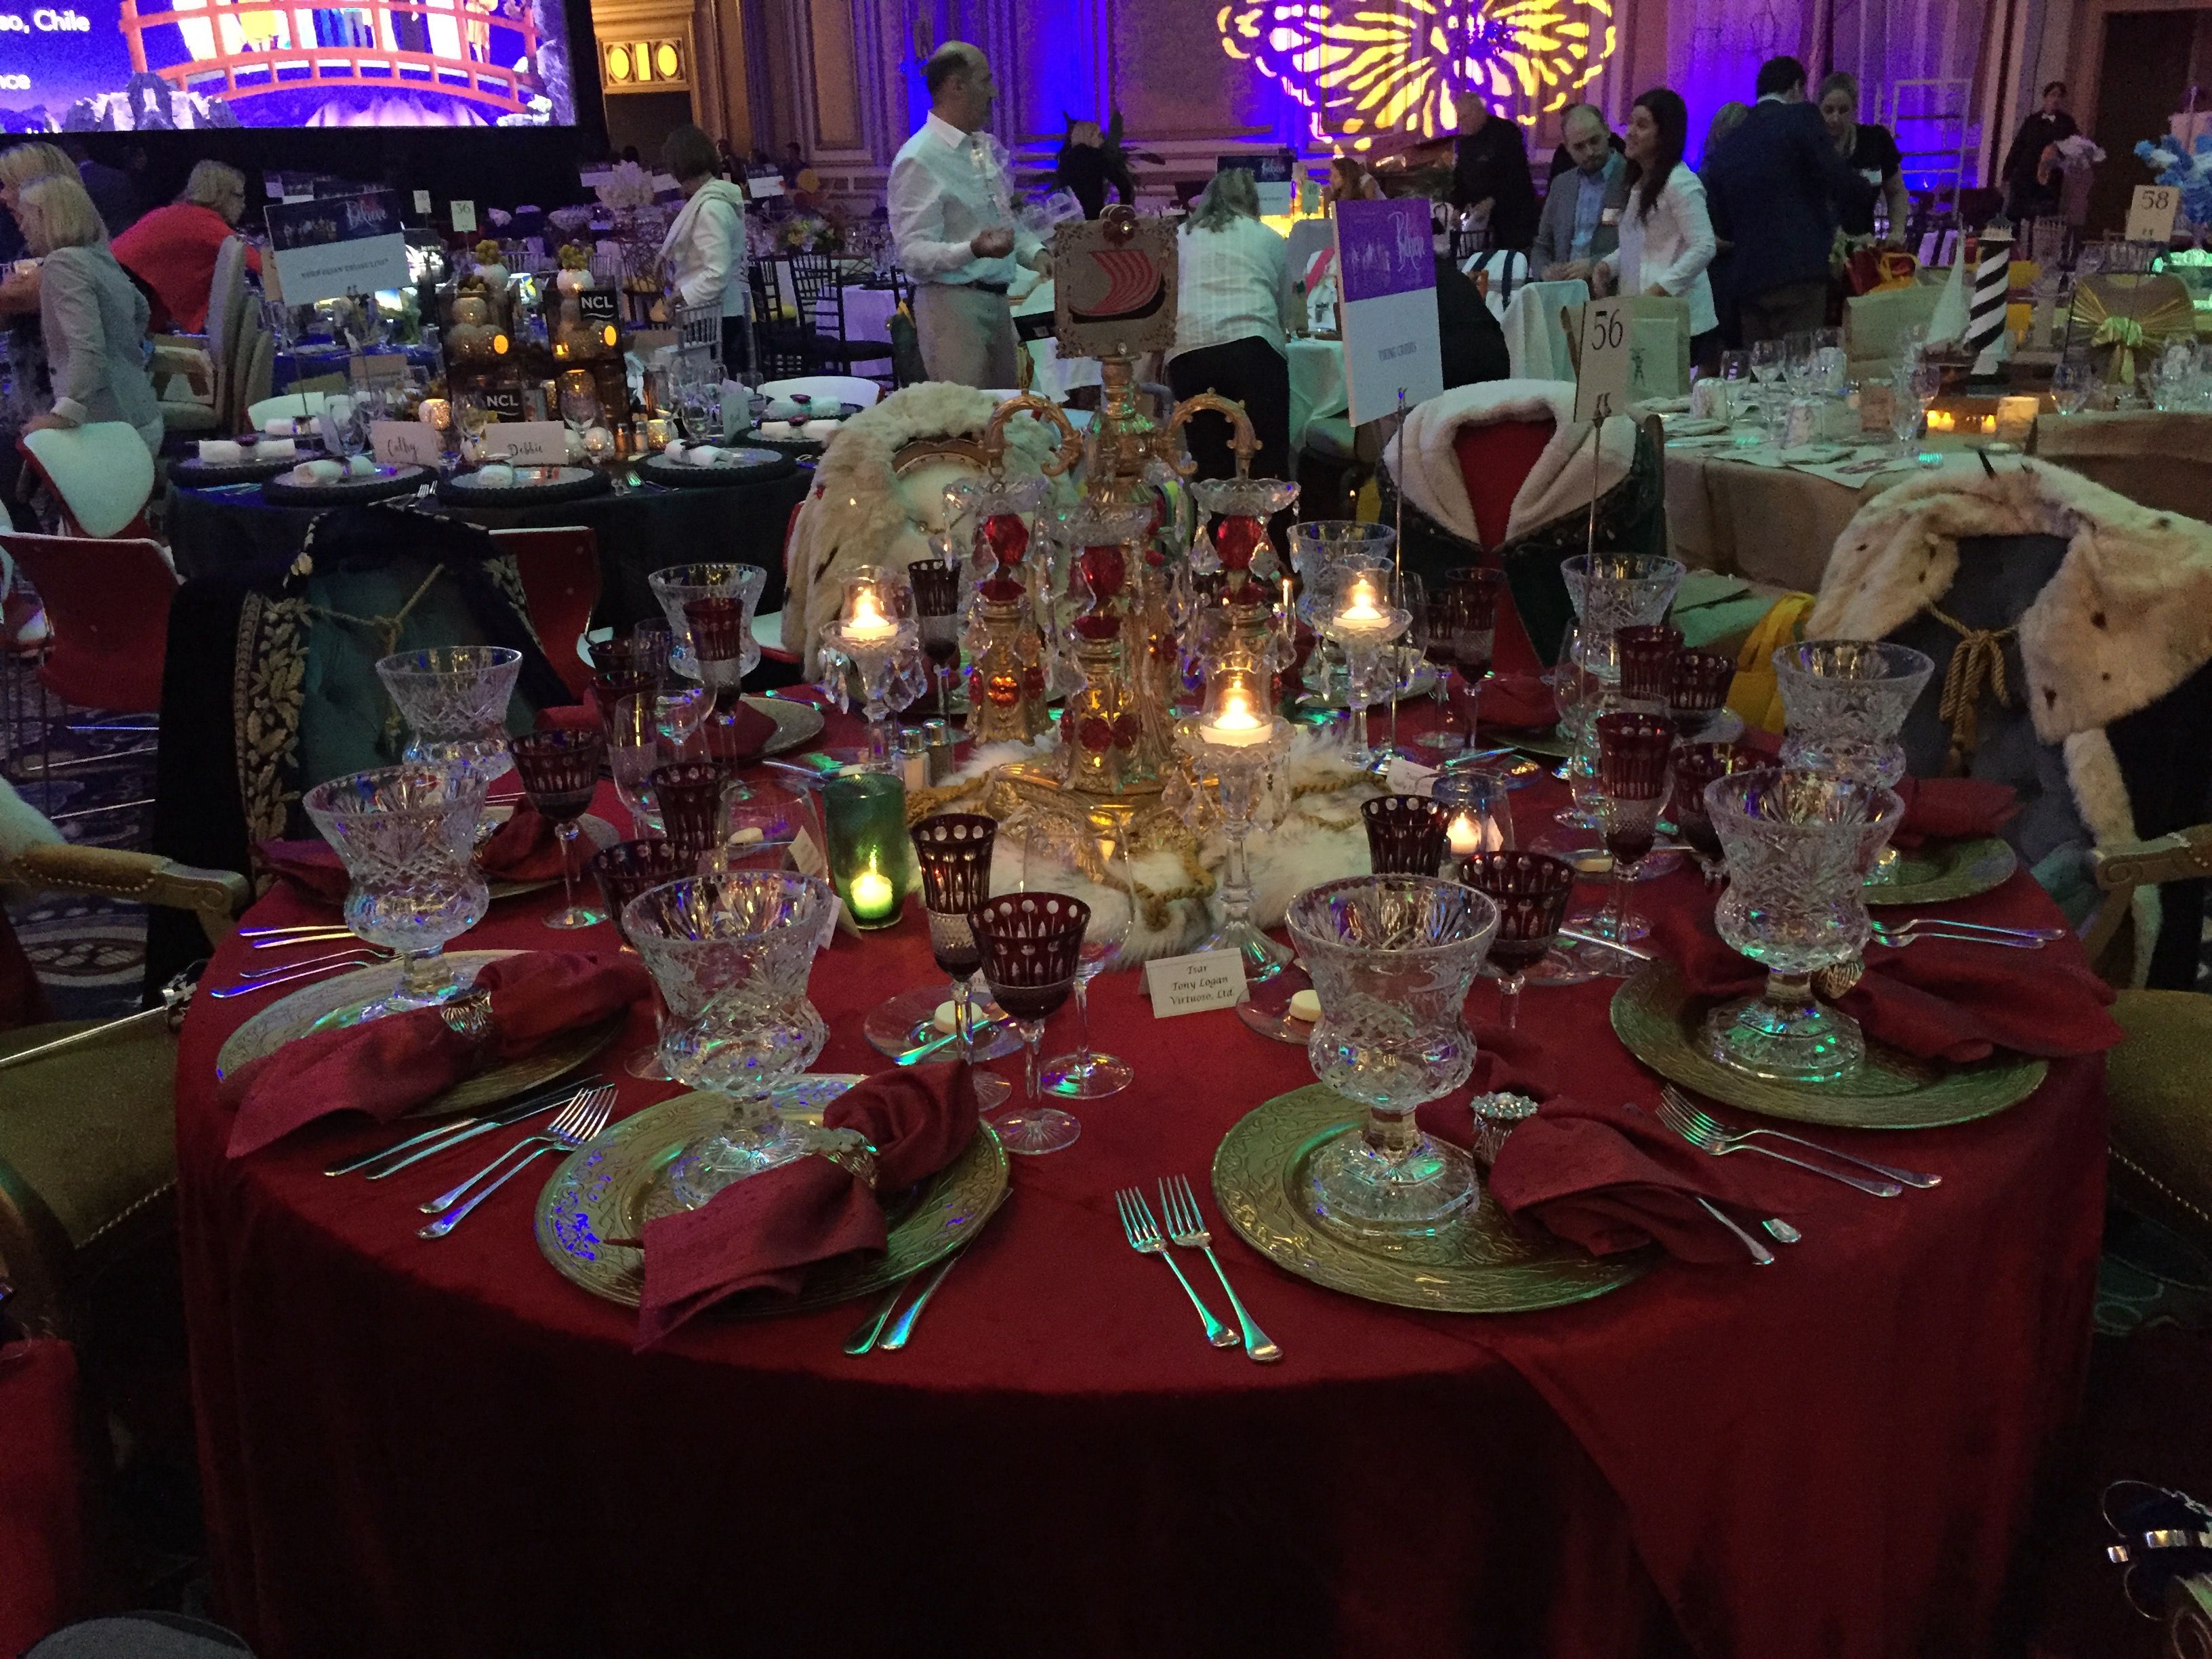
Thank you for your time and interests. I hope to share more of my projects with this community. =~D
👍 , , , , , , , , , , , , , , , , , , , , , , , , , , , , ,