How to install Gridcoin/BOINC on a Raspberry Pi
gridcoin·@scalextrix·
0.000 HBDHow to install Gridcoin/BOINC on a Raspberry Pi
My Pi stayin' cool: 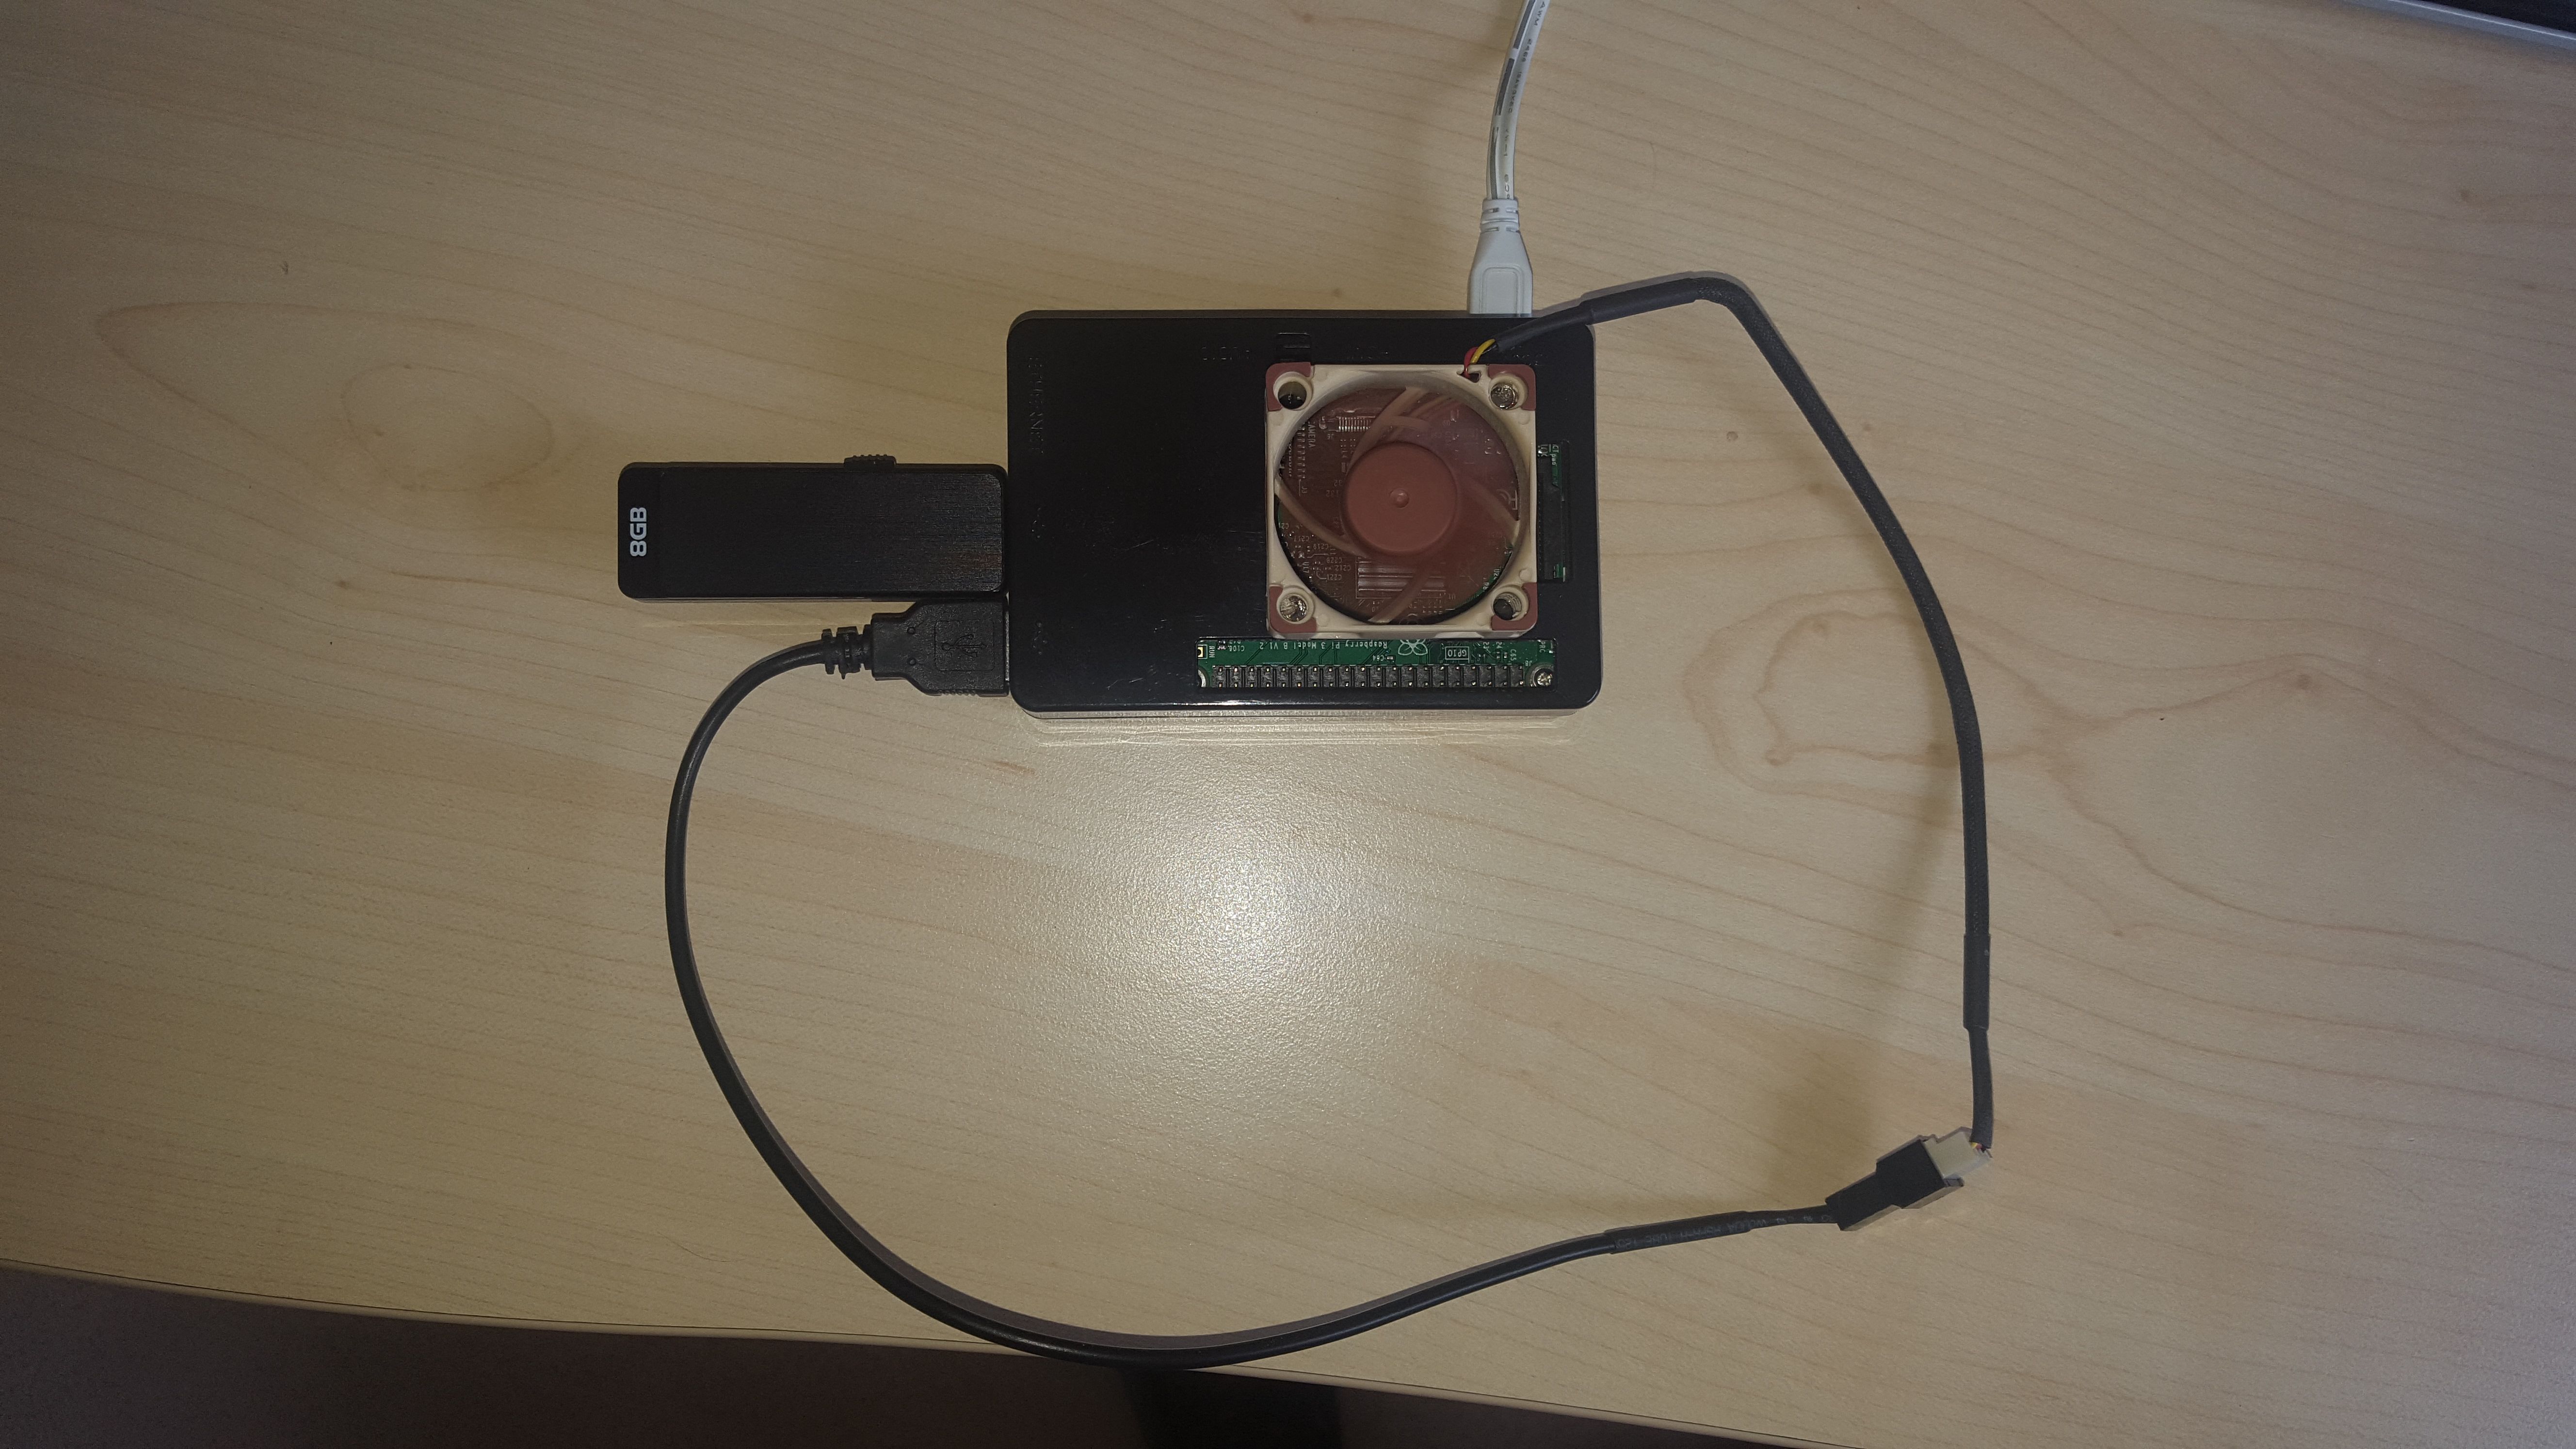
# A FEW NOTES BEFORE WE BEGIN
* I have personally tested this on a Pi 2b and a Pi 3b, both are capable of running Gridcoin and doing some light BOINC work.
* The install is on Raspian-lite, I think other Debian based OSes will work just fine
* This is a daemon install only, which means you control the wallet via command line - this is better because of RAM limitations on small devices like Pis
* Such small machines are not going to make you rich, but they are an excellent way to stake your Gridcoin 24/7, help support the network and give you the best chance of staking as a newbie without leaving power hungry kit on 24/7.
* Im going to assume you want to solo mine, versus joining a pool, please see https://www.gridcoin.us/ for more info about solo/pools.
* Im also assuming you know about joining projects, creating beacons and all that jazz, this guide is really just focussed on getting a Pi running with the software you need.
* In summary then, you already know enough about Gridcoin to successfully mine on a standard computer, but now you want it on a Pi as well, OK here goes...
# THE EASY ROUTE
Some of the wonderful community have made [Ubuntu PPAs](http://wiki.gridcoin.us/Linux_Downloads_(pre-compiled)), if you are happy to use that OS on your Pi, then thats probably the easiest route, though I have not tested it myself
# IF YOU DONT WANT UBUNTU
OK, hold onto your hats, here we go. You will need to be able to open the command line Terminal either using a screen on the HDMI port with a keyboard and mouse, or via SSH. The guide will compile a version of GridCoin that can only be controlled via the command line.
If you get a Permission denied message, try adding 'sudo ' to the start of the command.
## 1- Flash your SD card
The distribution version we need to flash on the SD card is the latest Stable Raspbian-lite Image from: https://www.raspberrypi.org/downloads/raspbian/
For instructions on how to flash an SD card: https://www.raspberrypi.org/documentation/installation/installing-images/
## 2- Setup Raspbian in the Pi
a) Insert the flashed SD with Raspbian in the Raspberry Pi 2/3.
b) Plug in the USB mouse, the USB keyboard, the HDMI screen, the network cable, and the power cable. You may also SSH to the Raspberry Pi.
The Raspberry Pi will boot for the first time, login with user 'pi' and password 'raspberry'.
> sudo raspi-config
You will be presented with the Raspberry Pi Software Configuration Tool (raspi-config). To navigate in this tool, the useful keys are: The up/down arrow, the Enter key, and the Tab key whenever the up/down arrow keys don’t do the job. Here, we will do next things:
b.1) Expand the Filesystem by choosing Option 1, TAB to Finish, and Reboot. You will get a message Root partition has been resized. If you are on SSH your terminal may abort, if this occurs just close the session and login to the Pi again.
b.2) Select your Proper Time Zone and Change the User Password by choosing option 2. Enter your new password twice. When entering the password, the characters won’t be displayed as a security feature. You will get a message Password changed successfully.
After reboot check the time is correct with:
> date
b.3) OPTIONAL If you don’t intend to use a display (ie you are on SSH), or output any video media we can free up additional RAM by reducing the amount dedicated to the GPU:
> sudo raspi-config
Select Advanced Options > Memory Split
Change the entry from 64 to 16
TAB to FINISH and Reboot
b.4) OPTIONAL: If you have a Pi3 with internal Wi-Fi and would prefer to connect to the Pi via Wi-Fi; then edit the wpa_supplicant.conf file
> sudo nano /etc/wpa_supplicant/wpa_supplicant.conf
The page will have some text at the top, add these lines below:
> network={
> ssid="YOURWIFISSID"
> psk="YOURWIFIPSK"
> }
CTRL+X to save, Y to confirm and then hit Enter
> sudo reboot
Disconnect the Ethernet cable and find your new IP address in your Wi-Fi router.
## 3- Update the Raspberry Pi device.
> sudo apt-get update && sudo apt-get upgrade && sudo apt-get dist-upgrade
### 4- Setting up the Raspberry Pi for compiling GridCoin.
a) Change Swap Size.
Use the following command to change the default swap size:
> sudo nano /etc/dphys-swapfile
Make sure it reads CONF_SWAPSIZE=1024 Use the left/right arrow keys to navigate the file. After change is done, press Ctrl+X followed by Y then Enter key to save the file. Then, press Ctrl+X to exit the editor.
Use the following commands to enable the swap file with its new size:
> sudo dphys-swapfile setup
Thats going to take a little while, be patient
> sudo dphys-swapfile swapon
You can check the new active swap size with next command:
> free -m
b) Install Required Dependencies with next command:
> sudo apt-get install autoconf libevent-dev libtool libssl-dev libboost-all-dev libminiupnpc-dev libdb-dev libdb4.8++ libdb5.3++-dev git ntp build-essential libdb++-dev libqrencode-dev libcurl4-openssl-dev curl libzip-dev libzip2 libboost1.55-all-dev hardening-includes -y
c) Compile and Install BerkeleyDB 4.8.30 by running the following commands:
> wget http://download.oracle.com/berkeley-db/db-4.8.30.NC.tar.gz
> sudo tar -xzvf db-4.8.30.NC.tar.gz
> cd db-4.8.30.NC/build_unix
> sudo ../dist/configure --enable-cxx
> sudo make
> sudo make install
> export CPATH="/usr/local/BerkeleyDB.4.8/include"
> export LIBRARY_PATH="/usr/local/BerkeleyDB.4.8/lib"
Note: the export commands are only valid in the current Terminal session. To avoid errors, don't close the Terminal until you fully completed with GridCoin compilation.
## 5- Clone the GridCoin Github, compile and install the client / node with following commands:
> cd
> git clone https://github.com/gridcoin/Gridcoin-Research
NOTE: This will create a new directory /home/pi/Gridcoin-Research
> cd db-4.8.30.NC/build_unix
> sudo ../dist/configure --prefix=/usr/local --enable-cxx
> cd
> sudo mkdir ~/Gridcoin-Research/src/obj && cd ~/Gridcoin-Research/src && chmod 755 leveldb/build_detect_platform && make -f makefile.unix –e PIE=1
NOTE: This could take a very long time, go and make a cup of tea, do not close the terminal!
> sudo strip gridcoinresearchd
> hardening-check gridcoinresearchd
You should see all the answers say yes like this:

> sudo install -m 755 gridcoinresearchd /usr/bin/gridcoinresearchd
> mkdir ~/.GridcoinResearch
> ~/
> chmod 700 .GridcoinResearch
> cd
## 6- Start the GridCoin daemon with:
> gridcoinresearchd
NOTE: You may get a warning and need to create a gridcoinresearch.conf file, don’t worry
> cd .GridcoinResearch
> sudo nano gridcoinresearch.conf
Enter the following in the blank page
> email=<your email, must match your BOINC projects>
server=1
daemon=1
rpcallowip=127.0.0.1
rpcuser= * anything you want, does not need to match BOINC *
rpcpassword= * does not need to match BOINC but this should be a long random string for security *
addnode=node.gridcoin.us
listen=1 * if you want a full node *
PrimaryCPID= your pre-existing CPID
privatekey< your pre-existing CPID>= your pre-existing private key
publickey< your pre-existing CPID>= your pre-existing public key
CTRL+X to save, Y to confirm and then hit Enter
## 7 - Install BOINC
> sudo apt-get install boinc-client boinc-manager
To control BOINC you will need to go to:
> cd /var/lib/boinc-client
Then use the boinccmd tools, more info at https://boinc.berkeley.edu/wiki/Boinccmd_tool. Assuming you have a BOINC account manager, you can do (all in one string)
> boinccmd --join_acct_mgr URL_of_account_manager_here your_BOINC_username_here your_BOINC_account_password_here
## 8 - Start Gridcoin
>cd
> gridcoinresearchd
To check if its running:
> gridcoinresearchd getinfo
NOTE: If you see 'error: couldn't connect to server', don’t worry, it just means the program is still starting up, keep trying 'gridcoinresearchd getinfo' every 30 seconds until it works
## 9 - IMPORTANT: Encrypt and back up your wallet and keep it on at least one other device!
Mount a USB drive, insert a USB drive int the Pi:
> sudo mkdir /media/usb
> sudo fdisk -l
Look for an entry at the bottom like /dev/sda1
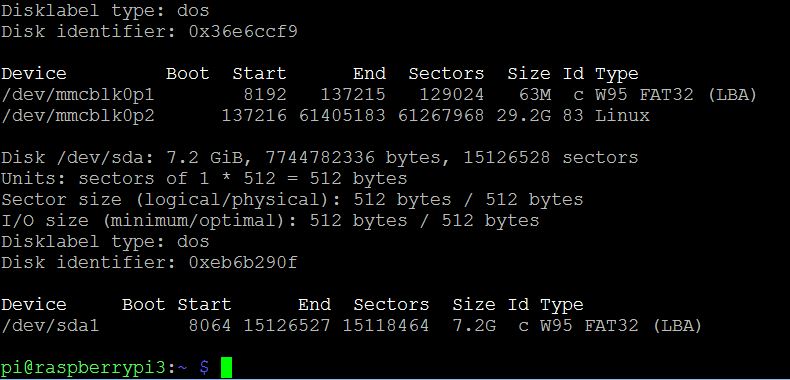
> sudo mount /dev/sda1 /media/usb
> gridcoinresearchd stop
> cd .Gridcoin-Research
> sudo cp wallet.dat /media/usb/wallet.dat
> sudo umount /dev/sda1
Remove the USB drive, then restart gridcoin with:
> gridcoinresearchd
## 10 - Run Gridcoin as a service, this will ensure proper shutdown and startup, and will restart Gridcoin in case of failure
> gridcoinresearchd stop
> sudo nano /lib/systemd/system/gridcoinresearchd.service
Then enter the following into the blank page:
> [Unit]
> Description=Gridcoin daemon services
> After=tlp-init.service
>
> [Service]
> Type=forking
> PIDFile=/home/pi/.GridcoinResearch/gridcoinresearch.pid
> RemainAfterExit=yes
> ExecStart=/usr/bin/gridcoinresearchd
> Restart=on-failure
> RestartSec=3
> User=pi
>
> [Install]
> WantedBy=multi-user.target
CTRL X, Y and Enter to save
Now enable and start the service:
> sudo systemctl enable gridcoinresearchd.service
> sudo systemctl start gridcoinresearchd.service
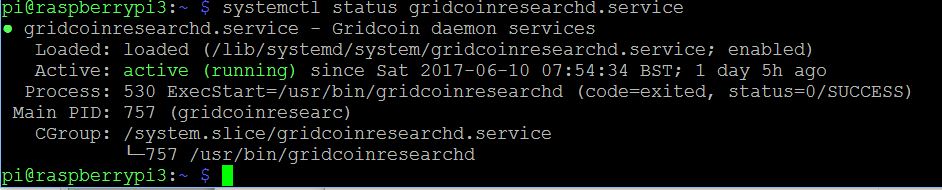
And to see if it is running:
> systemctl status gridcoinresearchd.service
To stop and disable the service (if you didnt want to to start on booting the Pi for example):
> sudo systemctl stop gridcoinresearchd.service
> sudo systemctl disable gridcoinresearchd.service
You just need to let your Pi sync to the Gridcoin blockchain, I have not tried bootstrapping because it only takes about 24 hours to catch up. You will also want to look at http://wiki.gridcoin.us/RPC_commands for a full list of commands to control your Pi daemon, each command is always preceeded with 'gridcoinresearchd'
Good luck and happy crunchin!👍 azlicr, cm-steem, grizgal, fkinglag, yung, redpill, cryptoctopus, enki, ervin-lemark, cloh76, virtualgrowth, platonicsironic, rymlen, blakeh, sixexgames, scalextrix, pheonike, steembets, steemprentice, dolov, thegame, viktorcapulet, steemland.com, hagbardceline, bola, vortac, sc-steemit, beordo, lennstar, youknow212012, sodom, gamer00, dannypc, teamhumble, diogogomes, theissen, rephill, erelas, darkhejmaster, thorondor, tr1r0y, techtek, beergeekgamer, saldenisov, tomasbrod, smiller, xamarynth, alexmaksto, aquatarkus, grider123,