Crea tu API en un VPS: Privex + Hive + Node.js | Build Your API on a VPS #2
hive-186392·@theghost1980·
0.000 HBDCrea tu API en un VPS: Privex + Hive + Node.js | Build Your API on a VPS #2

Saludos Hivers, un especial reconocimiento a todos los desarrolladores de web3. Sin ustedes darle vida a la blockchain no seria posible.
Para mantener consistencia en las publicaciones, traemos la siguiente entrega de como "crear un API usando privex/VPS". En este articulo tratare de explicar de manera practica, como ir configurando y hacer pruebas.
- Entendiendo SSH y el proceso de login.
- Caddy "out of the box" de @privex.
- App de nodejs sencilla y expandible.
- Ajustando el DNS gratuito, dos opciones: [DuckDNS](https://www.duckdns.org/) y [No-IP](https://www.noip.com/es-MX)
- Puesta en Marcha de la nodeapps usando pm2 y pruebas.
------
#### SSH + Privex VPS + Login
Si vas siguiendo el tutorial completo, ya deberias tener tus credenciales de tu servidor. Preferiblemente que hayas elegido una opcion con sistema operativo Linux y aplicaciones pre-configuradas como [Caddy](https://caddyserver.com/).
#### Sistema Operativo, Servidor Web
Al igual que corremos una aplicación en el navegador, usando nuestro sistema operativo, necesitamos contar con un sistema operativo en el VPS(servidor privado virtual) y la pagina web, necesita ser expuesta y servida por una aplicacion que use estandares y seguridad. Es alli donde radica la importancia del servidor web. Para el caso de privex, algunos paquetes de VPS ya traen Caddy, quien es una potente herramienta que se encarga de manejar el acceso a los puertos al servidor y servir lo que sea que le pidamos.
> SSH, que significa Secure Shell, es un protocolo de red que permite una comunicación segura y encriptada entre dos sistemas, como un cliente y un servidor remoto. [Fuente](https://www.arsys.es/blog/ssh#:~:text=SSH%20son%20las%20siglas%20de,como%20v%C3%ADa%20para%20las%20comunicaciones.)
#### Ok sigamos con el proceso.
- Ya tienes los datos importantes para que usemos SSH para conectarnos al recien adquirido VPS. Toma del e-mail que recibiste:

Los datos que necesitamos para conectarnos al VPS via remota usando SSH son:
1. IPv4 Address
2. Username
3. Password
- Si usamos windows, podemos usar la terminal simple o [PowerShell](https://learn.microsoft.com/es-es/powershell/scripting/install/installing-powershell-on-windows?view=powershell-7.5)
Supongamos que tenemos:
```
Username: debian
IP: 184.110.36.35
> ssh debian@184.110.36.35
```
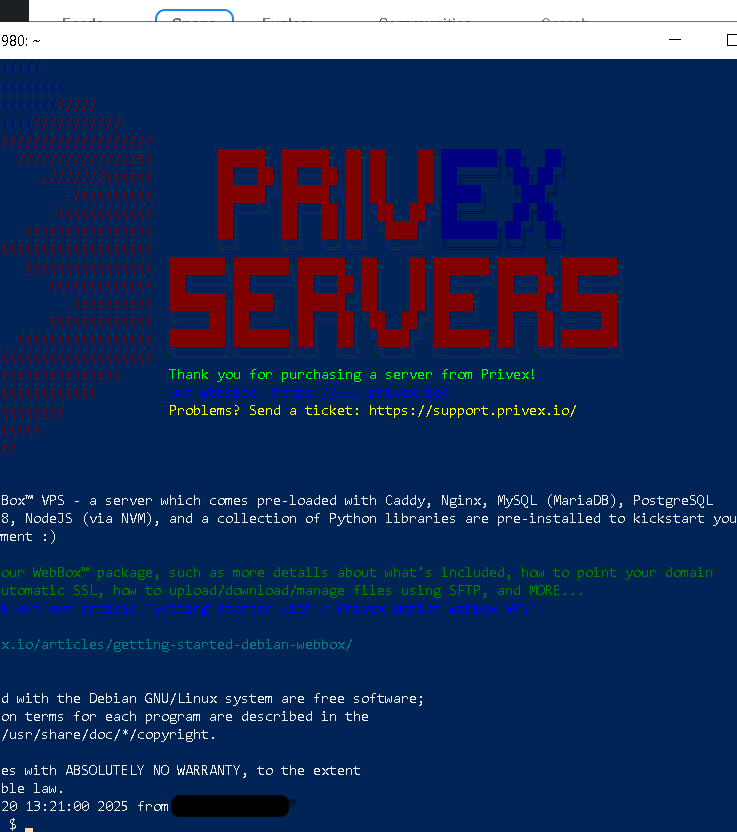
Al hacer la consola "nos pide" la clave. NOTA: Normalmente en muchas terminales o consolas de sistema operativo, cuando debemos introducir una clave, el cursor se queda fijo y podemos creer que no esta escribiendo pero si no hace. Al colocar la clave correcta, estaremos dentro del sistema operativo del VPS de prives y veremos algo como:
- Una vez dentro podemos y deberiamos practicar lo basico:
- comando `ls` para listar directorios.
- comando `cd` para cambiar de directorios.
- comando `mkdir` o `touch` para crear directorios o archivos.
#### Prueba como se ve la pagina pre-configurada de tu servidor
- Usando tu navegador en tu PC, accede directamente a https://[direccion-ip-de-tu-VPS] y tu VPS deberia mostrarte una pagina por defecto.
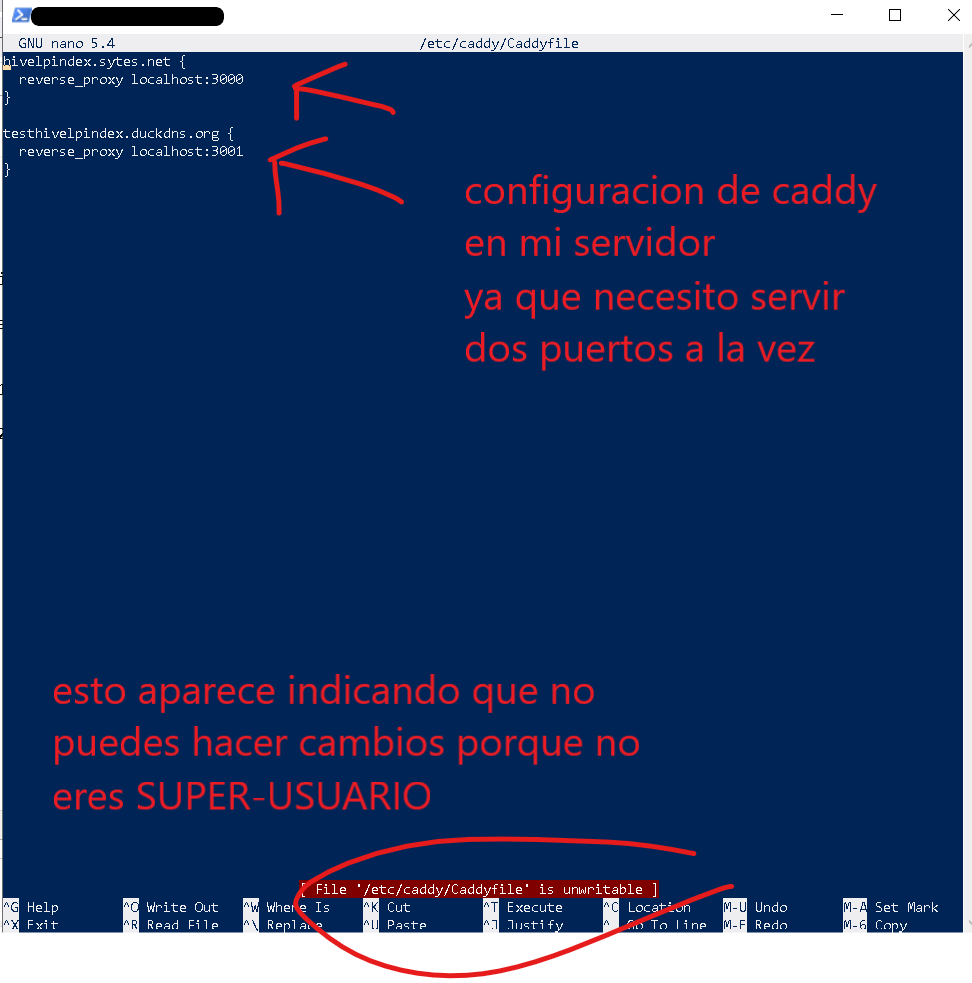
Ahora sigamos en el VPS y miremos como se ve la configuracion de caddy:
```
> nano /etc/caddy/Caddyfile
```
Y veremos algo como:
> Normalmente en linux, se llama SUPER USUARIO a un usuario que tiene privilegios para administrar el sistema operativo completo.
- Cierra el archivo: `CTRL + X`.
- Pasemos a super user usando:
```
> sudo su
```
Y ahora veras como el `prompt`del sistema cambia completamente.
> Advertencia: **antes de ejecutar comandos sin saber lo que haces, consulta con los chats de AI o entra a los foros de desarrolladores que comento al final del post** ya que siento super-user podrias incluso destruir el sistema completo.
#### Antes de cambiar Caddy y crear un DNS, miremos la app de node que les hice de ejemplo
Para simplicidad les codifique una app muy simple que sirve como ejemplo de API. Usando [express](https://expressjs.com/es/), [nodejs](https://nodejs.org/en) y [hive-io](https://www.npmjs.com/package/@hiveio/dhive). Este simple backend/API nos permite hacer peticiones para buscar usuarios nuevos en HIVE.
[Codigo en Github](https://github.com/theghost1980/hive-sample-api)
Descripcion de la Simple Hive API:
> Busca hivers que tengan reputacion entre 25 y 45, cuya ultima publicacion tenga 6 dias y aun no tenga muchos votos. Entre otras cositas
Por aca les dejo el [script.sh](https://github.com/theghost1980/hive-sample-api/blob/main/README.md) que se encarga de automatizar el fetch desde el repositorio de github + ejecutar usando pm2 la api en el puerto 4000.
#### Montemos la API en nuestro VPS usando git y script ejecutables
1. Ya como super usuario, vamos a la carpeta /home/usuario/
2. Creamos la carpeta tutoriales `mkdir tutoriales` y entramos en ella `cd tutoriales`.
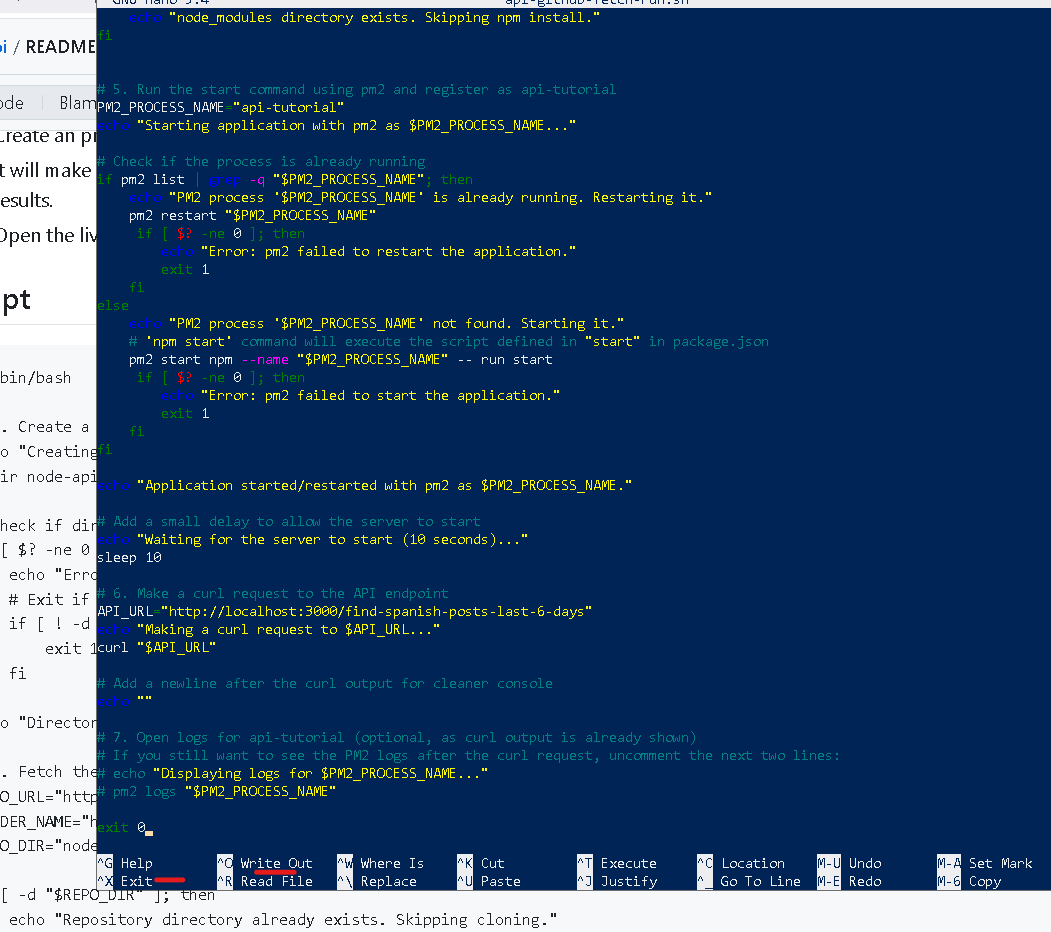
3. Vamos a crear el script usando `nano api-github-fetch-run.sh`.
4. El editor de texto nano se abre y podemos pegar el codigo. Lo copiamos del readme del [repo aca](https://github.com/theghost1980/hive-sample-api/blob/main/README.md)
Y deberia verse asi:
- Para guardar el contenido del script usamos `CTRL + O`
El editor pregunta, si te fijas justo debajo cuando aparece:
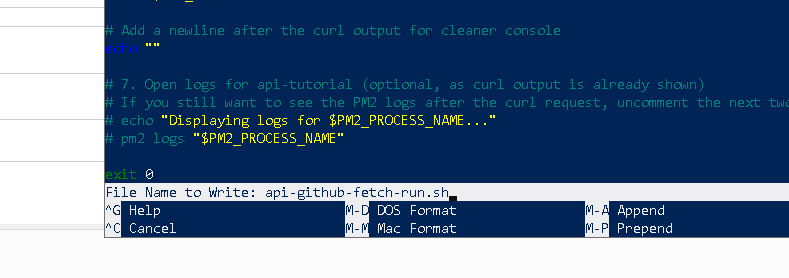
- Presionamos `ENTER` y salimos de nano usando `CTRL + X`
- Deberiamos ver el script al llamar al comando listar o `ls`.
- Como es un script que usa archivos, pues necesita privilegios.
- Ejecuta el comando `chmod +x api-github-fetch-run.sh`
> Al otorgar permisos el sistema no dira nada. Solo muestra una linea siguiente. Se interpreta como "Permisos dados".
- Ahora ejecutemos el script `./api-github-fetch-run.sh`
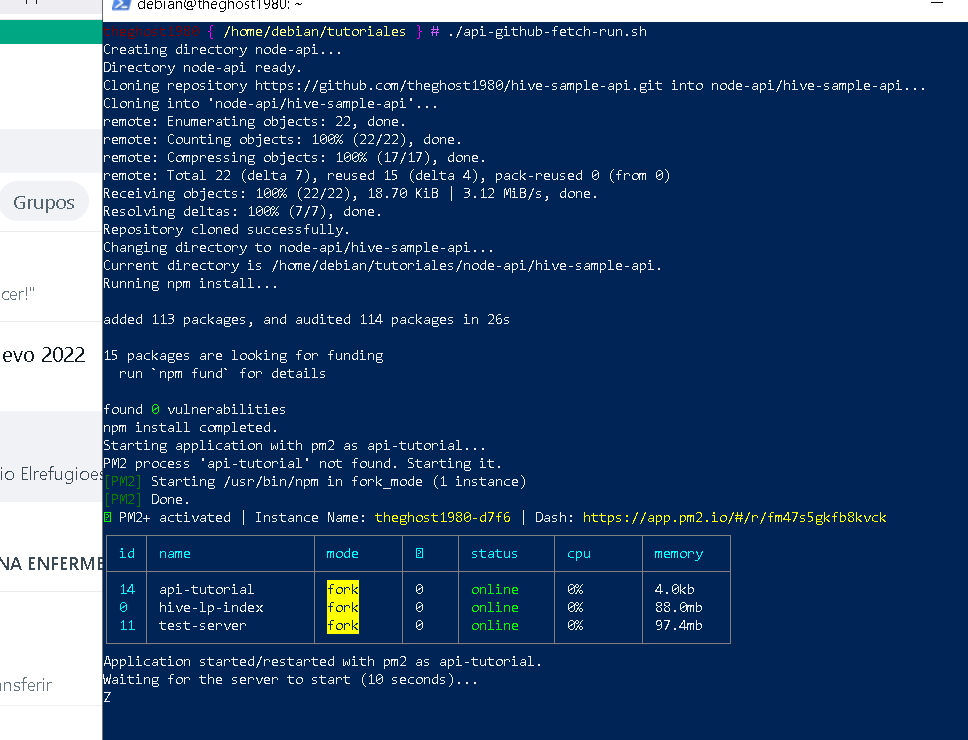
- Veremos como el script crea la carpeta `node-api`, clona el repositorio, ejecuta `npm i`, crear el proceso con pm2 lo inicia y muestra. En mi caso tengo otros procesos corriendo pero deberias ver al menos uno solo `api-tutorial online`. El script espera 10 segundos antes de hacer el fetch usando `curl`.

> Todo ese monton de texto, son los resultados lo que indica que la api funciona, al menos dentro del VPS.
#### Caddy para ganar?
- Abre el archivo de configuracion de caddy usando
`sudo nano /etc/caddy/Caddyfile`
- Veras un monton de texto. Localiza la linea que dice "# To use your own domain name (with automatic HTTPS)..."
- Y en un bloque debajo veras una direccion IP que encierra un par de llaves como si fuese un objeto. Algo como esto:
```
direccion_IP {
root * /var/www/mainsite
file_server
php_fastcgi unix//run/php/php7.3-fpm.sock
# Another common task is to set up a reverse proxy:
# reverse_proxy localhost:3000
}
```
- Donde `direccion-IP` sera la direccion de tu VPS algo como: 185.10.25.43
- Vamos a configurar primero el DNS para que un usuario en vez de tipear: `http://185.10.25.43` pueda hacer algo como `http://apitut.duckdns.org`
- Abre una cuenta en https://www.duckdns.org/domains ye sugiero usar github para acceder.
- Agrega tu dominio nuevo aca:

- Al Agregar por ejemplo `apitut` te aparecera debajo con la IP desde donde accedes. Alli debes colocar la IP a tu VPS:

- La colocas y presionas `update ip` y debe salir un mensaje como:
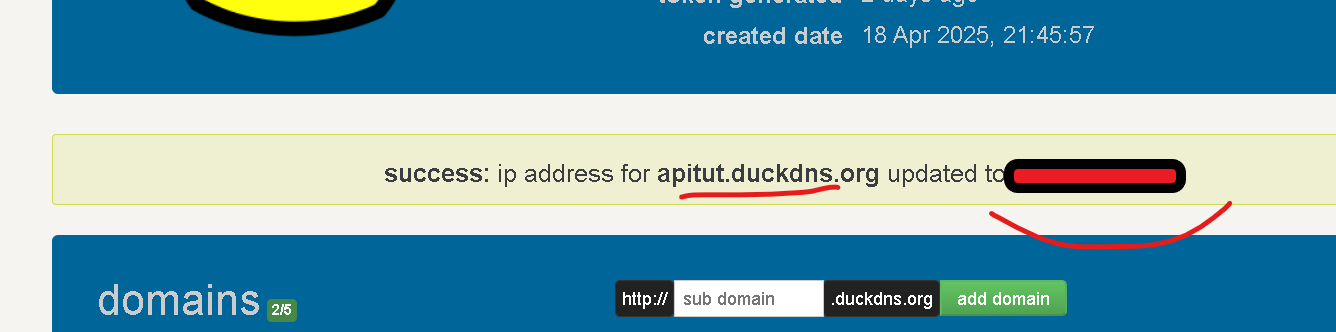
> Por seguridad he tapado la mia. Bueno intentemos acceder a: http://apitut.duckdns.org/ y no deberia ser posible ver nada porque aun no hemos configurado caddy para eso.
- Volvamos a caddy en el VPS.
- Abre caddy si no lo estaba usando `sudo nano /etc/caddy/Caddyfile`
- Y donde aparece la direccion IP, colocaremos el domino: `apitut.duckdns.org`
- Para guardar usa `CTRL + O` y salimos usando `CRTL + X`
- Debemos ahora recargar la configuracion de caddy para que tenga efecto `sudo systemctl reload caddy`
- Y revisamos el status de caddy usando `sudo systemctl status caddy`
- Ahora intentemos nuevamente usar el navegador para ver que sucede? Y en teoria deberiamos ver la pagina por defecto que nos dejo privex.
#### HTTPS? COMO y porque?
Porque es la norma para mantener una conexion segura entre cliente y servidor. Y lo una manera que normalmente funciona es hacer que caddy se encargue del https. Para eso abre nuevamente el archivo de caddy:
`sudo nano /etc/caddy/Caddyfile`
- Ubica estas lineas:
```
{
acme_ca https://acme-staging-v02.api.letsencrypt.org/directory
}
```
- Y comentalas colocando un # al inicio de cada linea asi:
```
#{
# acme_ca https://acme-staging-v02.api.letsencrypt.org/directory
#}
```
- Guarda los cambios `CTRL + O` y sal del editor `CTRL + X`.
- Recarga caddy `sudo systemctl reload caddy`
- Y prueba nuevamente a acceder al nuevo dns del servidor `apitut.duckdns.org`
- Si todo marcha bien, deberias tener ahora el servidor apuntando a ese dominio y con https.
> ante posibles errores no dudes en dejar comentarios o hablar con gemini o chatgpt.
#### Finalmente agregando mi api para que se vea corriendo desde mi dns actual
> Nota voy a sugerirte una manera que puedes revisar y probar. Para continuar haz un respaldo de tu archivo caddy actual, antes de colocar la version que voy a darte ya que no hare uso de la pagina por defecto que nos da privex.
- Abrimos caddy `sudo nano /etc/caddy/Caddyfile`
- Y borrando todo lo que estaba como configuracion vieja que ya deberiamos haber respaldado, colocamos en cambio:
```
apitut.duckdns.org {
reverse_proxy localhost:4000
}
```
- Guarda `CTRL + O` y sal de alli `CTRL + X`
- Y nada mas. Para por ahora solo servir esa app que ya esta corriendo y que haga un proxy inverso al puerto 4000.
- Recarga caddy `sudo systemctl reload caddy`
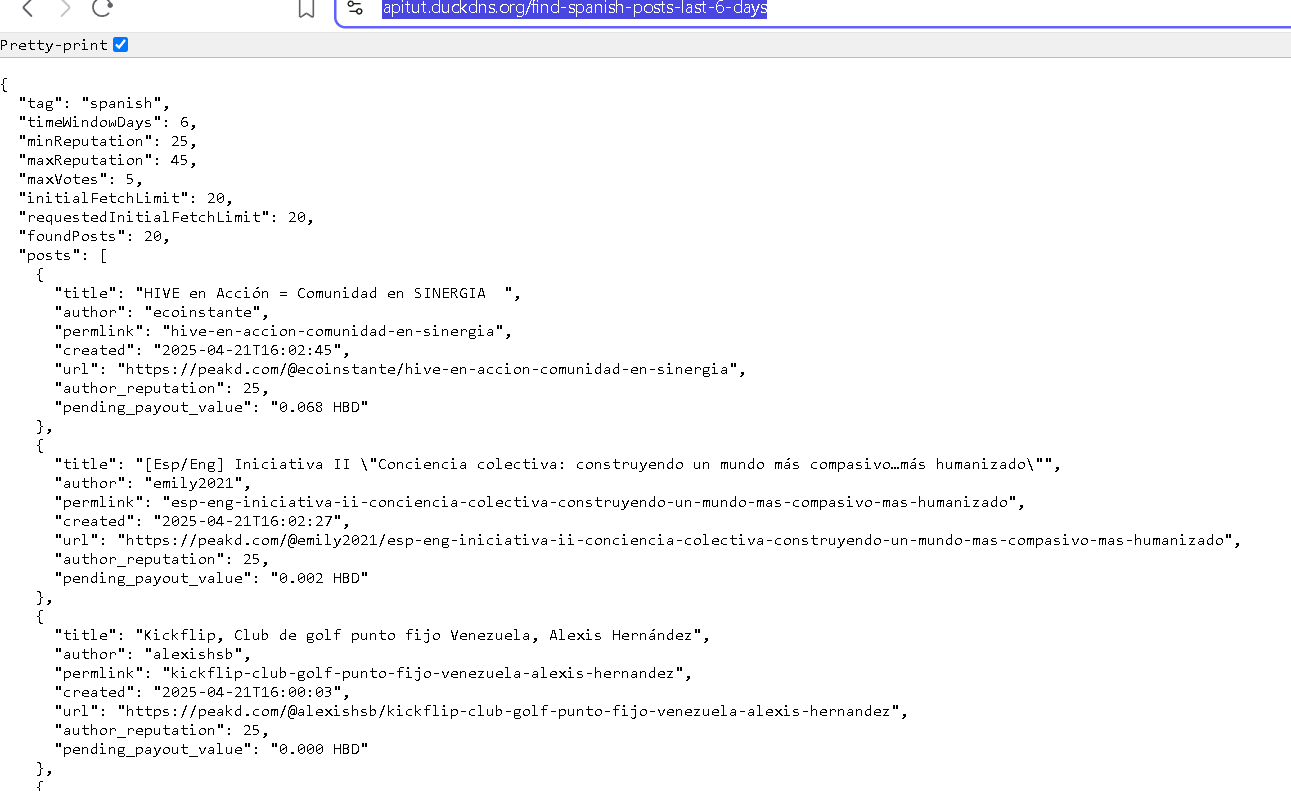
- Y listo ahora al usar el navegador, que por defecto hara una peticion `GET` al navegar en [Api-tutorial](https://apitut.duckdns.org/find-spanish-posts-last-6-days) veremos la data y la api funcionando como:
Notas Importantes:
- Ya no podrias usar `apitut.duckdns.org` deberas usar otro. Al menos no es duckdns.org
- La configuracion de caddy es un tanto compleja pero vale la pena intentarlo y dominarlo.
- Privex ofrece [documentos](https://www.privex.io/faq/) que puedes mirar y aprender aun mas.
- Canales de ayuda de discord indispensables para los desarrolladores en HIVE:
Discords:
- [Hive](https://discord.gg/cgZbmhBbw7)
- [Engine](https://discord.gg/t3Cg3w4nr4)
- [Peakd](https://discord.gg/6FEgSx56rF)
Docs:
- [Hive Developers](https://developers.hive.io/)
------
English:
Greetings Hivers, a special shout-out to all the web3 developers. Without you, bringing blockchain to life wouldn't be possible.
To maintain consistency in our publications, we bring you the next installment of how to **"create an API using privex/VPS"**. In this article, I’ll try to explain in a practical way how to set up and test everything.
- Understanding SSH and the login process.
- Caddy "out of the box" from @privex.
- Simple and expandable Node.js app.
- Adjusting free DNS with two options: [DuckDNS](https://www.duckdns.org/) and [No-IP](https://www.noip.com/es-MX)
- Running the node app with pm2 and testing.
------
#### SSH + Privex VPS + Login
If you’ve been following the full tutorial, you should already have your server credentials. Ideally, you chose a Linux-based OS option with pre-configured apps like [Caddy](https://caddyserver.com/).
#### Operating System, Web Server
Just like we run apps on our local OS via the browser, we need an OS on our VPS (virtual private server), and a web server to serve pages using proper standards and security. That’s where the web server becomes essential. In Privex's case, some VPS packages already include Caddy, a powerful tool that handles server port access and serves whatever we configure.
> SSH, which stands for Secure Shell, is a network protocol that enables secure and encrypted communication between two systems, like a client and a remote server. [Source](https://www.arsys.es/blog/ssh#:~:text=SSH%20son%20las%20siglas%20de,como%20v%C3%ADa%20para%20las%20comunicaciones.)
#### Let's continue with the process.
- You already have the important info to use SSH and connect to the VPS. From your email:

The data you need to connect remotely via SSH is:
1. IPv4 Address
2. Username
3. Password
- On Windows, you can use the standard terminal or [PowerShell](https://learn.microsoft.com/es-es/powershell/scripting/install/installing-powershell-on-windows?view=powershell-7.5)
Example: `Username: debian IP: 184.110.36.35`
> ssh debian@184.110.36.35
When you run this, the console will ask for your password. **NOTE**: In most terminals, typing a password won't show any feedback—this is normal. Once entered correctly, you'll access your Privex VPS and see something like:

- Once inside, practice basic commands:
- `ls` to list directories.
- `cd` to change directories.
- `mkdir` or `touch` to create directories or files.
#### Test the default pre-configured web page
- On your PC browser, visit: https://[your-VPS-ip-address] — and you should see a default page.
Now let’s inspect the Caddy configuration:
> nano /etc/caddy/Caddyfile
You’ll see something like:

> In Linux, a SUPER USER is a user with permissions to manage the entire OS.
- Close the file: `CTRL + X`.
- Become super user:
> sudo su
And you’ll notice the system prompt changes.
> Warning: **Before executing unknown commands, consult with AI tools or dev forums listed at the end of this post. As super-user, you could break the whole system.**
#### Before tweaking Caddy and DNS, let's check the example Node app
I coded a simple sample API using [express](https://expressjs.com/es/), [nodejs](https://nodejs.org/en), and [hive-io](https://www.npmjs.com/package/@hiveio/dhive). This backend/API allows user queries to find new Hivers.
[Code on Github](https://github.com/theghost1980/hive-sample-api)
Description:
> Finds Hivers with reputation between 25 and 45, whose last post is 6 days old and has few votes, among other things.
Here’s the [script.sh](https://github.com/theghost1980/hive-sample-api/blob/main/README.md) that automates cloning from GitHub + runs the API with pm2 on port 4000.
#### Deploy the API on our VPS using git and a script
1. As super-user, go to `/home/your-user/`
2. Create a folder `mkdir tutoriales` and go into it: `cd tutoriales`
3. Create the script: `nano api-github-fetch-run.sh`
4. Open the [repo](https://github.com/theghost1980/hive-sample-api/blob/main/README.md), copy the code and paste it into nano.
It should look like this:

- Save the script: `CTRL + O`, hit `ENTER`, then exit: `CTRL + X`
- Use `ls` to list and confirm it’s there.
- Give it execute permission:
> chmod +x api-github-fetch-run.sh
> No confirmation is shown—this is normal. Now run it:
> ./api-github-fetch-run.sh

You’ll see it cloning, installing dependencies, running pm2, and launching the API.

> All that output means your API is running—at least within the VPS.
#### Caddy FTW?
- Open Caddy config: `sudo nano /etc/caddy/Caddyfile`
- Find the line that says "# To use your own domain name (with automatic HTTPS)..."
- You’ll see a block like:
```
IP_address { root * /var/www/mainsite file_server php_fastcgi unix//run/php/php7.3-fpm.sock # reverse_proxy localhost:3000 }
```
- Replace `IP_address` with your VPS IP like: 185.10.25.43
Let’s configure DNS so you can access it via a domain like `http://apitut.duckdns.org`:
- Register at https://www.duckdns.org/domains (GitHub login recommended)
- Add your domain:

- Set your VPS IP and click `update ip`:

- It should say:

> Now try visiting `http://apitut.duckdns.org/`. Nothing will load yet—Caddy config still needs updating.
- Open Caddy again `sudo nano /etc/caddy/Caddyfile`
- Replace the IP with: `apitut.duckdns.org`
- Save `CTRL + O` and exit `CTRL + X`.
- Reload Caddy: `sudo systemctl reload caddy`
- Just in case check caddy status ` sudo systemctl status caddy`
- Try browsing again—you should now see the default Privex page.
#### HTTPS? How and why?
Because it’s the standard for secure communication. Let Caddy handle HTTPS.
Open `sudo nano /etc/caddy/Caddyfile`, find:
```
{
acme_ca https://acme-staging-v02.api.letsencrypt.org/directory
}
```
Comment it as:
```
#{
# acme_ca https://acme-staging-v02.api.letsencrypt.org/directory
#}
```
- Save `CTRL + O` and exit `CTRL + X`.
- Reload Caddy: `sudo systemctl reload caddy`
Now try accessing `https://apitut.duckdns.org` — it should now be HTTPS-secured.
> For issues, leave a comment or ask Gemini/ChatGPT.
#### Finally, show the API live on your DNS
> Tip: backup your current Caddyfile first.
Open Caddy: `sudo nano /etc/caddy/Caddyfile`, replace everything with:
```
apitut.duckdns.org {
reverse_proxy localhost:4000
}
```
- Save `CTRL + O` and exit `CTRL + X`.
- Reload Caddy: `sudo systemctl reload caddy`
And now your browser will load data from:
[https://apitut.duckdns.org/find-spanish-posts-last-6-days](https://apitut.duckdns.org/find-spanish-posts-last-6-days)

**Important Notes**:
- You can’t reuse `apitut.duckdns.org`—pick a different subdomain.
- Caddy configuration can be tricky, but worth learning.
- Privex offers helpful [docs](https://www.privex.io/faq/).
- Must-know Discord channels for HIVE developers:
- [Hive](https://discord.gg/cgZbmhBbw7)
- [Engine](https://discord.gg/t3Cg3w4nr4)
- [Peakd](https://discord.gg/6FEgSx56rF)
- Docs:
- [Hive Developers](https://developers.hive.io/)
--------
###### @theghost1980
###### Send me some love using the link in the image bellow:
> Mándame algo de amor usando el enlace en la imagen de abajo:
[](https://thecrazygm.com/hivetools/give/theghost1980/2/HBD)👍 freecompliments, tikki00taffi, wongi, beststart, ngwinndave, ijelady, liquidocelotytt, georgesantana73, hive-140084, fc-curation, meraki7578, fc-rewards, magicalex, indeedly, trovepower, mmbbot, hdmed, hetty-rowan, poplar-22, indiasierra, jacor, moretea, coolguy123, guurry123, imfarhad, ifarmgirl, trashyomen, vrezyy, noctury, whitneyalexx, tengolotodo.leo, spoonies, d-a-d, claudiavb, michael561, joeyarnoldvn, emsenn0, ifarmgirl-leo, manclar, svanbo, esmeesmith, fonestreet, edeyglezsosa, mk992039, instagram-models, steembasicincome, sbi2, sbi3, anikys3reasure, awesomegames007, sbi4, piestrikesback, buildingpies, sbi-tokens, qwertm, tub3r0, briefmarken, shauner, sbi5, sbi6, sneakyninja, netzisde, bububoomt, babysavage, ravensavage, sbi7, sbi8, sbi9, sbi10, gamer00, penguinpablo, cryptonized, funnyman, alphacore, hungrybear, jacuzzi, kiemis, filoriologo, tydynrain, laurajimeneza, calmphoenix, rudy-dj, moserich, tejidorosa, afroadrianv, jennylu, autinf, untaljames, cryptodelegator, jilt, ecoinstant, fatman, msp-makeaminnow, investegg, votehero, eturnerx-dbuzz, cryptoknight12, jozefkrichards, kernelillo, voter001, hivedrip, gaottantacinque, cribbio, gasaeightyfive, dpend.active, sketching, mxm0unite, thorlock, mighty-thor, splinterwhale, keys-defender, cryptoshots.nft, crypto-shots, karina.gpt, marcocasario, hive-defender, key-defender.shh, cryptoshots.play, cryptoshotsdoom, dutchchemist, artlover, thgaming, summertooth, dynamicrypto, zaddyboy, senseisar, kraaaaa, beffeater, wahlterwhite, braaiboy.pgm, dbooster.thg, psyberx, psx-bank, jim-crypto, mes, tehox, methodofmad, libersolum, omra-sky, blue.rabbit, cryptoniusrex, smartvote, dkidfit, likedeeler, lolz.byte, lrekt01, urun, jobaboard,