How to Fix Photo Exposure in Simple 3 steps
hive-194913·@vaipraonde·
0.000 HBDHow to Fix Photo Exposure in Simple 3 steps
Hi Hive friends! How are you doing today? Hope to find you well. Sometimes I see some photos and think that it could be better just with few clicks. So, I'm sharing with you all a simple trick that I usually use to fix light and exposure on my photos. #### 1st step - Auto Color Levels Adjust #### 2nd step - Saturation Adjust #### 3rd - Export and Save 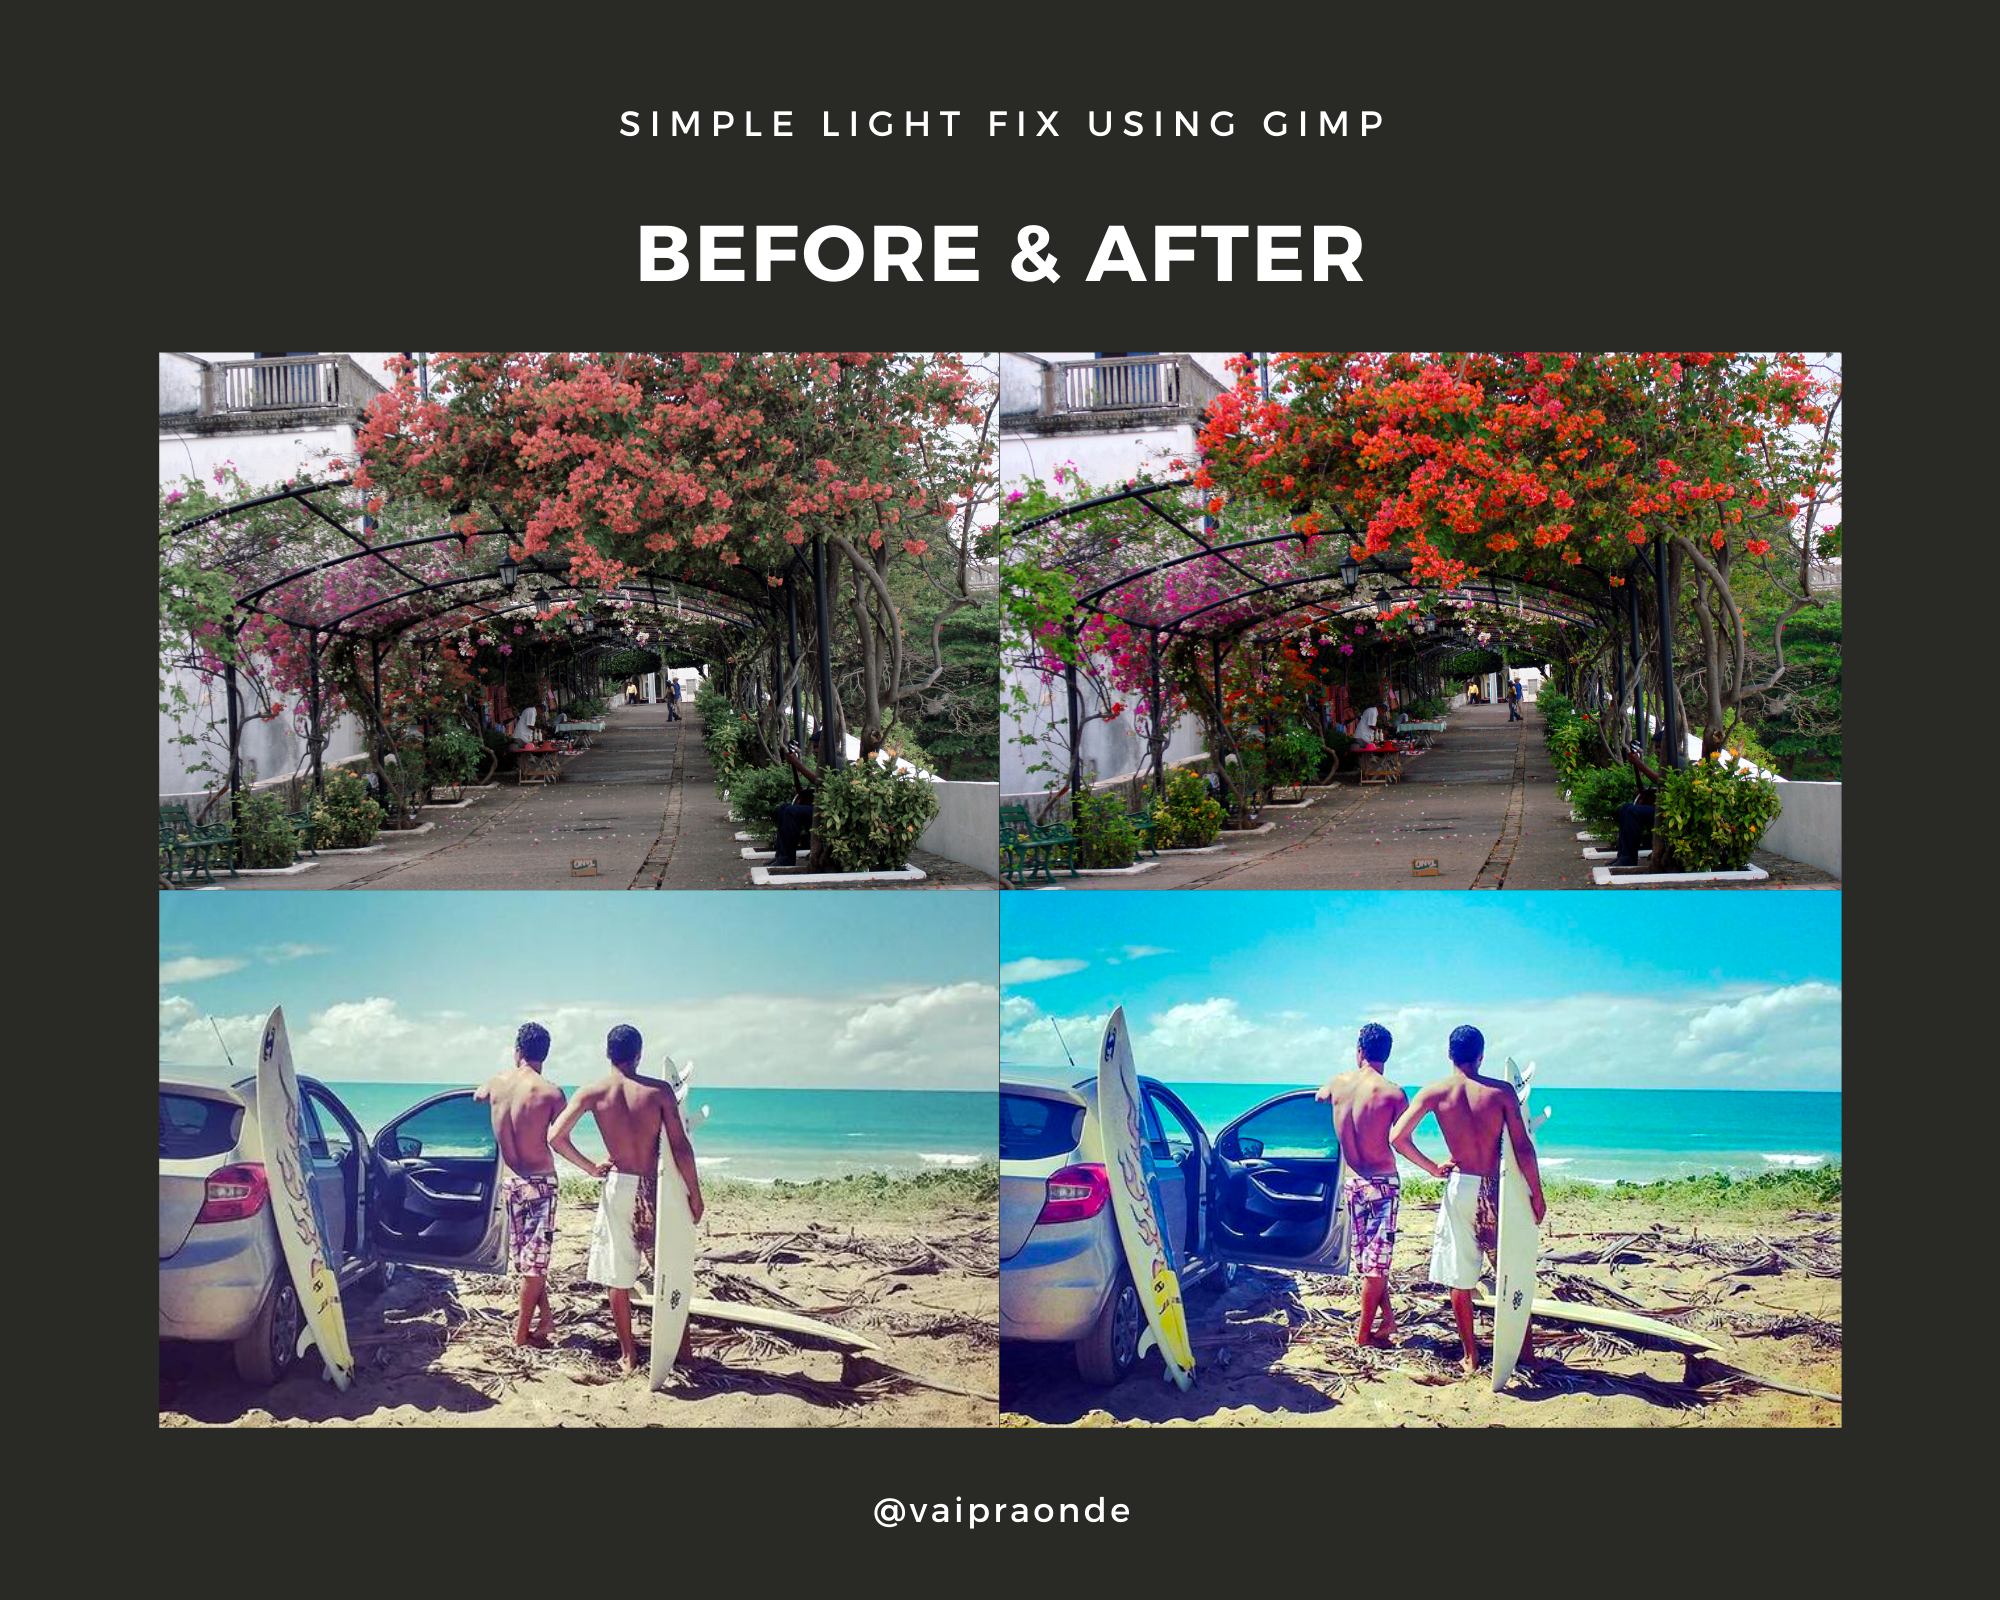 <center> <div class='phishy'> # How to Fix Photo Exposure </div> </center> <div class='text-justify'> How did I enhance these pictures? Let's find out! Before I start working with Software development, I was a Web Design as my first job. There, I had a very good mentor and could learn how to use Image Editors and I still use some of the skills I learned now a day. This trick is how to easily fix light and saturation in simple 3 steps. It will not work magically on all your pictures, but I can bet with you that almost all of them will be very well enhanced. I like to use GIMP Image Editor, my pocket image editor for all occasions, but you can use others software that gives you colors and saturation options. If you don't want to download new software or have a slow computer, you can also try editing with Google Photos, that have similar options and very similar after effect and work online at your web browser. If you are not familiar with GIMP, it is a free image manipulation software most similar to Photoshop that allows you the freedom to create any photo composition you want. I use it to retouching my new and old photos. >You can download GIMP from here: https://www.gimp.org/ No more talking, let's do it! https://images.hive.blog/0x0/https://images.hive.blog/DQmdvc788wxsBSQHY3z21o3wSTU7hqRnyYc2JFEn2pEYSev/dividers-04.png ## 1st step - Auto Color Levels Adjust - Open Gimp and open your picture. you can Drag and Drop it as well... it's faster. - At the Main Menu Choose *Colors -> Levels* - Click on button *Auto Input Levels* Sometimes you will see a great improvement just with this step and even don't need to go further into the next step. 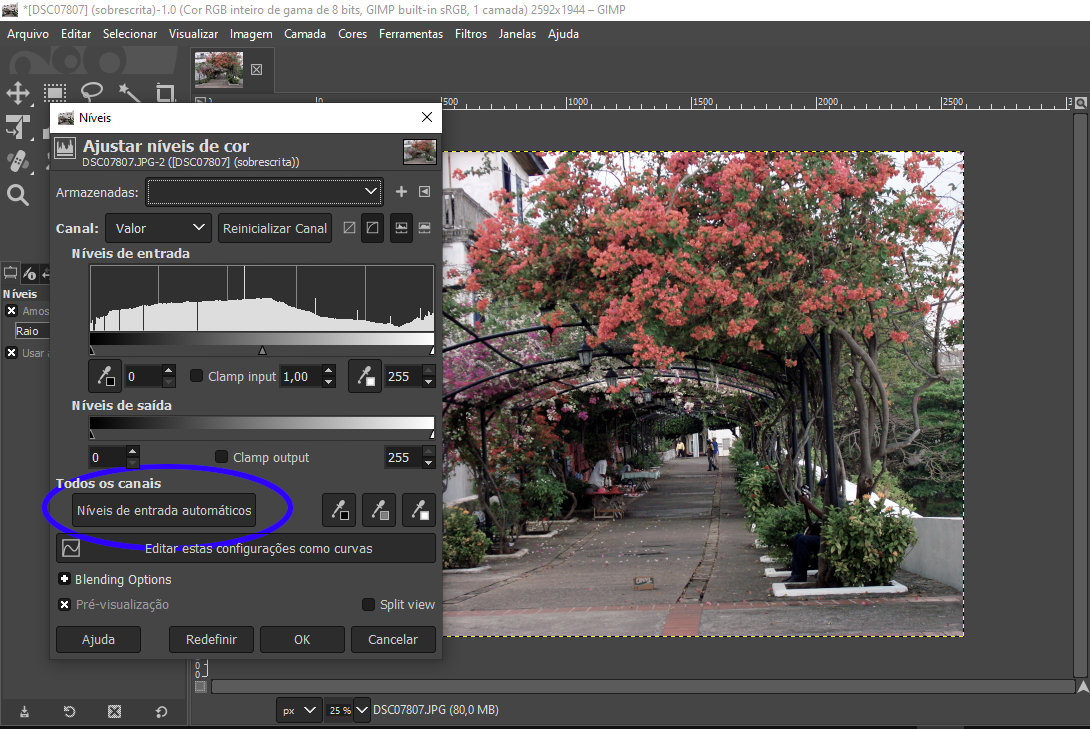 ## 2nd step - Saturation Adjust - At the Main Menu Choose *Colors -> Saturation* - With *Auto Preview* Option Selected, Move the slider smoothly until you like the result you got. 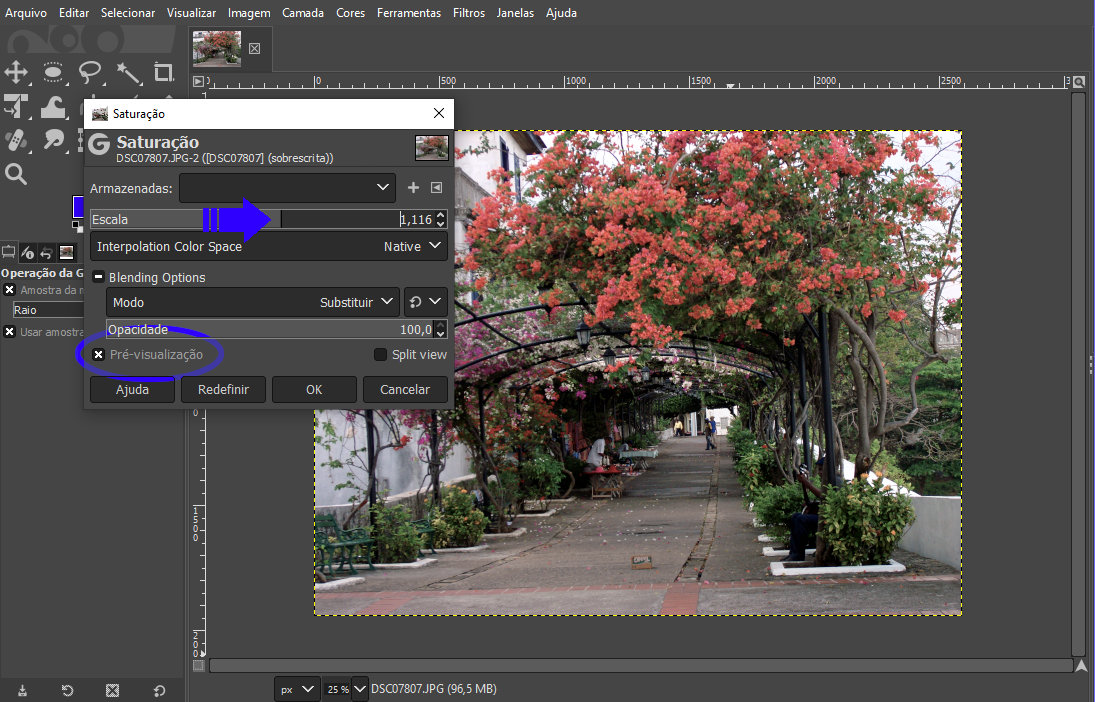 ## 3rd - Export and Save ##### ***Voilà*** Now you just need to save it. - At the Main Menu Choose *Export As* and choose a new filename for your picture. Remember that Save As will save a project, not an image file like .PNG or JPG. **IMPORTANT:** I always like to preserve the original photo. *Make a backup in case you want to try another configuration.* 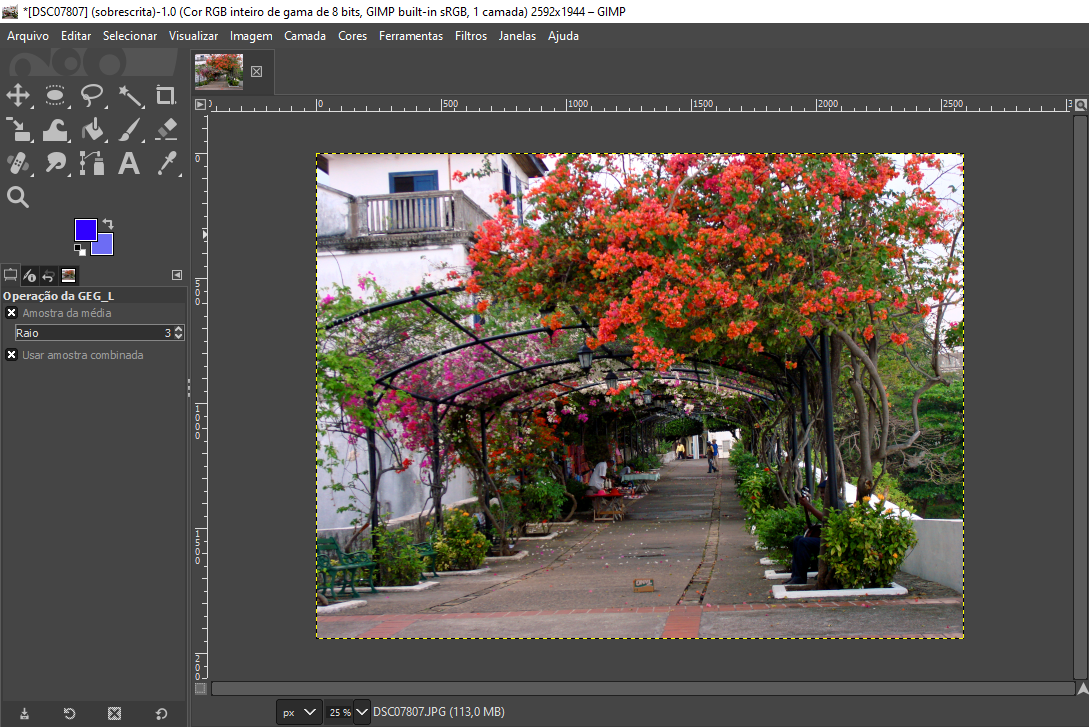 https://images.hive.blog/0x0/https://images.hive.blog/DQmdvc788wxsBSQHY3z21o3wSTU7hqRnyYc2JFEn2pEYSev/dividers-04.png I hope you like it and that this can help you with more vivid photos. If you have any questions about this process, feel free to ask me and I'll try my best to help you out. If you like this post, please share! Keep Hiving. @vaipraonde </div> --- https://images.hive.blog/0x0/https://i.imgur.com/m7OIEkV.gif