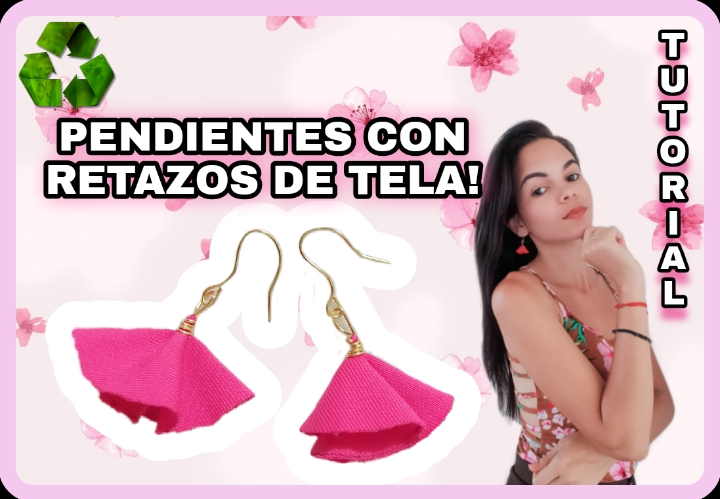
TUTORIAL: DISEÑANDO PENDIENTES CON RETAZOS DE TELA🌸// TUTORIAL: DESIGNING EARRINGS WITH PIECES OF FABRIC🌸 //ESP-ENG.
hive-130560·@venusl19·
0.000 HBDTUTORIAL: DISEÑANDO PENDIENTES CON RETAZOS DE TELA🌸// TUTORIAL: DESIGNING EARRINGS WITH PIECES OF FABRIC🌸 //ESP-ENG.
 <div class="text-justify"> Hola amigos de #hivediy , estoy complacida de saludarles y brindarles mi nuevo contenido, hoy les traigo un modelo de pendientes que se me ocurrió viendo este retazo de tela que conseguí en casa. <p> </div> > Hello friends of #hivediy, I am pleased to greet you and offer you my new content, today I bring you a model of earrings that occurred to me when I saw this piece of fabric that I got at home. <div class="text-justify"> me gusta crear mis accesorios, y principalmente diseñarlos,y me encanta ver un buen resultado así que en esta ocasión quise realizar algo fresco y que se vea algo diferente a mis otros deseños.! <p> </div> > I like to create my accessories, and mainly to design them, and I love to see a good result, so this time I wanted to do something fresh and make it look something different from my other designs!  <div class="text-justify"> Los retazos de tela a veces tendemos a desecharlos sin considerar las cosas hermosas que podríamos lograr, dentro de las muchas cosas que podemos realizar , me anime a realizar estos pendientes usando unos retazos de tela rosa que conseguí en casa. <p> </div> > Sometimes we tend to discard the scraps of fabric without considering the beautiful things that we could achieve, among the many things that we can do, I was encouraged to make these earrings using some scraps of pink fabric that I got at home.  <div class="text-justify"> Para su elaboración utilice los siguientes materiales, Los cuales se los mencionaré a continuación: <p> </div> > For its elaboration, use the following materials, which I will mention below: <div class="text-justify"> **MATERIALES** -alambre calibre 22. -pinza. -retazo de tela. -objeto cilíndrico -lapiz **MATERIALS** -22 gauge wire. -gripper. -piece of cloth. -cylindrical object -pencil <center>**PASO A PASO**</center> <center>**STEP BY STEP**</center> <p> </div> <div class="text-justify"> 1. Tomé el objeto cilíndrico, en este caso de un tamaño moderado, recuerda que tú decides el tamaño, lo ubique encima de la tela, y con el lápiz o marcador marque. <p> </div> > 1 . I took the cylindrical object, in this case of a moderate size, remember that you decide the size, place it on top of the fabric, and mark with the pencil or marker.  <div class = "text-justify"> 2. Tomé mi tijera y extraje la pieza cuidadosamente. <p> </div> > 2 . I took my scissors and extraje the piece carefully. 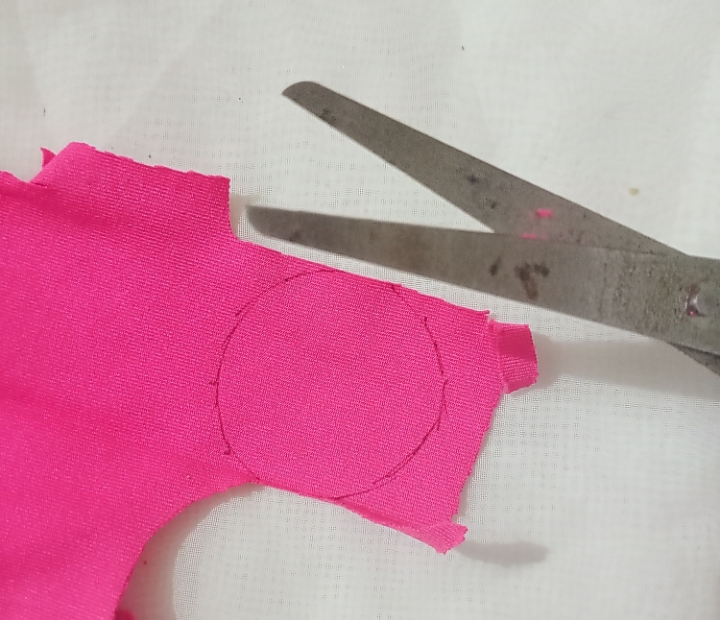 <div class = "text-justify"> 3. Ahora tomé el alambre calibre 22 y pinche la tela justo en el medio. <p> </div> > 3 . Now I took the 22 gauge wire and pierced the fabric right in the middle. 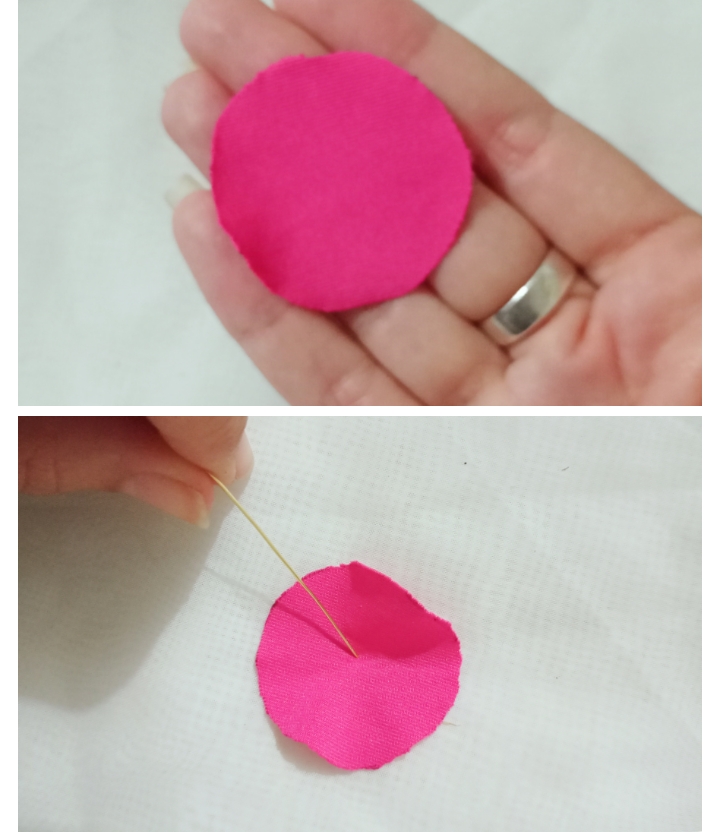 <div class = "text-justify"> 4. Doble el alambre y pinche nuevamente a un lado del pinche anterior dejando proximadamente medio centímetro de distancia. <p> </div> > 4 . Bend the wire and puncture again to one side of the previous puncture leaving approximately half a centimeter of distance. 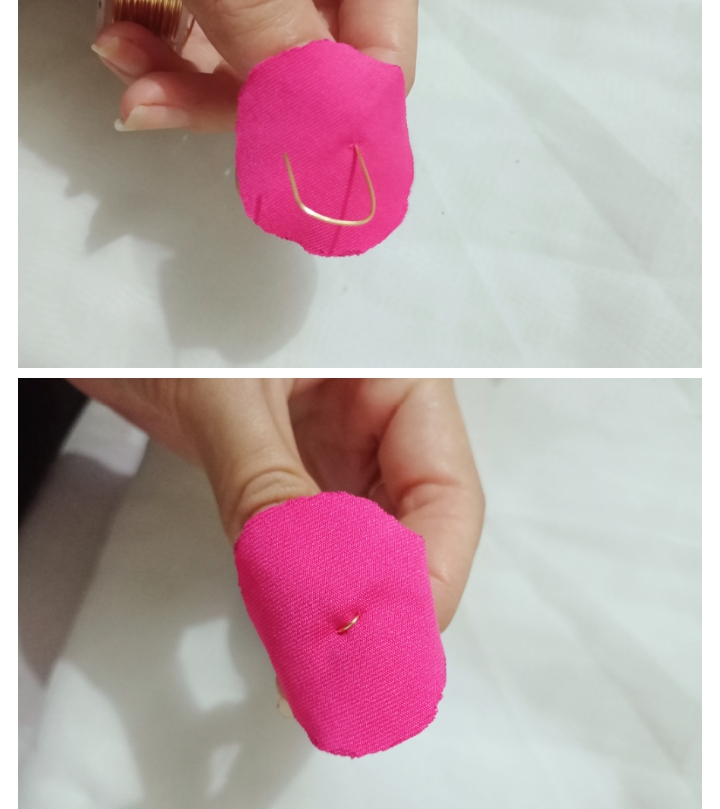 <div class = "text-justify"> 5. Ahora bien, una de las puntas las dejaremos de maneras recta y con la otra daremos vueltas en la base de la tela para crear en forma de espiral un copo. <p> </div> > 5 . Now, we will leave one of the ends straight and with the other we will go around the base of the fabric to create a flake in the shape of a spiral.  <div class = "text-justify"> 6. Con la pinza realizaremos una argolla en el alambre que dejamos recto en el paso anterior, y así obtendremos la pieza principal que quedara como especie de una flor. <p> </div> > 6 . With the clamp we will make a ring in the wire that we left straight in the previous step, and thus we will obtain the main piece that will remain as a kind of flower.  <div class = "text-justify"> 7. Finalmente elabore la pieza en forma de anzuelo la cual uni a la argolla elaborada anteriormente. <p> </div> > 7 . Finally make the piece in the form of a hook which joined the ring made earlier. 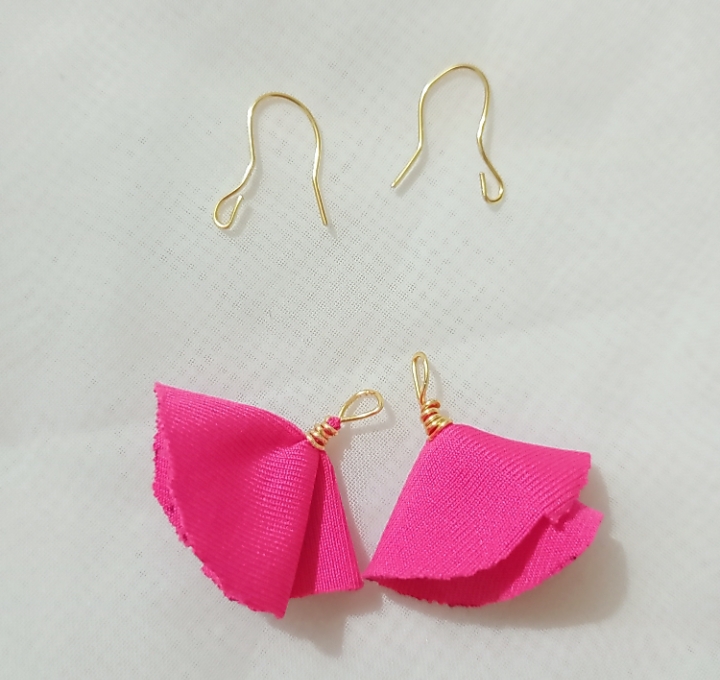 <div class = "text-justify"> Así obtendremos nuestro nuevo accesorio, unos hermosos pendientes rosa! Estoy segura de que les encantó, son muy fáciles de realizar y lucen muy bien, acá les muestro cómo me quedaron! <p> </div> > So we will get our new accessory, some beautiful pink earrings! I'm sure they loved it, they are very easy to make and they look great, here I show you how they turned out! <center>**RESULTADO FINAL**</center> > <center>**FINAL RESULT**</center> 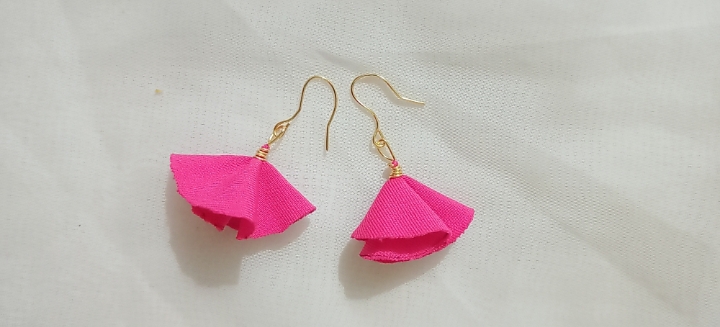     <div class="text-justify"> Feliz de compartir con ustedes amigos de #hivediy uno más de mis proyectos, espero haya sido de su agrado! Fue hecho con amor y dedicación😊 Pueden encontrar más tutoriales cómo este en mi blog, será hasta una próxima oportunidad! <p> </div> > Happy to share with you friends of #hivediy one more of my projects, I hope you liked it! It was made with love and dedication😊 You can find more tutorials like this on my blog, it will be until a next opportunity! <div class="text-justify"> **Fotografías propias tomadas con mi REALME 7i** **Own photographs taken with my REALME 7i** **Portada: diseño propio creado en PicsArt/ own design created in PicsArt** **Para traducir el texto utilice traductor Google// To translate the text use Google translate**