Post-Processing a 3D Printed Dragon Part 1: The Print
hobbies·@xerdo·
0.000 HBDPost-Processing a 3D Printed Dragon Part 1: The Print
<center></center> I've been exploring my creative side more recently, so for the past few days I've been working on [this forest dragon model](https://www.thingiverse.com/thing:87458) created by user [dutchmogul](https://www.thingiverse.com/dutchmogul) on thingiverse. It's a very new thing for me and while I have a little bit of prior experience in woodwork & crafting this is all mostly unfamiliar territory to me, so I'm documenting this as a sort of self-journey to see where I end up with it. This is my first update with more to come! Here is dutchmogul's dragon from the thingiverse page: <center></center> <center><sub><b>dutchmogul's dragon</b></sub></center> It's the basis I'm using for how I want my model to look, although it remains to be seen how well mine will actually turns out ;) Anyway, if you check through my blog history you'll see that I had a little, um, _trouble_ [the first time I tried to print the pieces](https://steemit.com/funny/@xerdo/how-not-to-print-a-dragon) for this dragon: <center>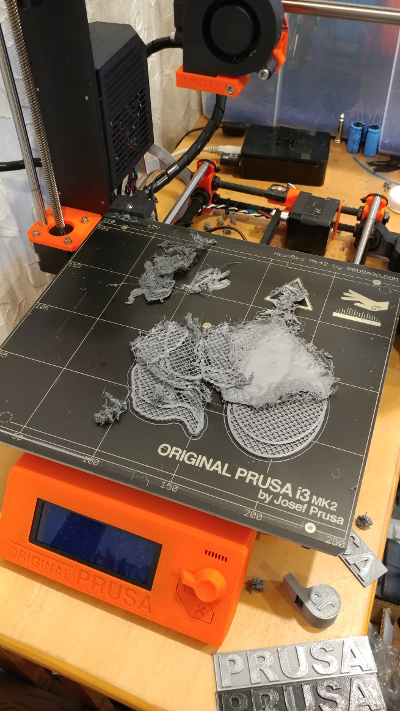</center> Put simply, that attempt was a catastrophic failure. It failed so badly that not only did I have to clean the bed/nozzle/hotend, I also had to recalibrate all of the dimensions (XYZ) and readjust the printer's height offset from the bed so it would stick correctly again. You can understand if I was a bit hesitant to start printing this thing again, but eventually I managed to work my way back up to it. To minimize the chance of failure the second time around, I made a couple changes. First I decided not to print everything at once. Because the bed is not perfectly even, it means that a piece could be more prone to warping just by simply being in a different location (eg. corner vs the center). So, I printed in smaller batches and tried to keep everything as close to the center as I could. Second, I printed with brims: <center></center> In case you're not familiar, a brim is just an extra border you print around a model to increase it's surface area on the bed. Generally you'll print 8-10 lines or so around it and that'll help with adhesion to the bed so it'll stick better and be less likely to warp. [More info on brims if you're curious.](https://www.simplify3d.com/support/articles/rafts-skirts-and-brims/) And the result was, it worked! Well, mostly. There was still some warping that happened mainly on the body and wings, but thankfully I didn't get any more catastrophic failures like the first time, and for the most part everything looked pretty good: <center>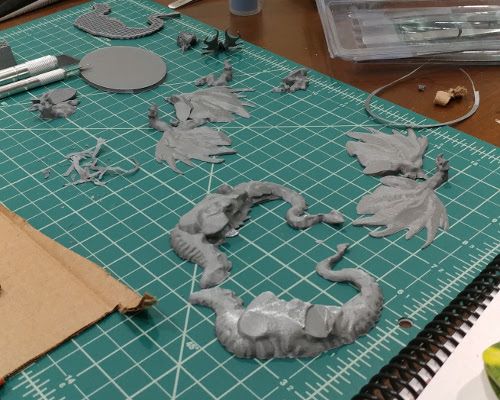</center>