Post-Processing a 3D Printed Dragon Part 4: Filling in the model gaps
hobbies·@xerdo·
0.000 HBDPost-Processing a 3D Printed Dragon Part 4: Filling in the model gaps
Alright, finally part 4 into this series! Last time we ended with all of the model halves glued together. This time, we get to deal with one of the byproducts of that: the model gap. [picture of model gap] <center></center> <center><sub>Example of a model gap</sub></center> A model gap is pretty much exactly as it sounds - an air gap between parts of the model. In my case this gap was the area between the halves that I glued together. Now, leaving the gap in would've been fine since sometimes it doesn't usually hurt the model aesthetically, but I wanted to see if I could do something about it. And lucky for me, there is a way to deal with these gaps! Turns out there's this stuff called modeling putty that's made exactly for this reason - you fill in the gaps, let it dry, sand off any remainder and away you go. <center>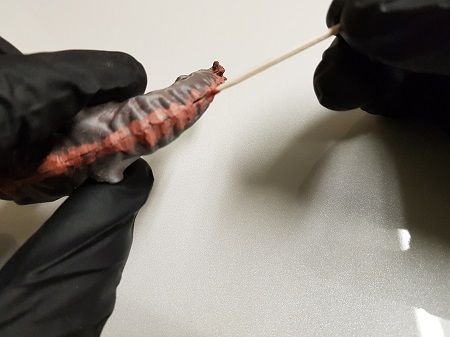</center> And here it is initially applied to each piece: <center>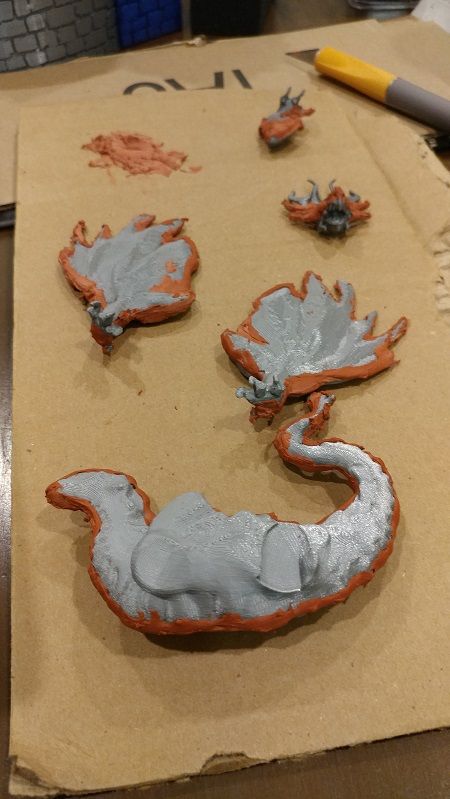</center> And after that was sanded down a bit: <center>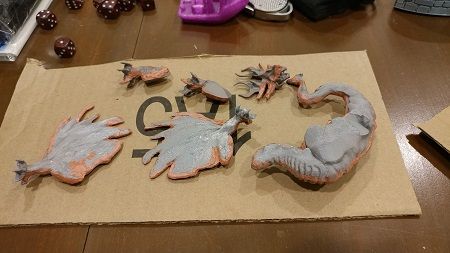</center> The only issue I ran into was that some of the putty didn't fill in correctly and actually fell out of the gaps when I trimmed/sanded the putty down: <center></center> So I had to fill those gaps in again and re-sand. Not that difficult to do, but still something to watch out for. So far I'm liking how this model is turning out! Next up will be the start of priming/painting, so look forward to that! --- Previous Parts: [Part 3: Gluing the halves together](https://steemit.com/hobbies/@xerdo/post-processing-a-3d-printed-dragon-part-3-gluing-the-halves-together) [Part 2: Trimming and De-warping](https://steemit.com/hobbies/@xerdo/post-processing-a-3d-printed-dragon-part-2-trimming-and-de-warping) [Part 1: The print](https://steemit.com/hobbies/@xerdo/post-processing-a-3d-printed-dragon-part-1-the-print)