Making your own key holder.
art·@yoswar·
0.000 HBDMaking your own key holder.
<center>**Hello dear steemit community** Did you know that there are situations that lead to stress, for example, where did I leave my keys??</center> <div class= "text-justify">There are times when we meet around the time, the taxi is already there, you are late for work and you can't find the keys easily, so we don't know where we put it. Does that ring a bell? "And I thought" What can help us? Of course, the key holder, placing a key holder in our house will always have the keys there, you'll never be late!</div> <center>This time I bring you an easy, practical and economical way to make your own key holder, **Let's get started!**</center> <center>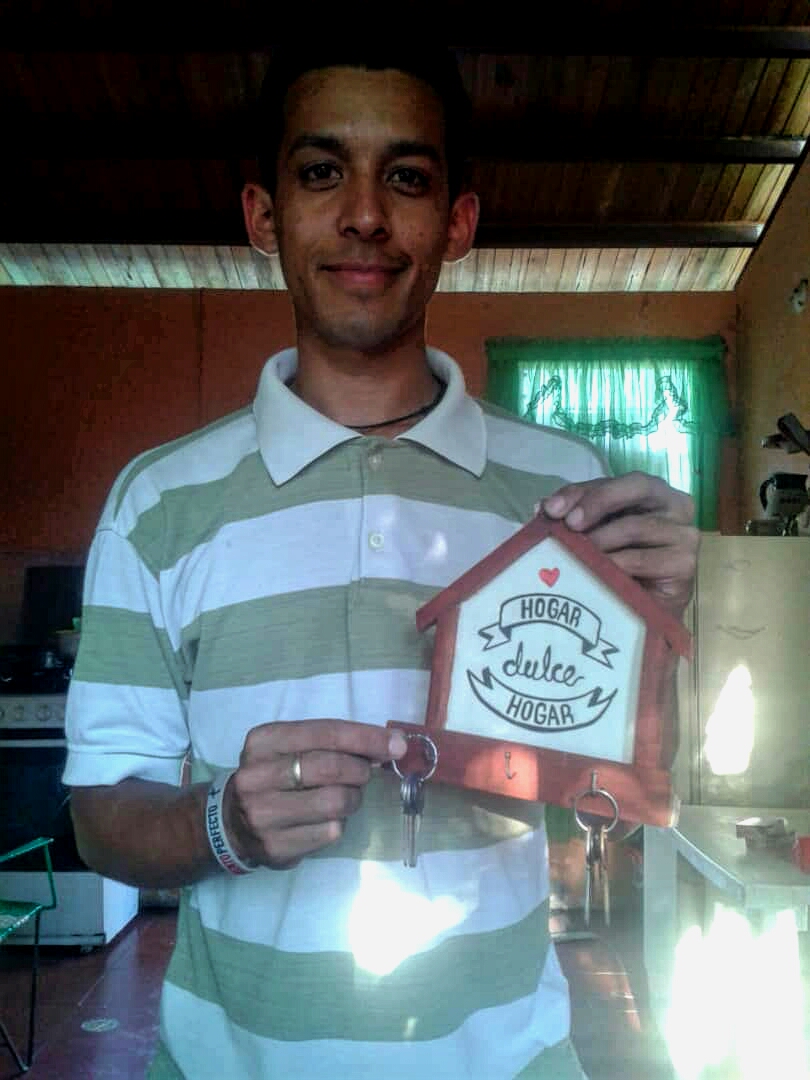</center> <center><h3>Materials to use:</h3></center> **1)** Wood can be remnants. **2)** Glue. **3)** Cardboard. **4)** Nails and hooks. **5)** Painting. <h3>Tools:</h3> • Segueta. • Sandpaper or lime. • Hammer. • Exacto. • Pincel. <center>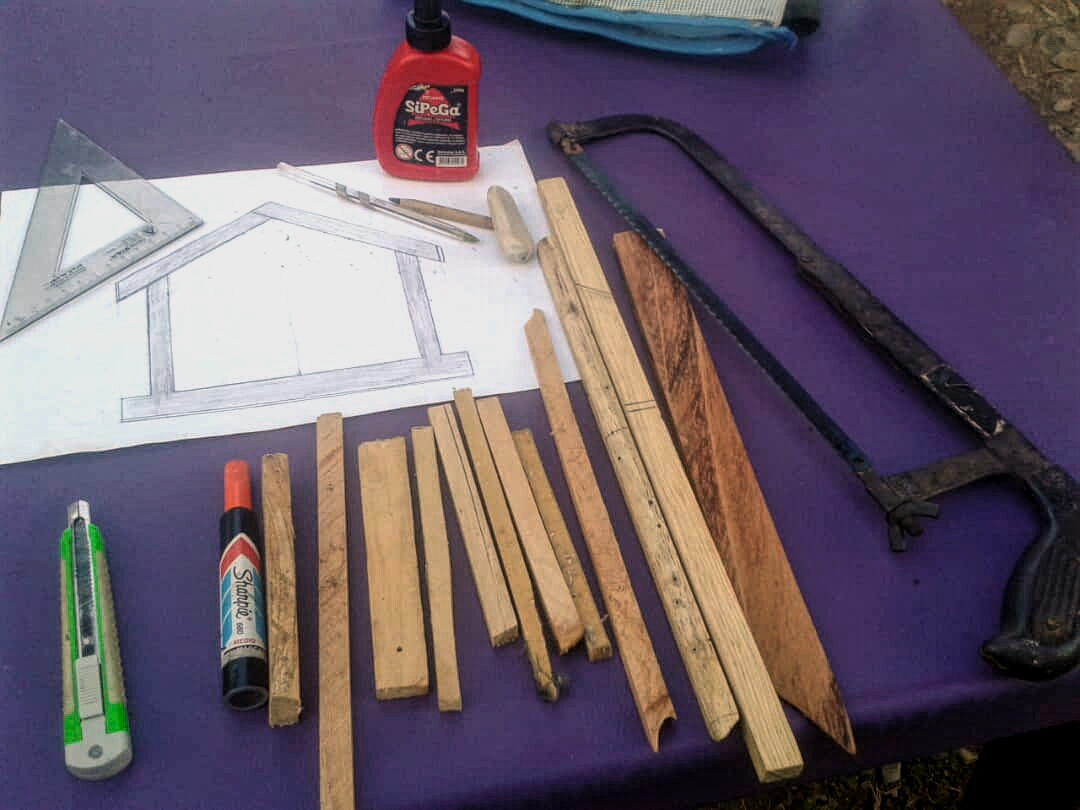</center> <center>**Step (1) Make a Design** In my case I made a sketch of a house to get some desired measures for the key holder, where later you will have the dimensions of this design.</center> <center>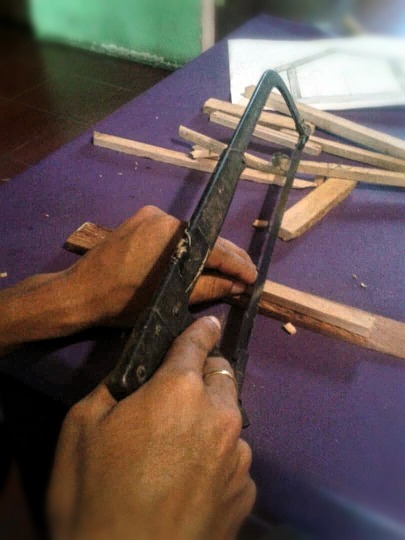</center> <center>**Step (2)** According to your design we cut the wood, remember that this can be done with small pieces of wood.</center> <center>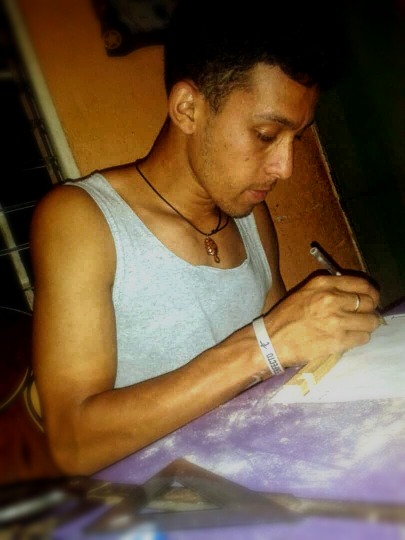</center> <center>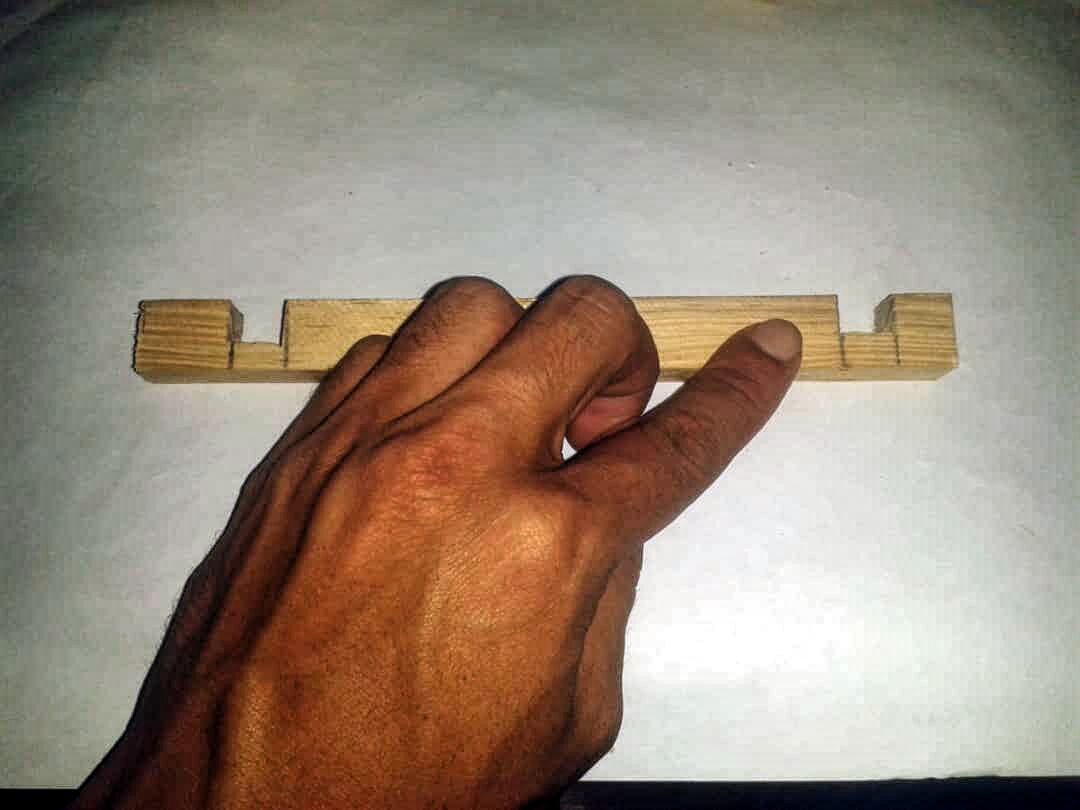</center> <center>If we make the parts we assemble much better.</center> <center>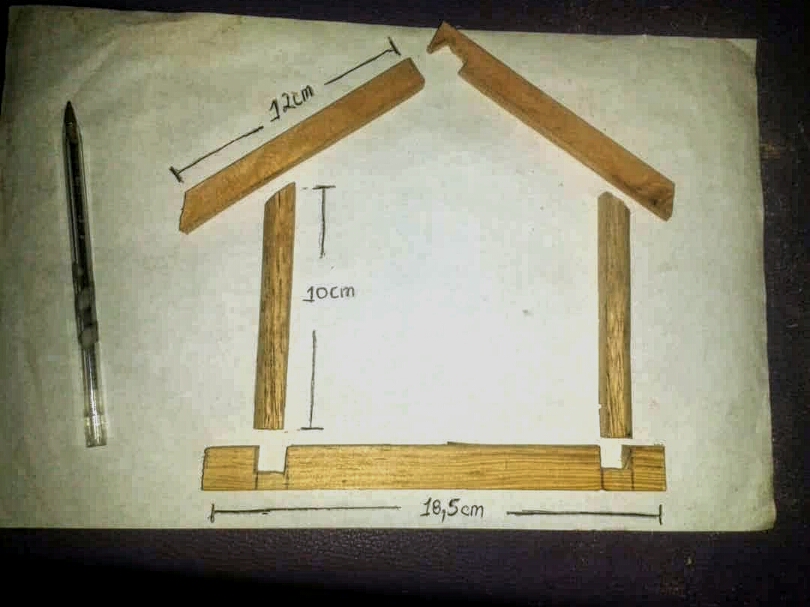</center> <center>**Step (3)** As you can see we get all the pieces cut, here leave the measurements if you like this design.</center> <center>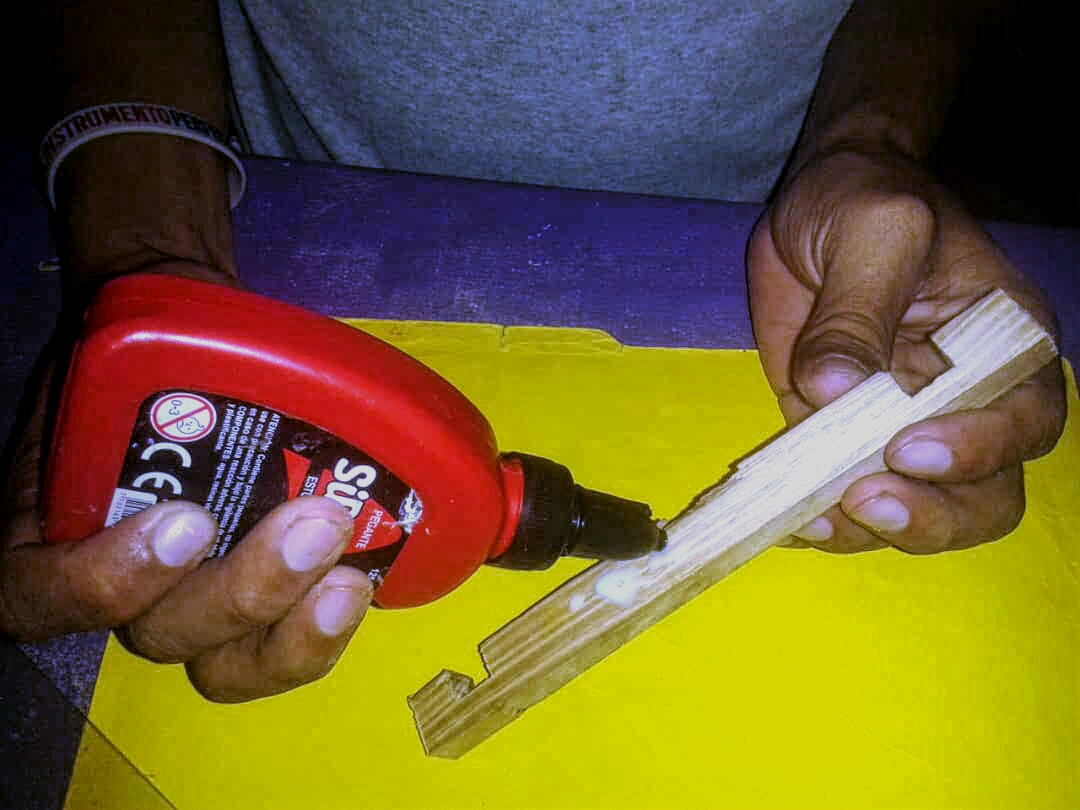</center> <center>**Step (4)** We use the cardboard to glue the wood on top of it.</center> <center>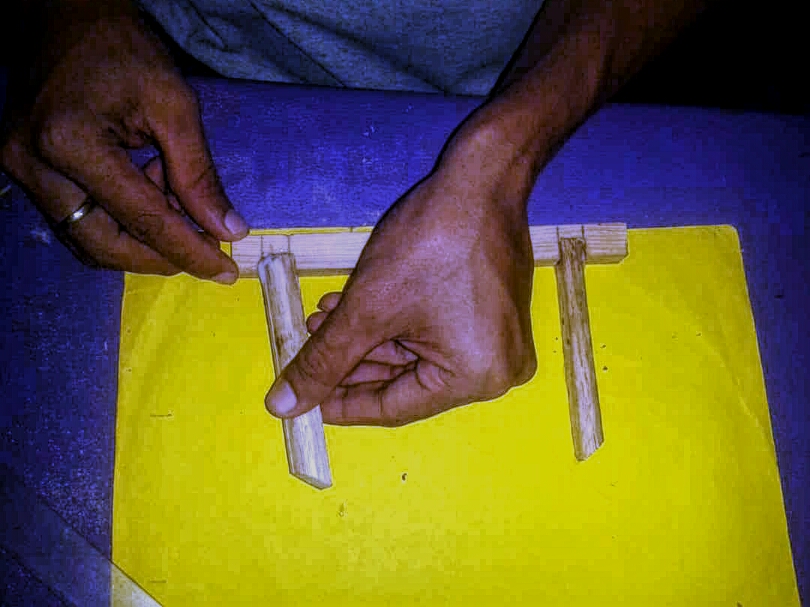</center> <center>We are gluing, assembling and squaring each piece on the cardboard according to the design.</center> <center>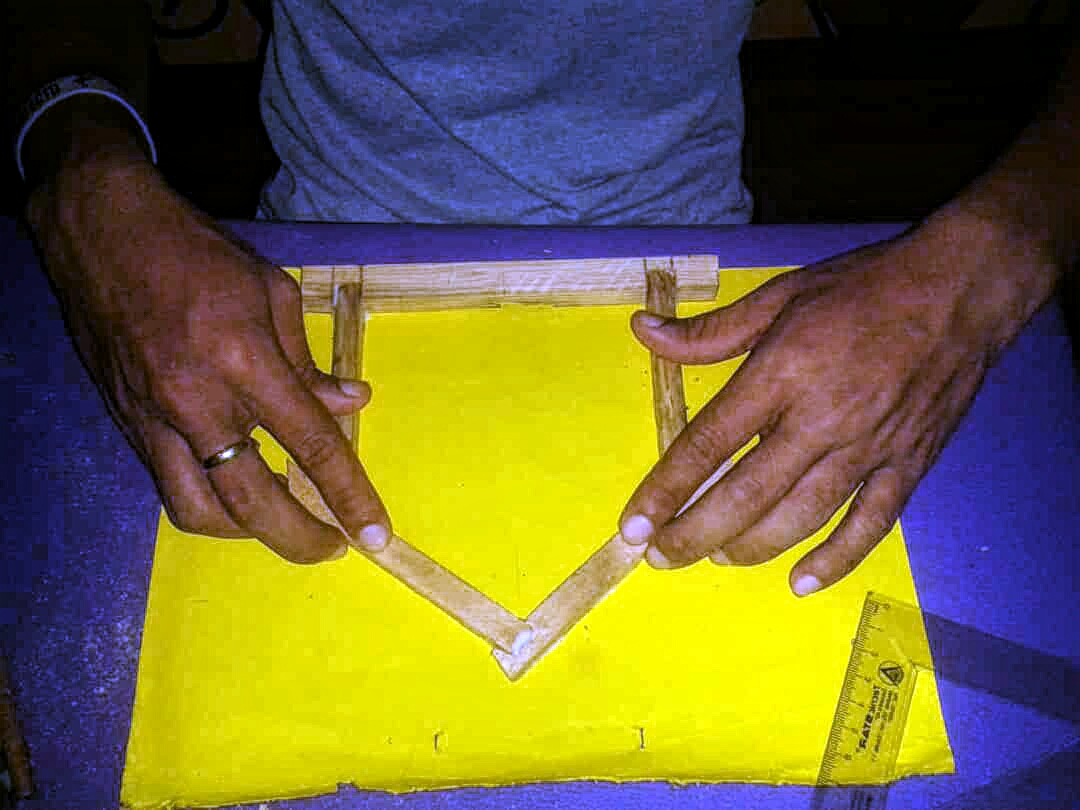</center> <center>**Step (5)** Having everything glued together, we let it dry enough, in my case I left it one day.</center> <center>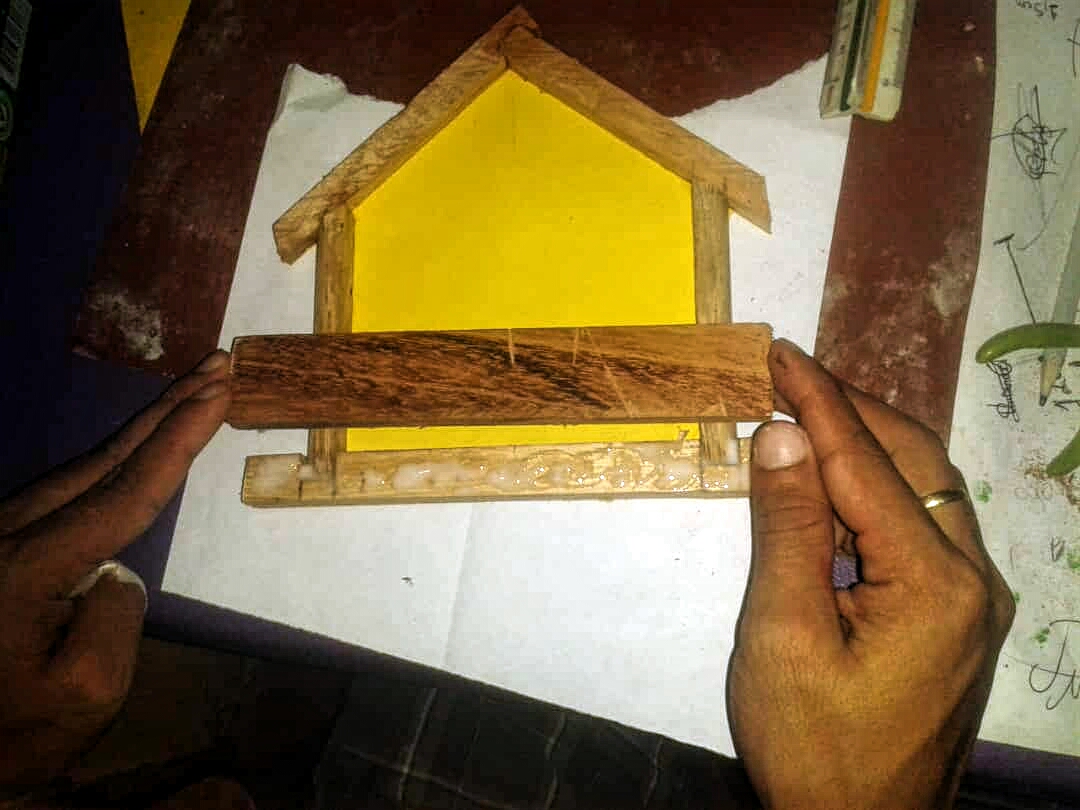</center> <center>**Step (6)** Here cut the cardboard with the exact one for all the edge, and use another wood a little wider (3cm) for the lower part by placing (2) nails and glue.</center> <center>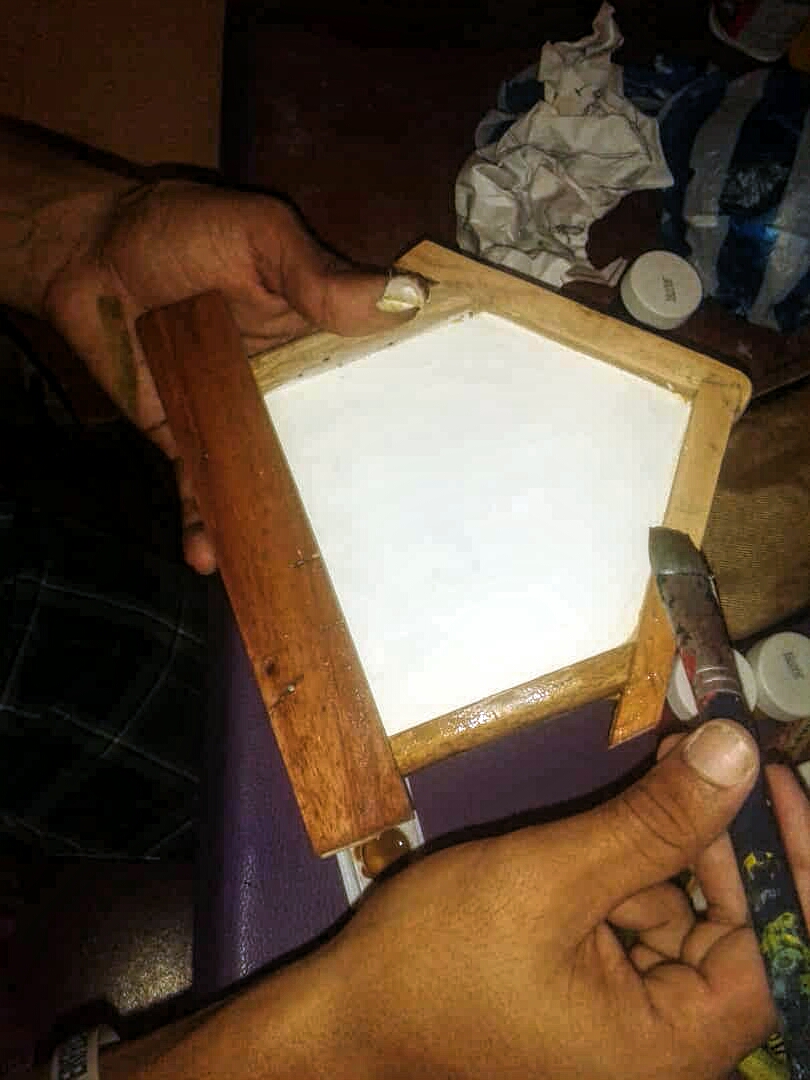</center> <center>**Step (7)** Lime the wood for later painting and varnishing.</center> <center></center> <center>**Step (8)** After painting, make a few small details to give it a better appearance.</center> <center>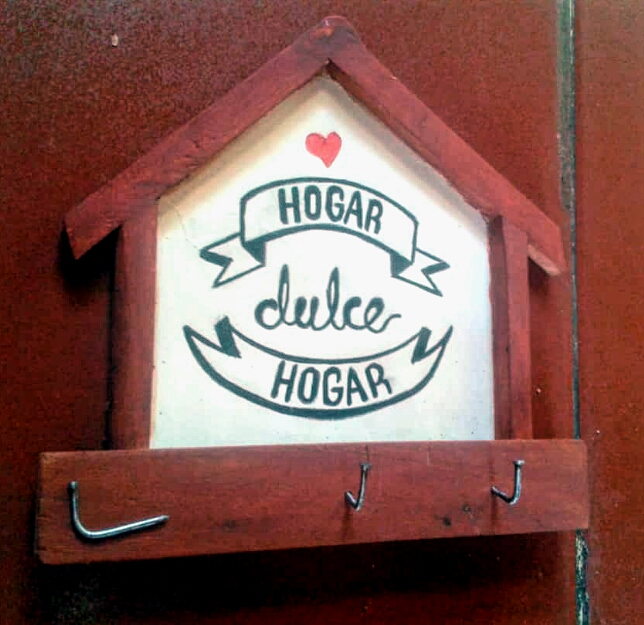</center> <center>**Step (9)** After decorating with the painted letters, place the hooks.</center> <center>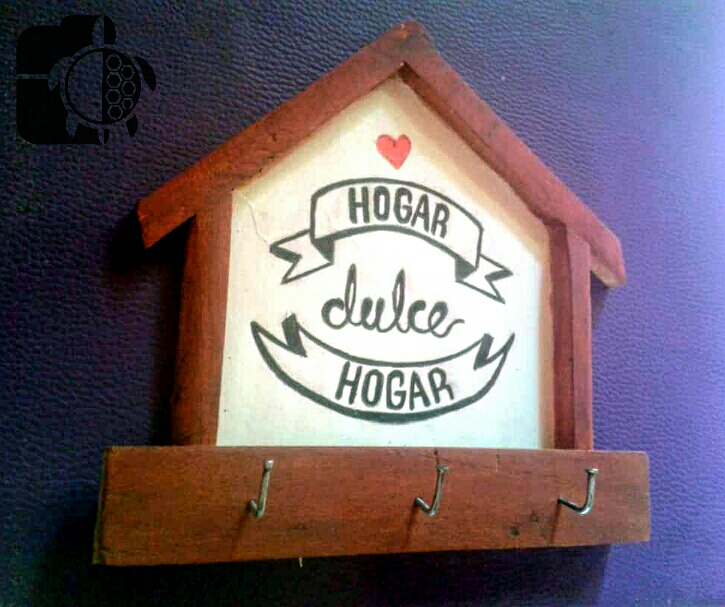</center> <center>and well that's how I stayed, I hope you like it there, easy and practical, do not forget any doubt or suggestion in the comments.</center> <center></center> <center>![[000234] (1) (1).png](https://cdn.steemitimages.com/DQmfPLmEneyDeEt4PMGhnAUSvHKZaAemND4AthwXqJrnC8B/[000234]%20(1)%20(1).png)</center> <center><sup>**Remember we are what we want to be!**</center></sup> <center><sup>¡Let's support every talent to drive growth!</center></sup> <center><sup>**YES WE CAN!**</center></sup>
👍 cn-ccc, carlgnash, c-squared, alexworld, kevinwong, choogirl, cepul, kendallron, lazybird, jorgeddln, shepherd-stories, erikaflynn, mattiarinaldoni, randomwanderings, gabyoraa, sarez, crivec68, tombstone, arconite, arcange, raphaelle, mindstabber, soyrosa, steemprotect, fyrstikken, kennyroy, longer, mrbarckhoff, poppie-schultz, steemph.manila, annazsarinacruz, rye05, kafupraise, steemitboard, snekkerdoodle, c00k13, tomsmaid, felt.buzz.ccc, milosm, curie, liberosist, juliocaraballo, suasteguimichel, jesse5th, locikll, jesusj1, wstanley226, andiblok, atomicannie, vact, tajstar, samlee2018, gpcx86, cryptorunway, theodosiskatq, reedhhw, cerd26, herculean, thewhalehunter, chrisluke, doggy5, hendrikdegrote, anwenbaumeister, aboutyourbiz, zacherybinx, makrotheblack, phogyan, skycae, esaia.mystic, dashfit, markmorbidity, bil.prag, ninjace, qberry, nitego, operahoser, niouton, schroders, clweeks, emdesan, smitop, raymondspeaks, szokerobert, jayna, joendegz, a0i, ntowl, hansmast, getrichordie, stahlberg, bavi, didic, hardaeborla, neumannsalva, drmake, misia1979, kylealex, niko3d, wishwood, clement.poiret, praditya, gbemy, predict-crypto, javier.dejuan, gangstayid, gabrielatravels, vilda, ilovecryptopl, rhethypo, chickenmeat, mininthecity, cjunros, rishhk, gmedley, felixrodriguez, zlatkamrs, yaelg, annaabi, pechichemena, gordon92, reizak, payger, bestofph, trang, eu-id, unconsumed, teukurival, brutledge, kenadis, maticpecovnik, jaro-art, somegaming, blewitt, bflanagin, double-negative, steemit-art, pulleyhead, lekang, allcapsonezero, dokter-purnama, jcalero, solarphasing, revo, eurodale, cryptononymous, ambitiouslife, positiveninja, cryptocopy, wallyt, reverseacid, ambercookie, jackramsey, crazy-facts, patris, wenderccc, edencourage, blueorgy, zerotoone, tensor, joshman, hijosdelhombre, norwegianbikeman, sereze, romeskie, dronegraphica, nmcdougal94, bluemaskman, breakout101, clamon, reitsportdokus, dontdieinternet, pipokinha, stayoutoftherz, goblinknackers, darklands, idlejack, alfatron777, pinas, wisewoof, monsuta, brendanweinhold, bott, bernardwest, neolinkhati, jchappe, cryptowrld, pamahdoo, xuhi, anthive, daniel.dalo, giuato, sku77-poprocks, dubignyp, varth-ogotaj, smalltall, peaceandwar, cleiver, thescubageek, doifeellucky, aarica, goodcontentbot, shivagangula, bitcoinportugal, cryptofuwealth, frost1903, celine-robichaud, wackou, drifter1, neddykelly, iptrucs, ledjo1991, mariusfebruary, reconstitution, smartkid809, alvin0617, sumotori, imaloser, felt.buzz, buttcoins, sanderjansenart, sincensura, avesum123, shayekh2, mohaaking, jackfitzgerald, photographybd, jiujitsu, danaedwards, shinedojo, vegan.niinja, scruffy23, gracelbm, steemean, cyprianj, acousticguitar, cherryandberry, mammasitta, rival, massivevibration, macoolette, eric-boucher, yomismosoy, steemeat, minnowsunite, daddylonglens, nicole-st, purelove, hhtb, slingshot, lekosvapenglass, goodway, abraham10, yashshah991, faithfullwills, lk666, dranren, xanderslee, nwjordan, ivan-g, flatman, m1alsan, oghie, steemboyuk, hanyseek, memeitbaby, indayclara, timemaster, steemfreak, steemerscare, markko, skorup87, elvenbard, adrian2art, hefrank22, foxy-lady, atongis, torico, jbrrd,