HOLOZING FIRE WOLF I /// Newtro Abstract Style by YUSAYMON (ENG/SPA)
hive-131131·@yusaymon·
2.731 HBDHOLOZING FIRE WOLF I /// Newtro Abstract Style by YUSAYMON (ENG/SPA)
# 🎨 How I Brought Holozing's Firewolf to Life in Newtro Style Today I want to share how I created this **Firewolf illustration** using just **black Sharpie, pencil and pen** with that **Newtro flair** I love. If you enjoy retro styles with a modern twist, you'll adore this technique! ## 🛠️ My Minimalist Toolkit Before starting, I gathered my essential tools: - **Smooth paper** (nothing fancy, just ink-friendly) - **HB pencil** for sketching - **Fine black pen** for detailing - **Trusty black Sharpie** (the king of fills) - **Eraser** for those "oops" moments ## ✏️ Step 1: Pencil Sketch with Attitude I began by capturing Firewolf's core shapes - his fierce head, muscular body, and that epic flaming tail. Wanting **retro vibes with edge**, I exaggerated key features: 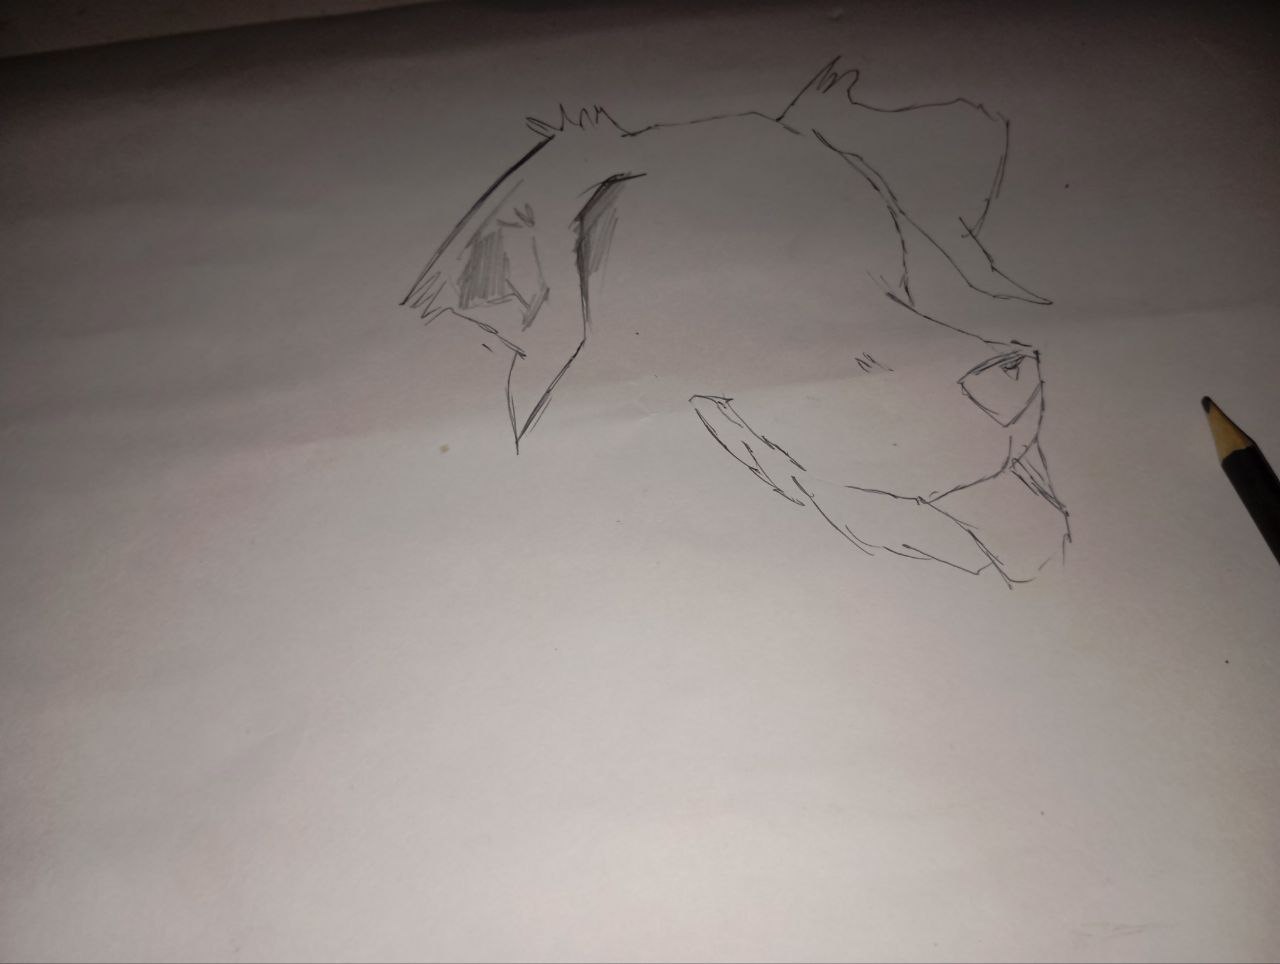 ### Key Focus Areas: - **Expressive eyes**: Oversized and luminous (90s cartoon inspired) - **Geometric elements**: - Angular flames on tail/paws - Triangular fur patterns - **Dynamic pose**: Prioritized energy over perfection ## 🖊️ Step 2: Pen Definition When the sketch felt right, I brought out my pen: | Technique | Application | Effect Achieved | |-----------|-------------|-----------------| | Bold outlines | Main contours | Strong visual weight | | Pattern work | Stripes/triangles in fur | Stylized texture | | Fine details | Eyes/flames | Depth and motion | **Pro Tip**: At this stage, the character had personality but needed that signature Newtro "pop". ## 🖍️ Step 3: Sharpie Power Moves Enter my **black Sharpie** for maximum impact: 1. **Deep shadows**: - Underbody - Ear interiors - Flame bases 2. **Cross-hatching**: - Volume without losing retro style 3. **High contrast**: - Solid black areas - Reinforced silhouette  > "The transformation was magical - from simple sketch to badass illustration" ## ✨ Step 4: Professional Finishing Touches The details that elevate artwork: - **Strategic highlights** (white dots in eyes/flames) - **Edge refinement** - **Signature flair** Bonus: Added a **custom Krita glitch effect** for abstract edge! ## Final Artwork 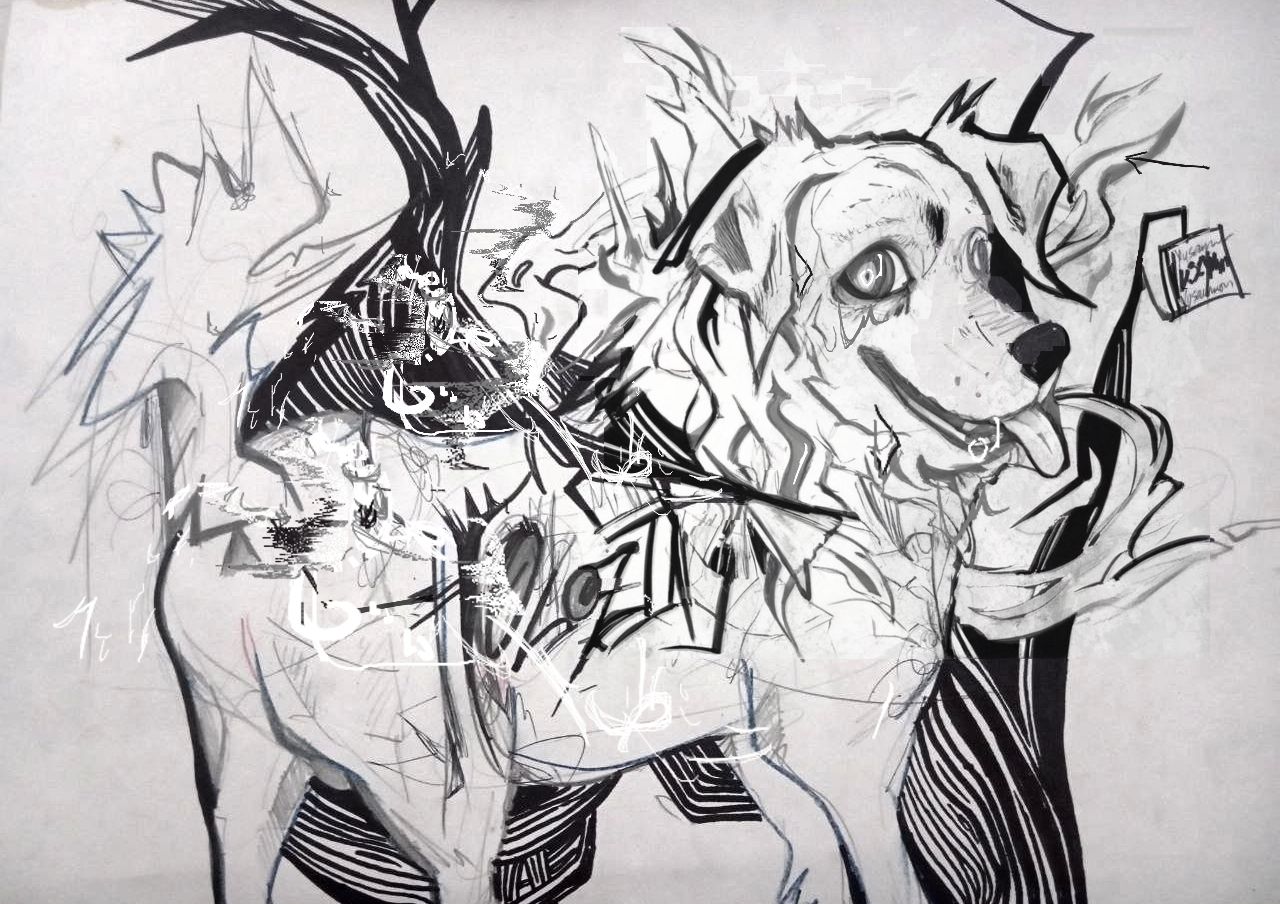 ________ Hoy quiero compartirles cómo le di vida al Firewolf de Holozing usando solo un Sharpie negro, lápiz y bolígrafo, dándole ese toque Newtro que tanto me encanta. Si les gusta el estilo retro pero con un giro moderno, ¡esta técnica les va a fascinar! Antes de empezar, reuní mis herramientas básicas: - Una hoja de papel liso (nada especial, pero que aguante el tinta). - Un lápiz para el boceto (cualquier HB sirve). - Un bolígrafo negro de punta fina (para detalles). - Mi Sharpie negro de siempre (el rey de los rellenos). - Una goma por si las cosas se ponían feas. Paso 1: El Boceto a Lápiz Empecé dibujando las formas básicas del Firewolf: su cabeza fierza, el cuerpo musculoso y esa cola llameante que lo hace ver tan épico. Quería que tuviera un aire retro pero con actitud, así que exageré un poco las líneas:  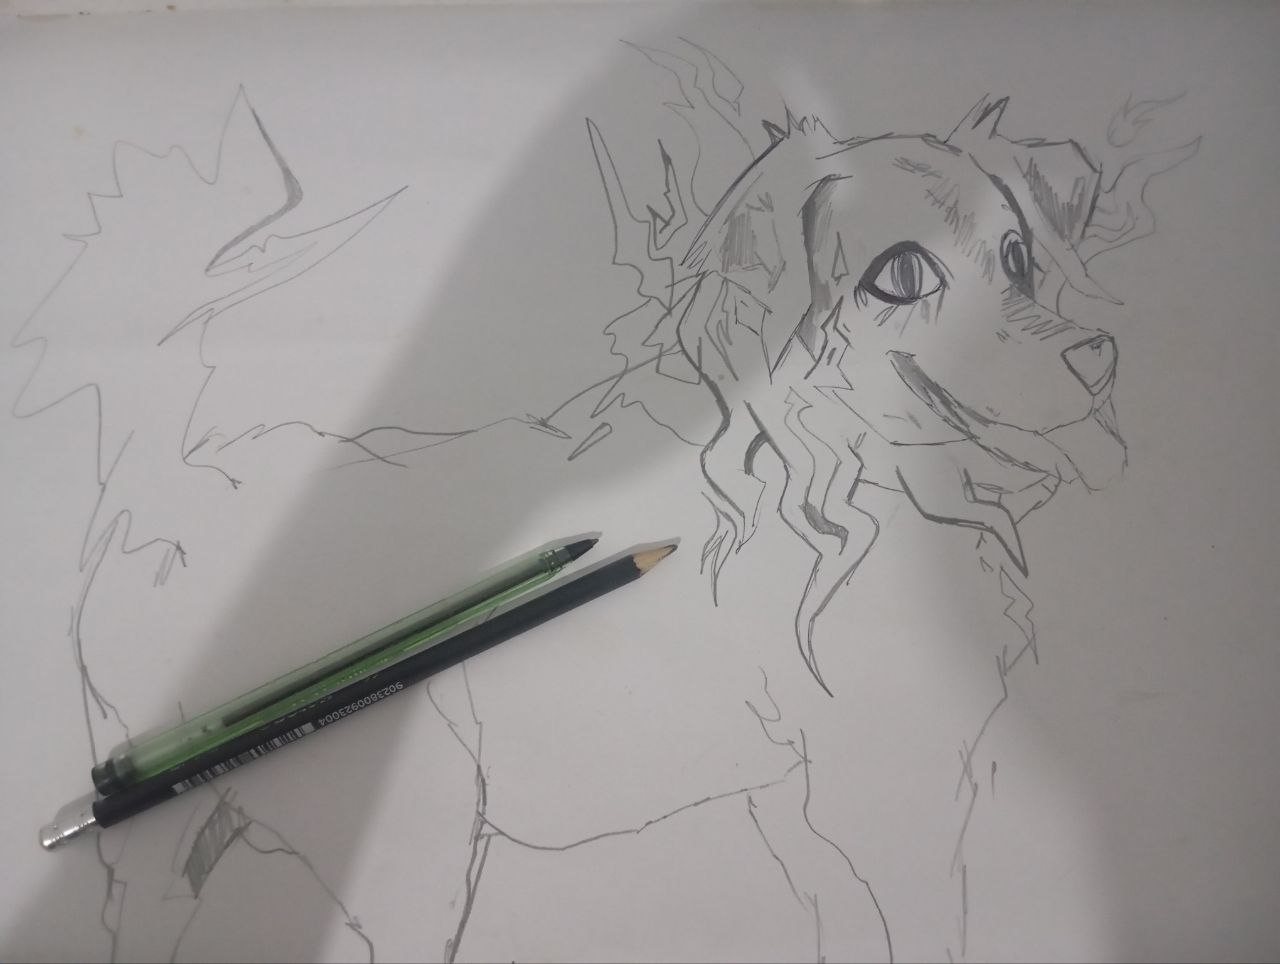 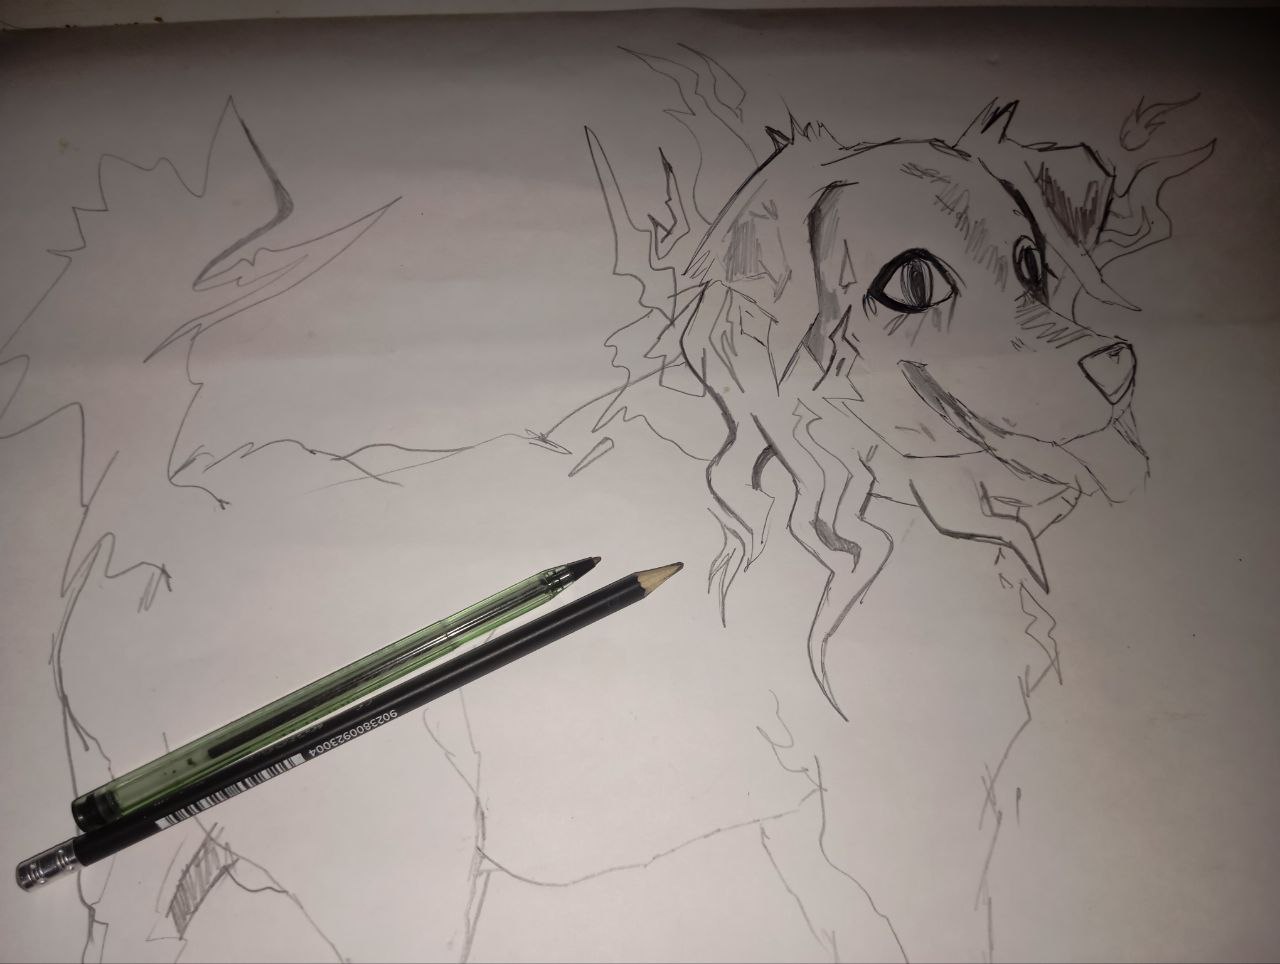 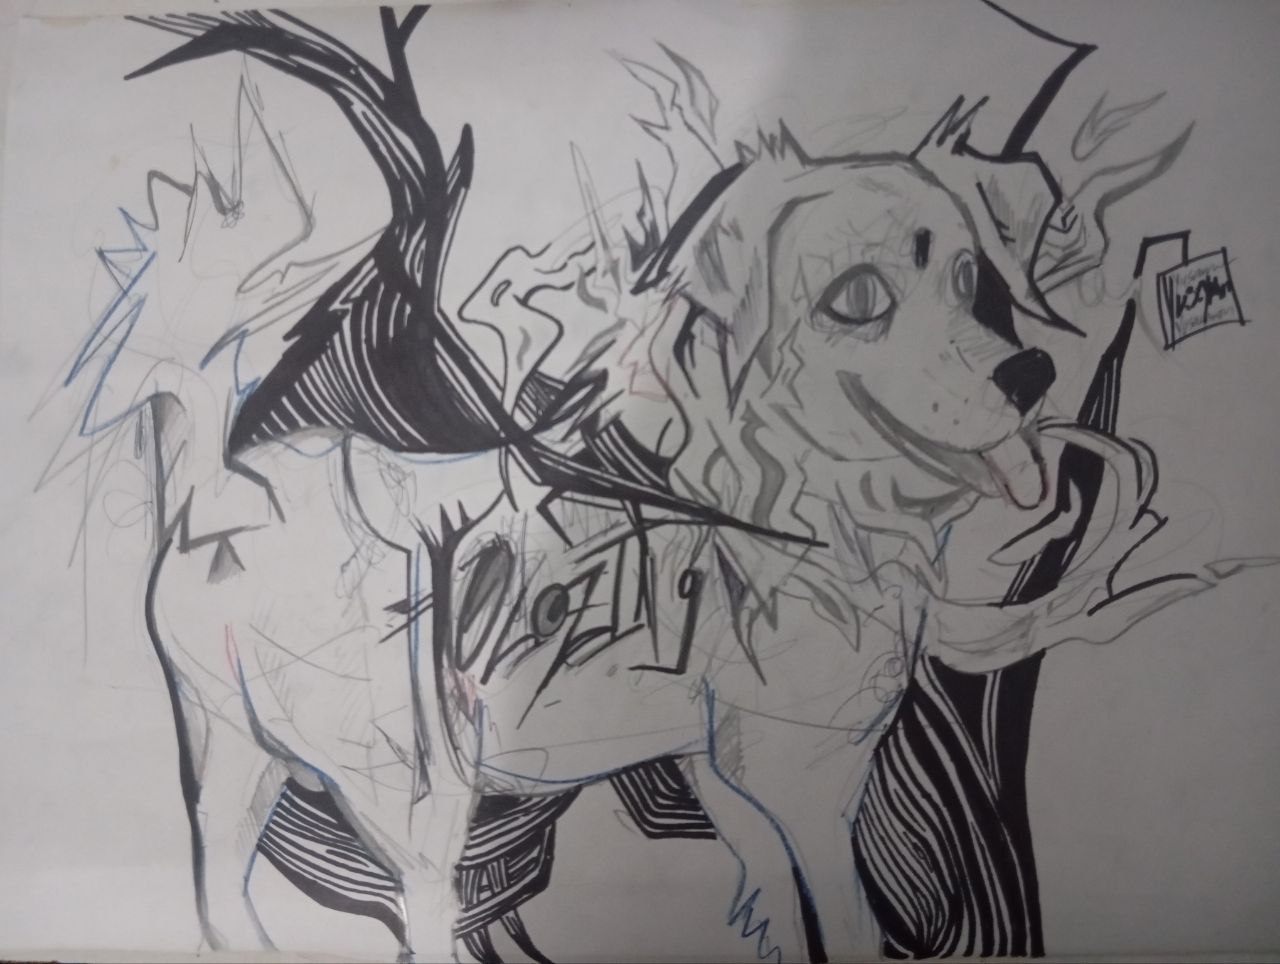 ## ✏️ Paso 1: Boceto con carácter Al comenzar el dibujo, me enfoqué en capturar la esencia del personaje: - **Ojos expresivos**: Los dibujé grandes y brillantes, inspirándome en los clásicos animados de los 90s pero con mi toque personal - **Elementos geométricos**: - Llamas con formas angulares en cola y patas - Diseños triangulares en el pelaje - **Enfoque en la pose**: Prioricé la energía del personaje sobre los detalles perfectos ## 🖊️ Paso 2: Definición con bolígrafo Cuando el boceto tomó forma, pasé a la etapa de tinta: | Técnica | Aplicación | Efecto logrado | |---------|------------|----------------| | Líneas gruesas | Contornos principales | Mayor peso visual | | Patrones | Rayas y triángulos en pelaje | Textura estilizada | | Detalles finos | Ojos y llamas | Profundidad y movimiento | **Observación**: En este punto el dibujo ya tenía personalidad, pero necesitaba ese "punch" visual característico del Newtro. ## 🖍️ Paso 3: Impacto con Sharpie El marcador negro fue mi aliado para: 1. **Sombras intensas**: - Zonas bajo el cuerpo - Interior de orejas - Base de las llamas 2. **Técnica de tramado**: - Líneas cruzadas para volumen - Manteniendo el estilo retro 3. **Contraste extremo**: - Áreas completamente negras - Silueta reforzada  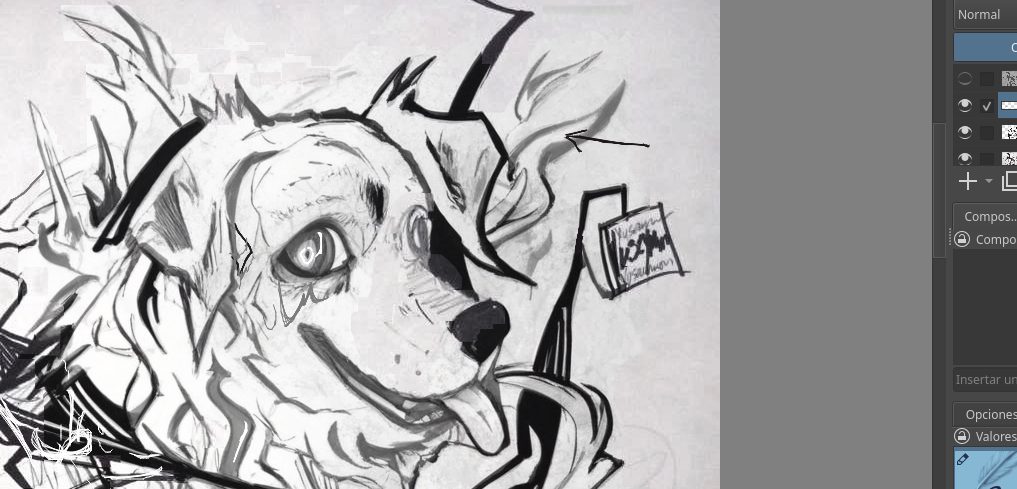 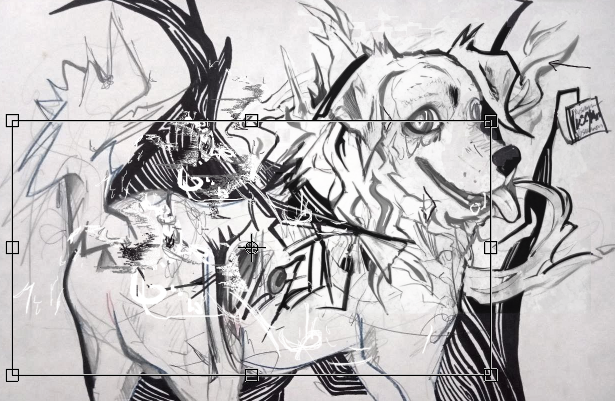 > "El cambio fue mágico: de simple dibujo a ilustración con actitud" ## ✨ Paso 4: Acabados profesionales Los detalles que marcan la diferencia: - **Reflejos estratégicos** (puntitos blancos en ojos/llamas) - **Bordes perfeccionados** - **Firma artística** Y como saben un toque en Krita con un Glitch peronsal para darle esa abstracticidad.!!! Resultado Final: 
👍 reward.app, tipu, justinashby, kirstin, joeyarnoldvn, upme, cryptkeeper17, vscampbell, randomblock1, sevenoh-fiveoh, madame-cyntaia, methodofmad, justinbennett, roelandp, kryptogames, bcm, dappstats, bilpcoinbpc, kam5iz, mukadder, soyernesto, barmbo, umuk, bilpcoin.pay, levi-miron, apoloo1, cryptogambit, sirclucksalot, meins0815, yorra, nicolimitless, glimpsytips.dex, fikif, koussbar, crimo, crimcrim, josueelinfame, kerlymera, jordanjosue, nairimcabmer, hive-116692, kerfa, vaner168, danielgye, hellene8, ashokcan143, longer, kharma.scribbles, haegar85, crimsonclad, anarcist69, bigdizzle91, blarchive, lk666, yusaymon, cubapl, kryptodenno, noctury, silviabeneforti, replicantua, worksinsane, juliakponsford, auditoryorgasms, nateaguila, peachymod, rootdraws, limn, dreeyor, vachemorte, pladozero,