❤️DIY | Making a foam and cardboard topper for my first anniversary on the Hive blog⛓️📌[ES~EN]
hive-130560·@anne002·
0.000 HBD❤️DIY | Making a foam and cardboard topper for my first anniversary on the Hive blog⛓️📌[ES~EN]
<center>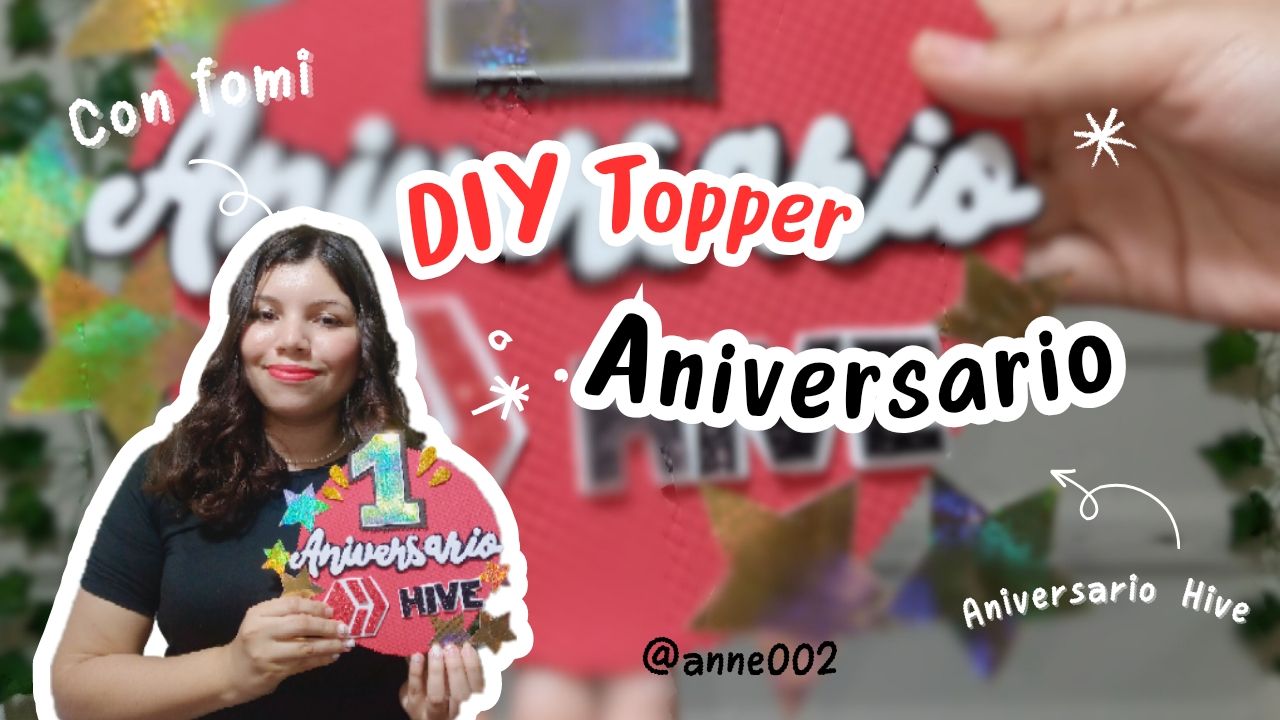</center> # ### _<div class="text-justify">✨Hola amigos linda noche 🙋🏻♀️❤️.</div>_ > ### _✨Hello friends, have a nice evening 🙋🏻♀️❤️._ # <center></center> <div class="text-justify">Holi amigos que tal un placer saludarte y darte la bienvenida a este blog donde aprenderás a hacer manualidades creativas y muchas cosas más,en el tutorial de hoy vamos a estar haciendo un topper de aniversario ,si precisamente un mes como este del año pasado recién me uní a Hive blog ,desde que inicié hasta ahora me he sorprendido mucho por el gran avance que he podido lograr gracias a las amistades que he hecho dentro de Hive sin ustedes pues mi progreso no hubiera sido grande pero quiero agradecer principalmente a mi amiga @razielmorales también por la ayuda y el tiempo que se ha tomado para enseñarme muchos consejos prácticos y útiles que me han servido a mi también para crecer en está página, también al equipo de @aliento por darme una grata bienvenida y a @ajolote por los consejos primerizos que me dieron cuando recién empezaba a conocer sobre el mundo de la cadena de de blog de Hive,agradecida enormemente por ustedes también queridos amigos por su apoyo y a esta comunidad principalmente @hivediy por el apoyo ,no dejaré de agradecer por tanto lo que me han brindado y gracias a Dios por lo que he podido lograr hasta ahora.</div> # > _Hi friends, it's a pleasure to greet you and welcome you to this blog where you will learn to make creative crafts and many more things, in today's tutorial we are going to be making an anniversary topper, precisely a month like this last year I just joined Hive blog, since I started until now I have been very surprised by the great progress that I have been able to achieve thanks to the friendships that I have made within Hive without you my progress would not have been great but I want to thank mainly my friend @razielmorales also for the help and the time she has taken to teach me many practical and useful tips that have helped me also to grow on this page, also to the @aliento team for giving me a warm welcome and @ajolote for the first-time advice they gave me when I was just starting to learn about the world of the Hive blog chain, enormously grateful to you also dear friends for your support and to this community mainly @hivediy for the support, I will not stop thanking you for so much what you have given me and thank God for what I have been able to achieve so far._ # <center></center> <div class="text-justify">Para recordar que hace un año me dió la bienvenida Hive he decidido hacer este hermoso topper como decoración de mi primer aniversario , usé recortes de fomi que tenía en casa y trozos de cartulina que me sirvieron muchísimo para hacerlo y pues un poco de imaginación para conmemorar este momento que me llena mucho de alegría,el proceso es sencillo de hacer y espero te guste el resultado.</div> # > ```To remember that Hive welcomed me a year ago, I decided to make this beautiful topper as a decoration for my first anniversary. I used foam cutouts I had at home and pieces of cardboard that were incredibly helpful. I also used a little imagination to commemorate this moment that fills me with so much joy. The process is simple, and I hope you like the result.``` # <center></center> --- <center></center> <center></center> ## _<div class="phishy">Materiales:// Materials:</div>_ # * **_Fomi de colores opcionales_** * **_Tijera_** * **_Silicon_** * **_Tijera de formas_** * **_Lapiz_** * **_Plantilla o patrones_** * **_Cartón suave_** # >* **_Optional colored foam_** >* **_Scissors_** >* **_Silicon_** >* **_Shaped scissors_** >* **_Pencil_** >* **_Template or patterns_** >* **_Soft cardboard_** <center></center> ## _<div class="phishy">Pasos a seguir://Steps to follow:</div>_ # <div class='pull-left'> 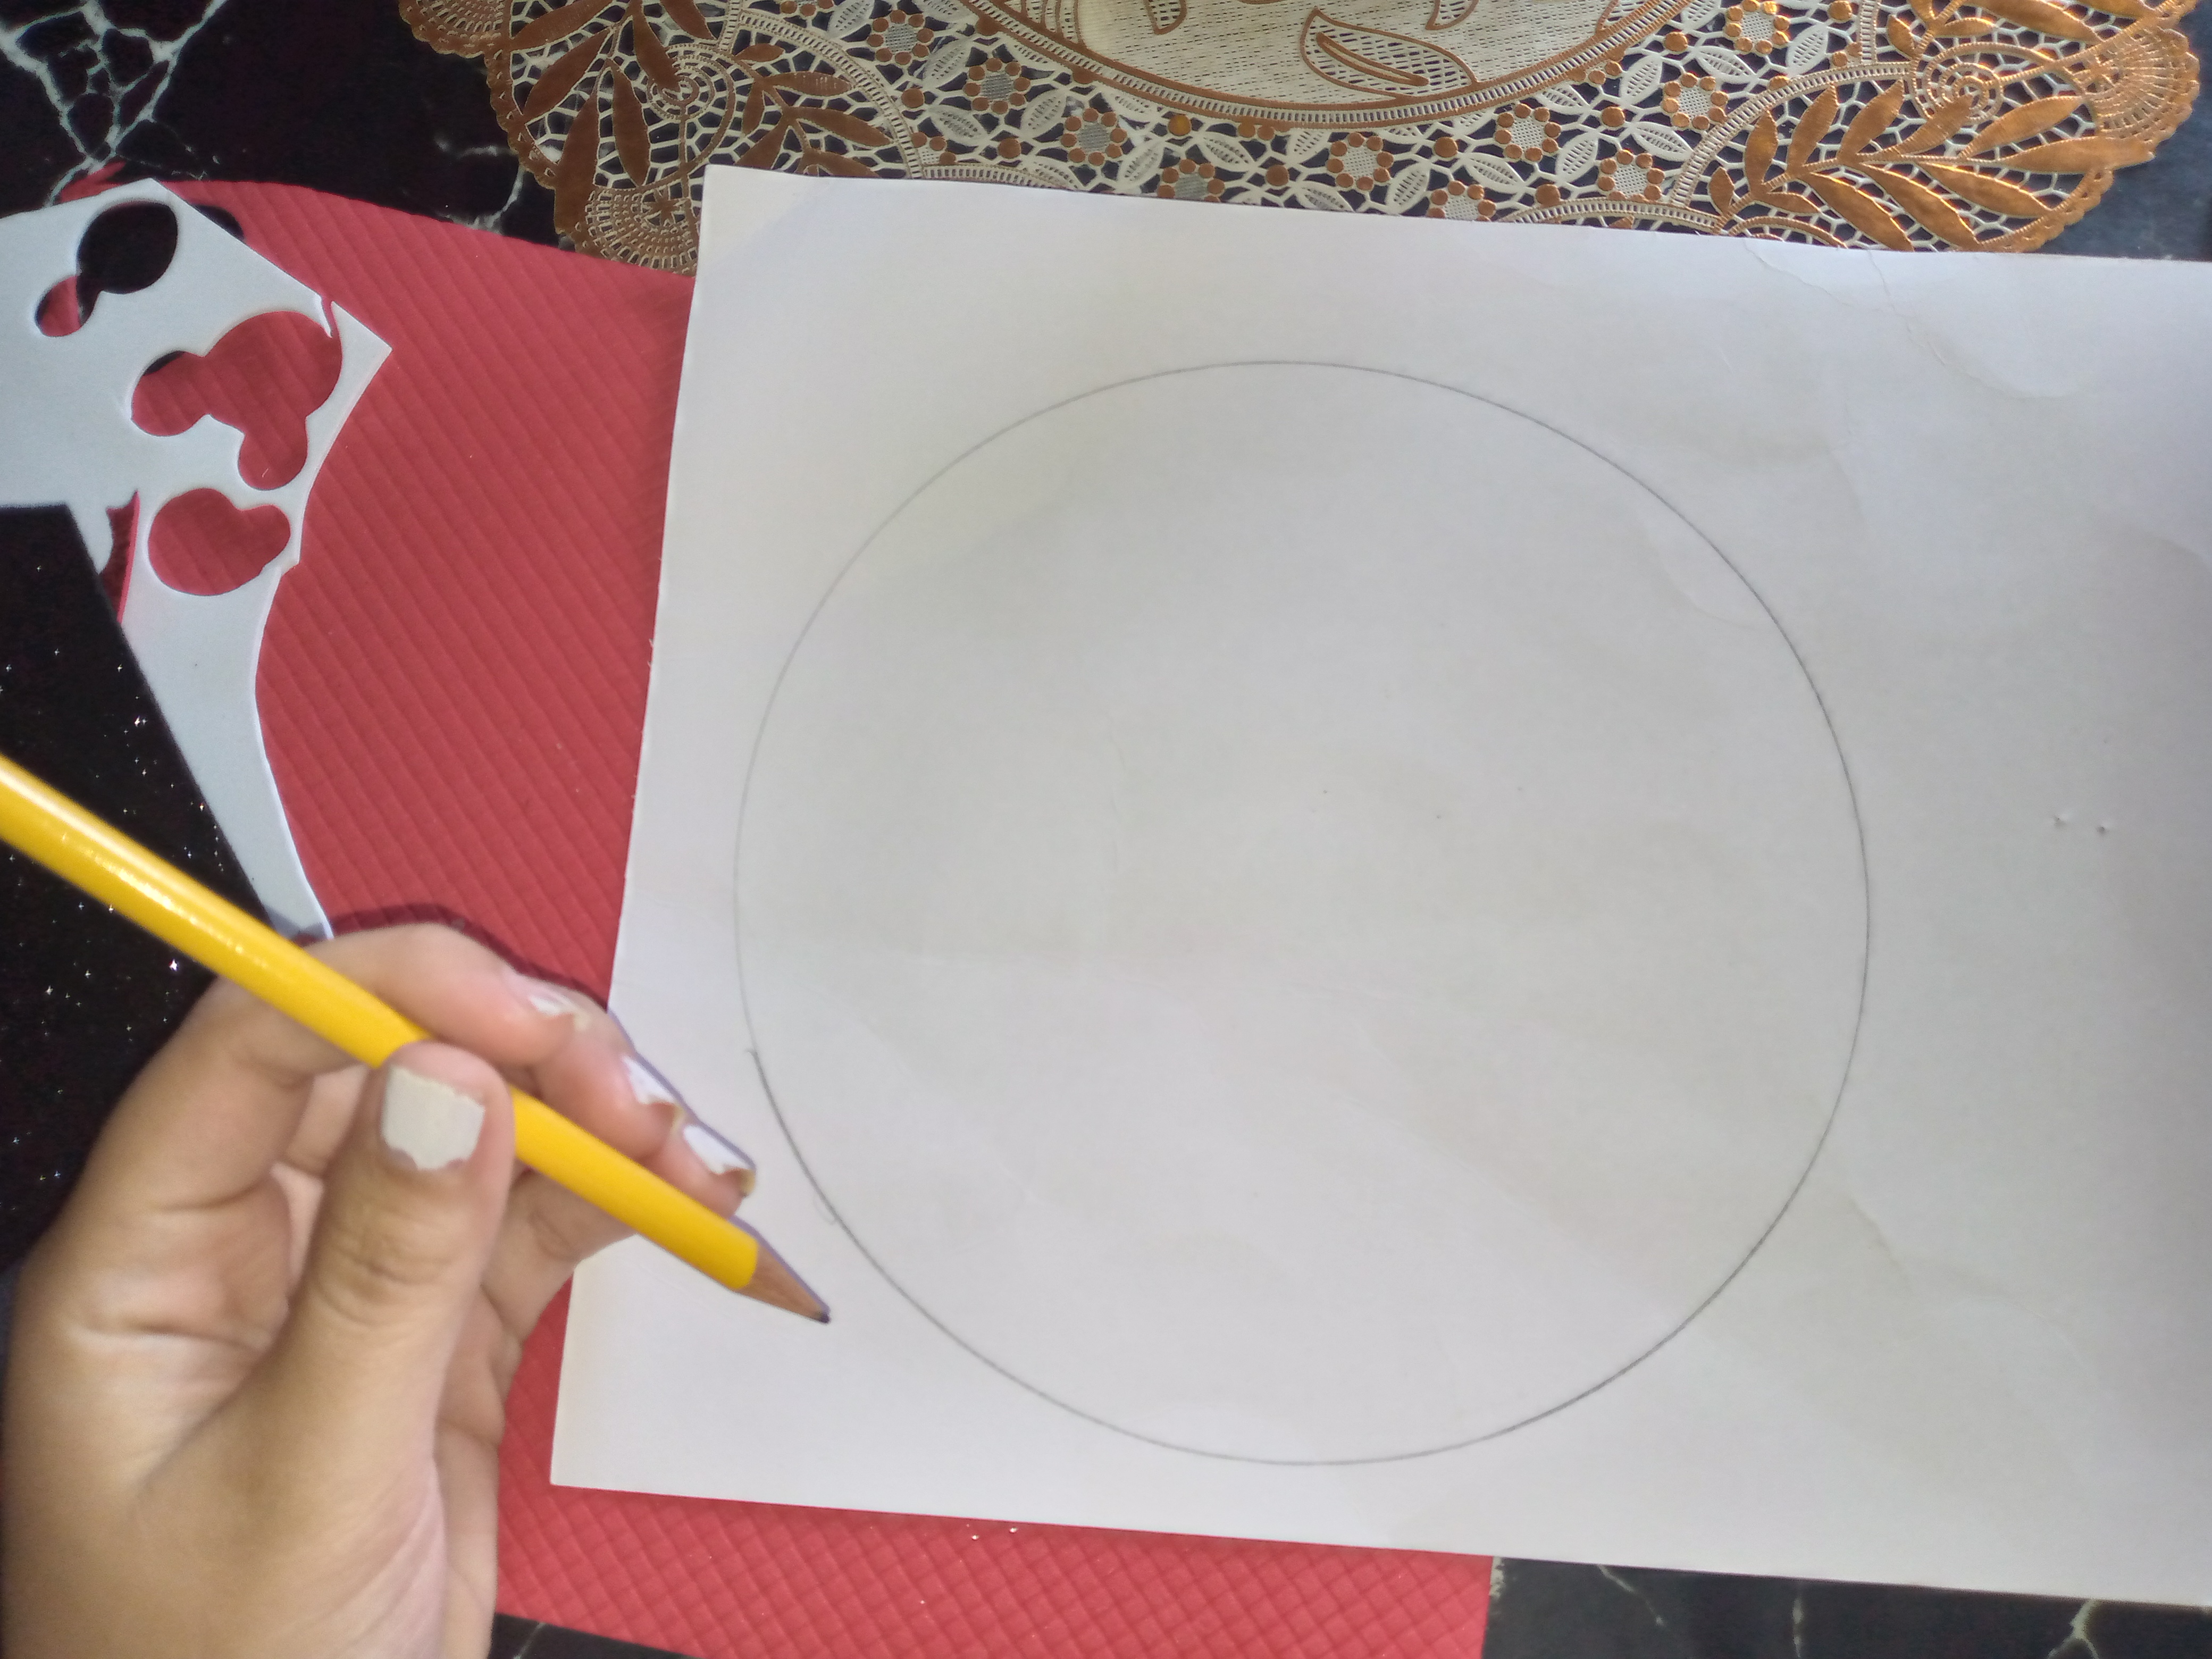 </div> <div class='pull-right'> 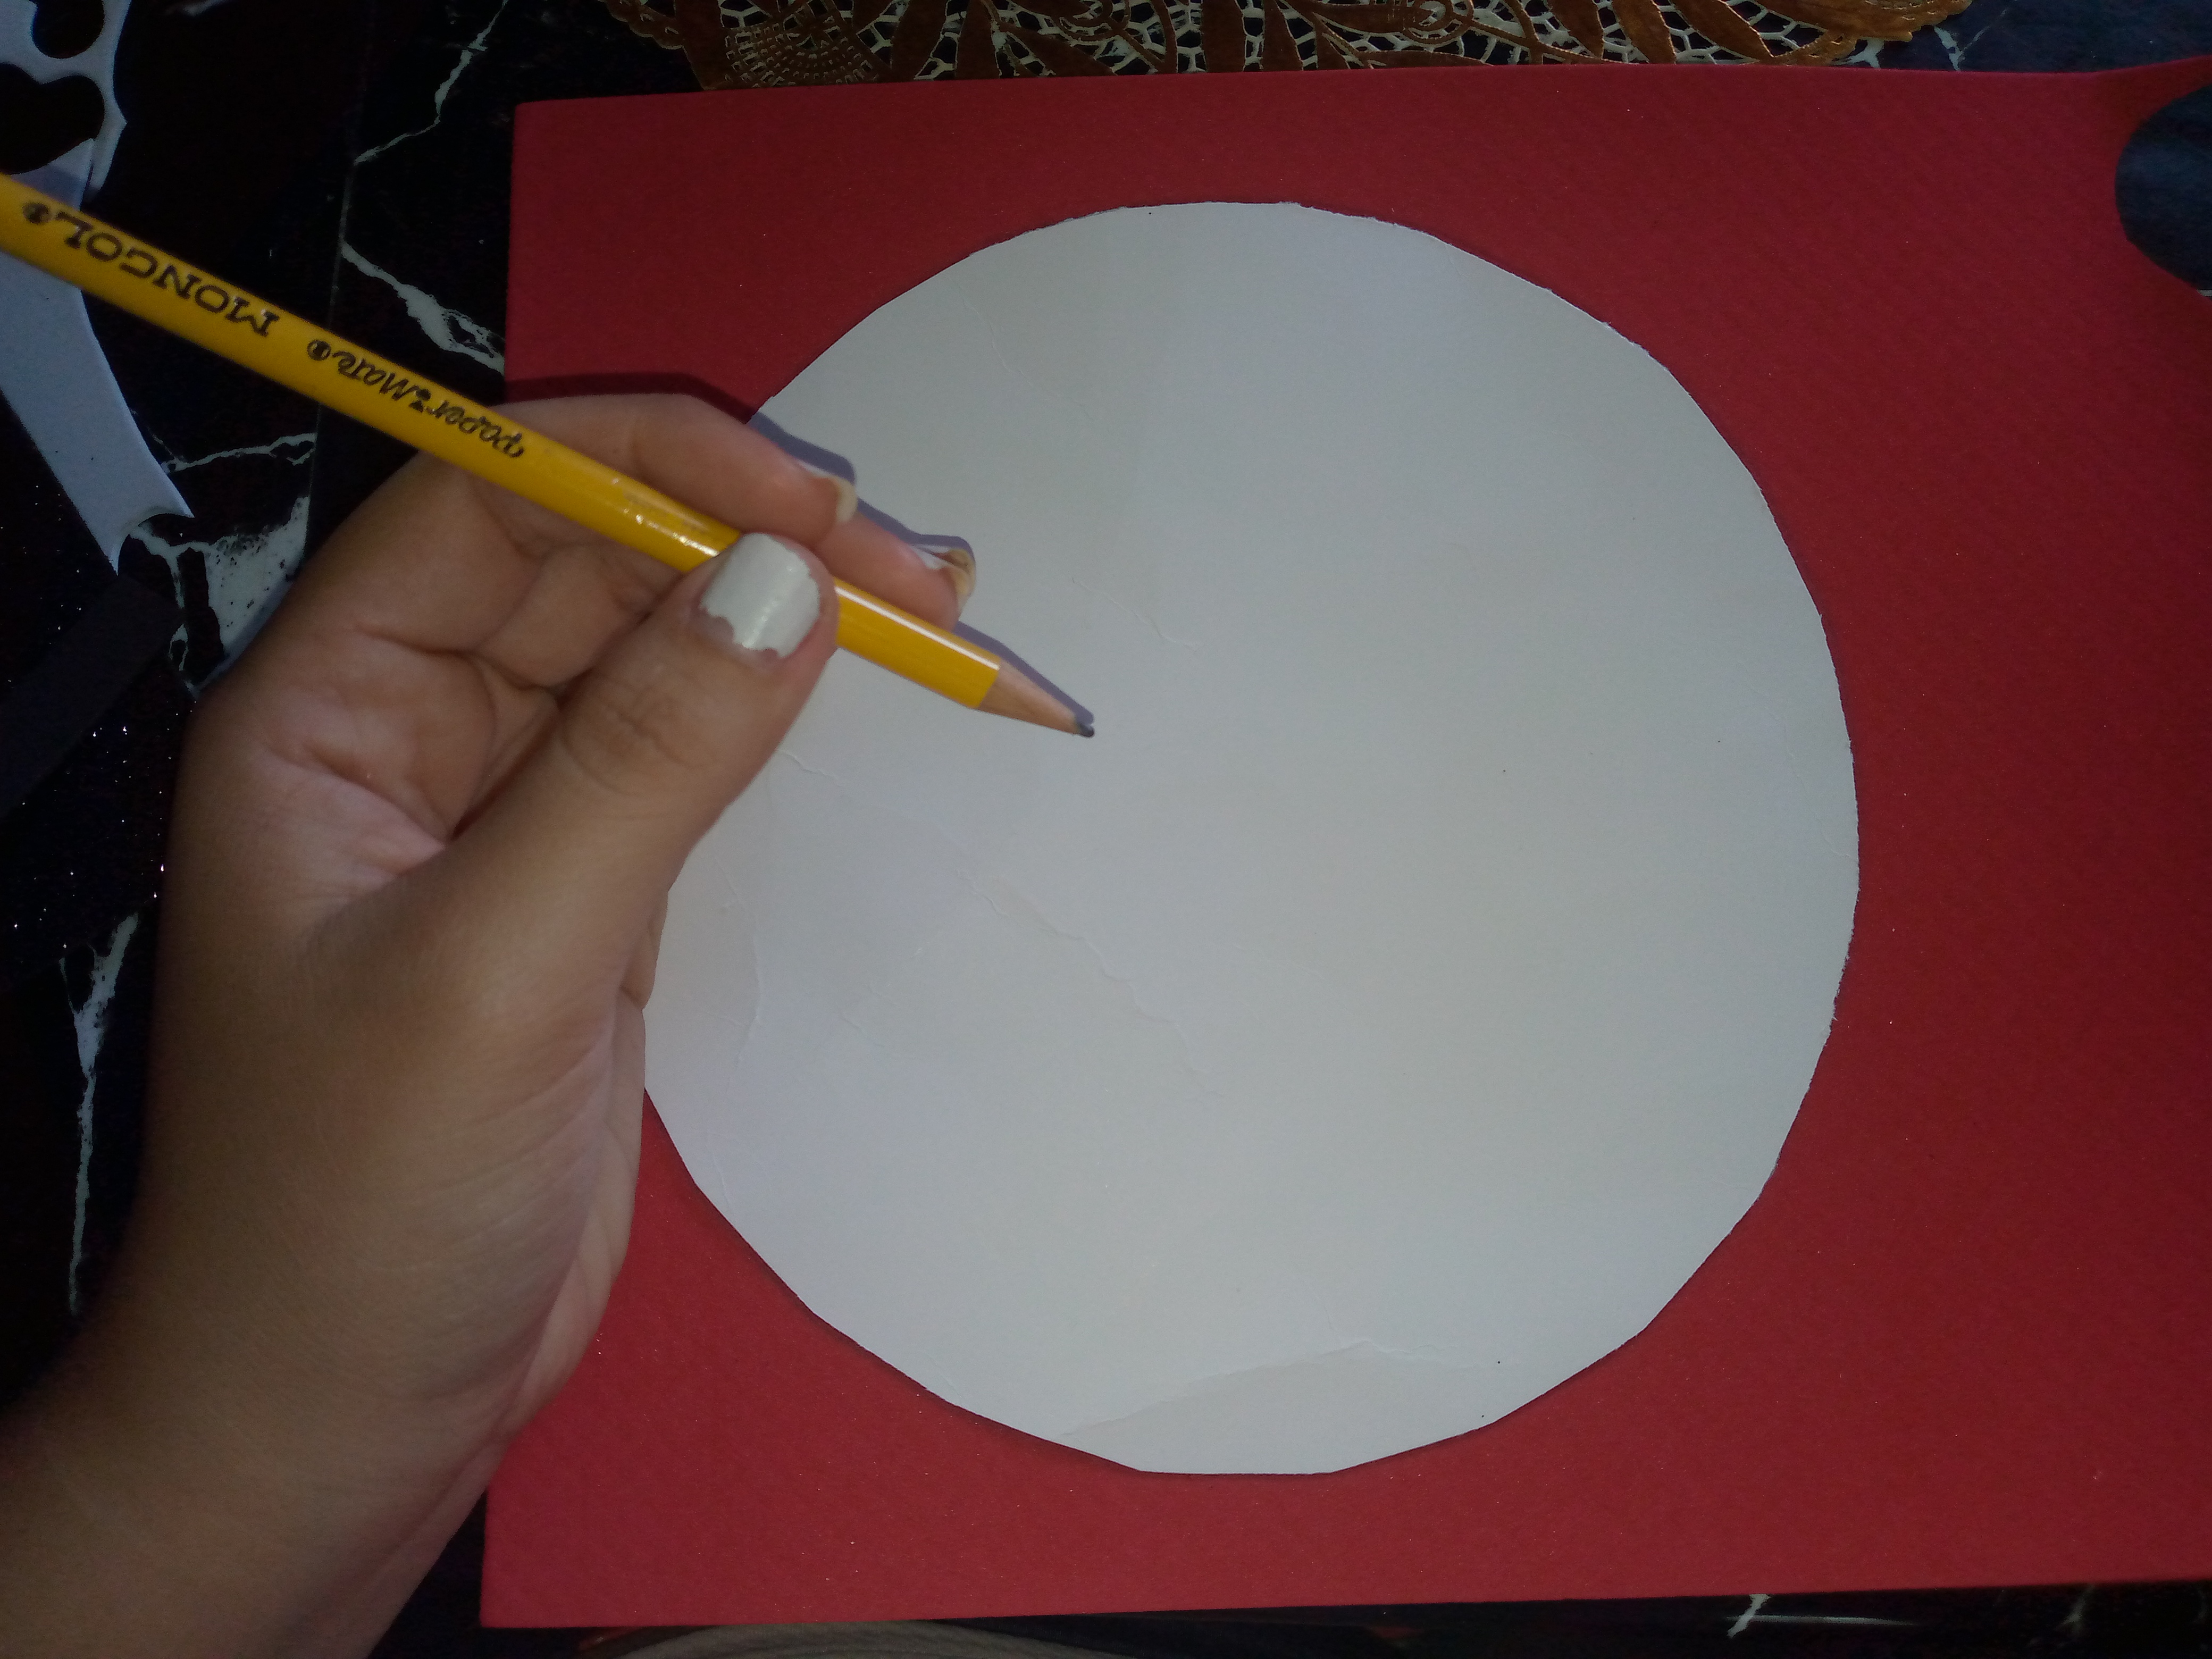 </div> <div class='pull-left'>  </div> <div class='pull-right'> 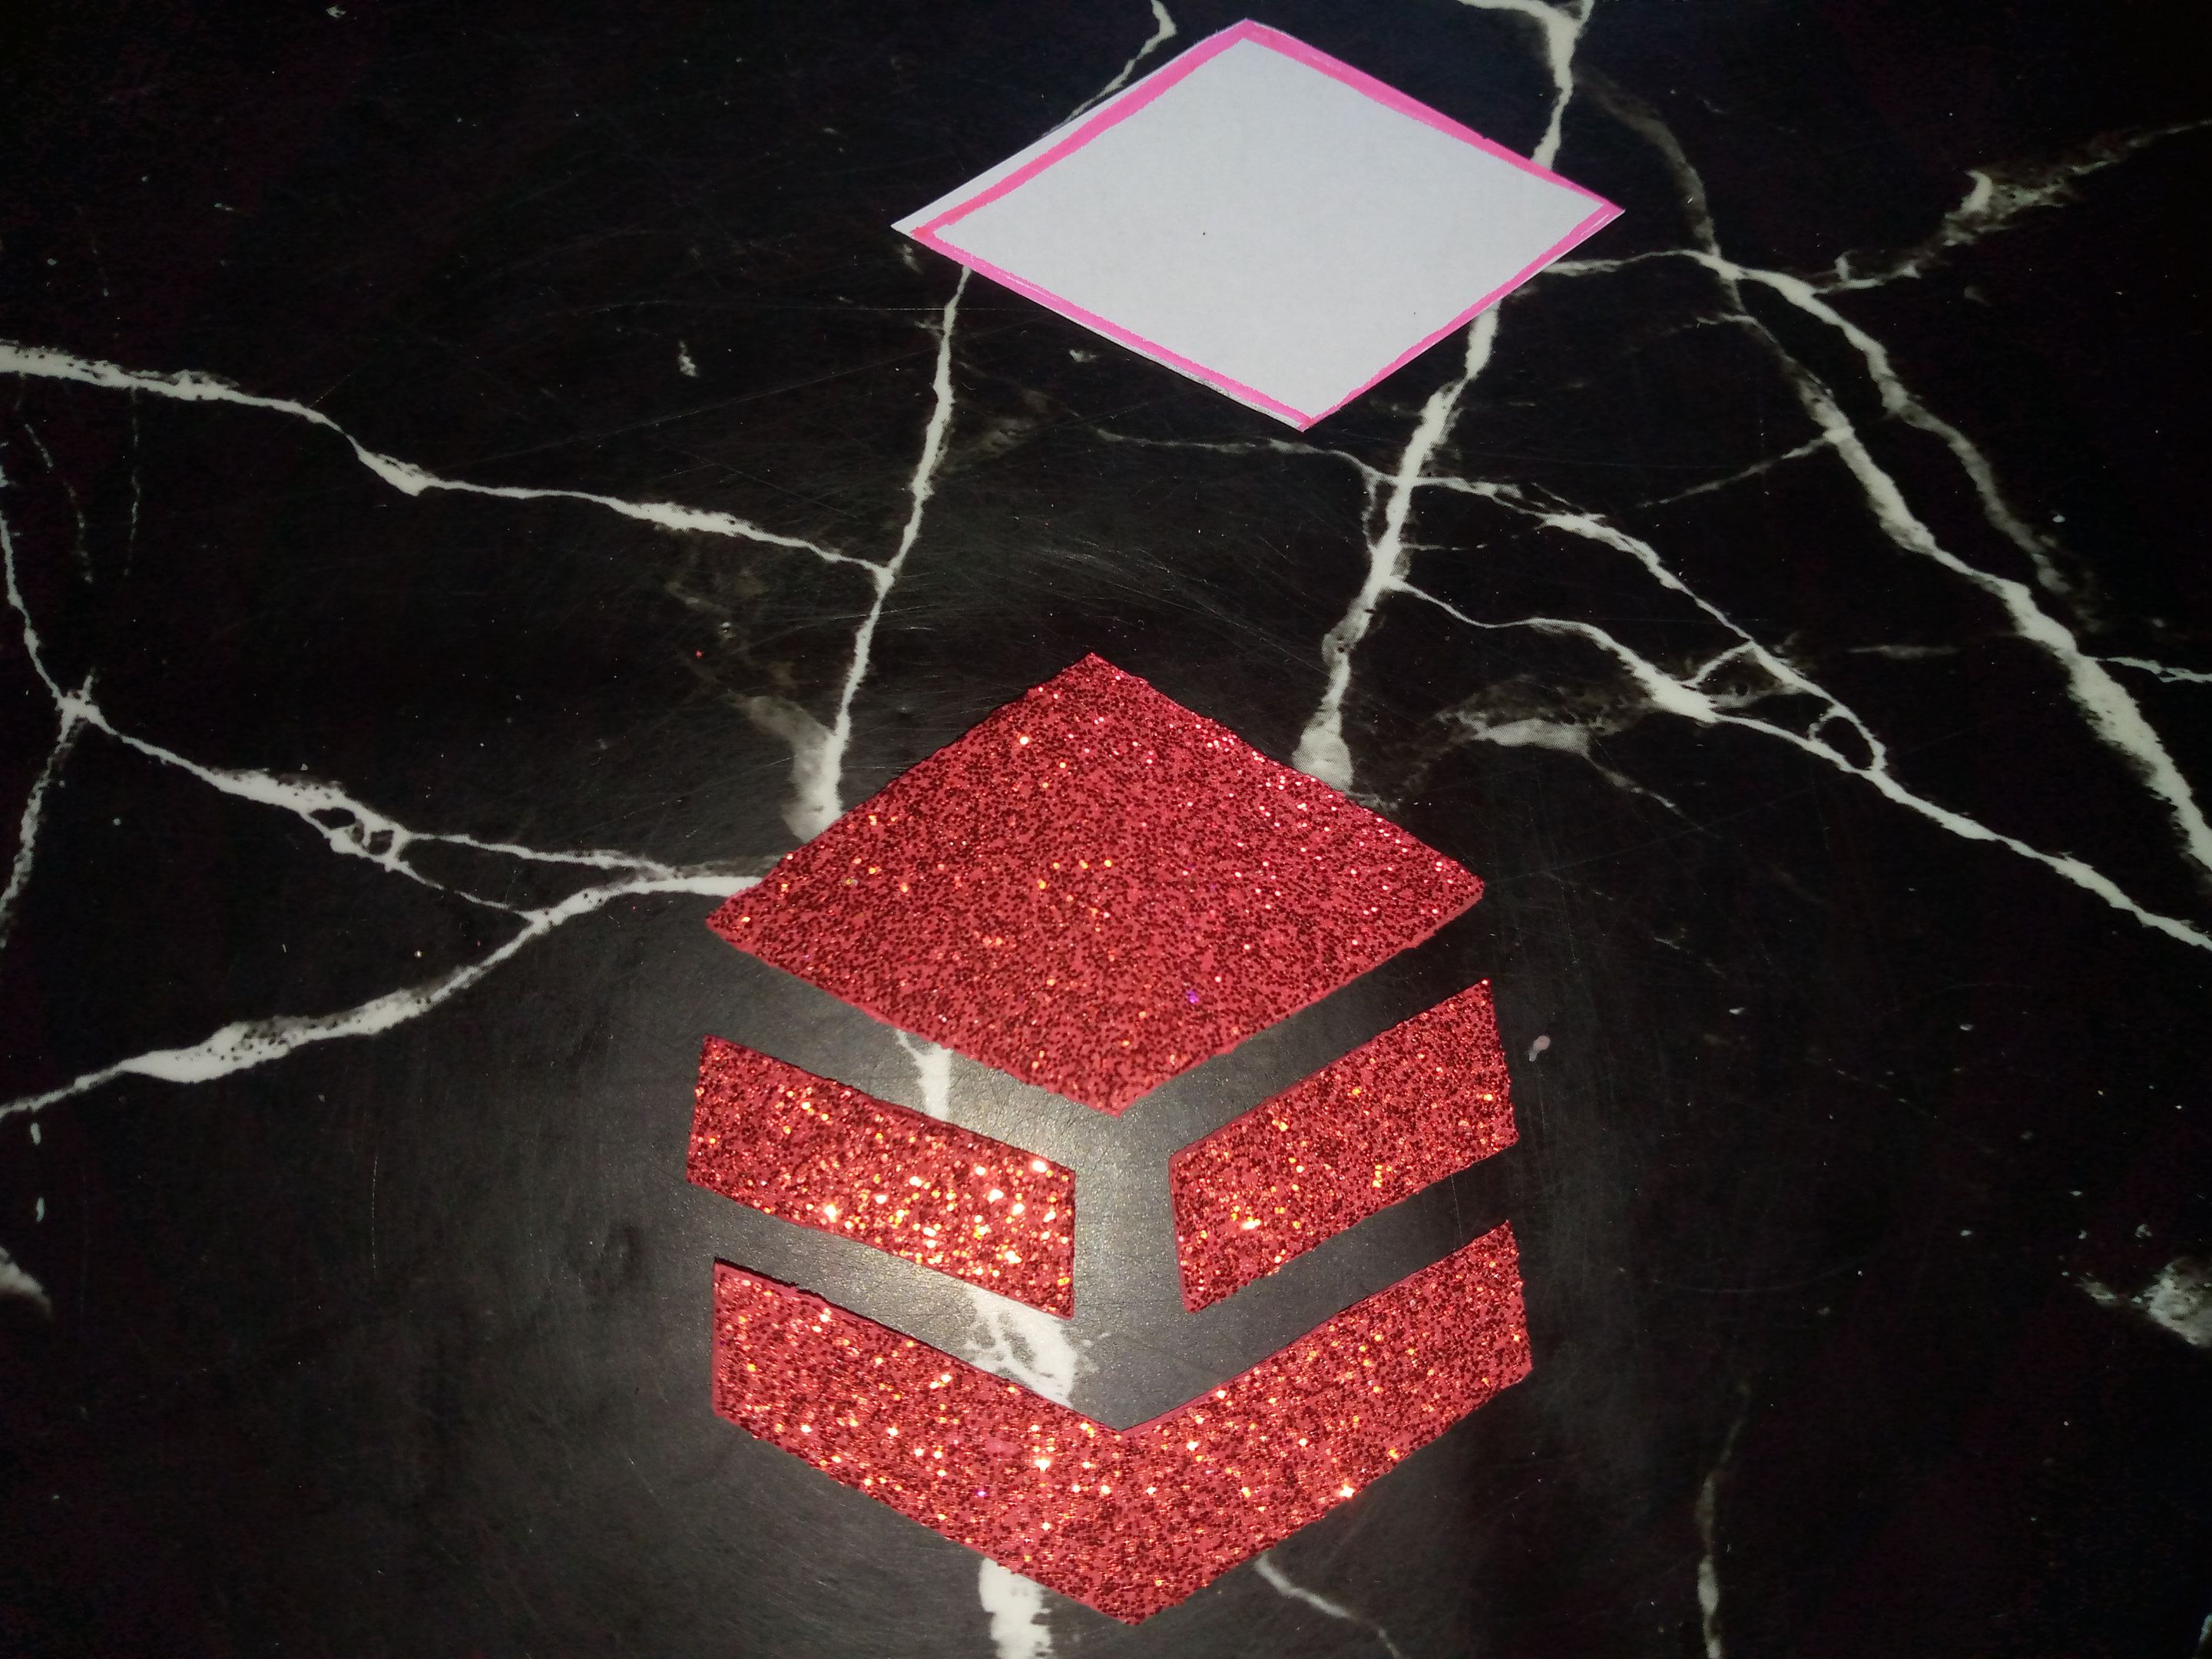 </div> ### _Paso 01_ <div class="text-justify">Comenzamos tomando nuestro cartón delgado y con un plato redondo vamos a marcar el contorno para hacer un círculo que nos va a servir como apoyo del topper por la parte de atrás, luego vamos a hacer con el color de fomi en rojo hacemos un círculo más grande y cortamos con la tijera de formas por el contorno y con esto hacemos la base para colocar los siguientes adornos que haremos como decoración como letra como los logos y otros detalles que le estaré colocando,luego recortaremos la plantilla de los logos para dibujarla en el fomi de color brillante en rojo porque el logo es rojo por supuesto y lo fuí ordenando para no equivocarme.</div> # > ### _Step 01_ > ```We start by taking our thin cardboard and with a round plate we are going to mark the outline to make a circle that will serve as support for the topper on the back, then we are going to make with the red color of fomi we make a larger circle and cut with the scissors of shapes along the outline and with this we make the base to place the following ornaments that we will make as decoration such as letters like the logos and other details that I will be placing, then we will cut out the template of the logos to draw it on the bright colored fomi in red because the logo is red of course and I was ordering it so as not to make mistakes.``` --- <div class='pull-left'>  </div> <div class='pull-right'> 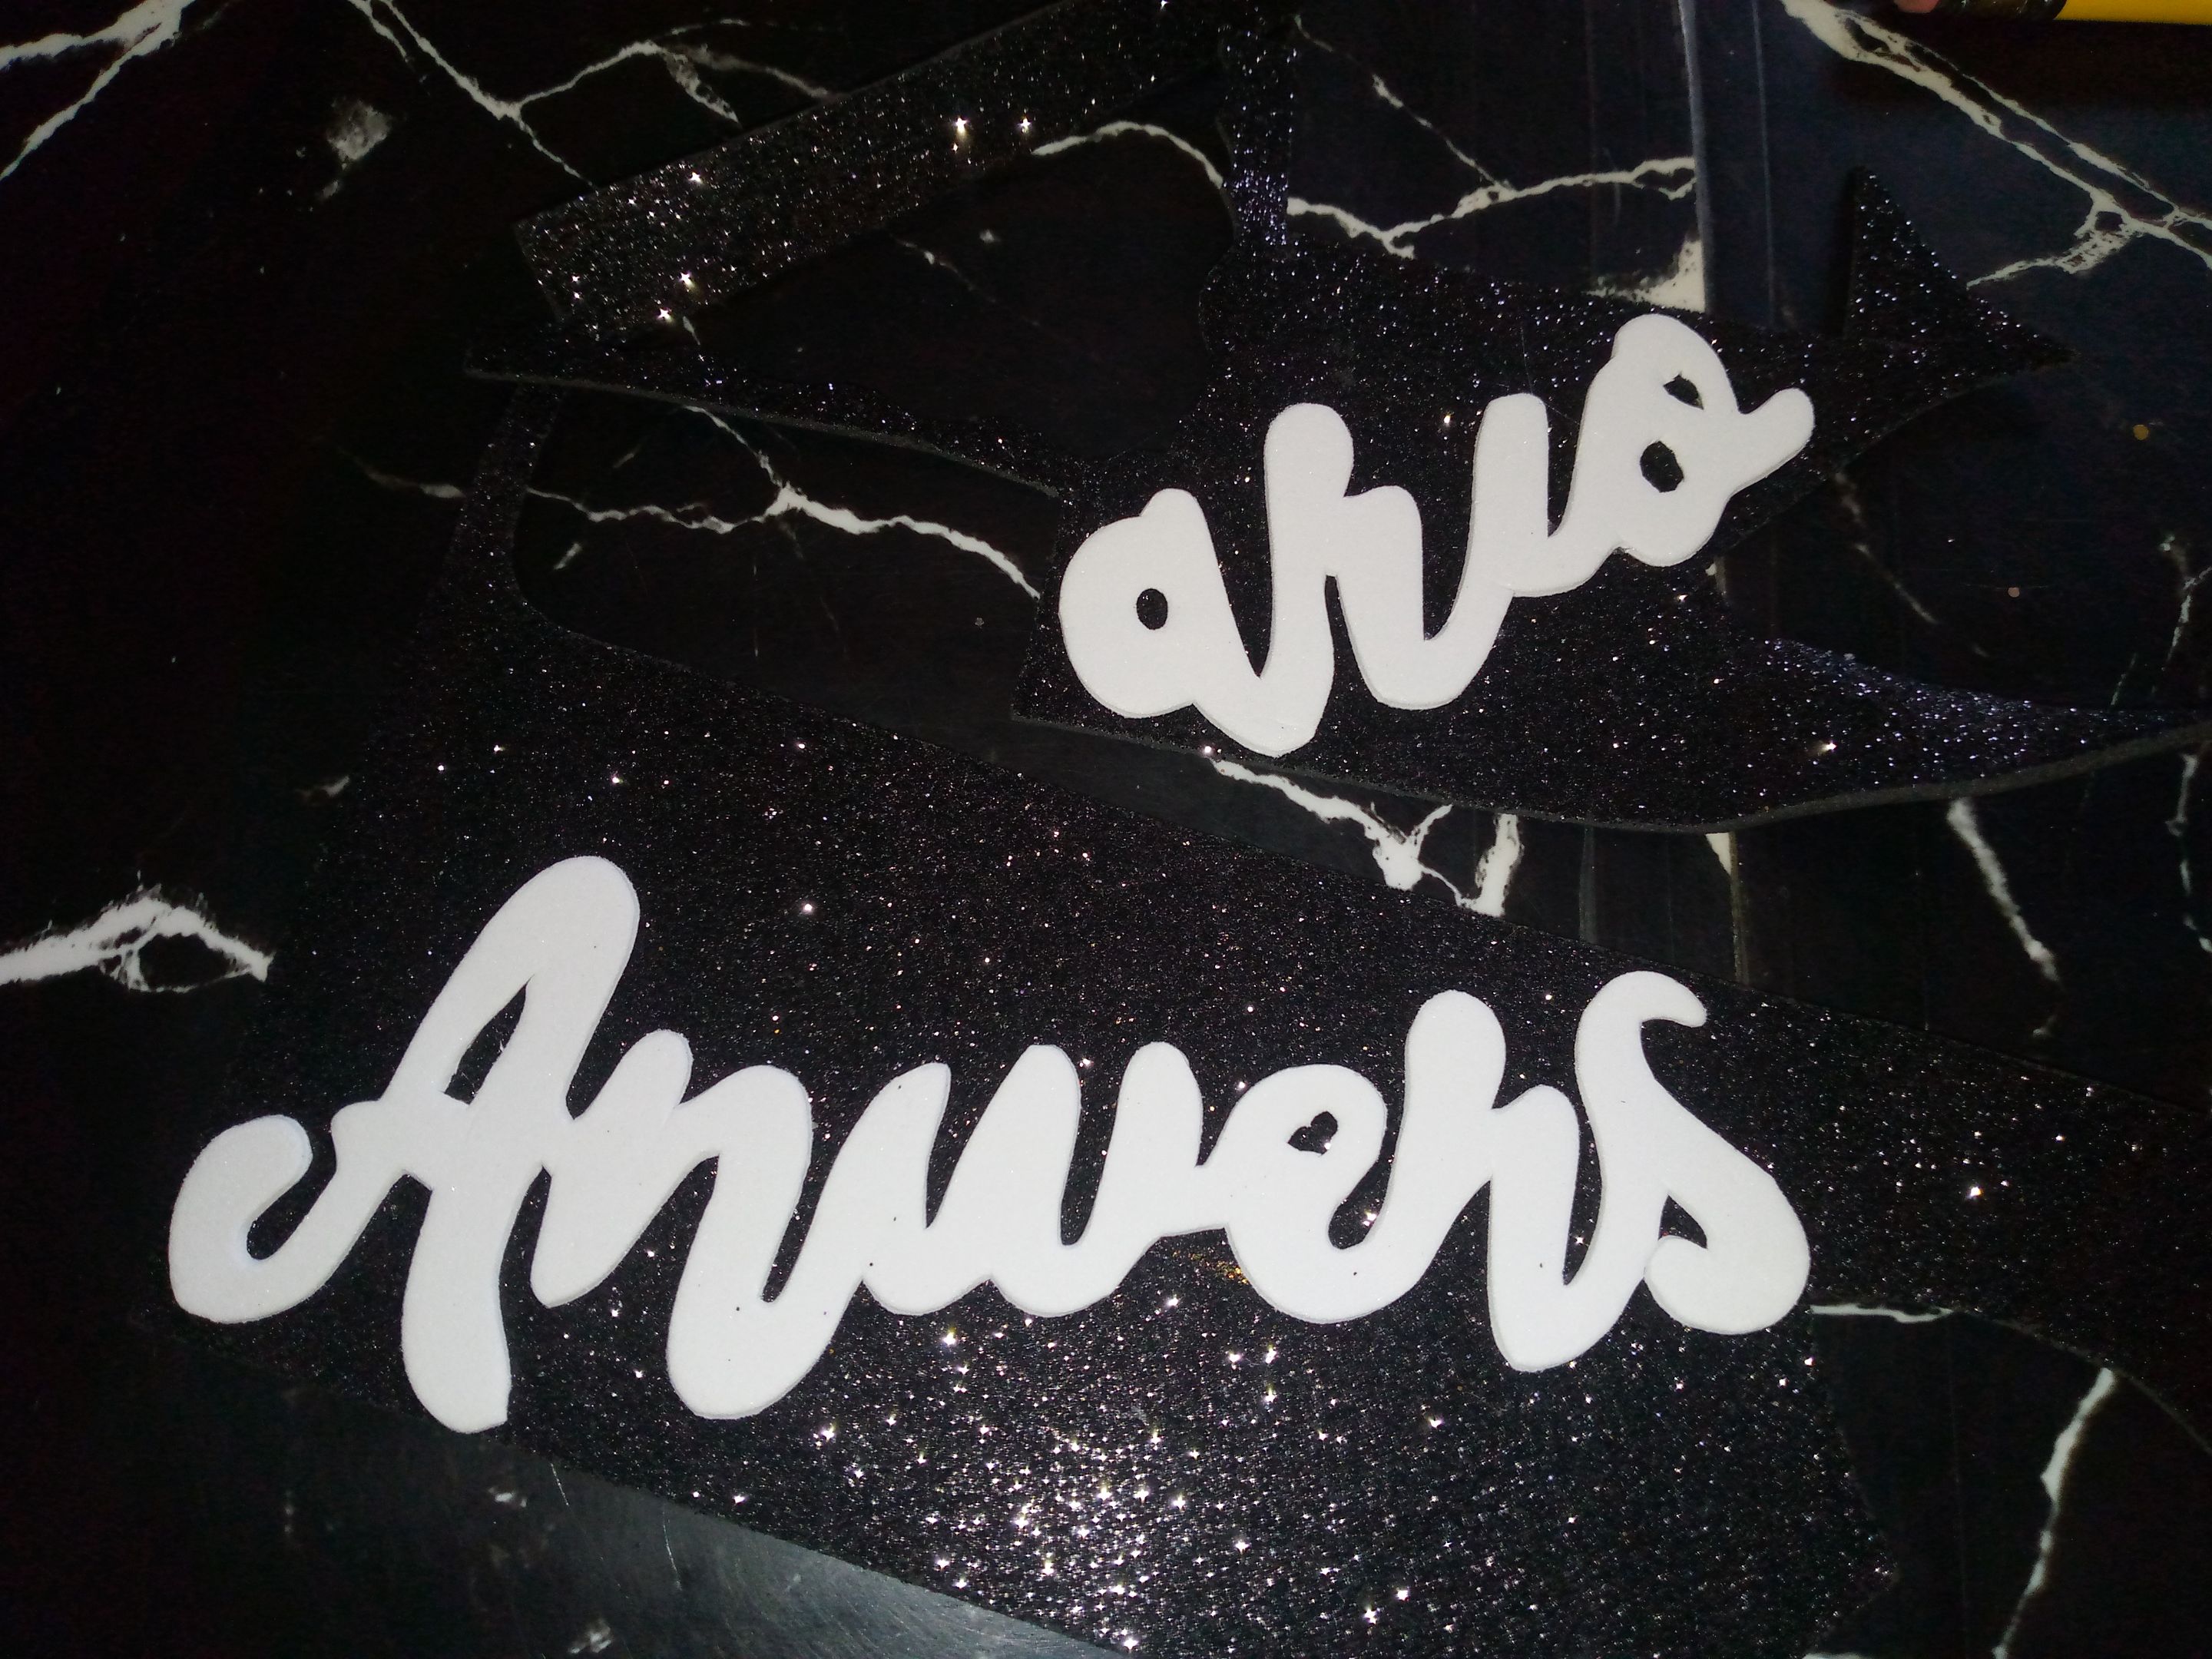 </div> <div class='pull-left'>  </div> <div class='pull-right'> 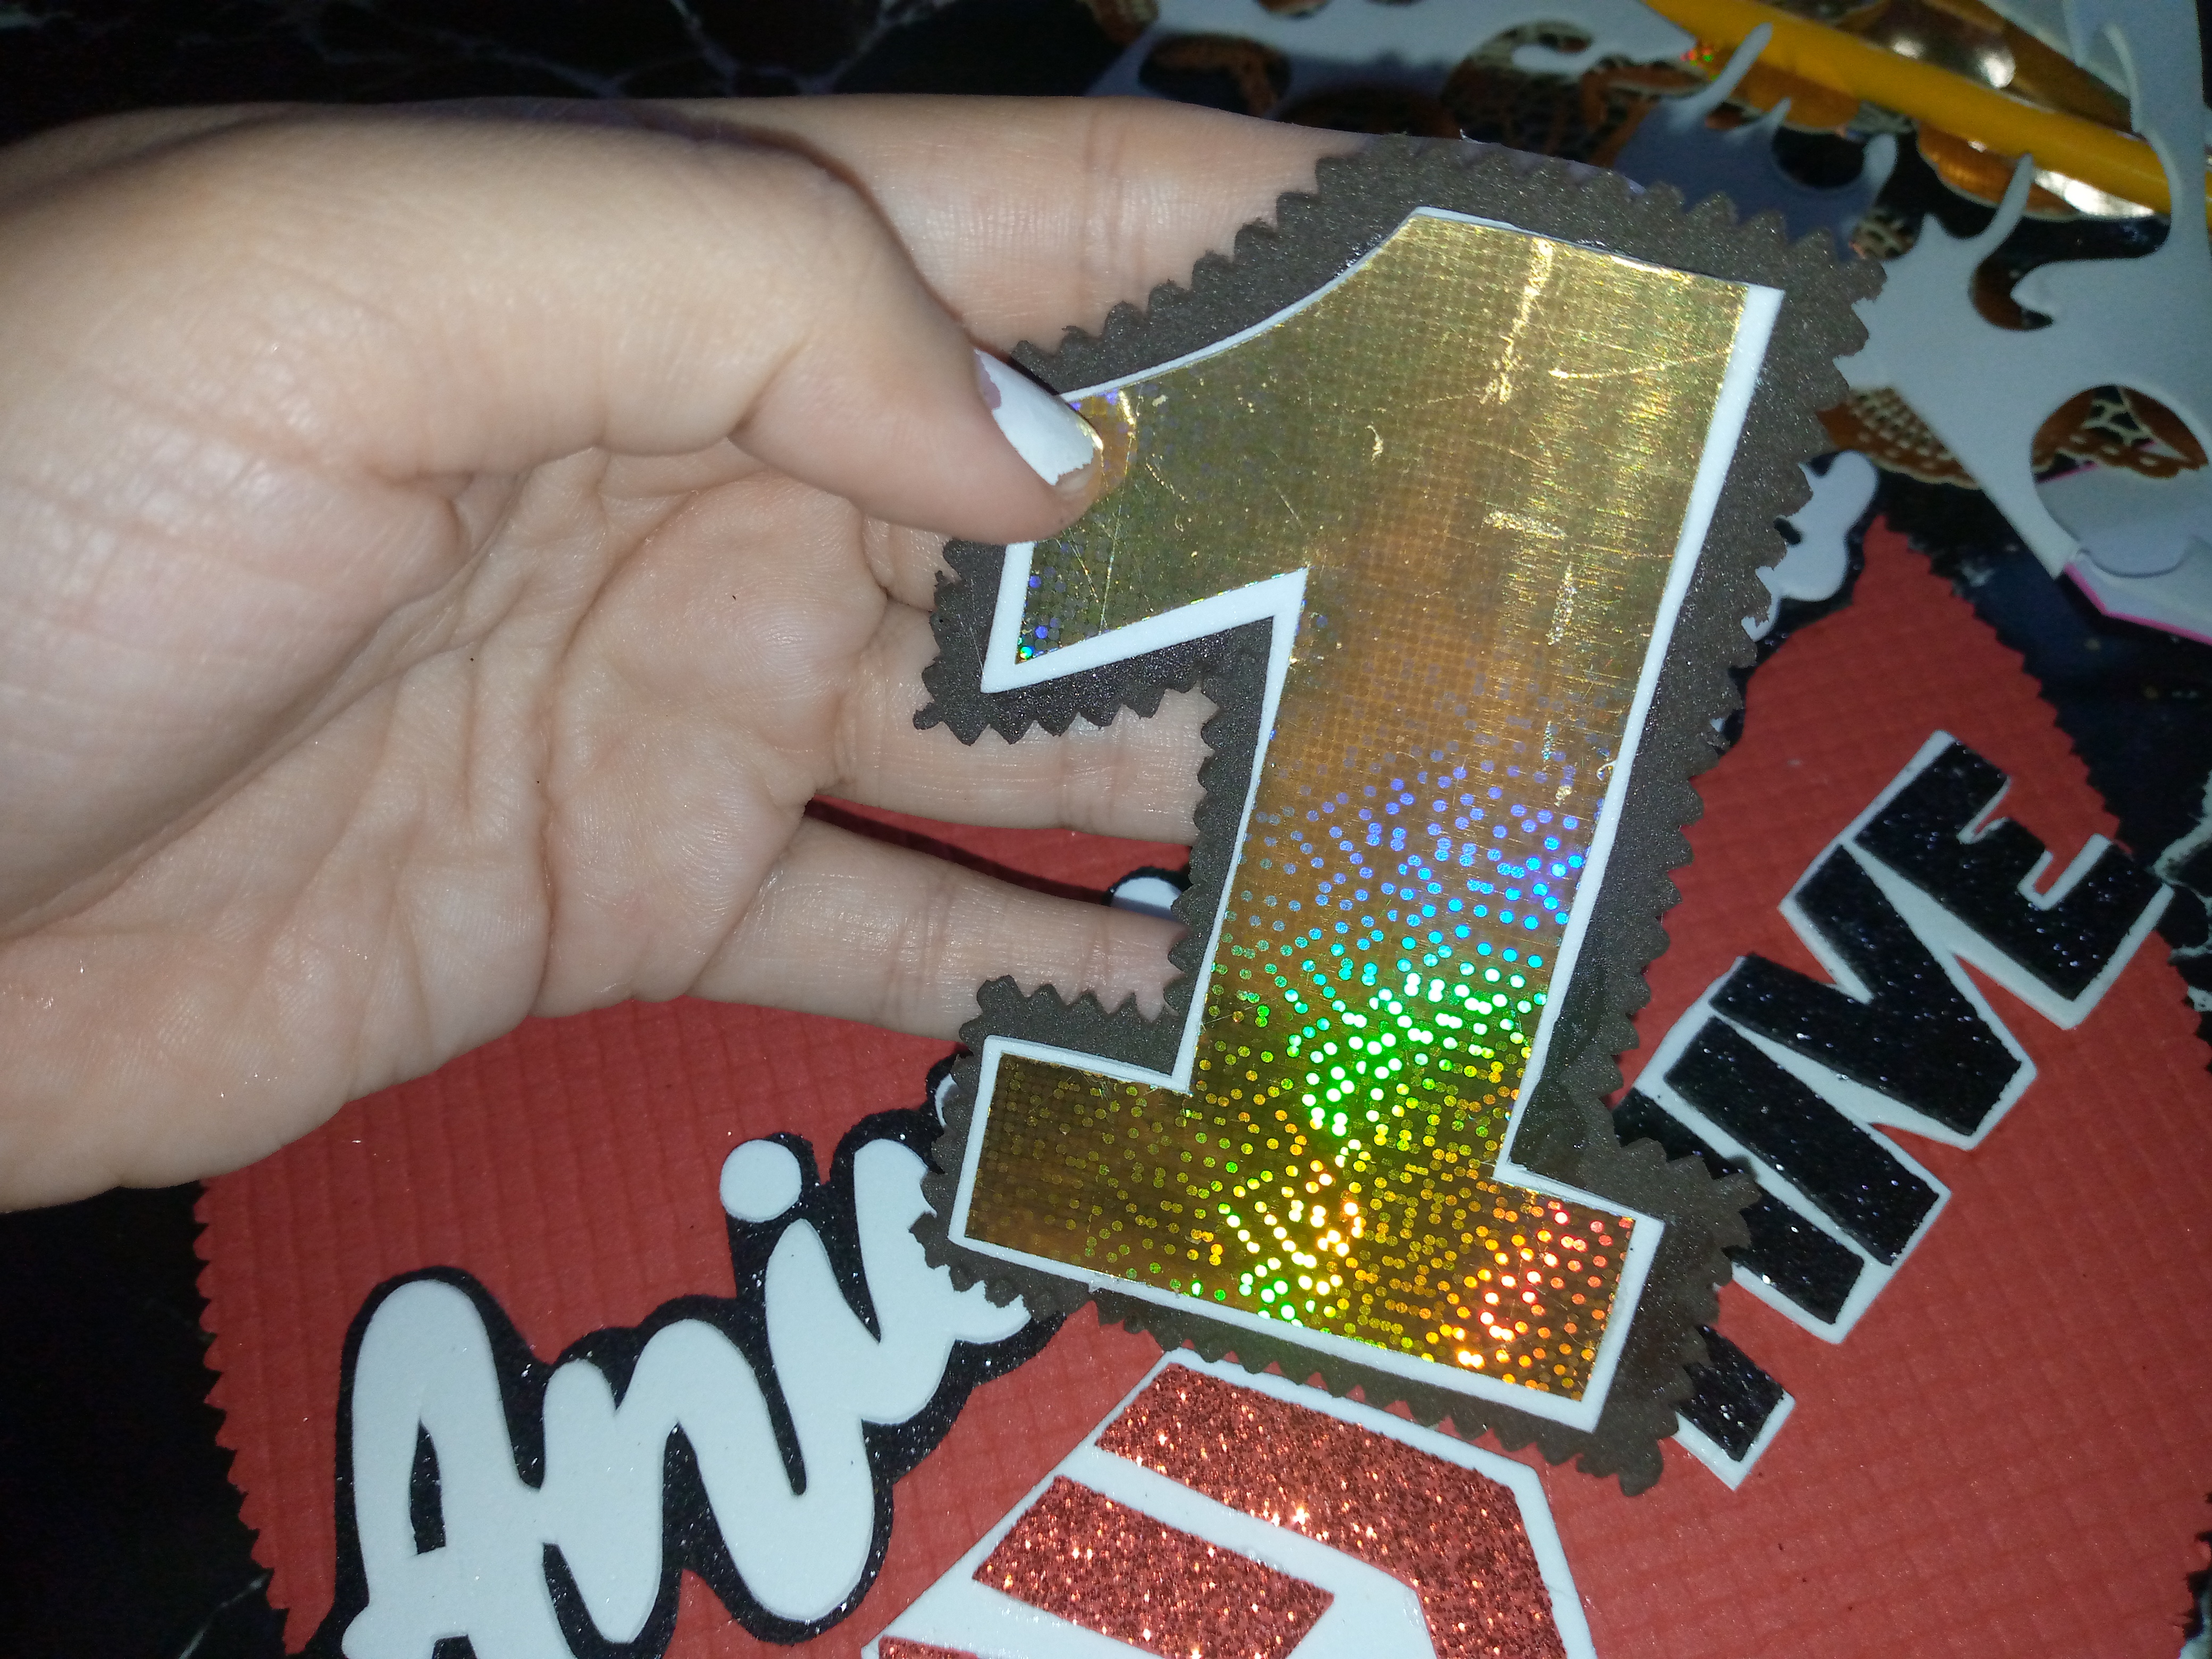 </div> ### _Paso 02_ <div class="text-justify">Luego vamos a ir ubicando el logo con una base de fomi en color blanco para que resalte,luego recortaremos la plantilla que usaremos para hacer nuestras letras en fomi blanco y lo haremos al espejo para que al voltear lo de frente nos quede derecho nuestras letras,luego cortamos la plantilla del número 1 y vamos a hacerlo en trozo de cartulina que pues tenía en casa y luego le puse otra base de fomi en color negro para que resalte el color dorado.</div> # > ### _Step 02_ > ```Next, we'll place the logo on a white foam base so it stands out. Then, we'll cut out the template we'll use to make our letters out of white foam we'll do this in front of the mirror so that when we flip it over, our letters will be straight. Then, we'll cut out the number 1 template and use a piece of cardboard that I had at home. Then, I added another black foam base to make the gold stand out.``` --- <div class='pull-left'>  </div> <div class='pull-right'> 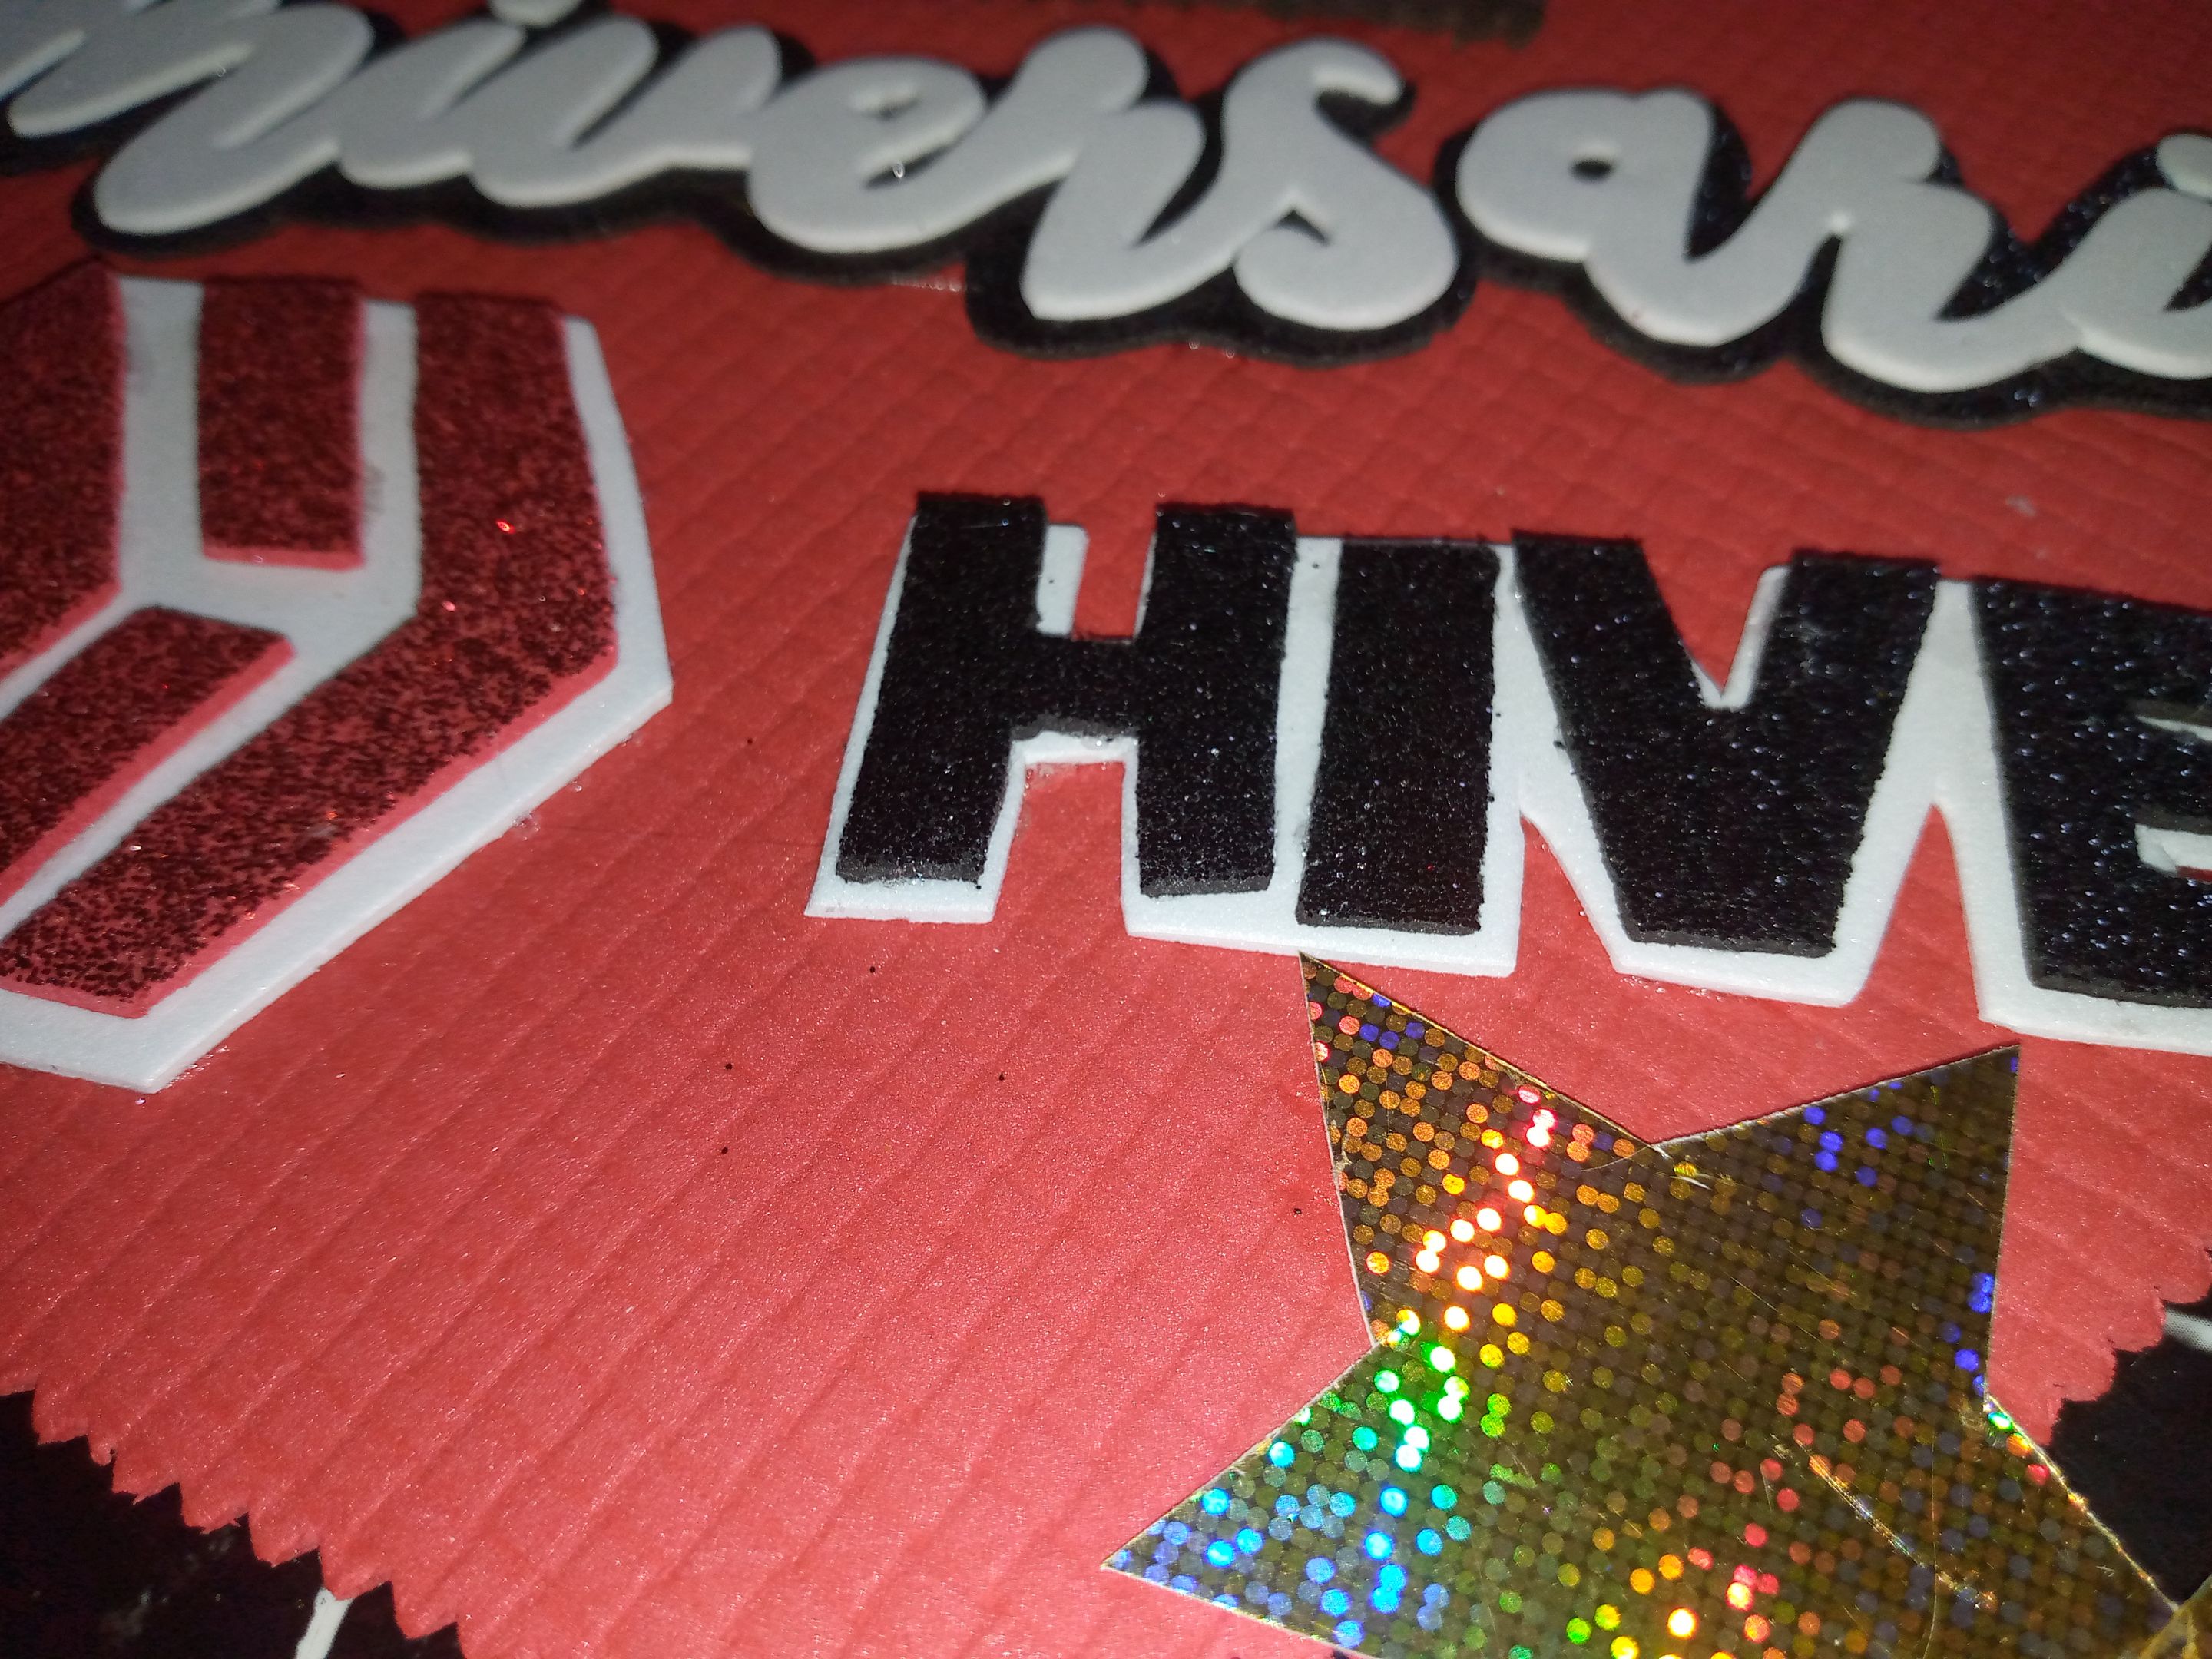 </div> ### _Paso 03_ <div class="text-justify">El ultimo paso que haremos como detalle final es colocar las letras "Hive" en color negro con fondo blanco las pegamos con silicón a nuestra base y ya terminamos por cierto para que resaltara un poco mas quise colocarle unas estrellas con trozos de cartulina dorado que me han sobrado de trabajos anteriores y bueno las ubiqué alrededor de mi topper,si deseas hacer topper para pasteles lo recomendable sería que le colocaras unos palillos de madera para poder sosterlo a la hora de insertarlo en el pastel, usaré este para adornar un espacio de mi pared y por supuesto para que me sirva como recordatorio de que he ido avanzando un año más aquí y las ganas de seguir trabajando y aprendiendo siguen adelante y bueno asi recordarme lo mucho que ha valido la pena el esfuerzo y la dedicación que le pongo a cada cosa que hago con amor.</div> # > ### _Step 03_ > ```The last step we will do as a final detail is to place the letters "Hive" in black with a white background, we glue them with silicone to our base and we are done, by the way, to make it stand out a little more I wanted to place some stars with pieces of gold cardboard that I have left over from previous jobs and well I placed them around my topper, if you want to make a topper for cakes it would be advisable to place some wooden sticks to be able to hold it when inserting it into the cake, I will use this to decorate a space on my wall and of course to serve as a reminder that I have been advancing another year here and the desire to continue working and learning continue forward and well thus remind myself how much the effort and dedication that I put into everything I do with love has been worth it.``` --- --- <center></center> ## _<div class="phishy">Resultado:// Result:</div>_ # <div class="text-justify">Les recomiendo dejar secar un poco el silicón líquido después de pegar las figuras para que no se vayan a mover del sitio donde las hemos pegado una vez se seque pues ya podemos usarlo,pueden usar otros materiales para hacerlos bien sea como fomo brillante escarcha y otro tipo de material que ustedes vean que es muy útil para esto ,con esto les dejo fotos del resultado final a mi me ha parecido genial como hice este sencillo trabajo y asi aprovechar el tiempo para reciclar los sobrantes de fomi que tenía aqui guardados.✨❤️</div> # > ```I recommend letting the liquid silicone dry a little after gluing the figures so that they do not move from the place where we have glued them once it dries then we can use it, you can use other materials to make them either like shiny fomo, frost and other types of material that you see that is very useful for this, with this I leave you photos of the final result, it seemed great to me how I did this simple work and thus take advantage of the time to recycle the leftover fomi that I had stored here. ✨❤️``` <center></center> <center> </center> _<div class="text-justify">Espero les haya gustado el proceso sencillo de esta hermosa manualidad,siempre me encantará compartir con ustedes mi trabajo y pues mostrarle muchas ideas para que ustedes también aprendan a hacer cositas como estas,les doy gracias de antemano por apreciar este blog y por leerme,les deseo una feliz noche y espero tengan un feliz descanso,hasta la próxima amigos.</div>_ # > _I hope you enjoyed the simple process of this beautiful craft. I will always love to share my work with you and show you lots of ideas so you can also learn how to make things like these. I thank you in advance for appreciating this blog and for reading me. I wish you a happy evening and hope you have a good rest. See you next time, friends._ # <center></center> # **_<center><sub>Creando las cosas con amor 🌷❤️</sub></center>_** **_<center><sub>🦋✨Todas las imágenes de esta publicación son de mi autoria ,📱tomadas con mi celular TecnoSpark8C |📸Fotos editadas en PicsArt y Canva. Texto traducido en el traductor de Google. </sub></center>_** # > **_<center><sub>Creating things with love 🌷❤️</sub></center>_** > **_<center><sub>🦋✨ All the images in this publication are my author ,📱taken with my TecnoSpark8C cell phone |📸Photos edited in PicsArt and Canva. Text translated in Google Translate.</sub></center>_** --- <center></center> ---
👍 hope-on-fire, da-dawn, quochuy, teamvn, new-world-steem, dylanhobalart, lauracraft, equipodelta, joeyarnoldvn, eleazarvo, historiasamorlez, lionsaturbix, ang.spc, hive-130560, eduard20, hivediy, rcreationalgames, dari-s, curangel, sustainablyyours, jayna, sco, taldor, cmplxty, thevil, dfacademy, ritch, jijisaurart, jloberiza, thelivingworld, pharesim, gikitiki, shaka, bryan-imhoff, abh12345, moretea, qsounds, dandesign86, diabolika, grocko, diegoameerali, lenasveganliving, felt.buzz, rocky1, meno, fknmayhem, auleo, cherryng, lemony-cricket, sandracabrera, bertrayo, azircon, louis88, greddyforce, tijntje, coloneljethro, cooltivar, remotehorst23, tashidelek, bflanagin, ezunjoshy, coccodema, nsfw-power, scubahead, littlesorceress, dawnoner, epicdice, phillarecette, babytarazkp, delilhavores, nerdvana, dpend.active, laruche, millycf1976, gabilan55, goliathus, hive-world, altleft, paolazun, meritocracy, hiveart, hivechat, ramisey, zanoz, traderhive, tawadak24, robvector, suezoe, naath, seryi13, aguamiel, jessicaossom, josdelmi, blingit, nozem01, liveofdalla, marlasinger666, yisusth, kam5iz, bluepark, callmesmile, geelocks, minas-glory, the-burn, actordontee, the-lead, scraptrader, nialalolleur, astronerd, itz.inno, ghilvar, propolis.wiki, franco10, qiparosa, gaottantacinque, gasaeightyfive, cribbio, monster-one, horpey, doctor-cog-diss, ssiena, keys-defender, alebrijes, walterjay, robotics101, racibo, milky-concrete, cryptoshots.nft, sophieandhenrik, crypto-shots, marcocasario, karina.gpt, hive-defender, cryptoshots.play, cryptoshotsdoom, spliddash, jlsplatts, r-nyn, saboin, koenau, voxmortis, josepimpo, mrhoofman, uwelang, mochilub, juwon-btc, leprechaun, rayshiuimages, castri-ja, mballesteros, pedrobrito2004, macoolette, lxsxl, cubapl, ocd, roelandp, newsflash, zyx066, ricardo993, ocd-witness, jacor, yadamaniart, ma1neevent, mobbs, eliel, rt395, rawselectmusic, niallon11, emrebeyler, tomatom, adelepazani, spydo, bartheek, mciszczon, takowi, sanderjansenart, indigoocean, nateaguila, talentclub, ocdb, athunderstruck, multifacetas, instagram-models, kaeserotor, evelynchacin, dhedge, dcrops, drricksanchez, atexoras.pub, jaydr, ivycrafts, eustace-kidd, lukasbachofner, allentaylor, killerwot, pgm-curator, filmmaking4hive, humbe, whitneyalexx, hd-treasury, mmjs826, empo.voter, ifhy, imx.center, justinw, askari, howo, eonwarped, onestrong, carsonroscoe, achimmertens, browery, nathyortiz, javyeslava.photo, rashid5, squareonefarms, h-hamilton, chris-uk, the100, cescajove, solymi, partiesjohall, princekham, h3m4n7, nhaji01, susieisclever, chidistickz, kevinwong, torkot, juancar347, decomoescribir, oscarina, davemccoy, oadissin, friendsofgondor, steem.services, variedades, qwerrie, queengaga, empoderat, monica-ene, actioncats, evagavilan2, cielitorojo, elgatoshawua, aprasad2325, luchyl, hive.helps, lesiopm, poliac, suarlex, ebargains, pl-travelfeed, deeanndmathews, kheldar1982, detlev, gabrielatravels, ciderjunkie, twosomesup, el-dee-are-es, hmvf, anli, pladozero, taskmaster4450, hivelist, ganjafarmer, danielhuhservice, e-sport-gamer, e-sport-girly, beerlover, pradeepdee6, bluefinstudios, der-prophet, an-sich-wachsen, hive-153503, mario89, michjazz, sommylove, appreciator, flemingfarm, bluemist, sunsea, kkarenmp, zaku, alenox, discoveringarni, lucianav, noalys, omarcitorojas, hexagono6, power-kappe, fotomaglys, malhy, pinkchic, abu78, beauty197, dahpilot, aslamrer, yummycruz1, qurat-ul-ain, noelyss, eolianpariah2, inciter, david.dicotomia, kattycrochet, thereikiforest, stefany0720, jane1289, valerianis, nyxlabs, dilianny20, razielmorales, mily23m, naty16, yennysferm71, mayifiestas, sarangzg7, jmartinezp, marile21,